Custom Fields for Tasks
In addition to standard settings, you can add custom fields to tasks to record team-specific information directly on the task card. This lets you adapt the interface to your processes without involving a technical team.
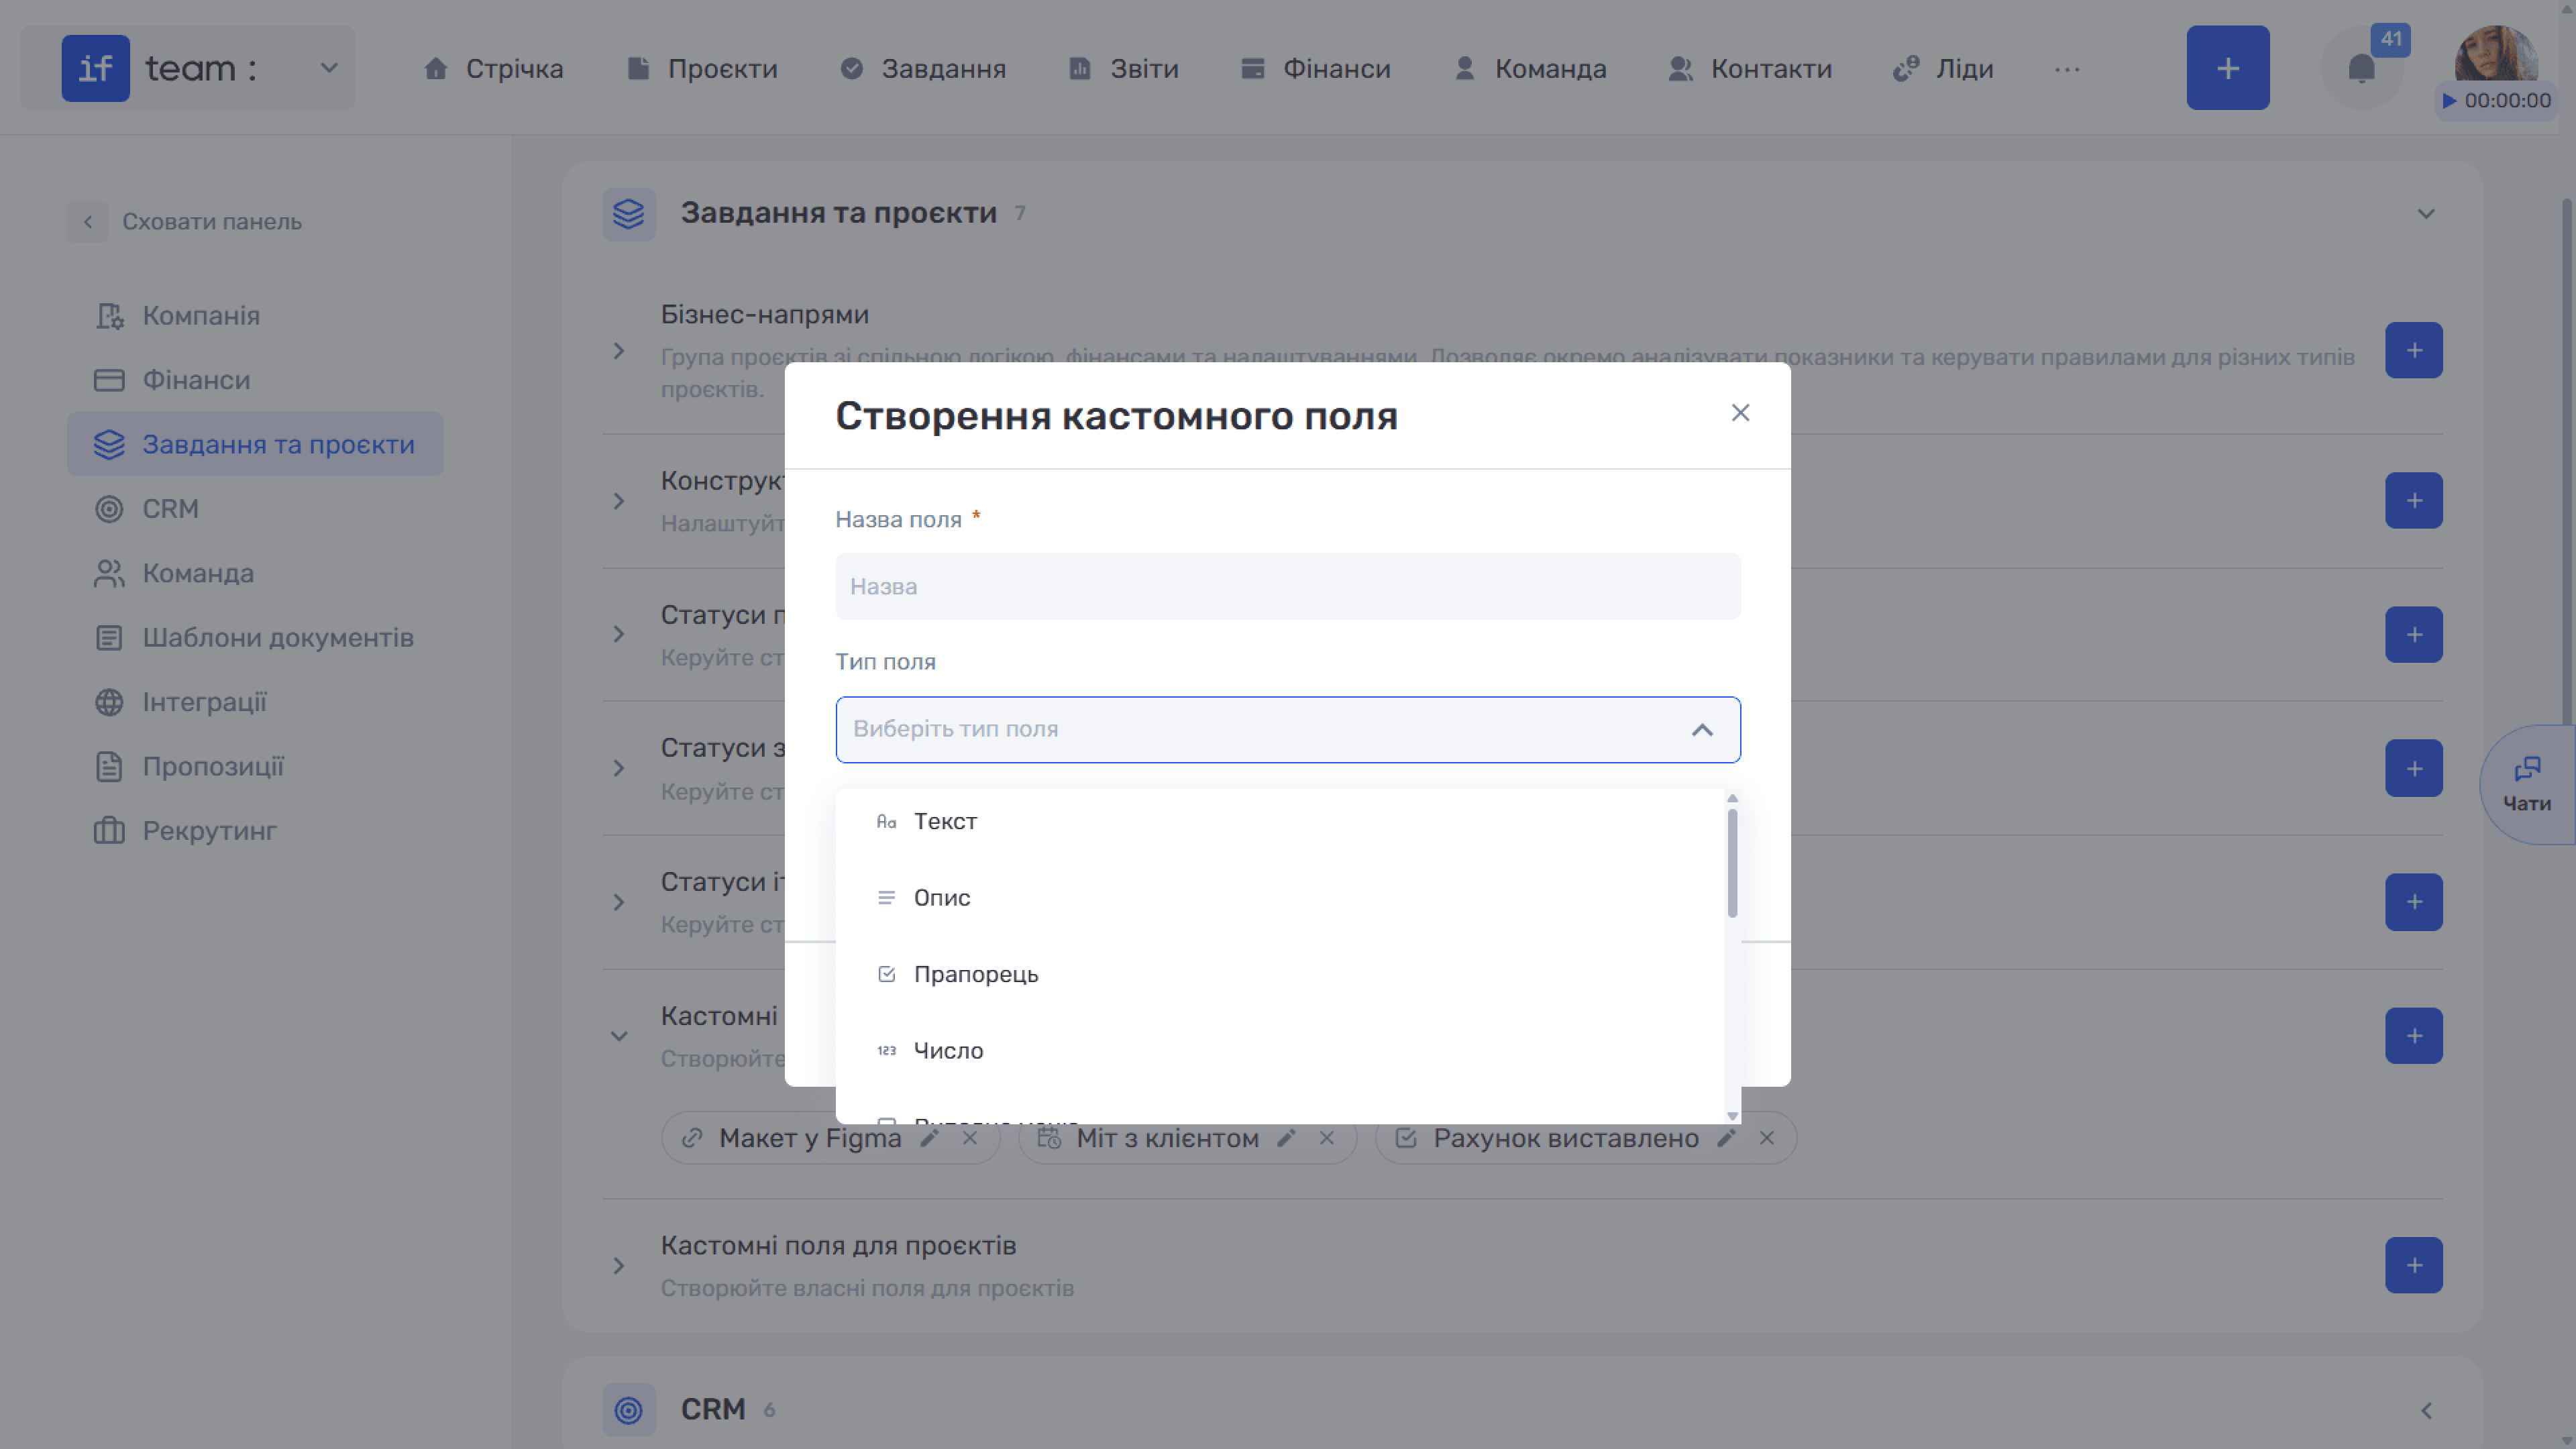
Available Field Types
Text, Description, Checkbox, Number, Drop-down Menu, Date, Date and Time, Link, Labels, Time, Members, and Contacts.
How to Create a Custom Field
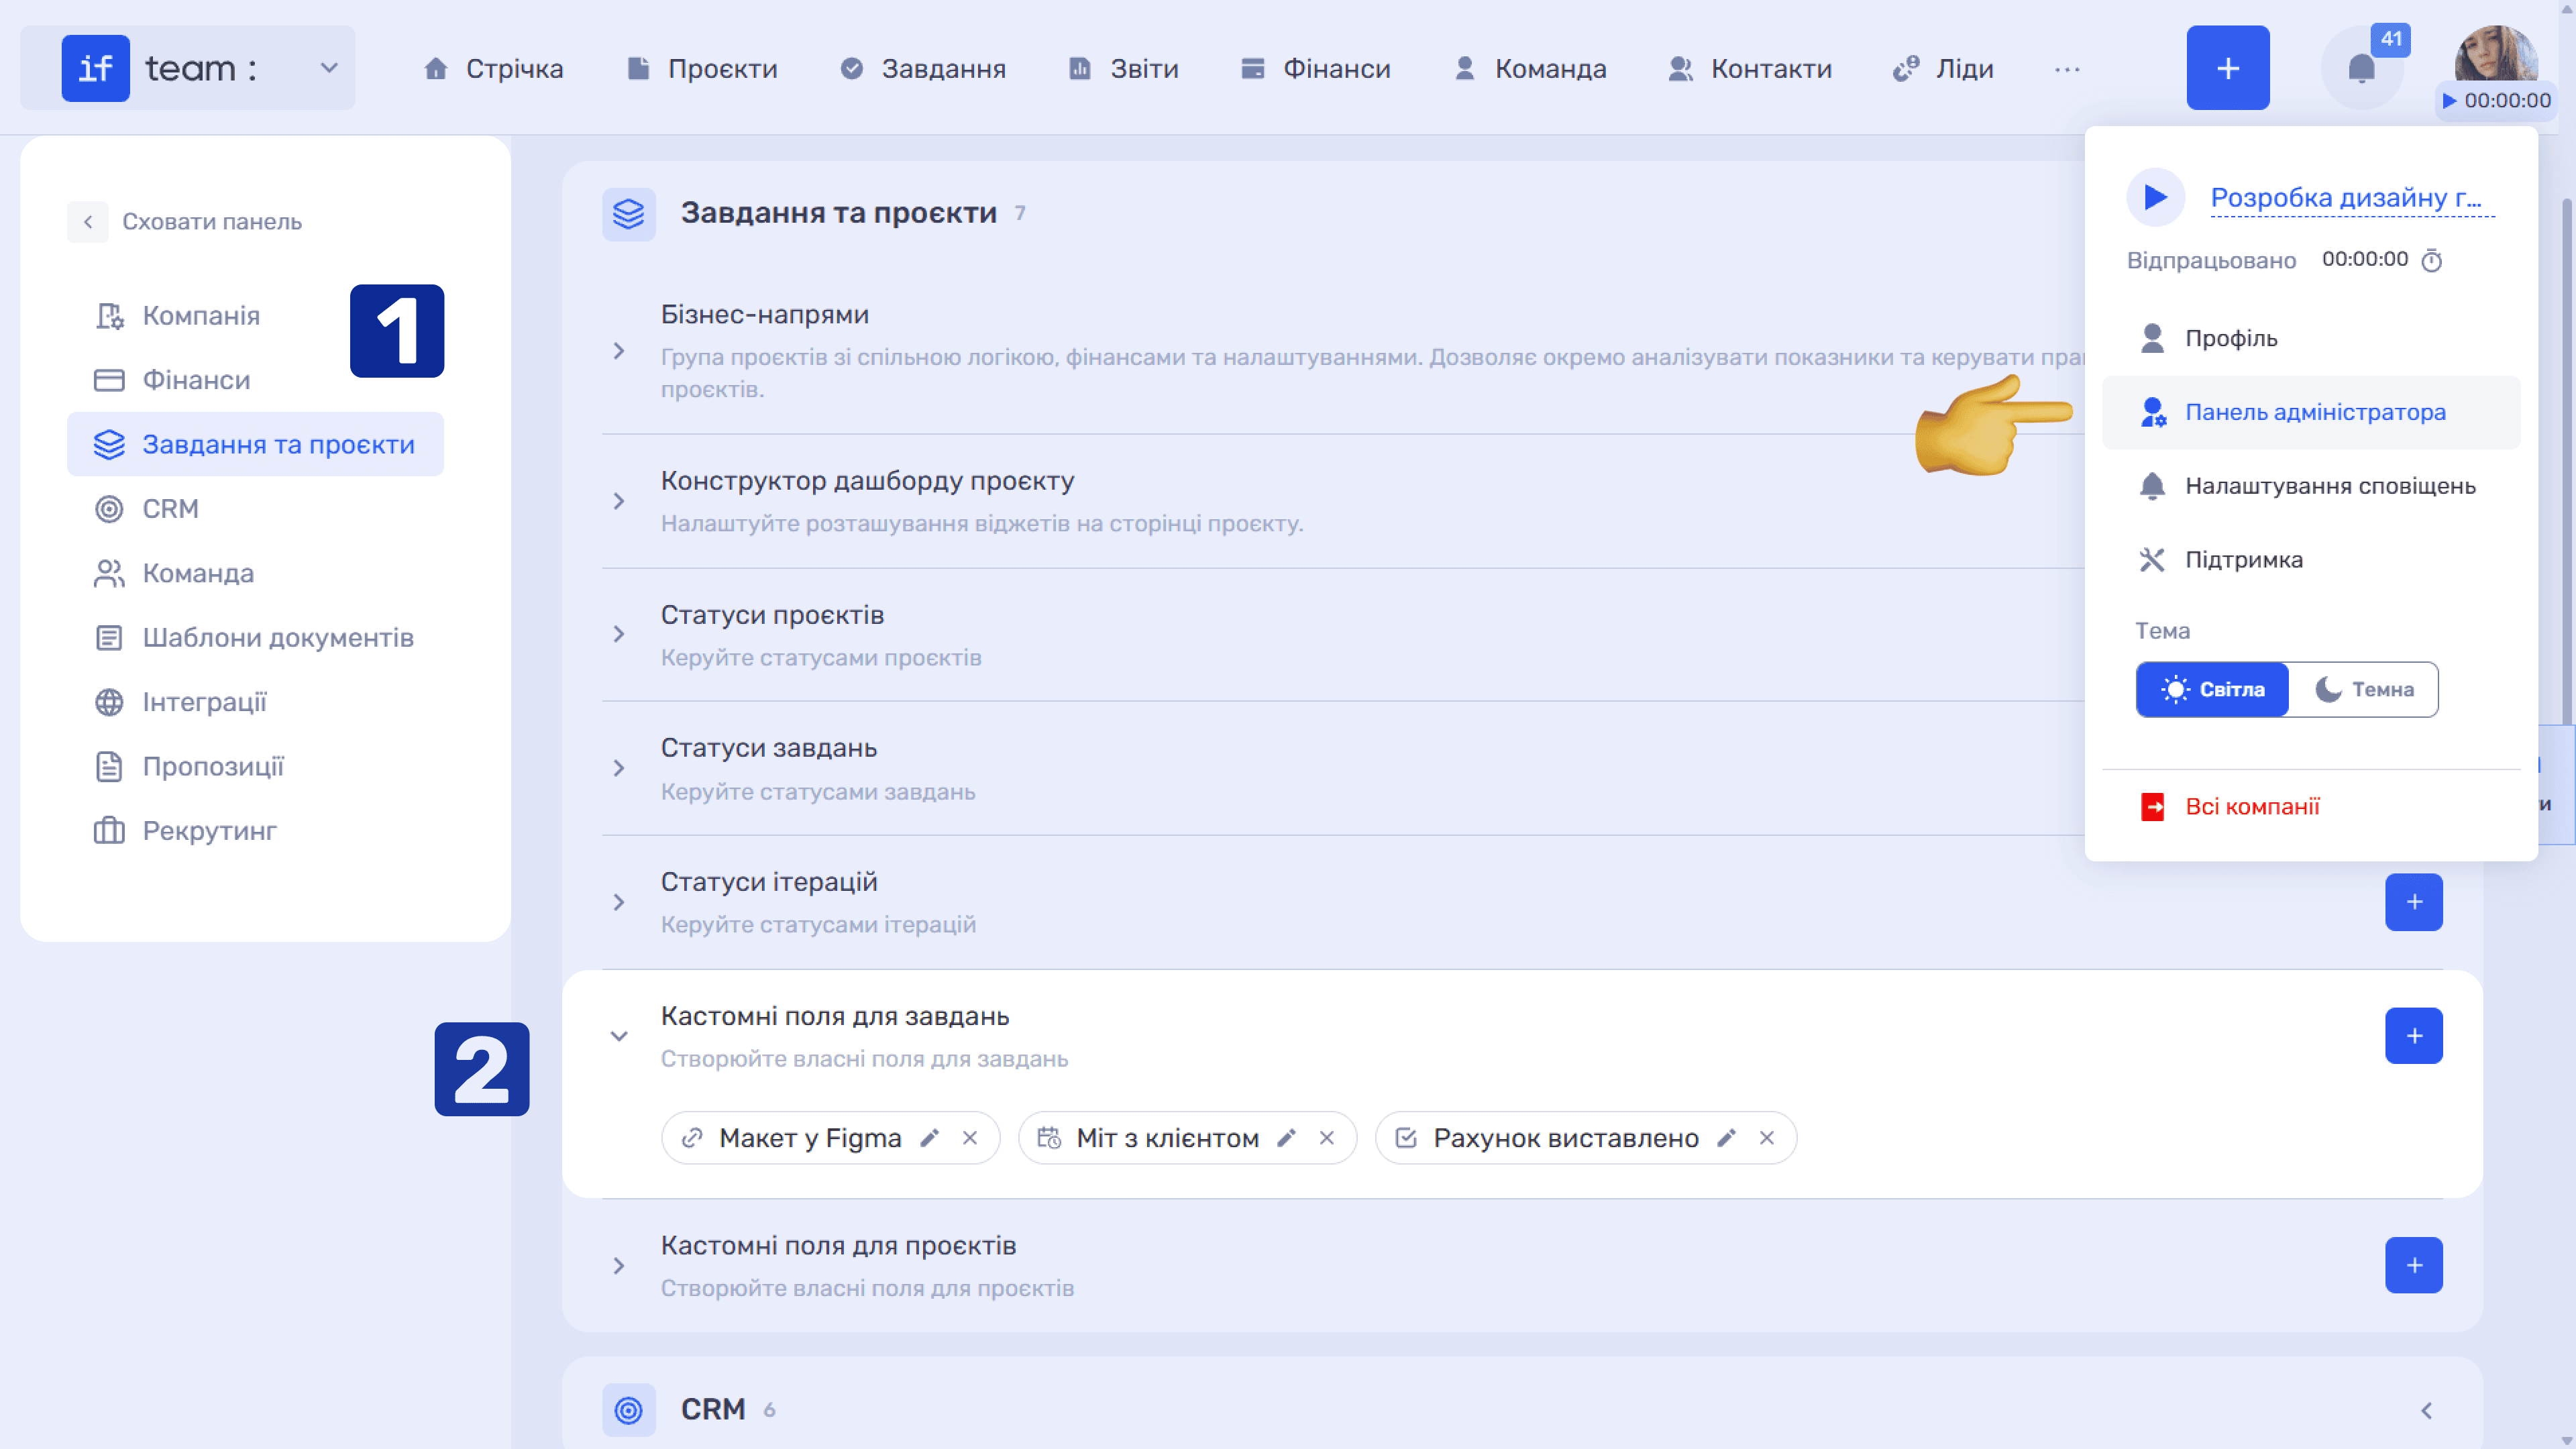
Custom fields are created in the Admin Panel. Click your profile avatar and select “Admin Panel.” Under “Settings,” open “Tasks & Projects” and expand “Custom Fields for Tasks.”
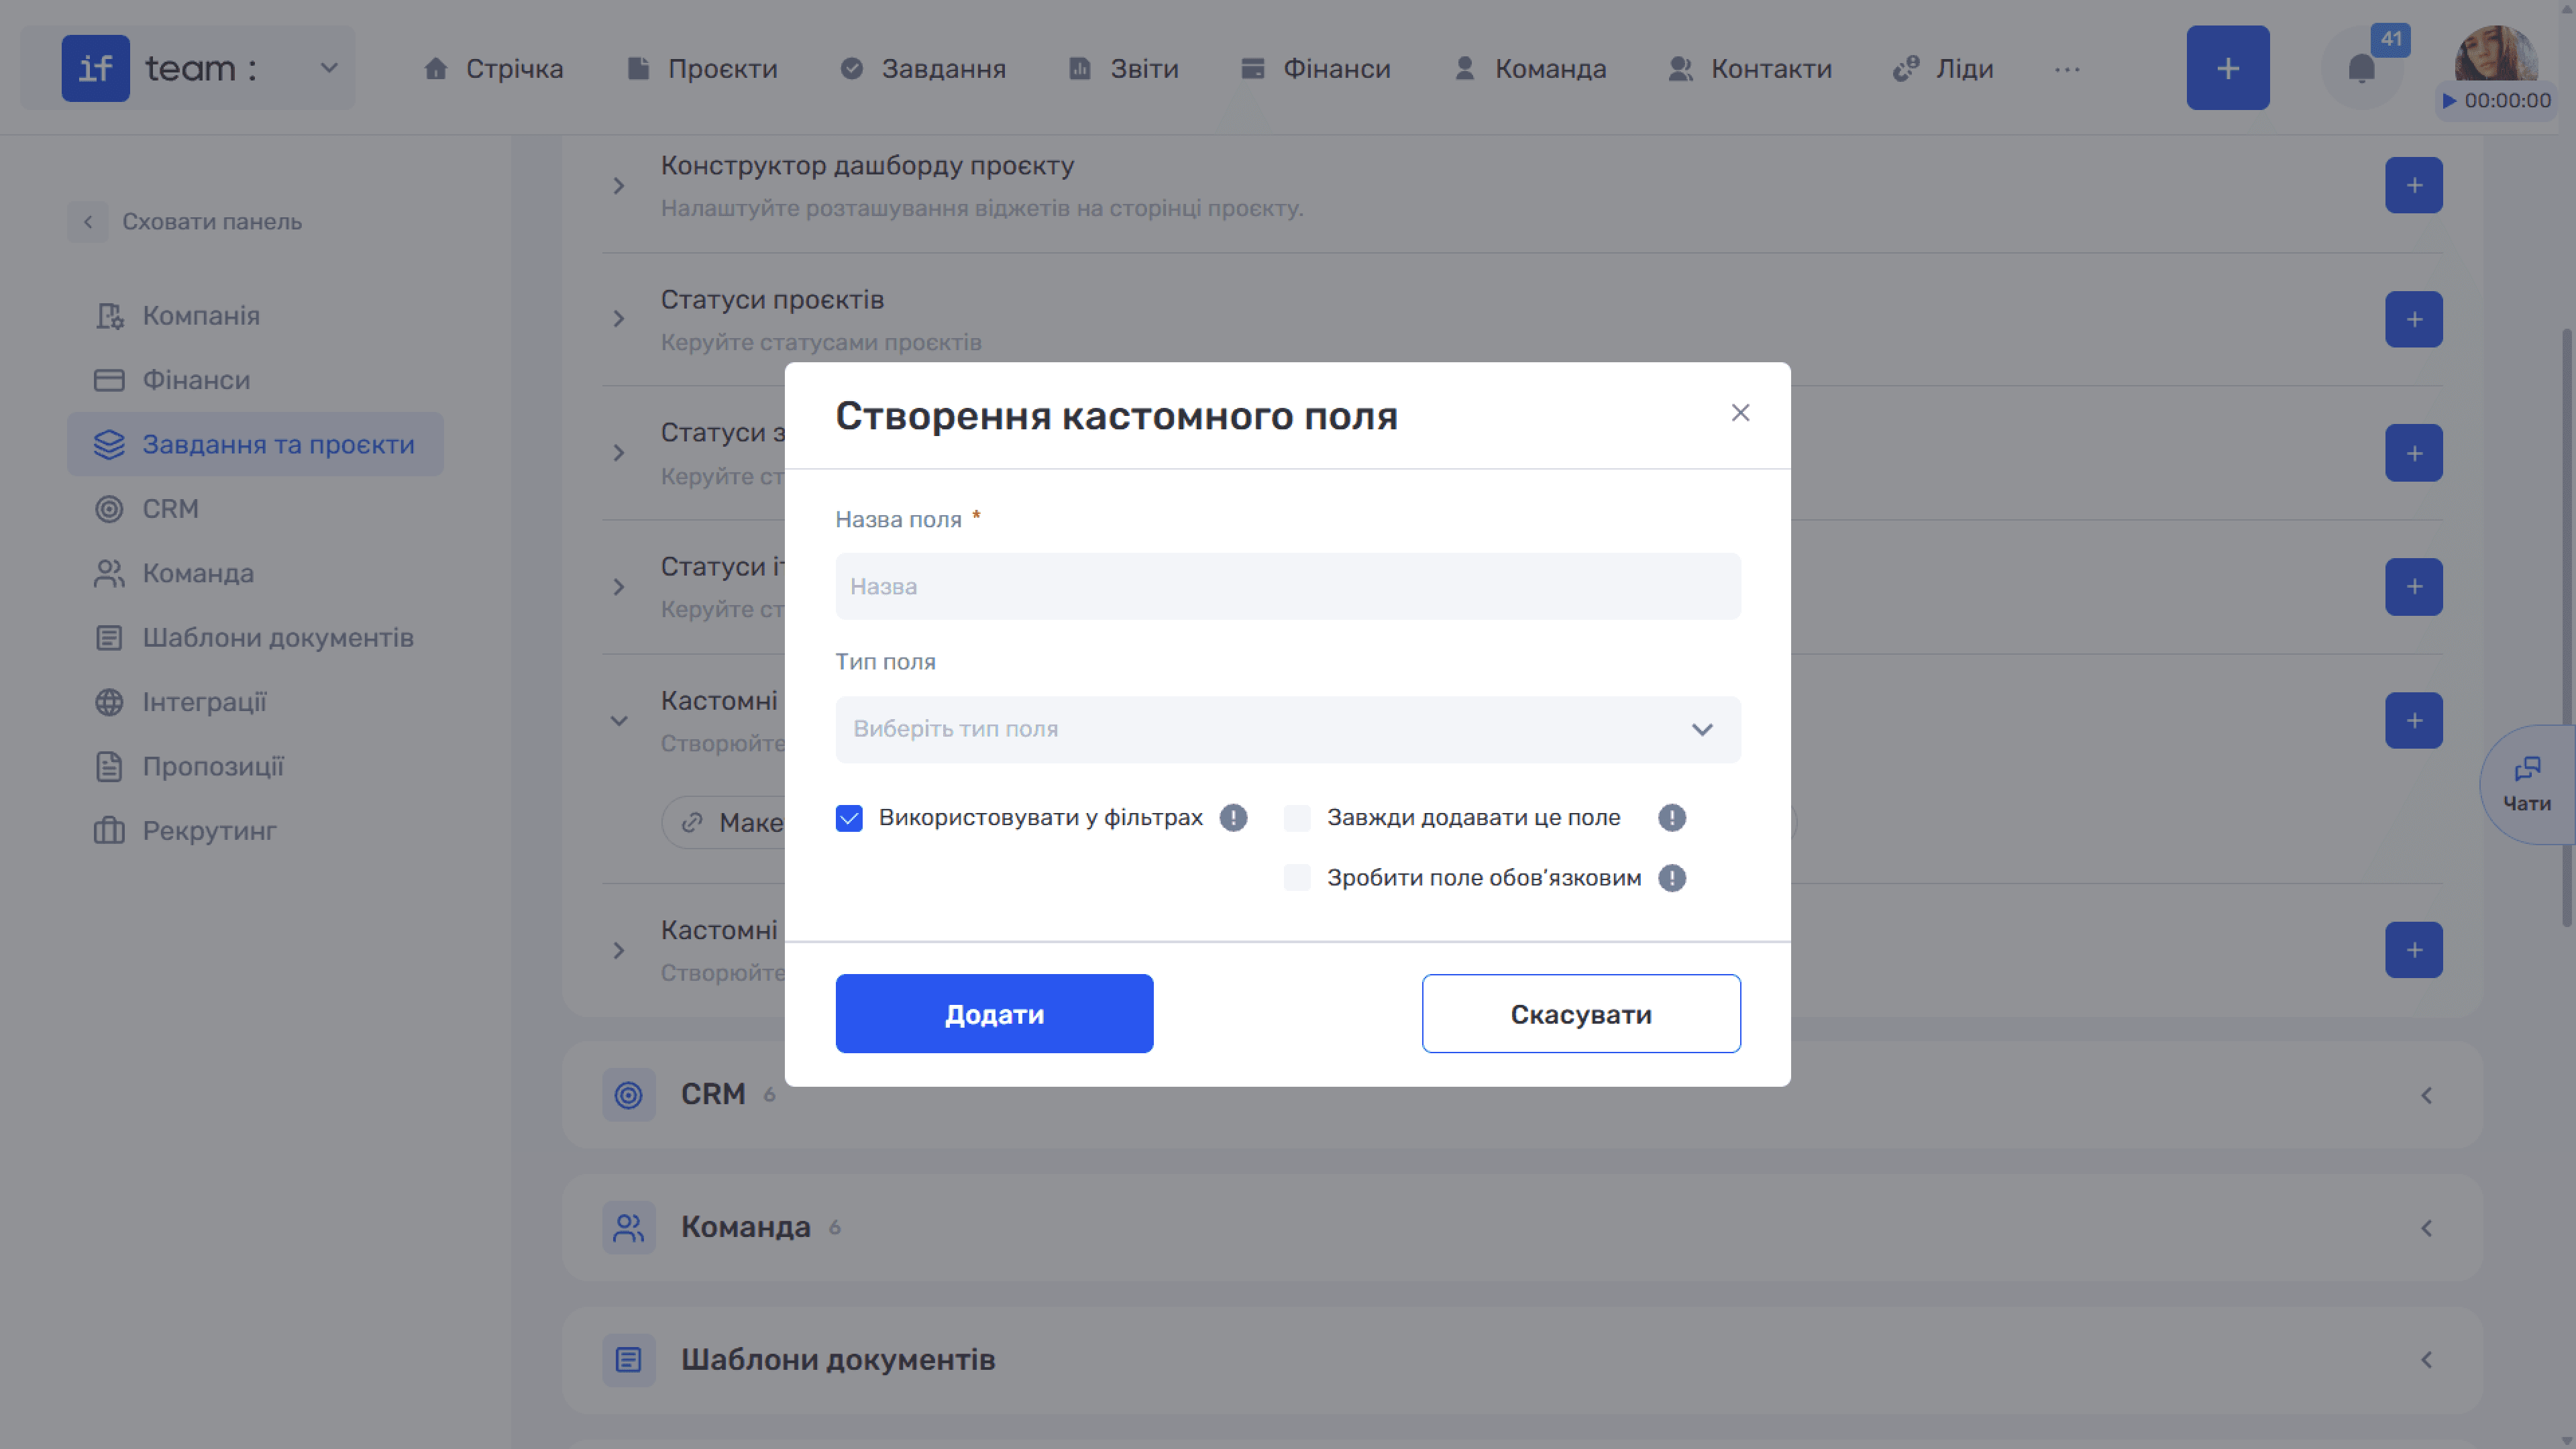
Click “+” to open “Create Custom Field”:
- Field Name is the name displayed on the task card and is required.
- Field Type determines the data format stored by the field, such as Text, Checkbox, or Date and Time.
The following additional options are available:
- Use in Filters makes the field available as a parameter in task filters.
- Always Add This Field automatically adds the field to every new task.
- Make This Field Required prevents the task from being saved until the field is completed.
After completing the form, click “Add,” or click “Cancel” to close the window without saving.
How to Edit or Delete a Field
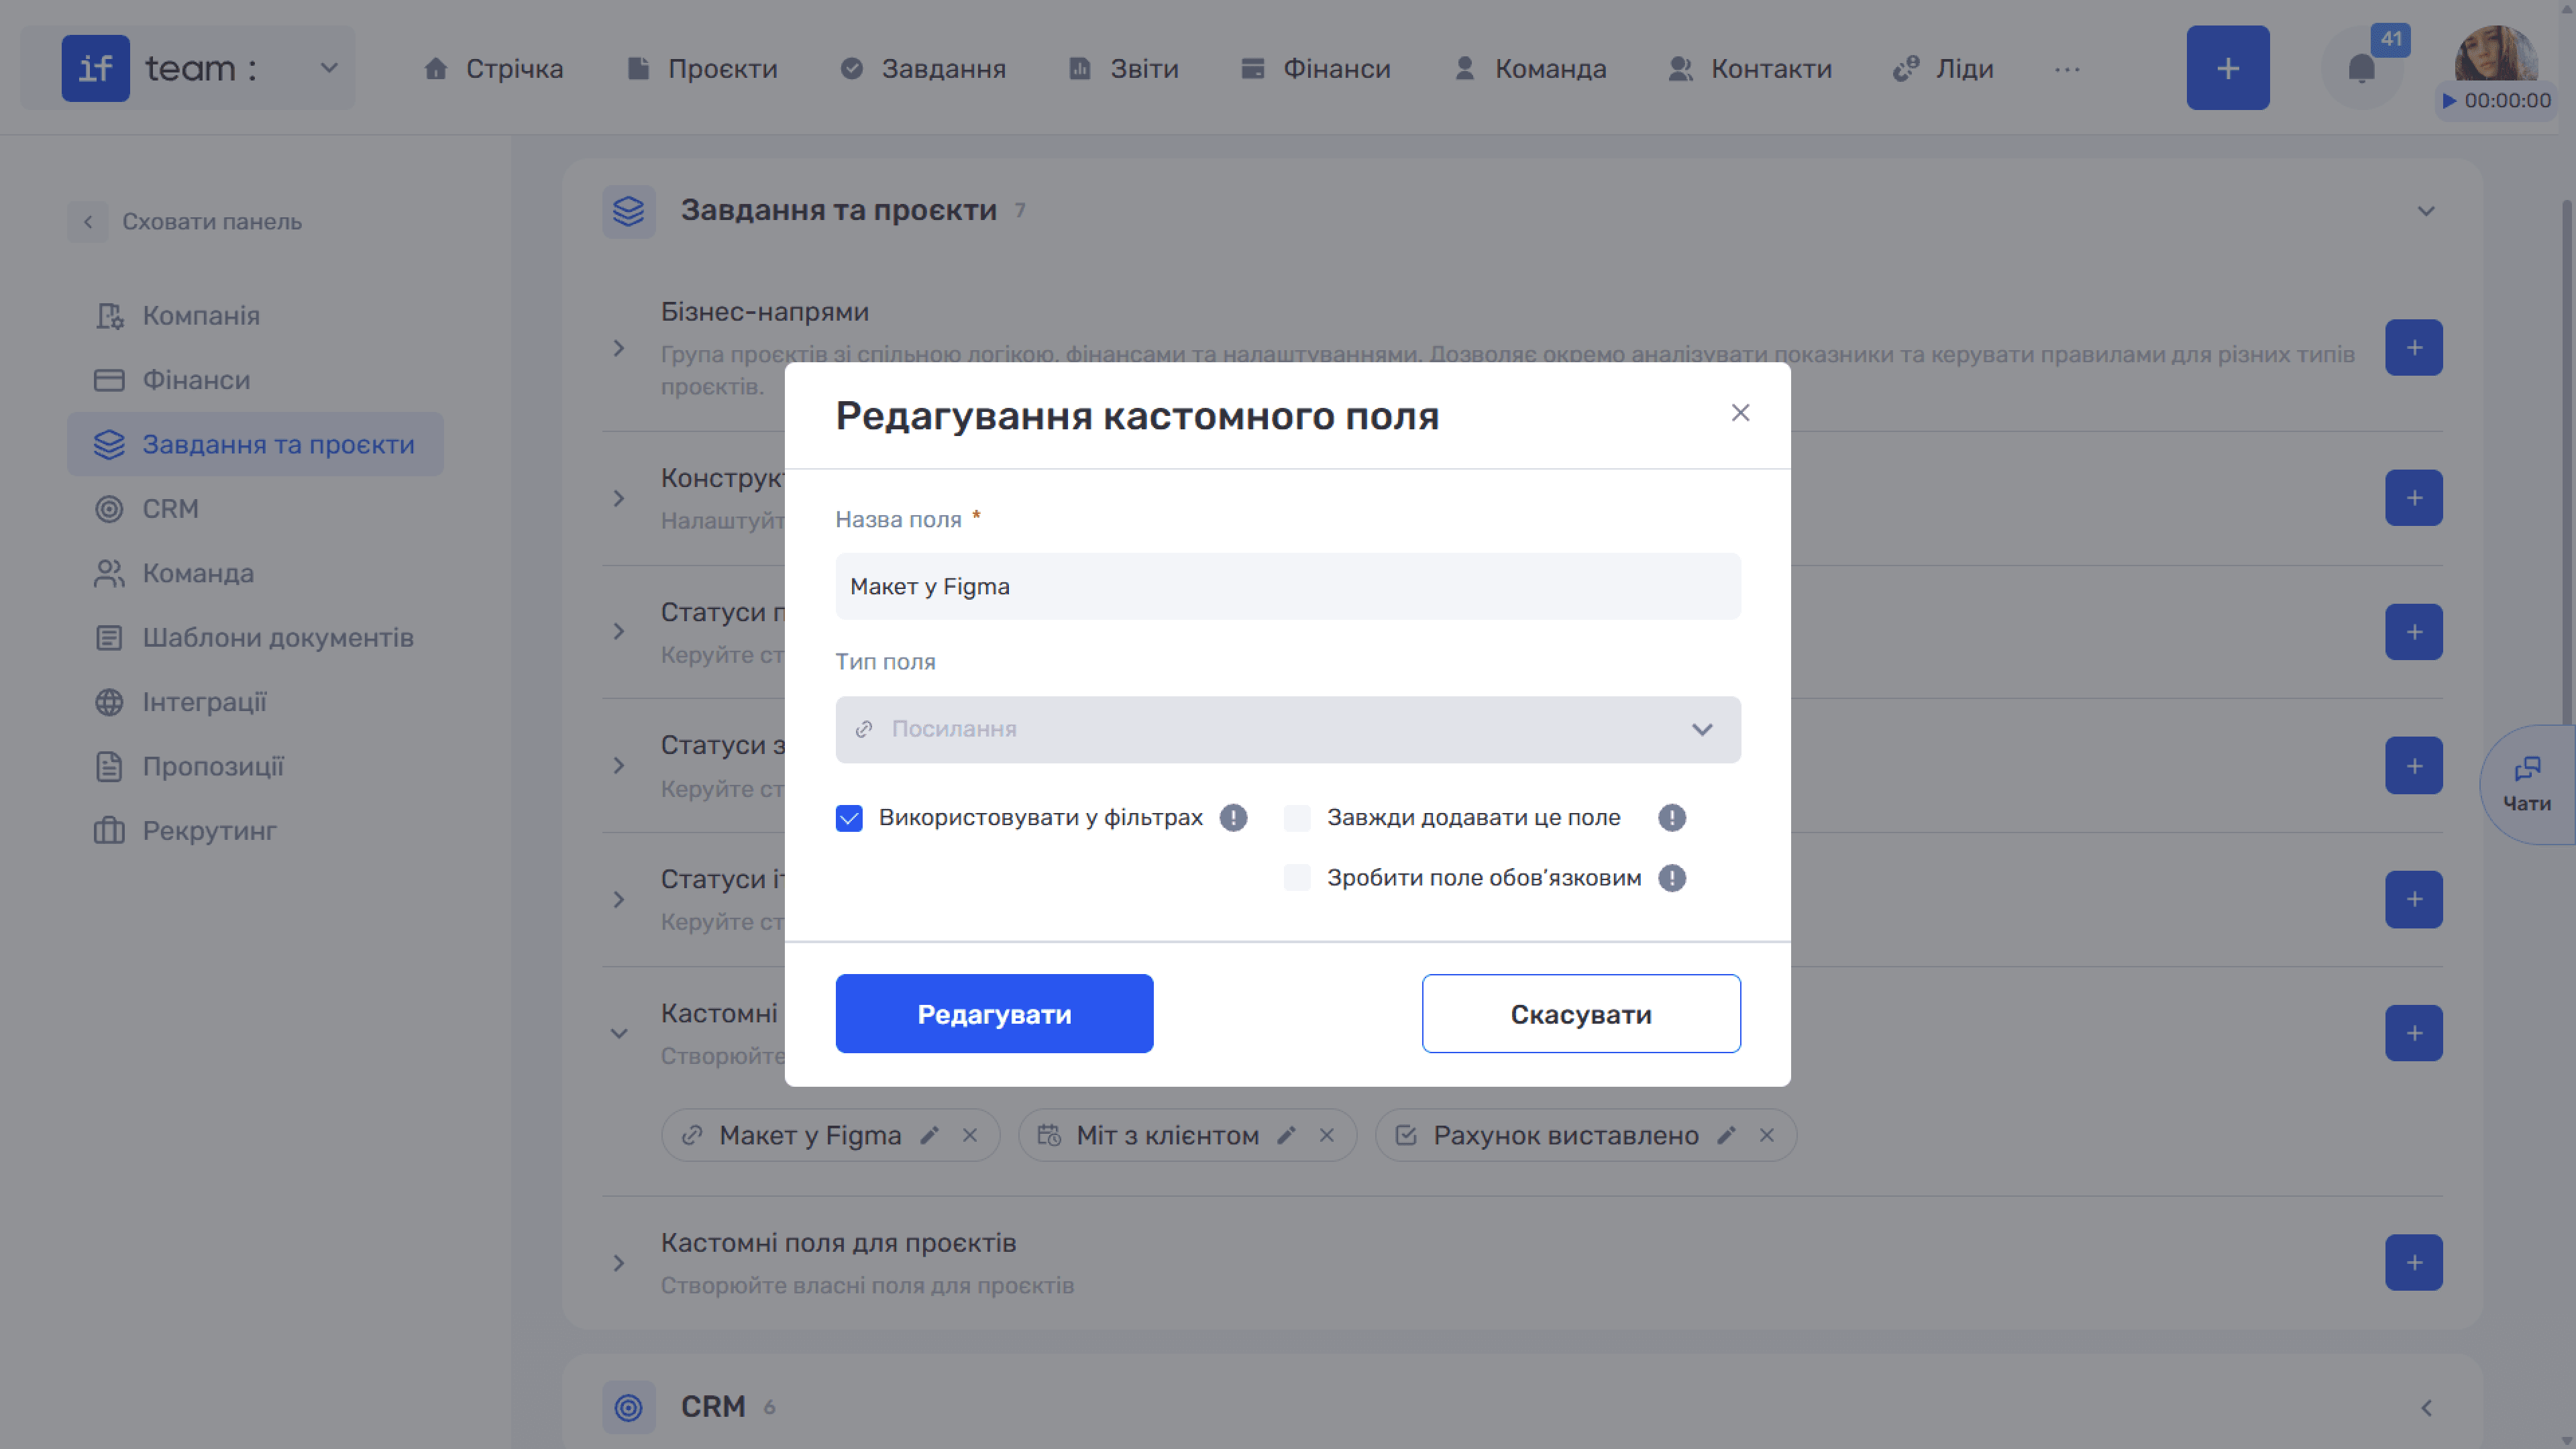
All created fields appear in settings as tags. Click the pencil icon (✏) on a tag to open “Edit Custom Field,” where you can change the field name and options. The field type is set during creation and cannot be changed later. Click ✕ on a tag to delete the field.
How to Complete a Field in a Task
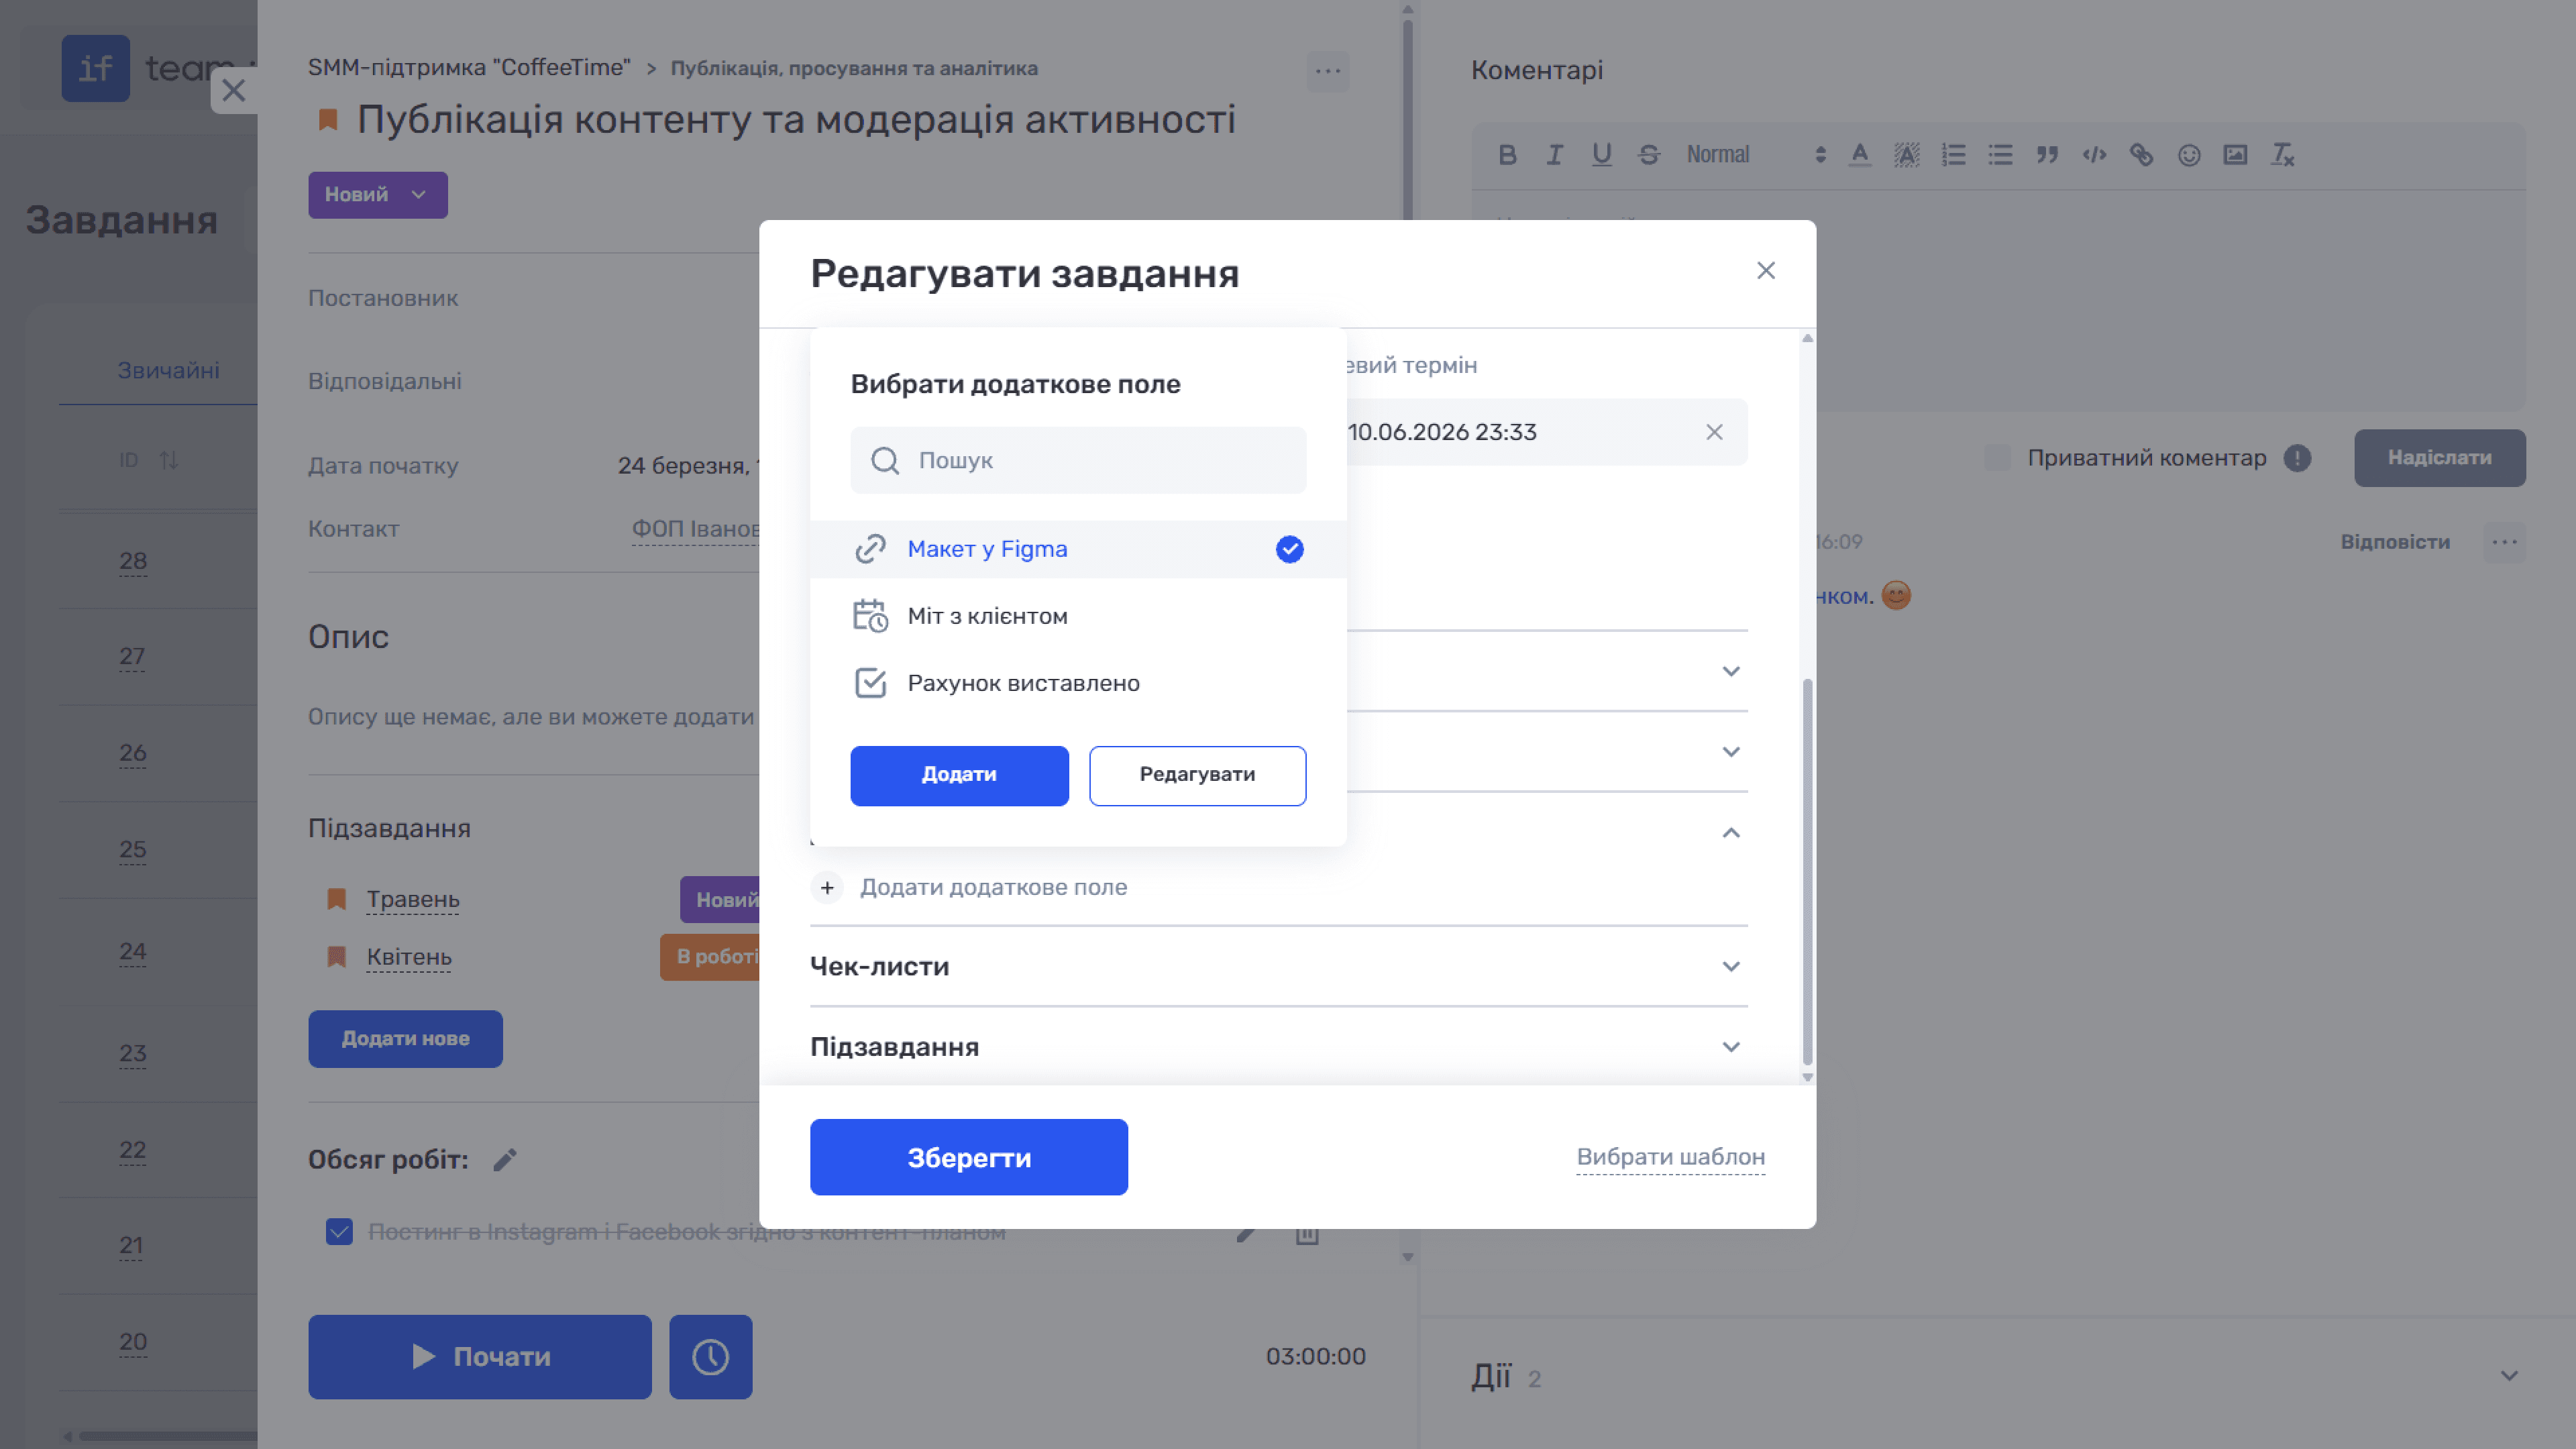
Previously created fields appear in “Add Task” and when editing an existing task. Expand “Additional Fields” and click “+ Add Additional Field.” The “Select Additional Field” list appears with all available fields. Find the required field using search, select it, and click “Add.” The field appears in the form ready to be completed.
The adjacent “Edit” button takes you to settings, where you can create a new field or change an existing one.
Where Custom Fields Appear
Completed custom-field values are available in several places:
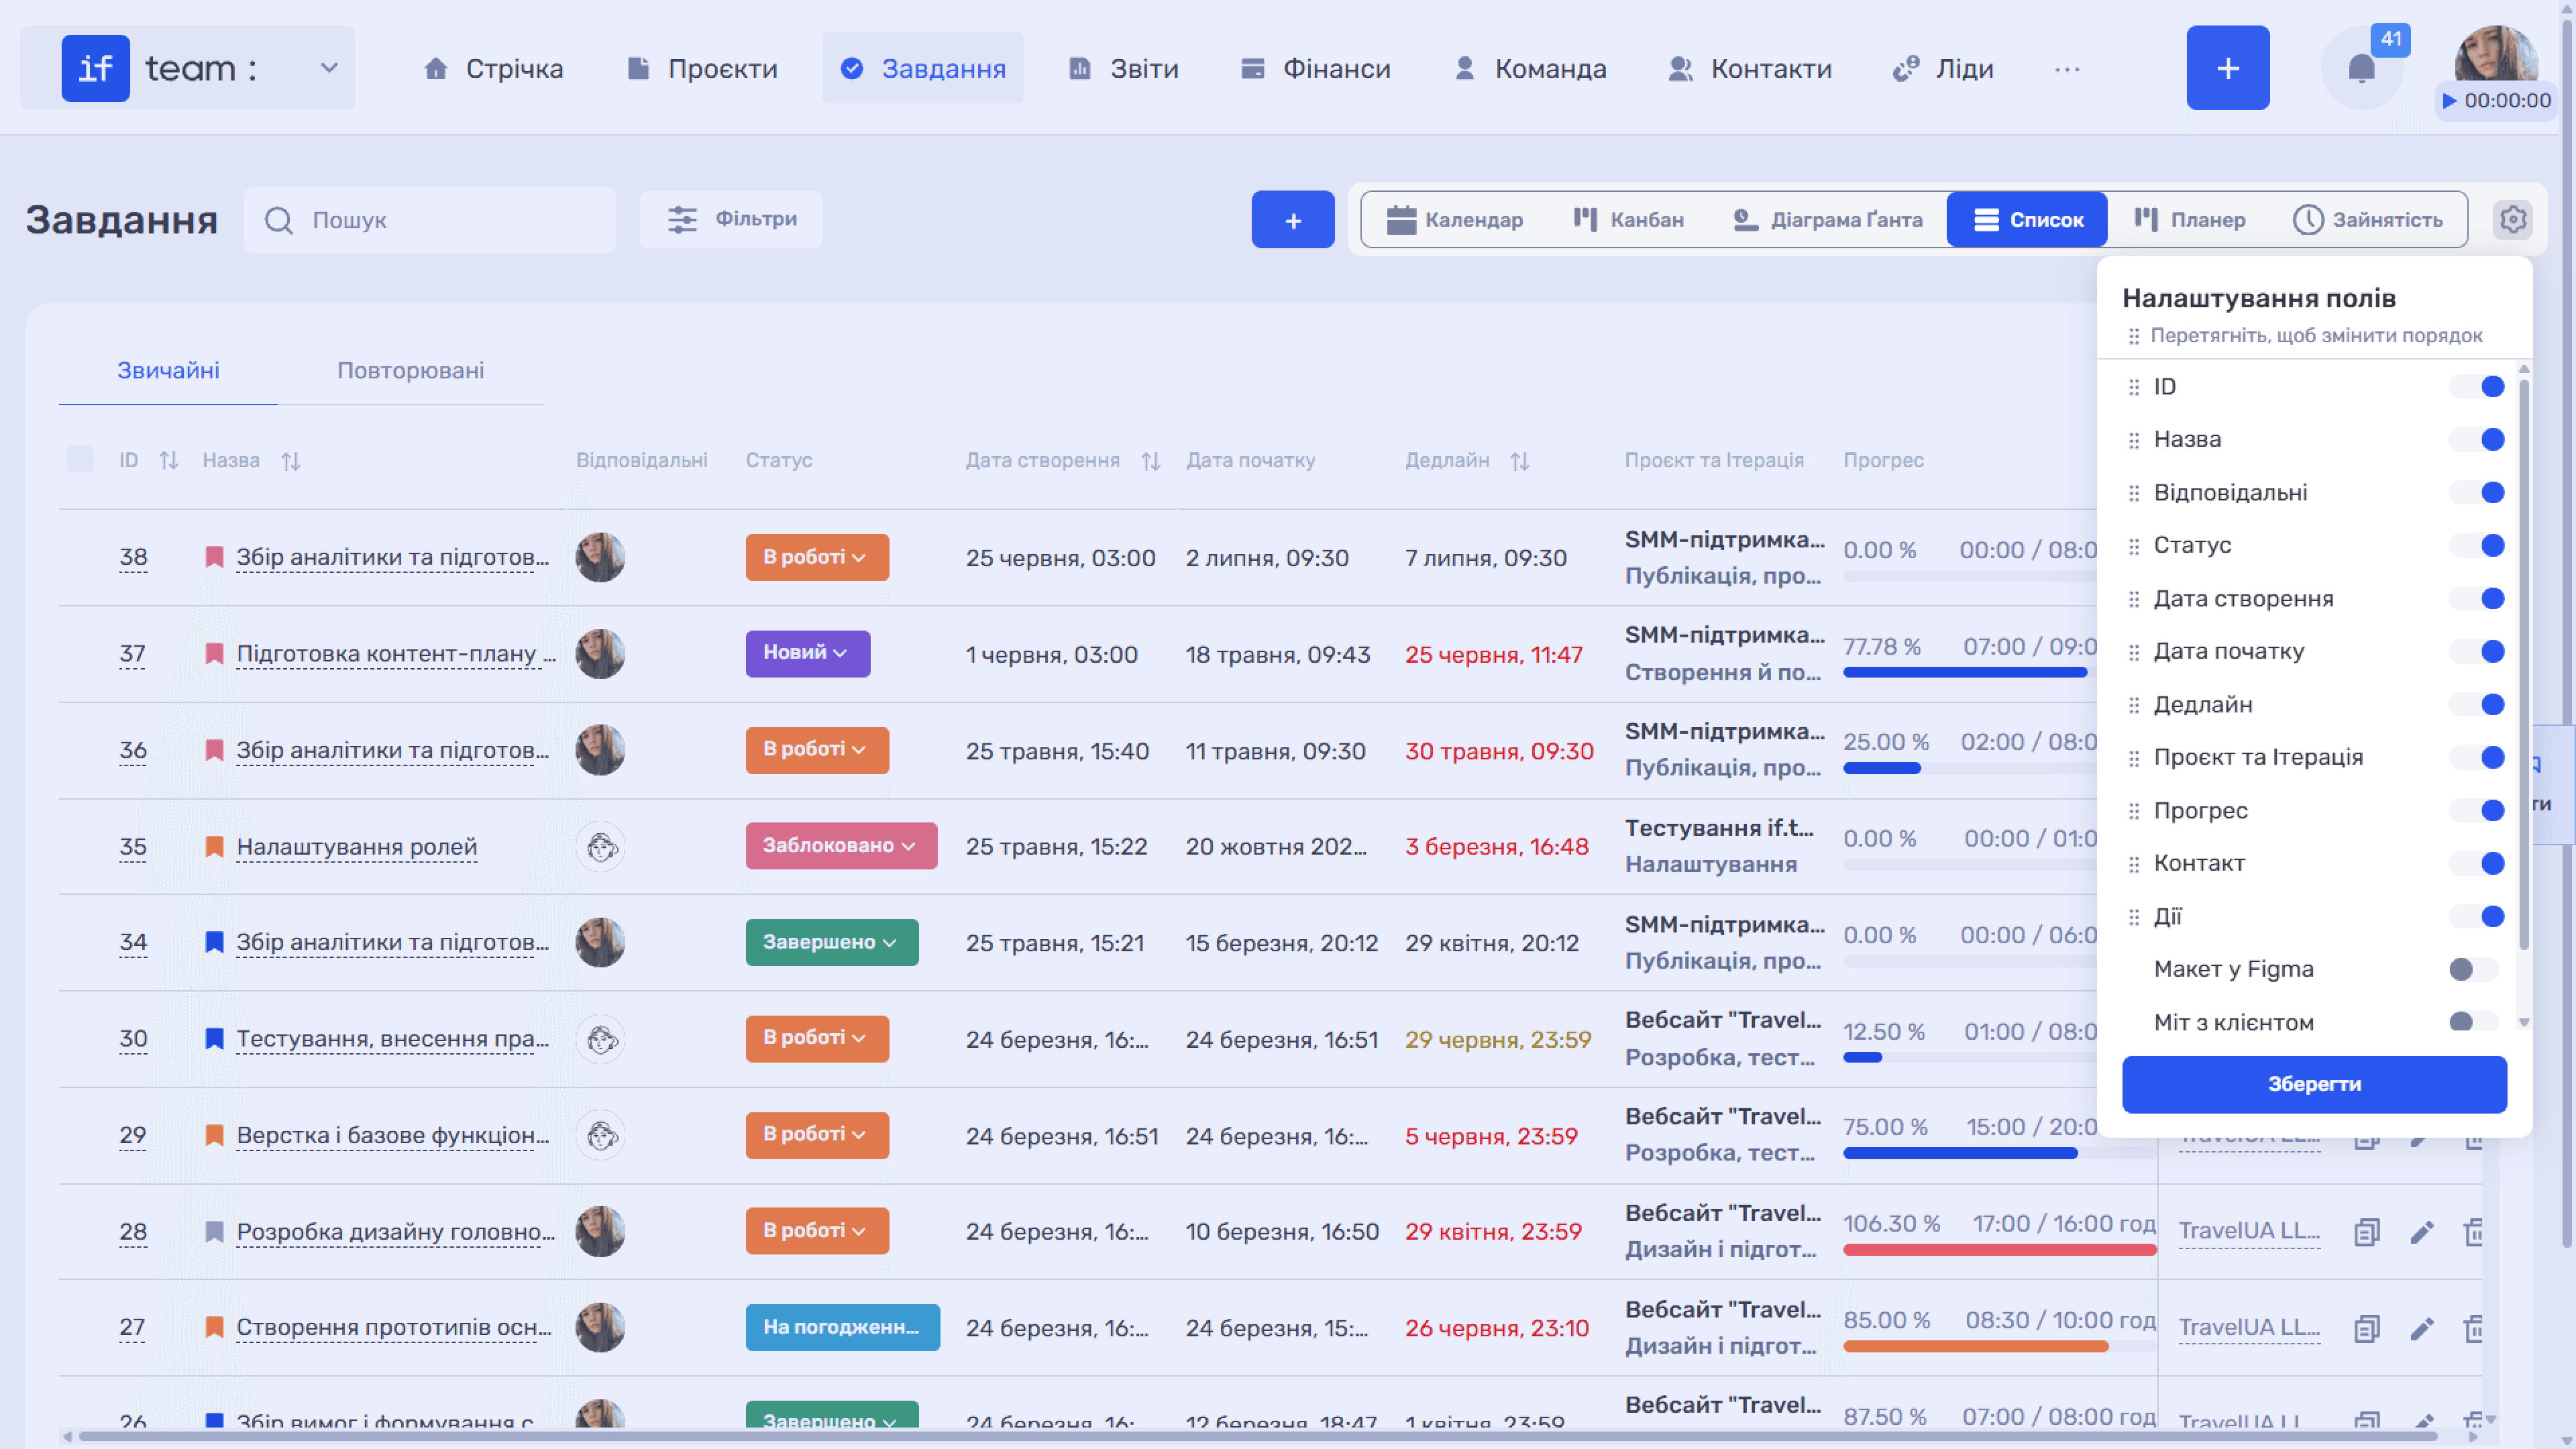
- In the task list. In “List” view, click the gear icon (⚙) and enable the required custom fields in “Field Settings.” They appear as additional table columns.
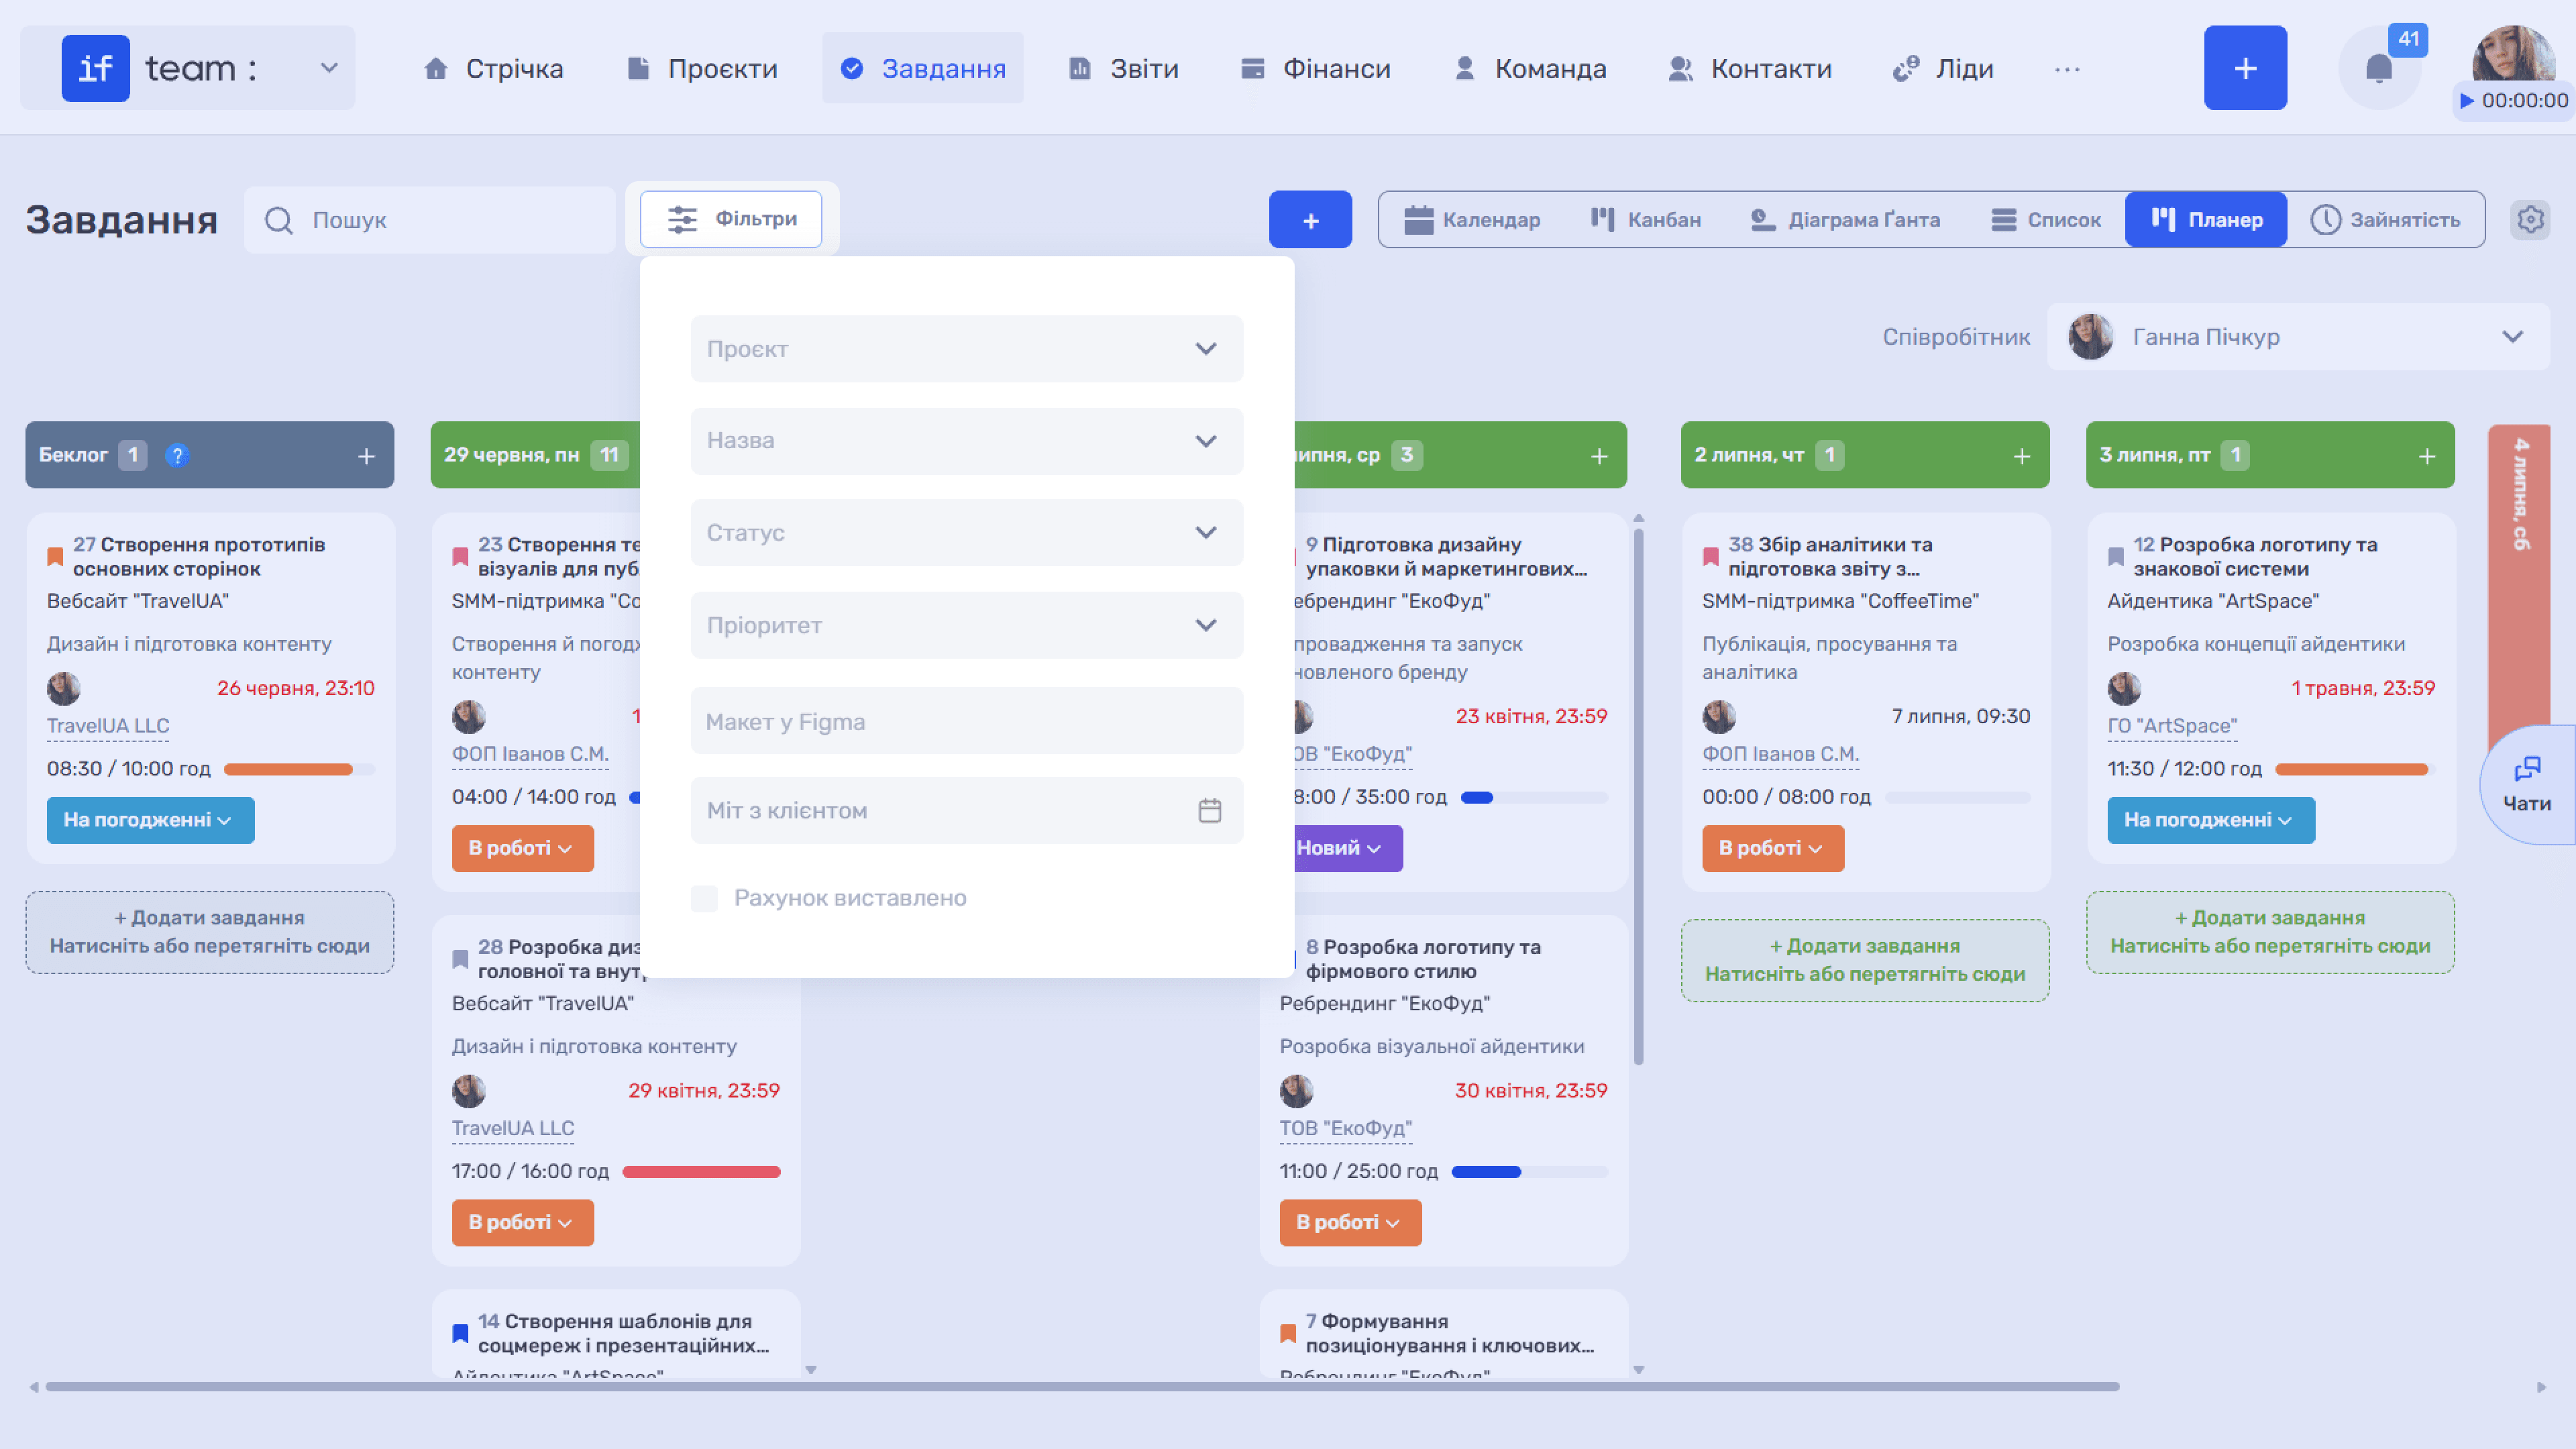
- In filters. If “Use in Filters” was enabled when the field was created, it appears among the filtering parameters in all task views except “Workload.”
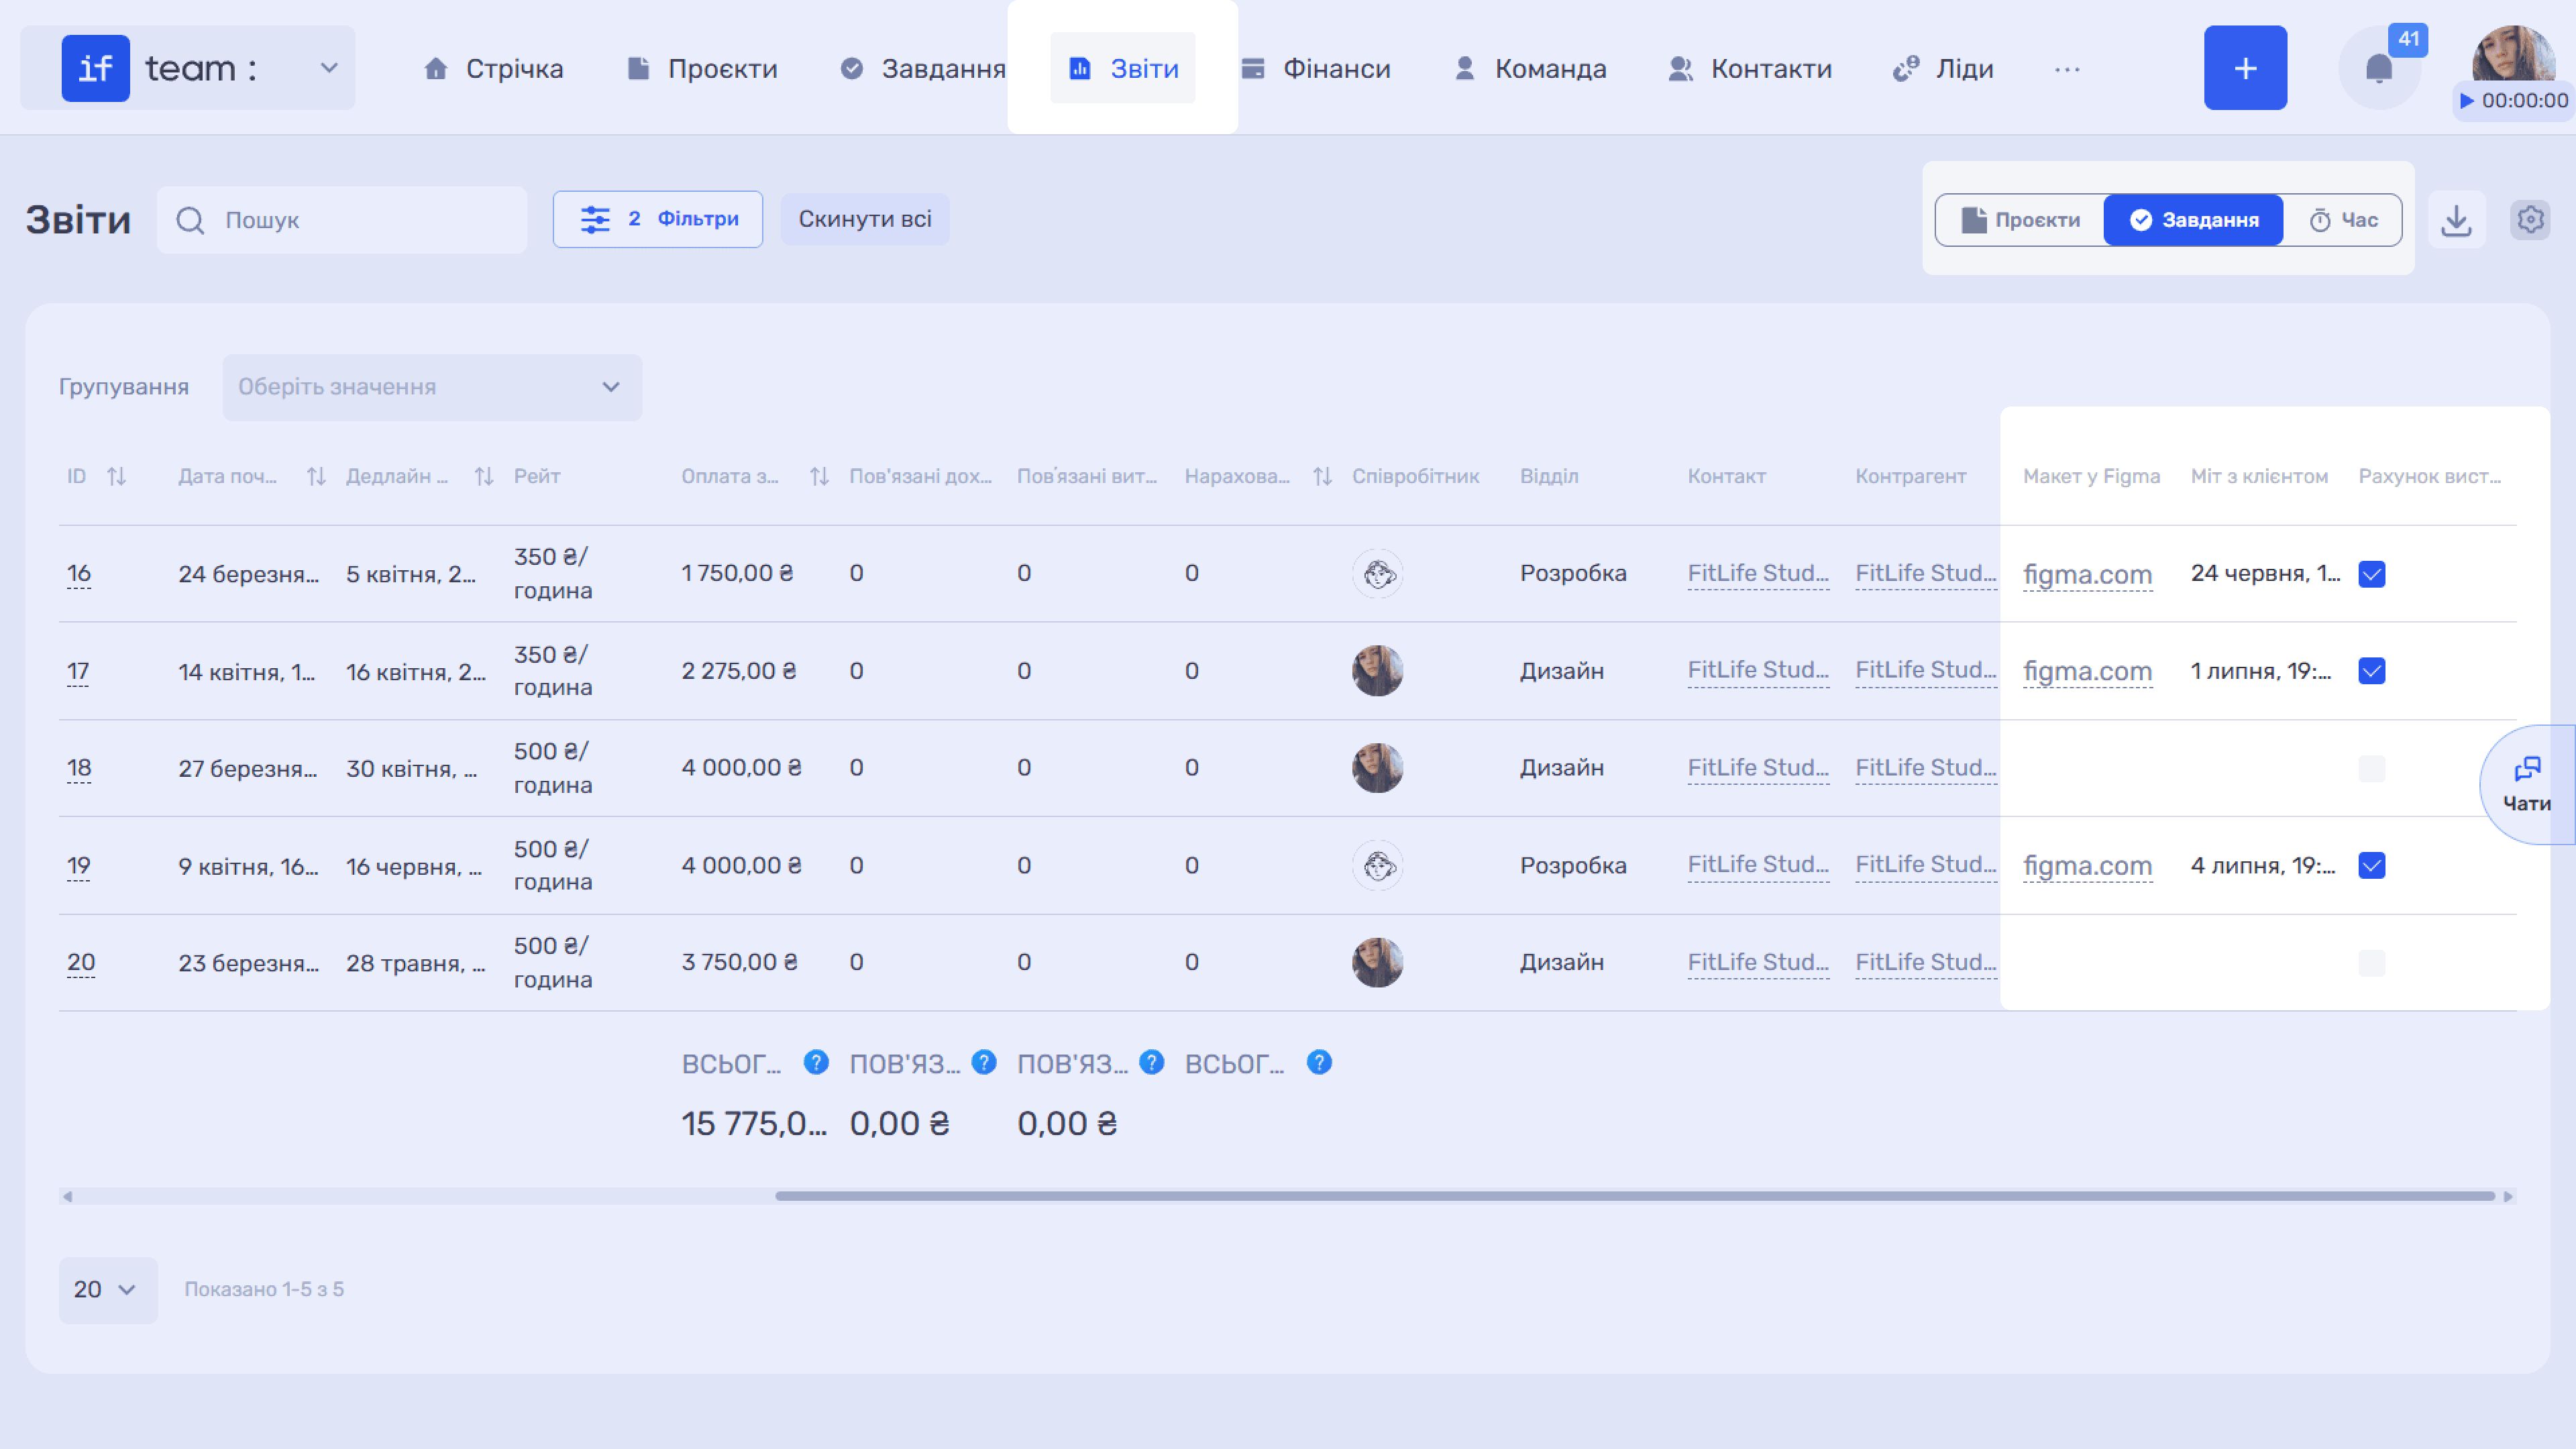
- In reports. Under “Tasks” in “Reports,” custom fields appear as separate columns. Their values can be changed by editing the corresponding task.
Still have questions?
Maybe we haven't added this information yet. But you can always reach out:
Request a demo
Submit a request and we'll show you how the service works and its capabilities.
Book a demo