Subtasks
Subtasks let you divide a large task into smaller parts. Unlike a checklist, which is a simple list of items, each subtask is effectively a complete task with its own ID, status, assignee, planned time, and deadline. It can be converted into a main task in one click.
How to Create a Subtask
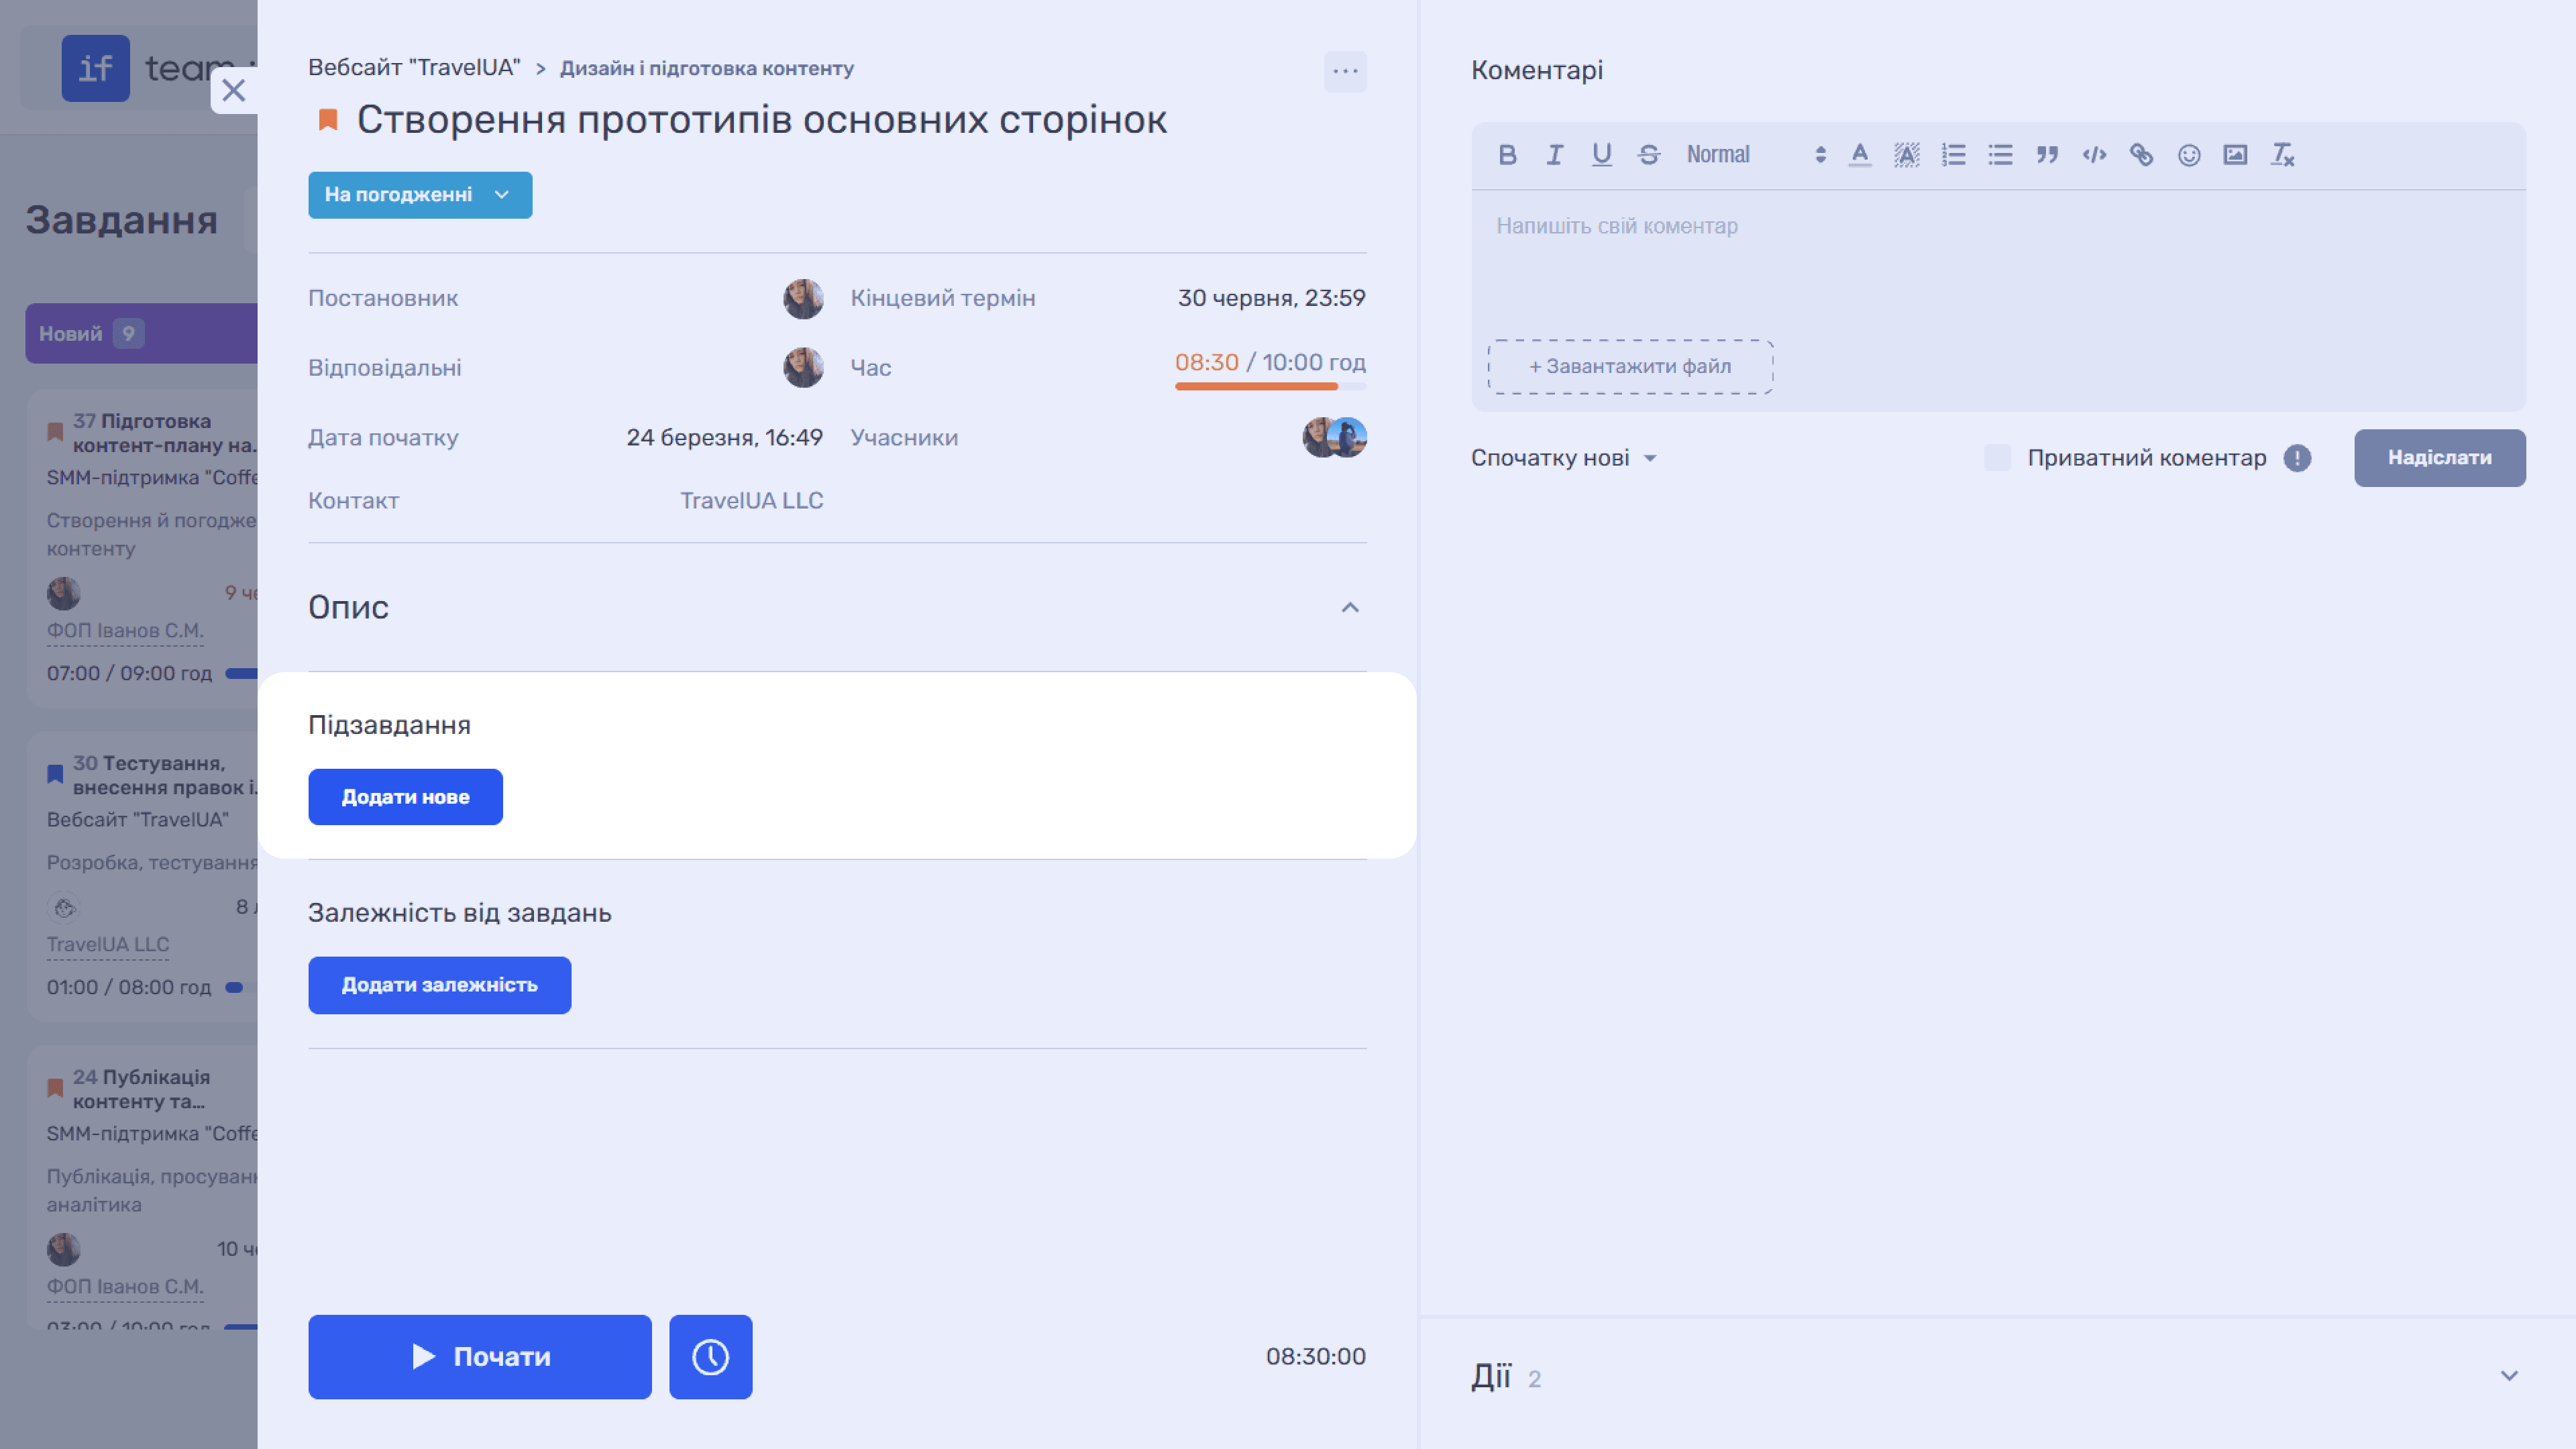
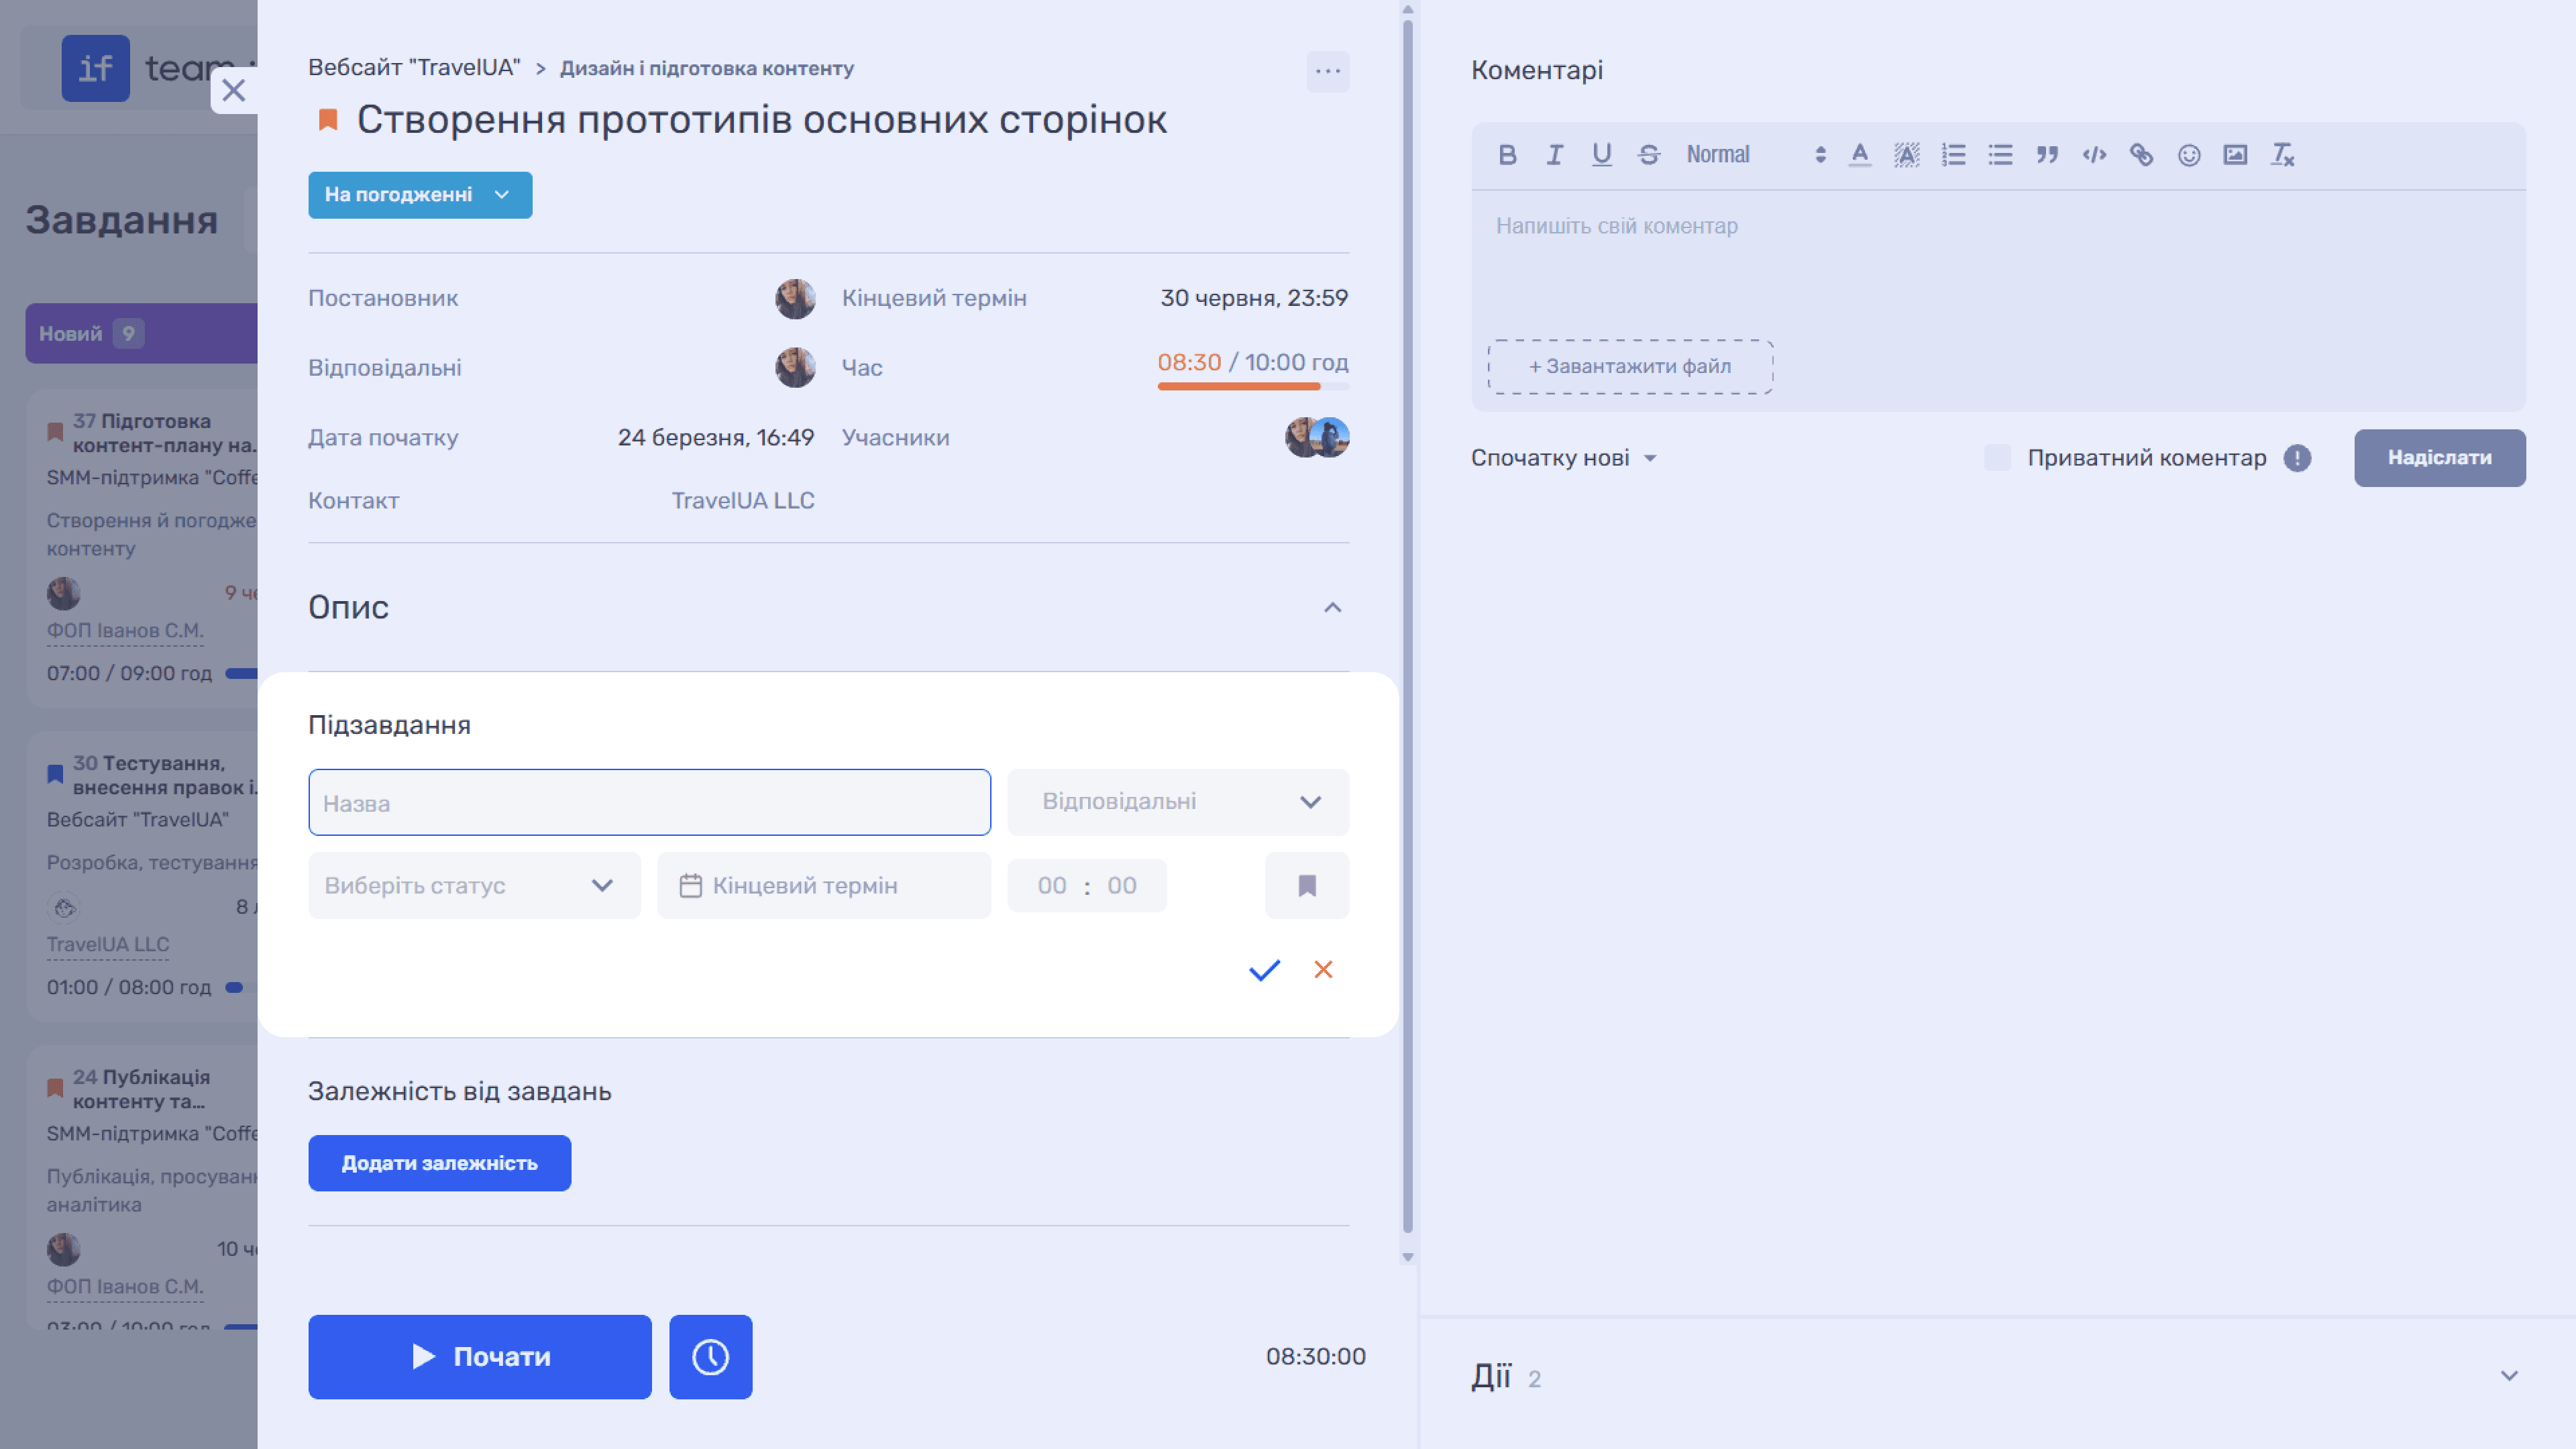
Open the task card and click “Add New” in the “Subtasks” section. The following fields appear: name, assignees, status, deadline, planned time, and priority, represented by the flag icon. Complete them and confirm creation using the checkmark (✓), or cancel using the cross (✗).
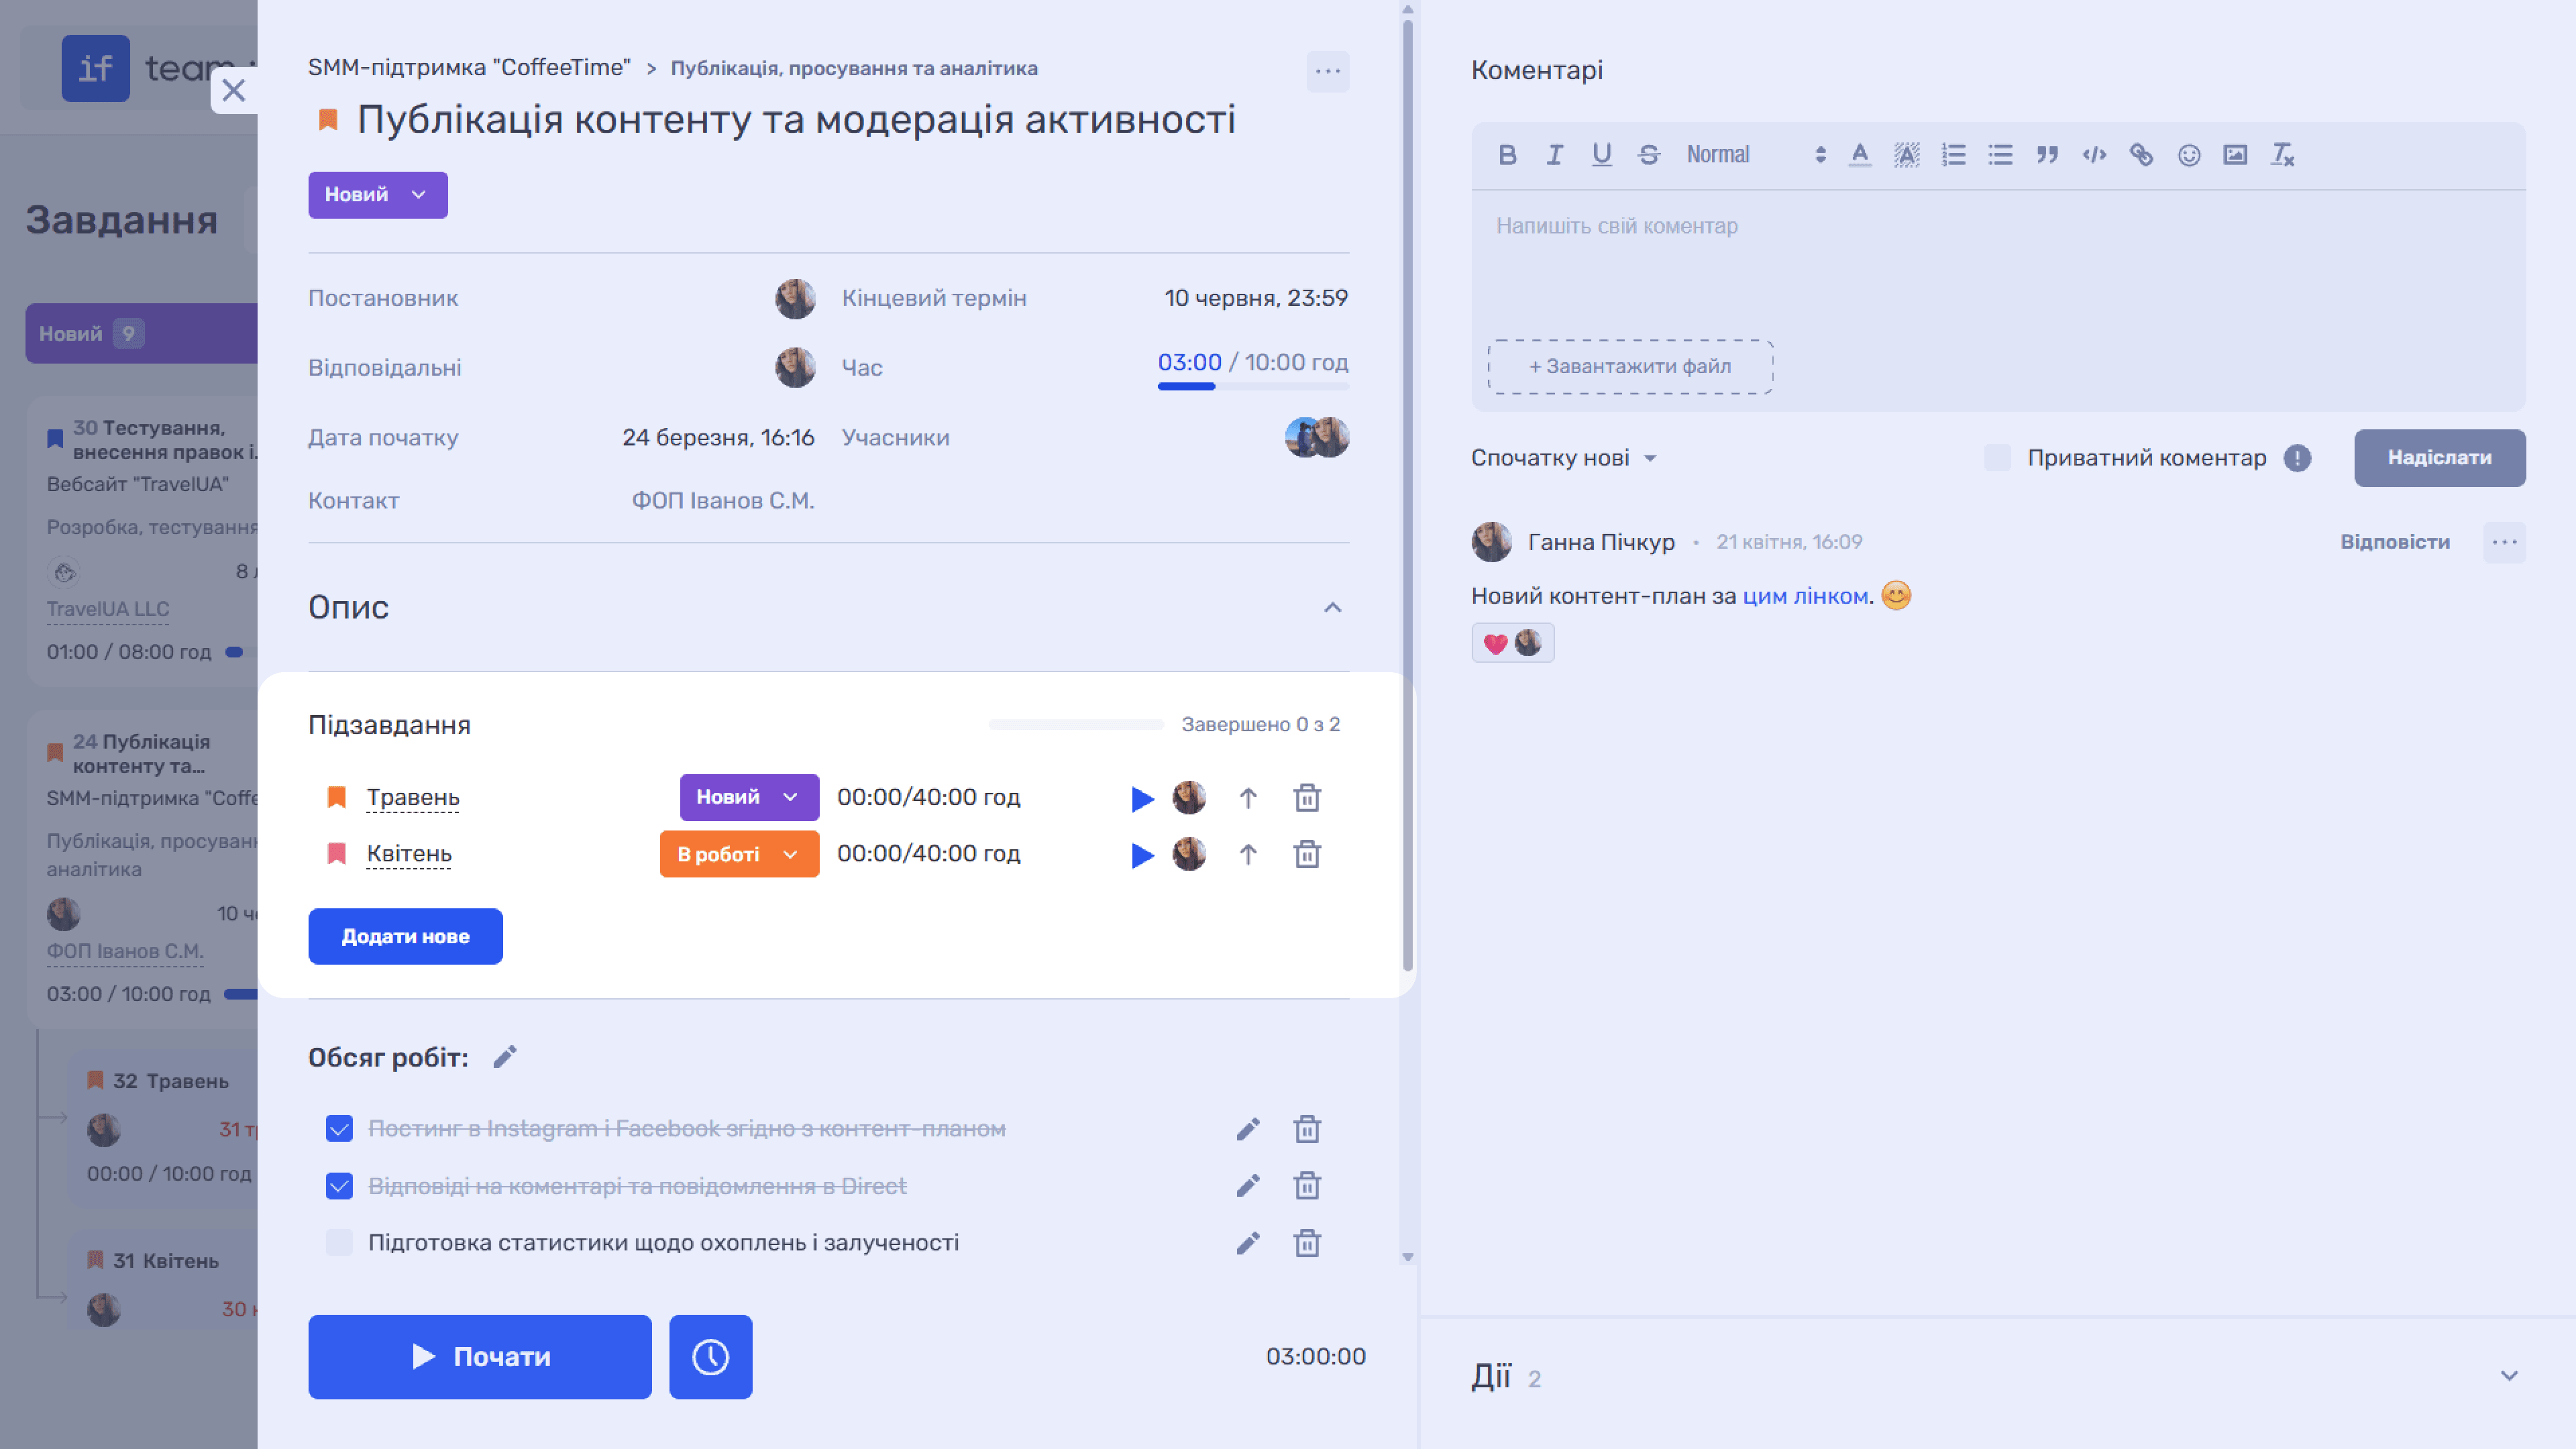
Created subtasks are displayed as a list in the parent task card. Each entry shows its priority, status, time spent relative to planned time, and action buttons. The progress at the top of the section shows how many subtasks have been completed.
Subtask Actions
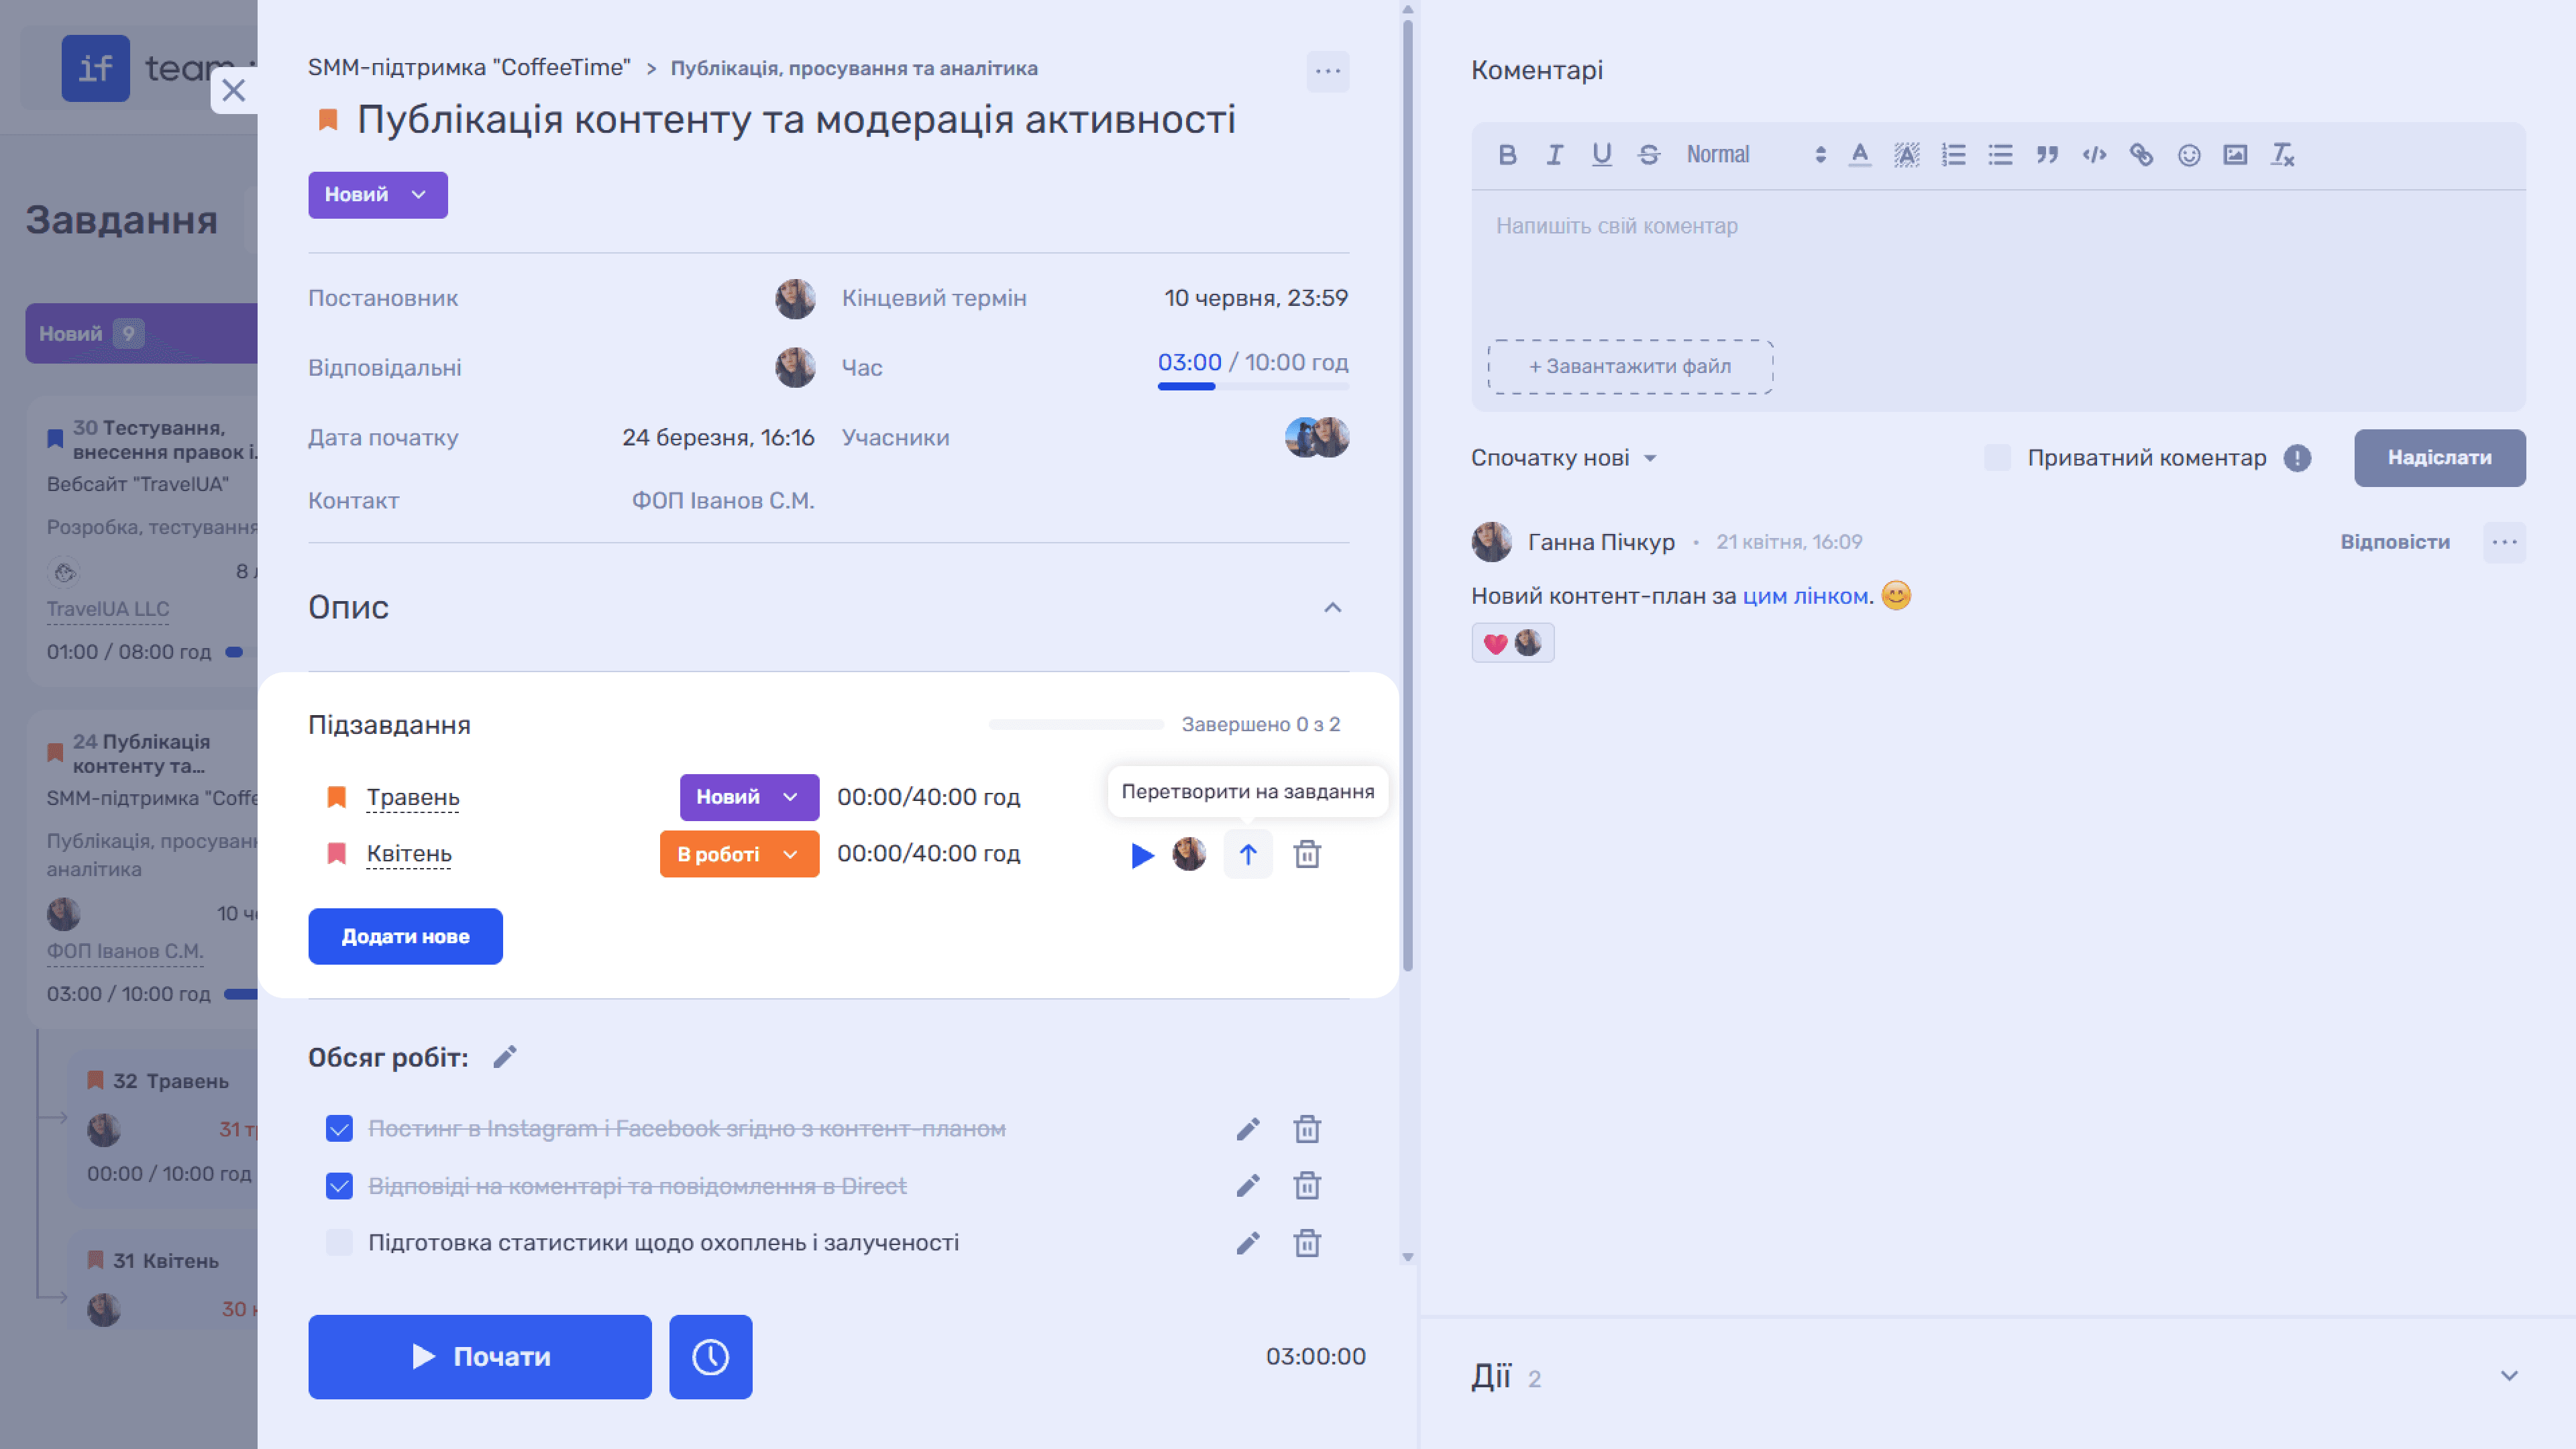
The following buttons are available next to each subtask:
- ▶ “Start” starts the time tracker for the subtask.
- ↑ “Convert to Task” detaches the subtask from its parent and turns it into an independent task.
- 🗑 “Delete Task” deletes the subtask.
Navigating Between a Task and Subtask
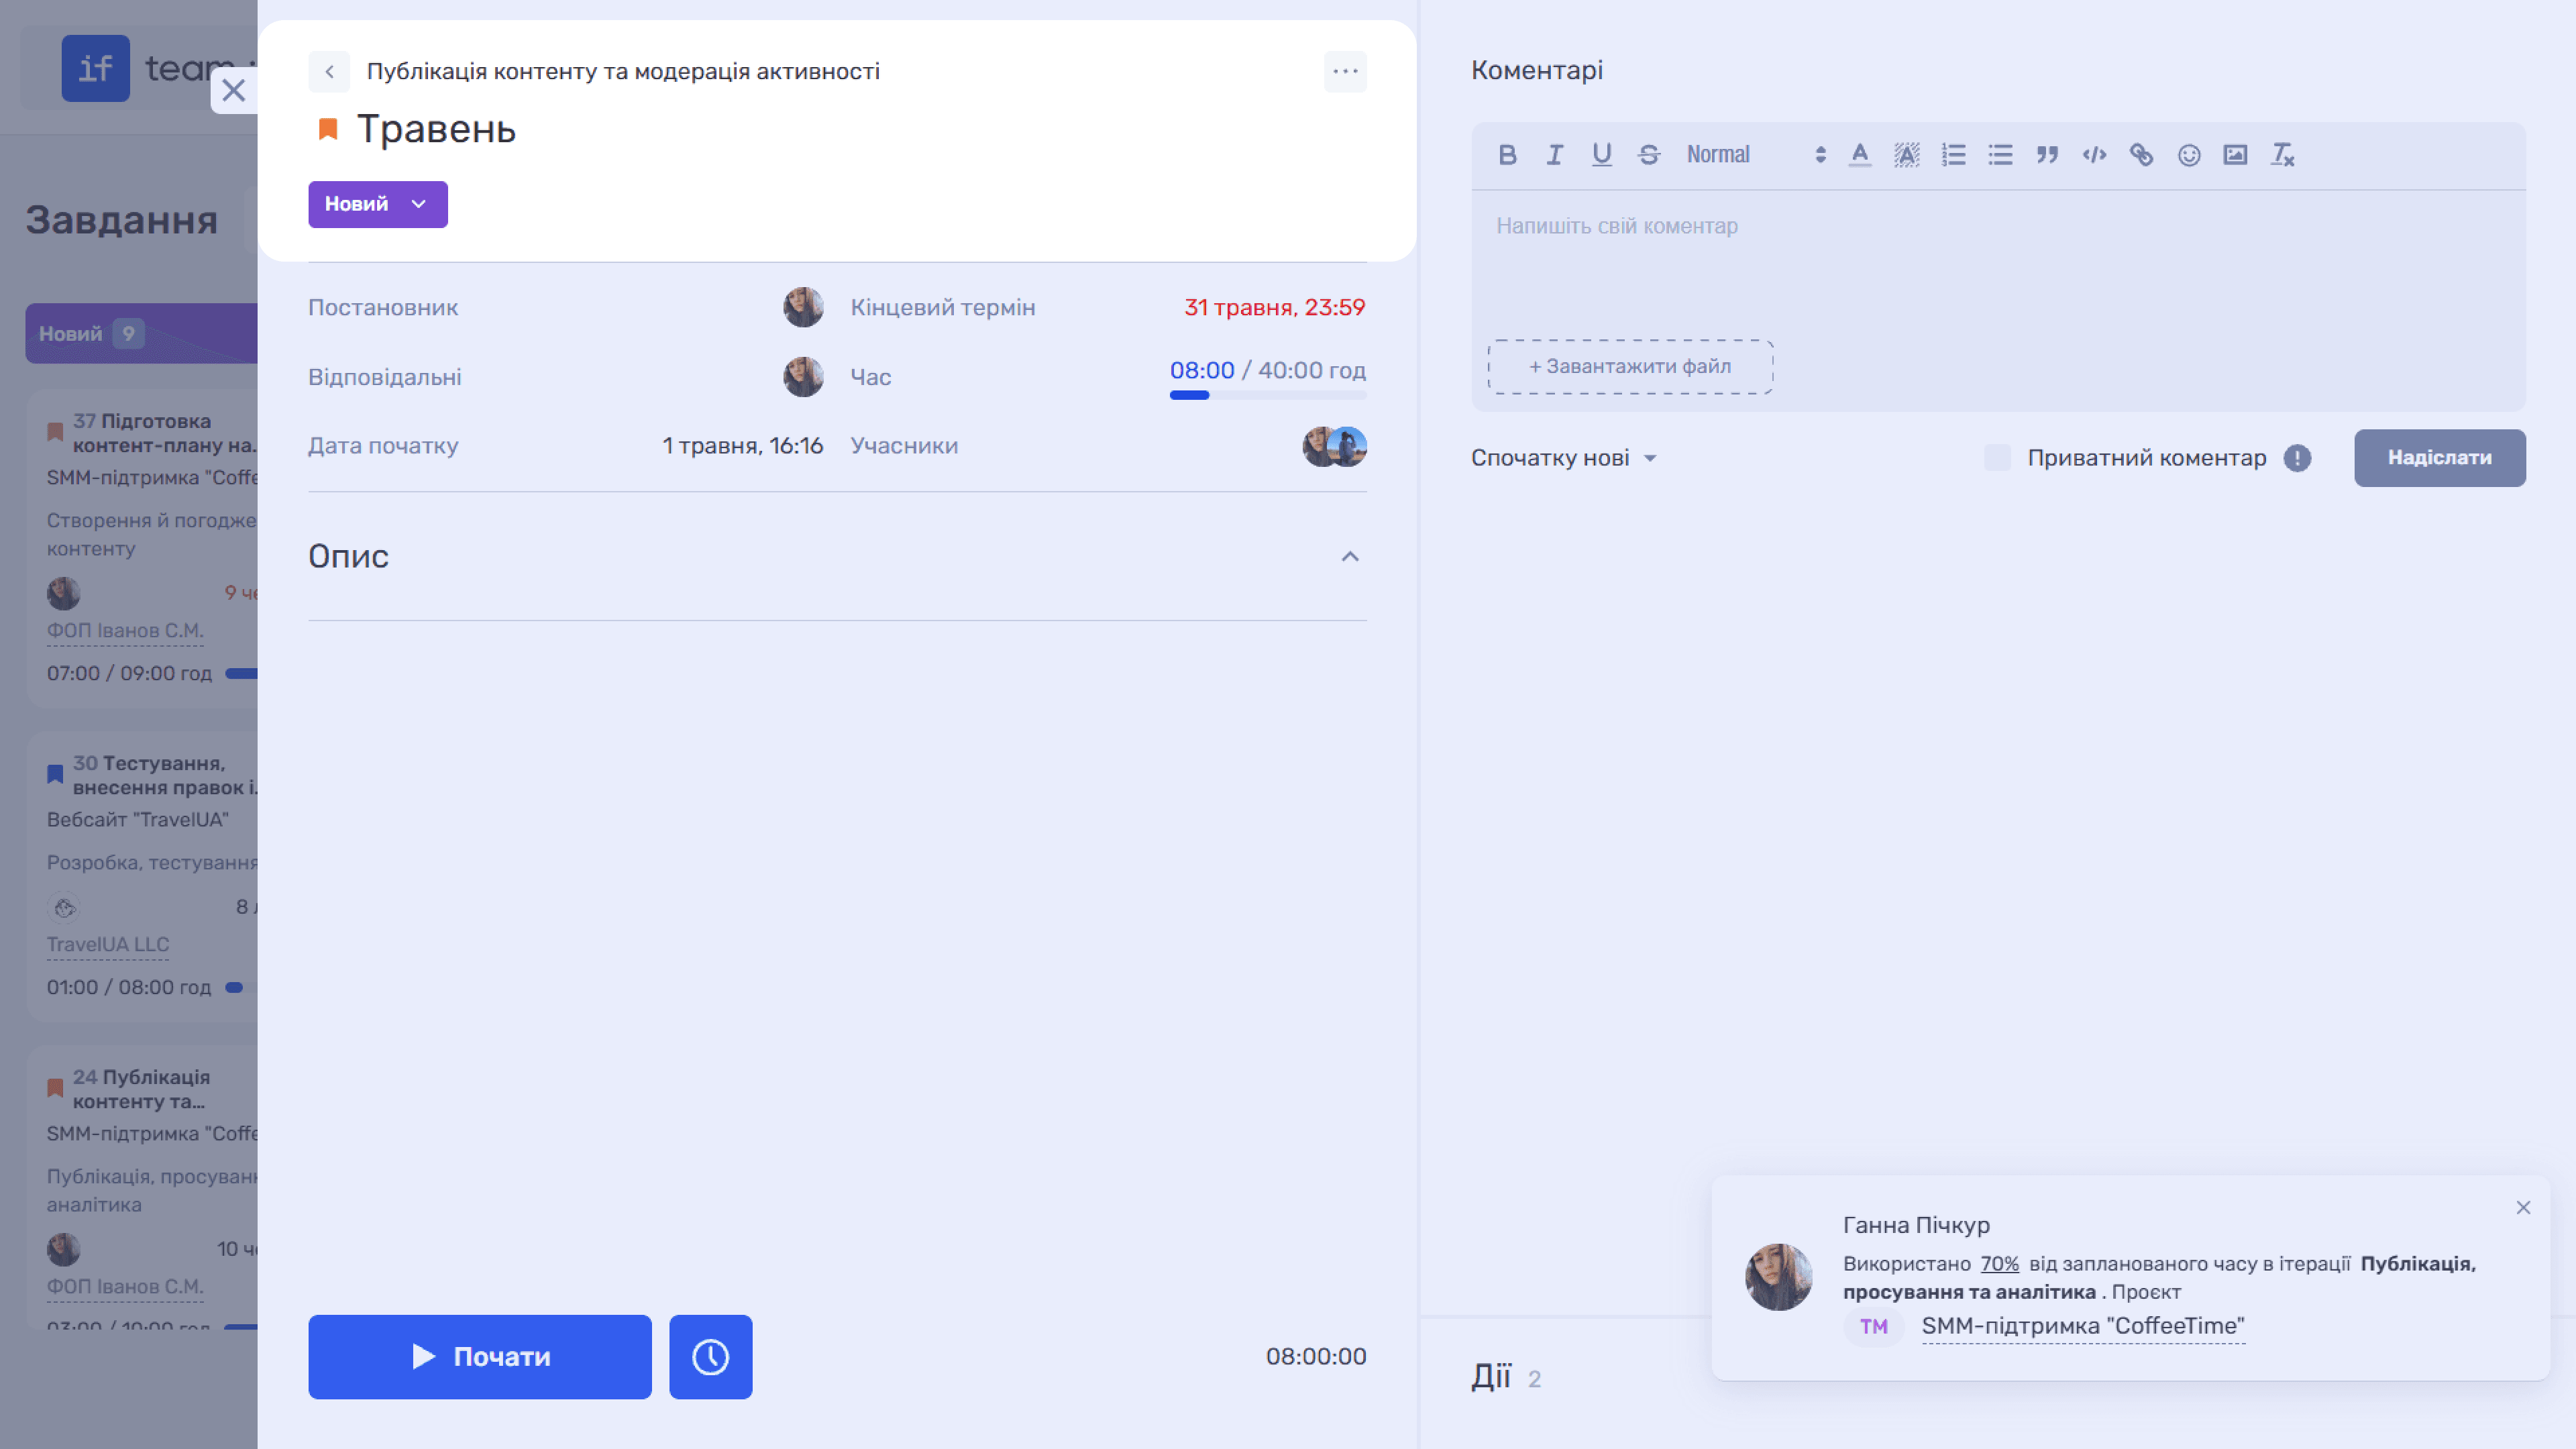
When you open a subtask card, navigation appears at the top for quickly returning to the main, or parent, task. Click the arrow (‹) next to the name.
Please note
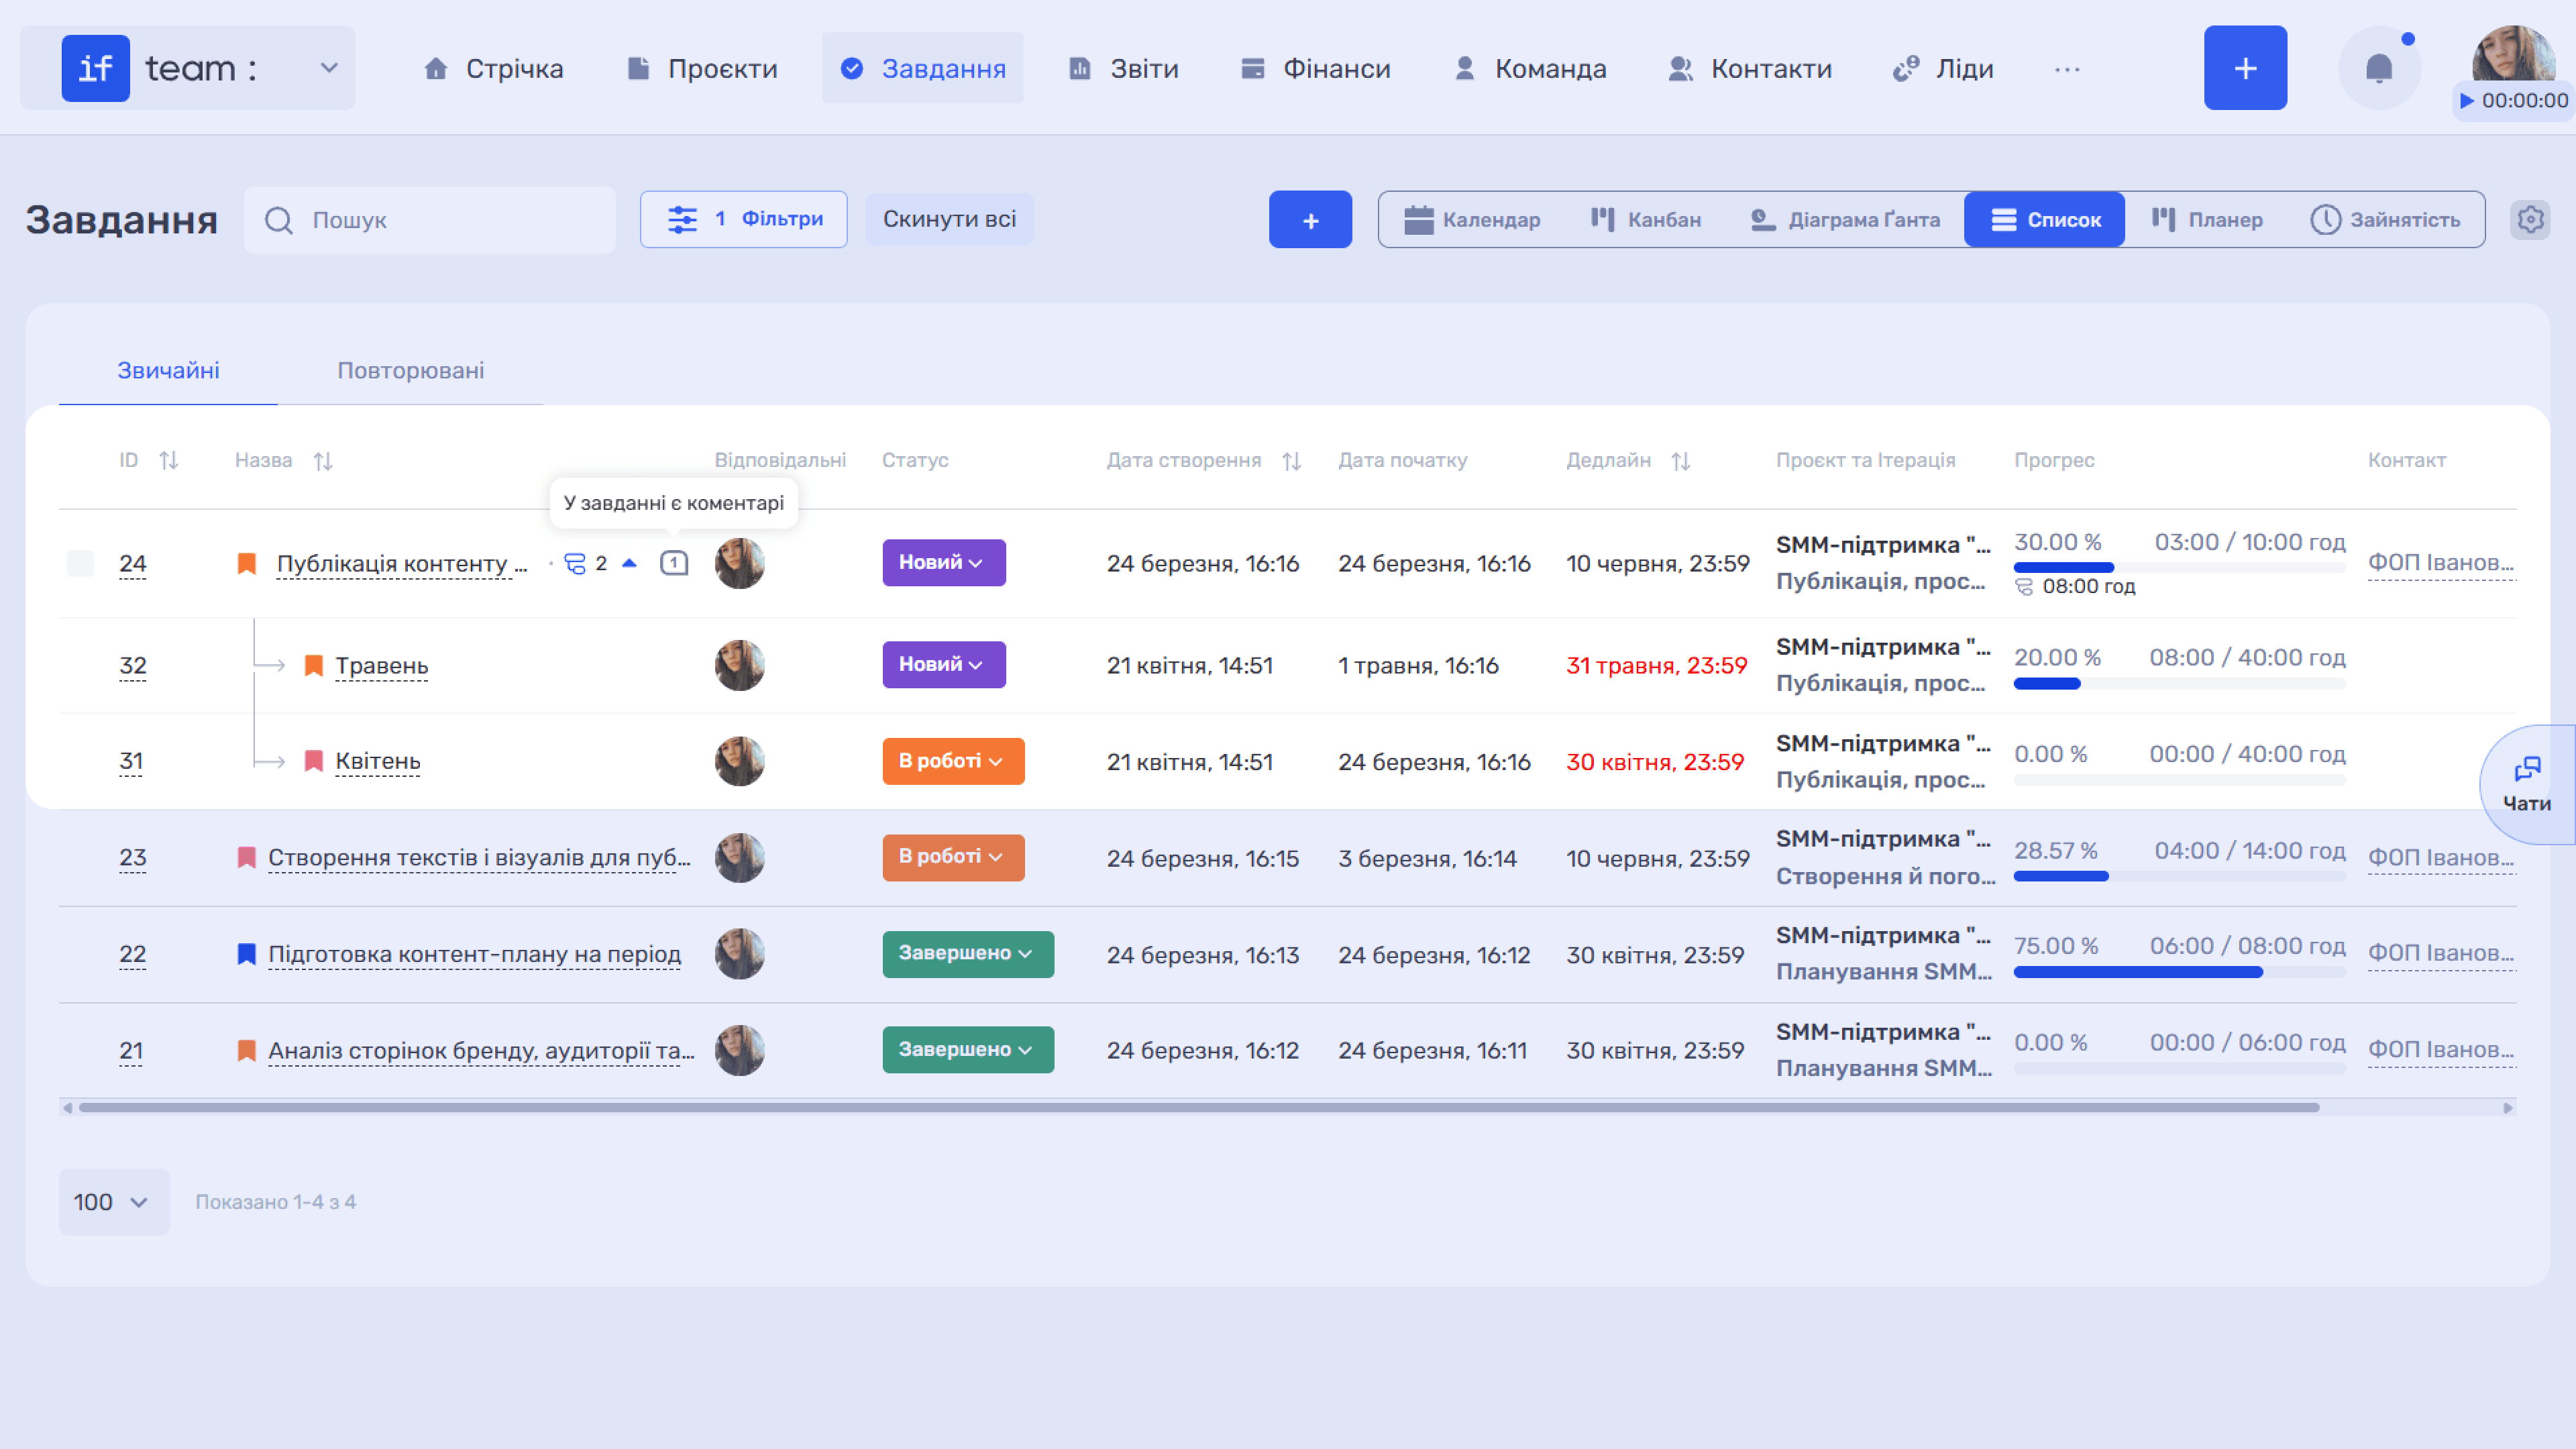
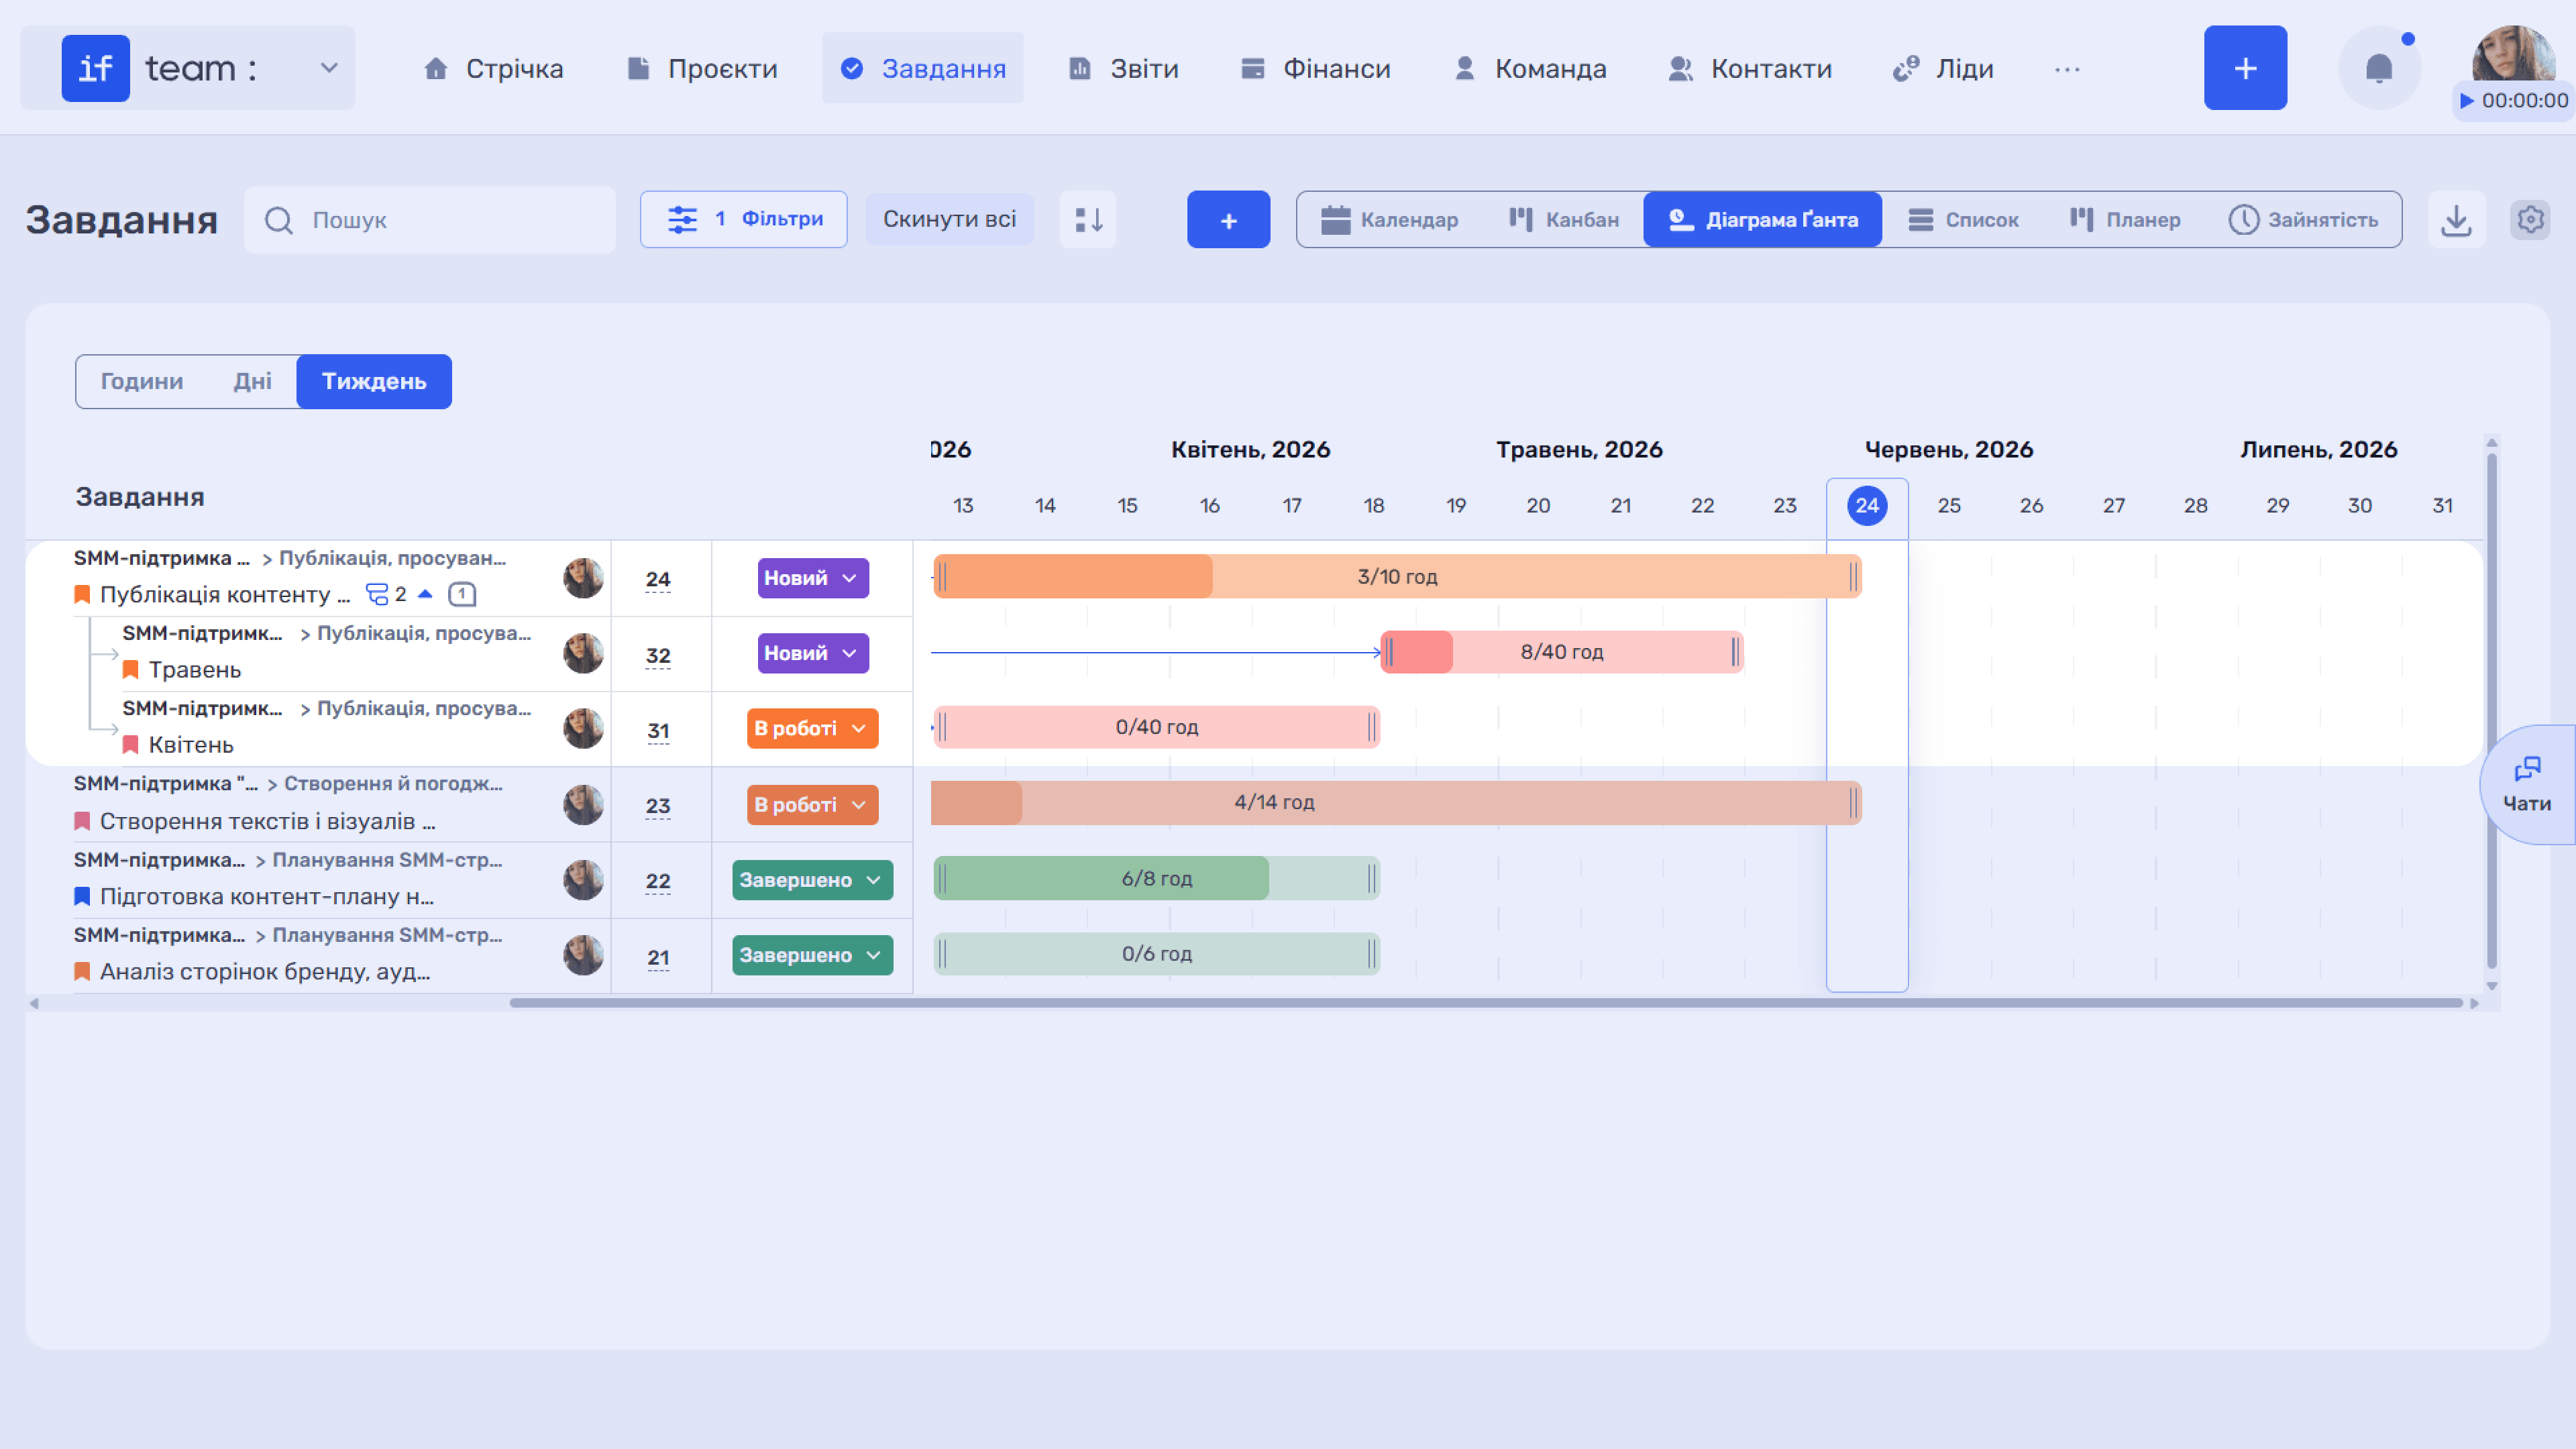
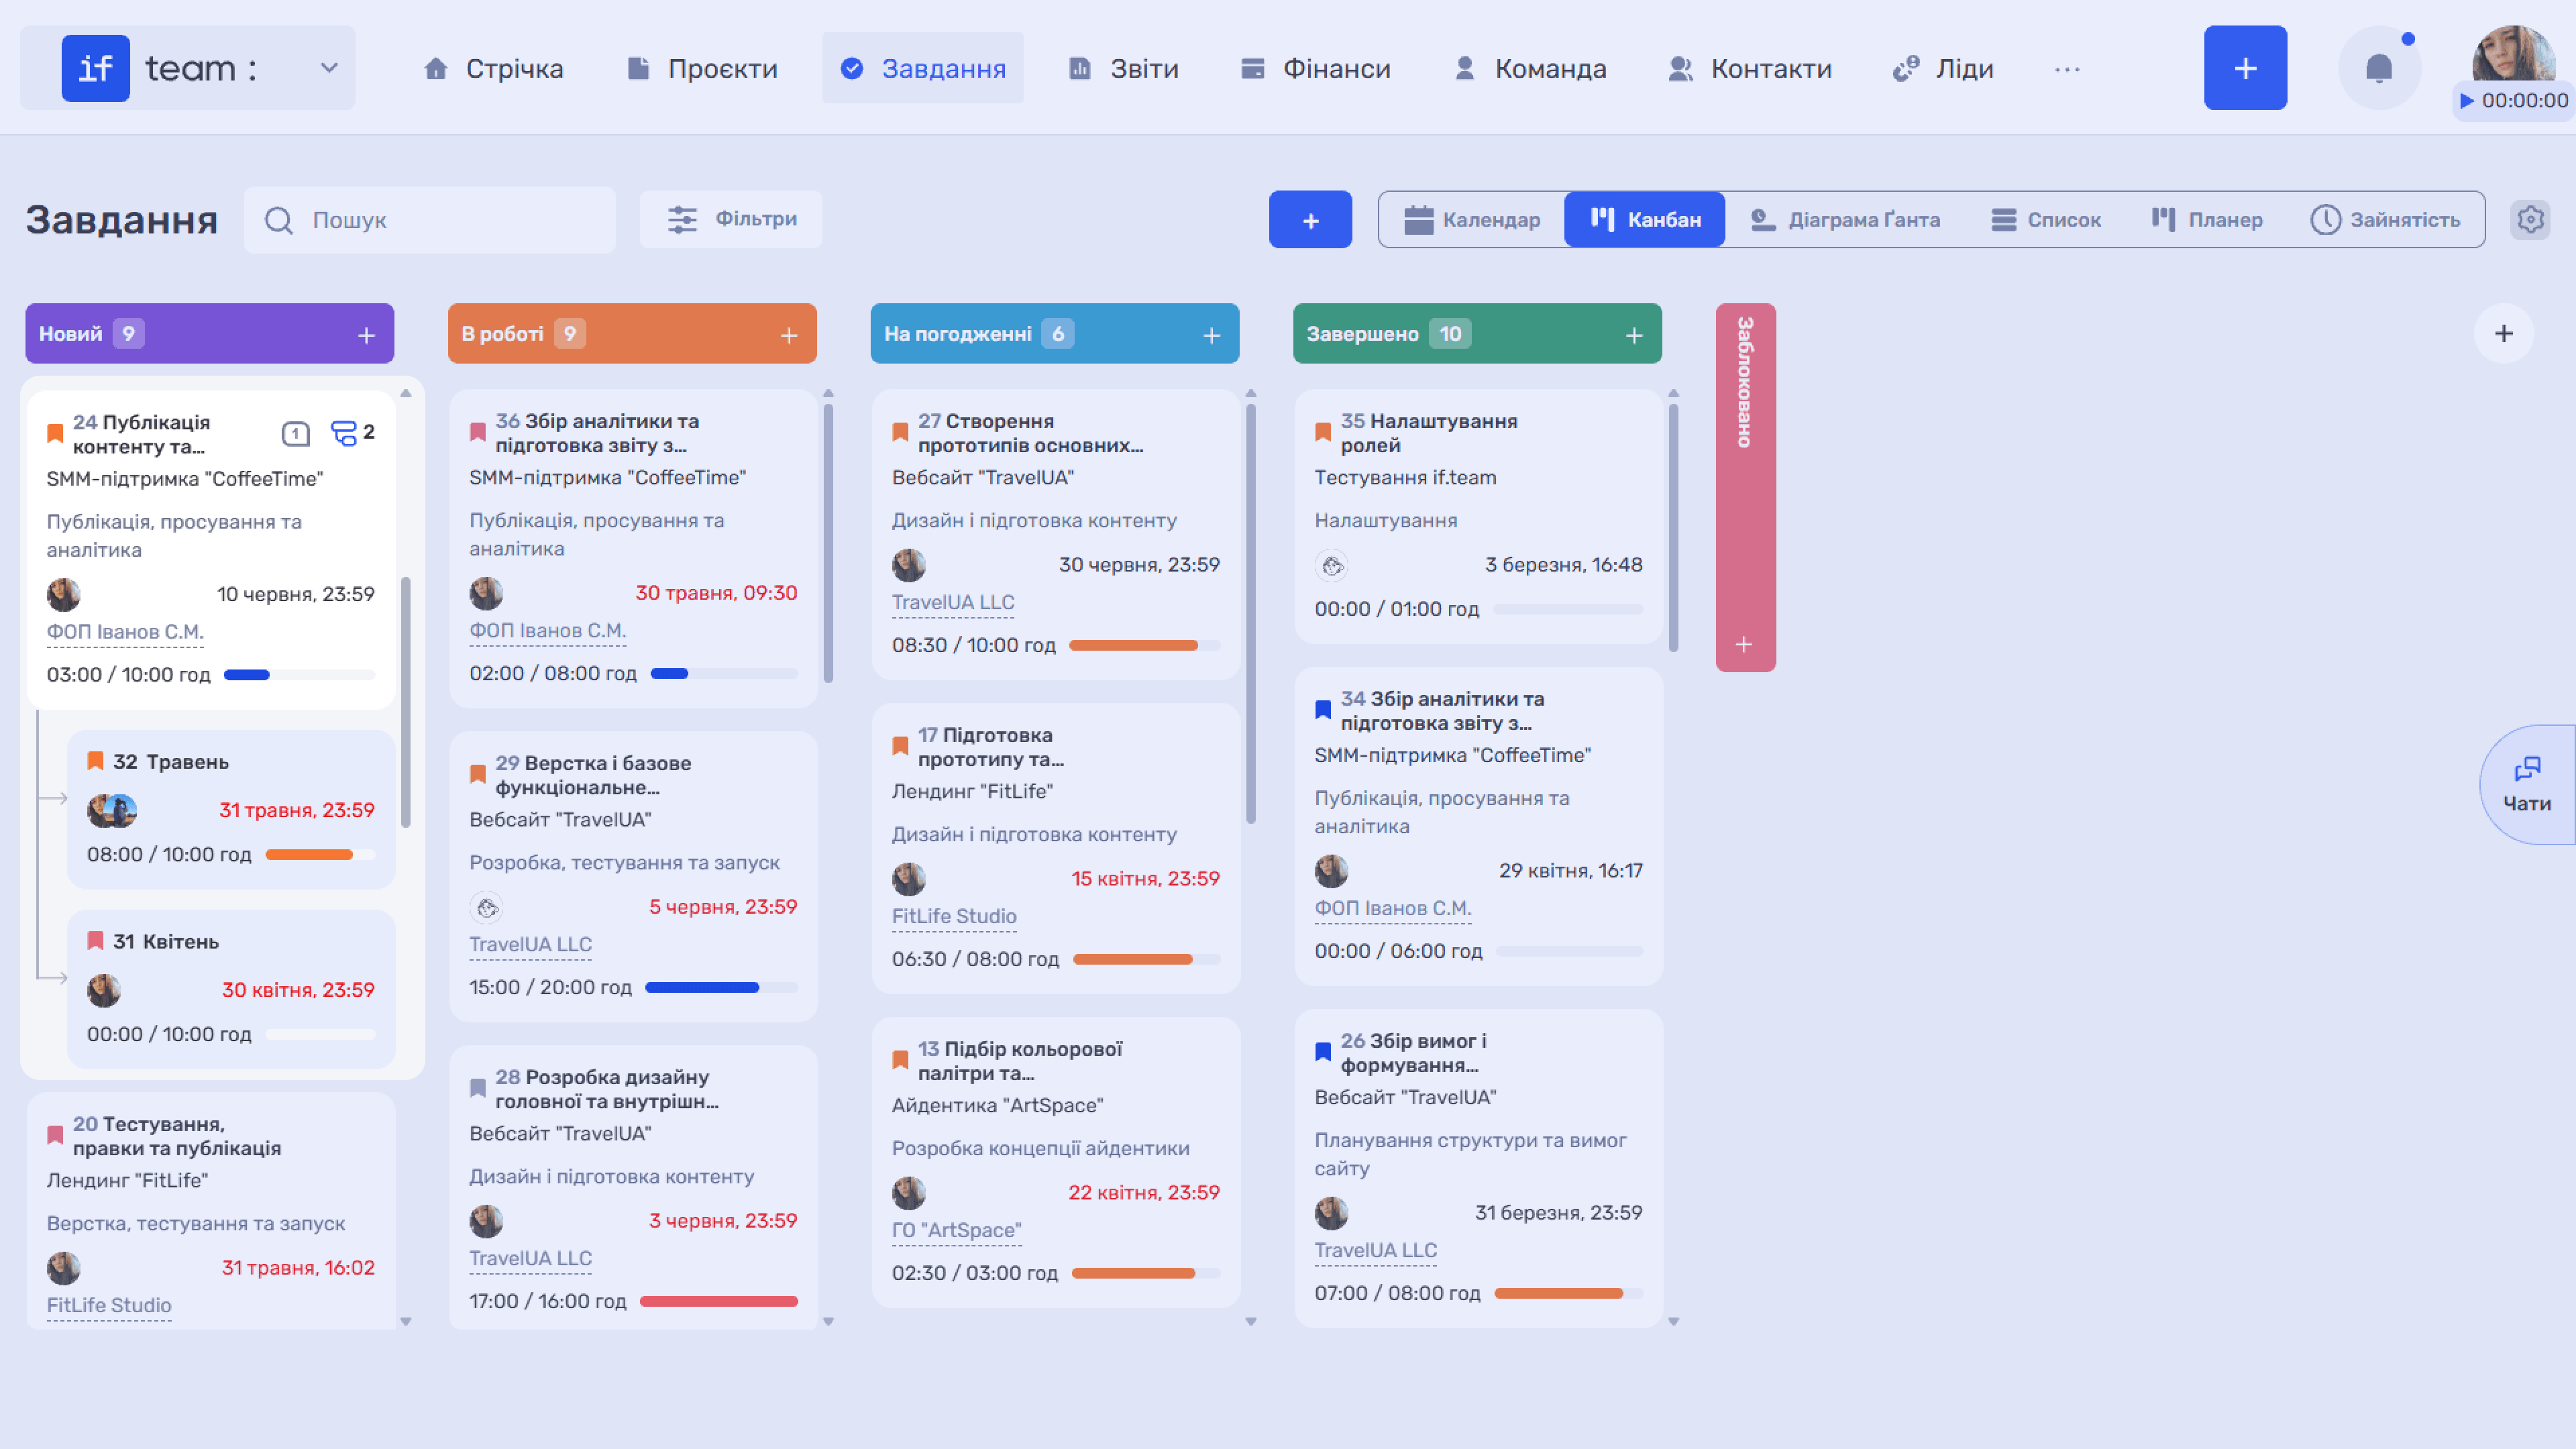
Subtasks have their own IDs and appear in every view—List, Kanban, and Gantt Chart—as separate rows or cards linked to their parent task. The list shows the total hours across all subtasks.
Still have questions?
Maybe we haven't added this information yet. But you can always reach out:
Request a demo
Submit a request and we'll show you how the service works and its capabilities.
Book a demo