Team Settings
This section describes the company structure and access rules: which department each person works in, which positions exist, what each role can do in the system, and the team’s work schedule.
Team
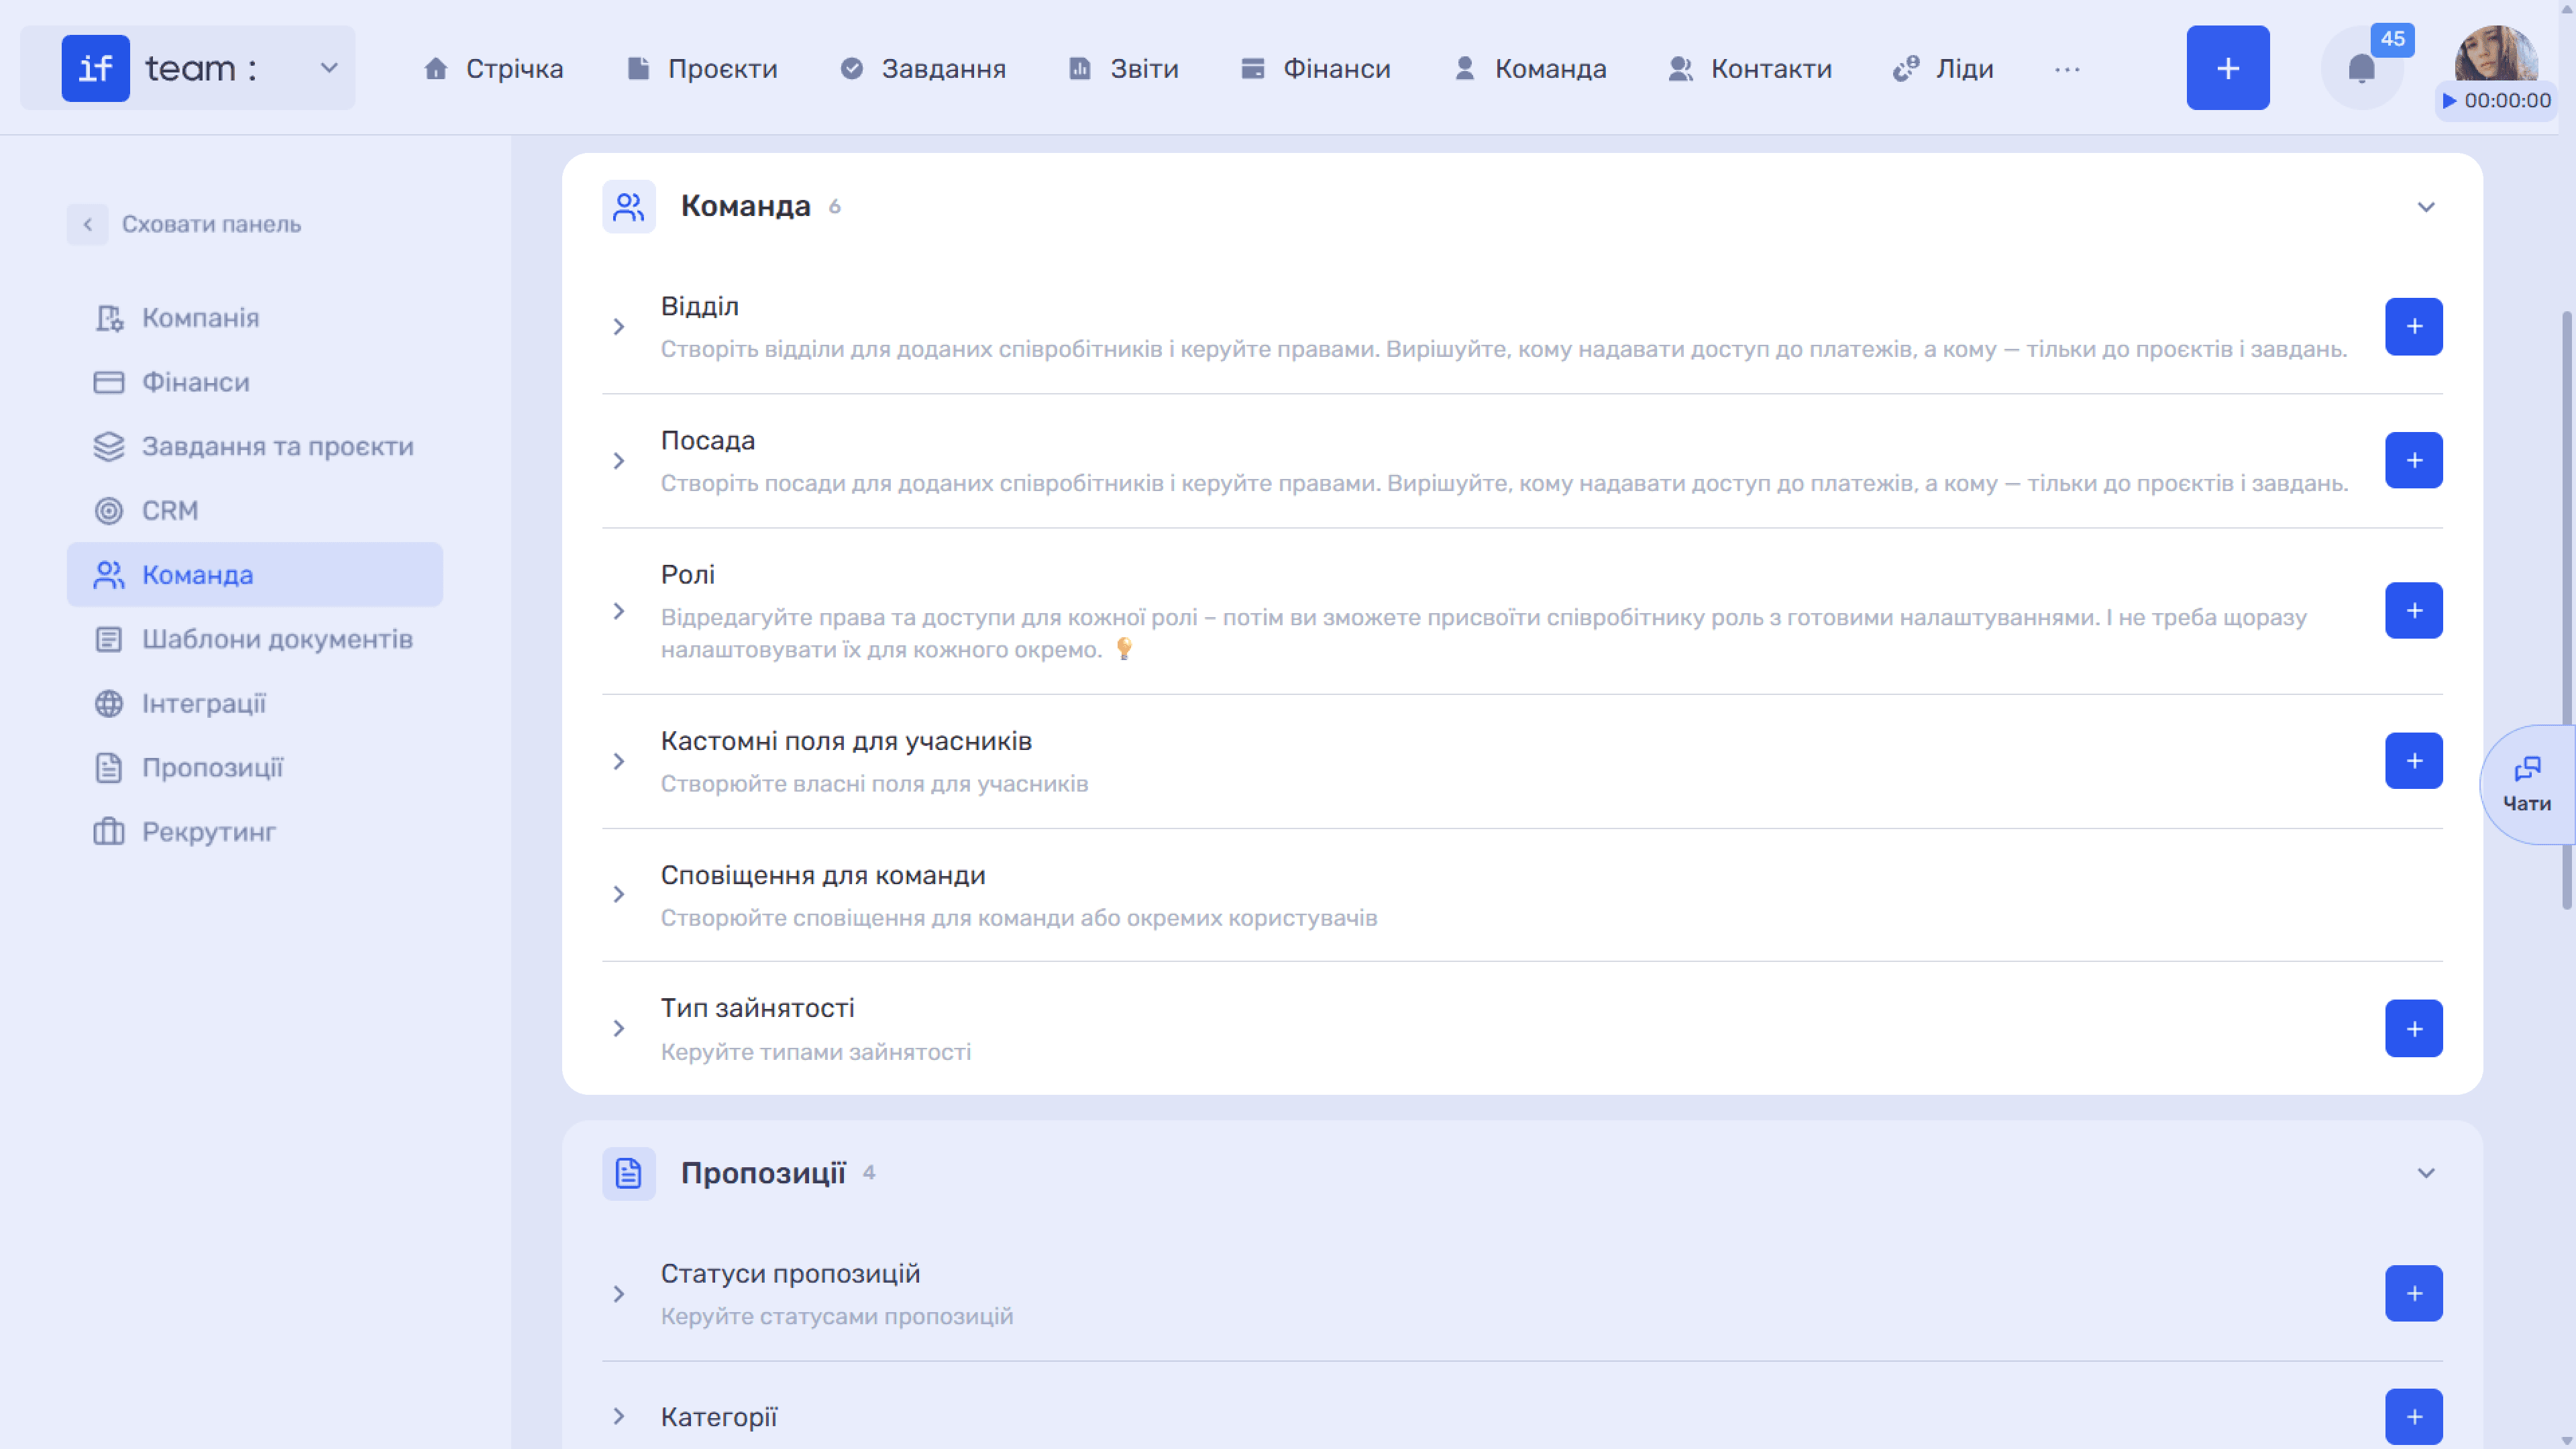
Department
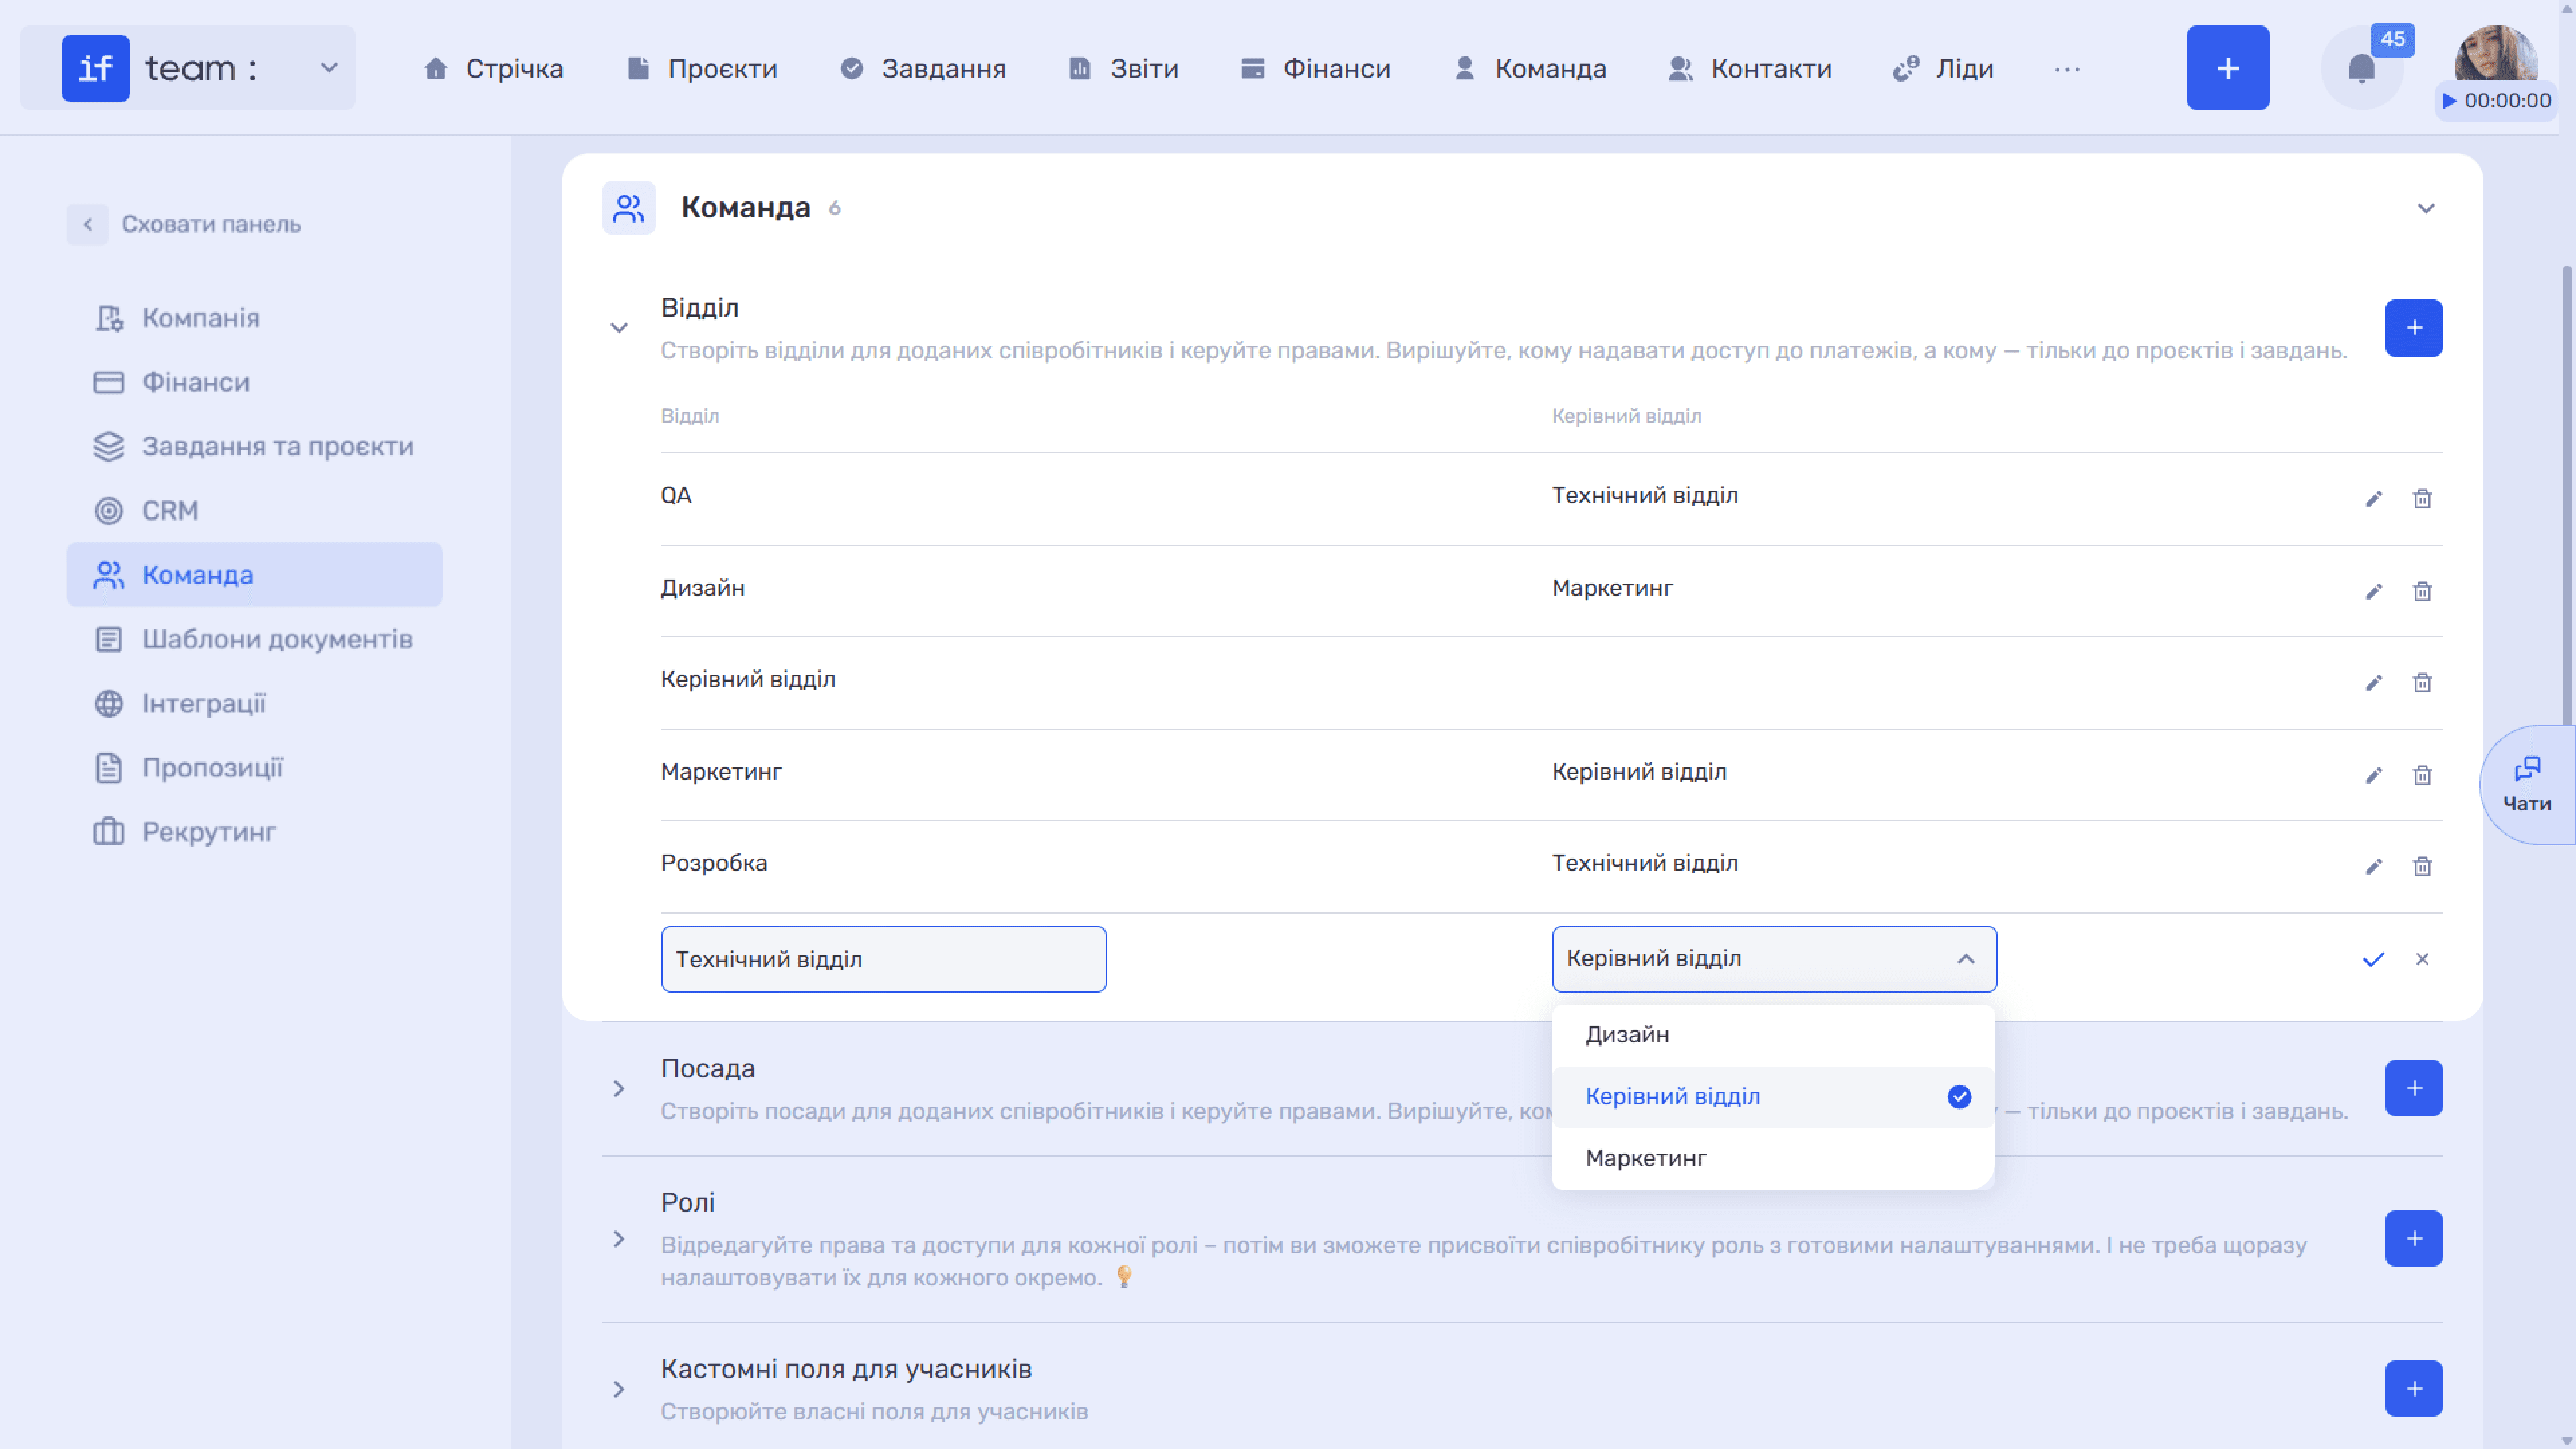
Departments form the company’s hierarchical structure. The section is displayed as a table with two columns:
- Department is the name of the department;
- Parent Department is the higher-level department in the hierarchy. For example, the Design department may report to Marketing. If it is a top-level department, this field remains empty.
The pencil icon lets you edit the name and parent department directly in the list. Confirm changes with the checkmark or cancel them with the cross. The trash icon deletes the department.
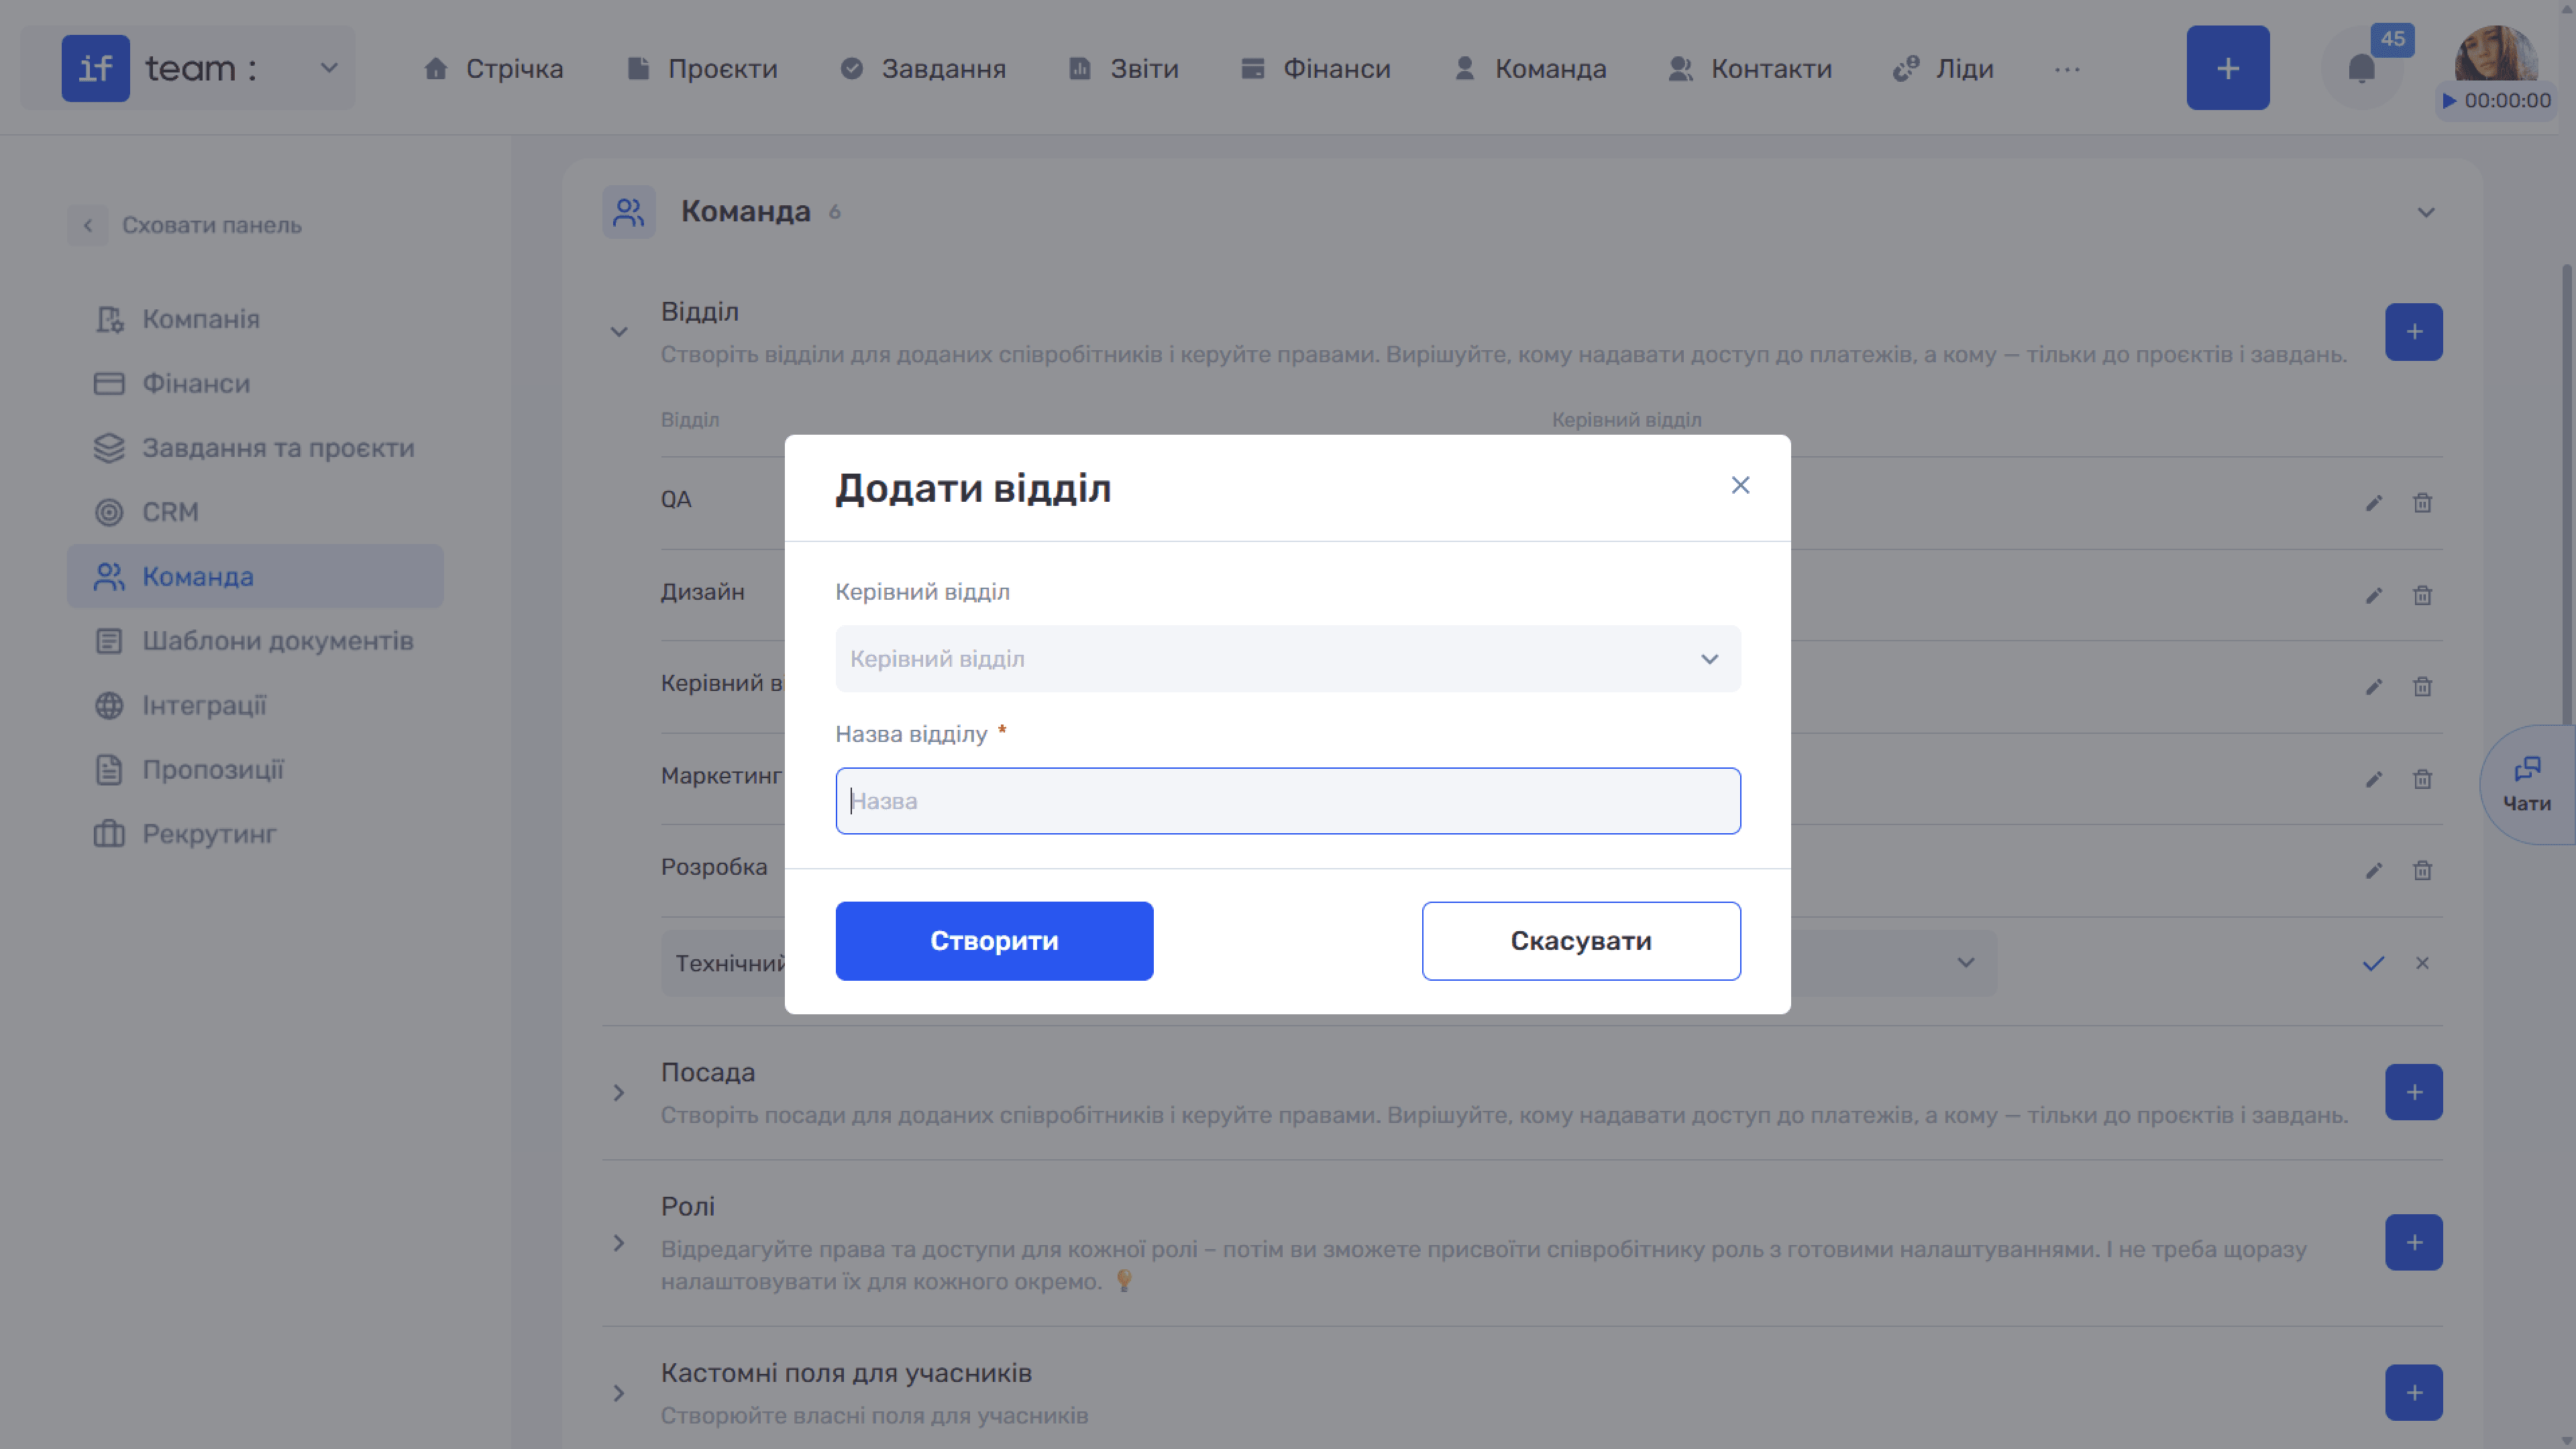
Click + to add a new department. Enter its name in the window and, if necessary, select a parent department from the drop-down list. Click Create to save it or Cancel to close the window without changes.
Position
Positions describe an employee’s job, such as Developer, Designer, or Marketer.
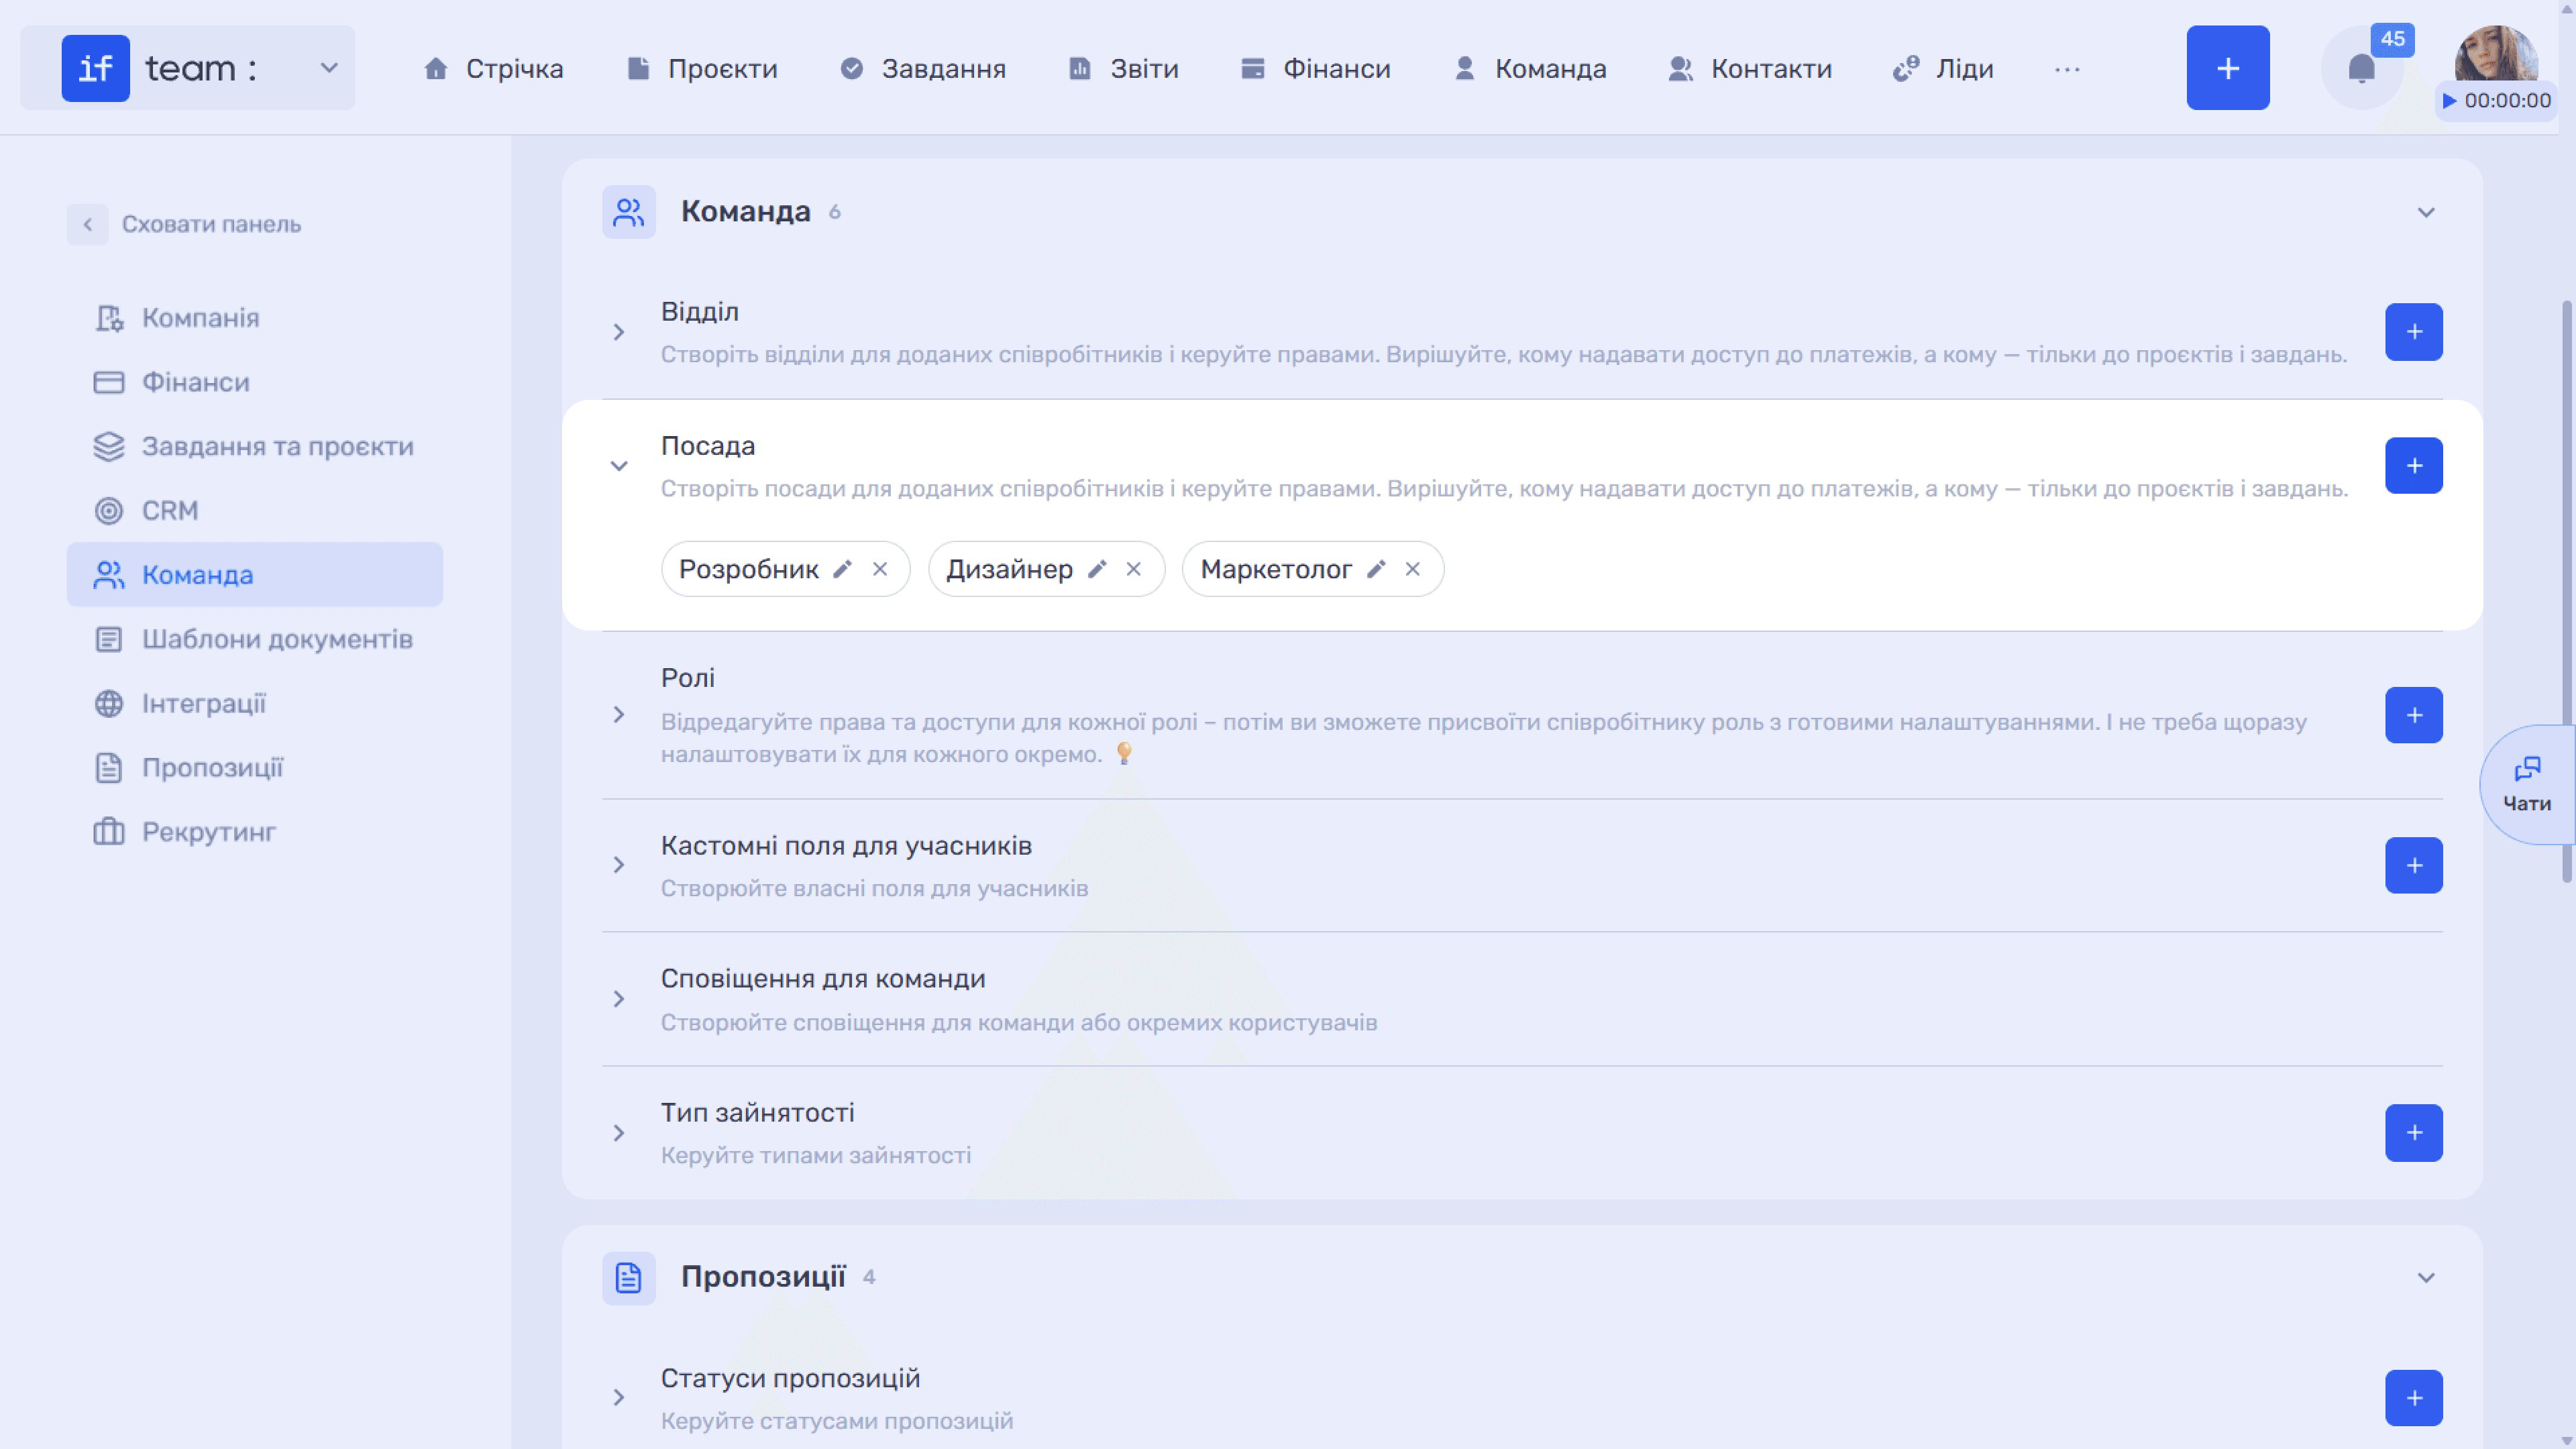
The Add Position window contains one required field: Position.
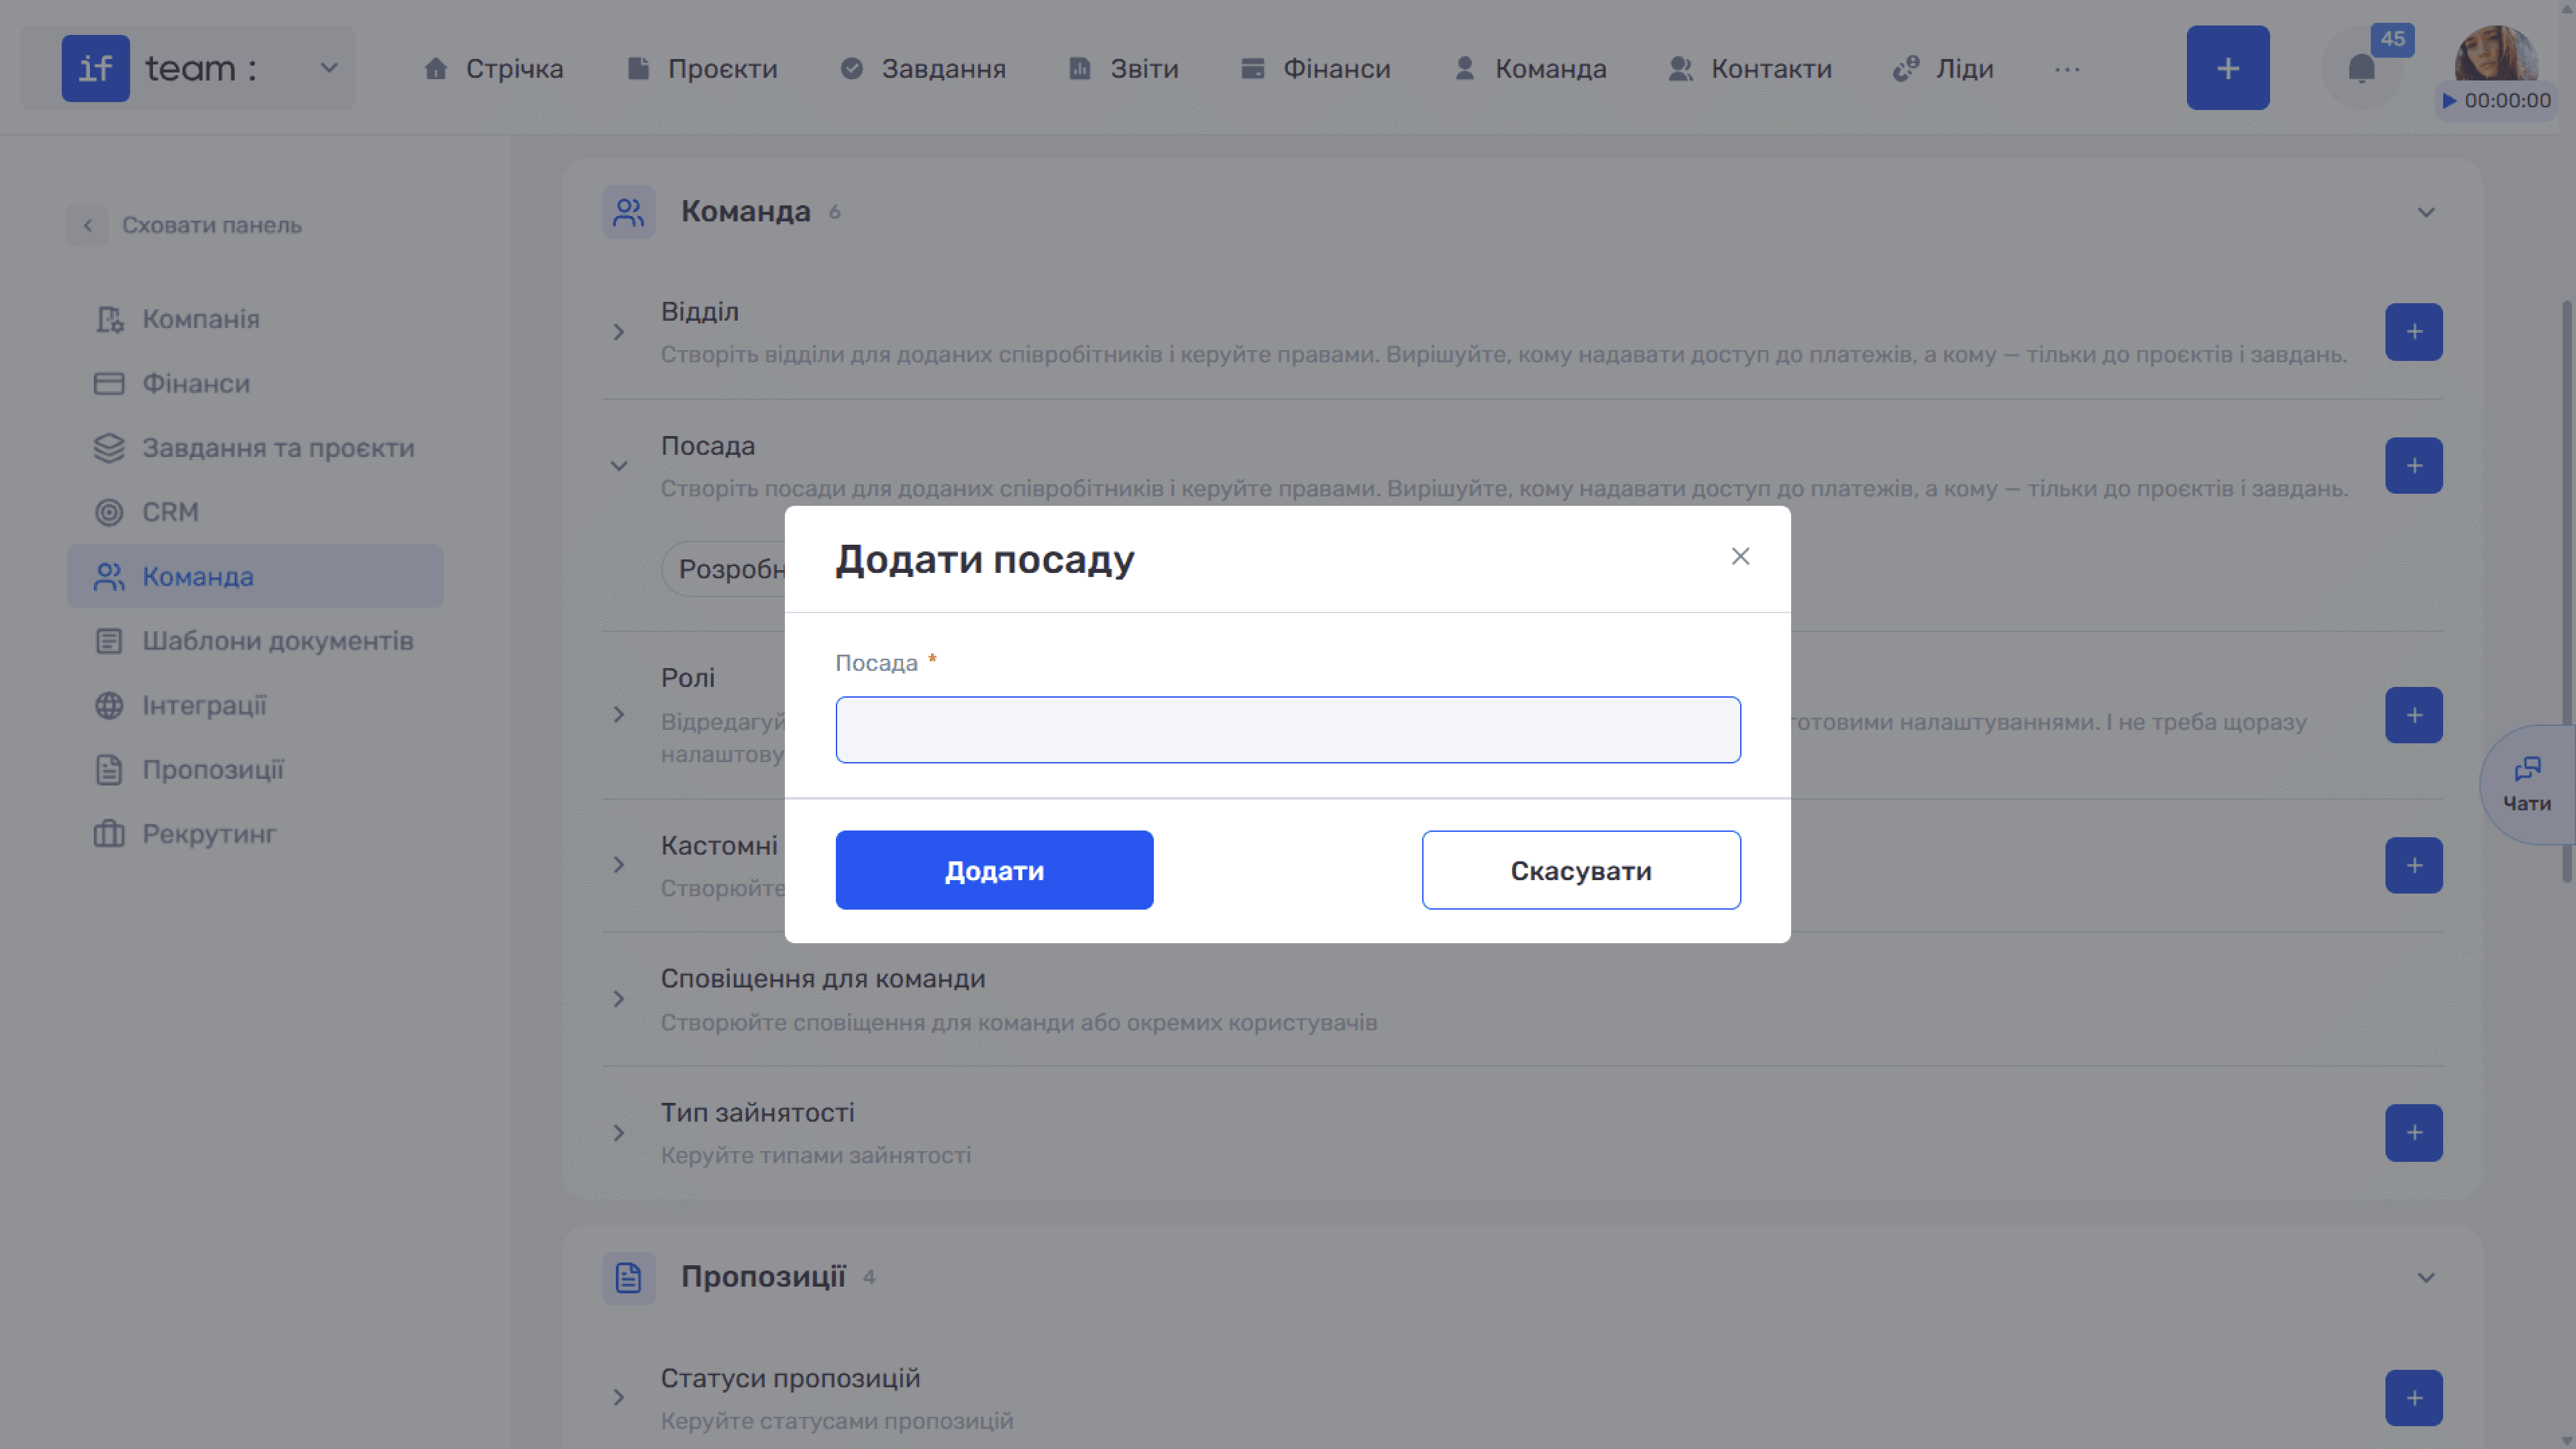
ℹ️ Department and position are company structure directories: they describe where and in what capacity a person works. A person’s role determines what they can do in the system.
Roles
A role is a predefined set of permissions assigned to an employee when they are invited to the system. Once you configure a role, you do not need to configure permissions separately for every new user.
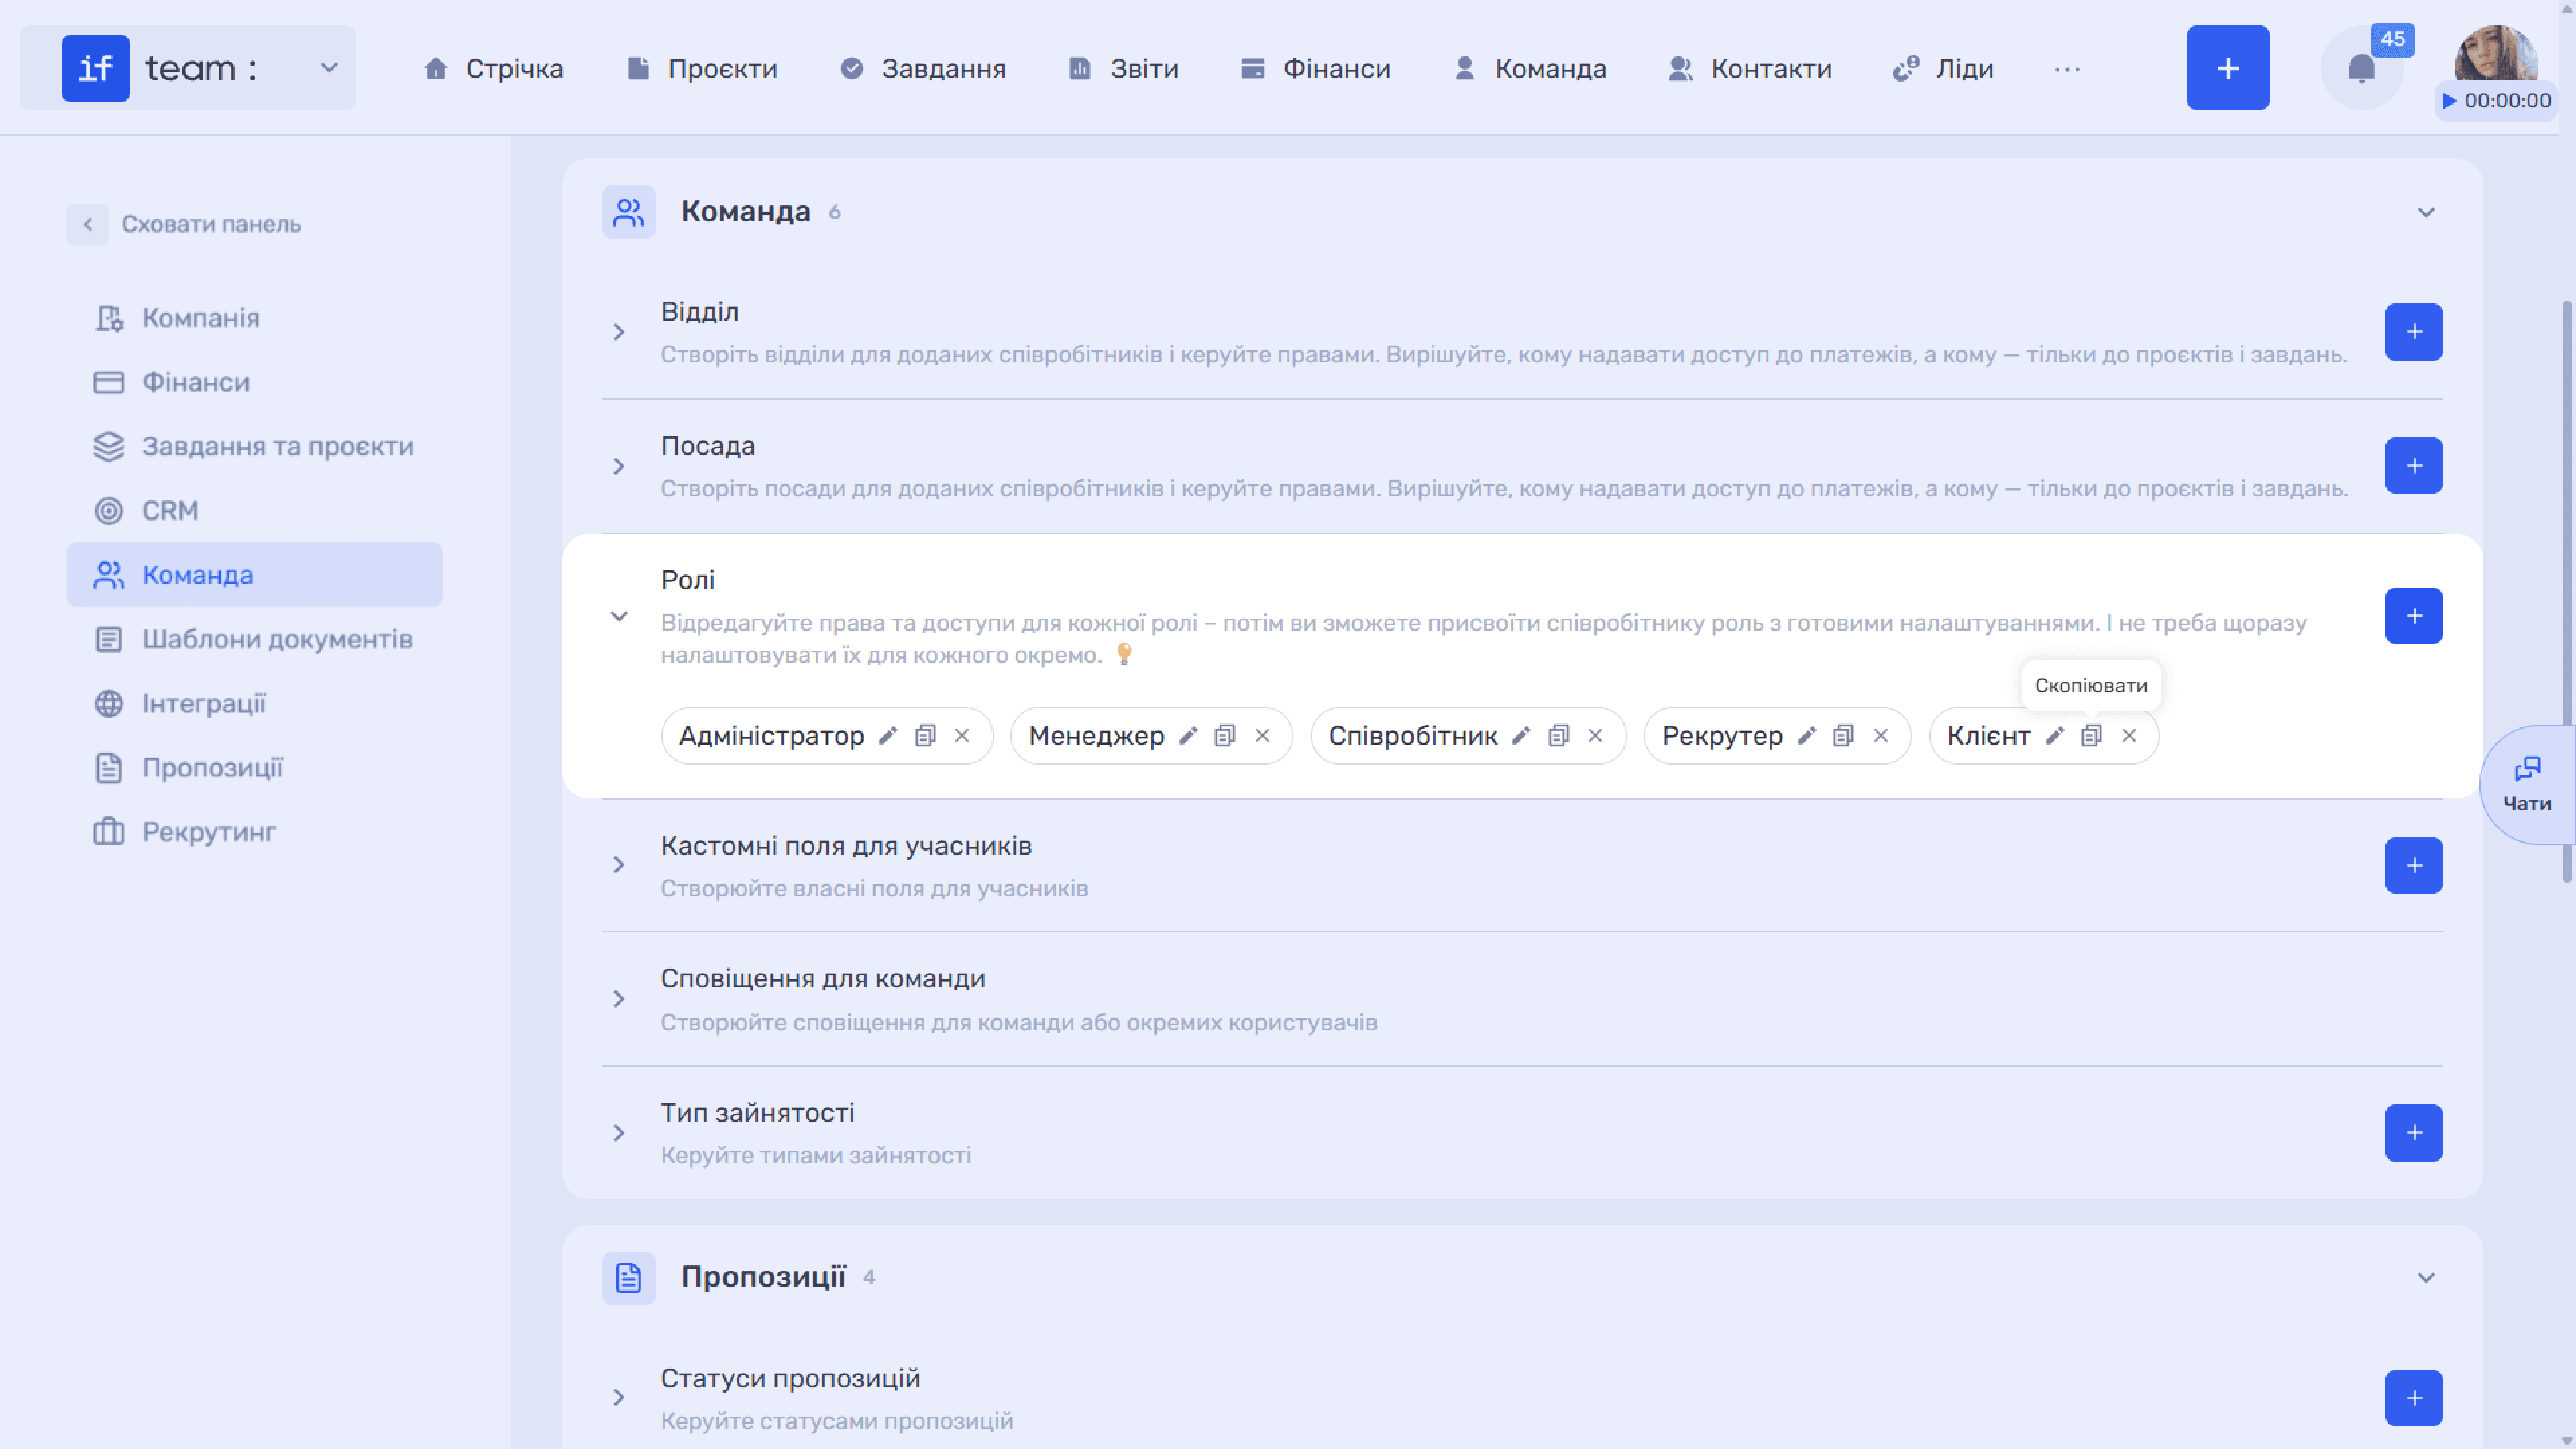
This section lists the existing roles. Each tag has three icons:
- ✏️ opens the role for permission editing.
- Copy duplicates the role. All permissions are copied exactly, while the name field remains empty, so enter the new role’s name yourself. This is useful when you need a role that is “like Manager, but without Finance”: copy the existing role and change a few values instead of configuring everything from scratch.
- ✕ deletes the role.
The + button creates a role from scratch.
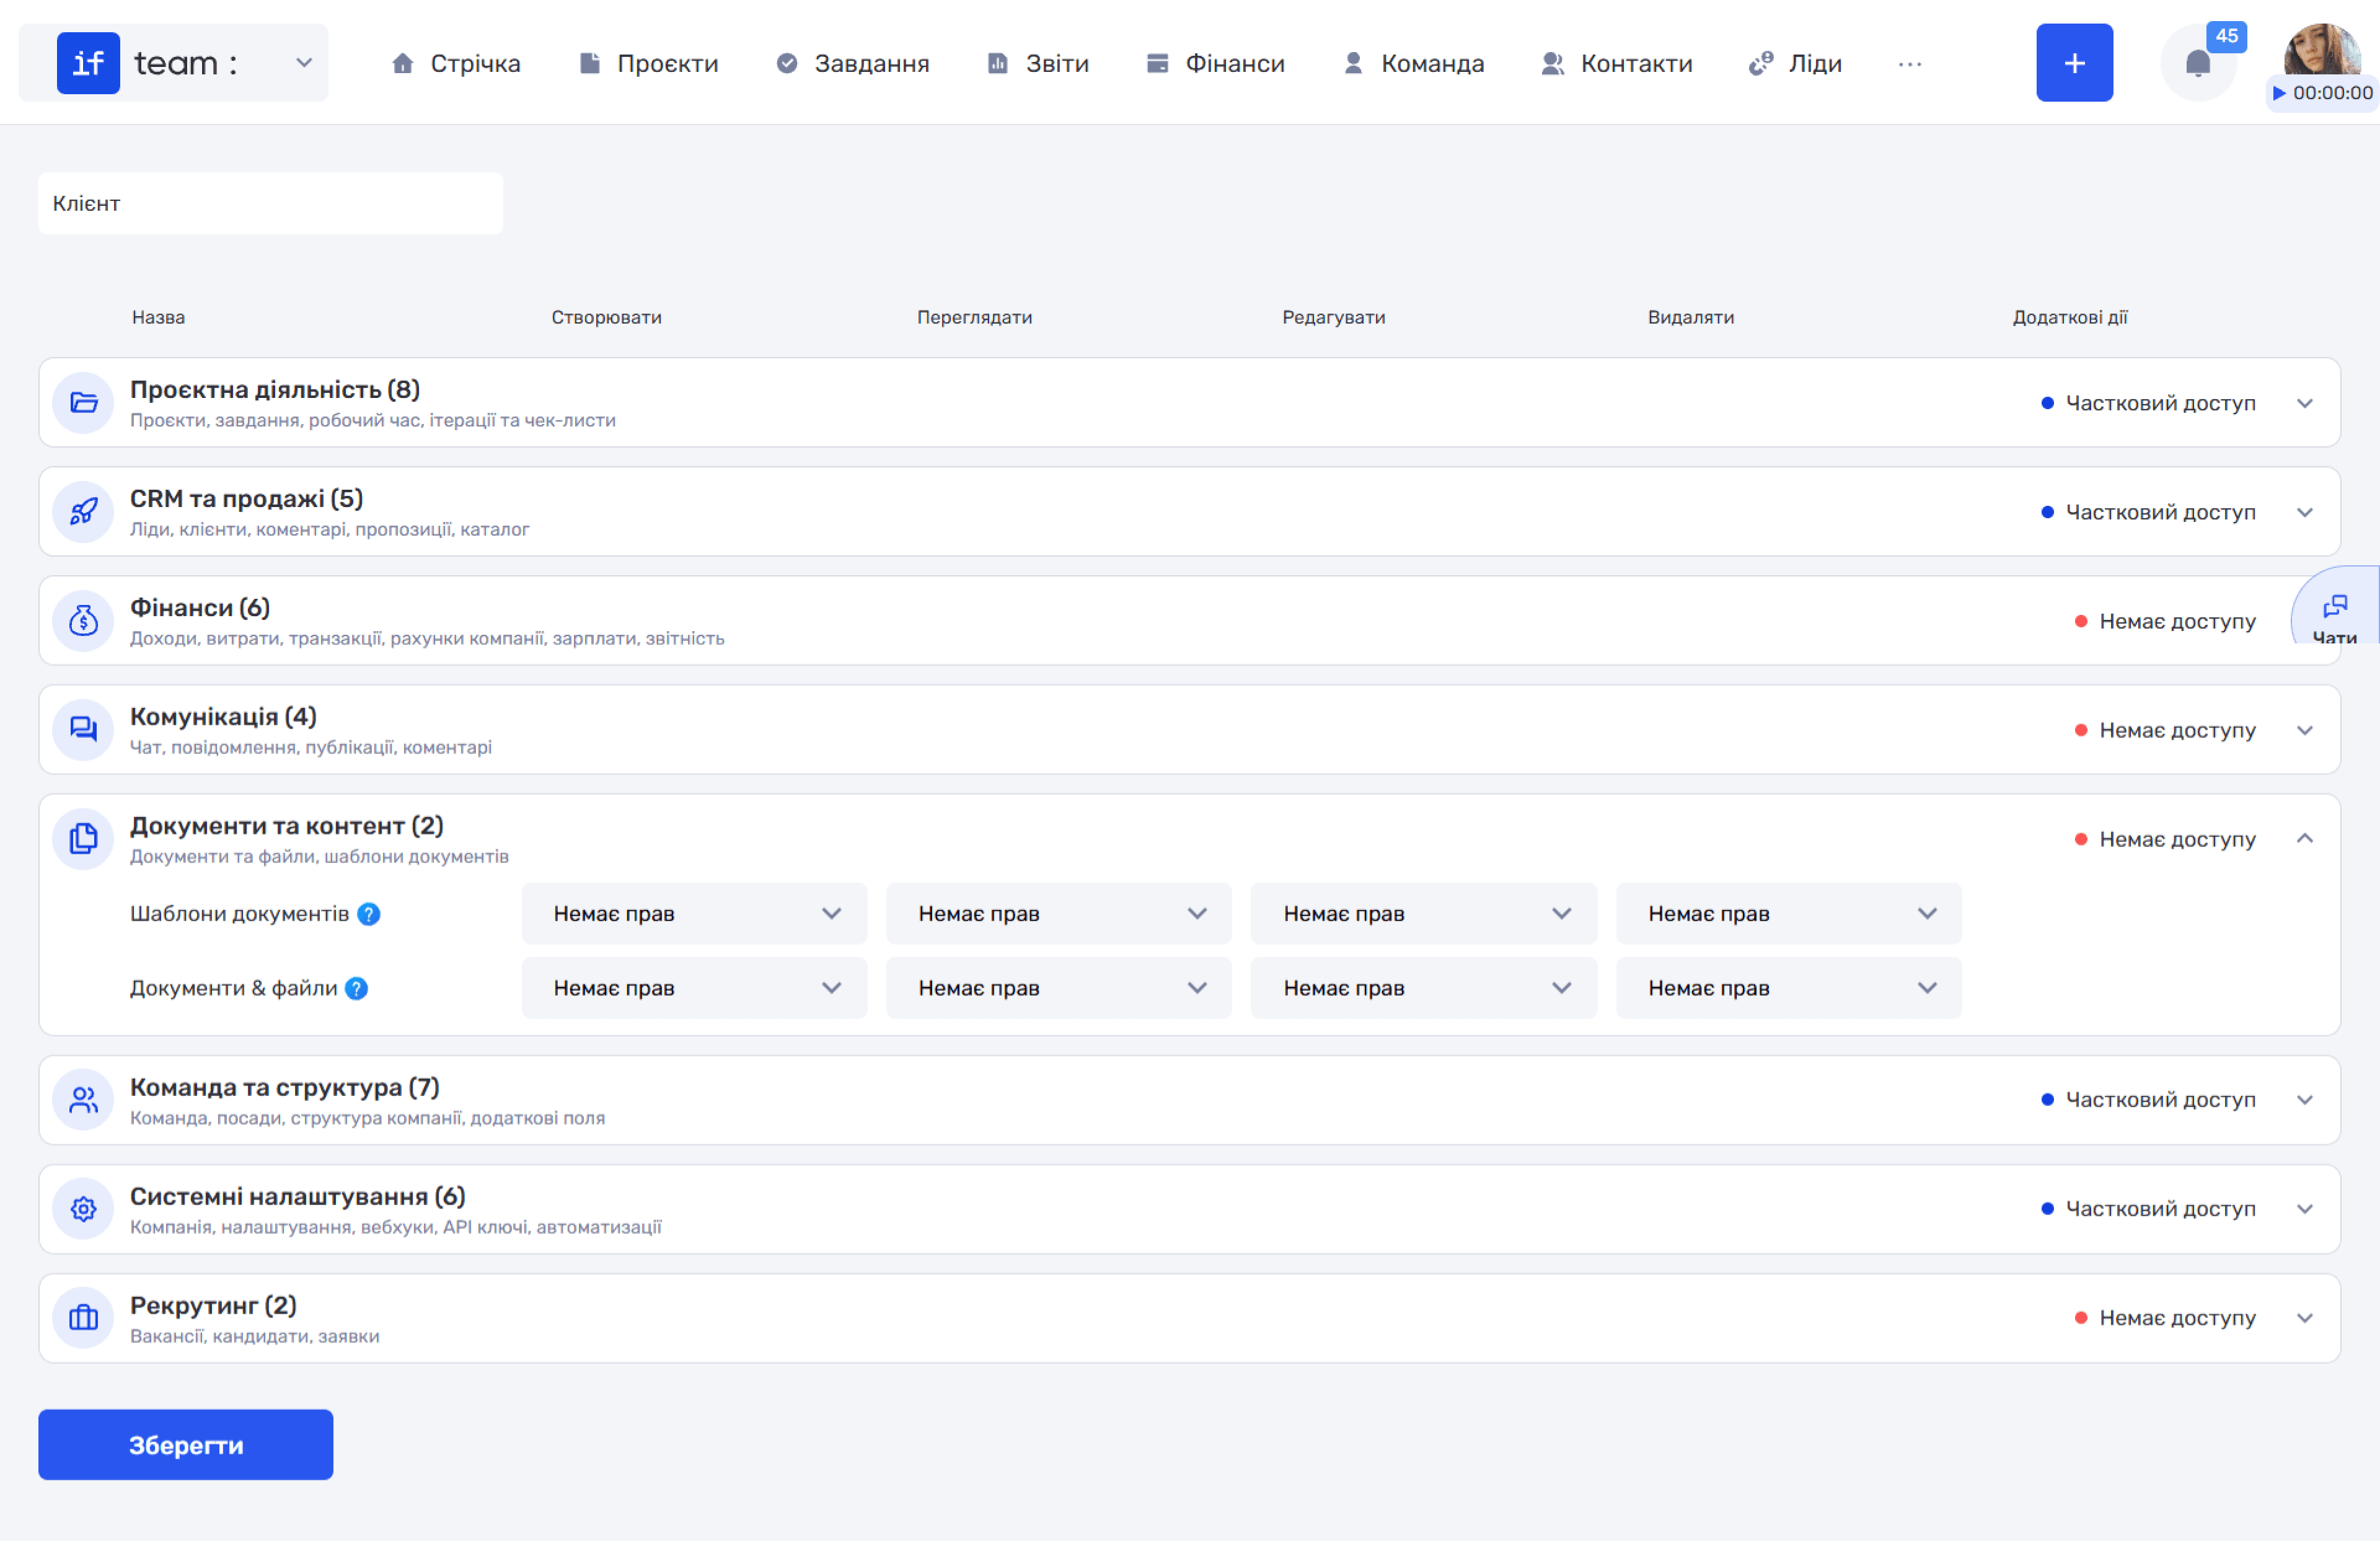
Clicking the pencil icon (✏️) opens the editing screen. The role name field is at the top, followed by a permission matrix grouped into eight sections. The Save button is at the bottom of the page, and changes are not applied unless you click it. To the right of each section name is a summary status: Full Access, Partial Access, or No Access.
Please note
For a detailed explanation of the matrix, including the permissions in each section, the complete list of access levels, and configuration scenarios, see Team → Access Permissions.
Custom Fields for Members
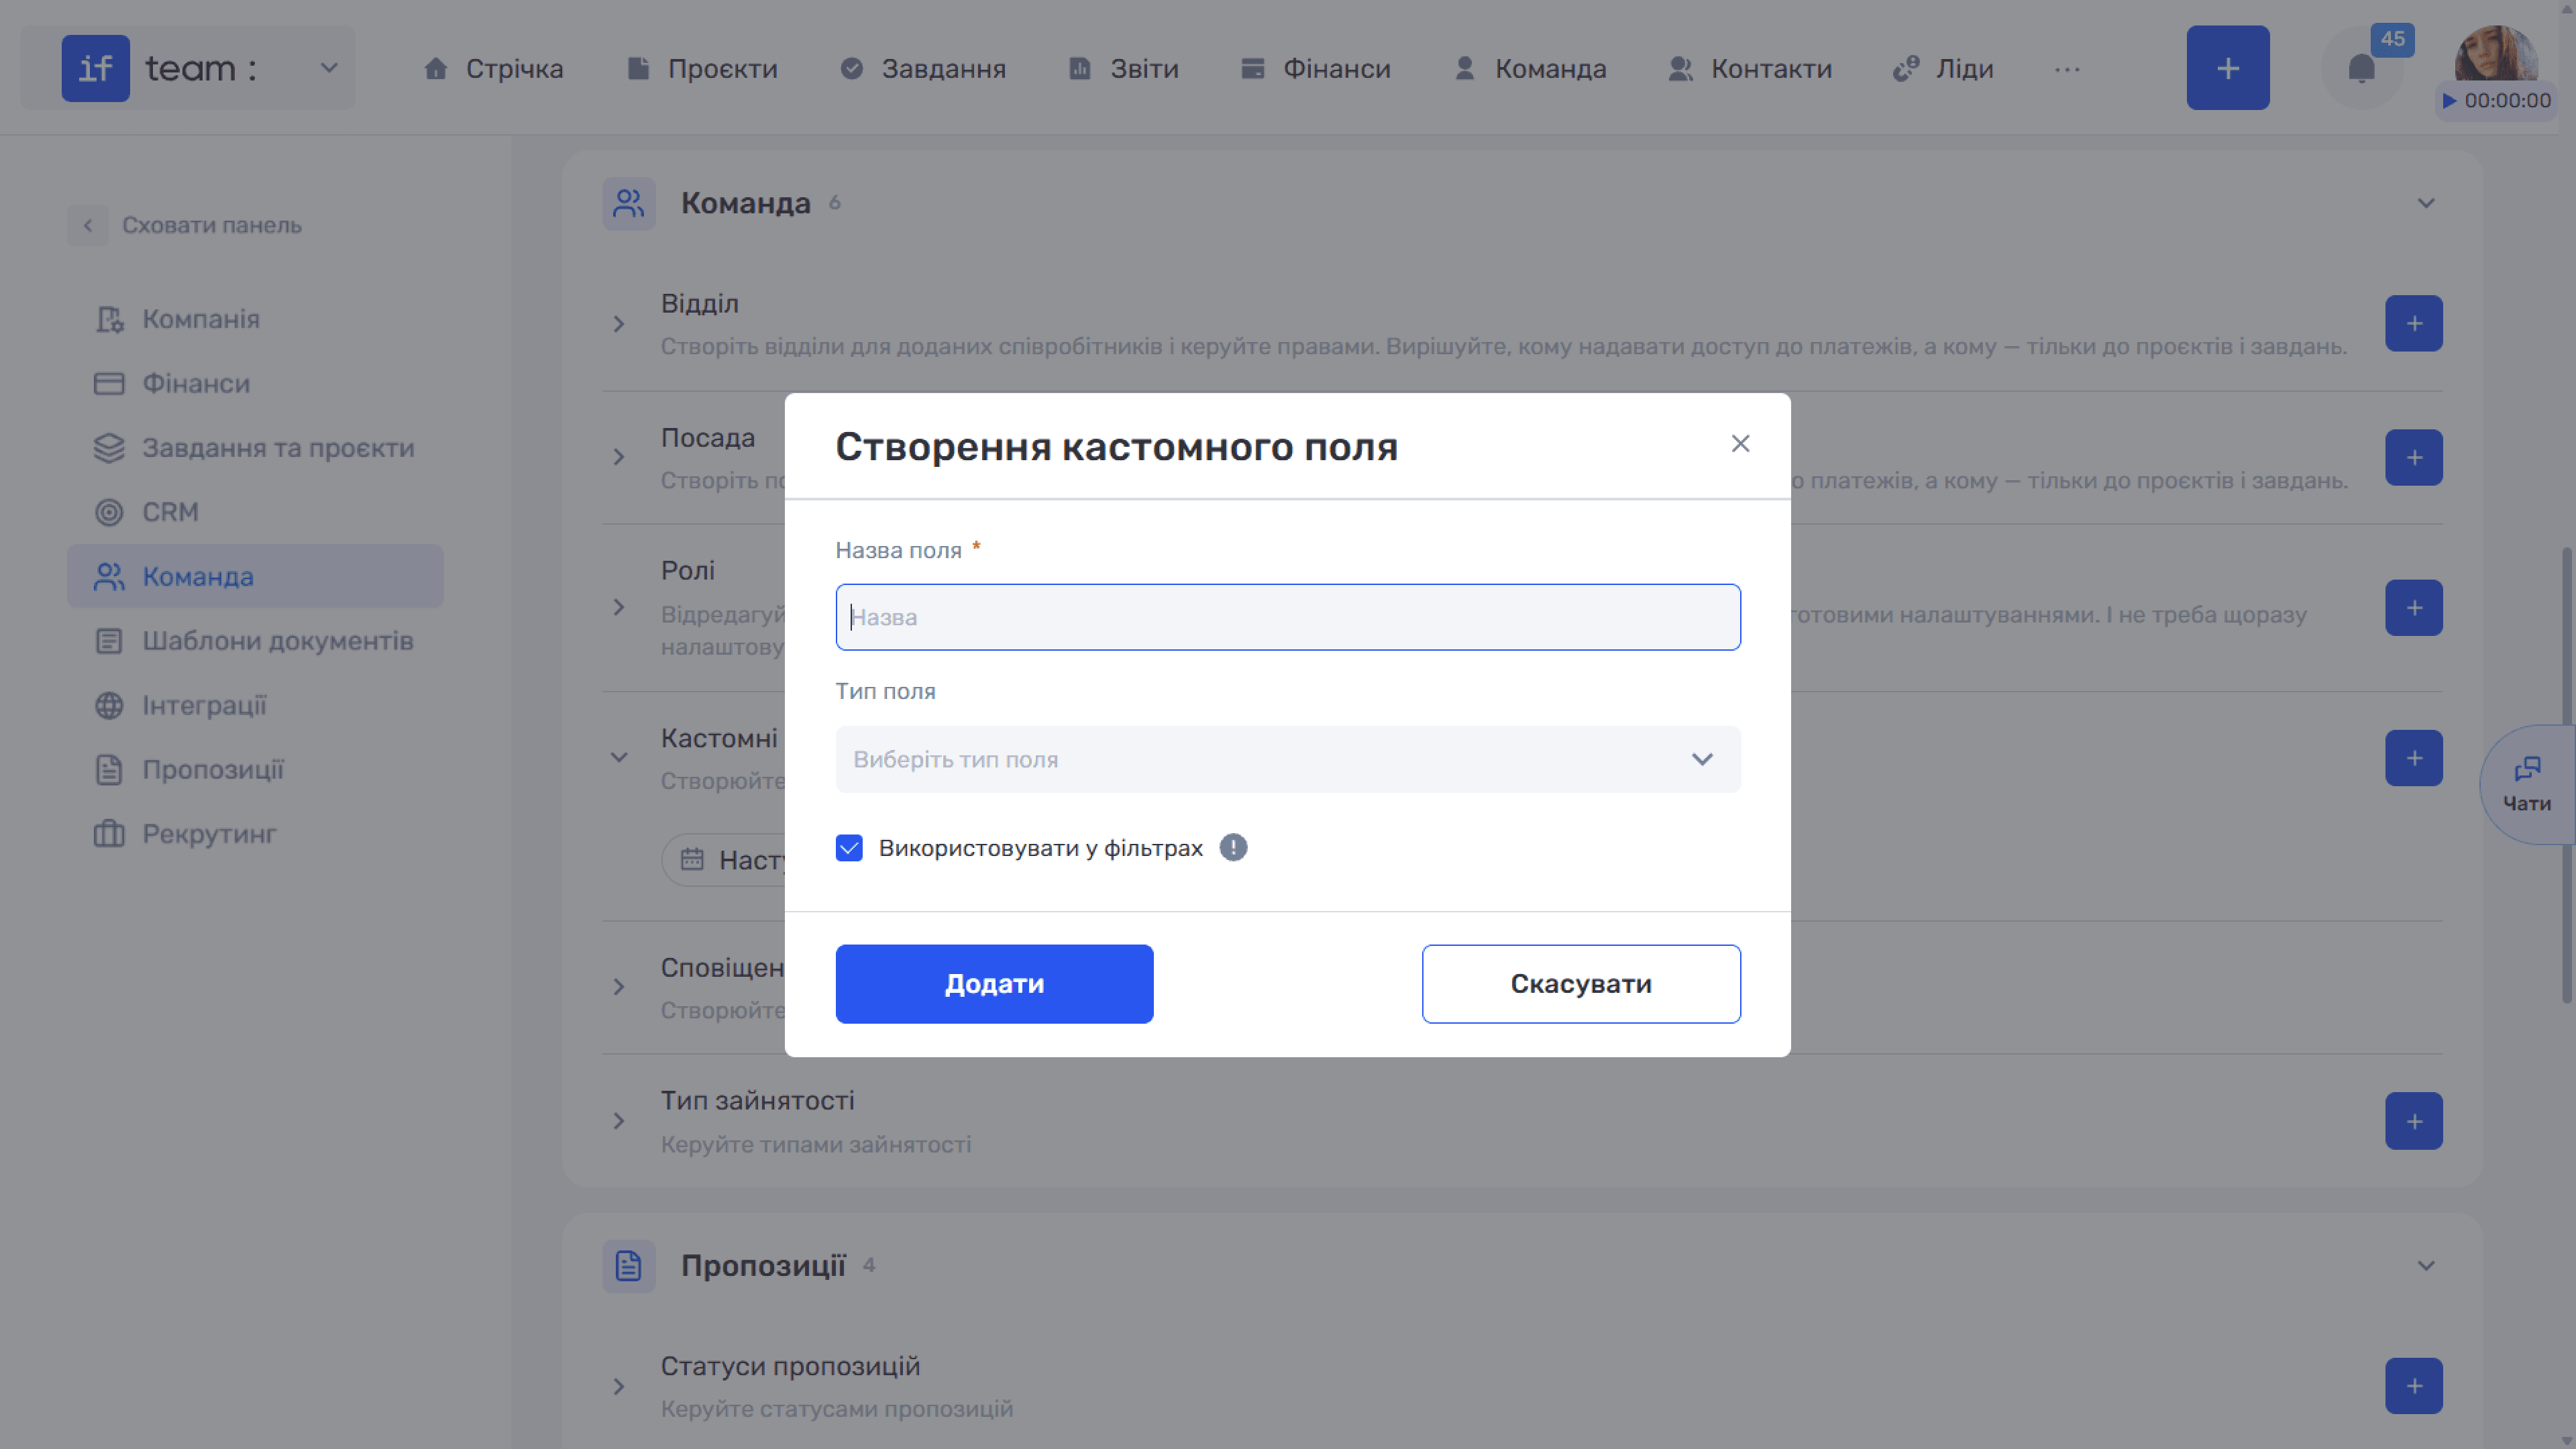
These are custom fields in the employee card, such as the date of the next rate review or English proficiency level.
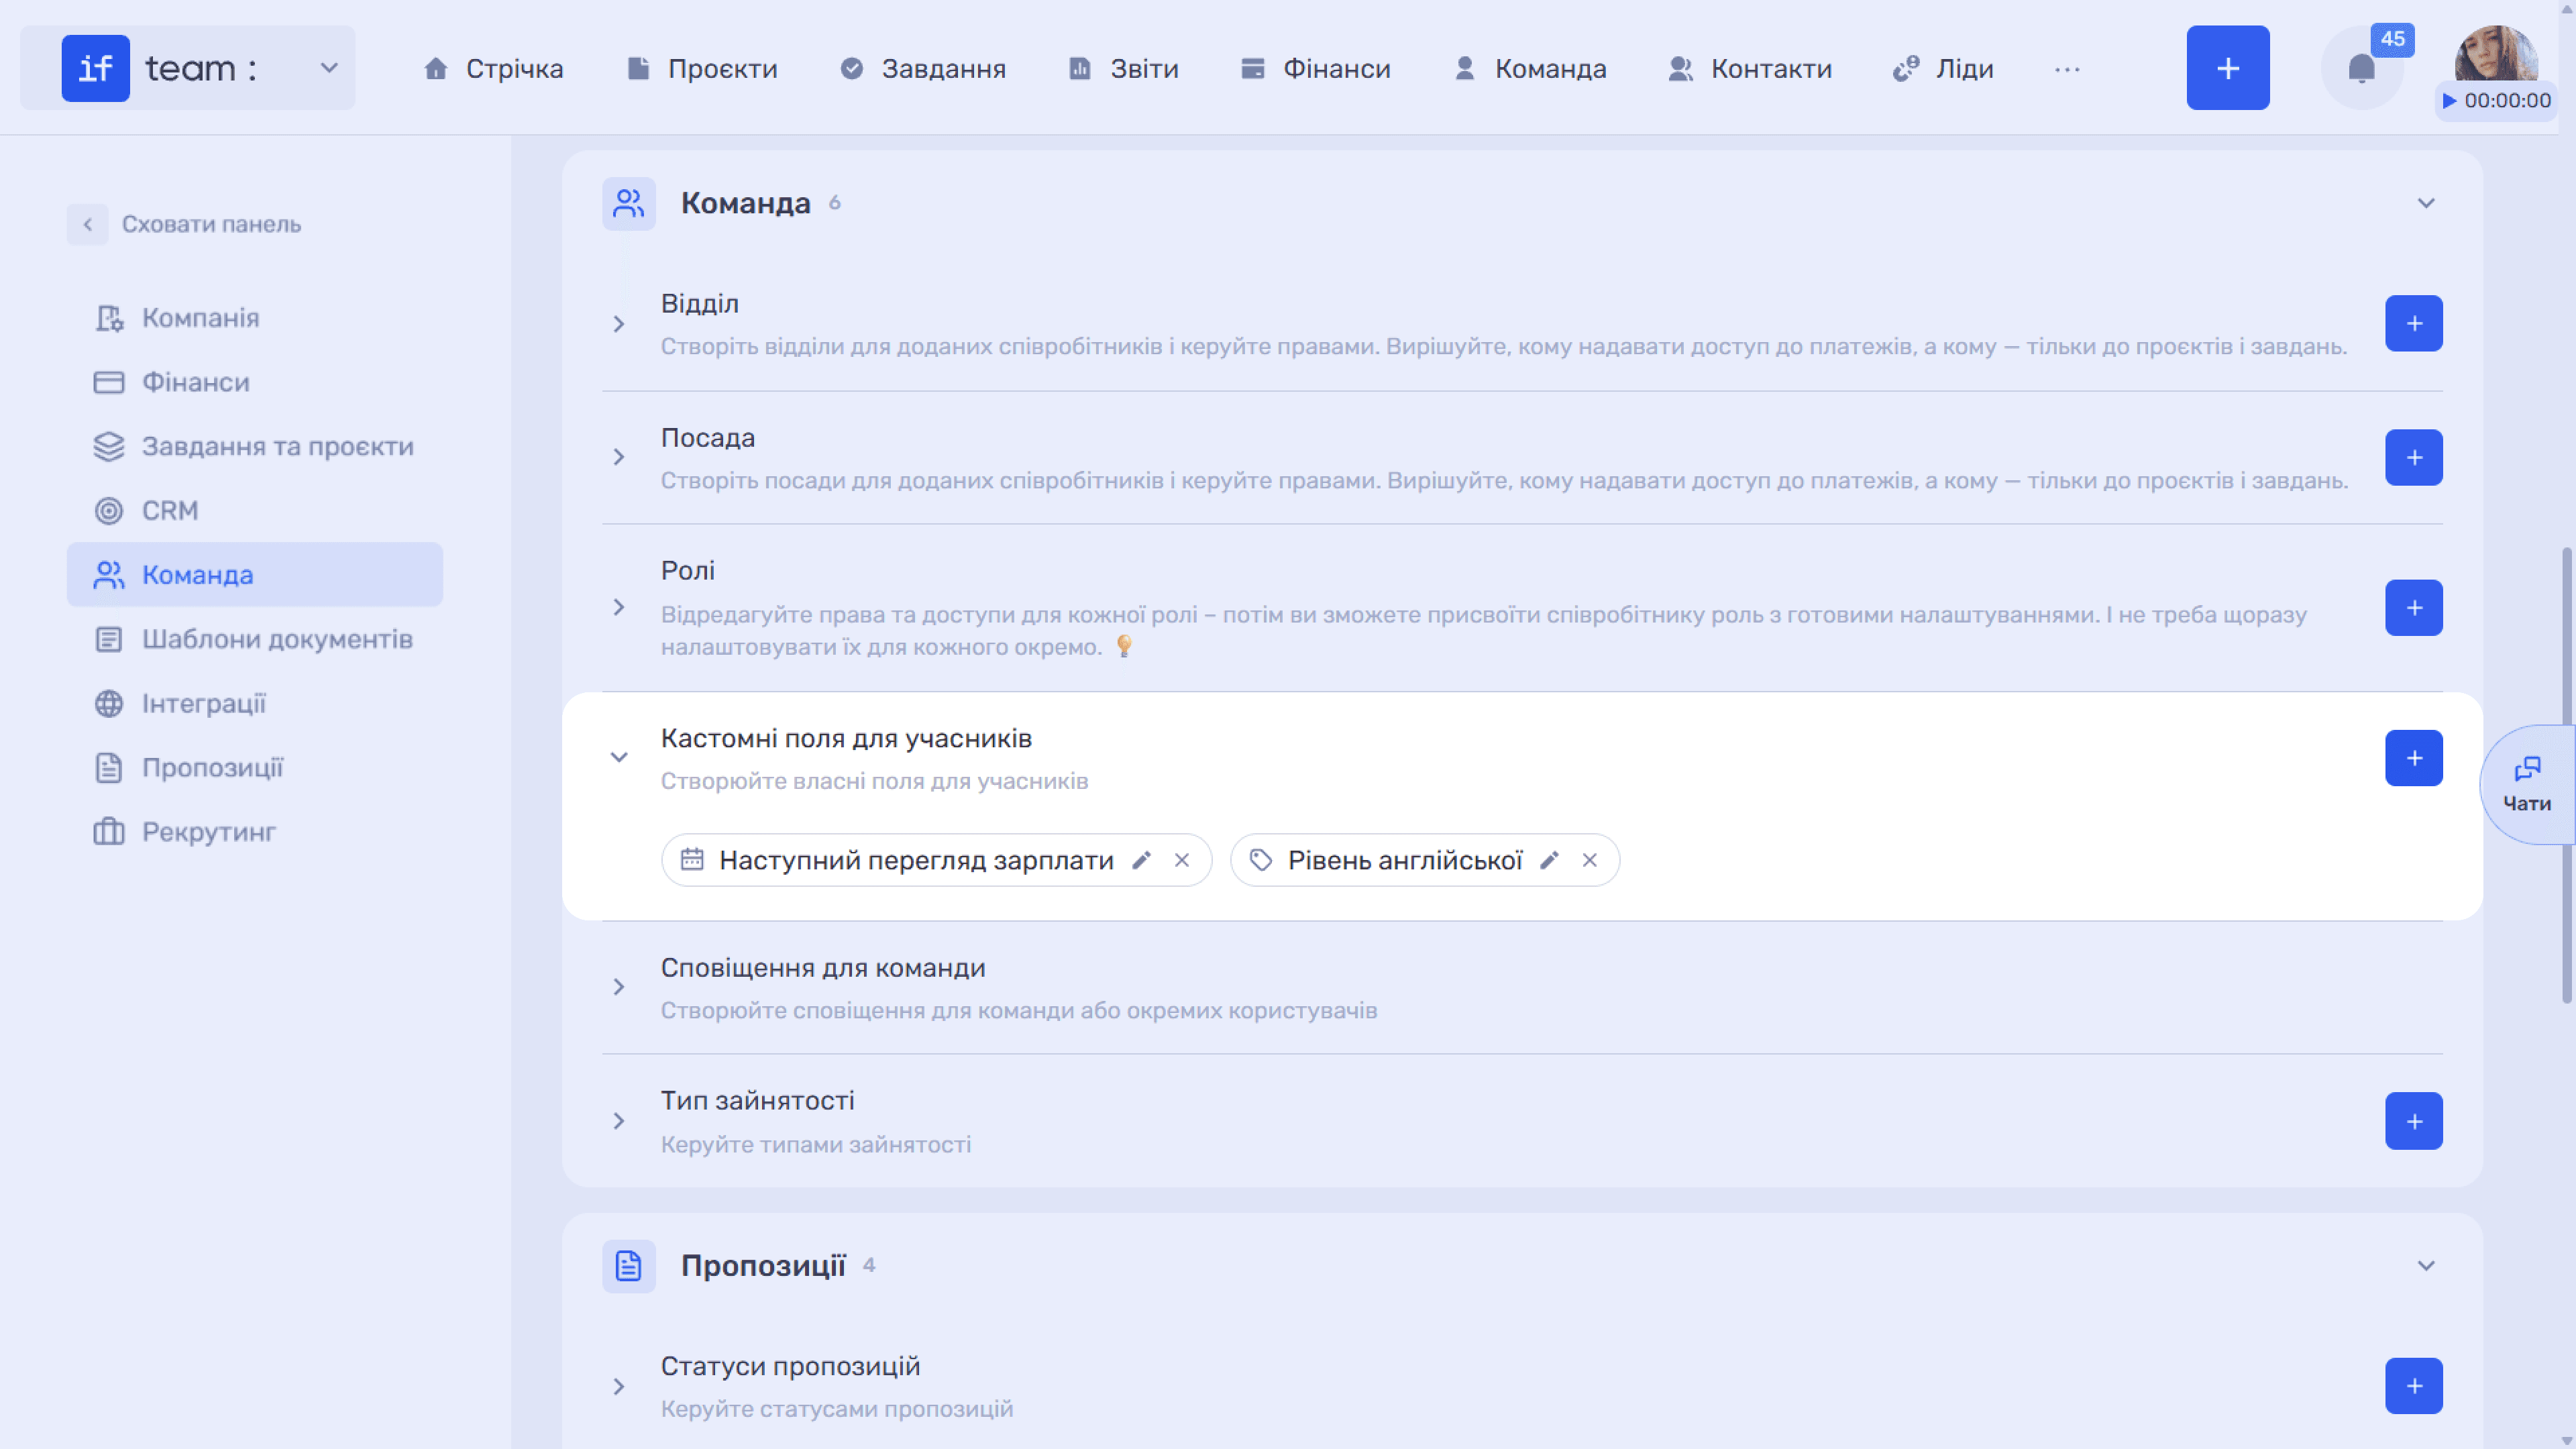
The creation window here is shortened: Field Name, Field Type, and only one checkbox, Use in Filters.
Team Notifications
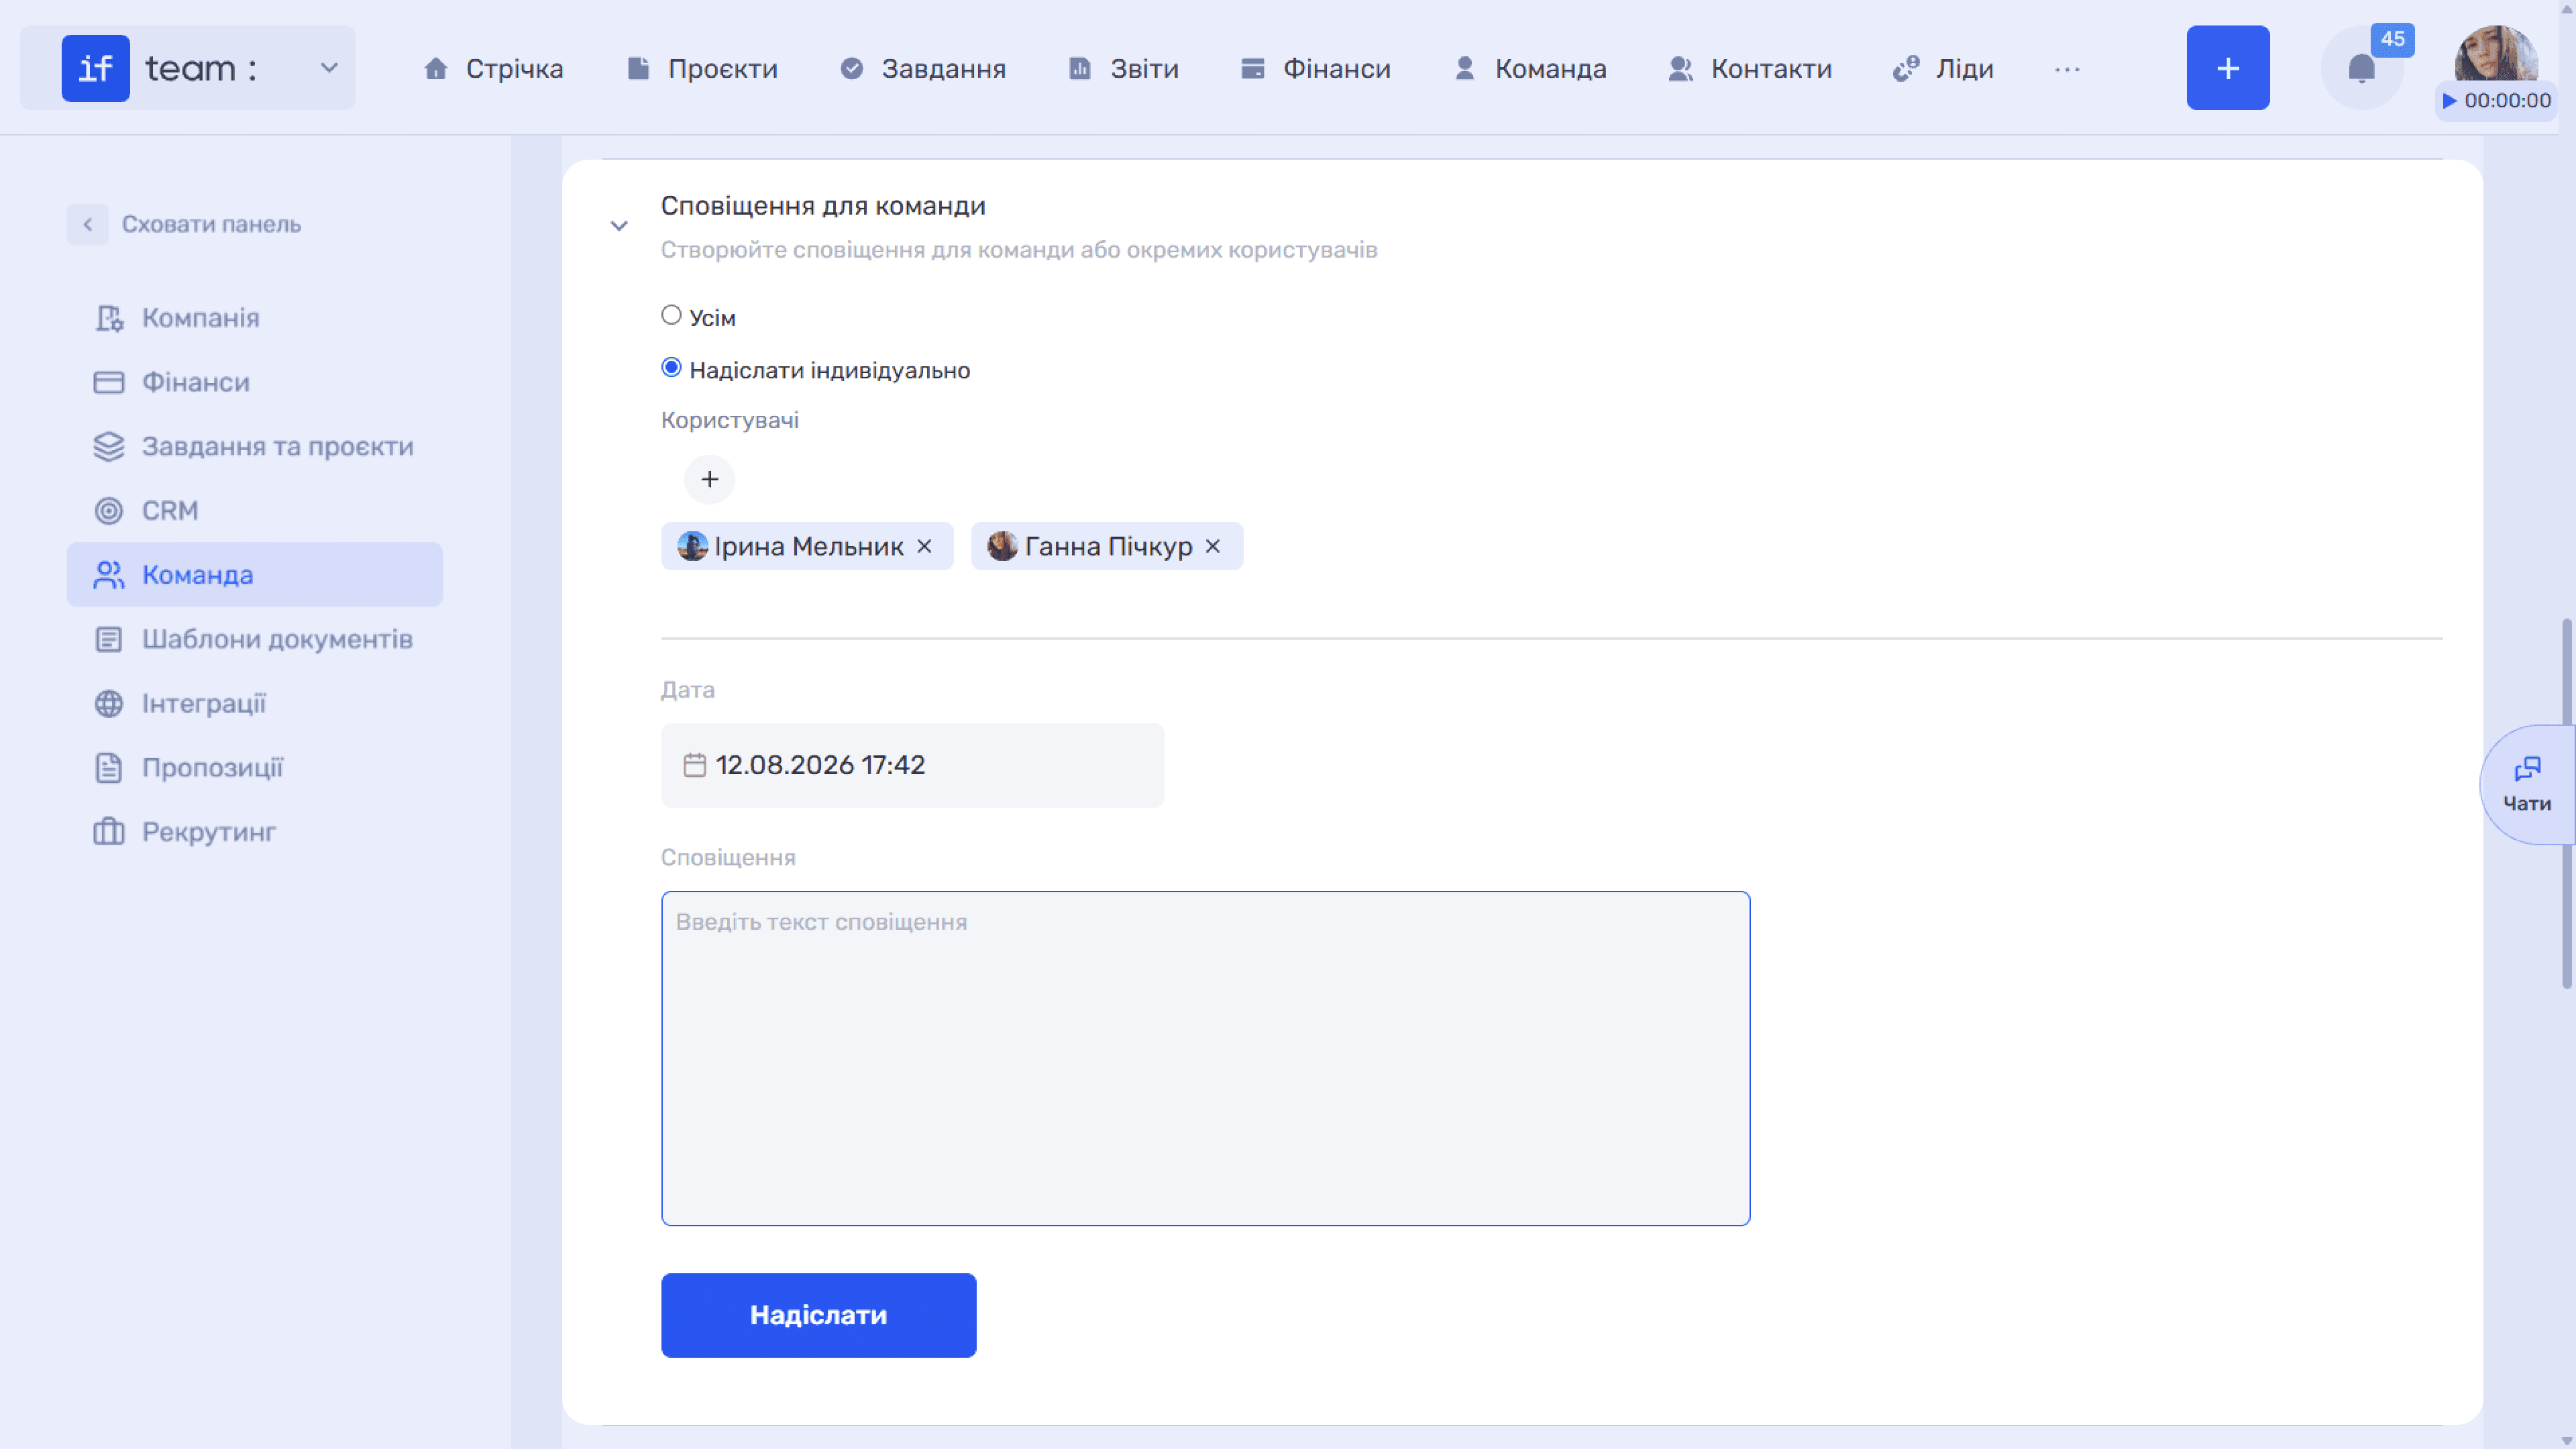
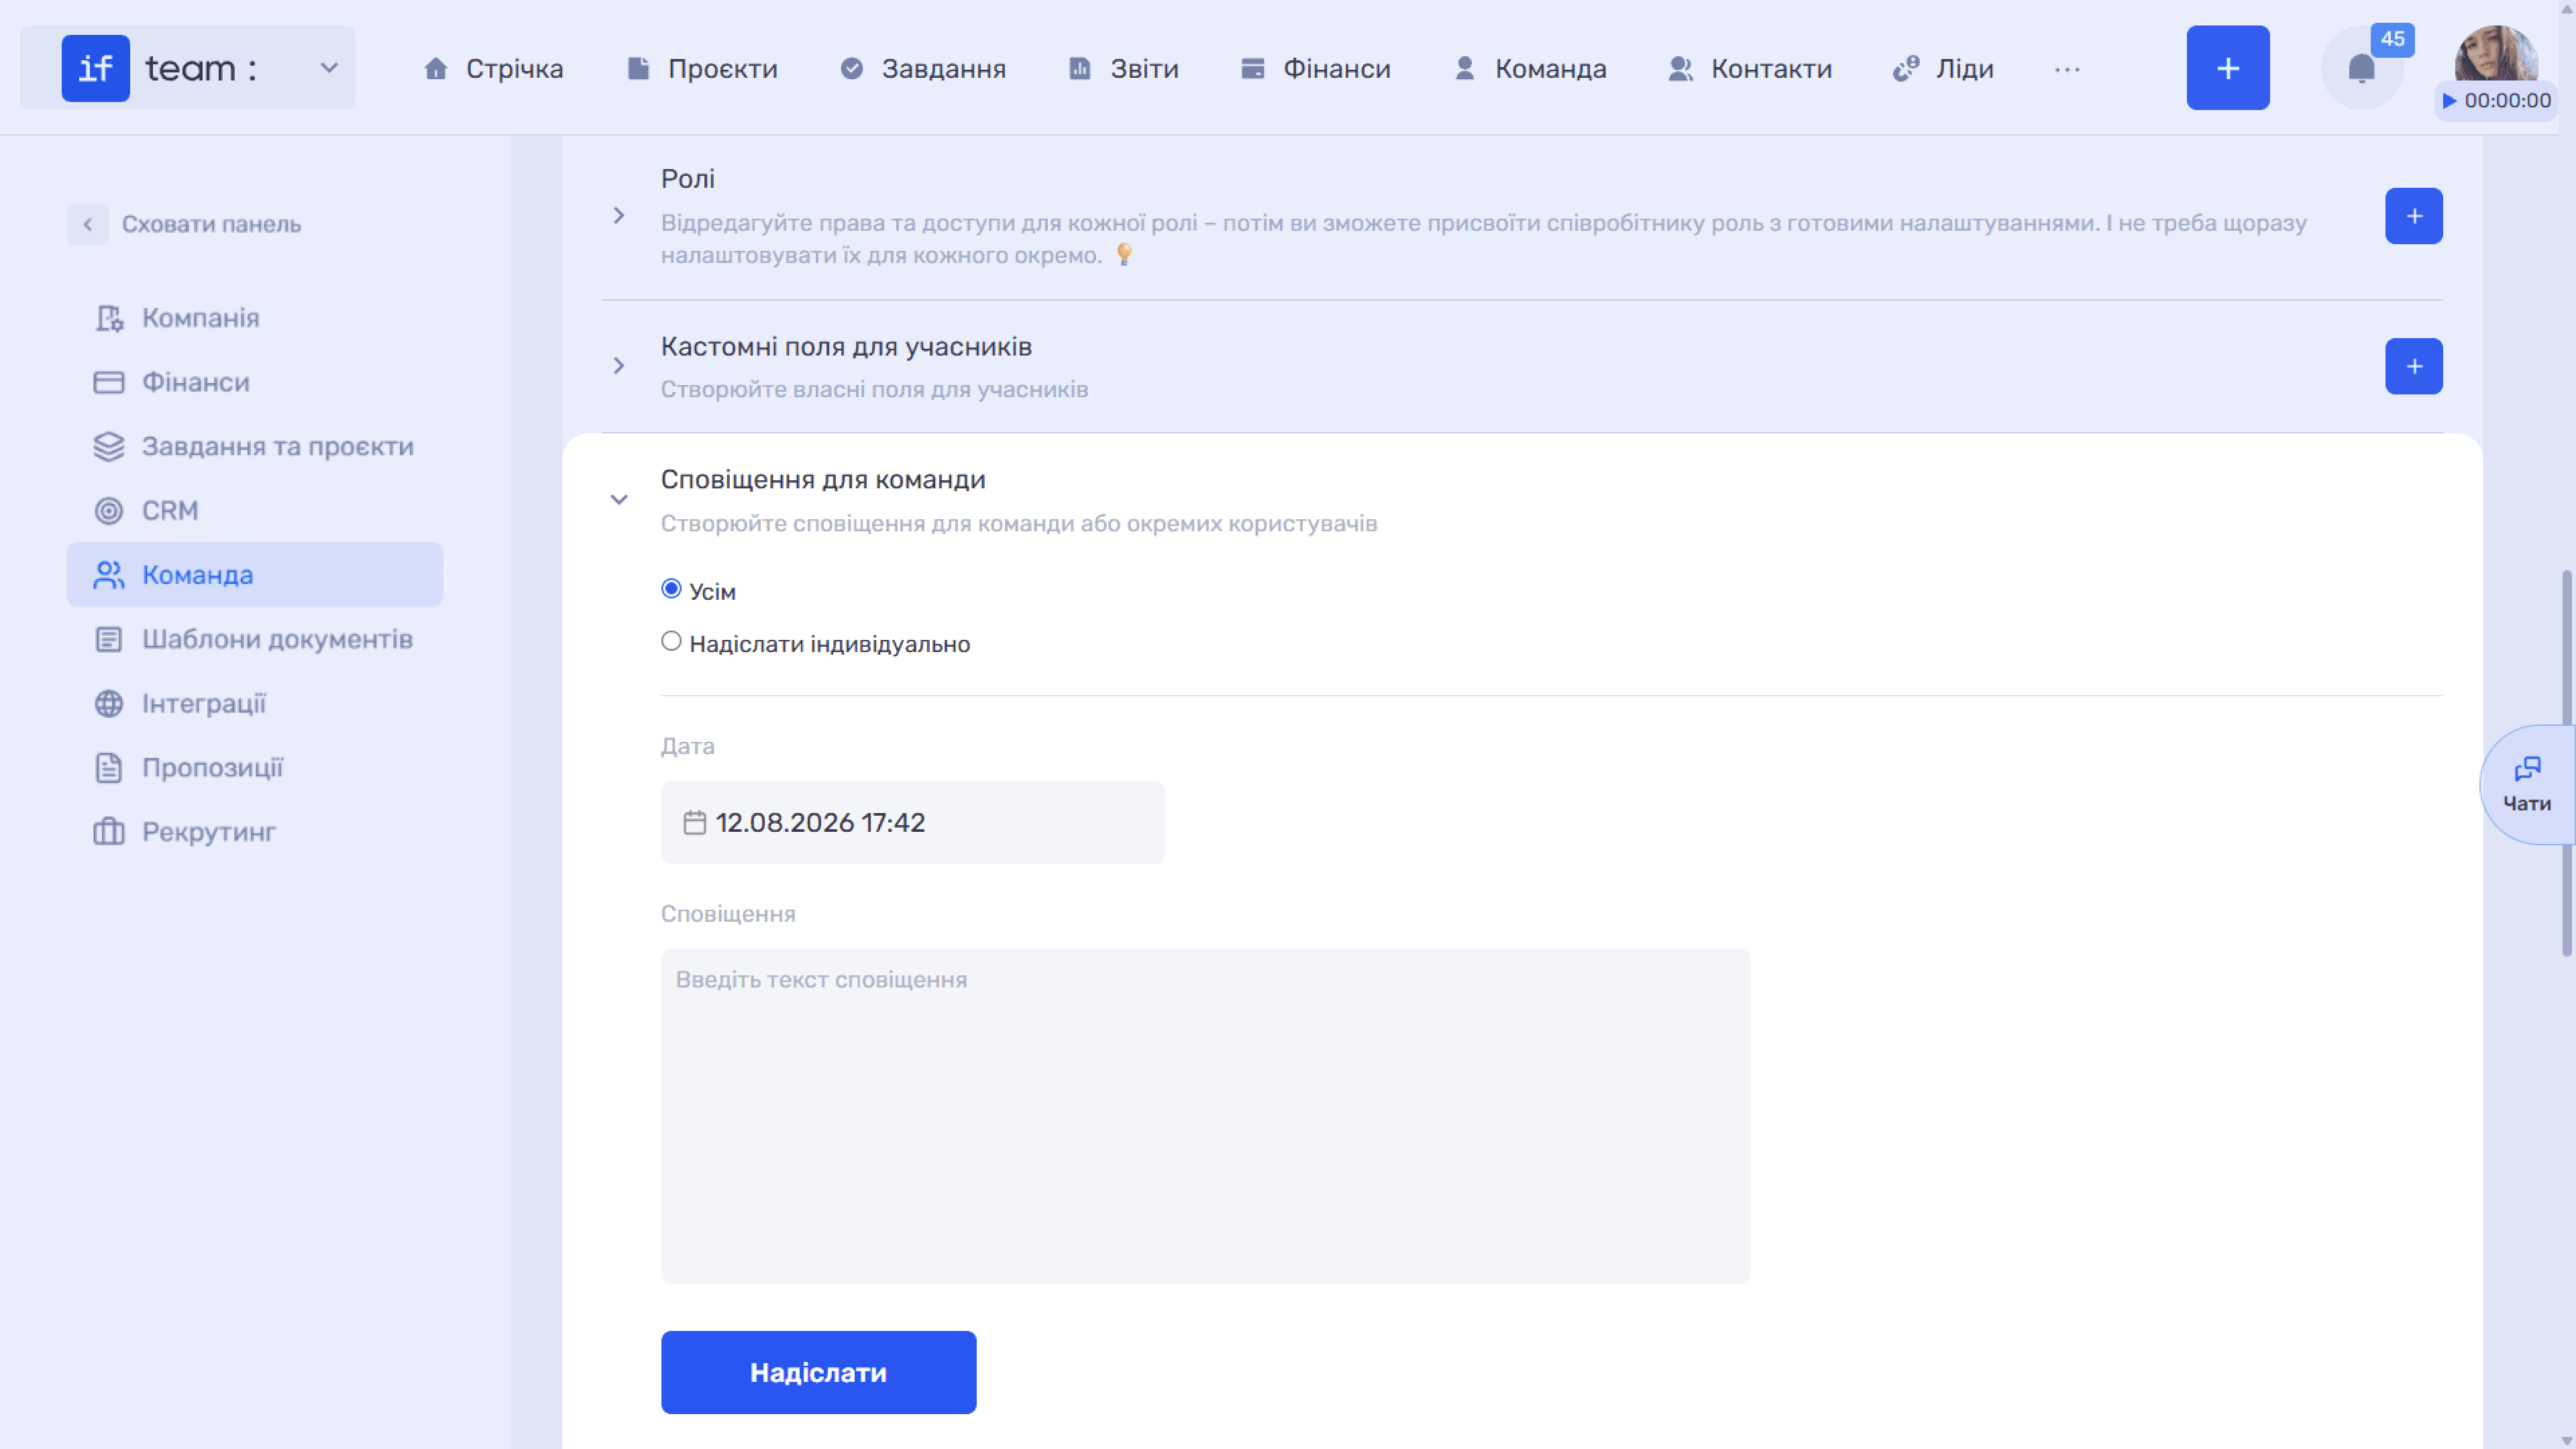
This section lets you send a message to the entire team or selected people, for example to notify them about maintenance or a company event.
- Everyone / Send Individually switch. In the second case, the Users field appears. Click +, find employees using search, and select them. Selected employees appear as chips and can be removed using the cross.
- Date is the date and time when the notification is sent and can be scheduled in advance.
- Notification is the message text.
- Send button.
Employment Type
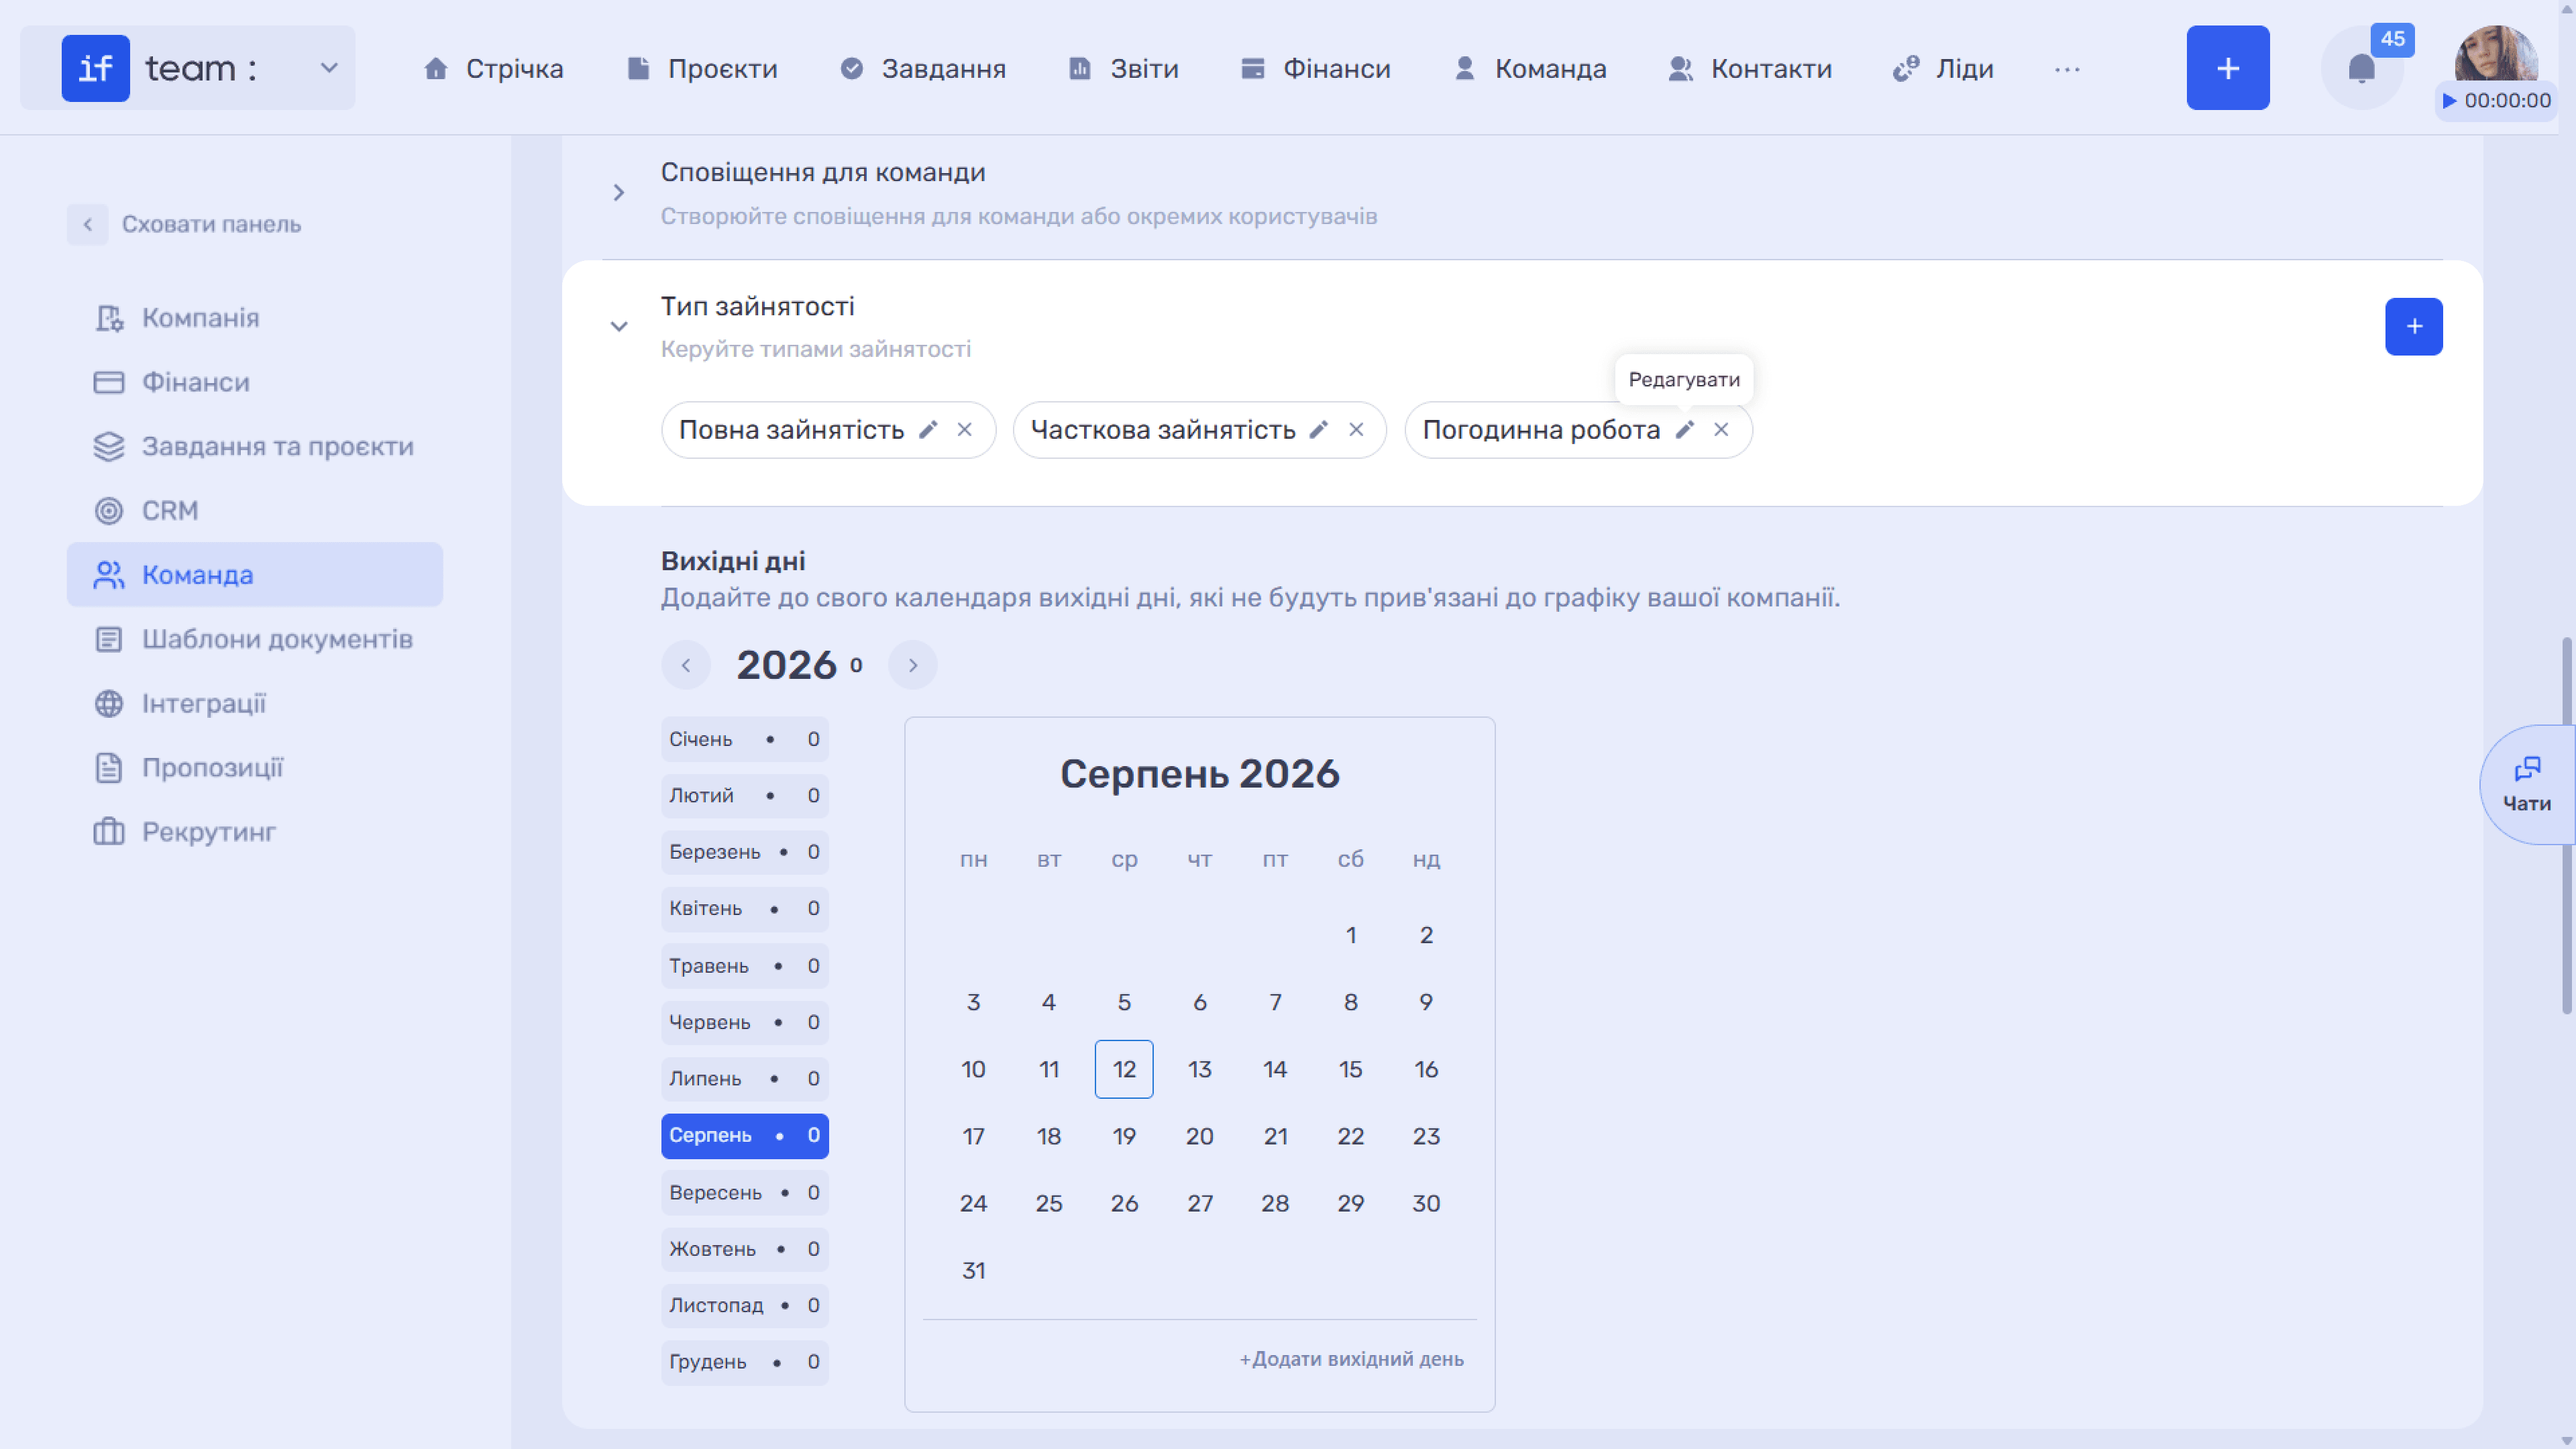
Employment type describes an employee’s work arrangement, such as Full-time, Part-time, or Hourly Work, and directly affects work-time accounting, workload calculations, and payroll.
Click + to open the New Employment Type window:
- Name is required.
- Standard Hours per Day is required and is the baseline the system uses to calculate workload.
- Permitted Deviation from the Standard, % defines how much actual hours may differ from the standard before the system treats them as overtime or undertime.
- Schedule is required. Select the working days of the week using the calendar.
- Vacation Days per Year is used in the workload calendar and when approving vacation.
- Workday is the time range from start to end.
- Prevent Time Tracking Outside the Work Schedule means that an employee can log work time only within their schedule. They cannot log more hours than scheduled or add time on days off, holidays, vacation, sick leave, or another absence.
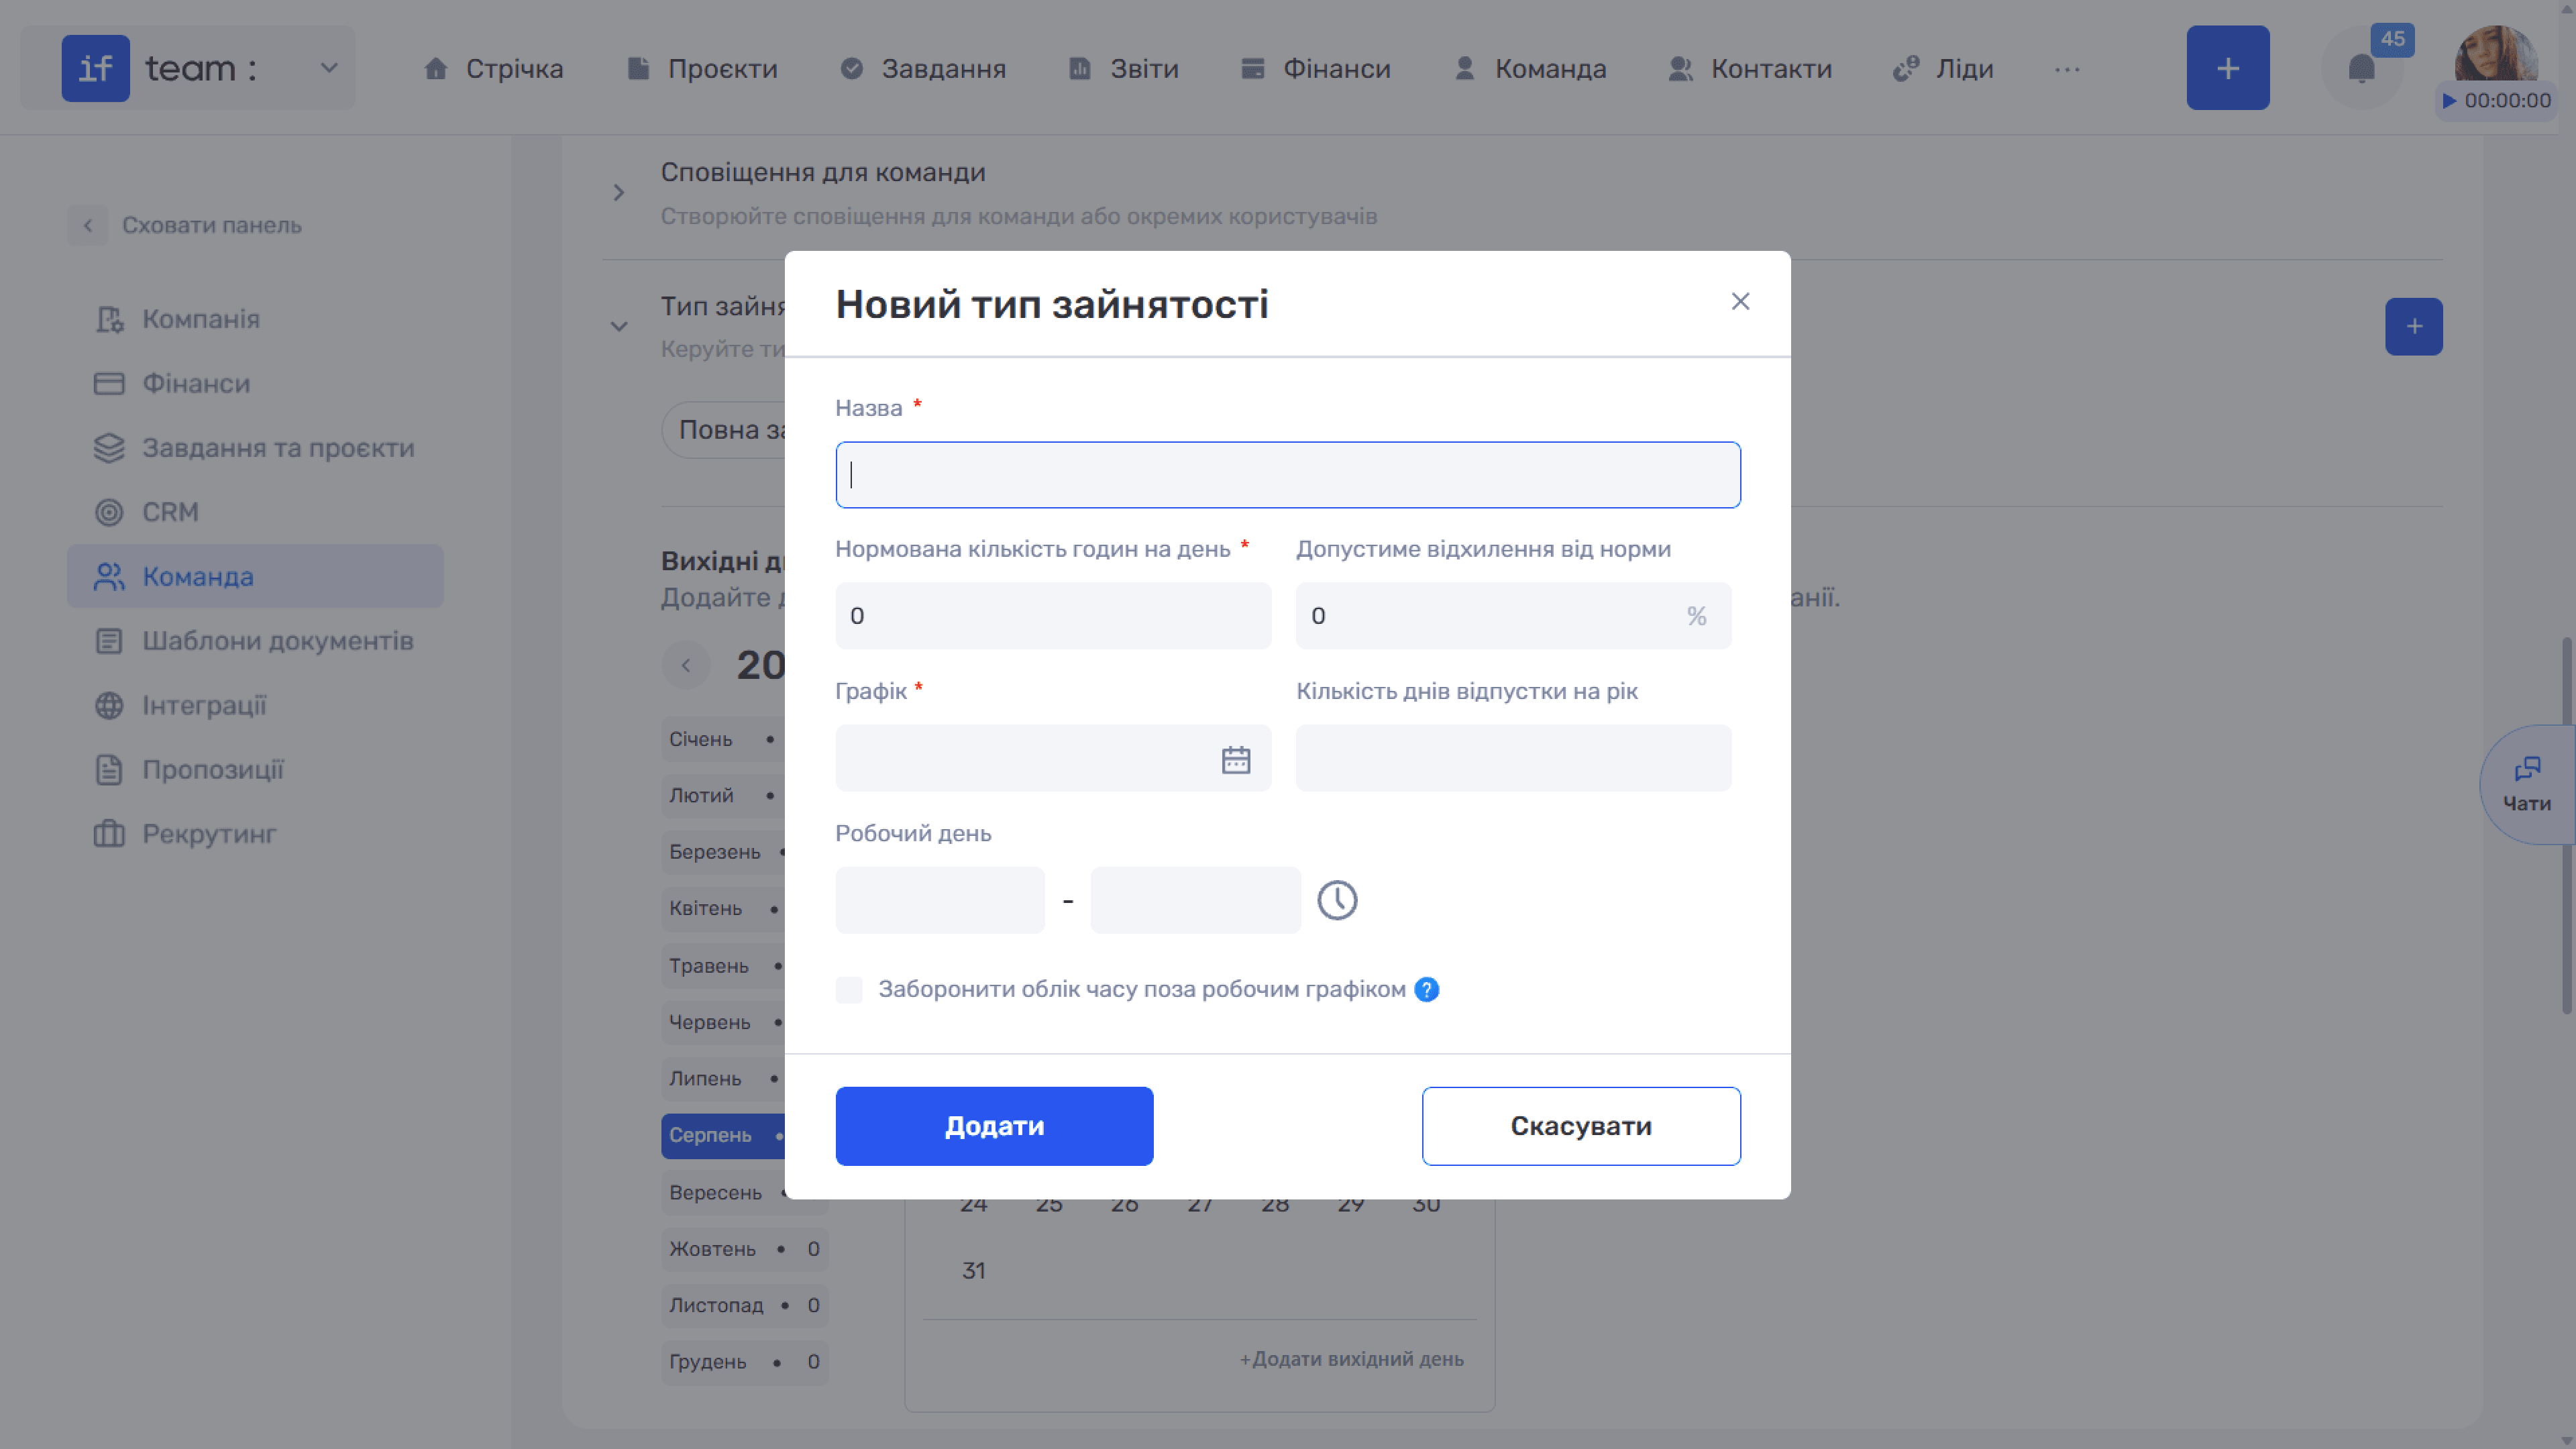
ℹ️ The Prevent Time Tracking Outside the Work Schedule checkbox is the simplest way to prevent reports from containing hours entered retroactively for vacation days.
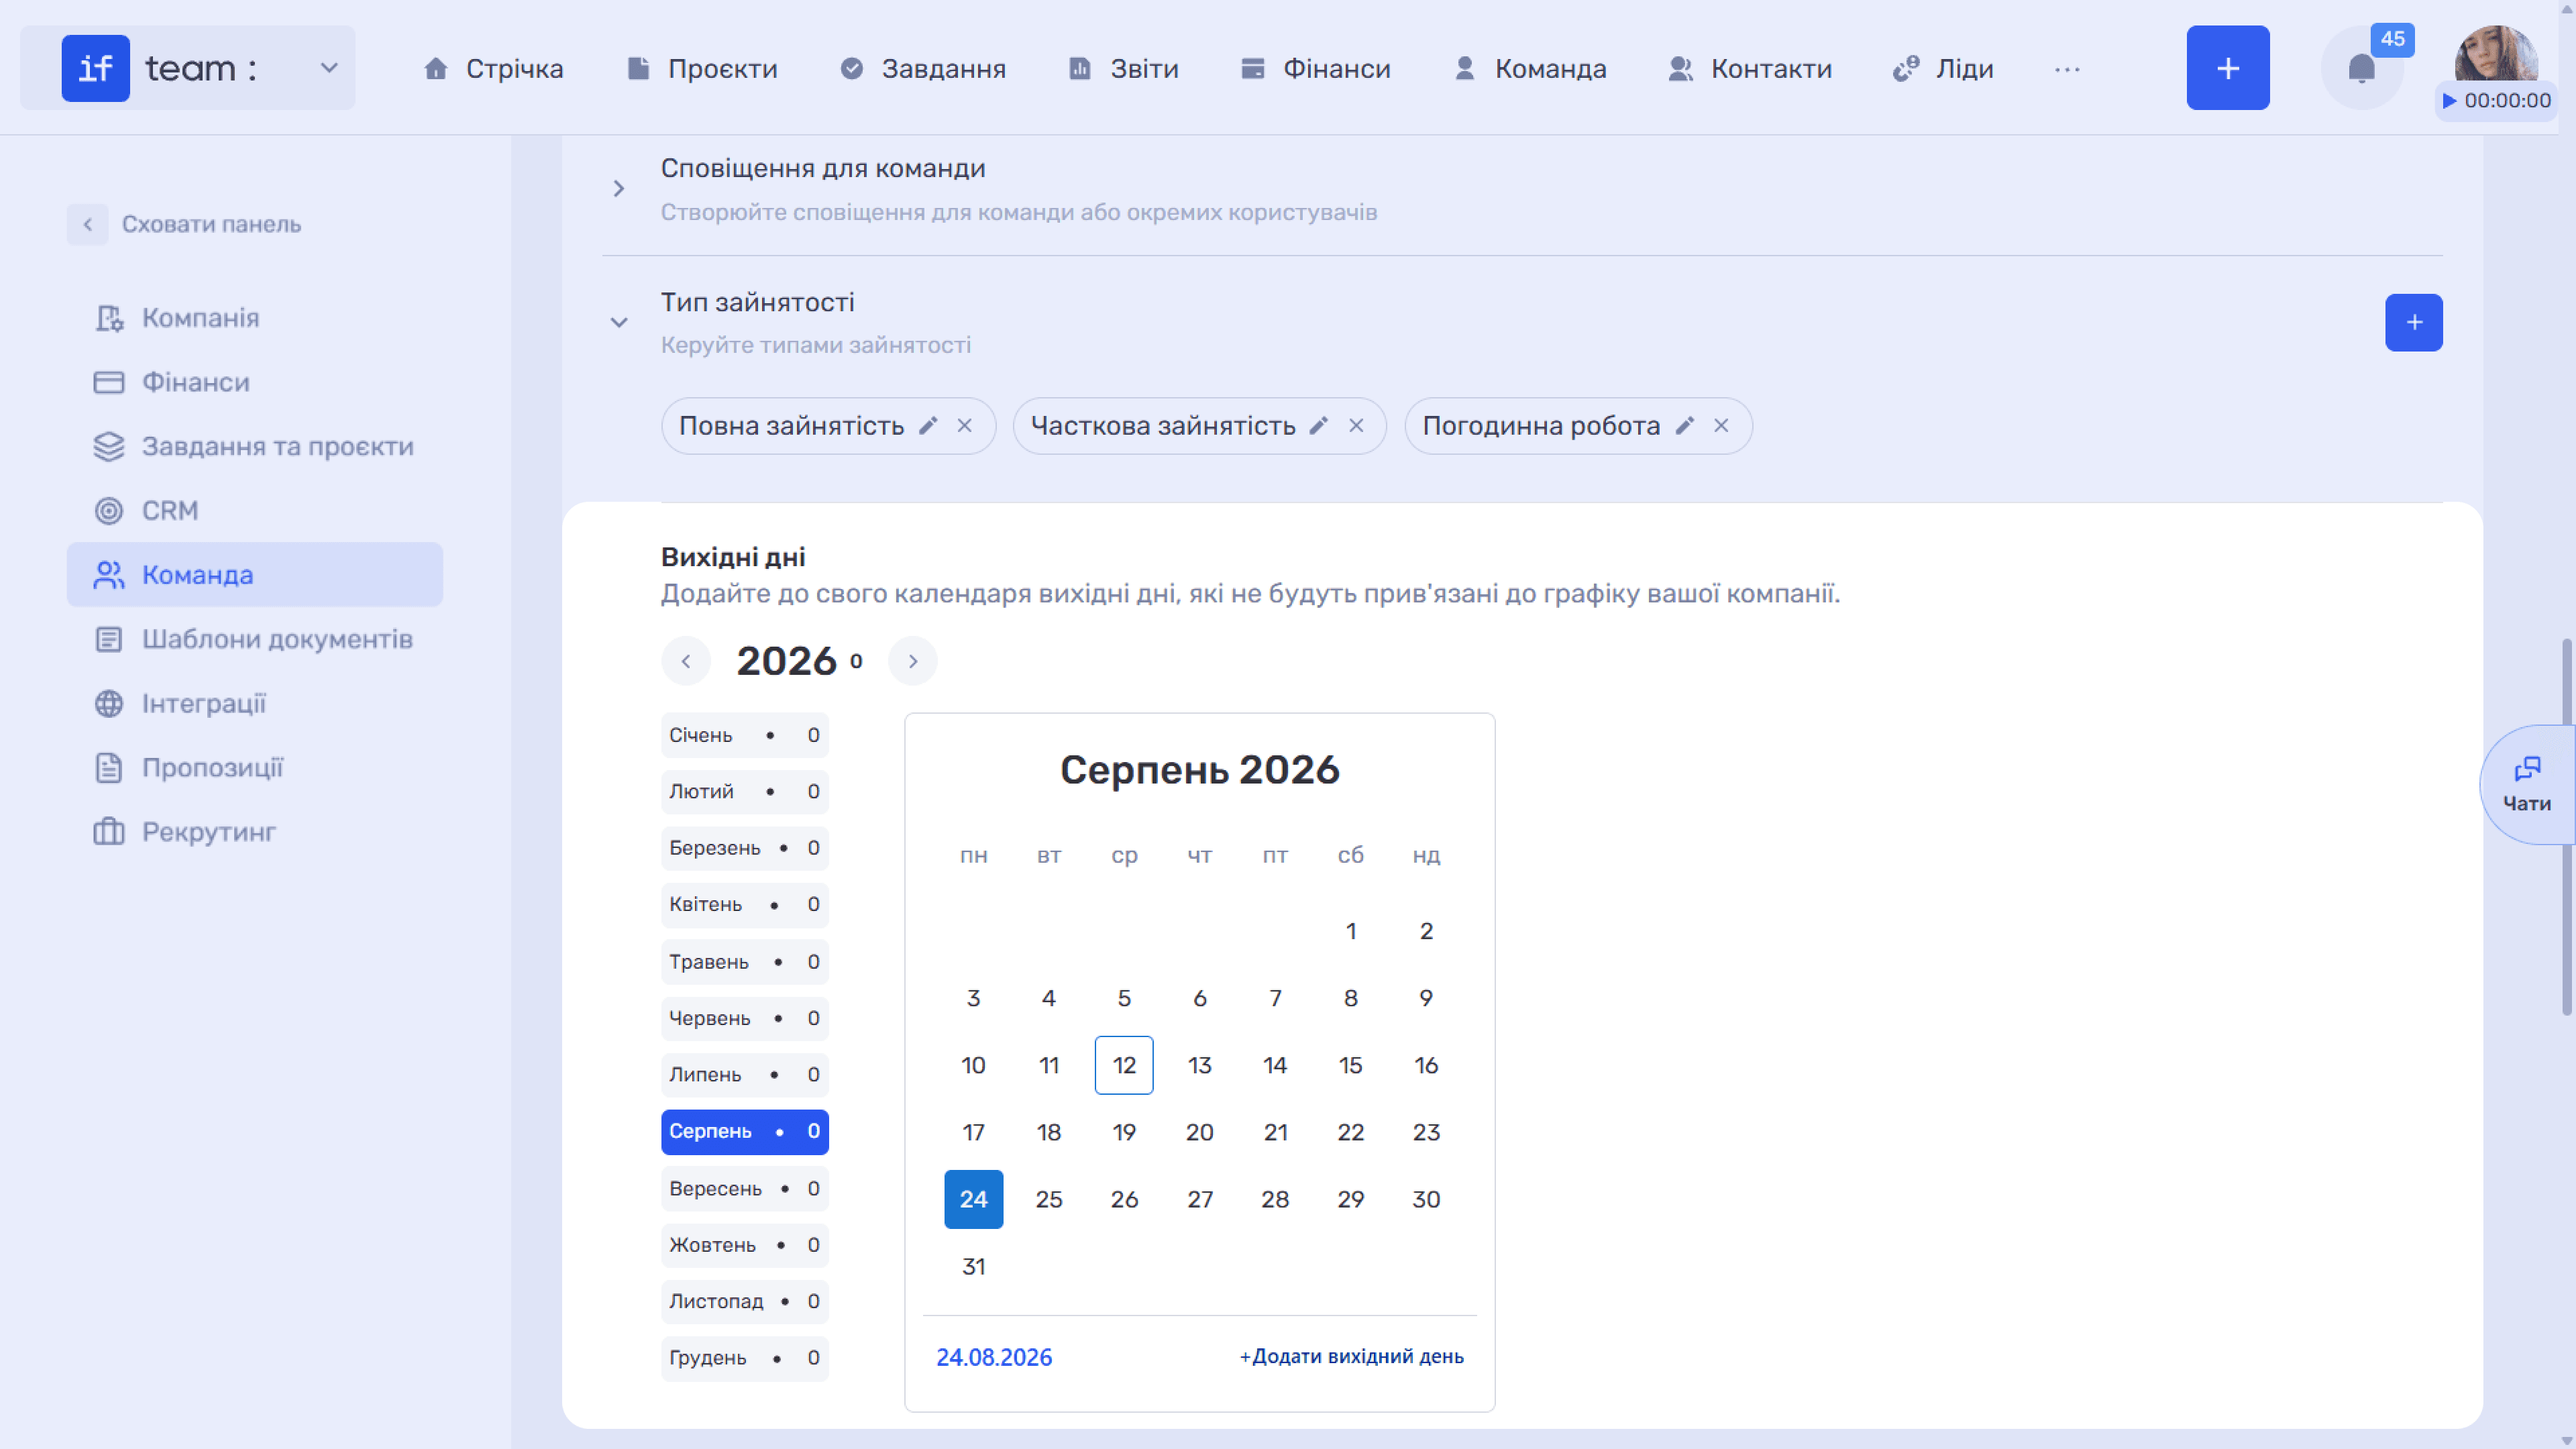
Days Off is the calendar of company non-working days outside the standard schedule, such as public holidays or company days off. Use the arrows to change the year and select a month from the list on the left; the number of added days appears next to each month. The + Add Day Off link below the calendar adds the selected date.
Still have questions?
Maybe we haven't added this information yet. But you can always reach out:
Request a demo
Submit a request and we'll show you how the service works and its capabilities.
Book a demo