Document Templates
This block lets you upload your own .docx templates — invoices, acceptance certificates, quotes, contracts — and then generate finished documents in one click straight from a transaction, lead, or quote card. Data is filled in automatically, and the finished file is saved to the corresponding entity right away.
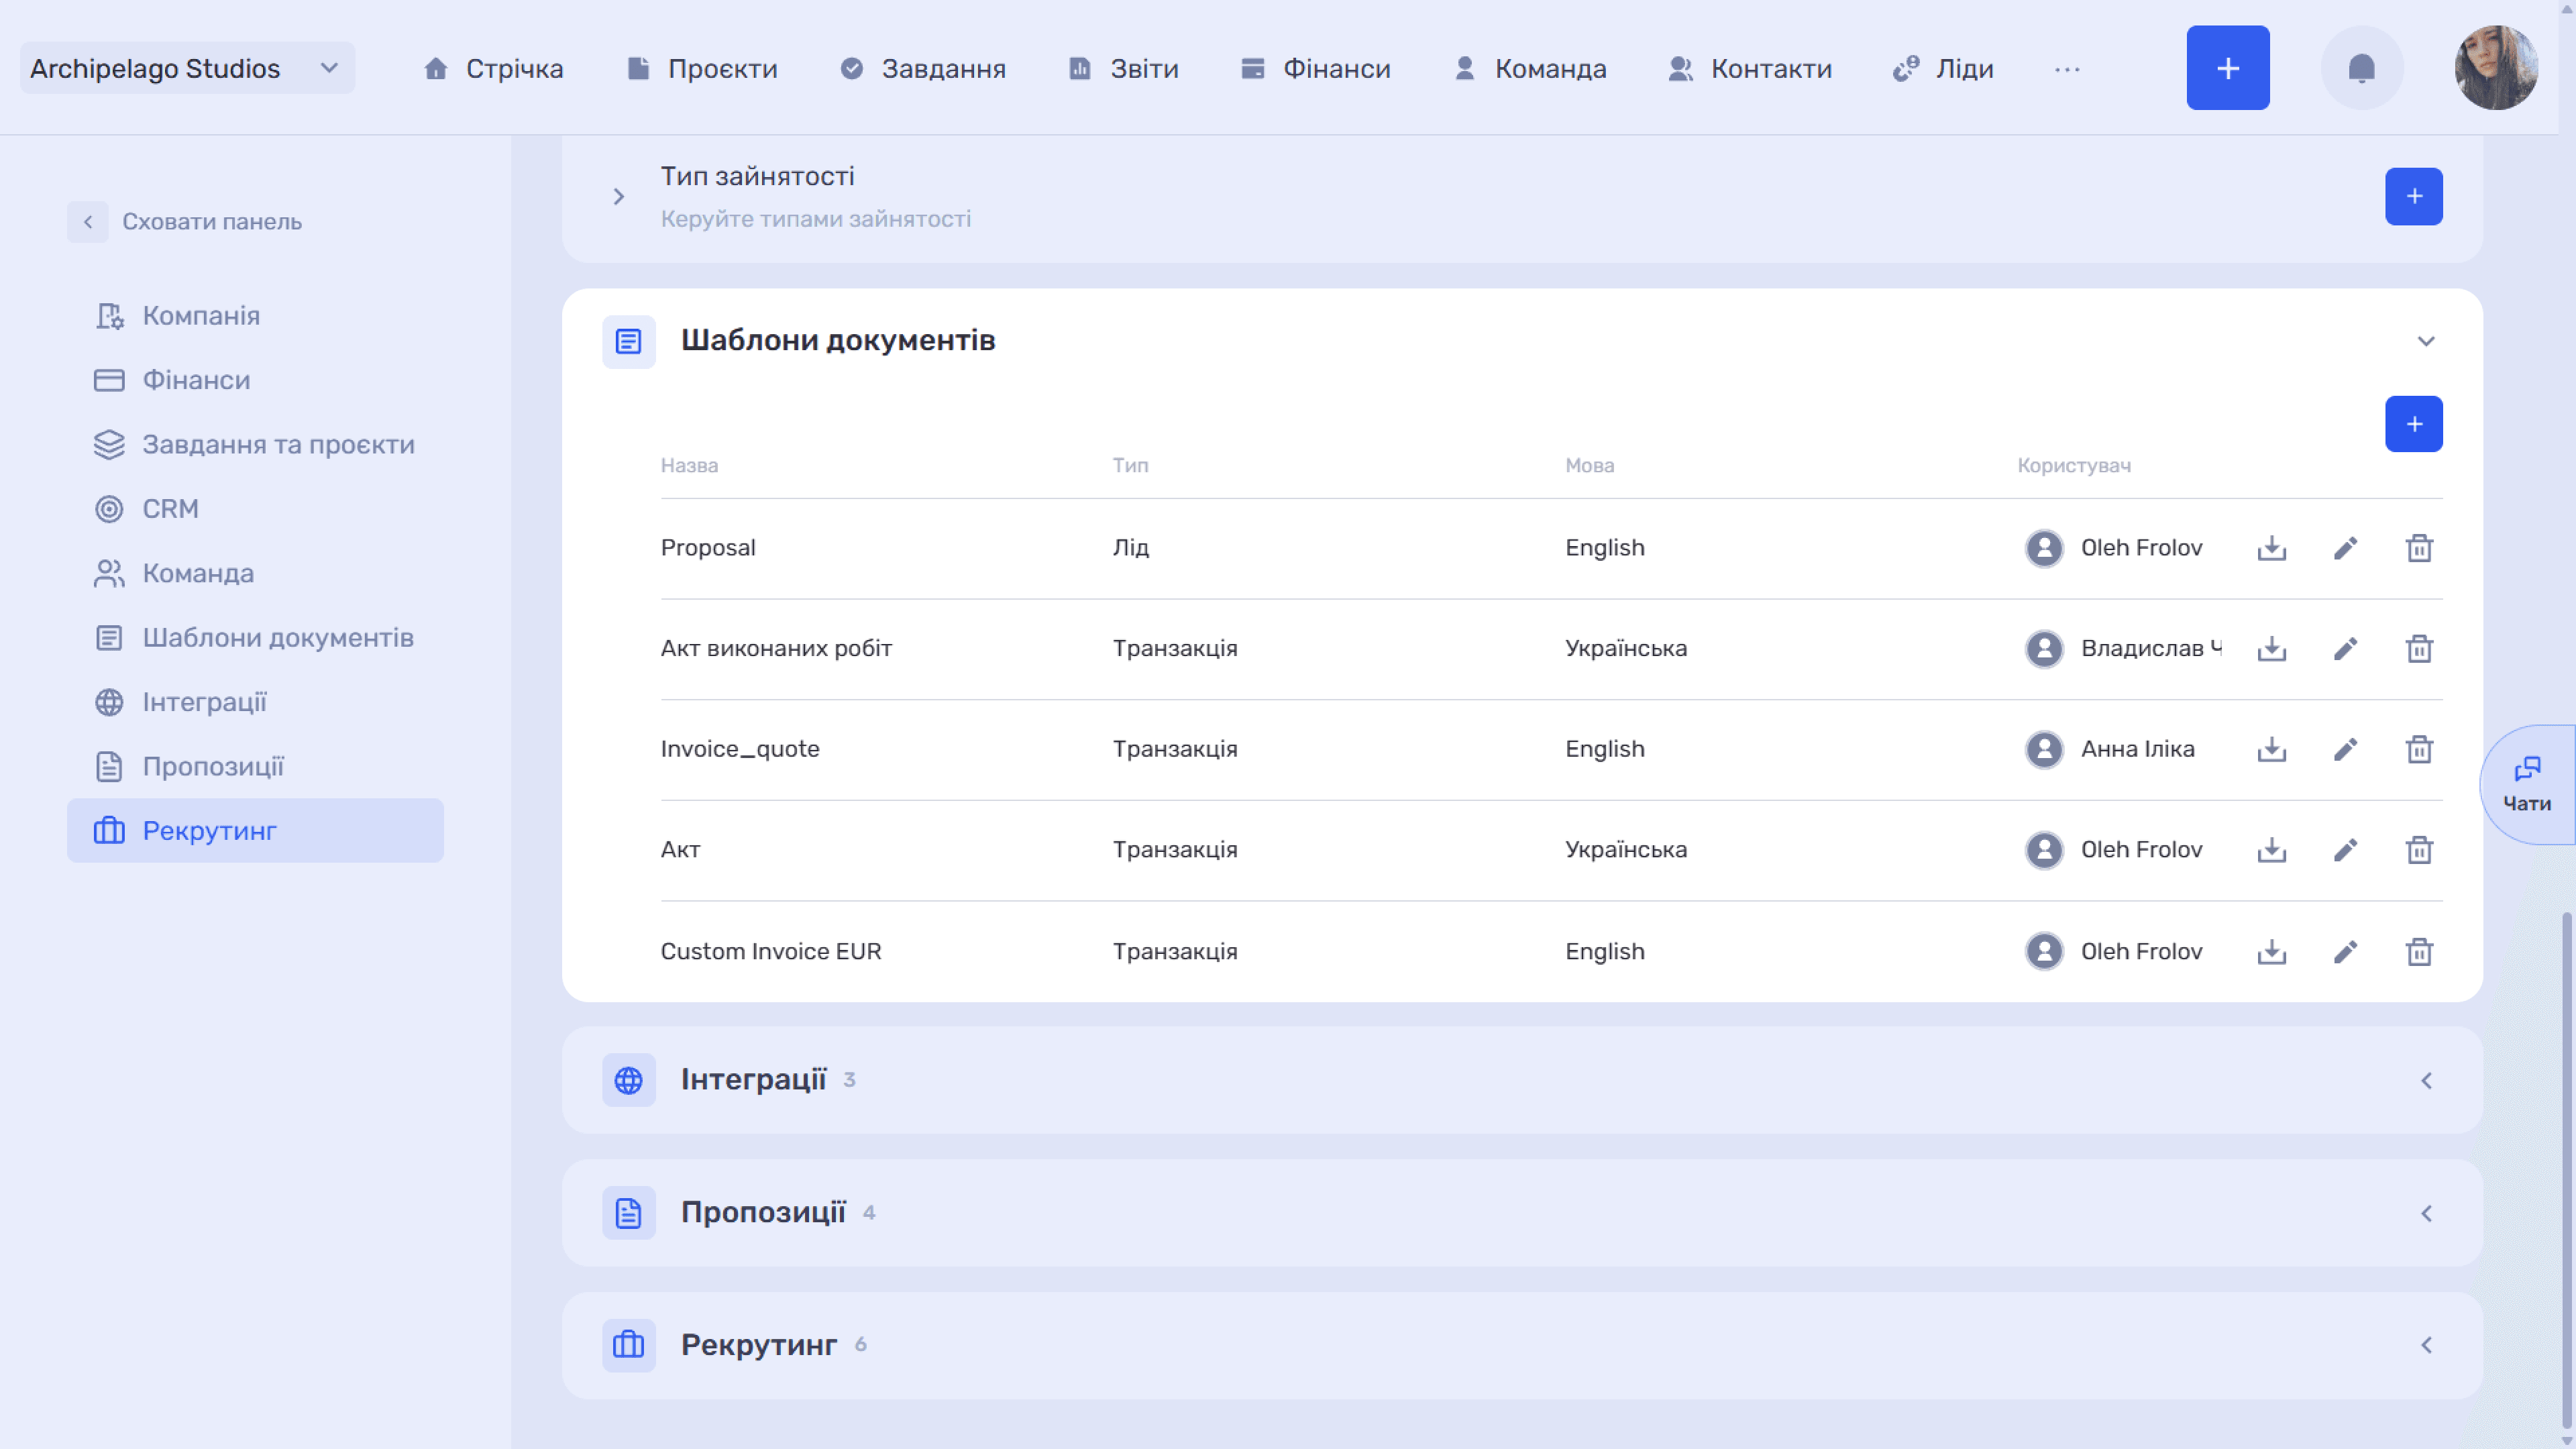
Template list
All uploaded templates are shown in a table with these columns:
- Name — the template name that appears in the list during generation.
- Type — the entity the template is for: Transaction, Lead, or Quote.
- Language — the document language: Ukrainian or English.
- User — who added the template.
On the right of each row are three actions: download the template file, edit, and delete.
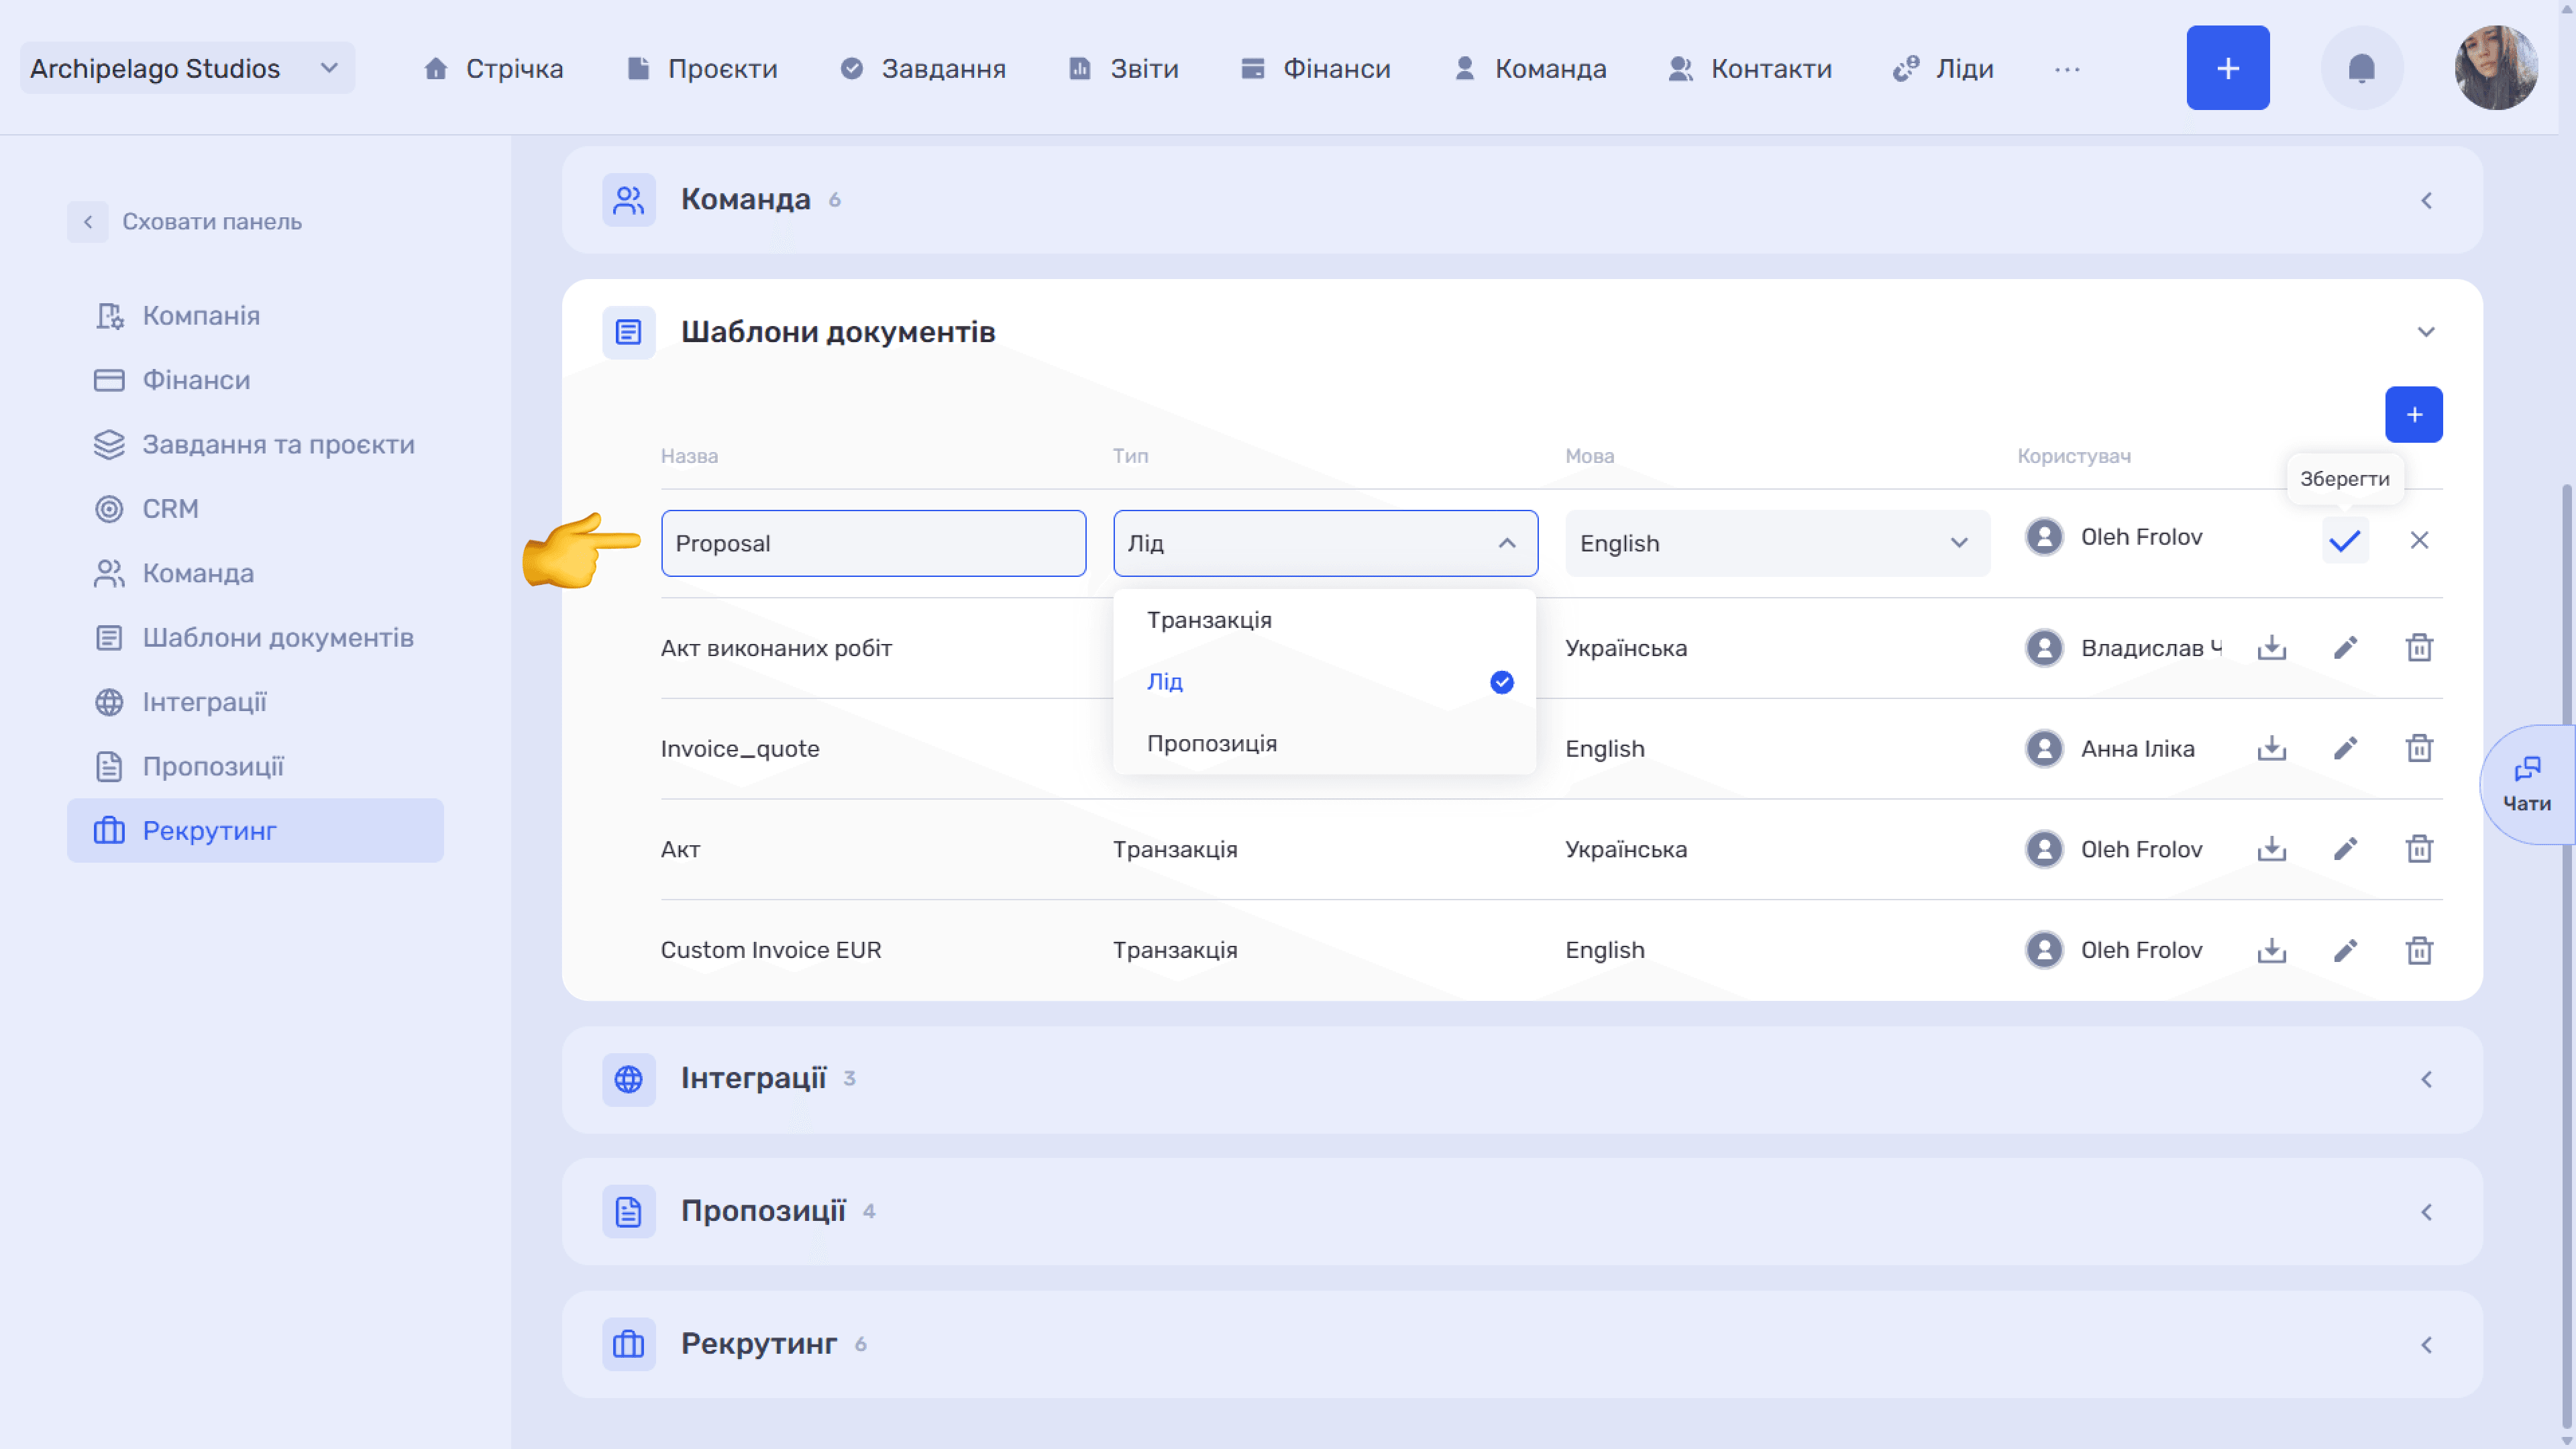
Editing happens right in the table: click the edit icon and the row becomes editable — change the name, type, and language, then confirm with ✓ or cancel with ✕.
Please note
In edit mode you can only change the name, type, and language — the template file itself cannot be replaced. To update the document content, upload the template again and delete the outdated one.
Adding a template
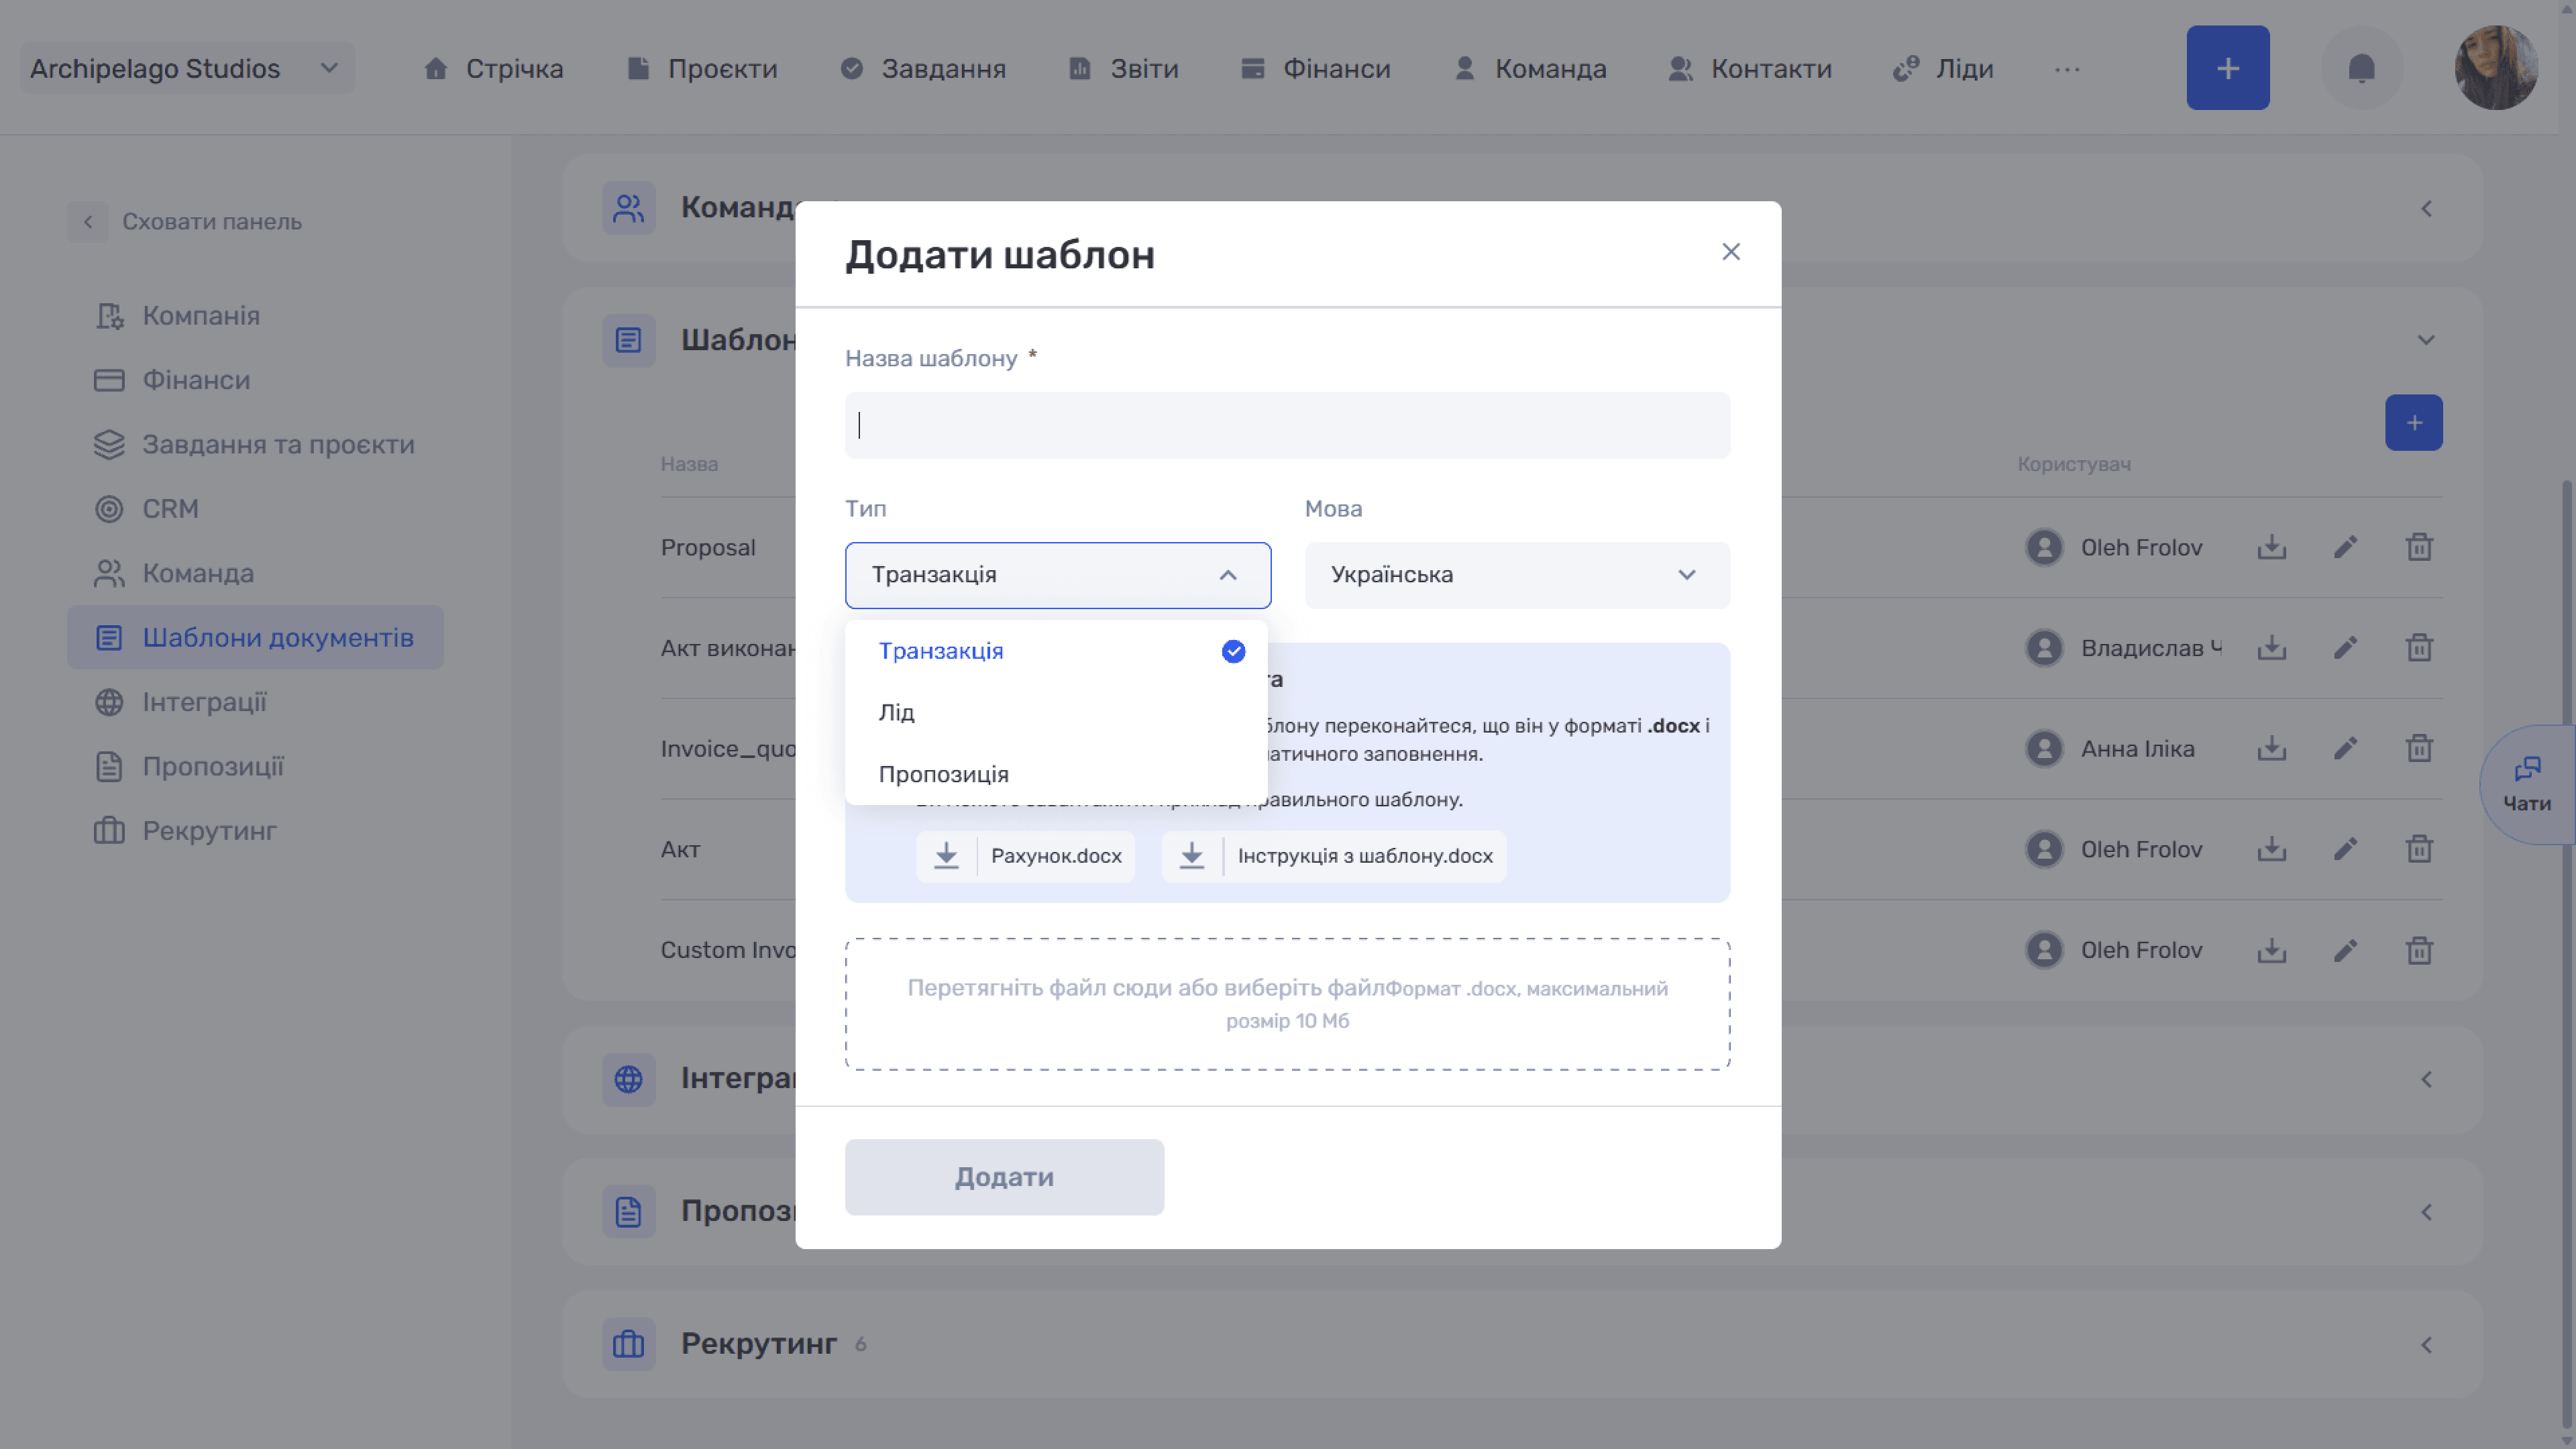
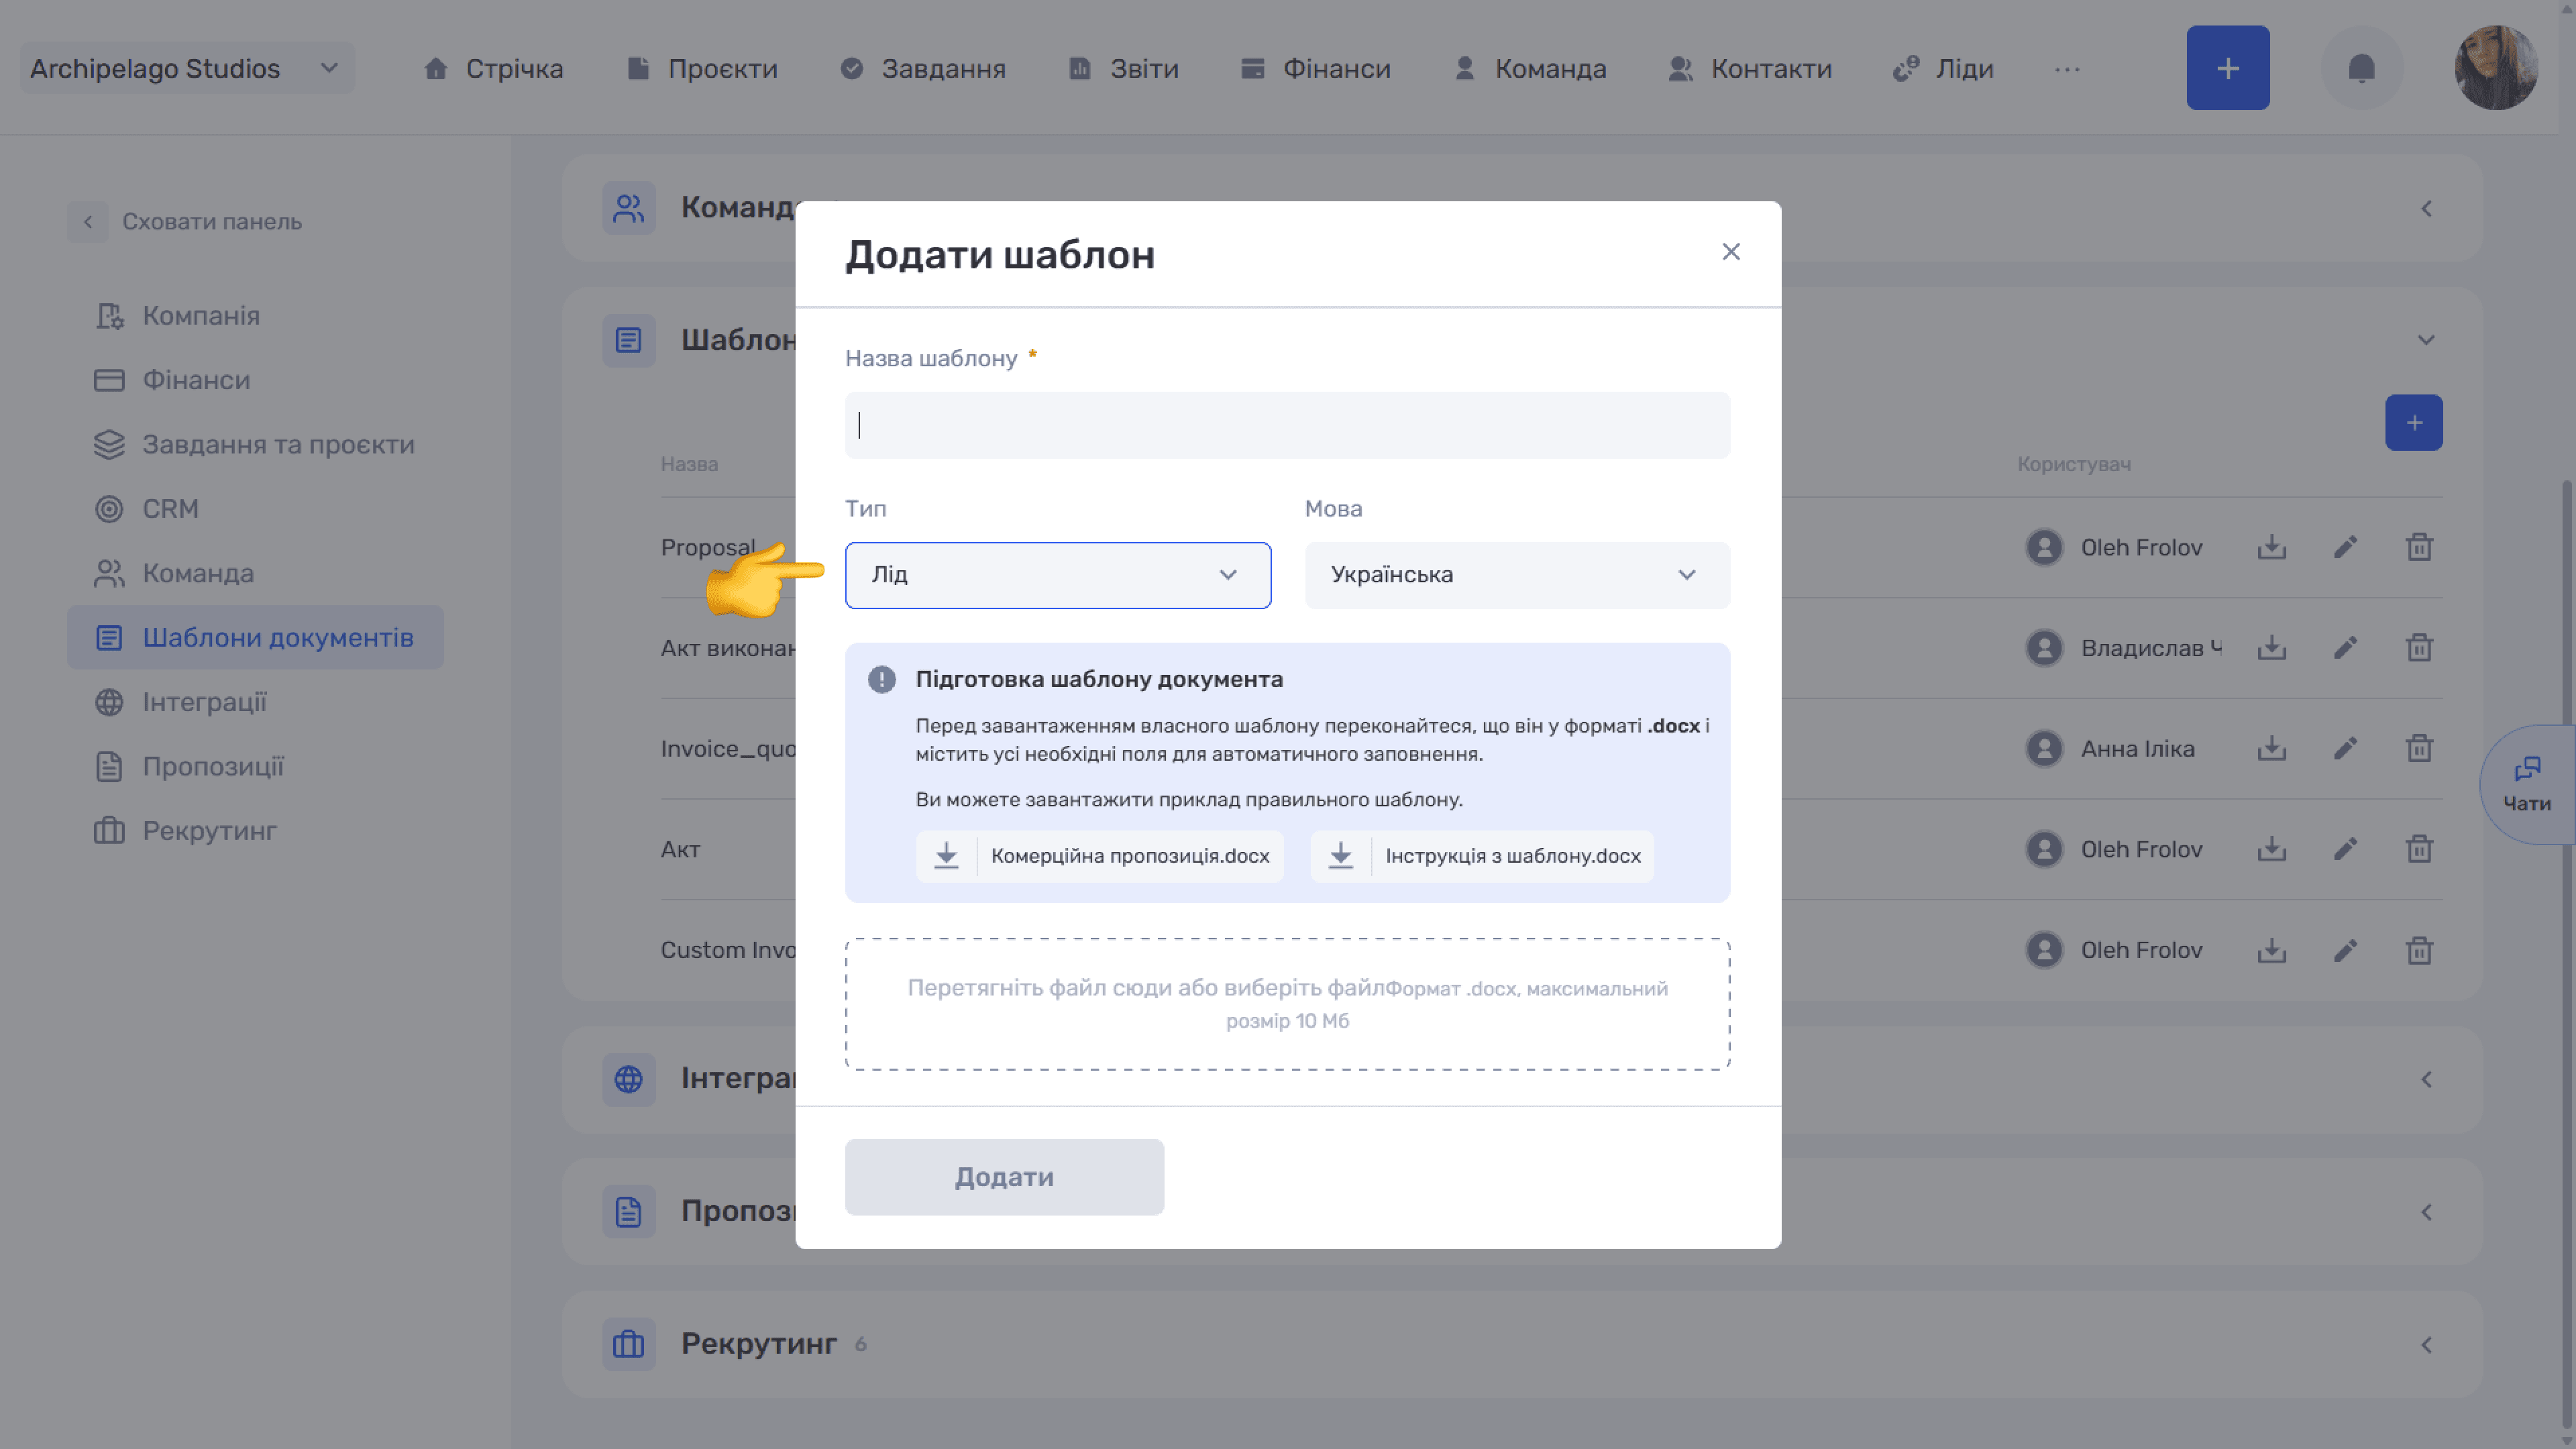
Click + (tooltip Add) in the upper-right corner of the block. The Add template window opens:
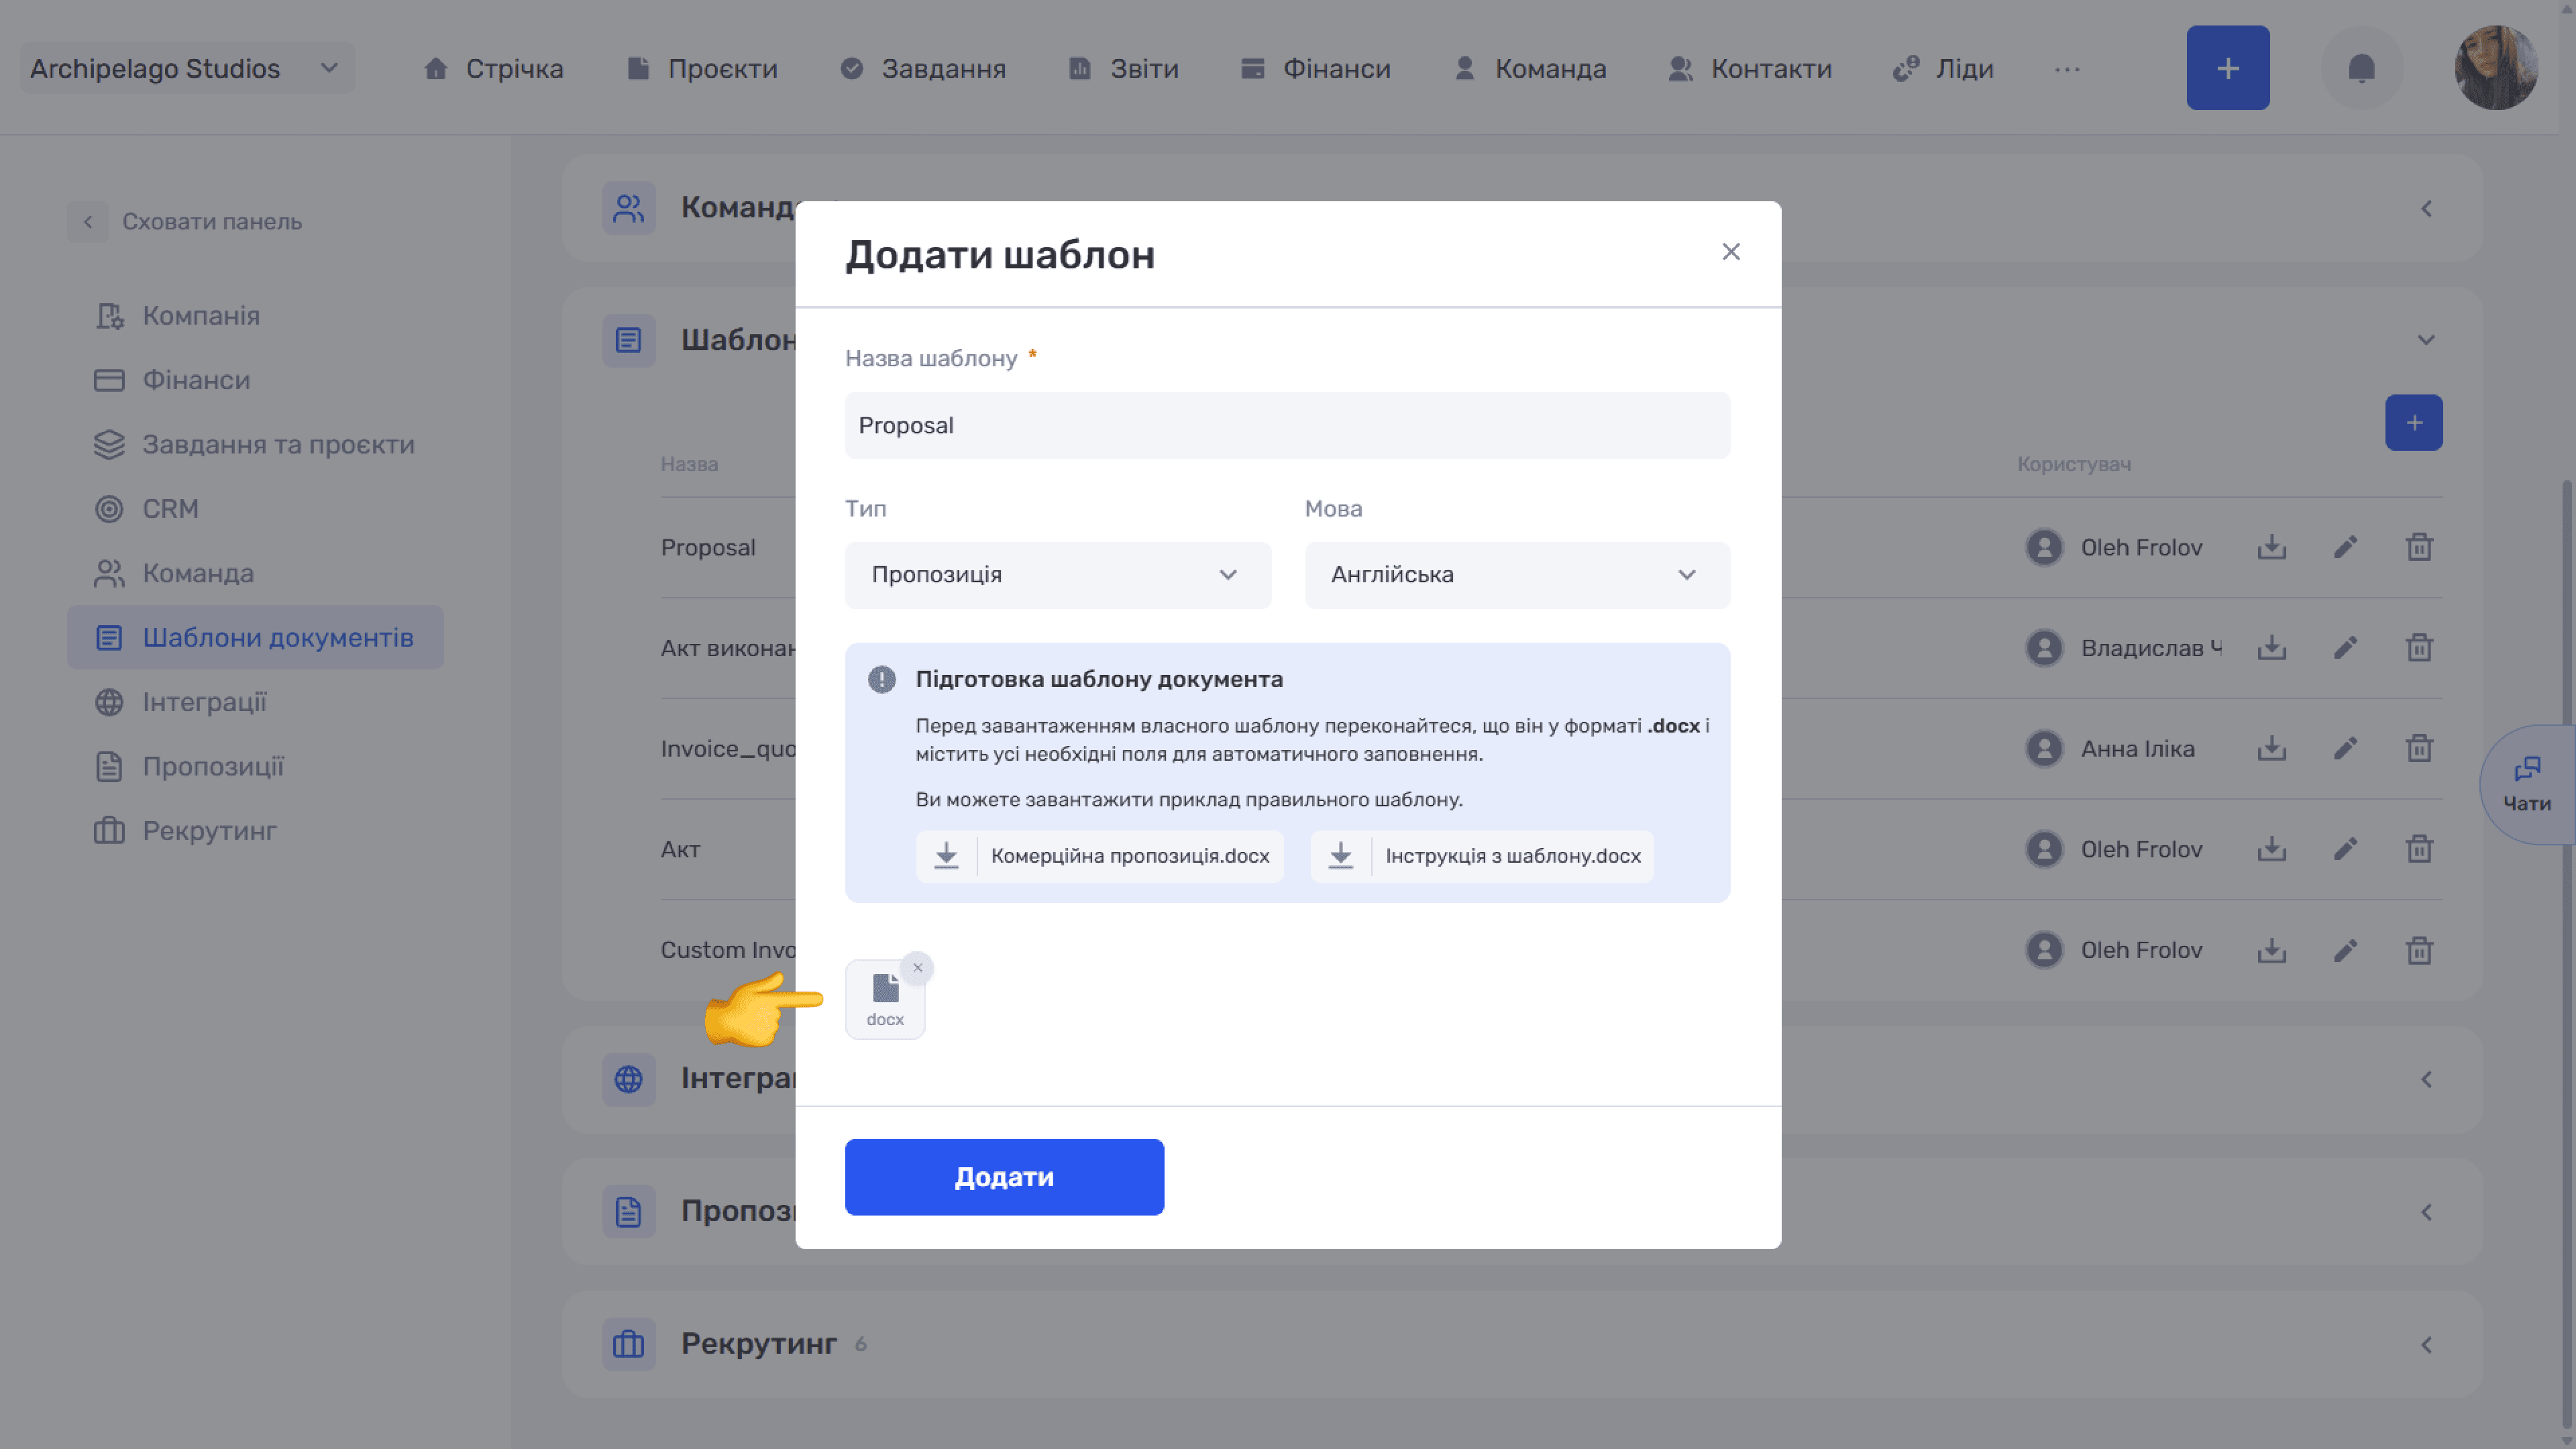
- Template name (required) — the name under which the template appears in the selection list during document generation.
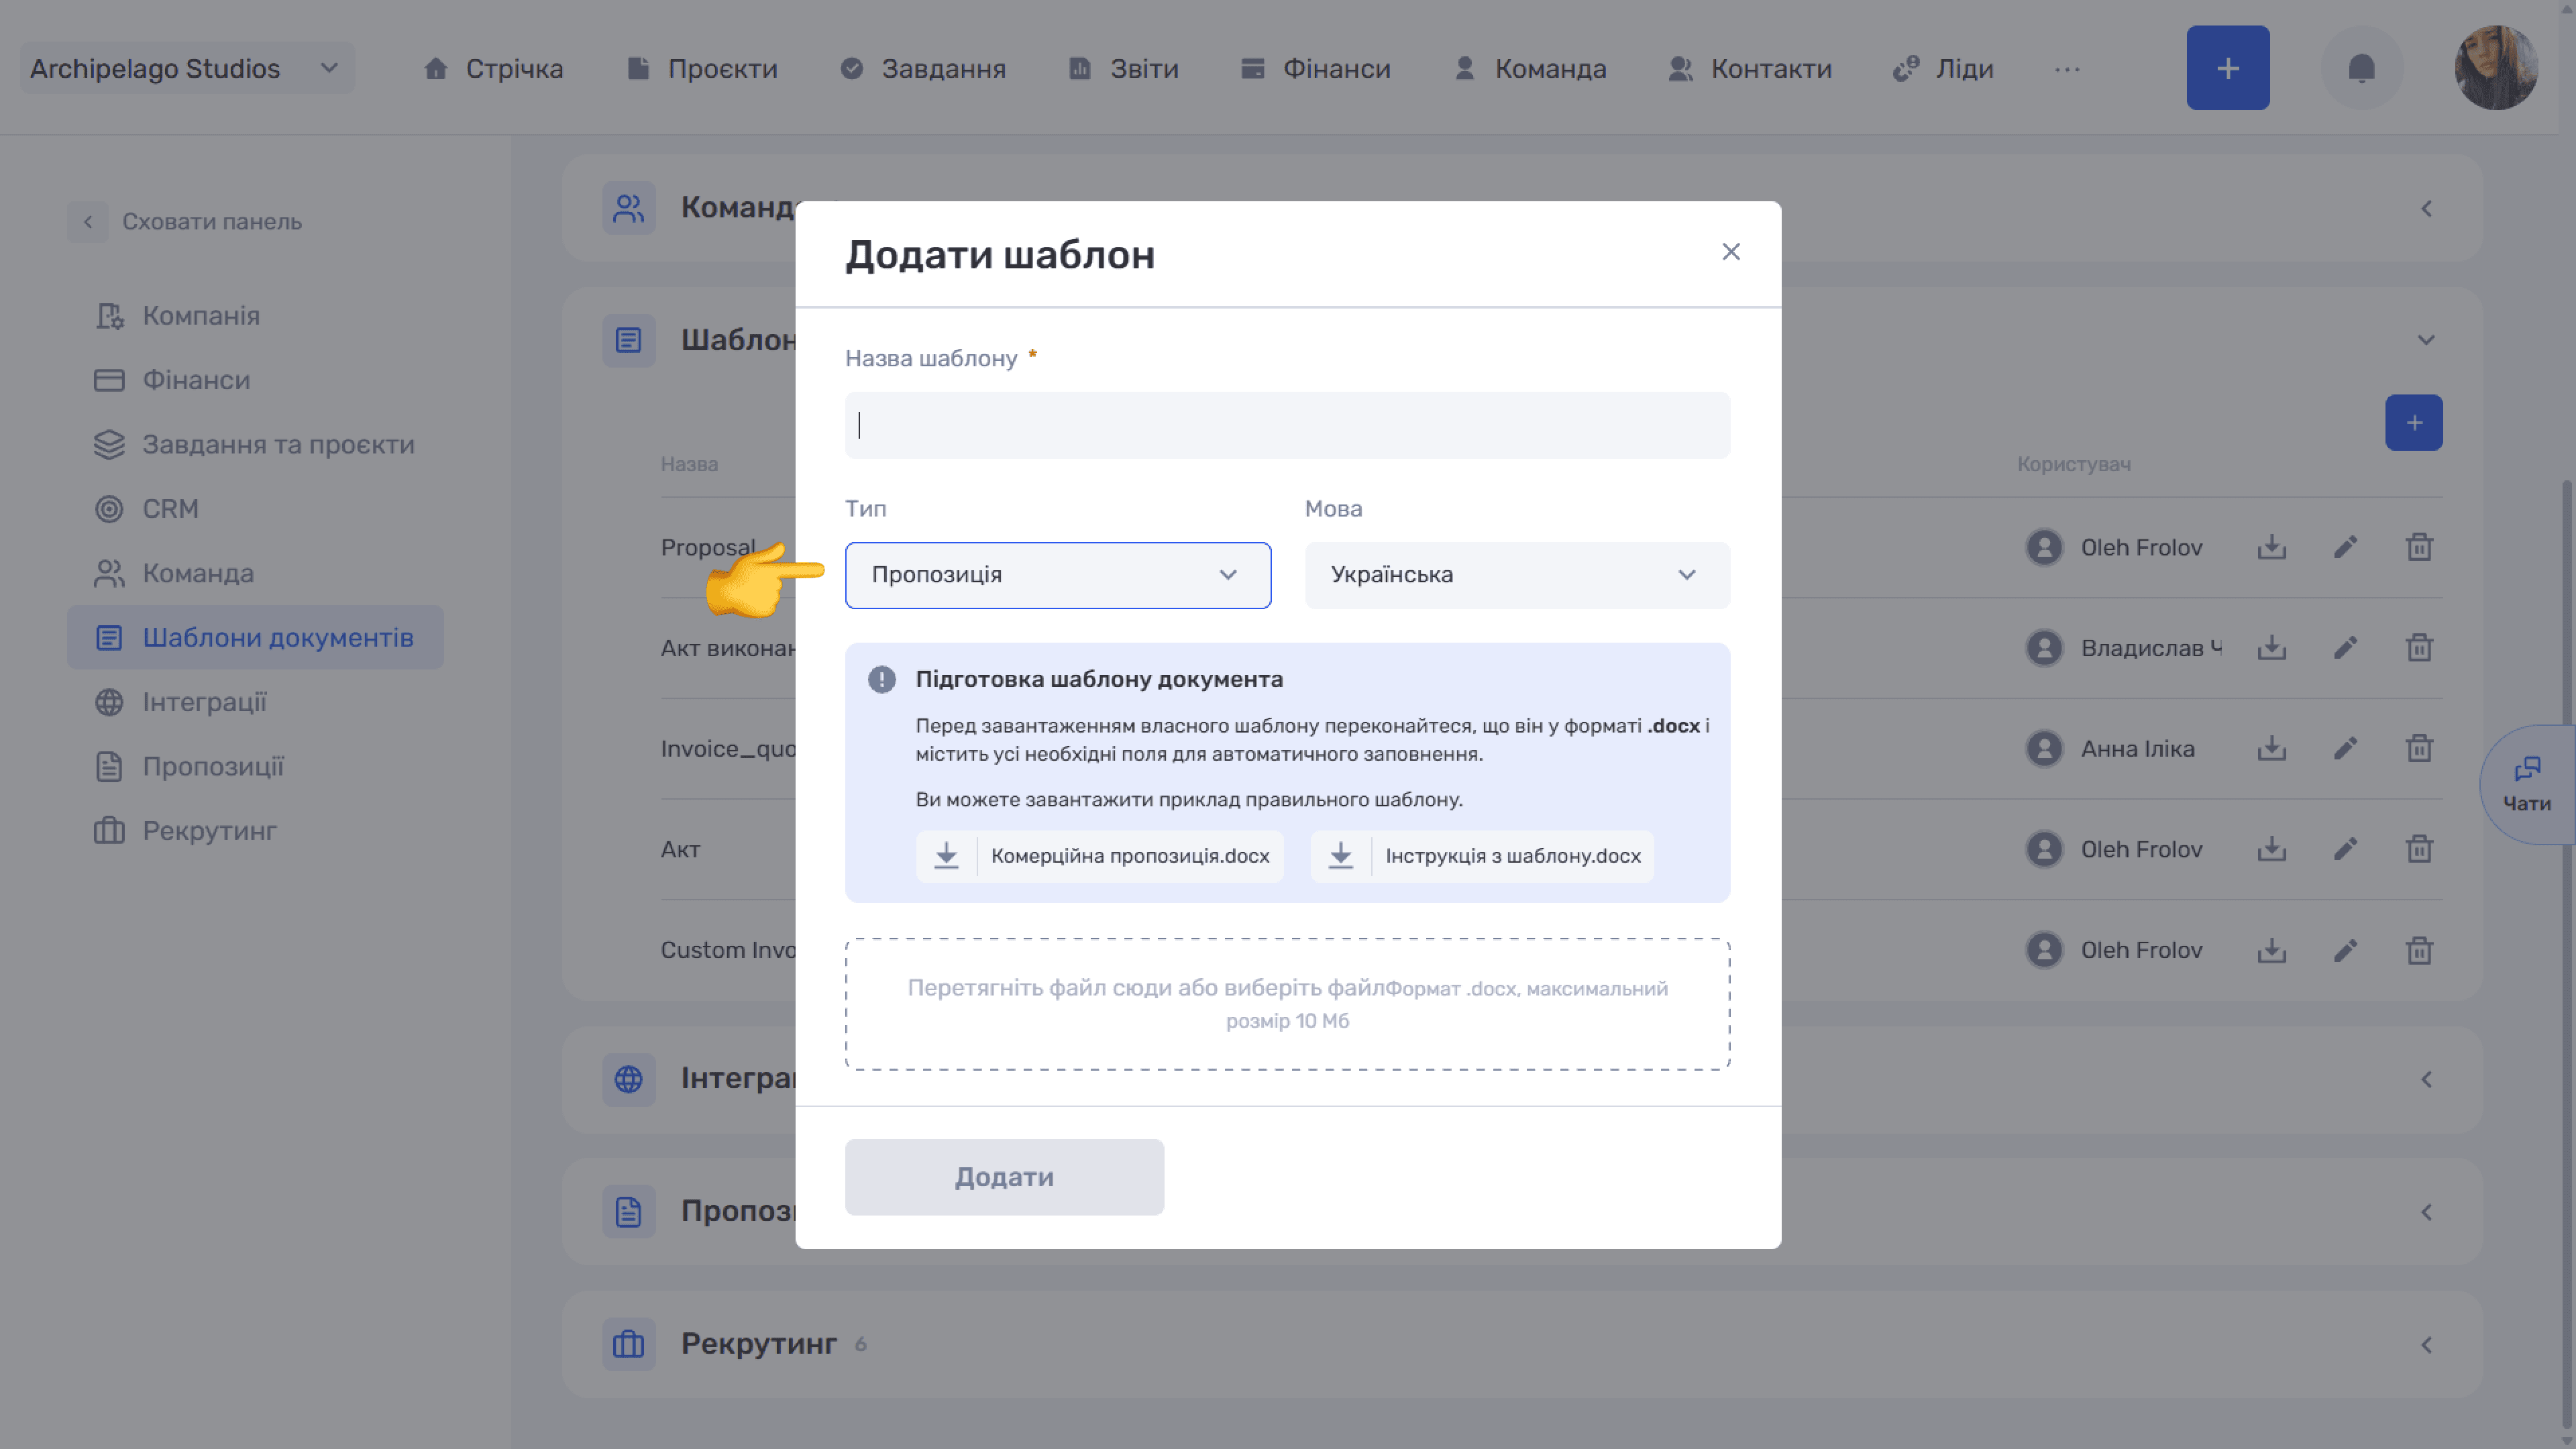
- Type — Transaction, Lead, or Quote. Defines which entity the document is generated from and which data is filled in.
- Language — the language of the finished document.
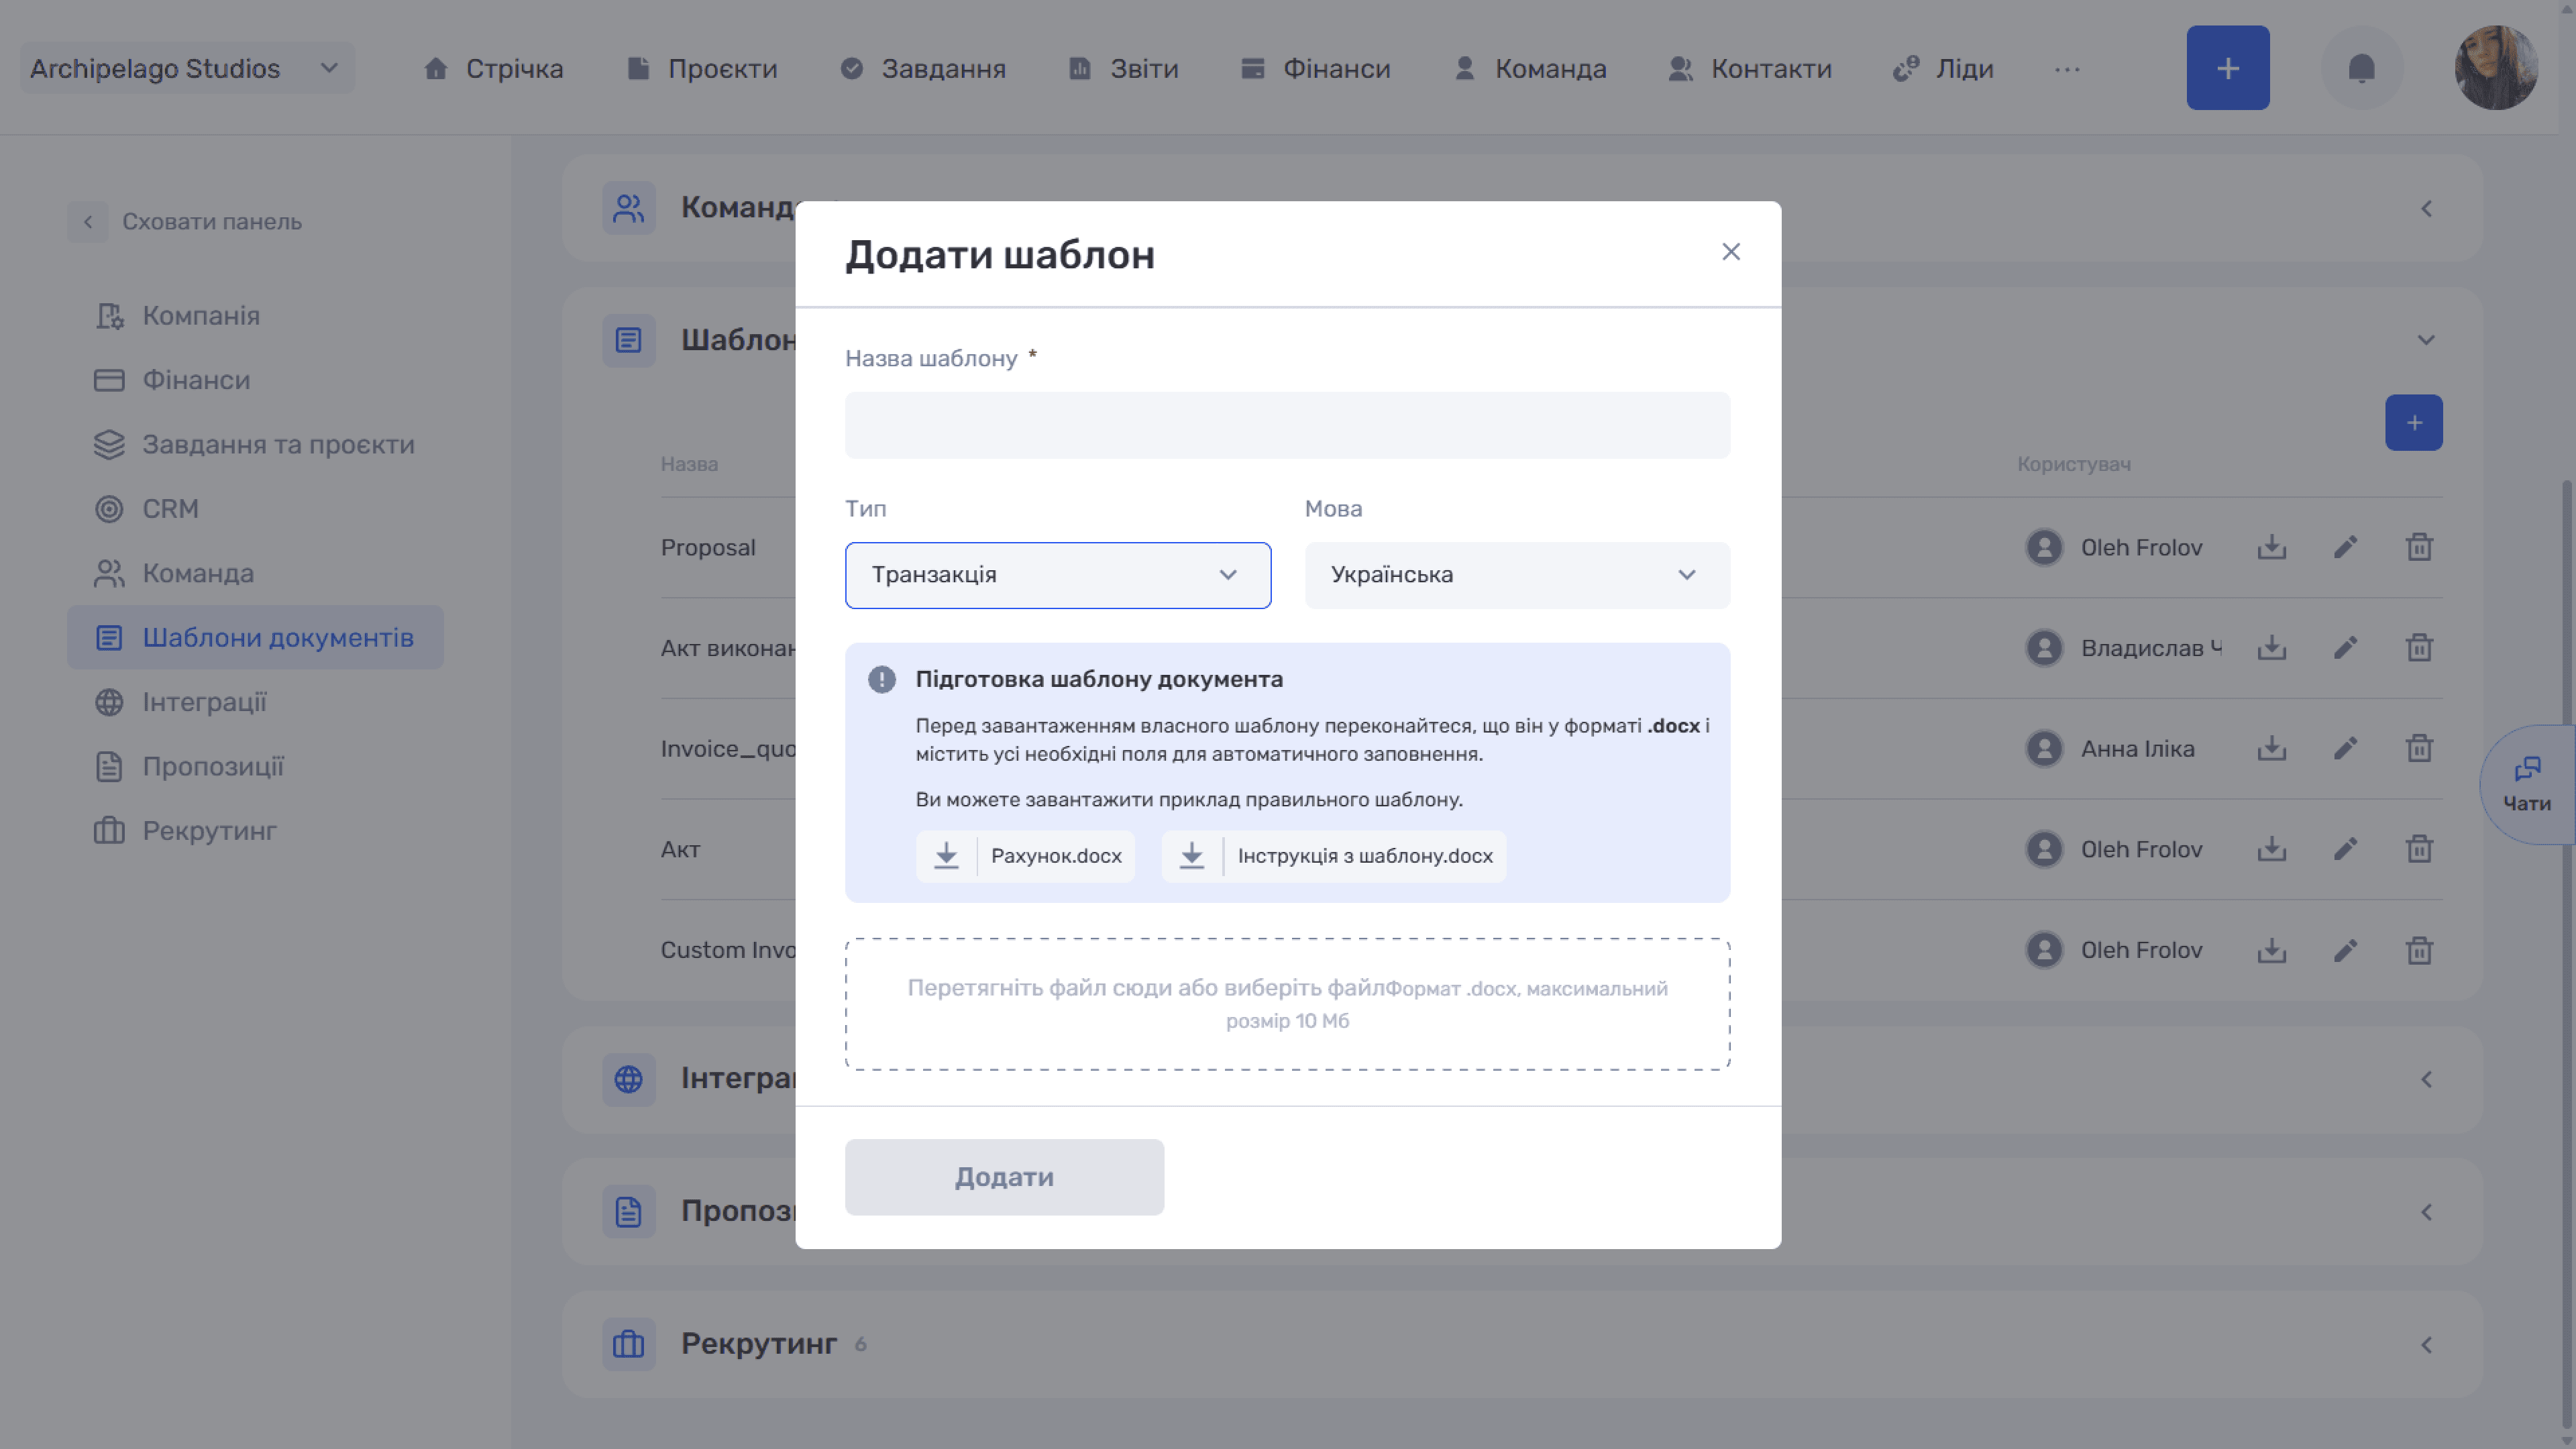
The Preparing a document template hint reminds you that the file must be in .docx format and contain fields for automatic filling. Two helper files can be downloaded here — they change depending on the selected type:
- a sample template: for a transaction — Invoice.docx, for a lead and a quote — Quote.docx;
- Template instructions.docx — a reference of available fields and syntax.
Please note
Both files — the sample and the instructions — are different for each type. Switch the Type before downloading them: for a lead and a quote the sample has the same name (Quote.docx) but contains different fields.
Below is the upload zone: drag a file in or pick it manually. Limits — .docx format, up to 10 MB. The uploaded file is shown as a chip; the cross on it removes the file. The Add button becomes active only after the name is filled in and the file is uploaded.
Please note
The fastest way is to download the sample for the type you need, open it in Word or Google Docs, and replace the text with your own, leaving the placeholder fields in place.
How a template works
Instead of real values, the document contains placeholders in curly braces — during generation the system fills them with data from if.team.
The set of available fields depends on the template type. Transaction, lead, and quote templates refer to different entities, so fields from one type do not work in another. The current list is always in the Template instructions.docx file — it differs for each type.
Common rules
The capitalize modifier returns a value with a capital letter: {capitalize(date.monthWord)} gives "August" instead of "august".
Amount modifiers. Price fields accept a format qualifier:
- .number — the numeric value
- .integer — the integer part only
- .integerWords — the integer part in words
- .fractional — cents as a number
- .fractionalWords — cents in words
For example, {$quote.amount.integerWords}. The modifier is optional — without it the field returns the value in the default format — but it is worth specifying every time: that way you know exactly what will end up in the document. In the tables below such fields are marked with an **asterisk (*)**.
Loops repeat a fragment of the document for each item in a list. The opening and closing tags must come in pairs, and inside the loop the item is referenced with the $ prefix:
{FOR item IN items}
{$item.name} — {$item.quantity}
{END-FOR item}
Loops also work in Word tables: put {FOR ...} and {END-FOR ...} in separate table rows, with a row of item fields between them.
Row numbering: {$idx + 1} inside the item loop ($idx itself counts from zero).
Item image: {IMAGE getImage($item.image, width, height)} — replace width and height with integers.
Custom fields are inserted by name in square brackets and are available at several levels:
- Lead — {customFields['Field name']}
- Client (in a lead) — {client.customFields['Field name']}
- Counterparty (in a transaction) — {counterparty.customFields['Field name']}
- Quote item — {$item.customFields['Field name']}
- Quote client — {$client.customFields['Field name']}
The name must match the field name in the system exactly — including case and spaces. Use straight apostrophes ', not typographic quotes: Word inserts them automatically, so turn off autocorrect or insert the character manually.
Transaction template
- Amount — {amount}*
- Rates — {amountByRate}* — amount in the company currency, {recipientAmountByRate}* — in the account currency
- Date — {date.day}, {date.month}, {date.monthWord}, {date.year}
- Other — {comment} — transaction comment
- Company account — {account.name}, {account.bank}, {account.iban}, {account.legalAddress}, {account.registrationNumber}
- Counterparty — {counterparty.name}, {counterparty.email}, {counterparty.phone}. Clients only: {counterparty.iban}, {counterparty.bank}, {counterparty.address}, {counterparty.registrationNumber}
If a quote is attached to the transaction, it is available via {quote}: {quote.name}, {quote.description}, {quote.amount}*, {quote.amountByDiscount}*, {quote.currency.code}, {quote.currency.symbol}.
Lead template
- Lead — {name} — name, {description} — description
- Amount — {amount}*
- Currency — {currency.code} (e.g. USD), {currency.symbol} (e.g. $), {exchangeRate} — rate to the company currency
- Date — {date.day}, {date.month}, {date.monthWord}, {date.year}
- Contact — {contactName} — contact person, {phone}, {email} — phone and email linked to the lead
- UTM tags — {utmSource}, {utmMedium}, {utmCampaign}, {utmContent}, {utmTerm}
- Client — {client.name}, {client.email}, {client.phone}, {client.iban}, {client.bank}, {client.address}, {client.registrationNumber}
A lead can have several quotes, so they are iterated with an outer loop:
{FOR quote IN quotes}
{$quote.name} — {$quote.amountByDiscount.number} {$quote.currency.symbol}
{FOR category IN $quote.categories}
{$category.name}
{FOR item IN $category.items}
{$item.name} | {$item.quantity} | {$item.finalAmount.number}
{END-FOR item}
{END-FOR category}
{END-FOR quote}
Inside, the following are available: {$quote.name}, {$quote.description}, {$quote.amount}*, {$quote.amountByDiscount}*, {$quote.currency.code}, {$quote.currency.symbol}.
Quote template
Here the quote itself is the document context, so its fields are used without a prefix.
- Quote — {name} — name, {description} — description
- Created — {createdAt} (format 31.12.2026), plus {createdAt.day}, {createdAt.month}, {createdAt.year}, {createdAt.monthWord}
- Amount — {amount}*, {amountByDiscount}* — with the discount applied
- Currency — {currency.code}, {currency.symbol}
Items are iterated without the quote prefix:
{FOR category IN categories}
{$category.name}
{FOR item IN $category.items}
{$item.name} | {$item.quantity} | {$item.finalAmount.number} {currency.symbol}
{END-FOR item}
{END-FOR category}
If you do not need grouping by category, use the flat loop {FOR item IN items} … {END-FOR item}.
{$item.name} — name, {$item.quantity} — quantity, {$item.unit} — full unit of measurement ("pieces"), {$item.unitShort} — short form ("pcs"), {$item.amount}* — original price, {$item.amountByRate}* — price in the company currency, {$item.totalAmount}* — quantity × price, {$item.discountPercent} — discount percentage, {$item.finalAmount}* — final price with the discount.
The category name can be inserted in two ways, depending on whether the items are grouped:
- if you use the category loop, the name comes from the category: {$category.name};
- if the items are output as a flat list, the item itself provides the category name: {$item.category} — without .name.
A quote can have several clients. They are iterated with a separate loop:
{FOR client IN clients}
{$client.name} | {$client.email} | {$client.iban}
{END-FOR client}
Available fields: {$client.name}, {$client.email}, {$client.phone}, {$client.iban}, {$client.bank}, {$client.address}, {$client.registrationNumber}.
In a lead template this loop is nested inside the quote loop, and the root gets a prefix: {FOR client IN $quote.clients}.
Please note
A lead can have several quotes, so it needs an extra, outer loop — {FOR quote IN quotes} … {END-FOR quote}. A transaction has one quote — it is referenced directly via {quote}. In a quote template you do not need to reference it at all: the loop starts right from items or categories.
- Lead: quotes in the entity — several; outer loop — {FOR quote IN quotes}; iterating items — {FOR category IN $quote.categories} → {FOR item IN $category.items}
- Transaction: quotes in the entity — one; outer loop — not needed; iterating items — {FOR category IN quote.categories} or {FOR item IN quote.items}
- Quote: quotes in the entity — the quote itself; outer loop — not needed; iterating items — {FOR category IN categories} or {FOR item IN items}
Generating a document
How you start generation depends on the entity.
Transaction and lead
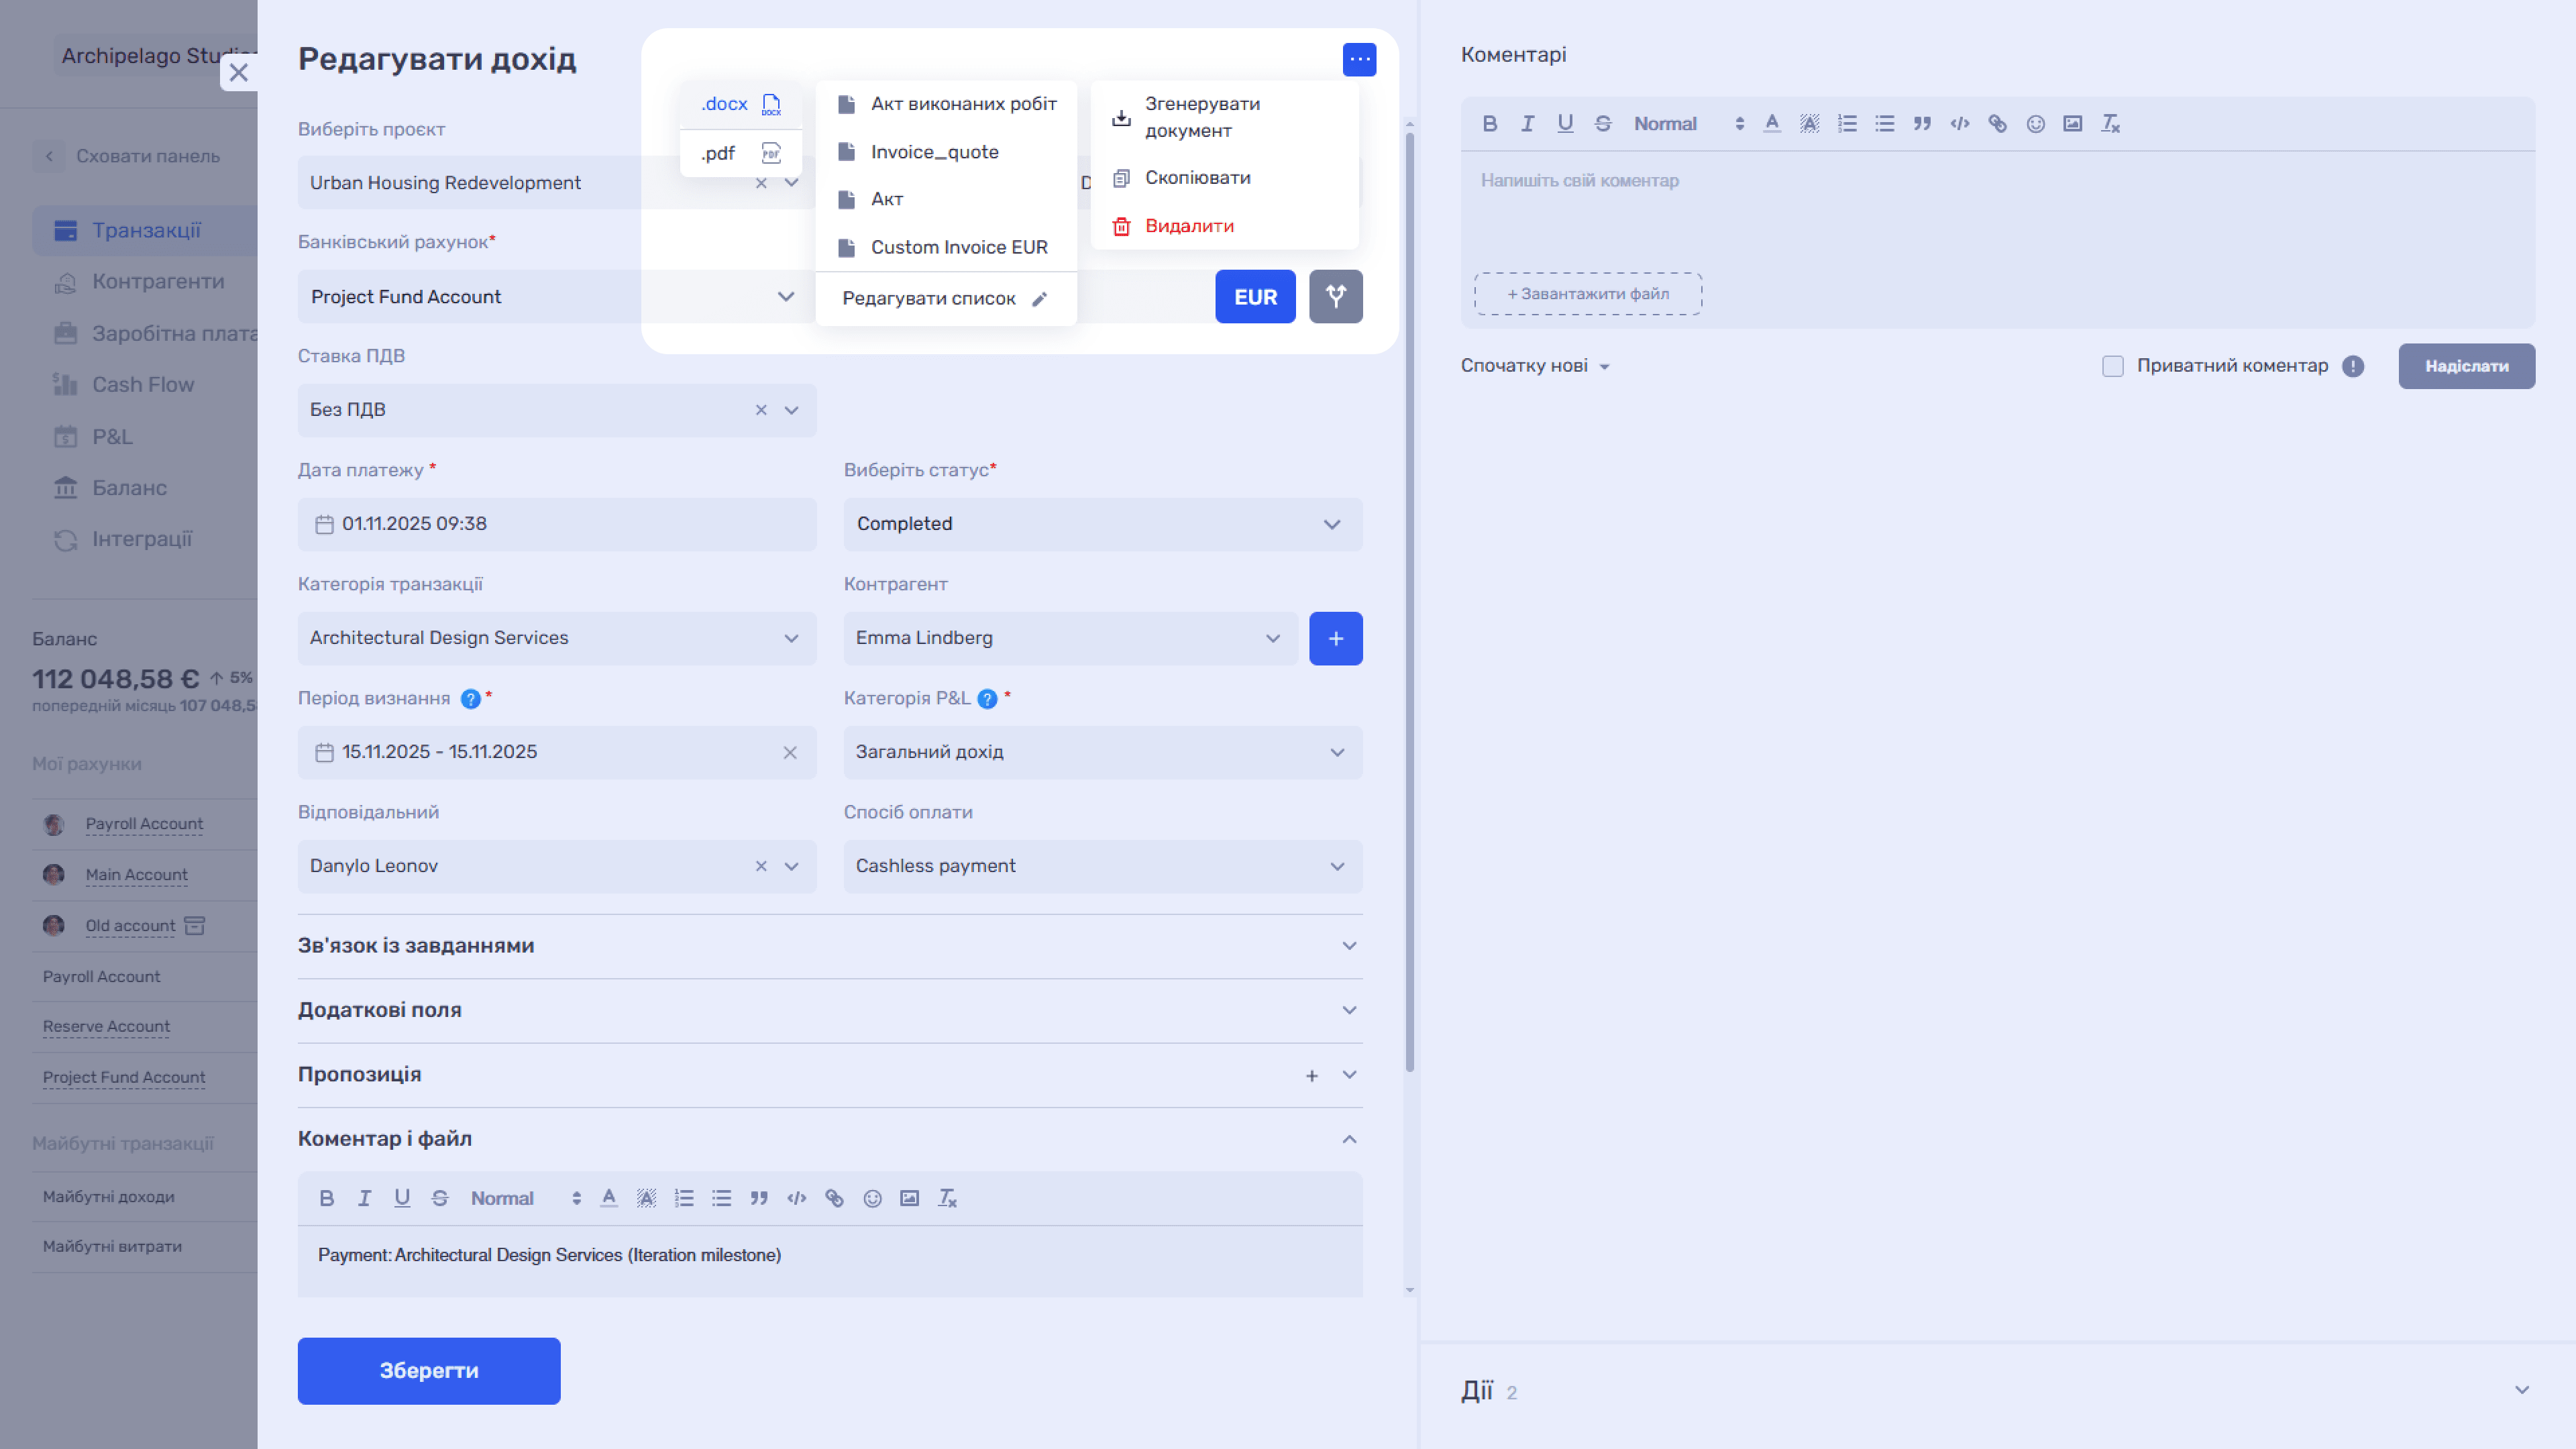
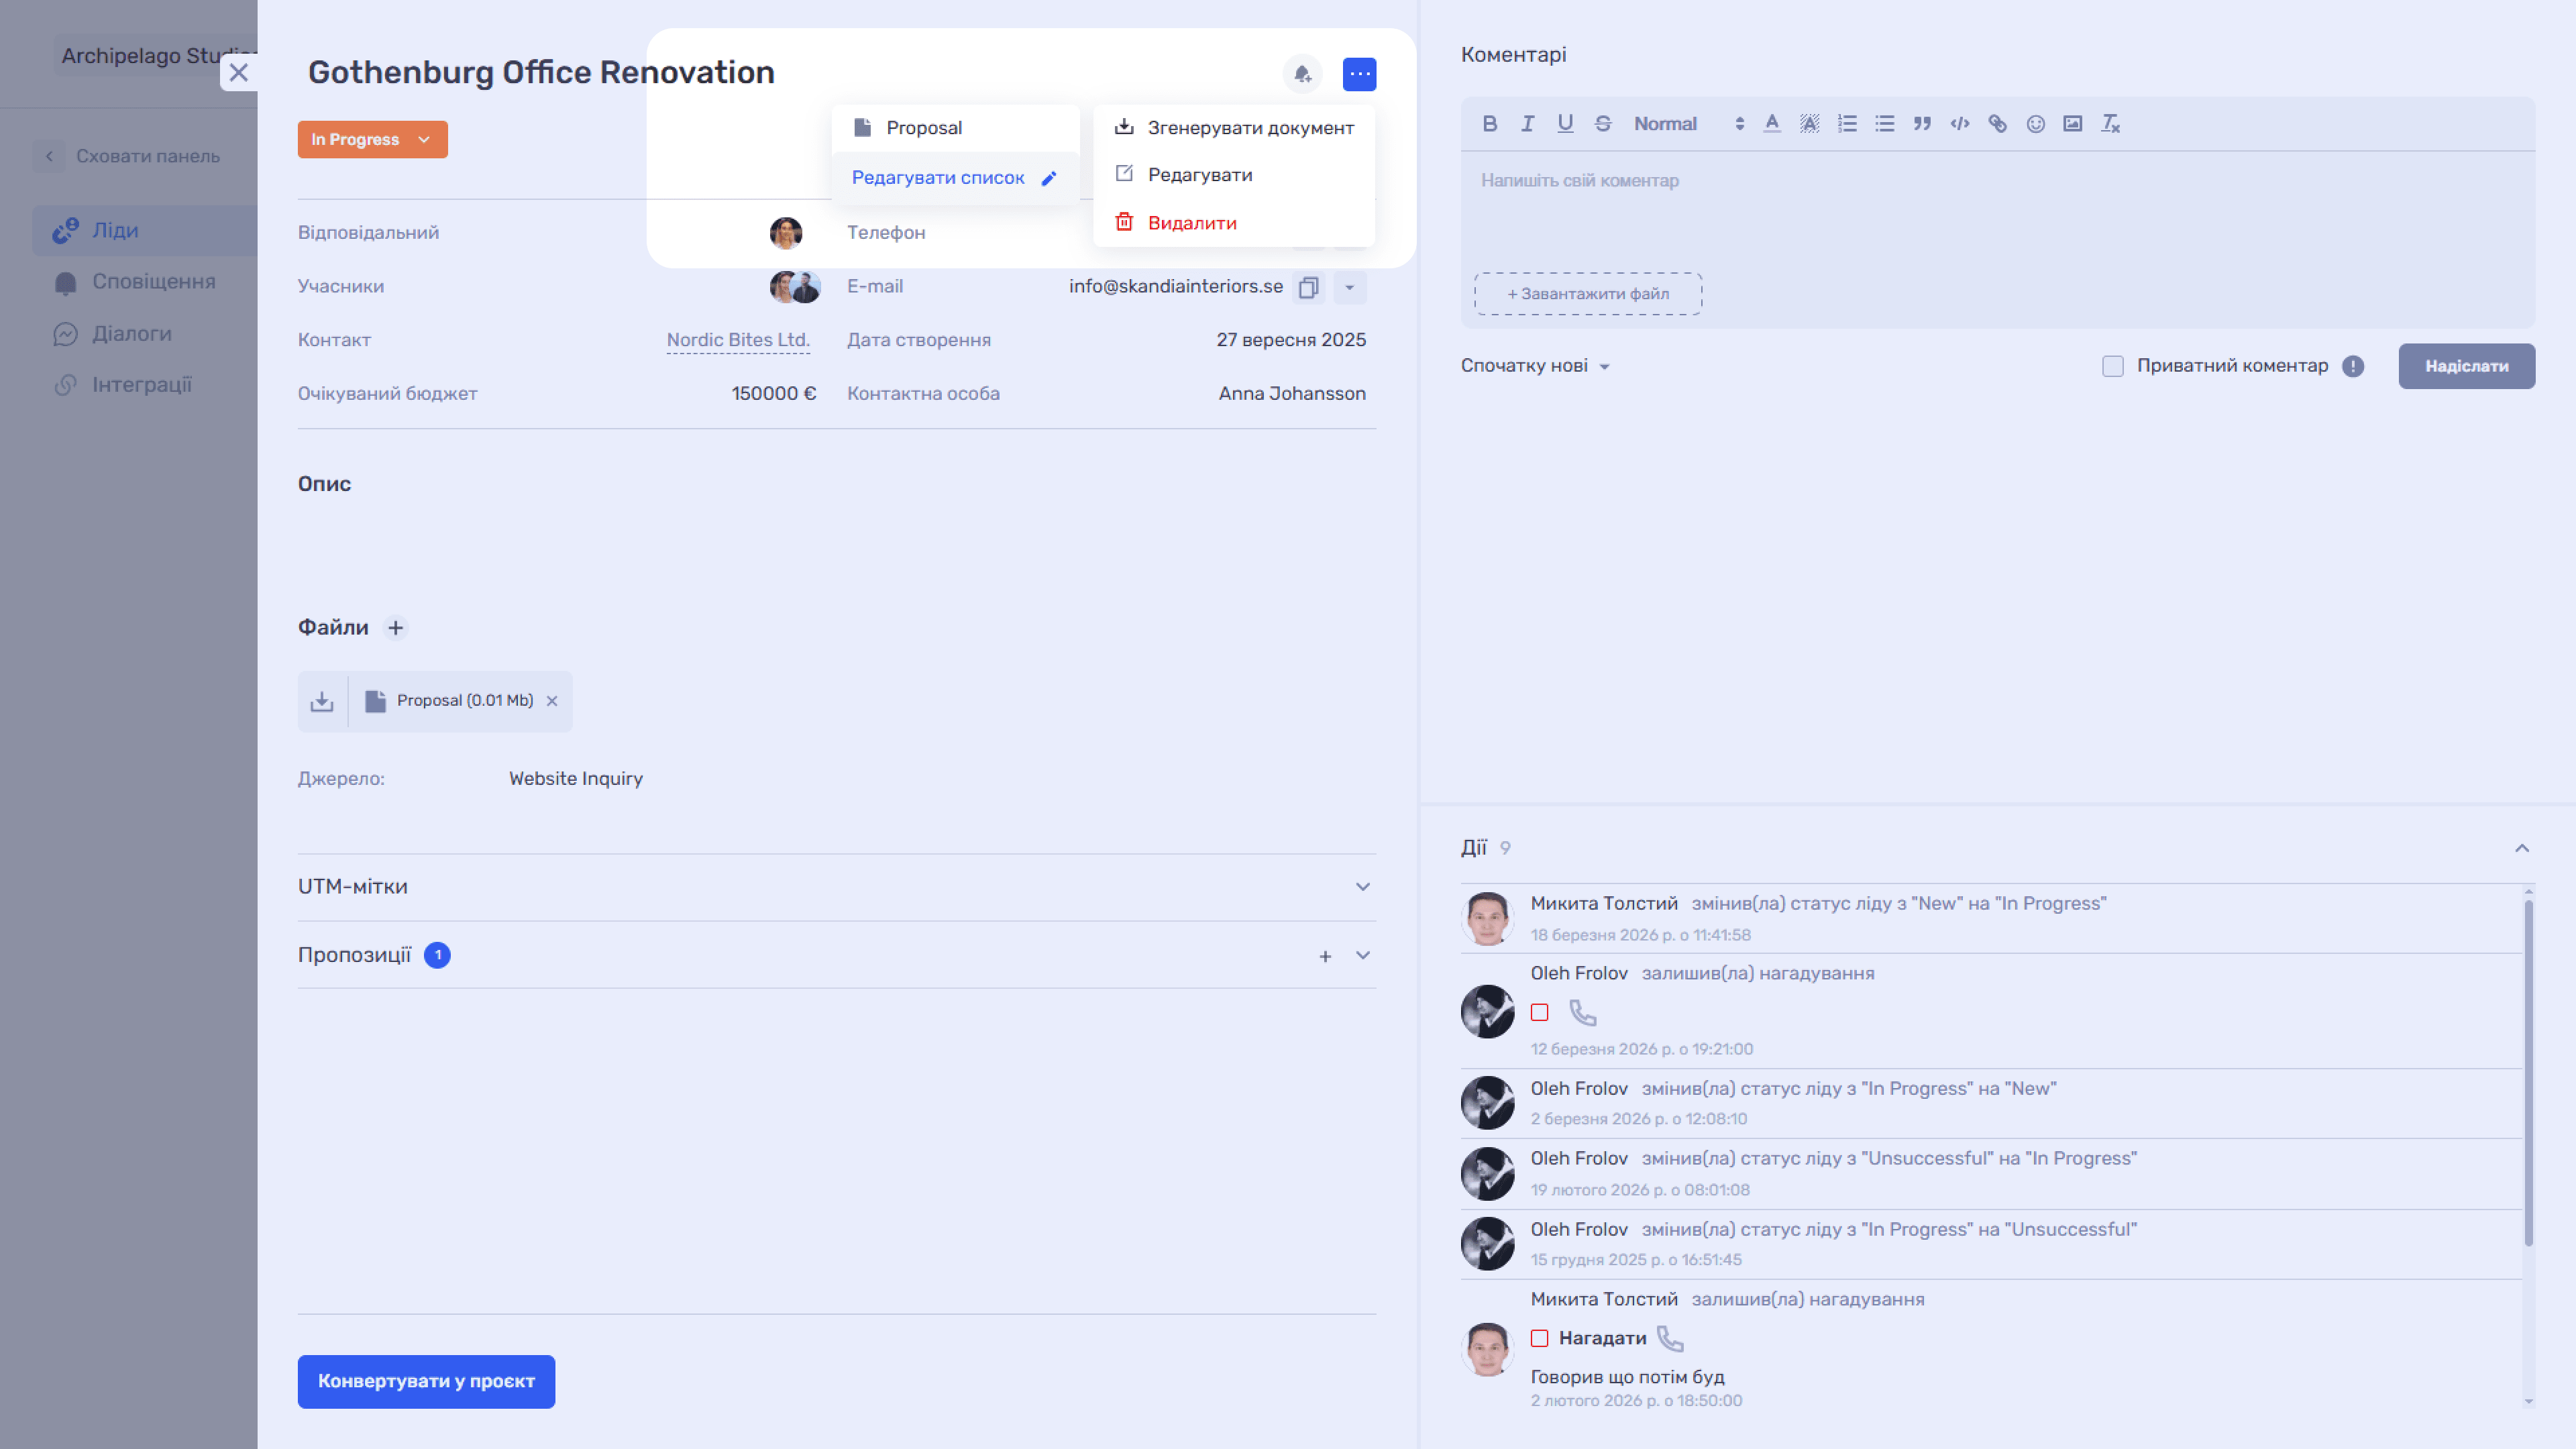
Open the card, click the ... menu in the upper-right corner, and select Generate document.
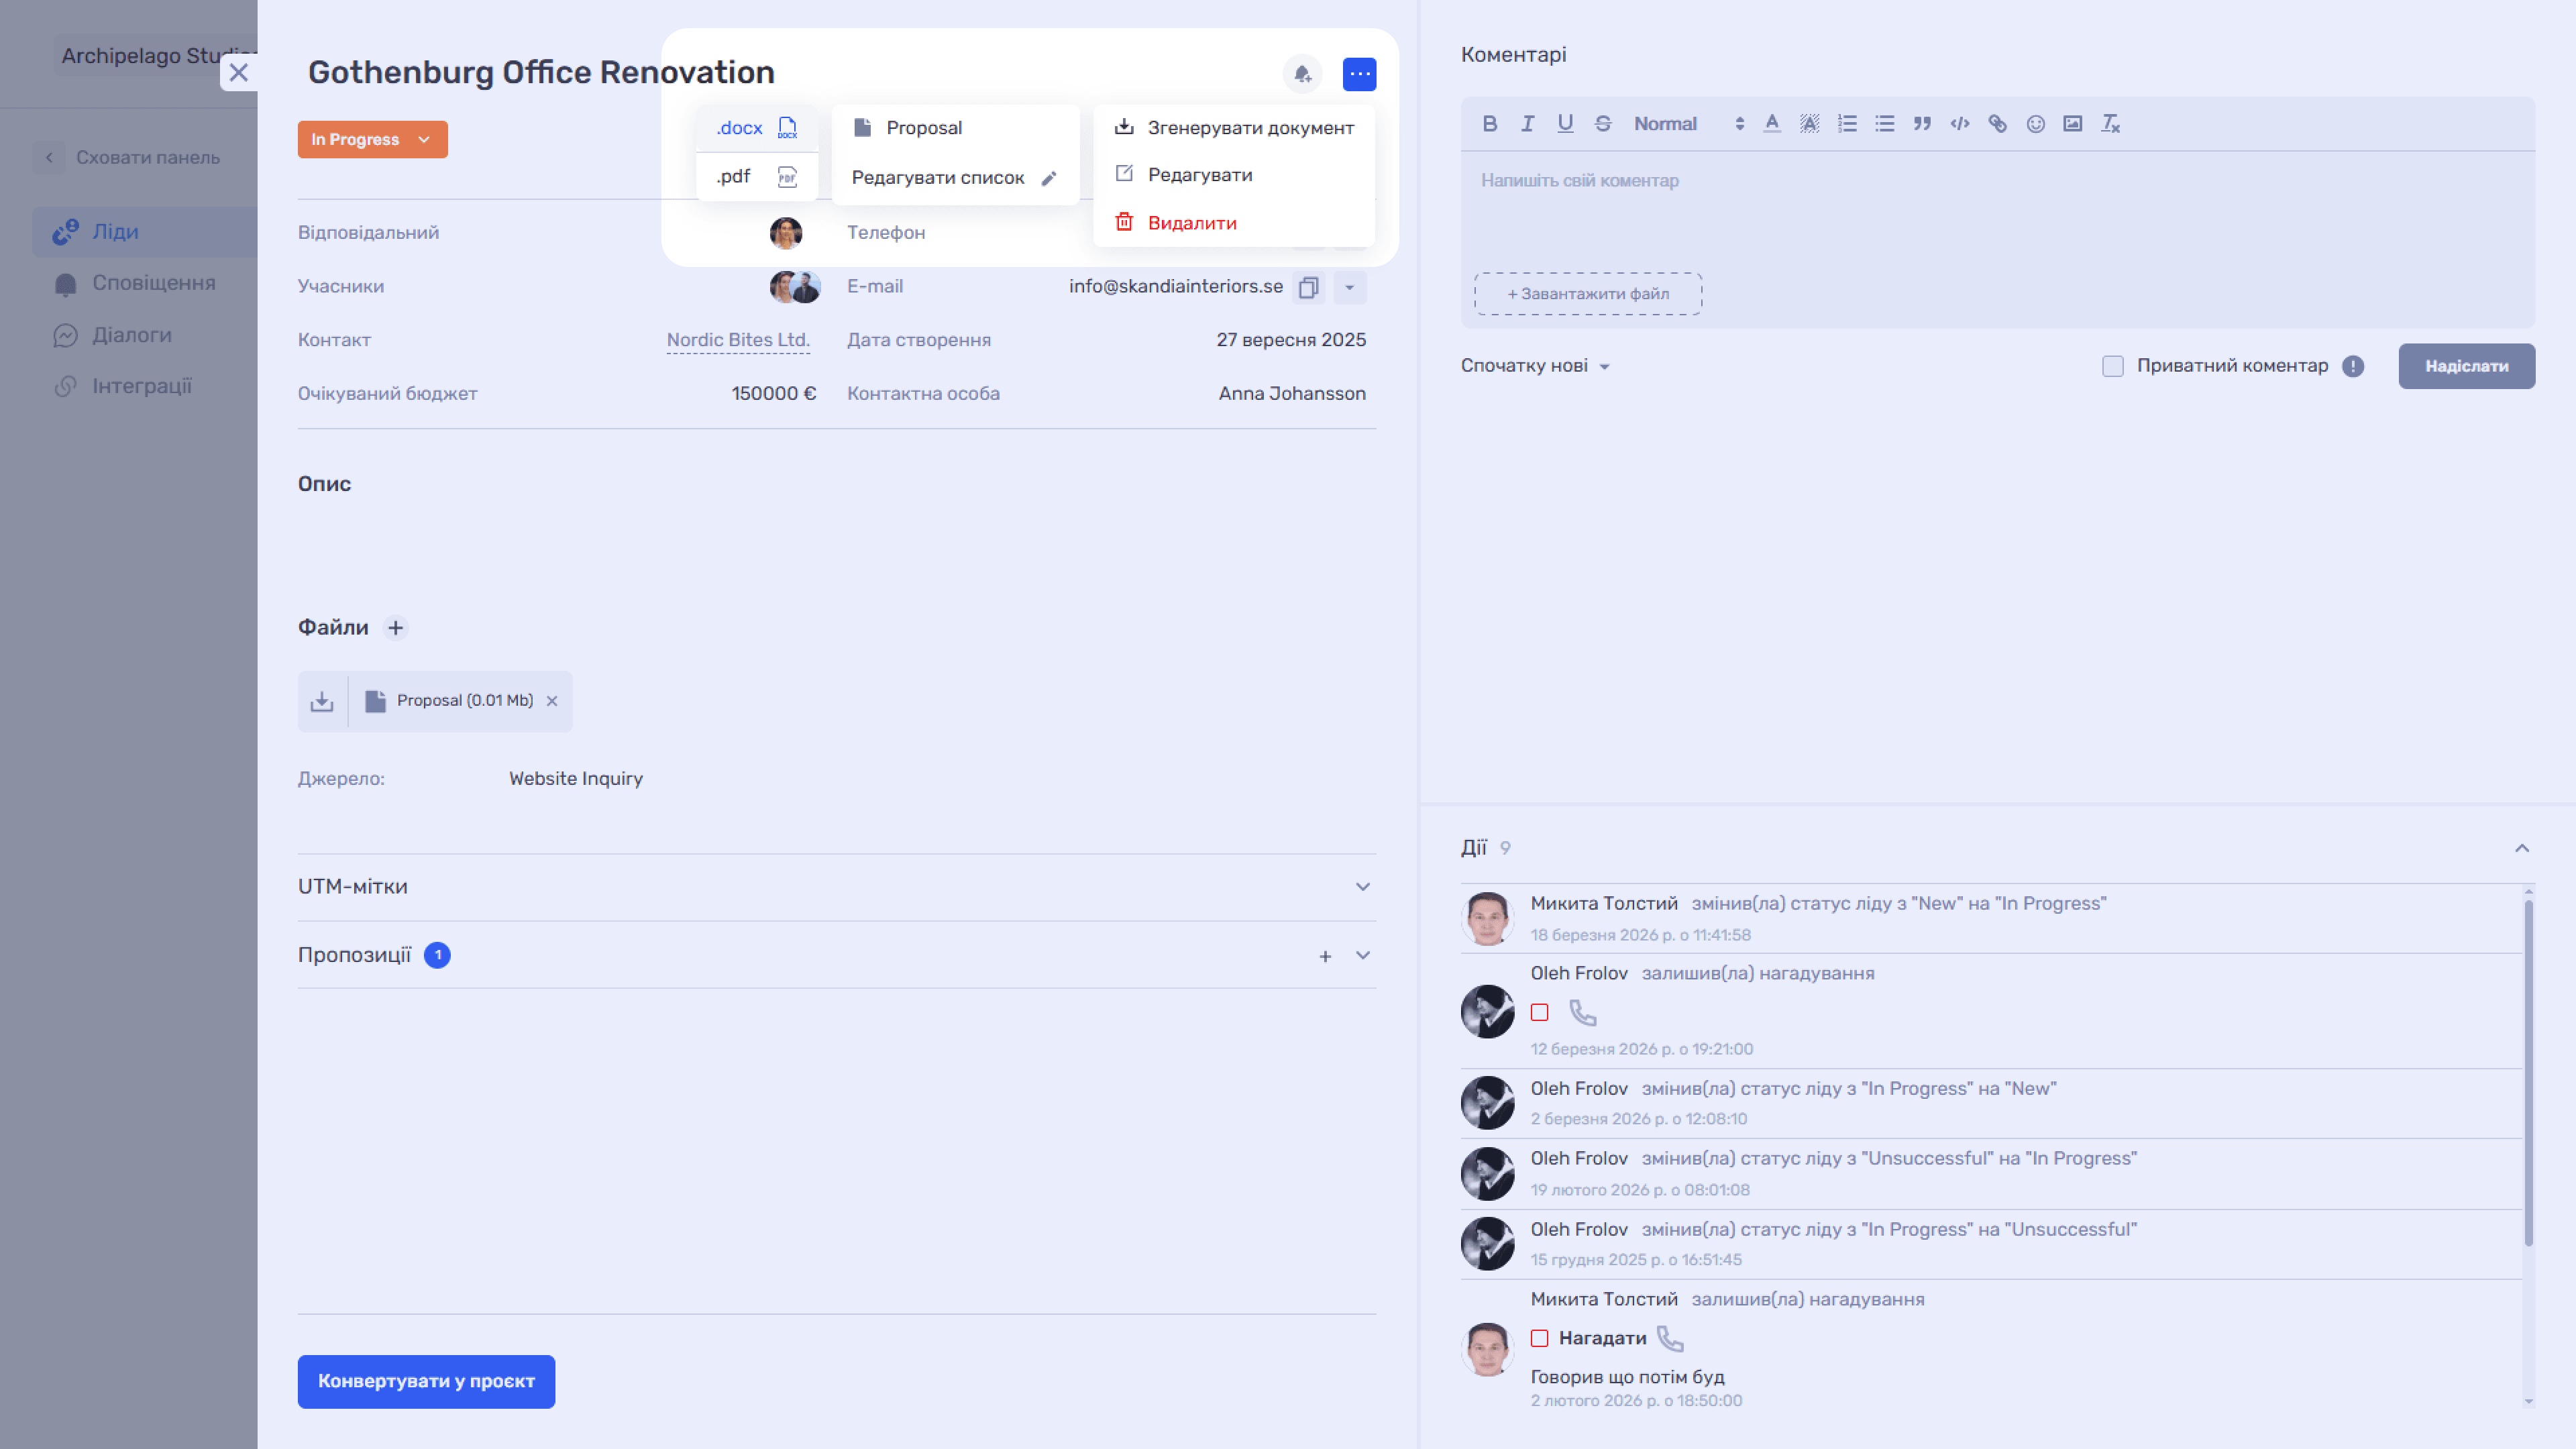
Quote
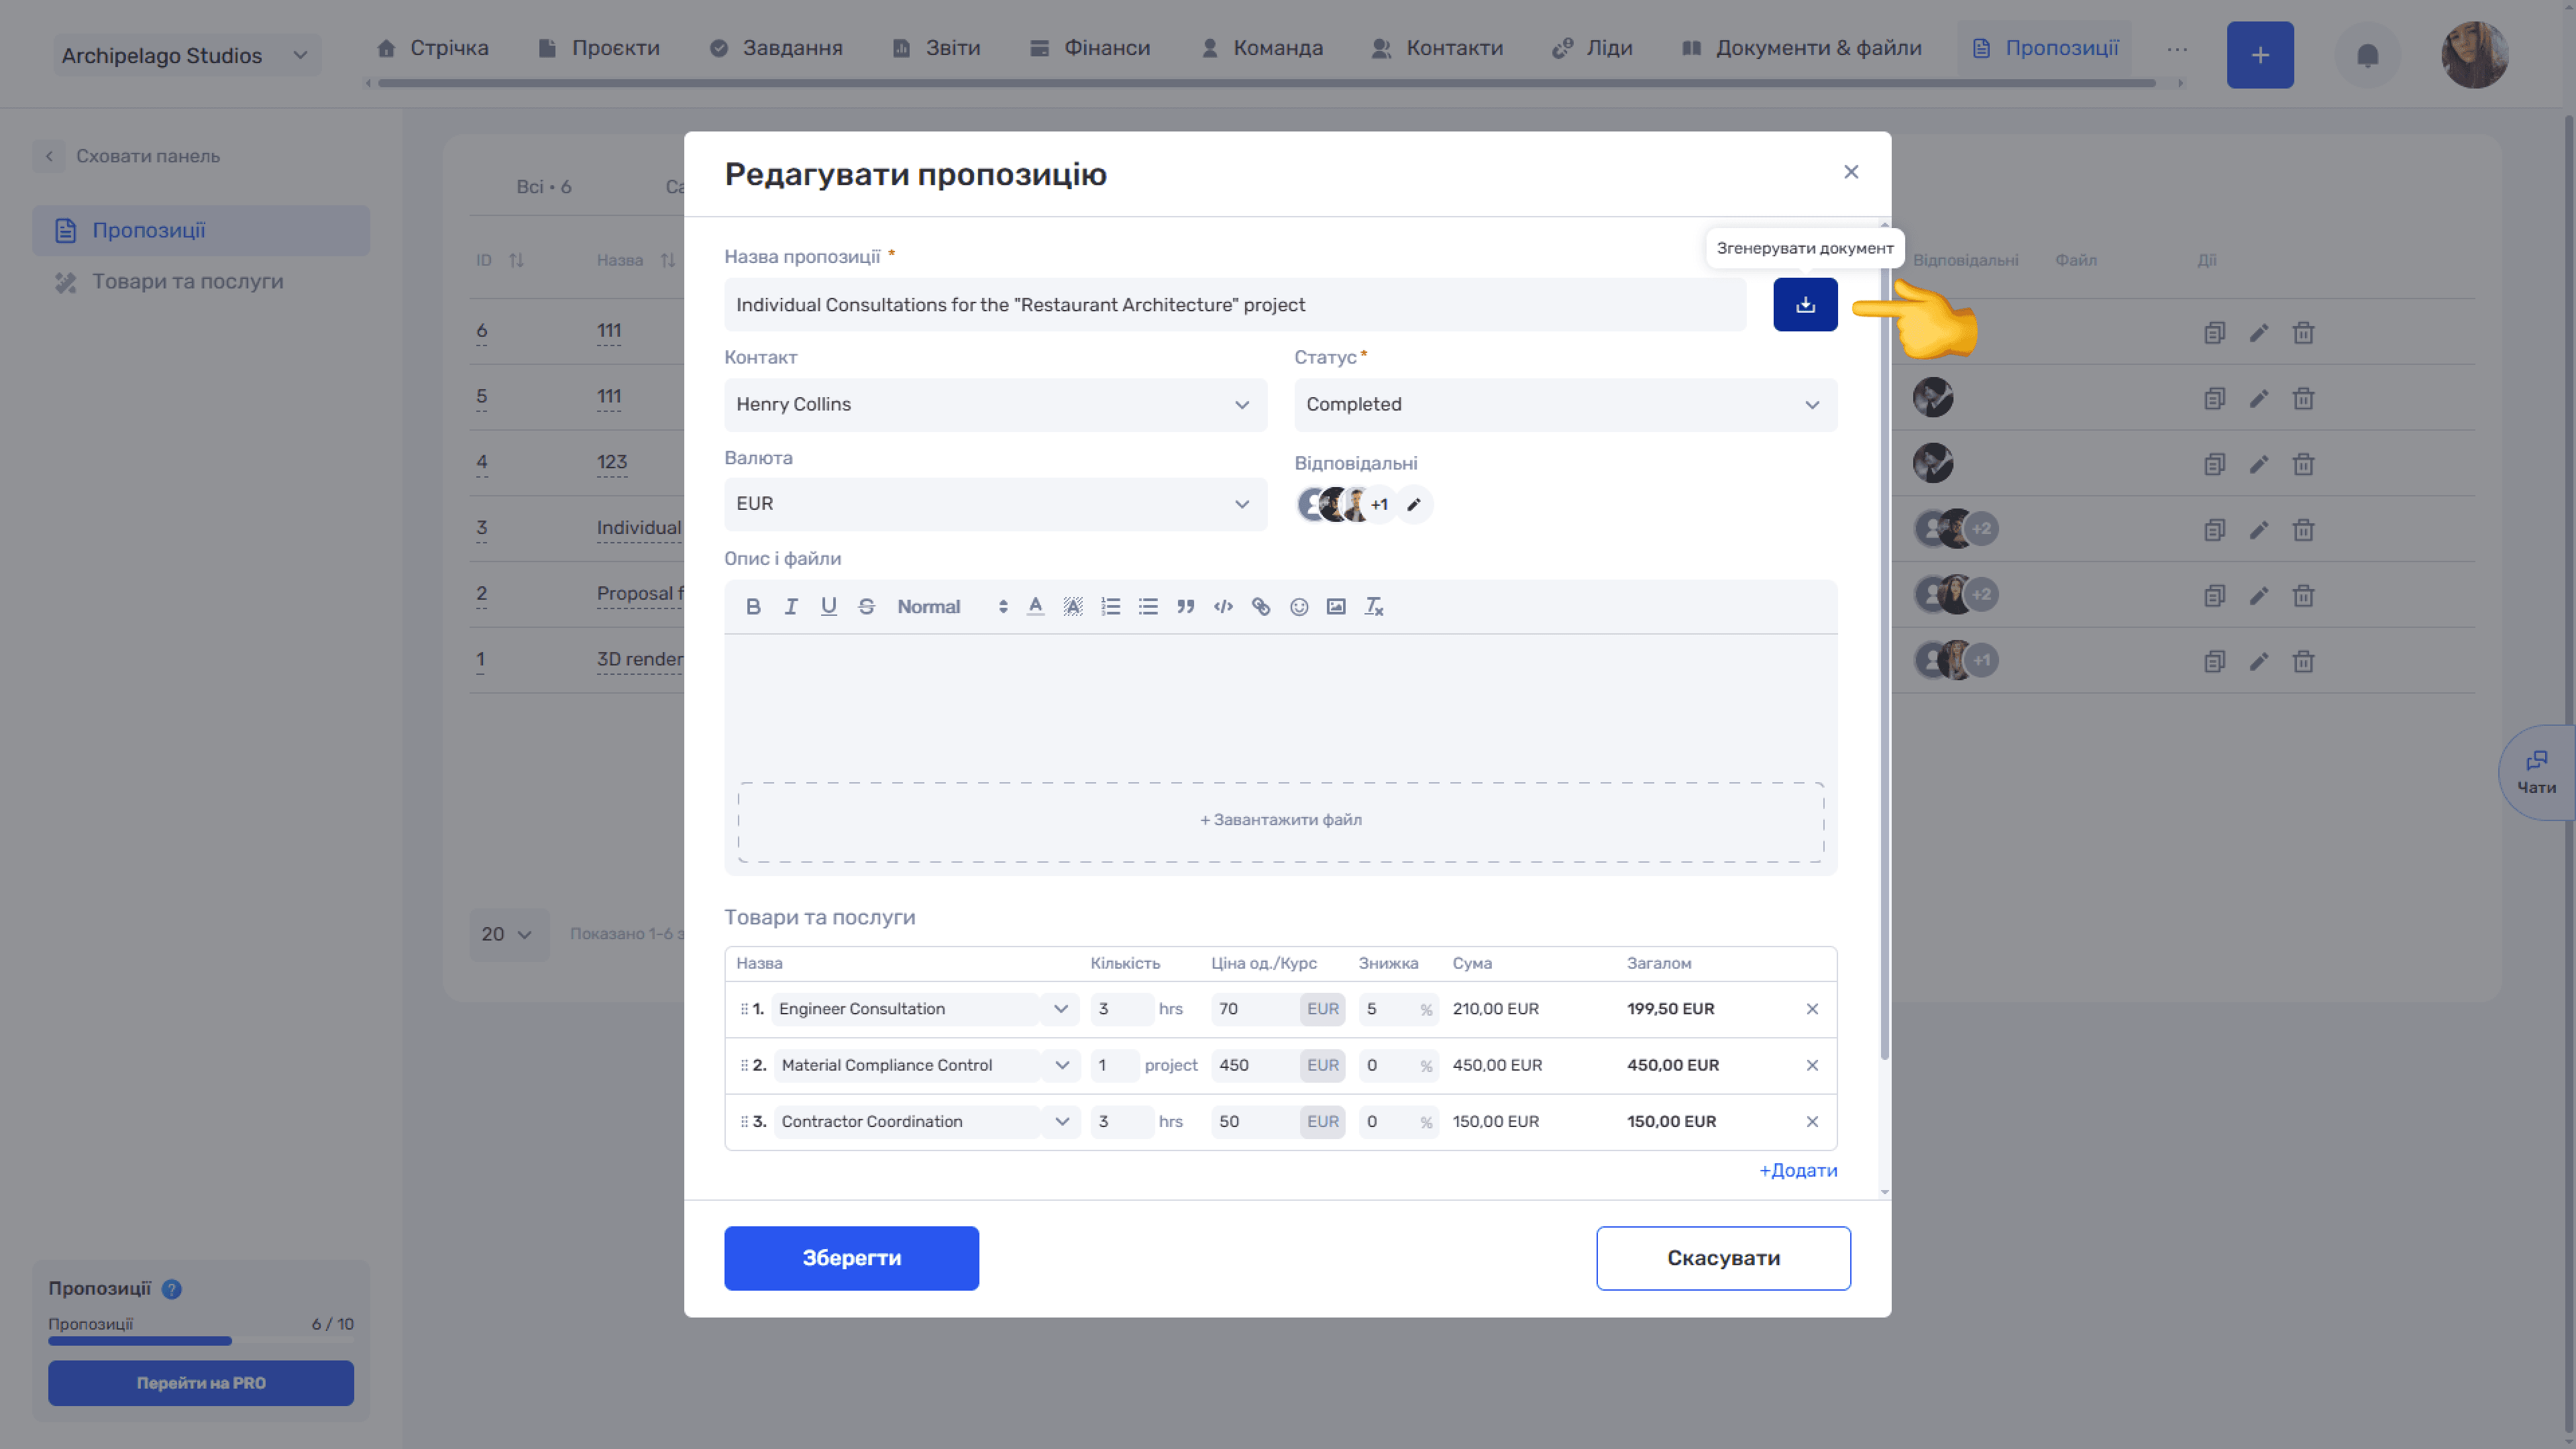
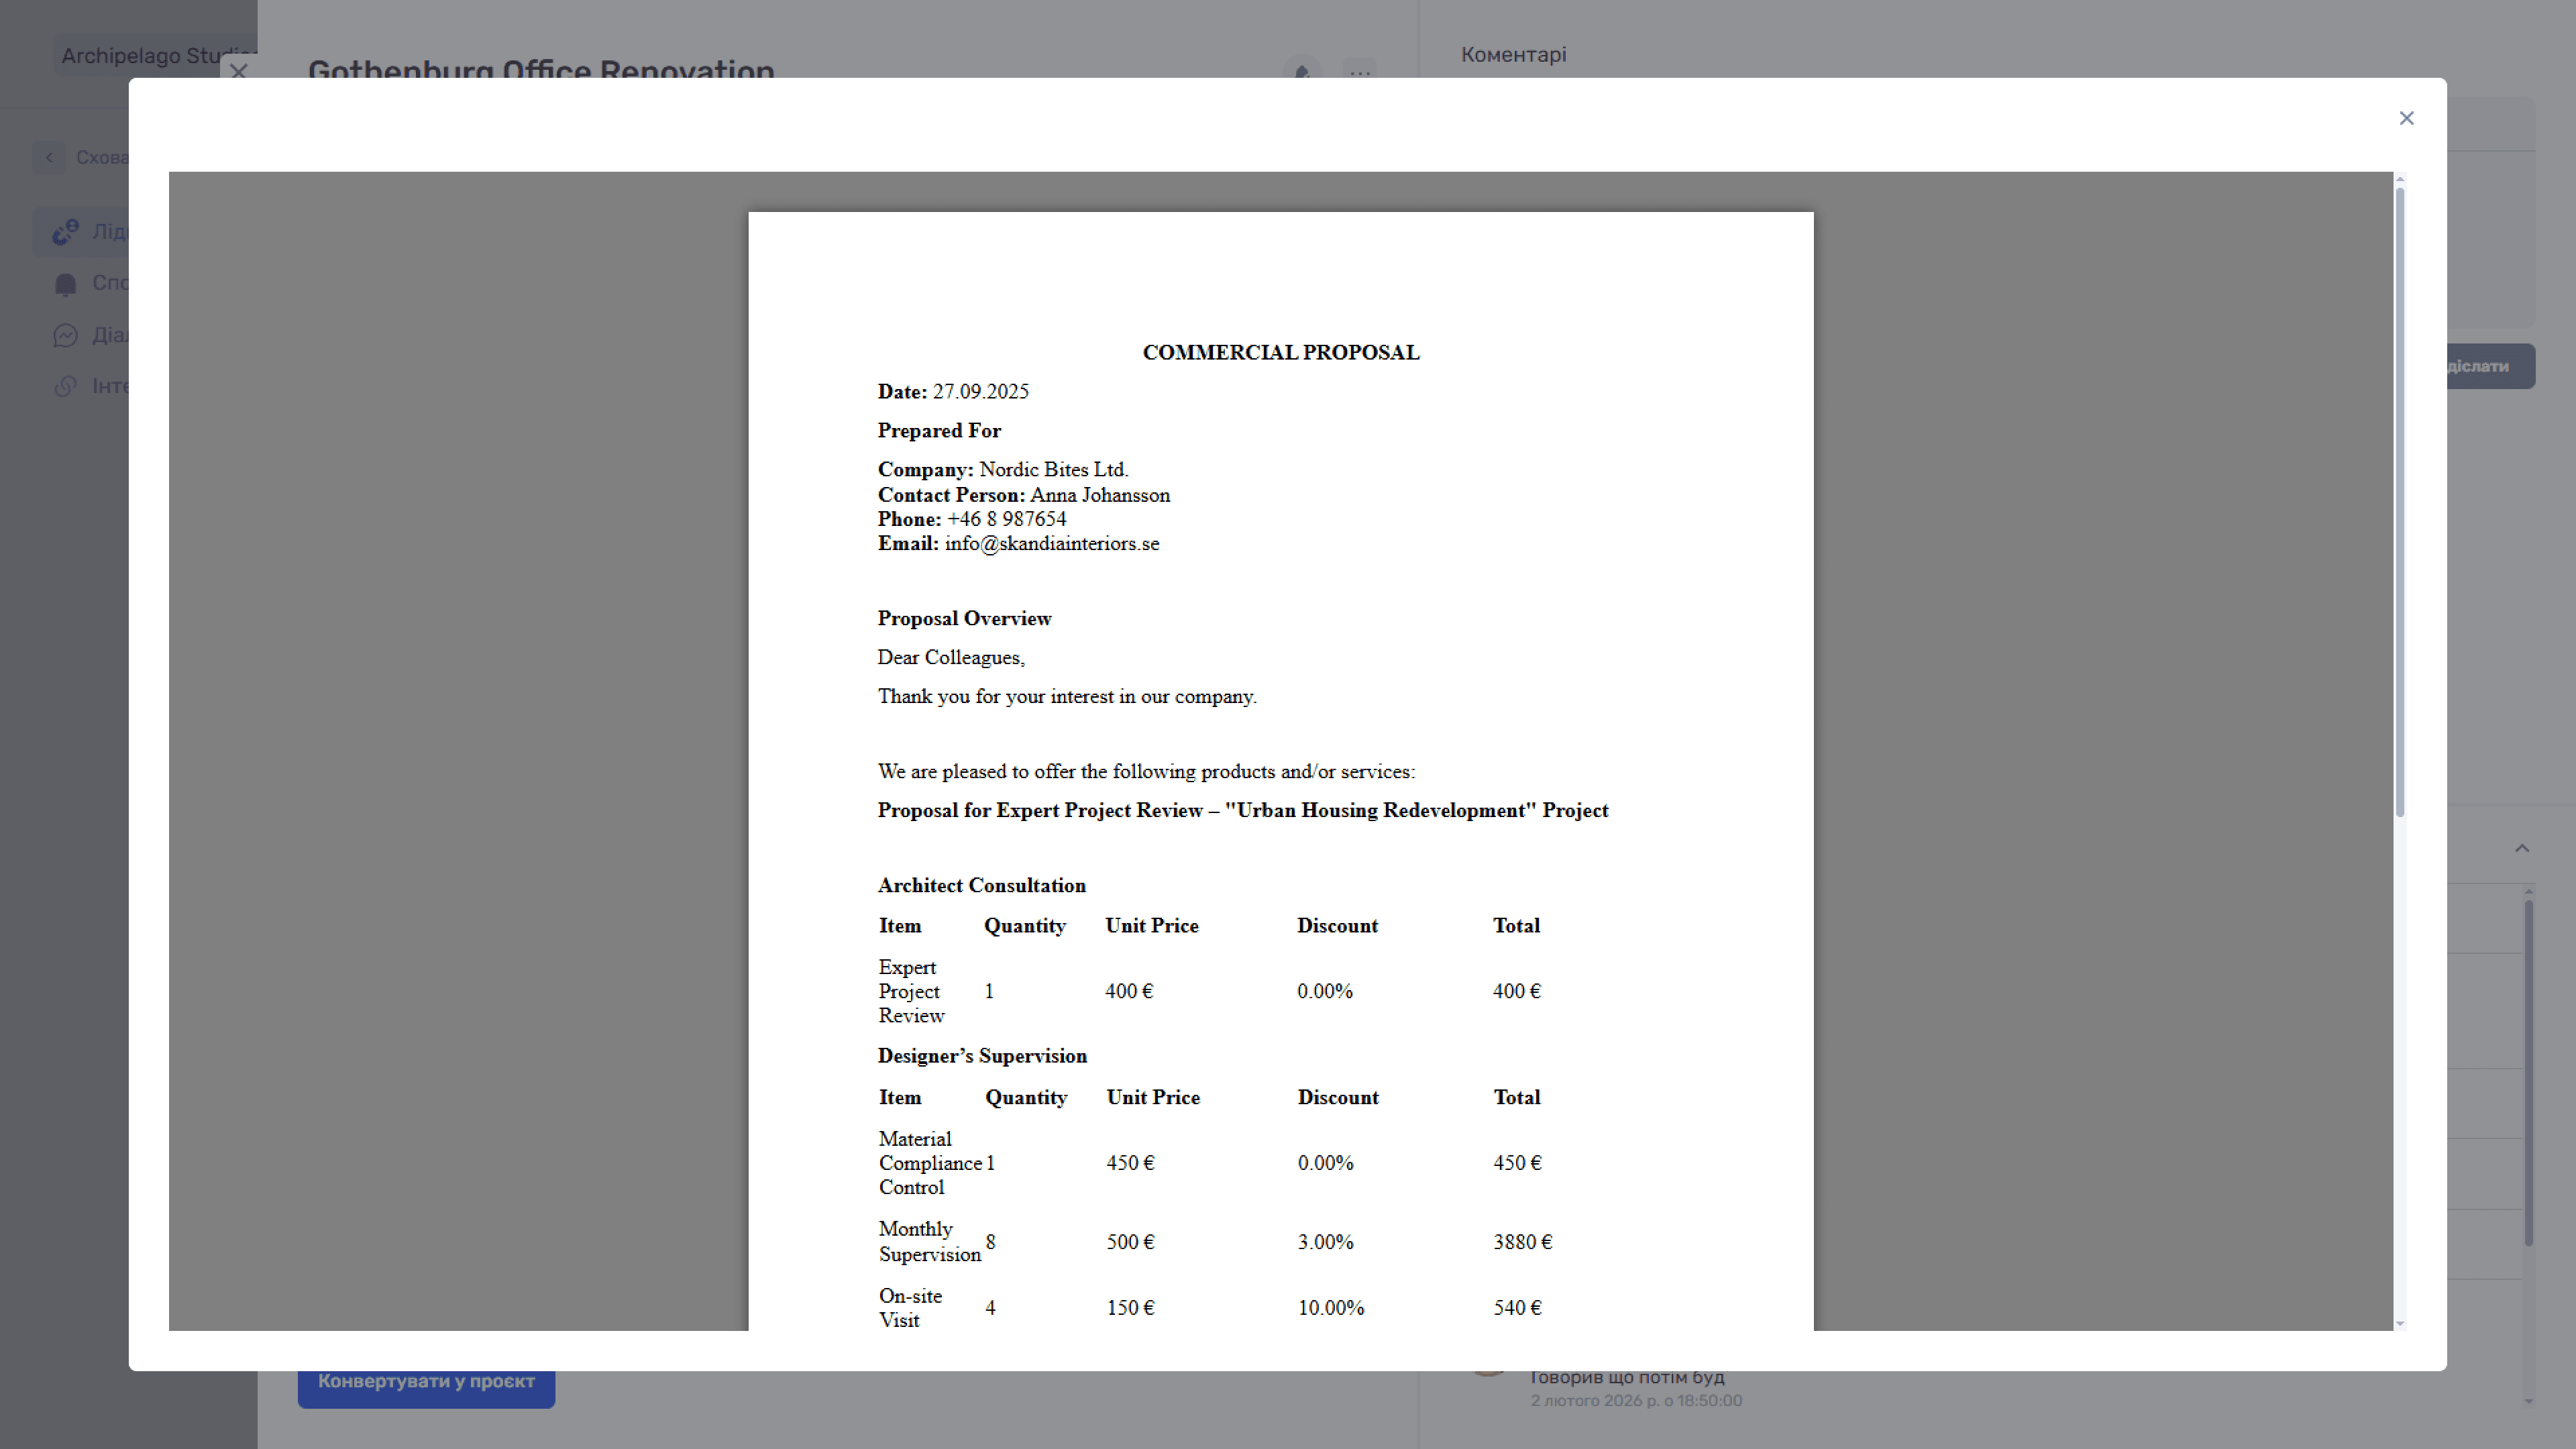
In the Edit quote window (Quotes section), generation has its own button to the right of the Quote name field — tooltip Generate document.
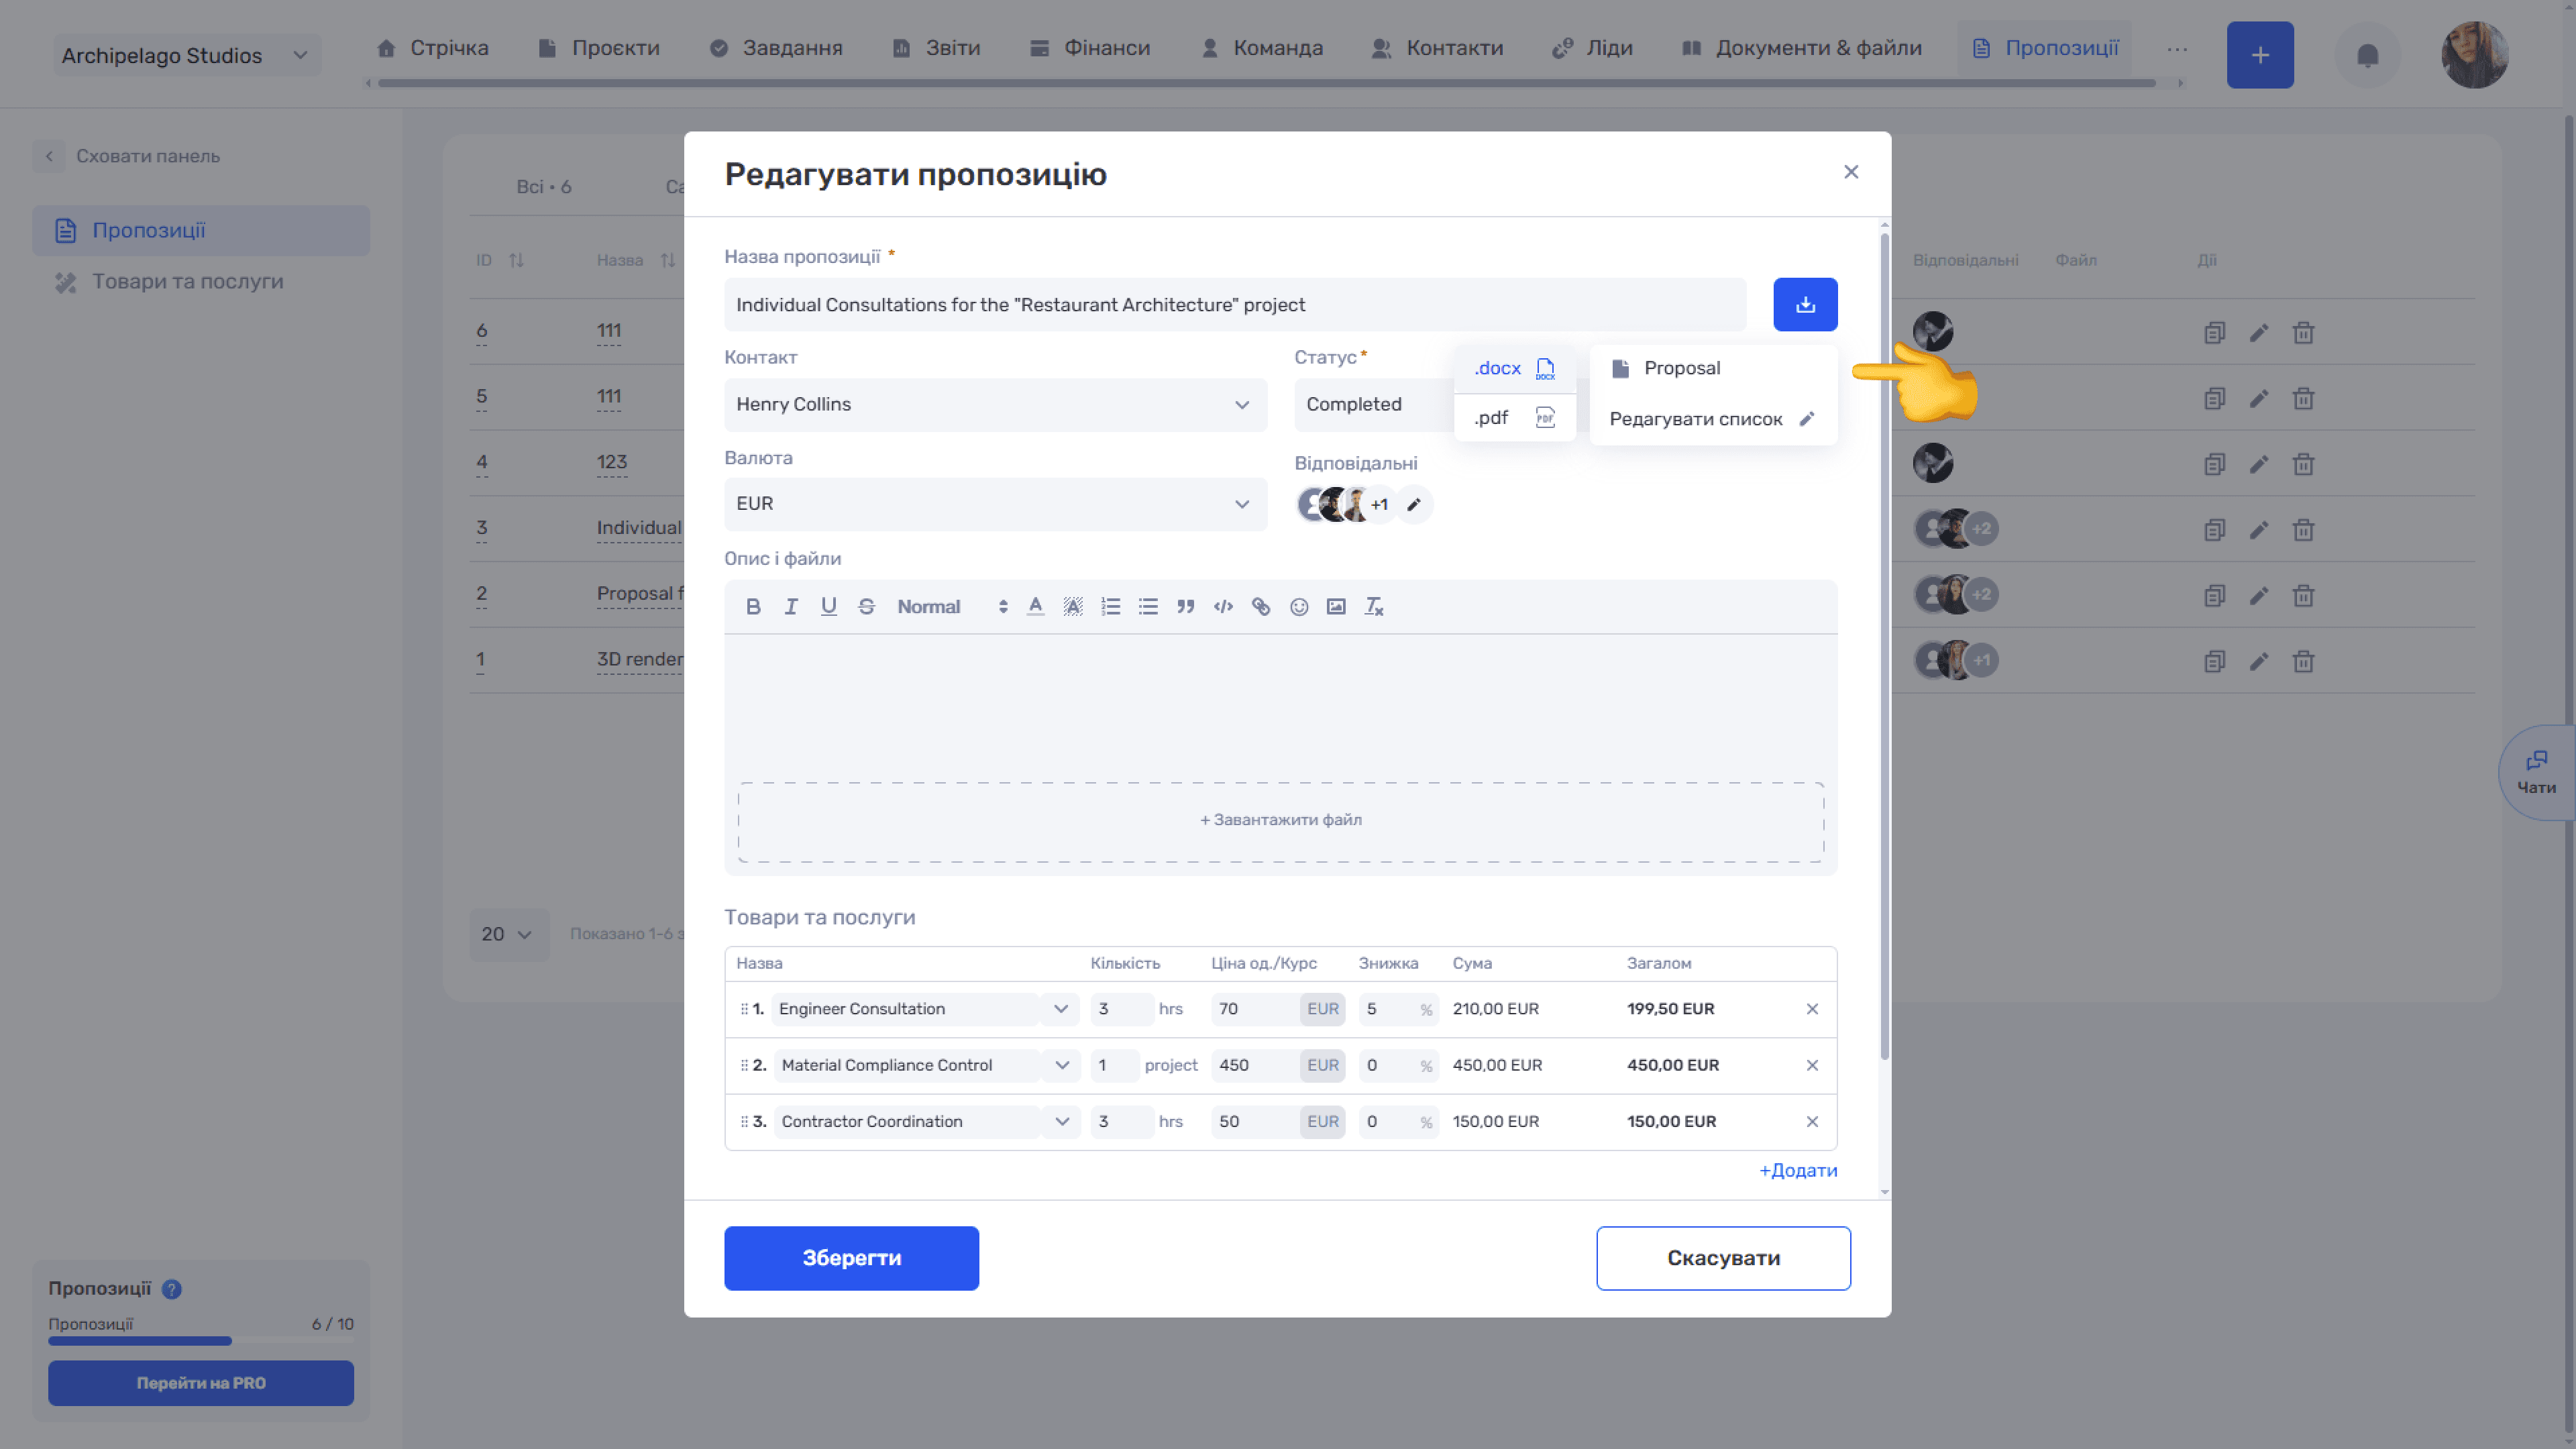
From here the logic is the same. A list of templates appears, filtered by type: a transaction shows only Transaction templates, a lead — Lead, a quote — Quote. Select a template and choose the format — .docx or .pdf.
The document is generated in a few seconds: the system shows the message "The file will appear soon…", and when it is done — "File … added to…".
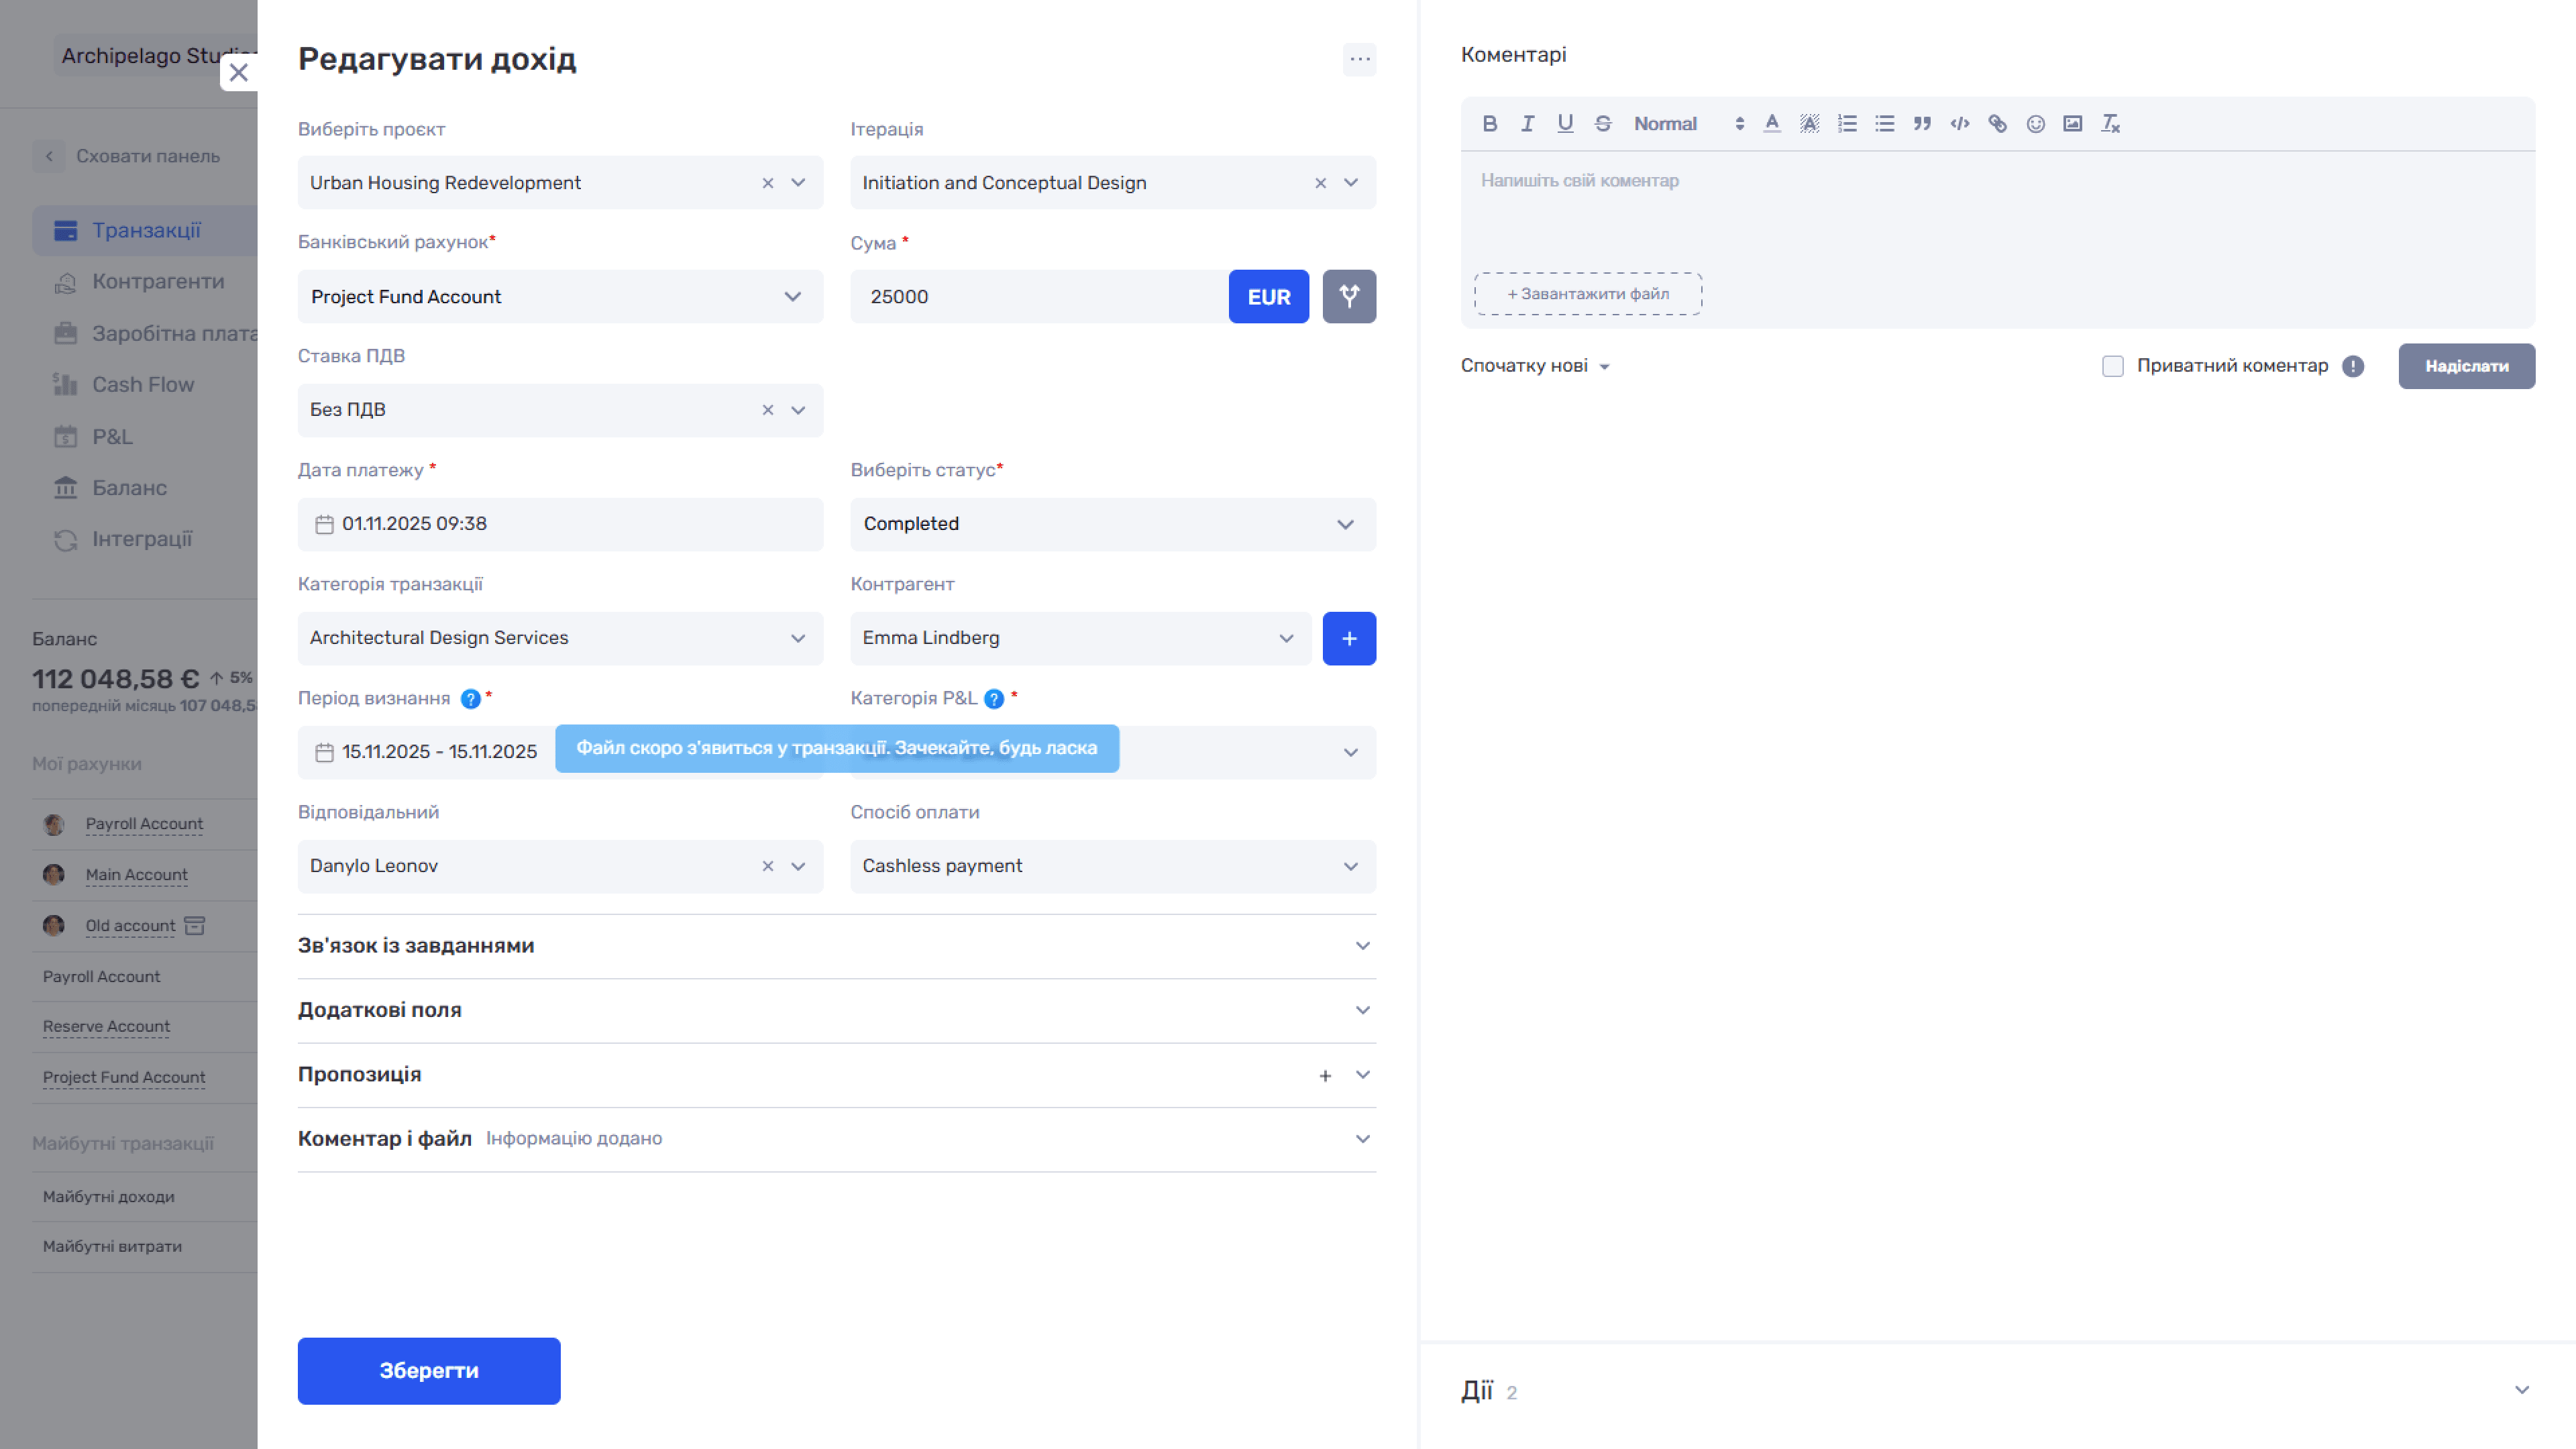
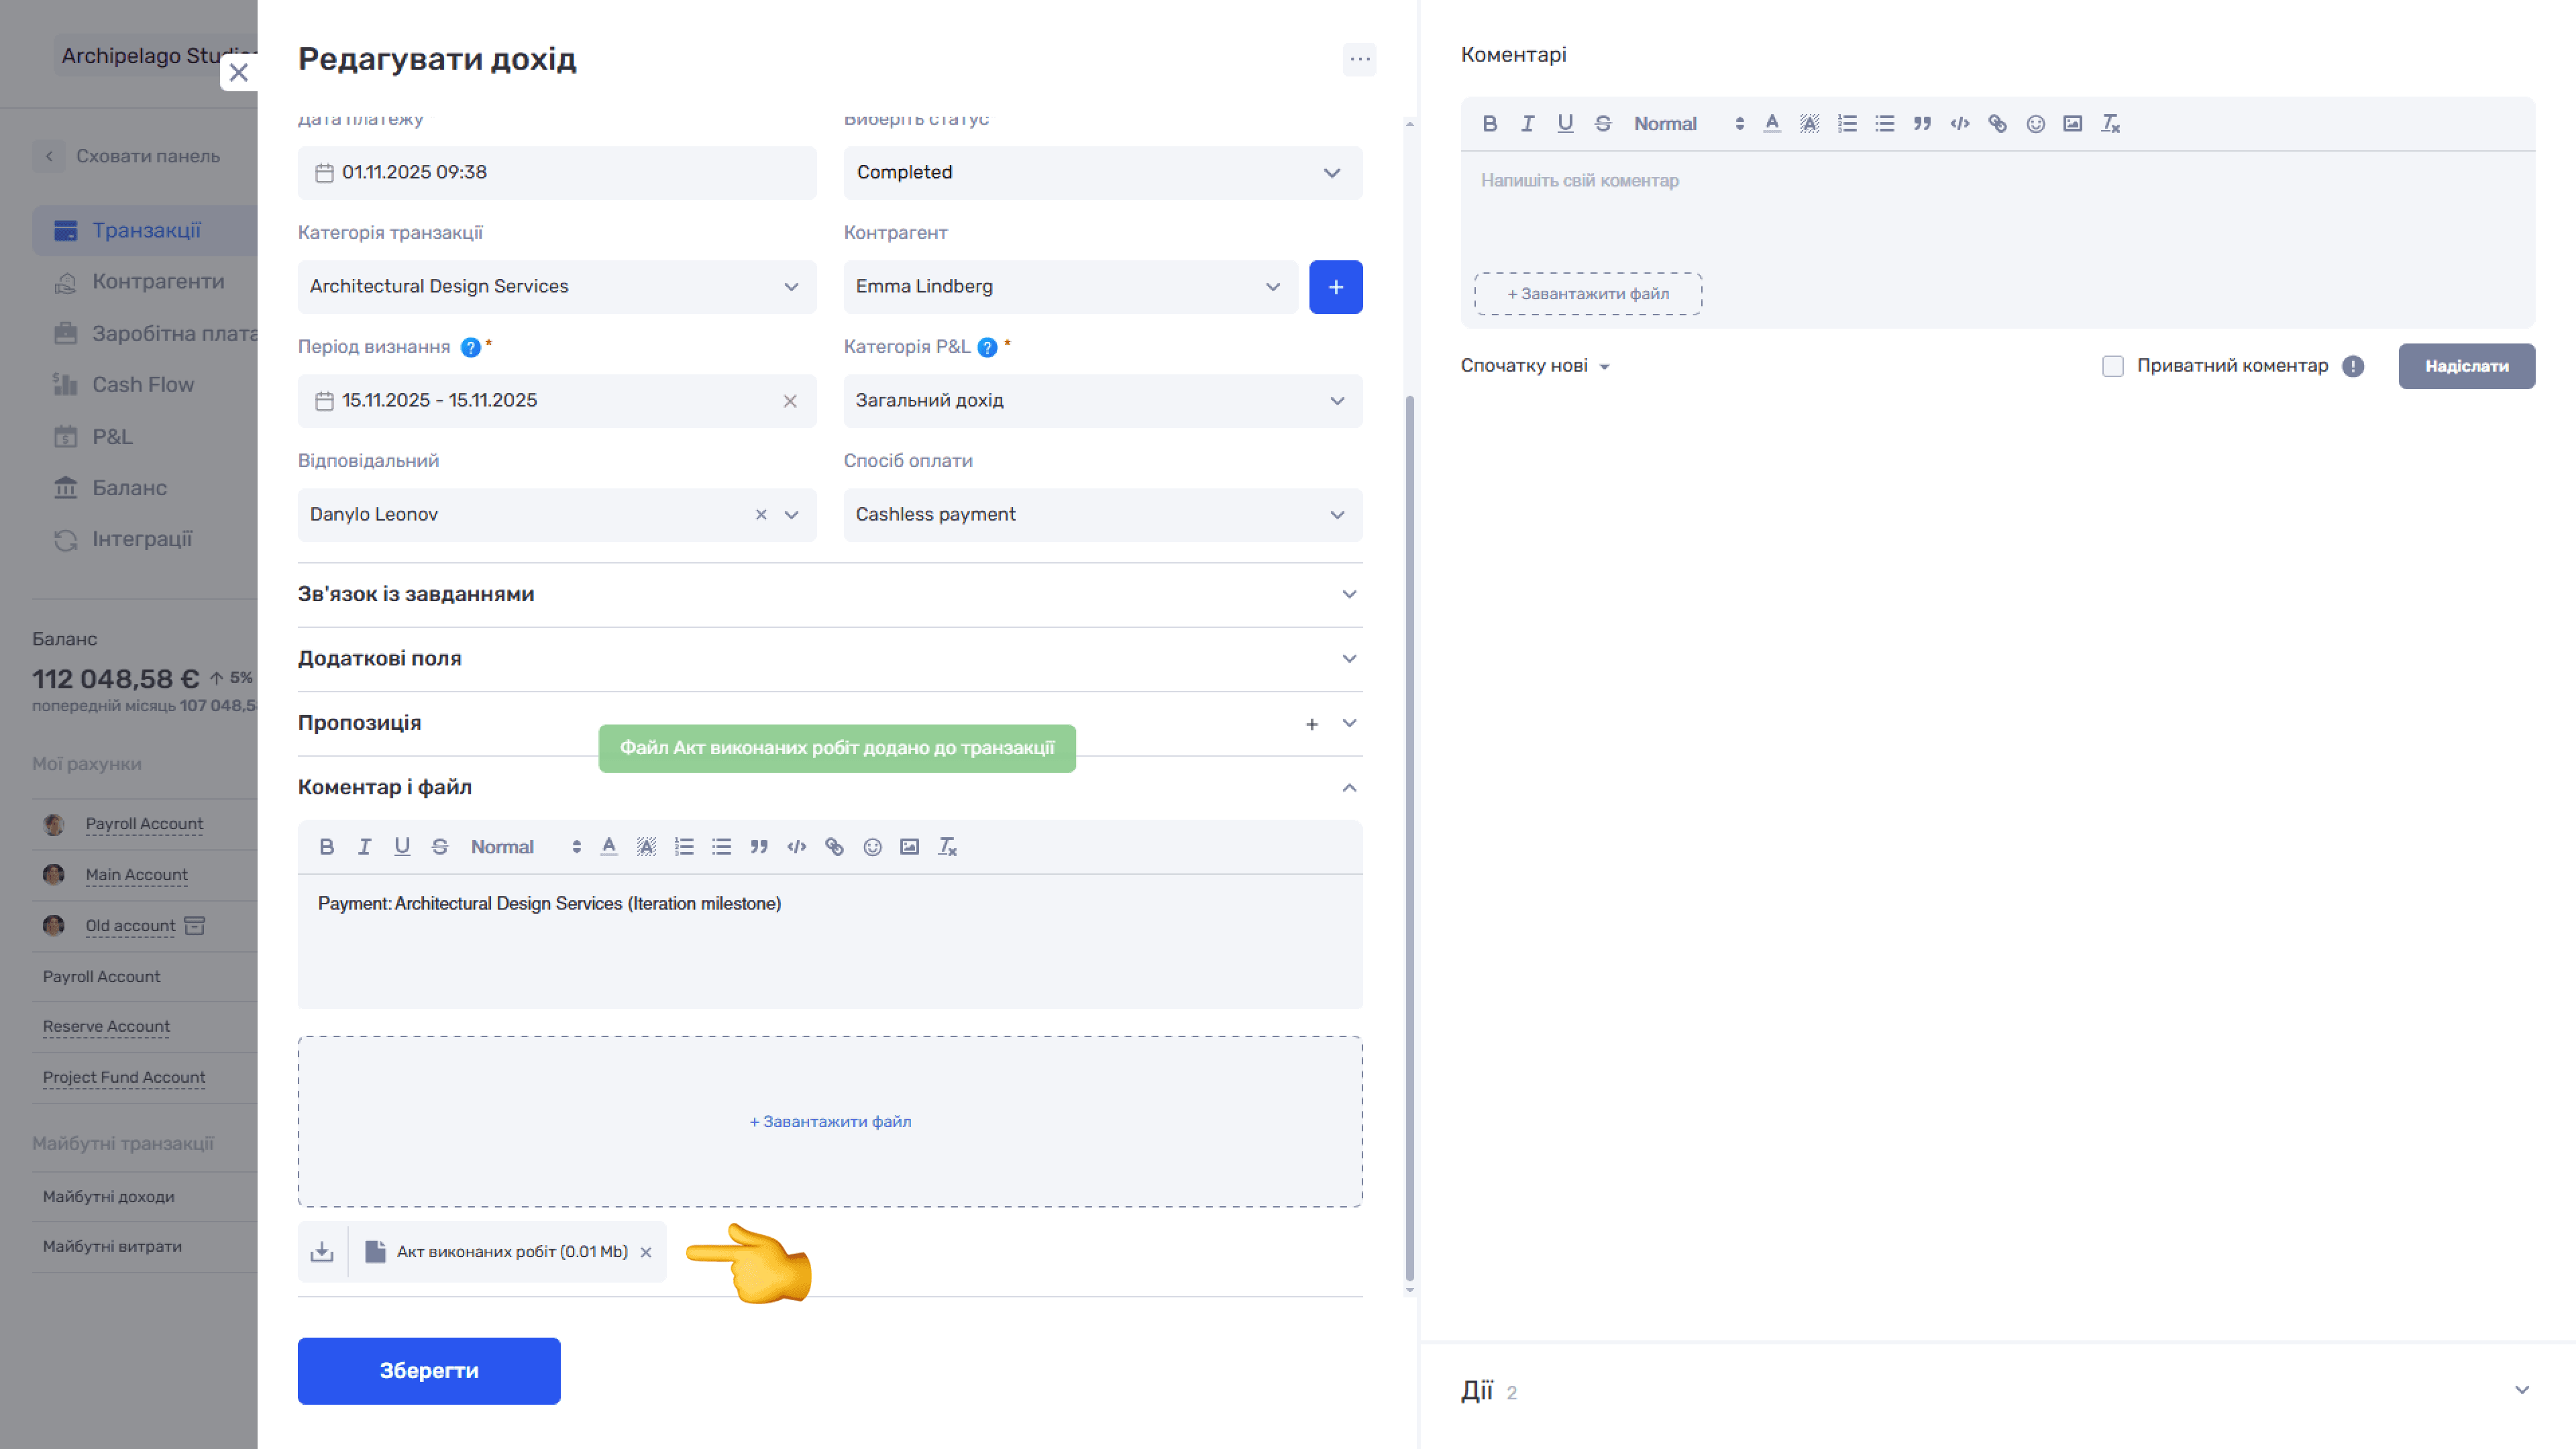
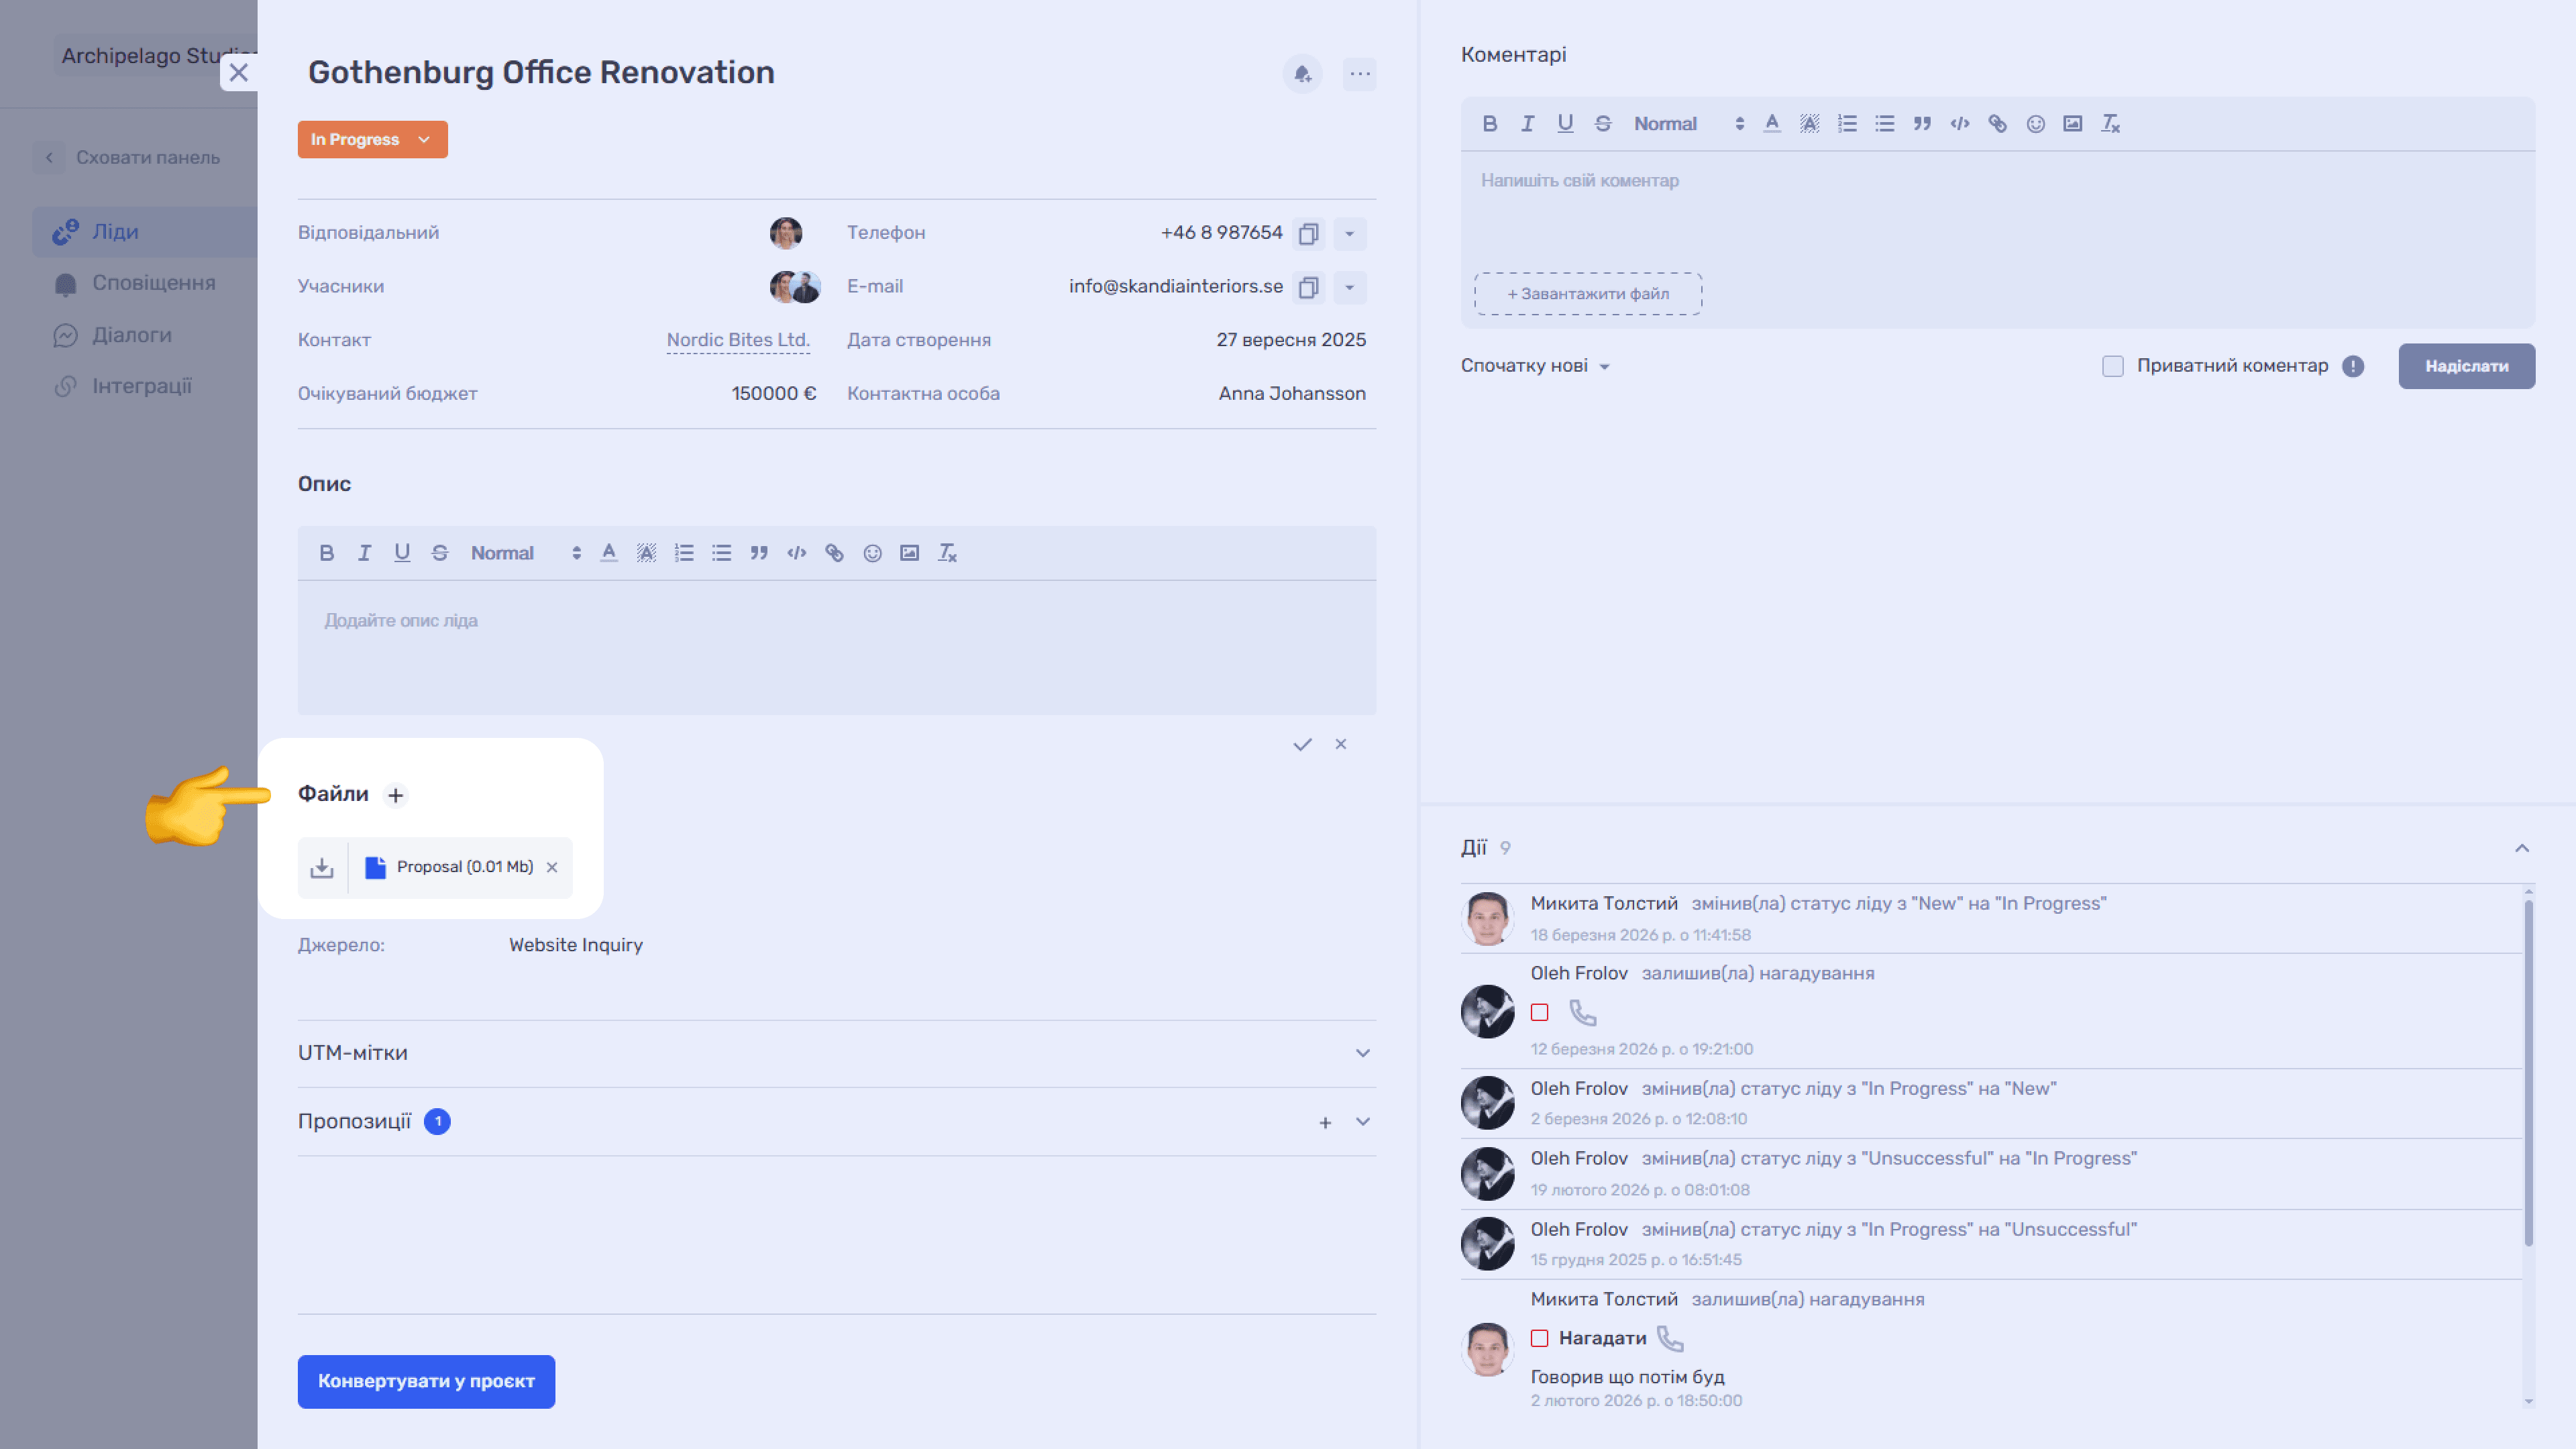
The finished document is saved:
- in a lead — in the Files block;
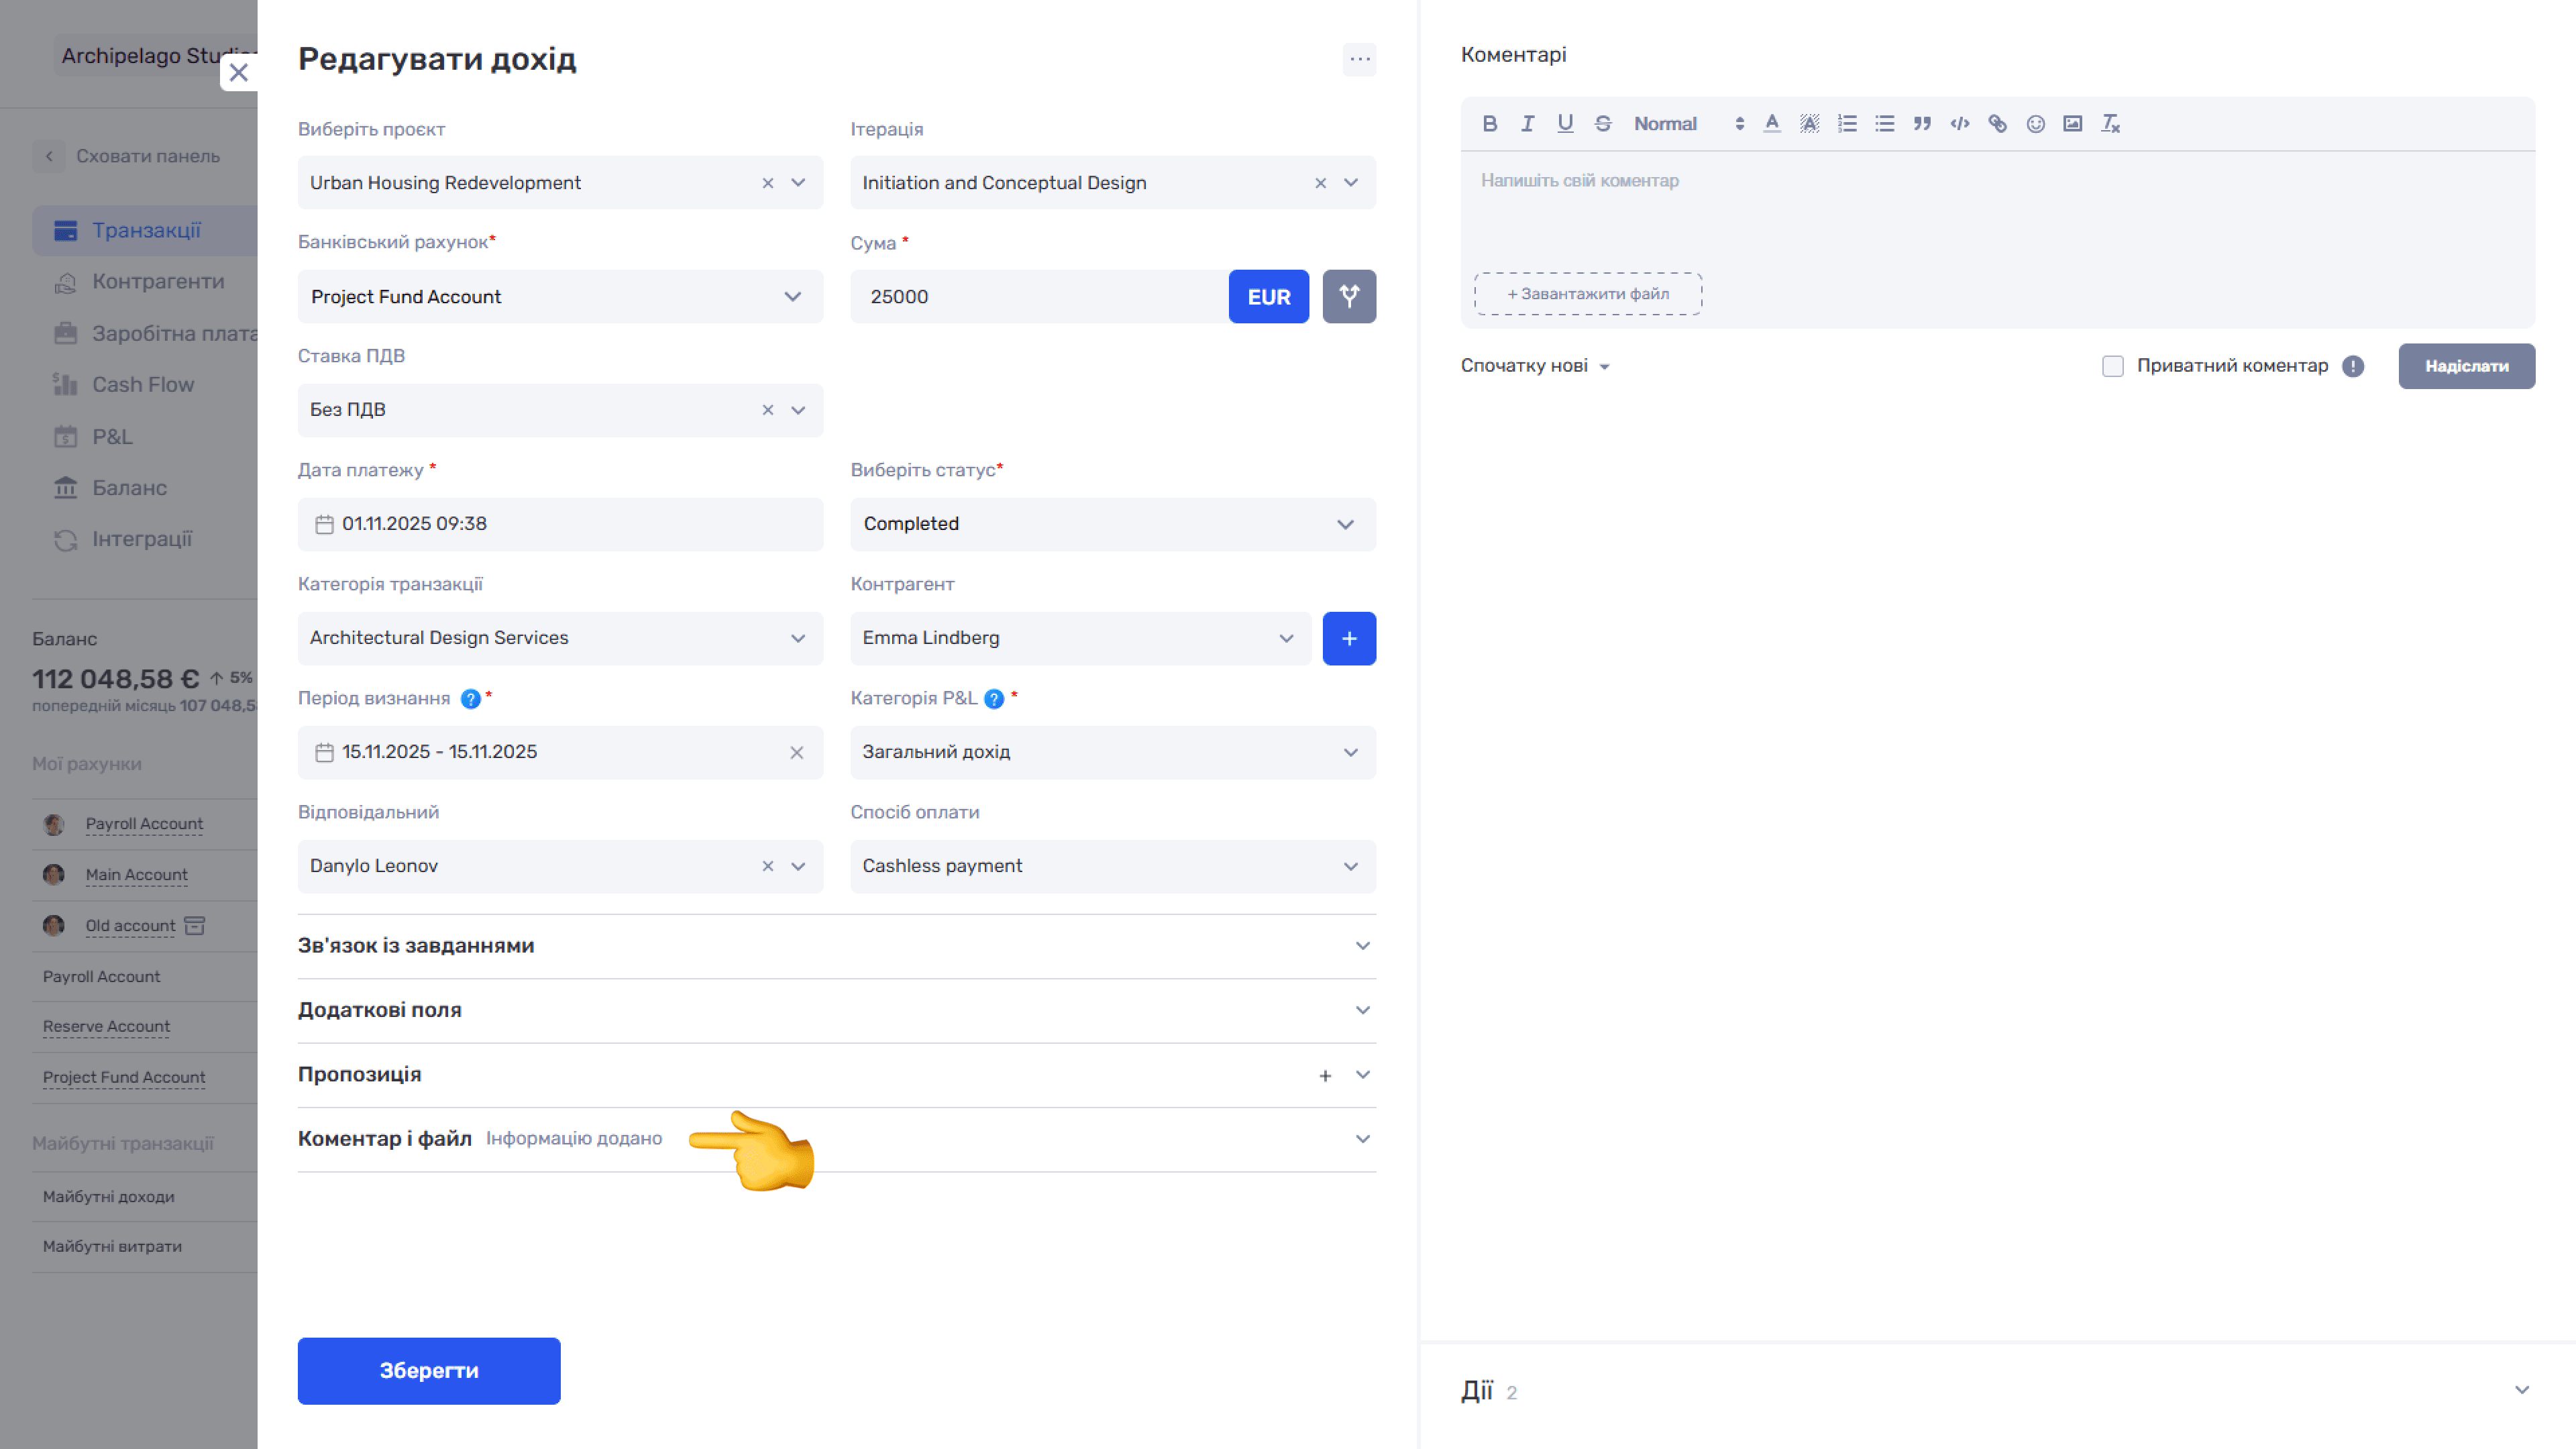
- in a transaction — in the Comment and file block (the Information added mark appears next to the block title).
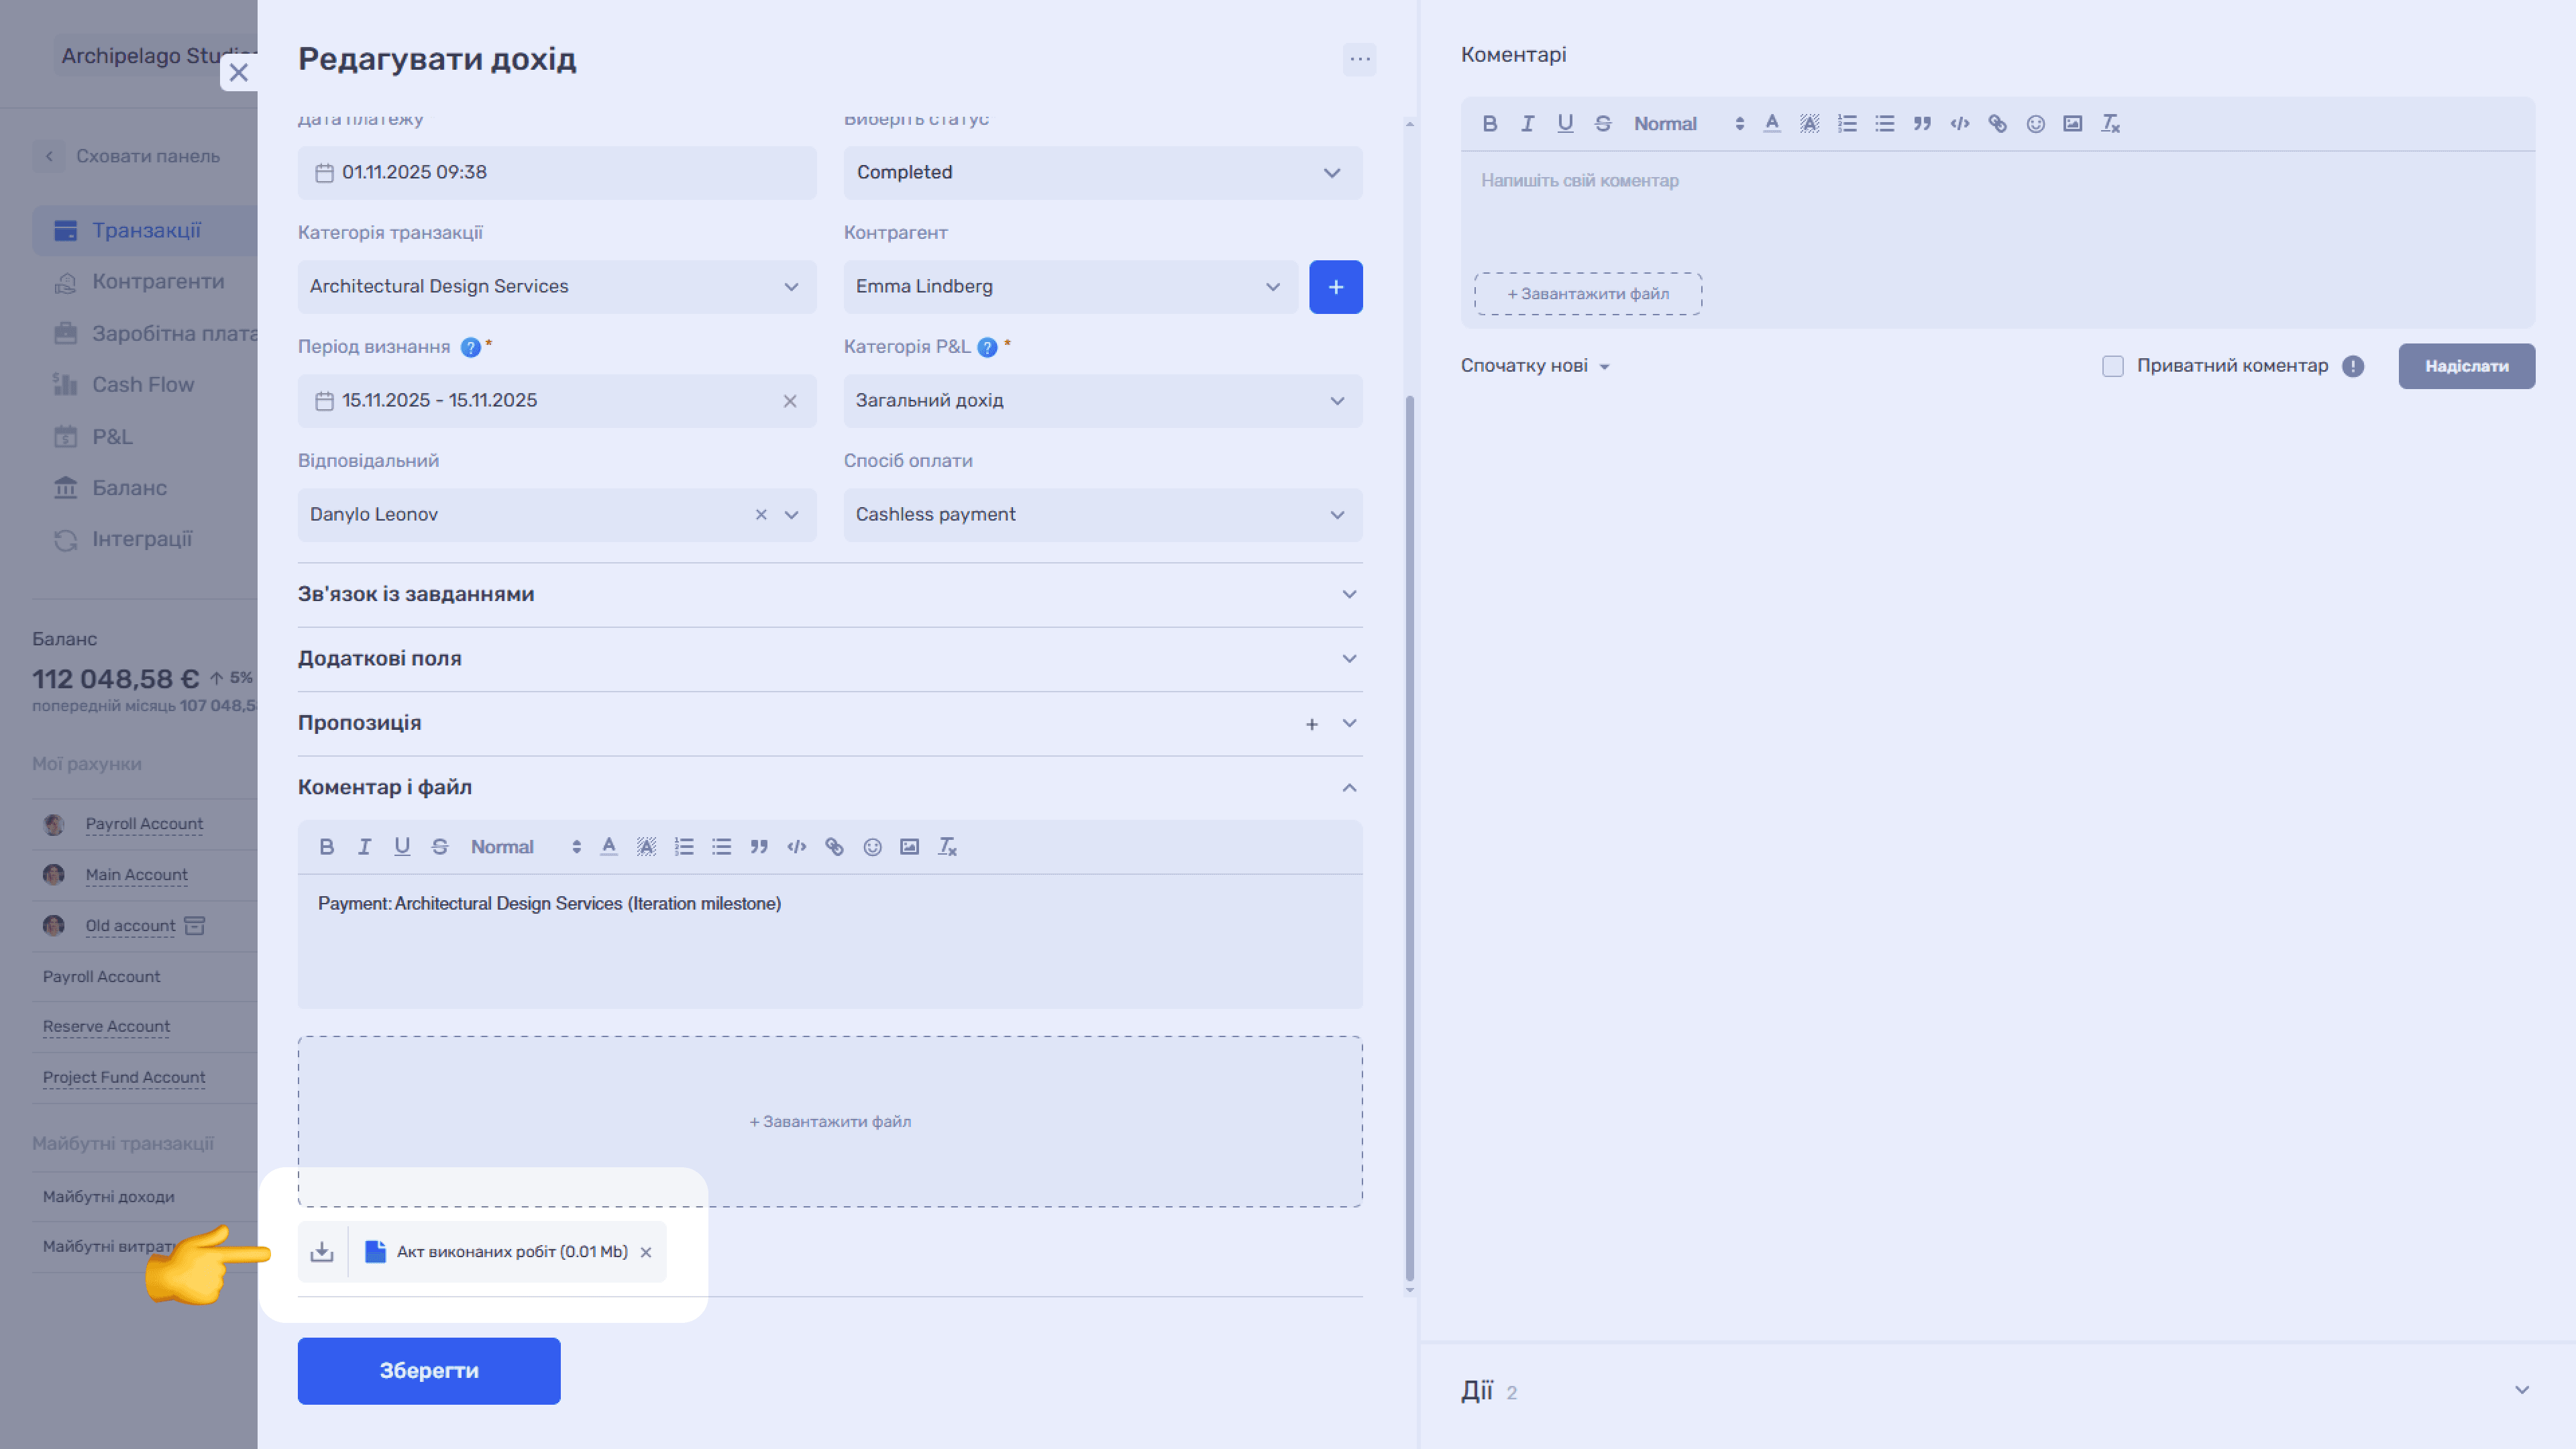
From there the file can be downloaded, opened for viewing, or deleted (✕).
Please note
If the entity has no data for a field (an empty contact, no quote attached), that spot in the document simply stays blank — there is no generation error. Check the finished file before sending it to the client.
The Edit list item in the template selection menu leads directly to the admin panel, to the Document templates block. If there are no templates of the required type yet, this will be the only item in the menu — use it to add the first template.
Access rights to templates
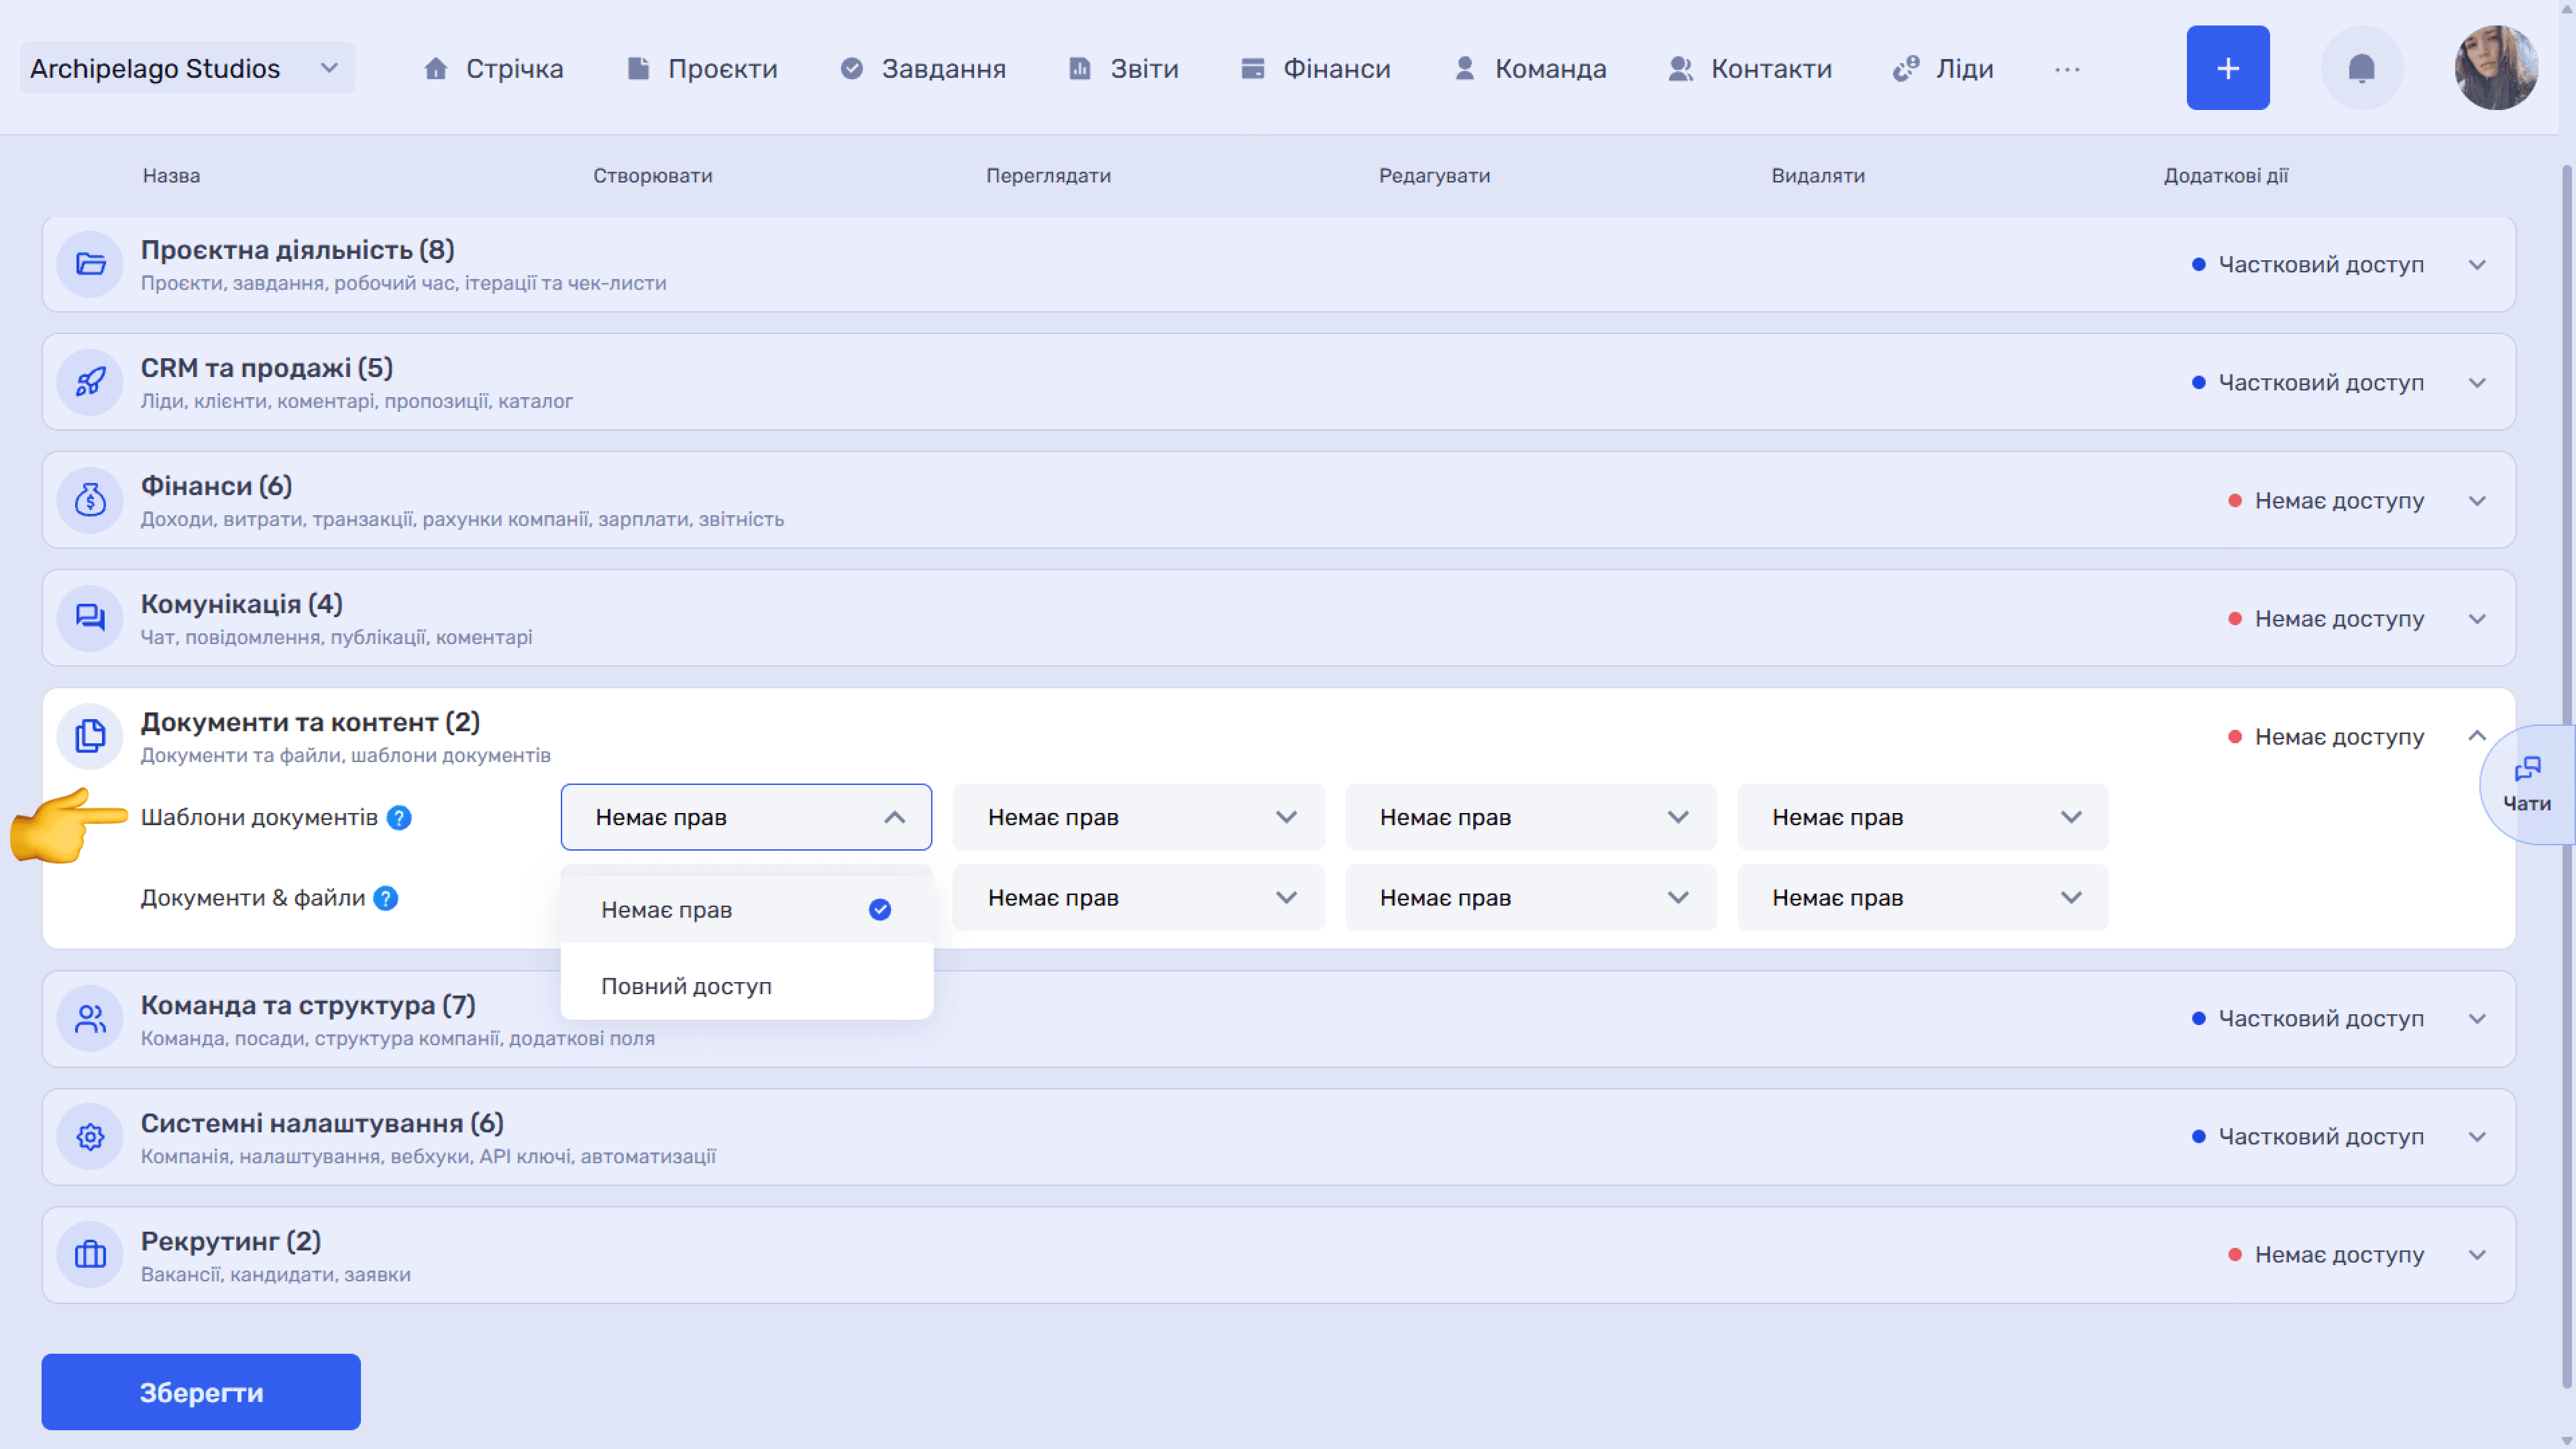
Access to templates is configured in the admin panel: Team → Roles, the Documents and content permission group. The group has two rows:
- Document templates — creating, editing, and managing document templates;
- Documents & files — uploading, viewing, and managing project files and documents.
For each row, rights are set separately for four actions: Create, View, Edit, Delete.
For document templates each action has two values — No rights or Full access.
For documents and files the set is wider: the Create action also has two values, while View, Edit, and Delete have four: No rights, By access list, Full access, and Own (only files the user uploaded themselves).
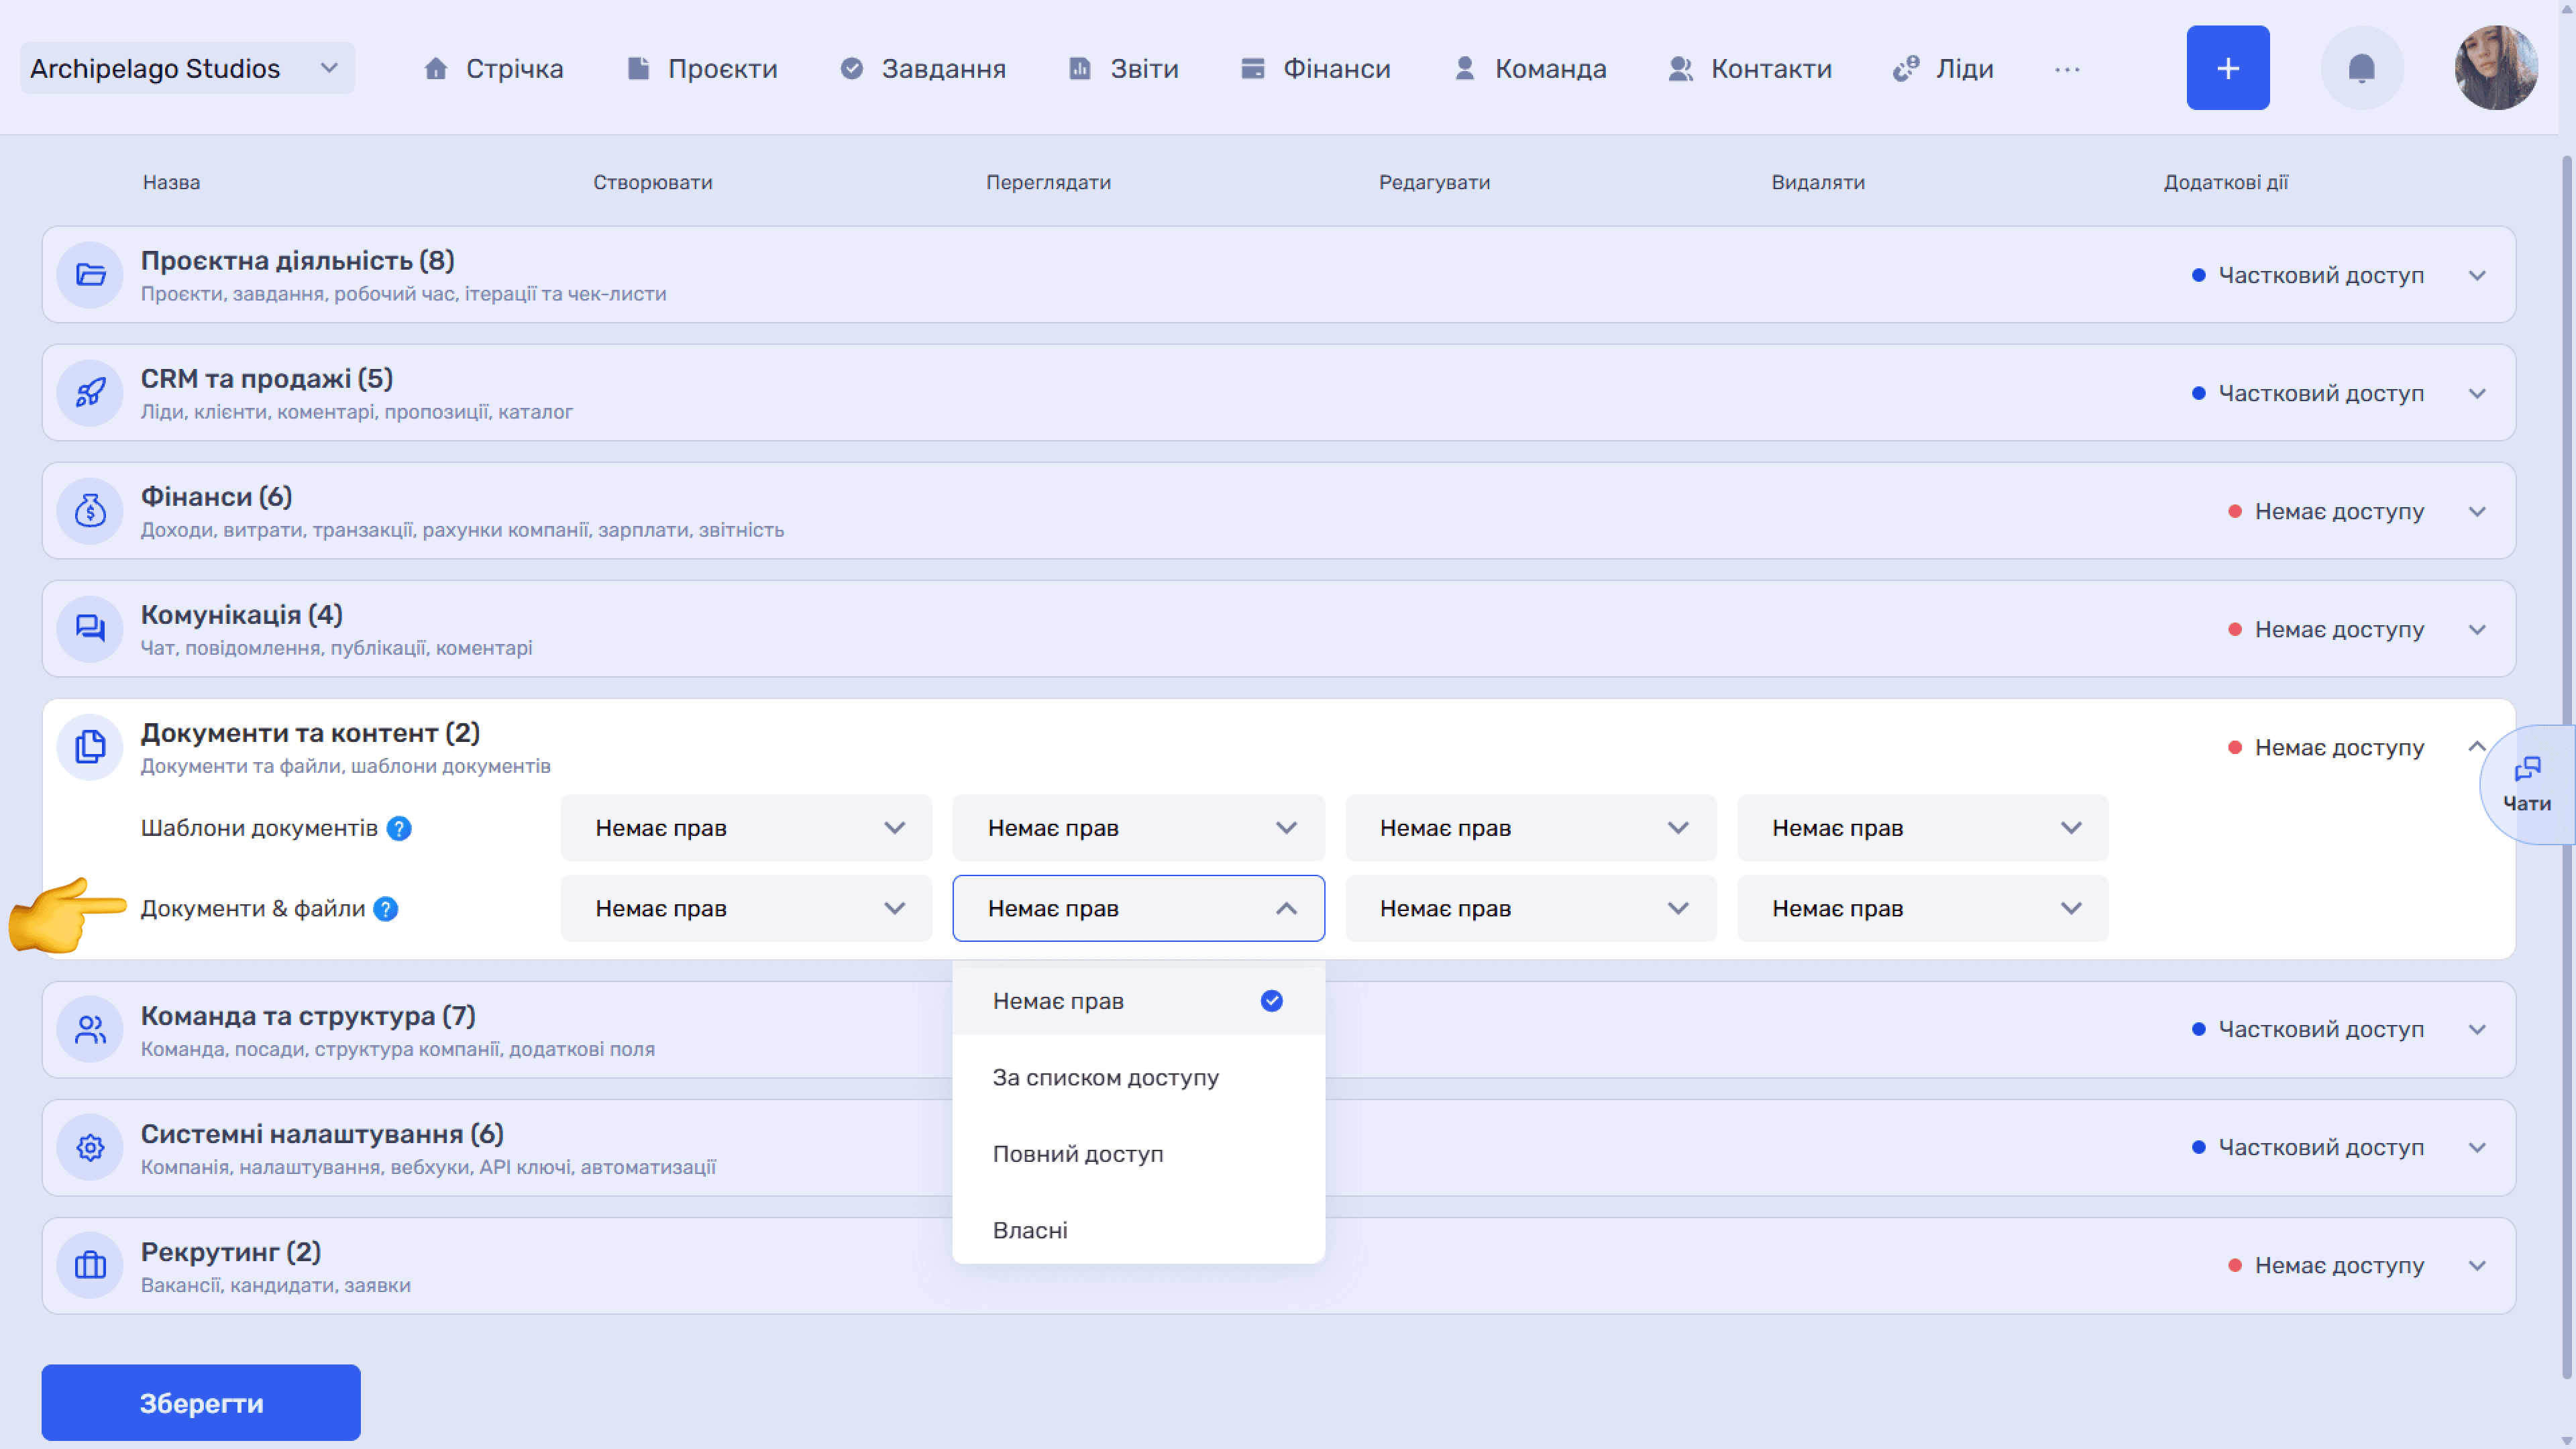
On the right of the group header a summary state is shown — No access, Partial access, or full. After making changes, click Save.
Please note
The right to templates makes it possible to change documents that go to clients on behalf of the company. Grant Full access to edit and delete to a limited circle — for everyone else, view is enough to generate documents from ready templates.
Still have questions?
Maybe we haven't added this information yet. But you can always reach out:
Request a demo
Submit a request and we'll show you how the service works and its capabilities.
Book a demo