Recurring Transactions
For payments that repeat on a schedule—rent, subscriptions, recurring fees, or regular client payments—you do not need to create a transaction manually each time. A recurring transaction is a template the system uses to generate income or expenses automatically: every day, on selected days of the we
How to Create a Recurring Transaction
At the top of the income or expense creation form is a Transaction Type switch: Standard / Recurring. Select Recurring, and the form changes to Create Recurring Income or Create Recurring Expense.
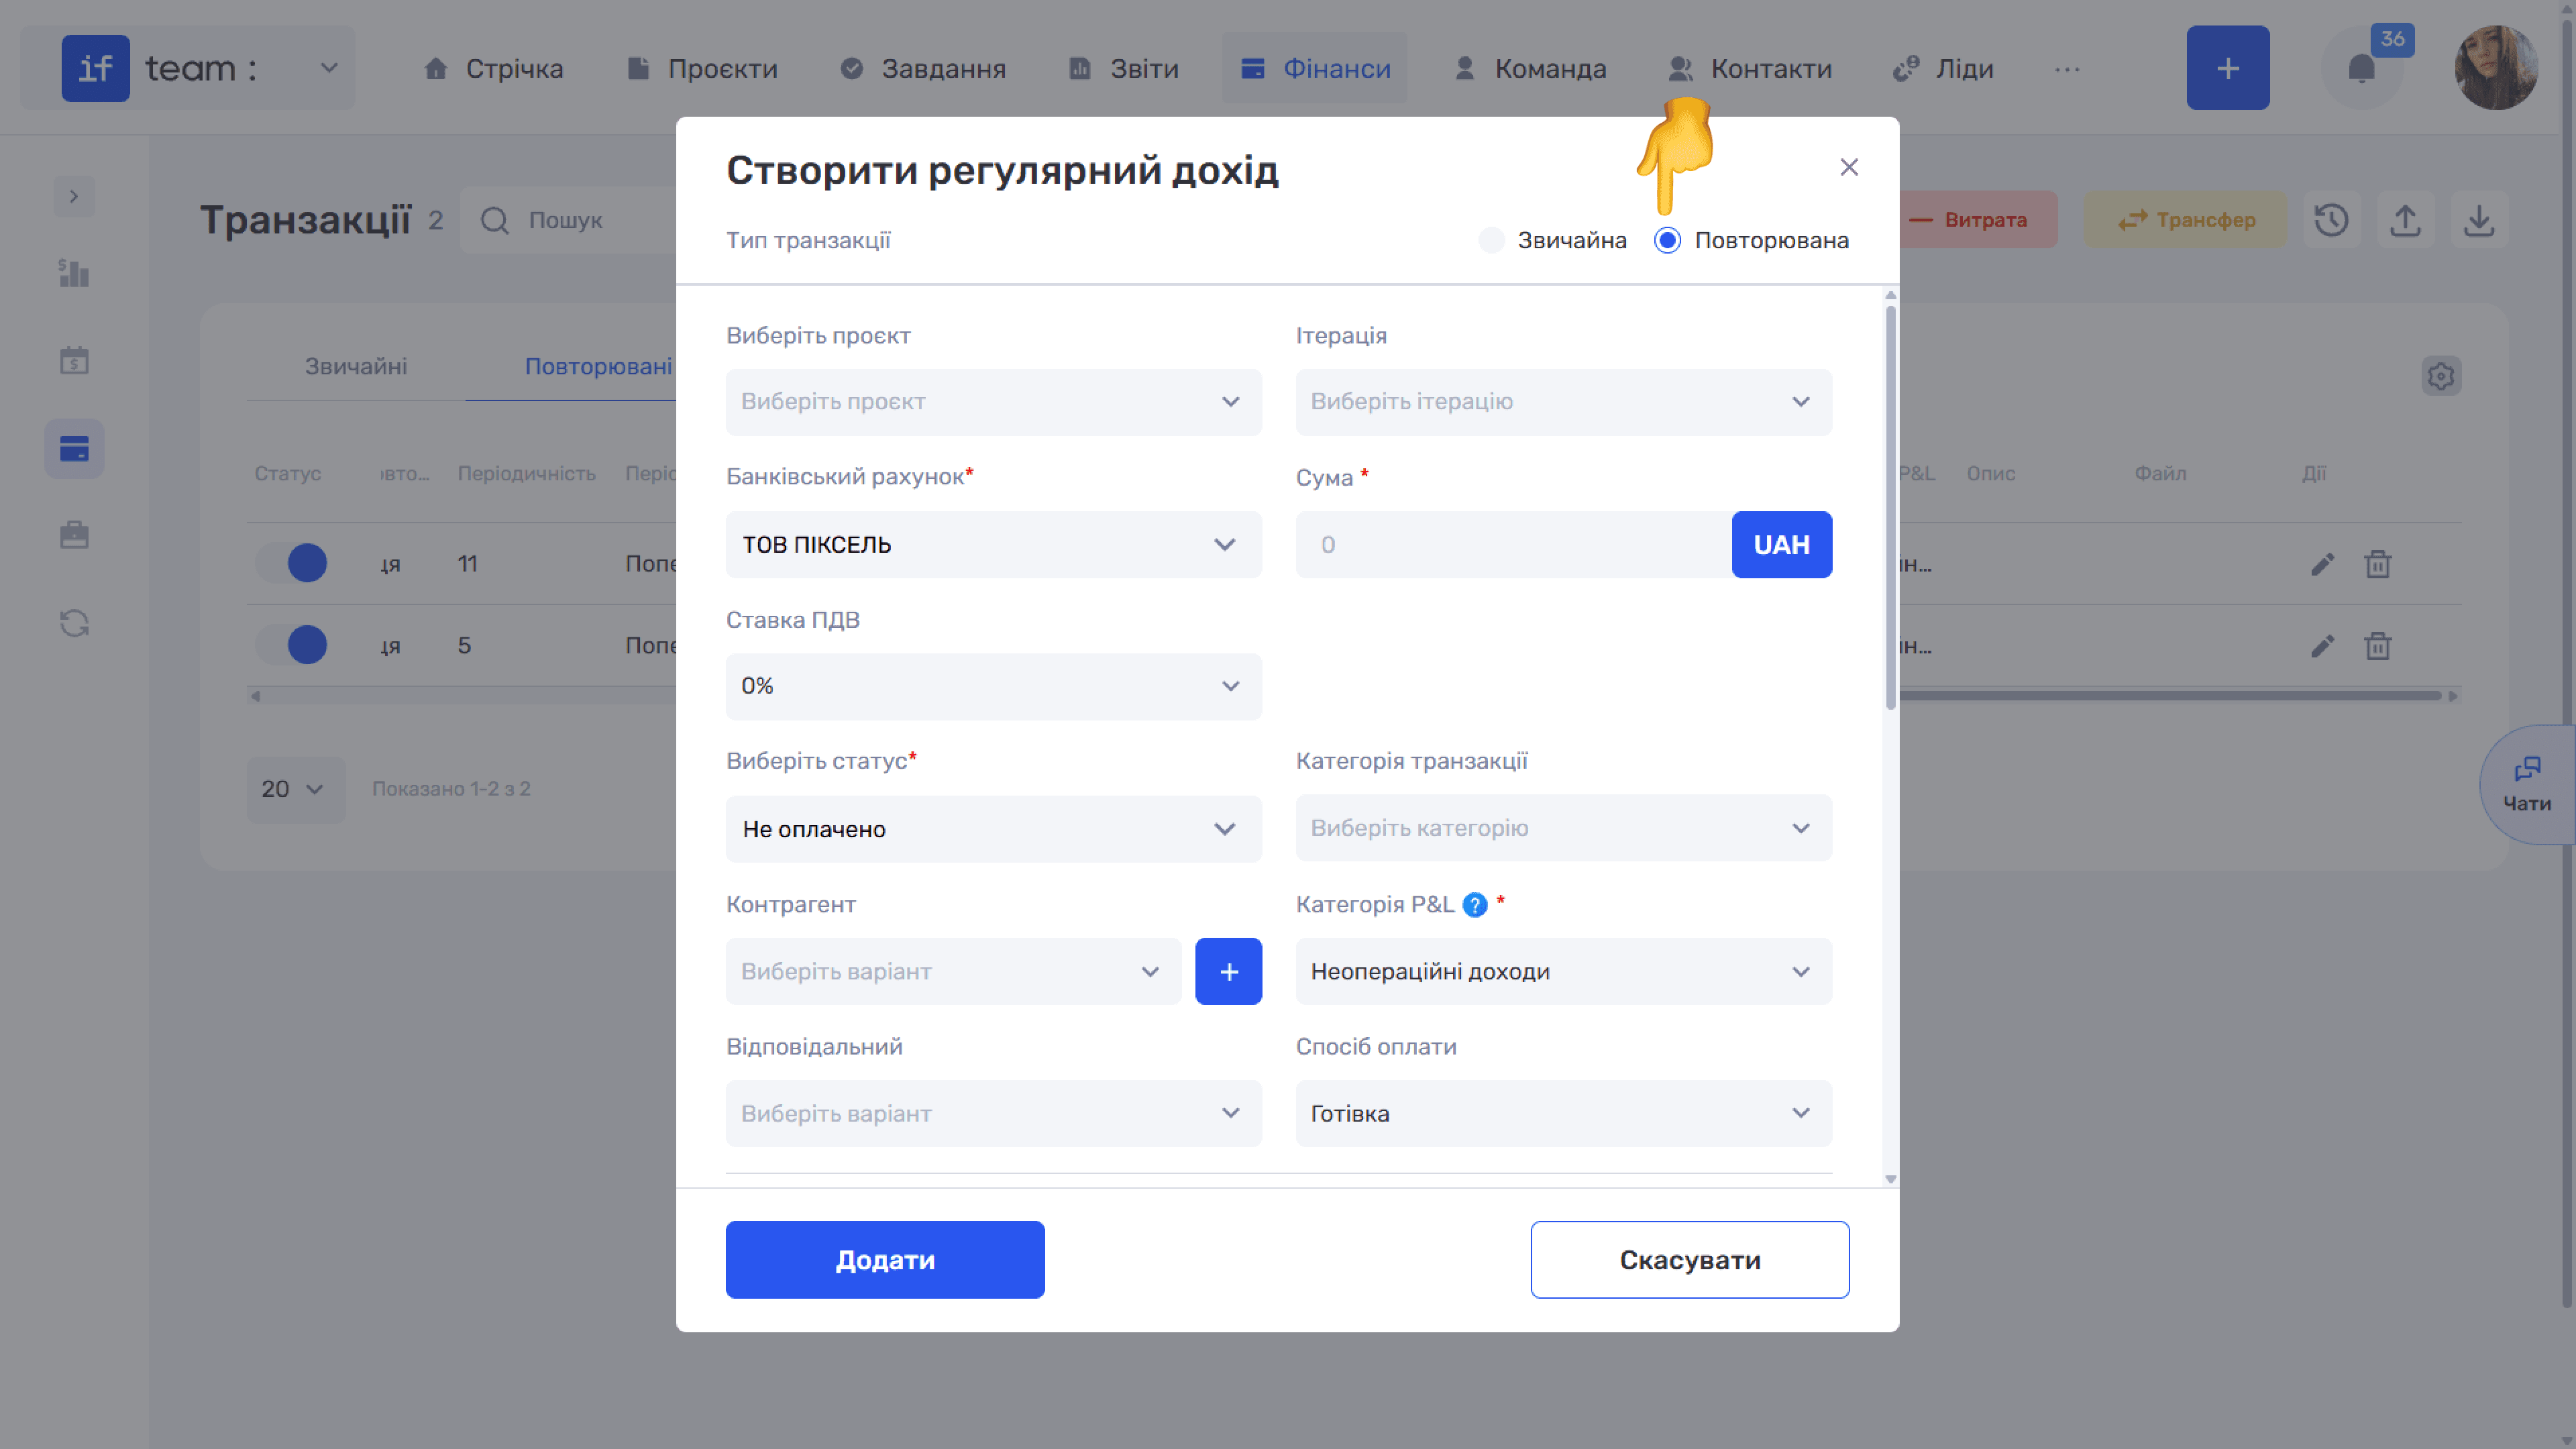
The main fields are the same as for a standard transaction—project and iteration, bank account, amount, VAT rate, status, transaction and P&L categories, counterparty, responsible employee, and payment method. However, there is also an additional schedule section:
- Payment Date sets the transaction frequency: Daily, Weekly, or Monthly.
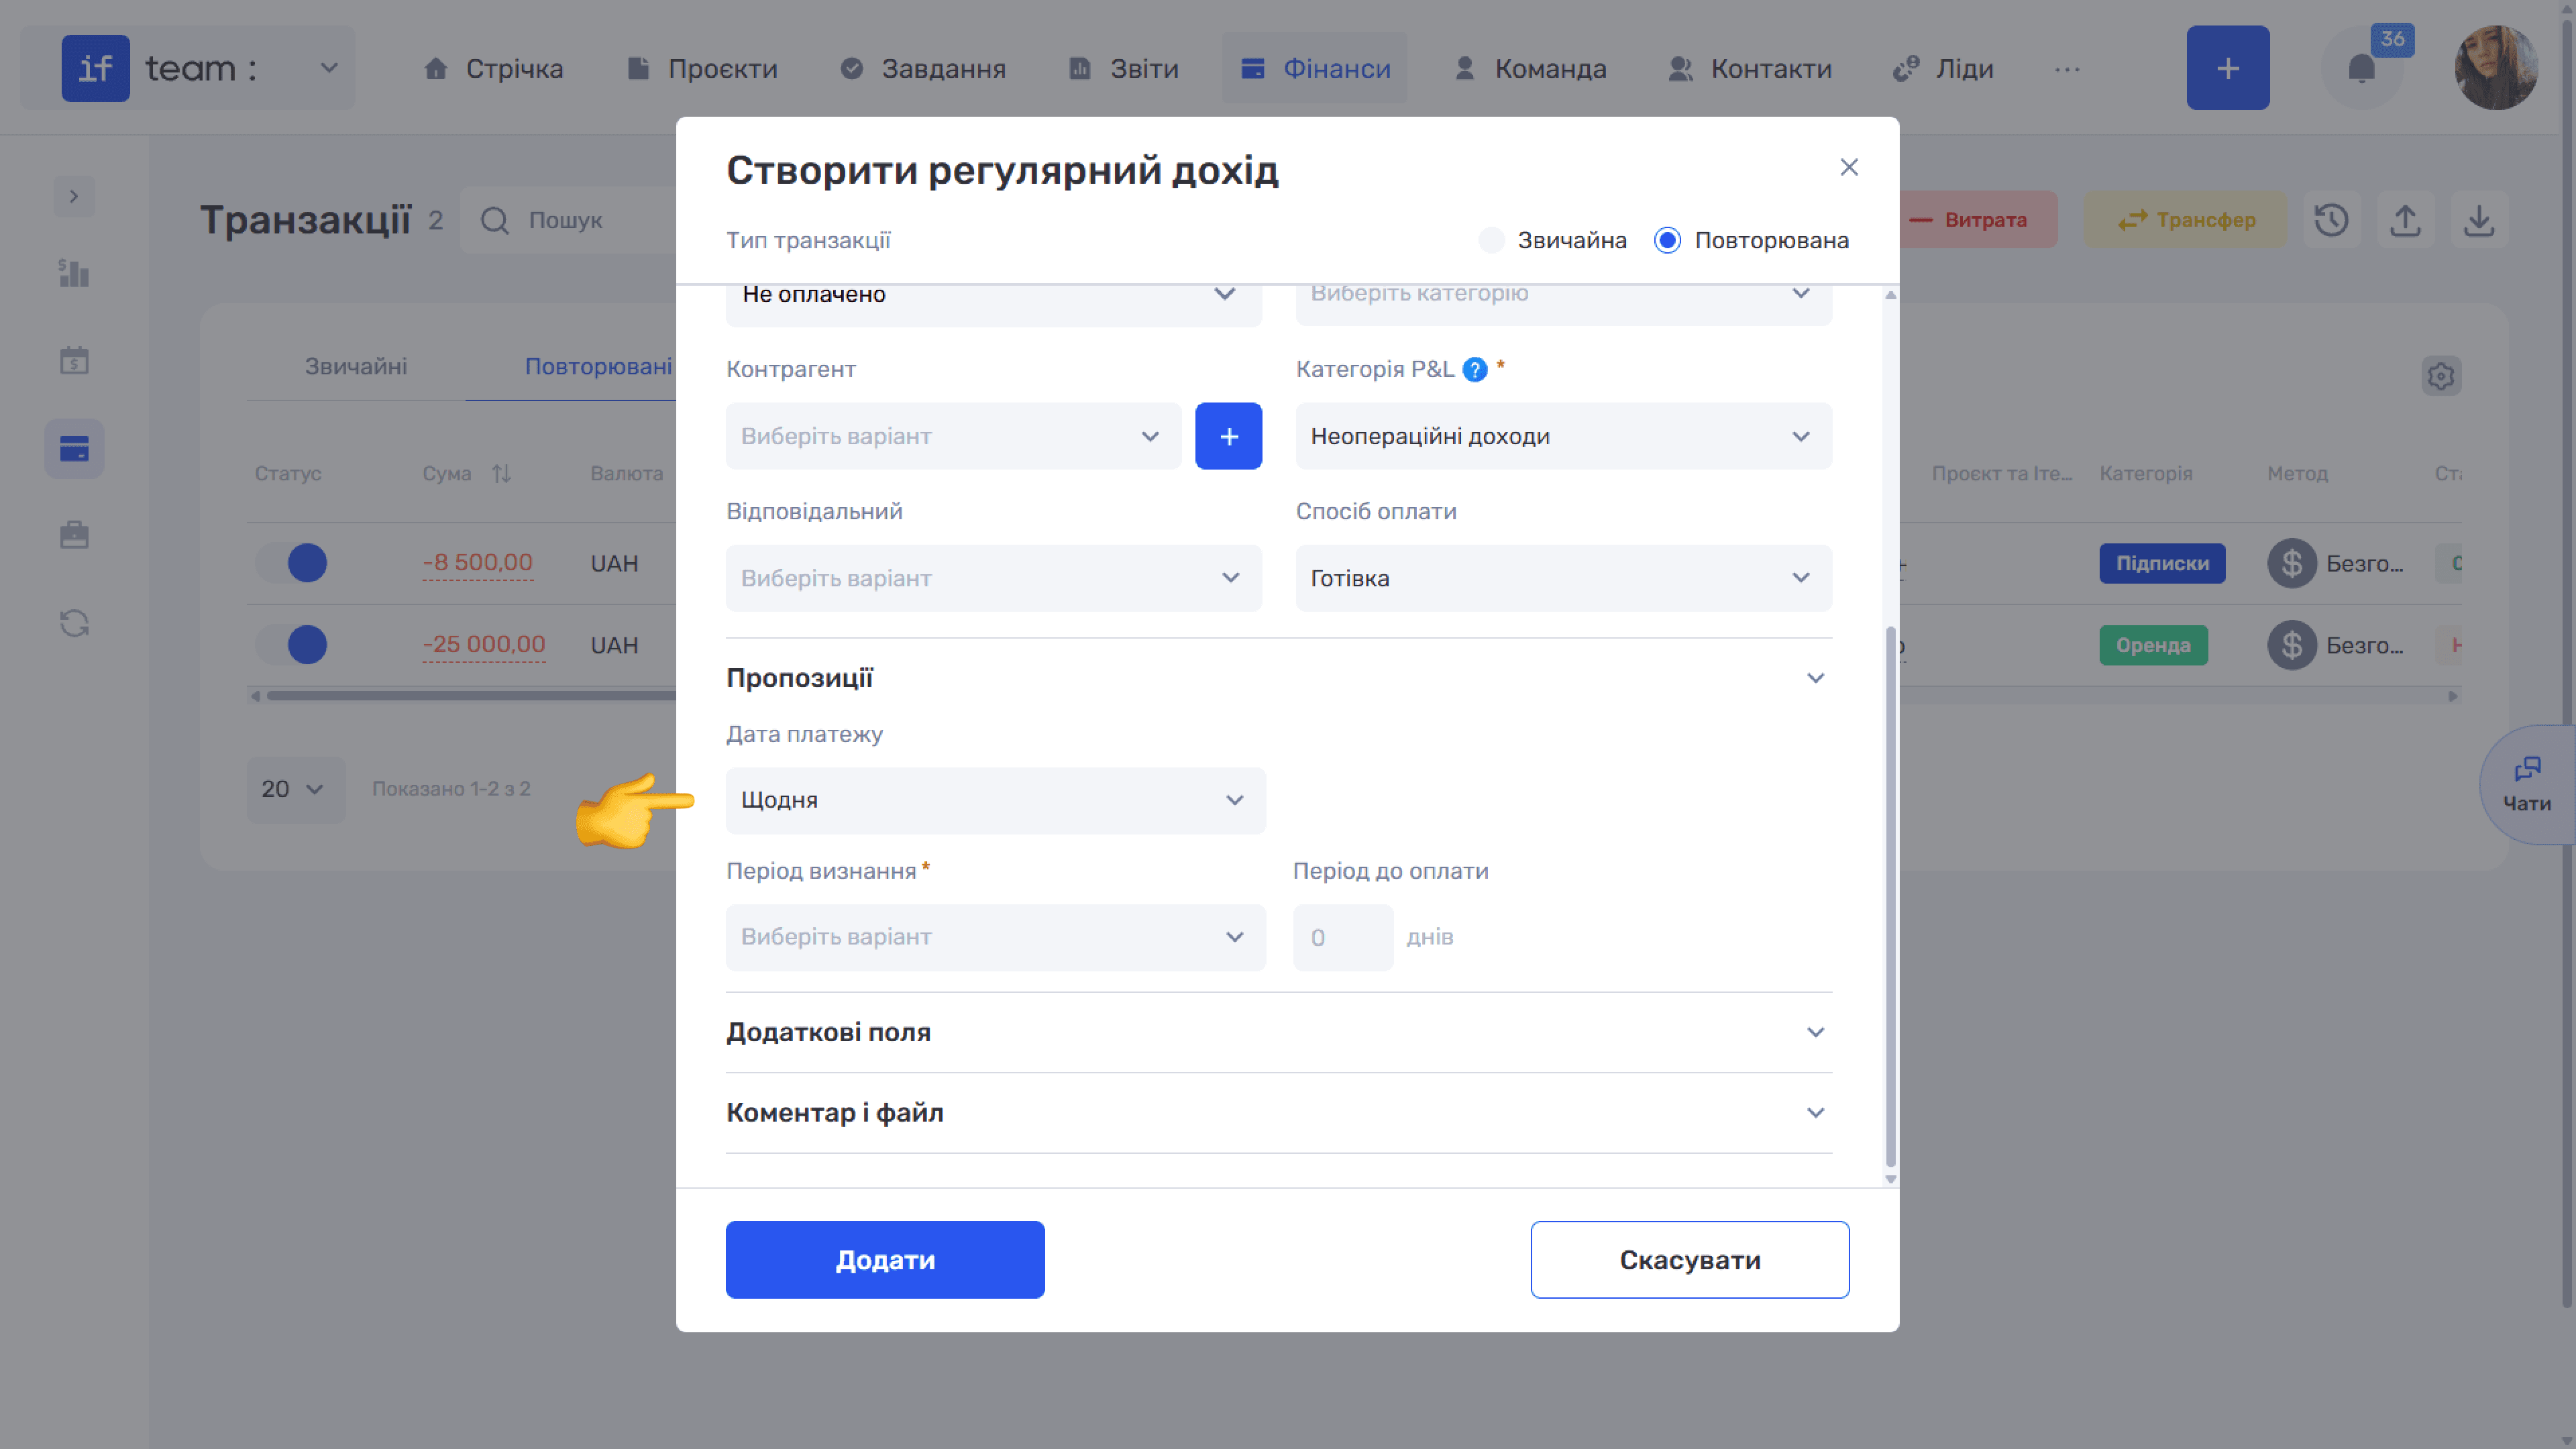
- Day of the Week appears for the Weekly frequency. Click the calendar icon and select one or more days: Mon, Tue, Wed, Thu, Fri, Sat, or Sun.
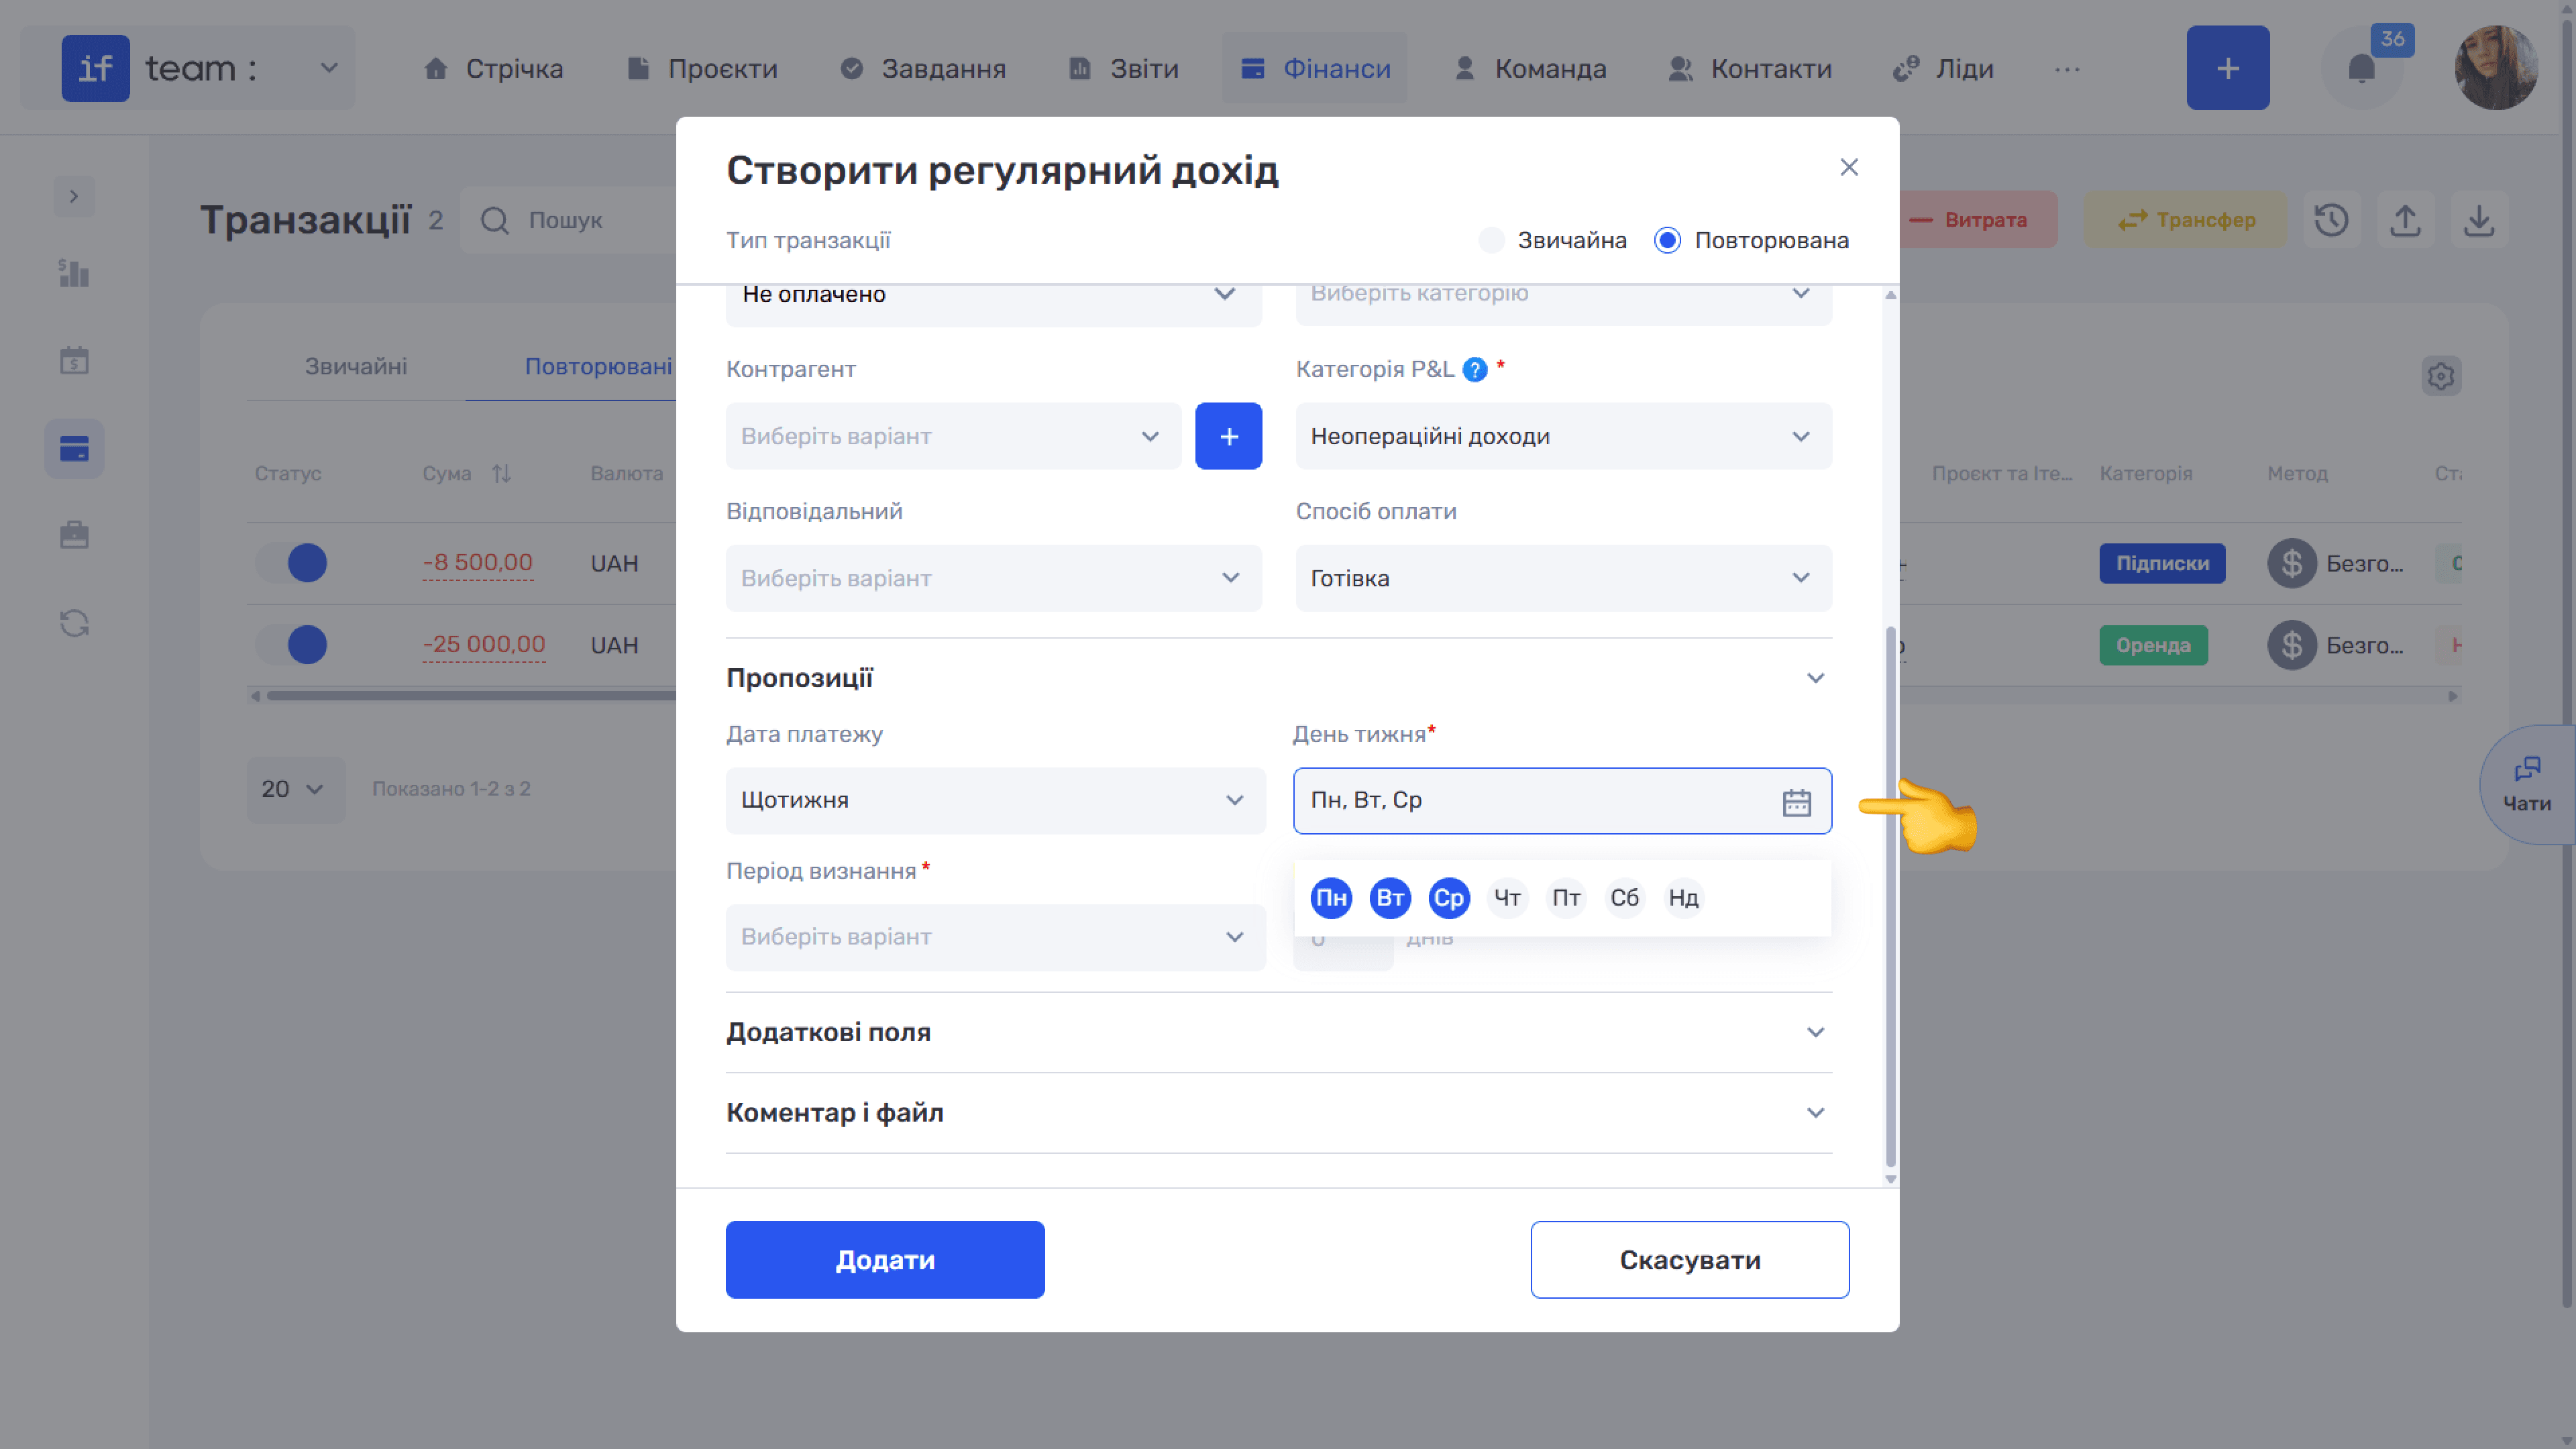
- Day of the Month specifies the days of the month on which the transaction is created. It is required for the monthly frequency.
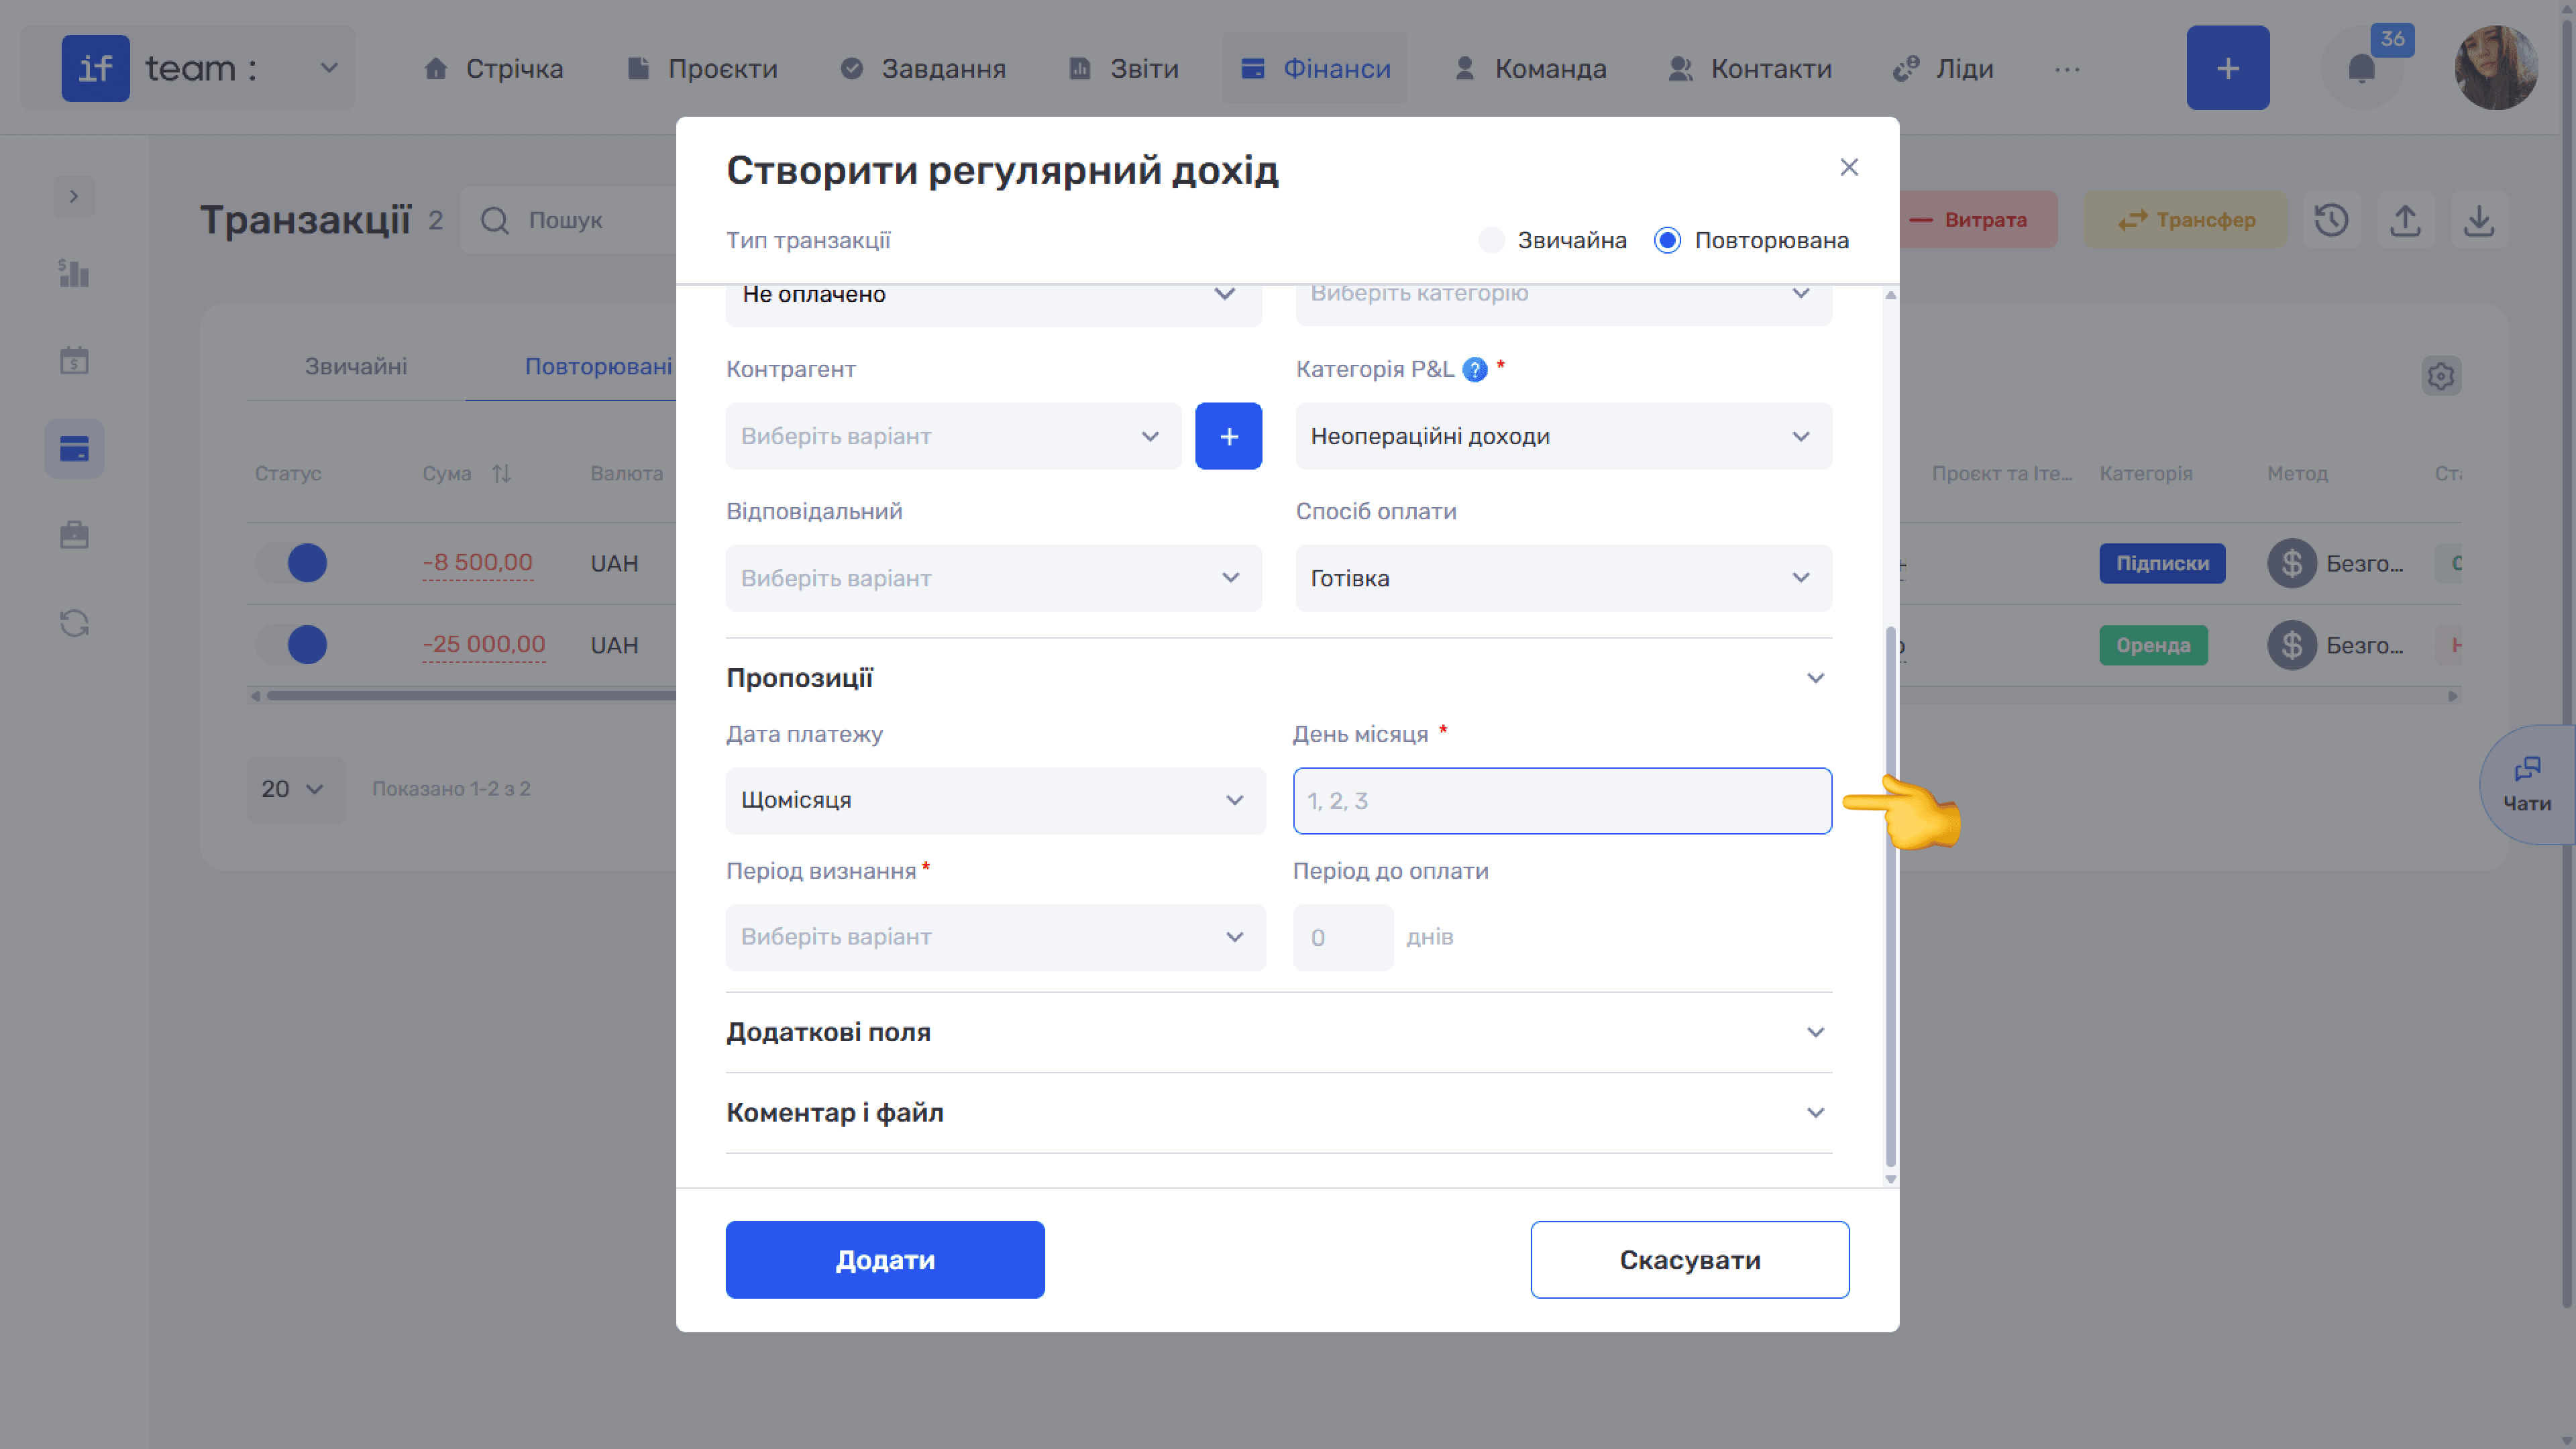
- Recognition Period specifies the P&L period to which each generated transaction is assigned: Previous Month, Current Month, or Next Month. This field is required.
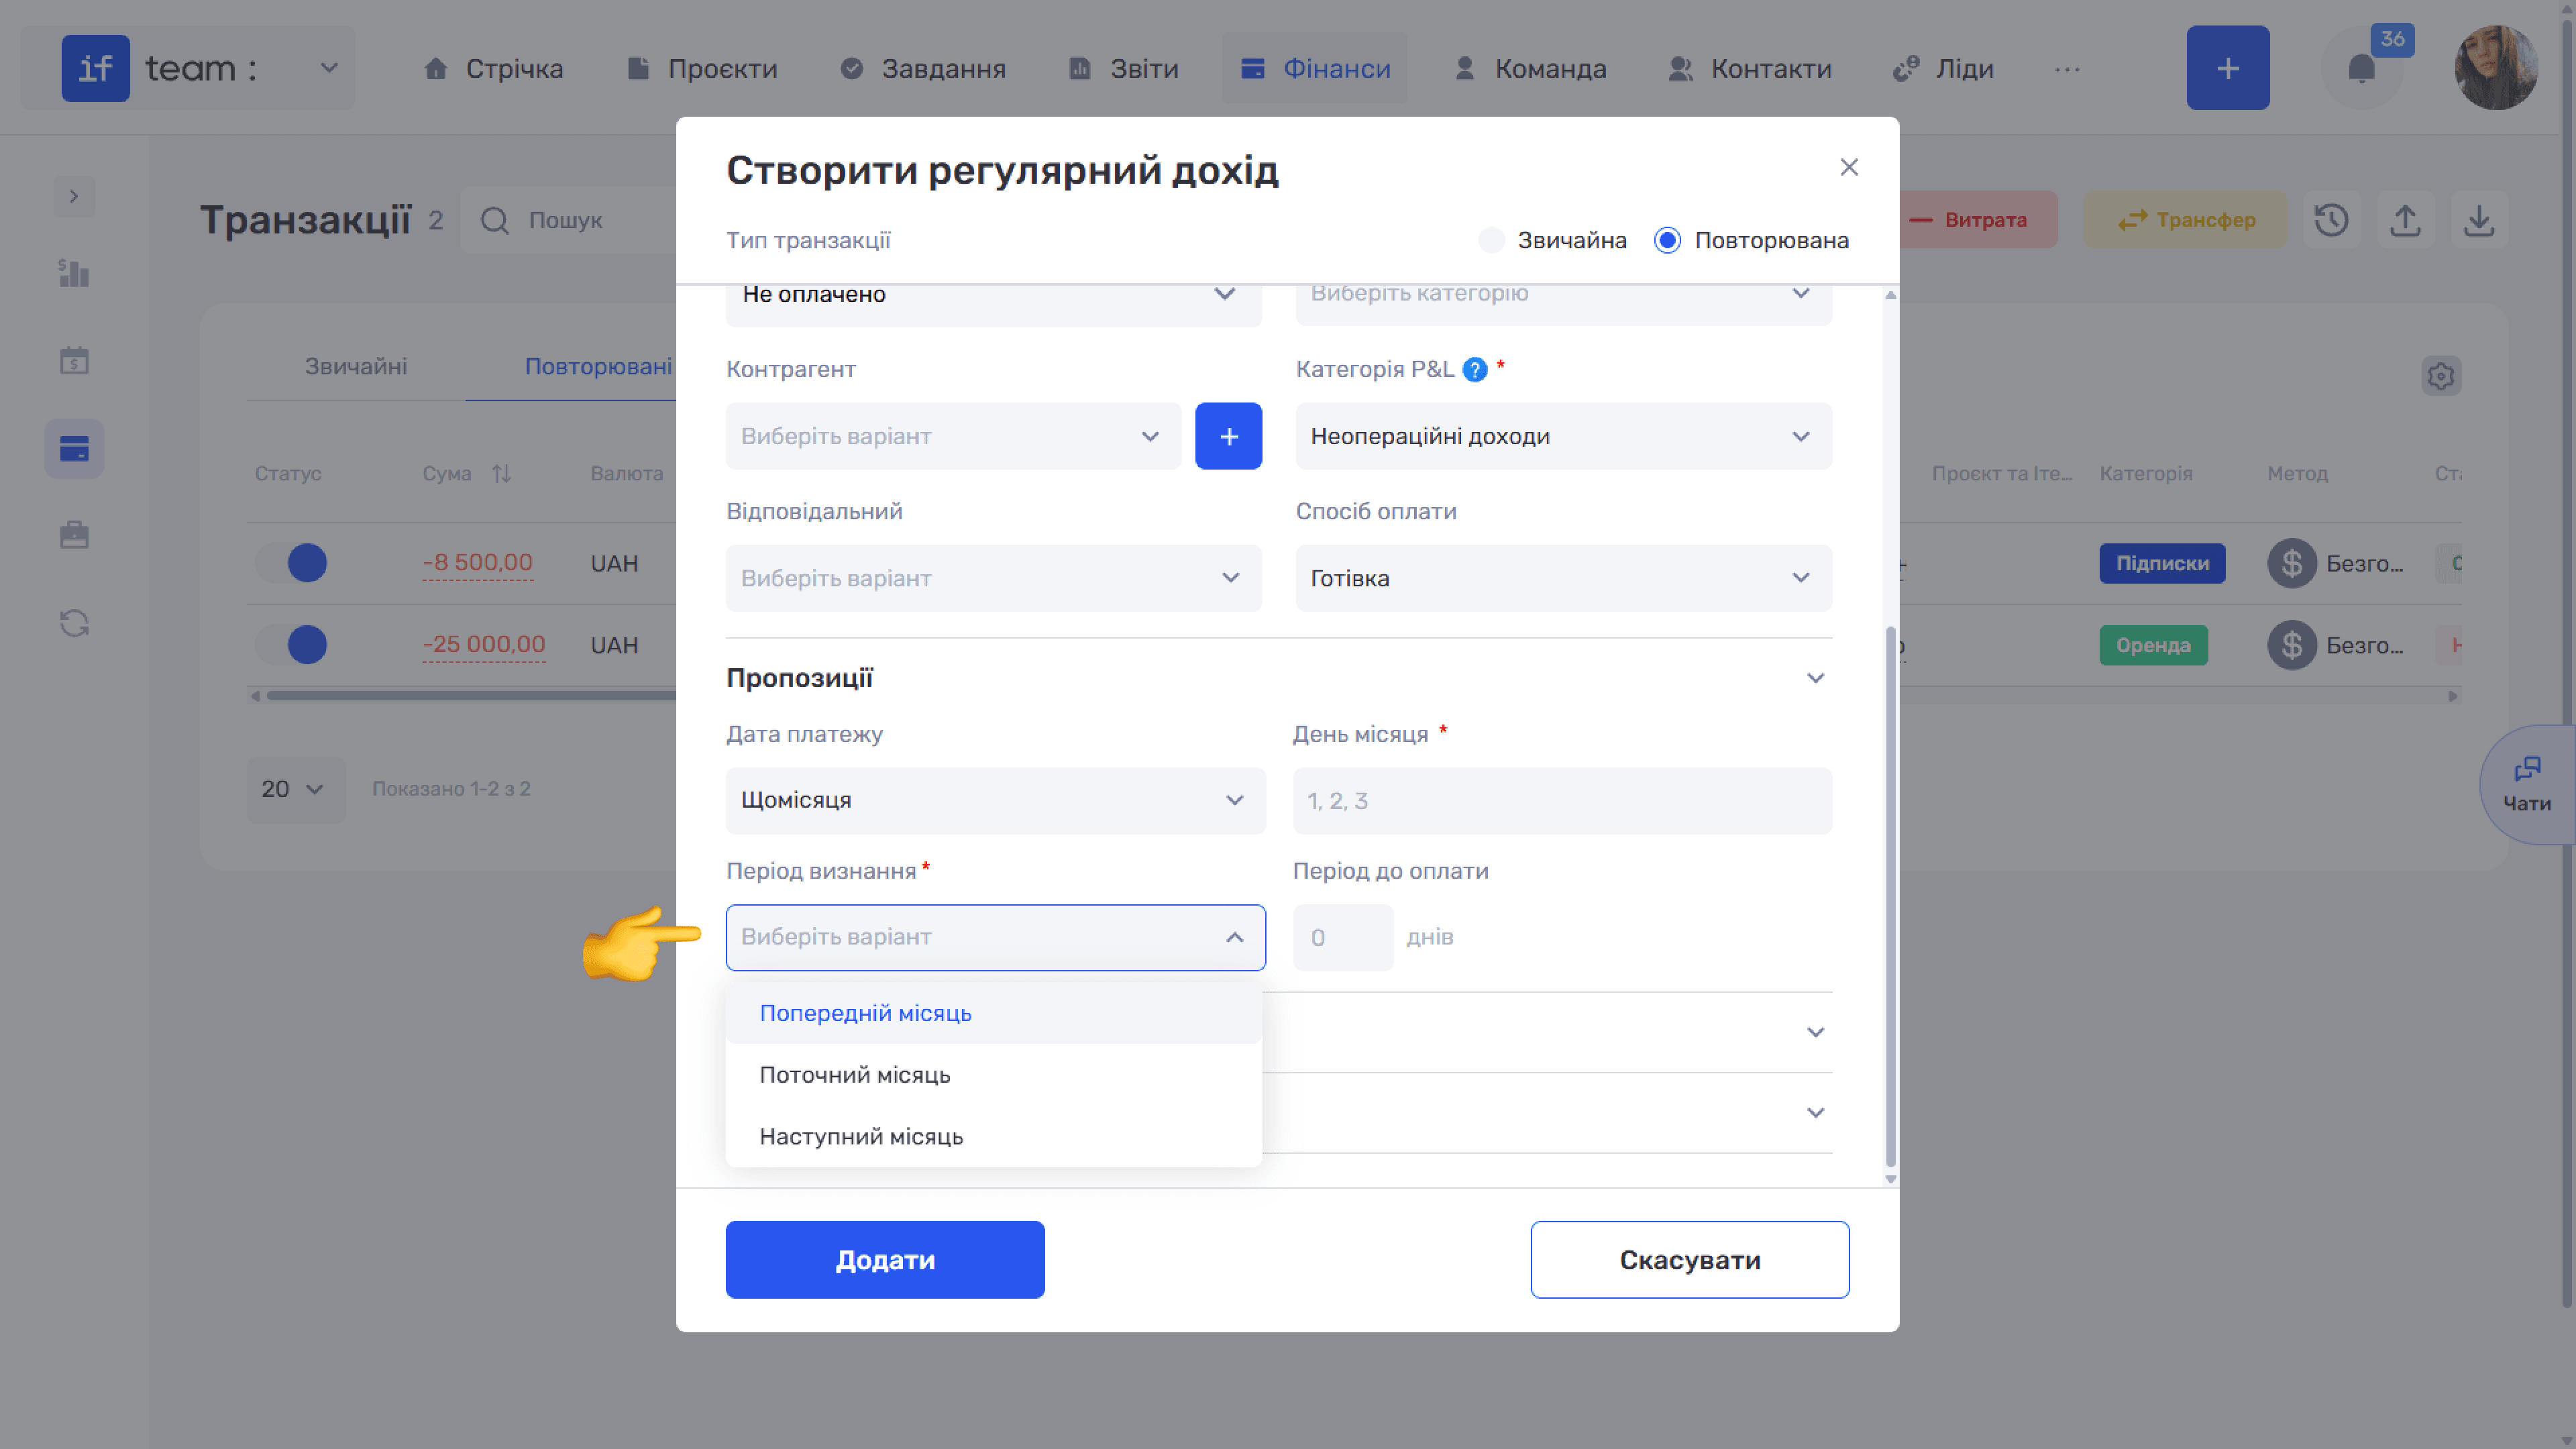
- Payment Period is the number of days allowed to pay the generated transaction. This field is active only if the recurring transaction has the Unpaid status; for paid transactions, it is 0 days.
Click Add. The template is saved, and the system automatically generates transactions according to the schedule.
Where to Find Recurring Transactions
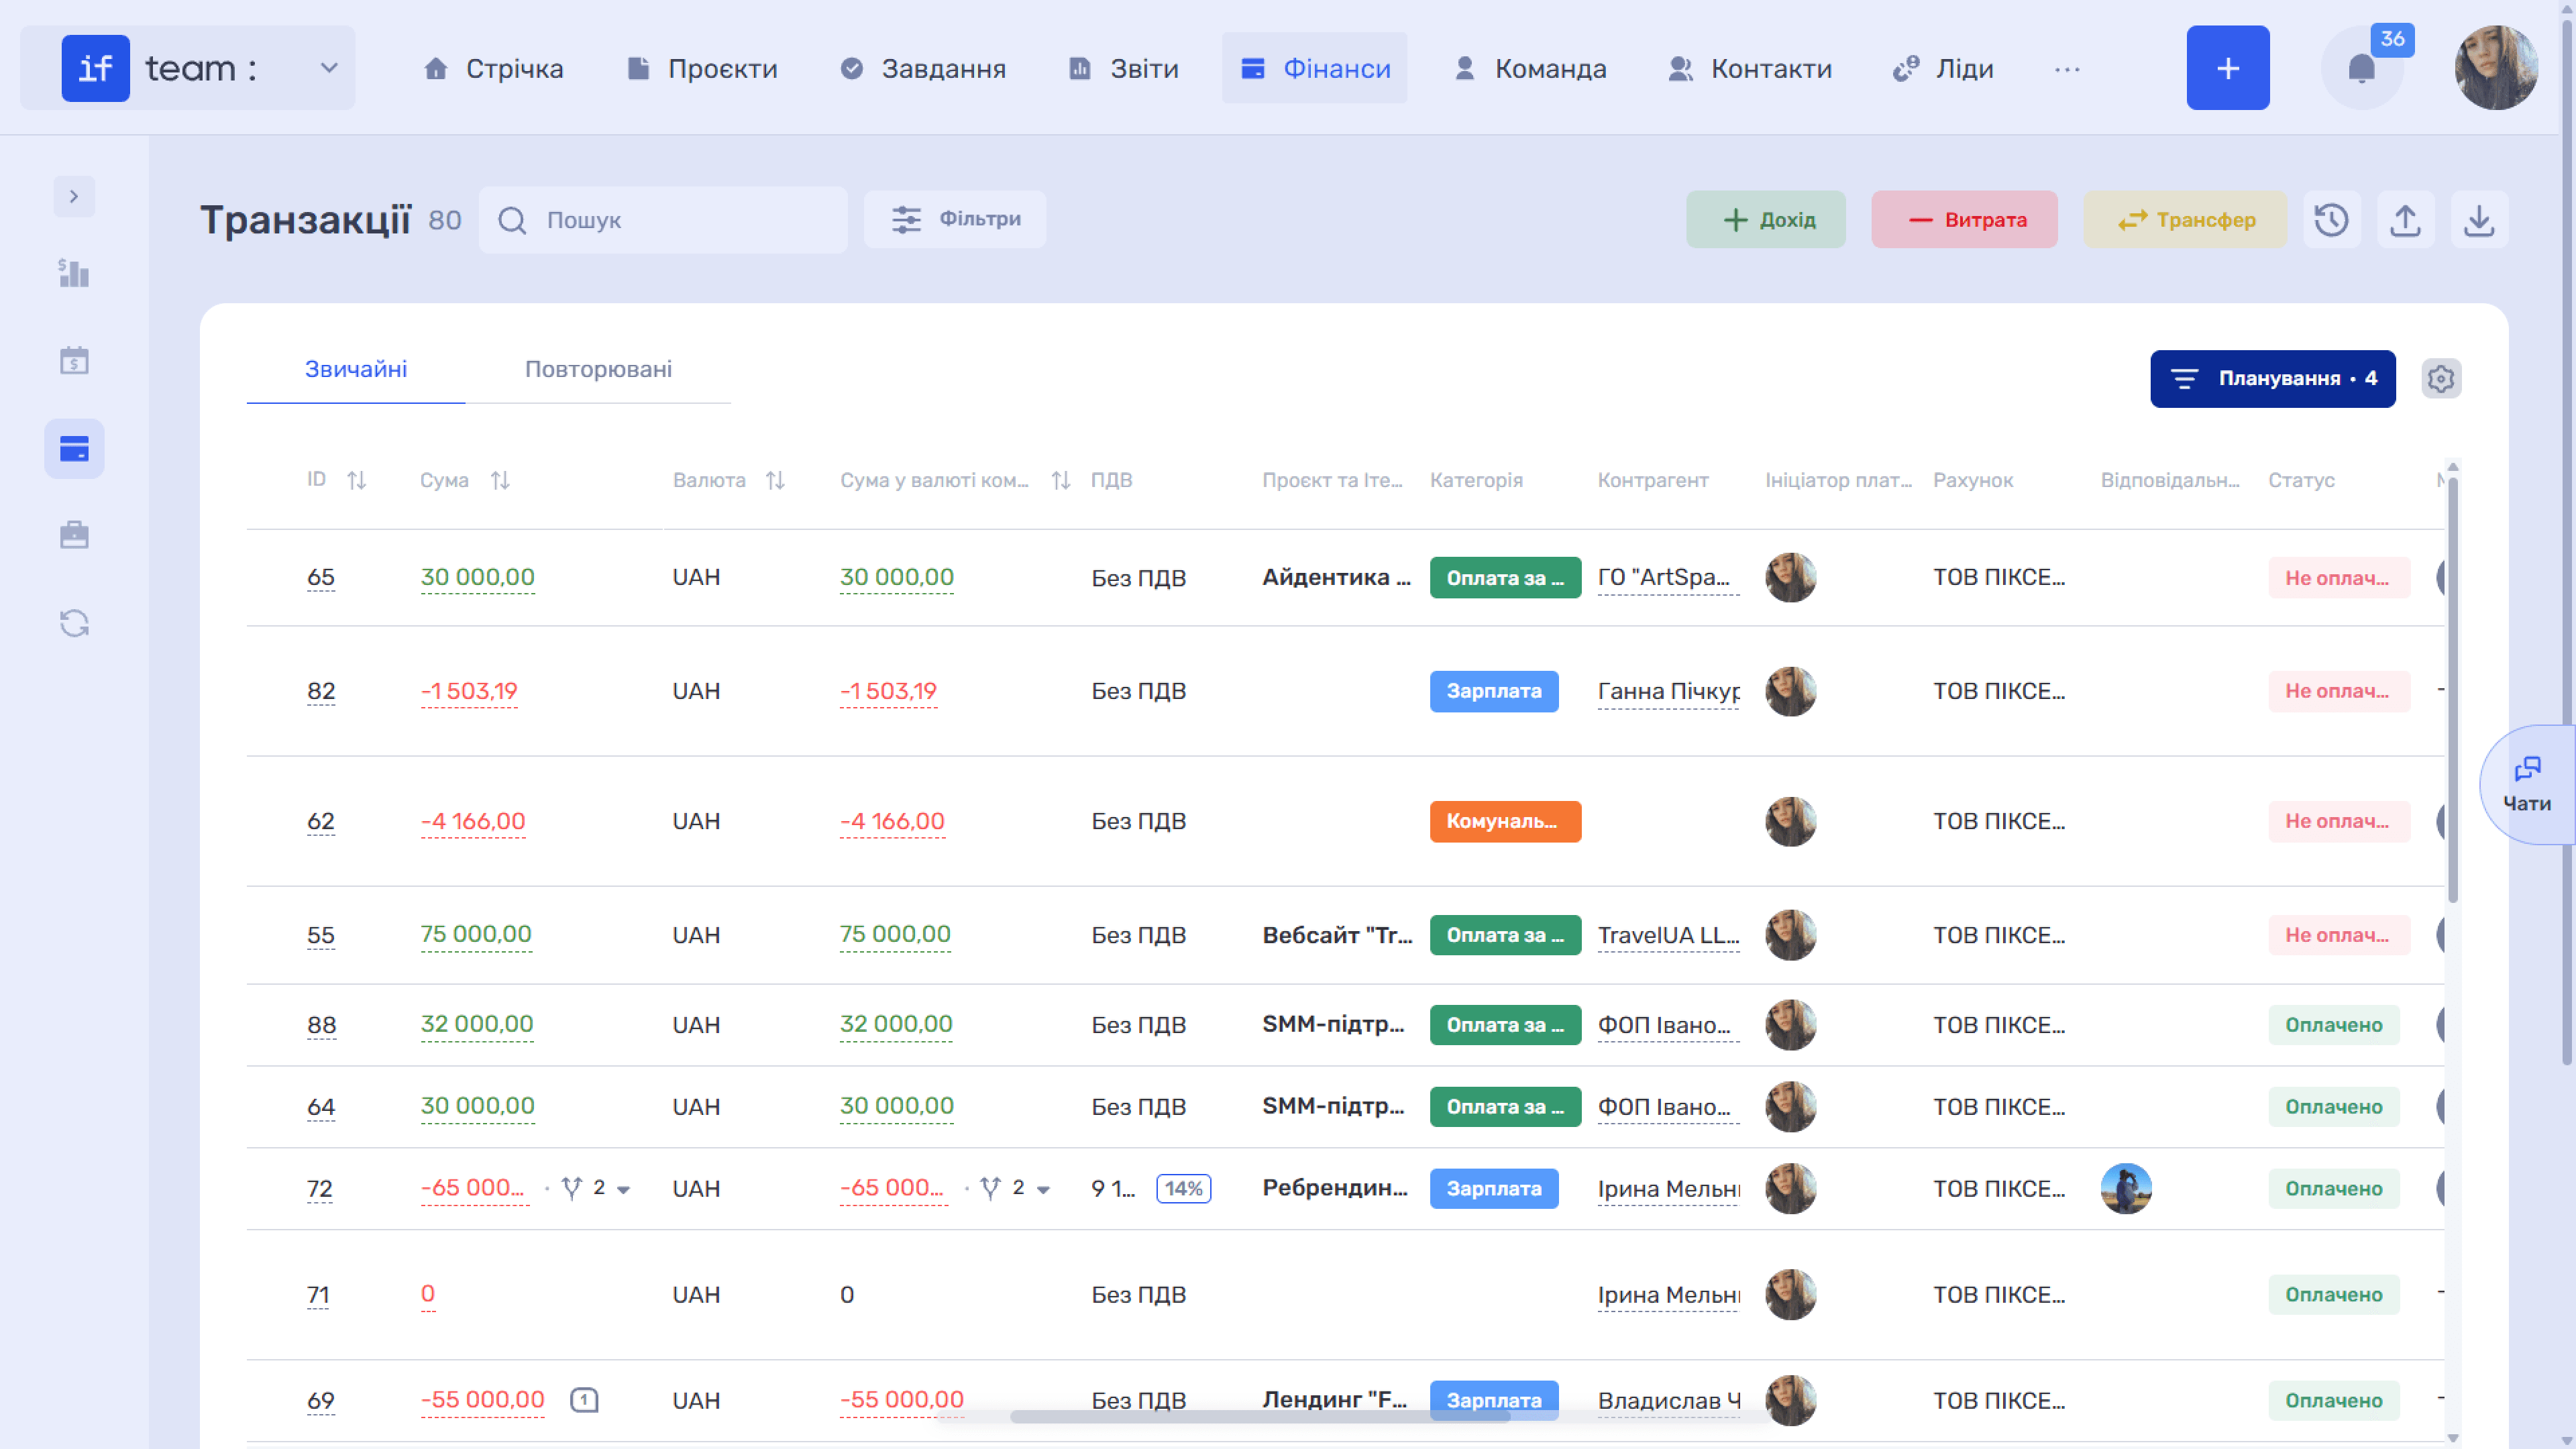
Above the table in Transactions are two tabs: Standard and Recurring. The counter next to the heading shows the number of entries on the active tab.
Open the Recurring tab to see all recurring payment templates. Each row is a separate rule with its own parameters and schedule: recurrence period, frequency, and the P&L period to which generated transactions are assigned.
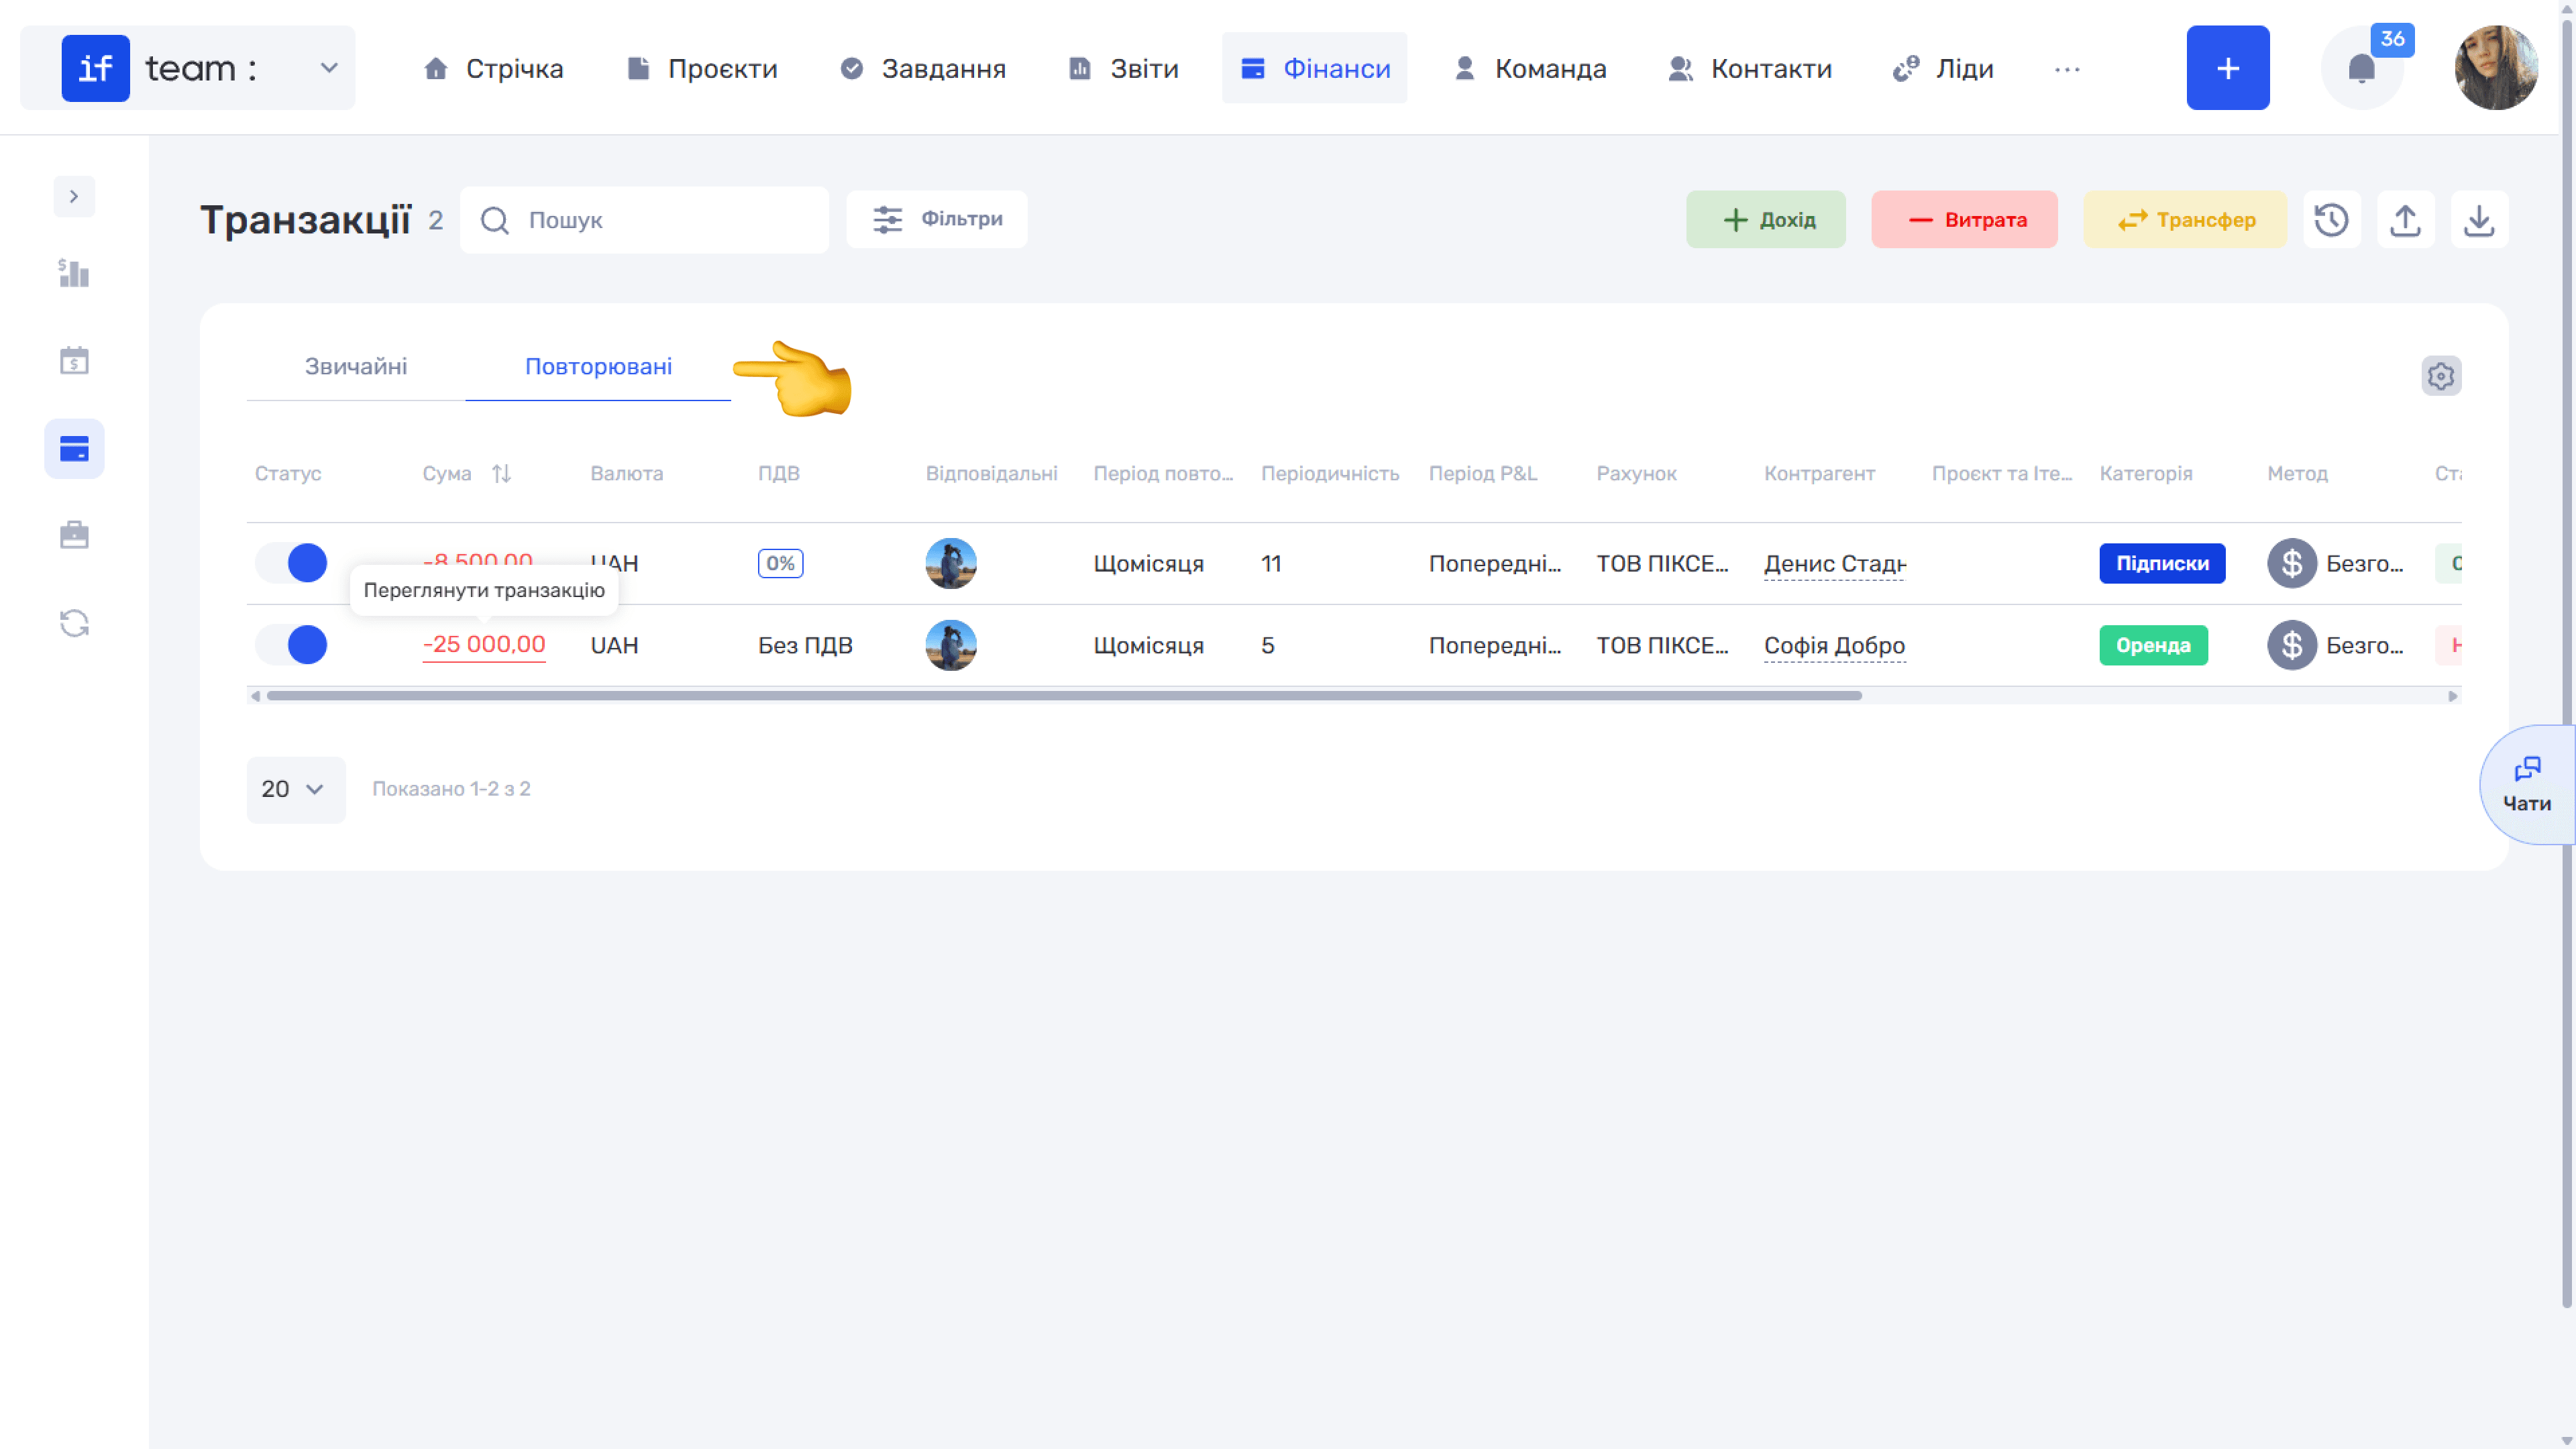
The first Status column contains a switch that enables or pauses the template. When disabled, the rule remains in the list, but new transactions are not generated from it. This is convenient when you need to pause a recurring payment temporarily without deleting its settings.
To open a template for editing, click the cell containing the amount or the ✏️ icon in the table’s Actions column.
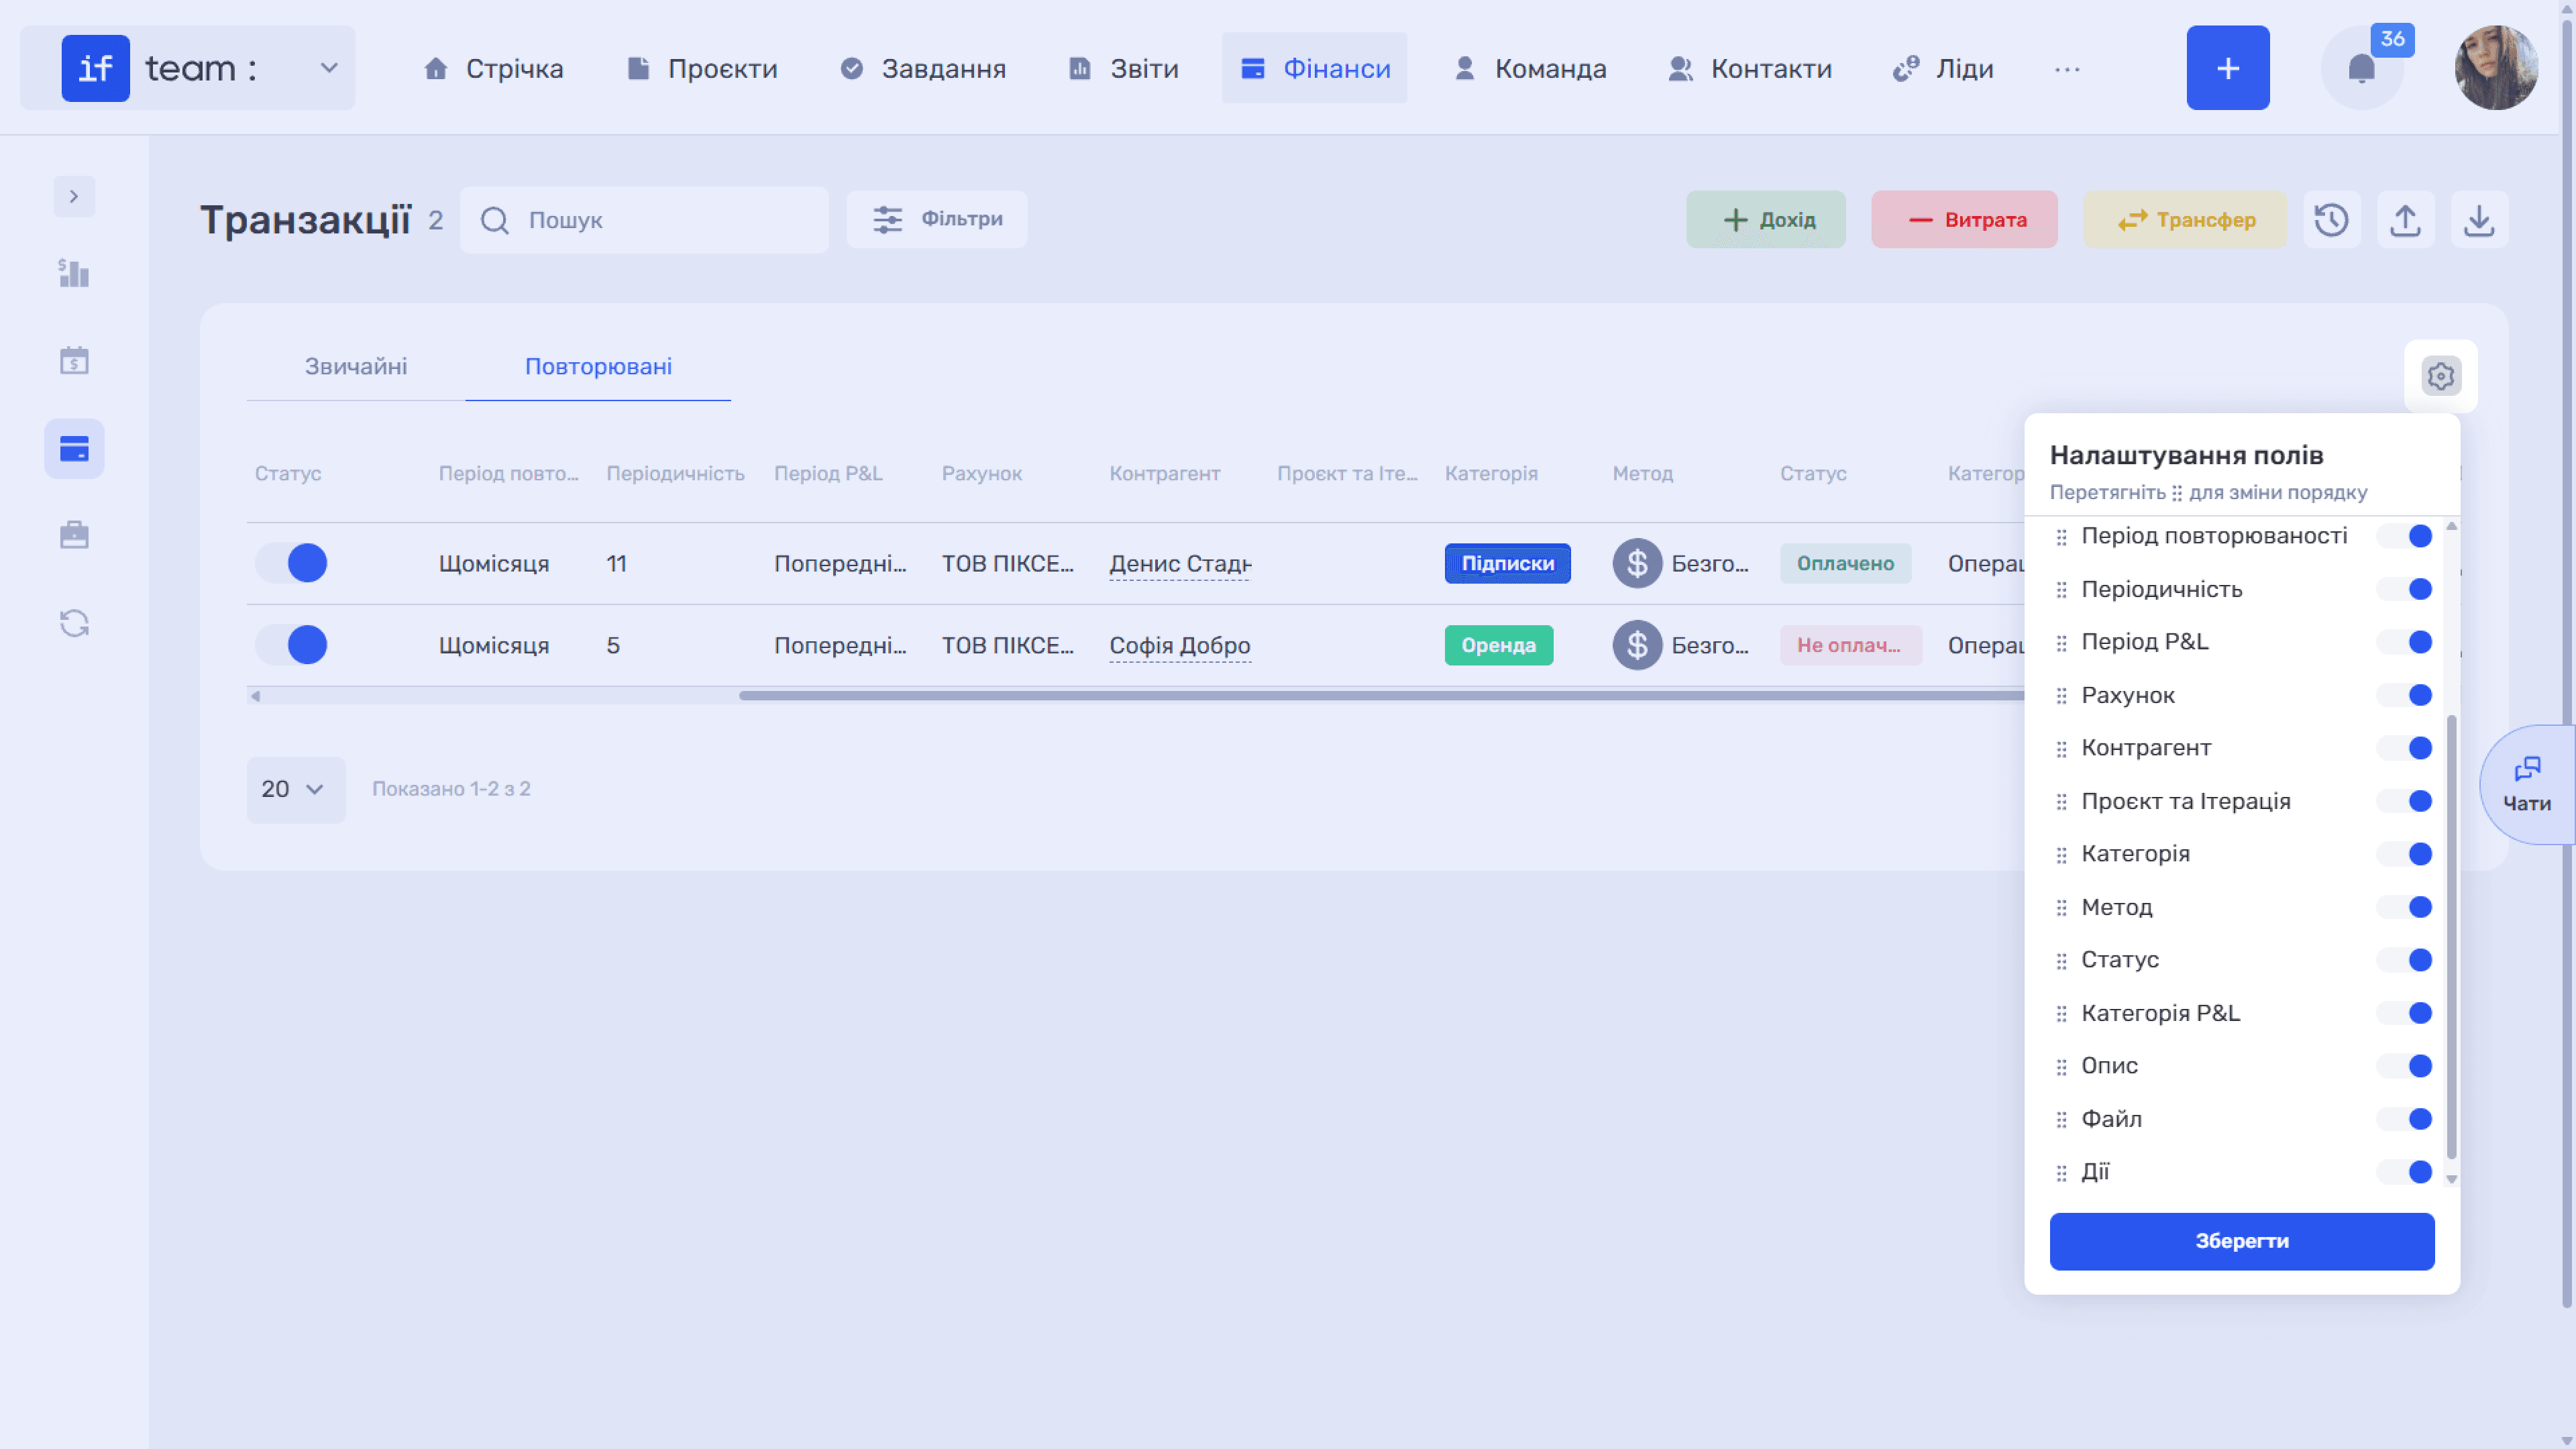
As in other Finance tables, configure the set and order of columns using the gear icon (⚙). In the Field Settings panel, enable, disable, or drag the required columns.
Planned and Overdue Payments
Any transaction with the Unpaid status and a future date is considered planned. These payments are summarized under Upcoming Transactions in the left-hand panel, with separate totals for future income and future expenses.
To display planned transactions on the Cash Flow chart, enable Planning · N. They appear on the chart as future income and expenses and form the planned balance, allowing you to identify cash shortfalls in advance. For details, see Cash Flow Planning and Tracking.
If the payment date has passed and the status has not been changed to Paid, the transaction is considered overdue and is marked with separate hatching on the Cash Flow chart.
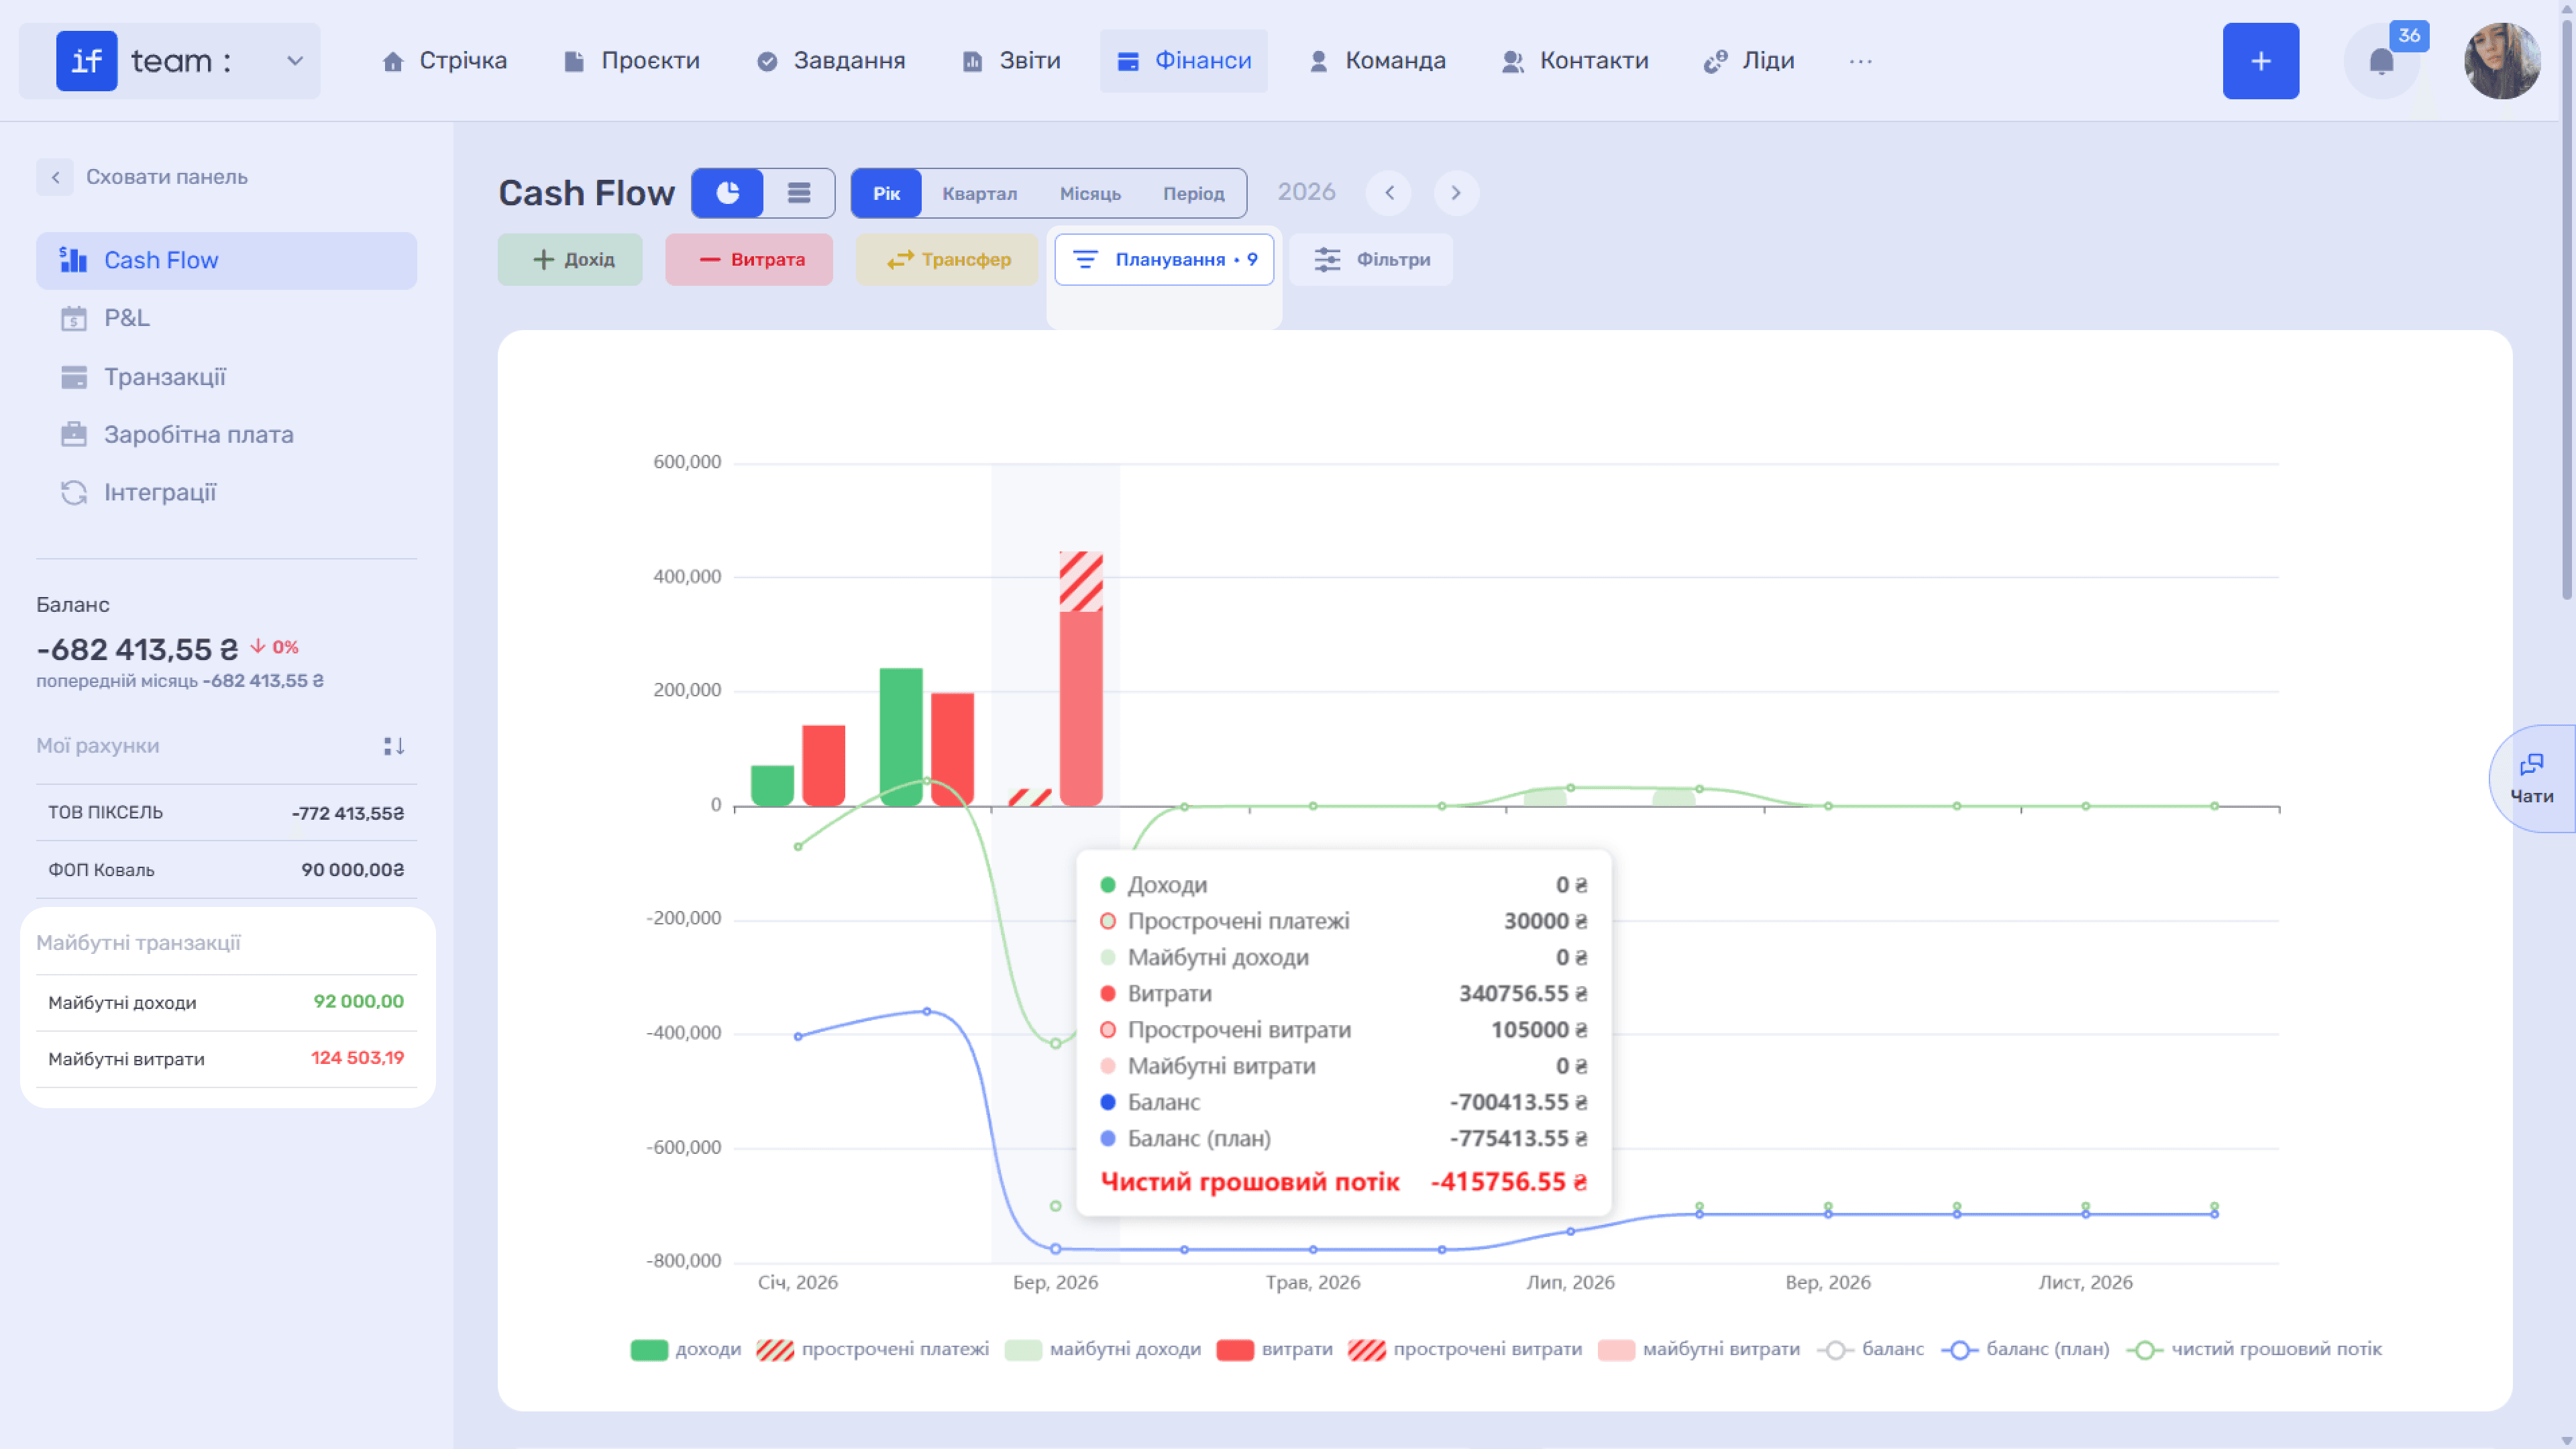
The Planning · N button above the table in Transactions enables the display of planned transactions, while the counter next to it shows the number of these payments. Clicking the button moves planned entries to the top of the table. Clicking it again hides them and restores the standard transaction order.
Still have questions?
Maybe we haven't added this information yet. But you can always reach out:
Request a demo
Submit a request and we'll show you how the service works and its capabilities.
Book a demo