Custom Fields for Projects
if.team lets you create custom fields for projects so you can adapt the system to the specifics of your business.
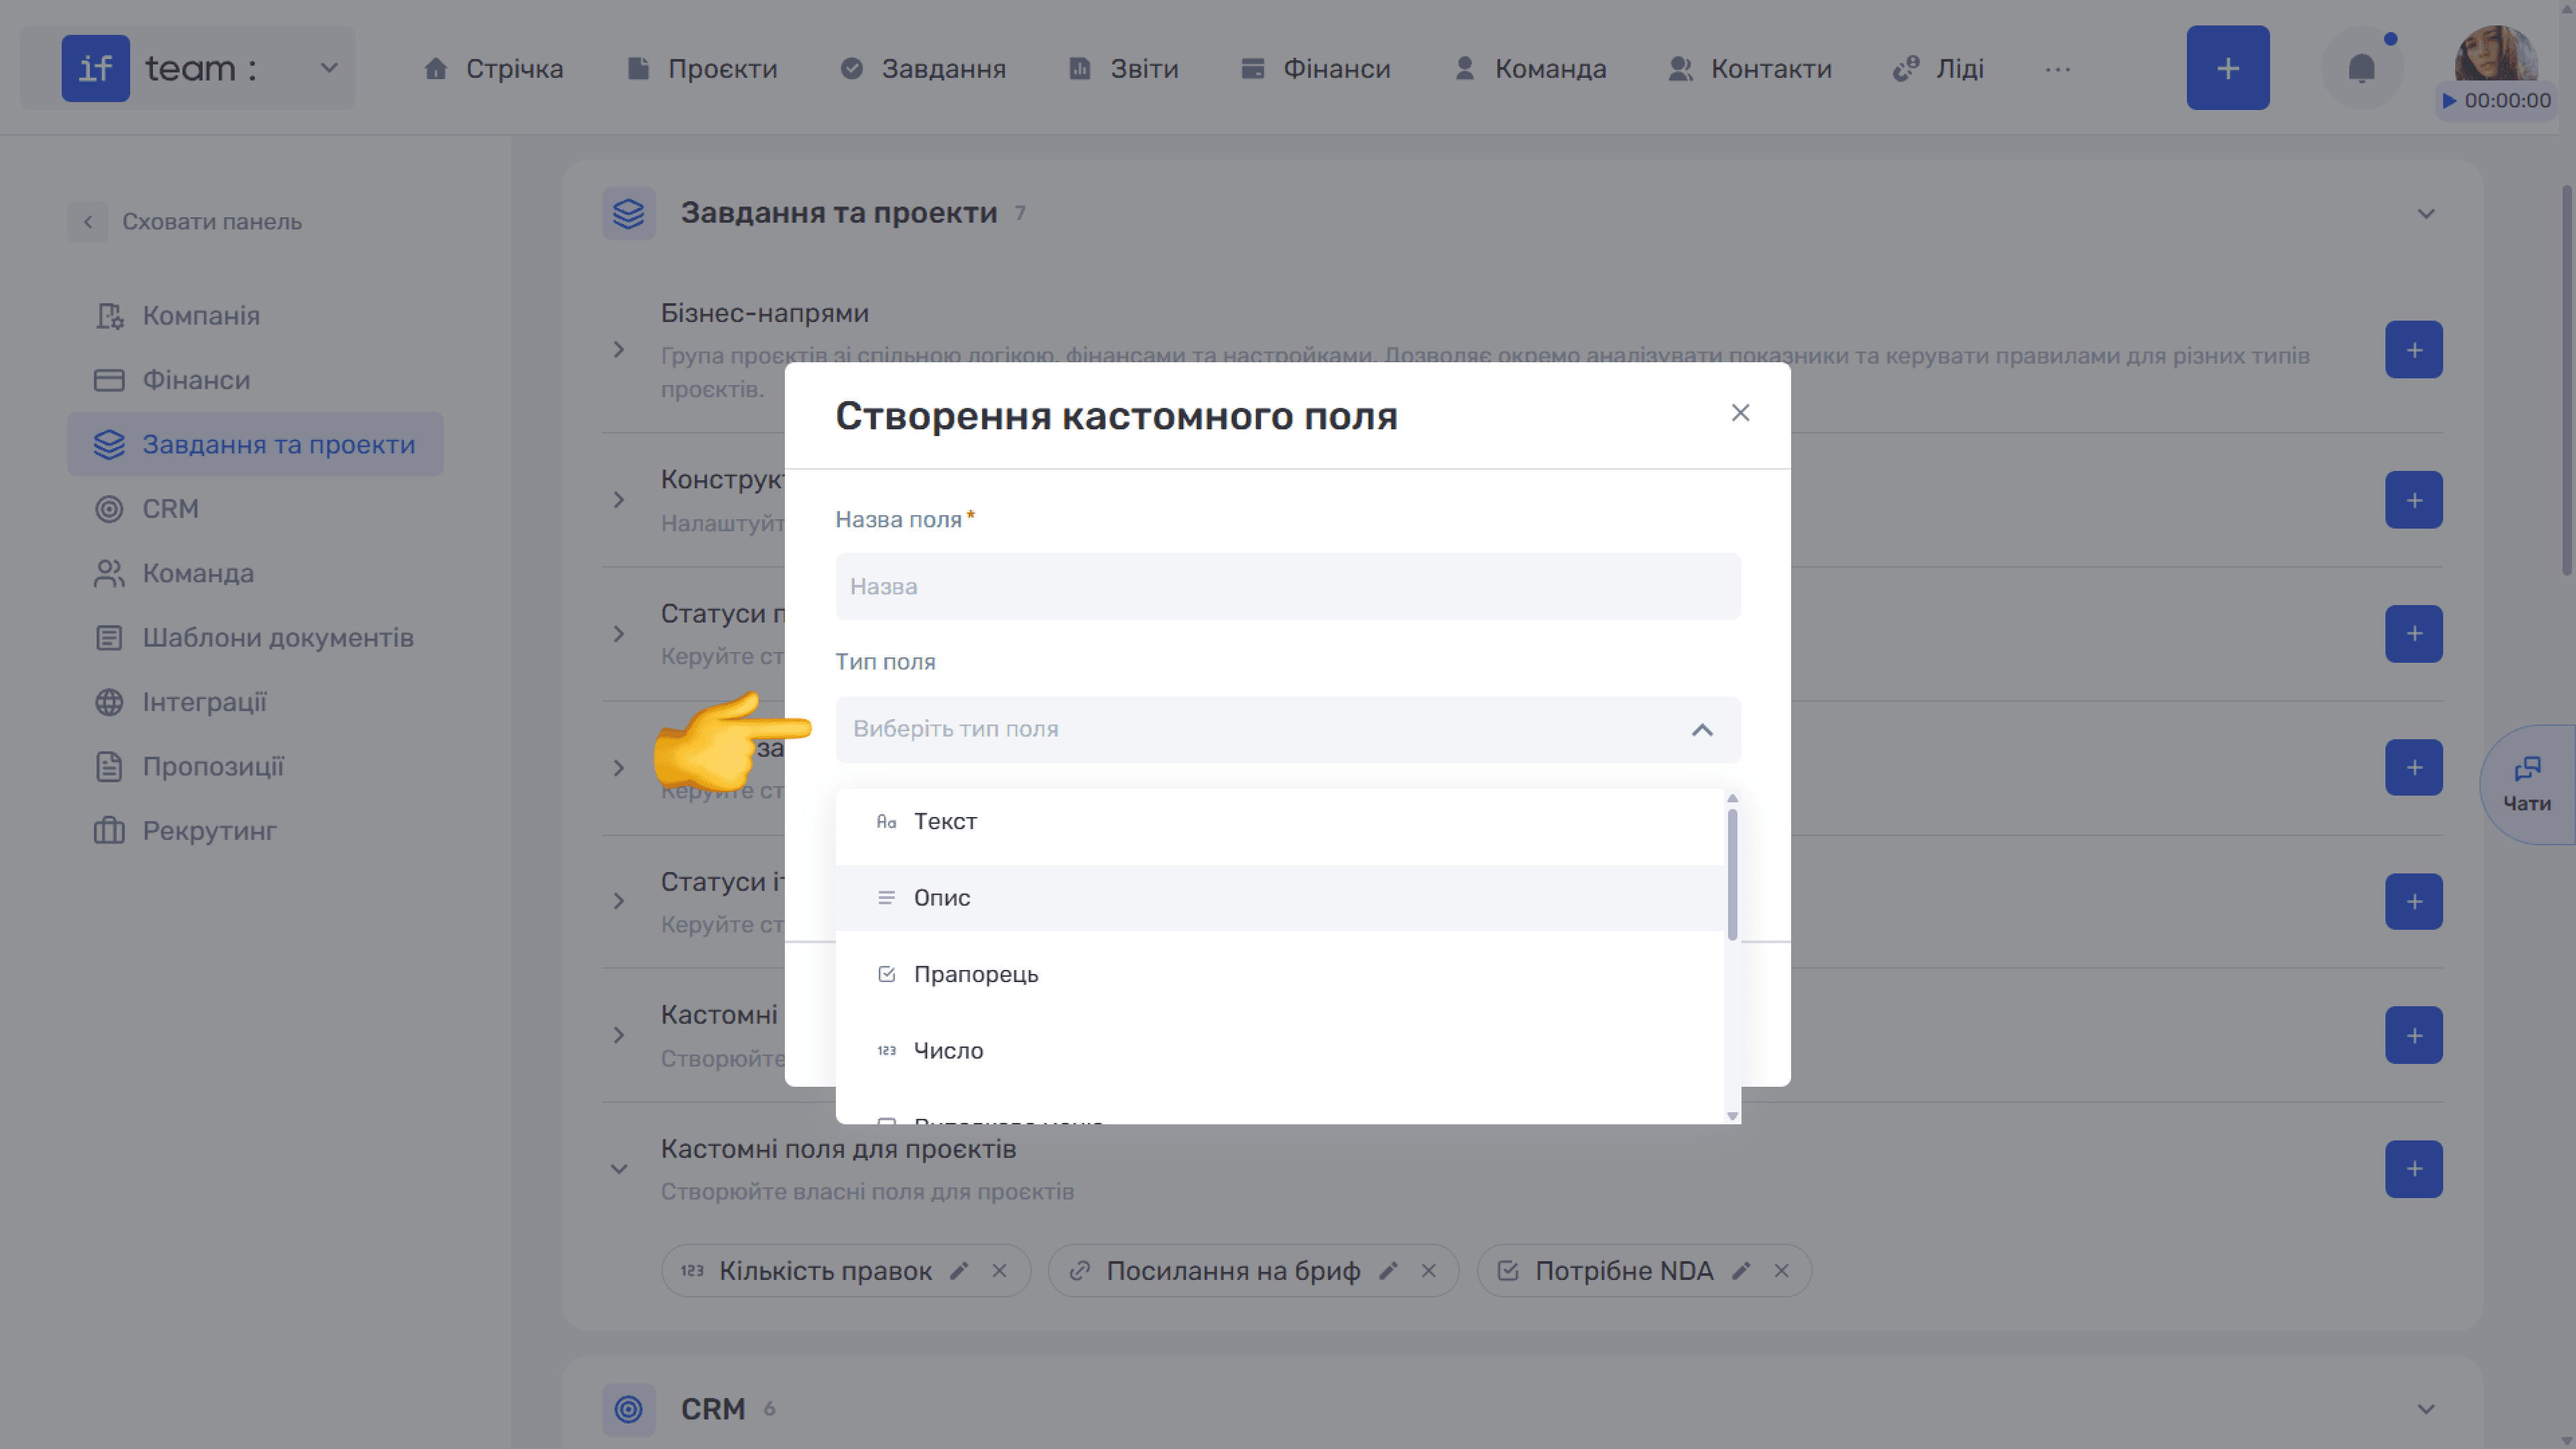
Available Field Types
Text, Description, Checkbox, Number, Drop-down, Date, Date and Time, Link, Labels, Time, Participants, and Contacts.
How to Create a Custom Field
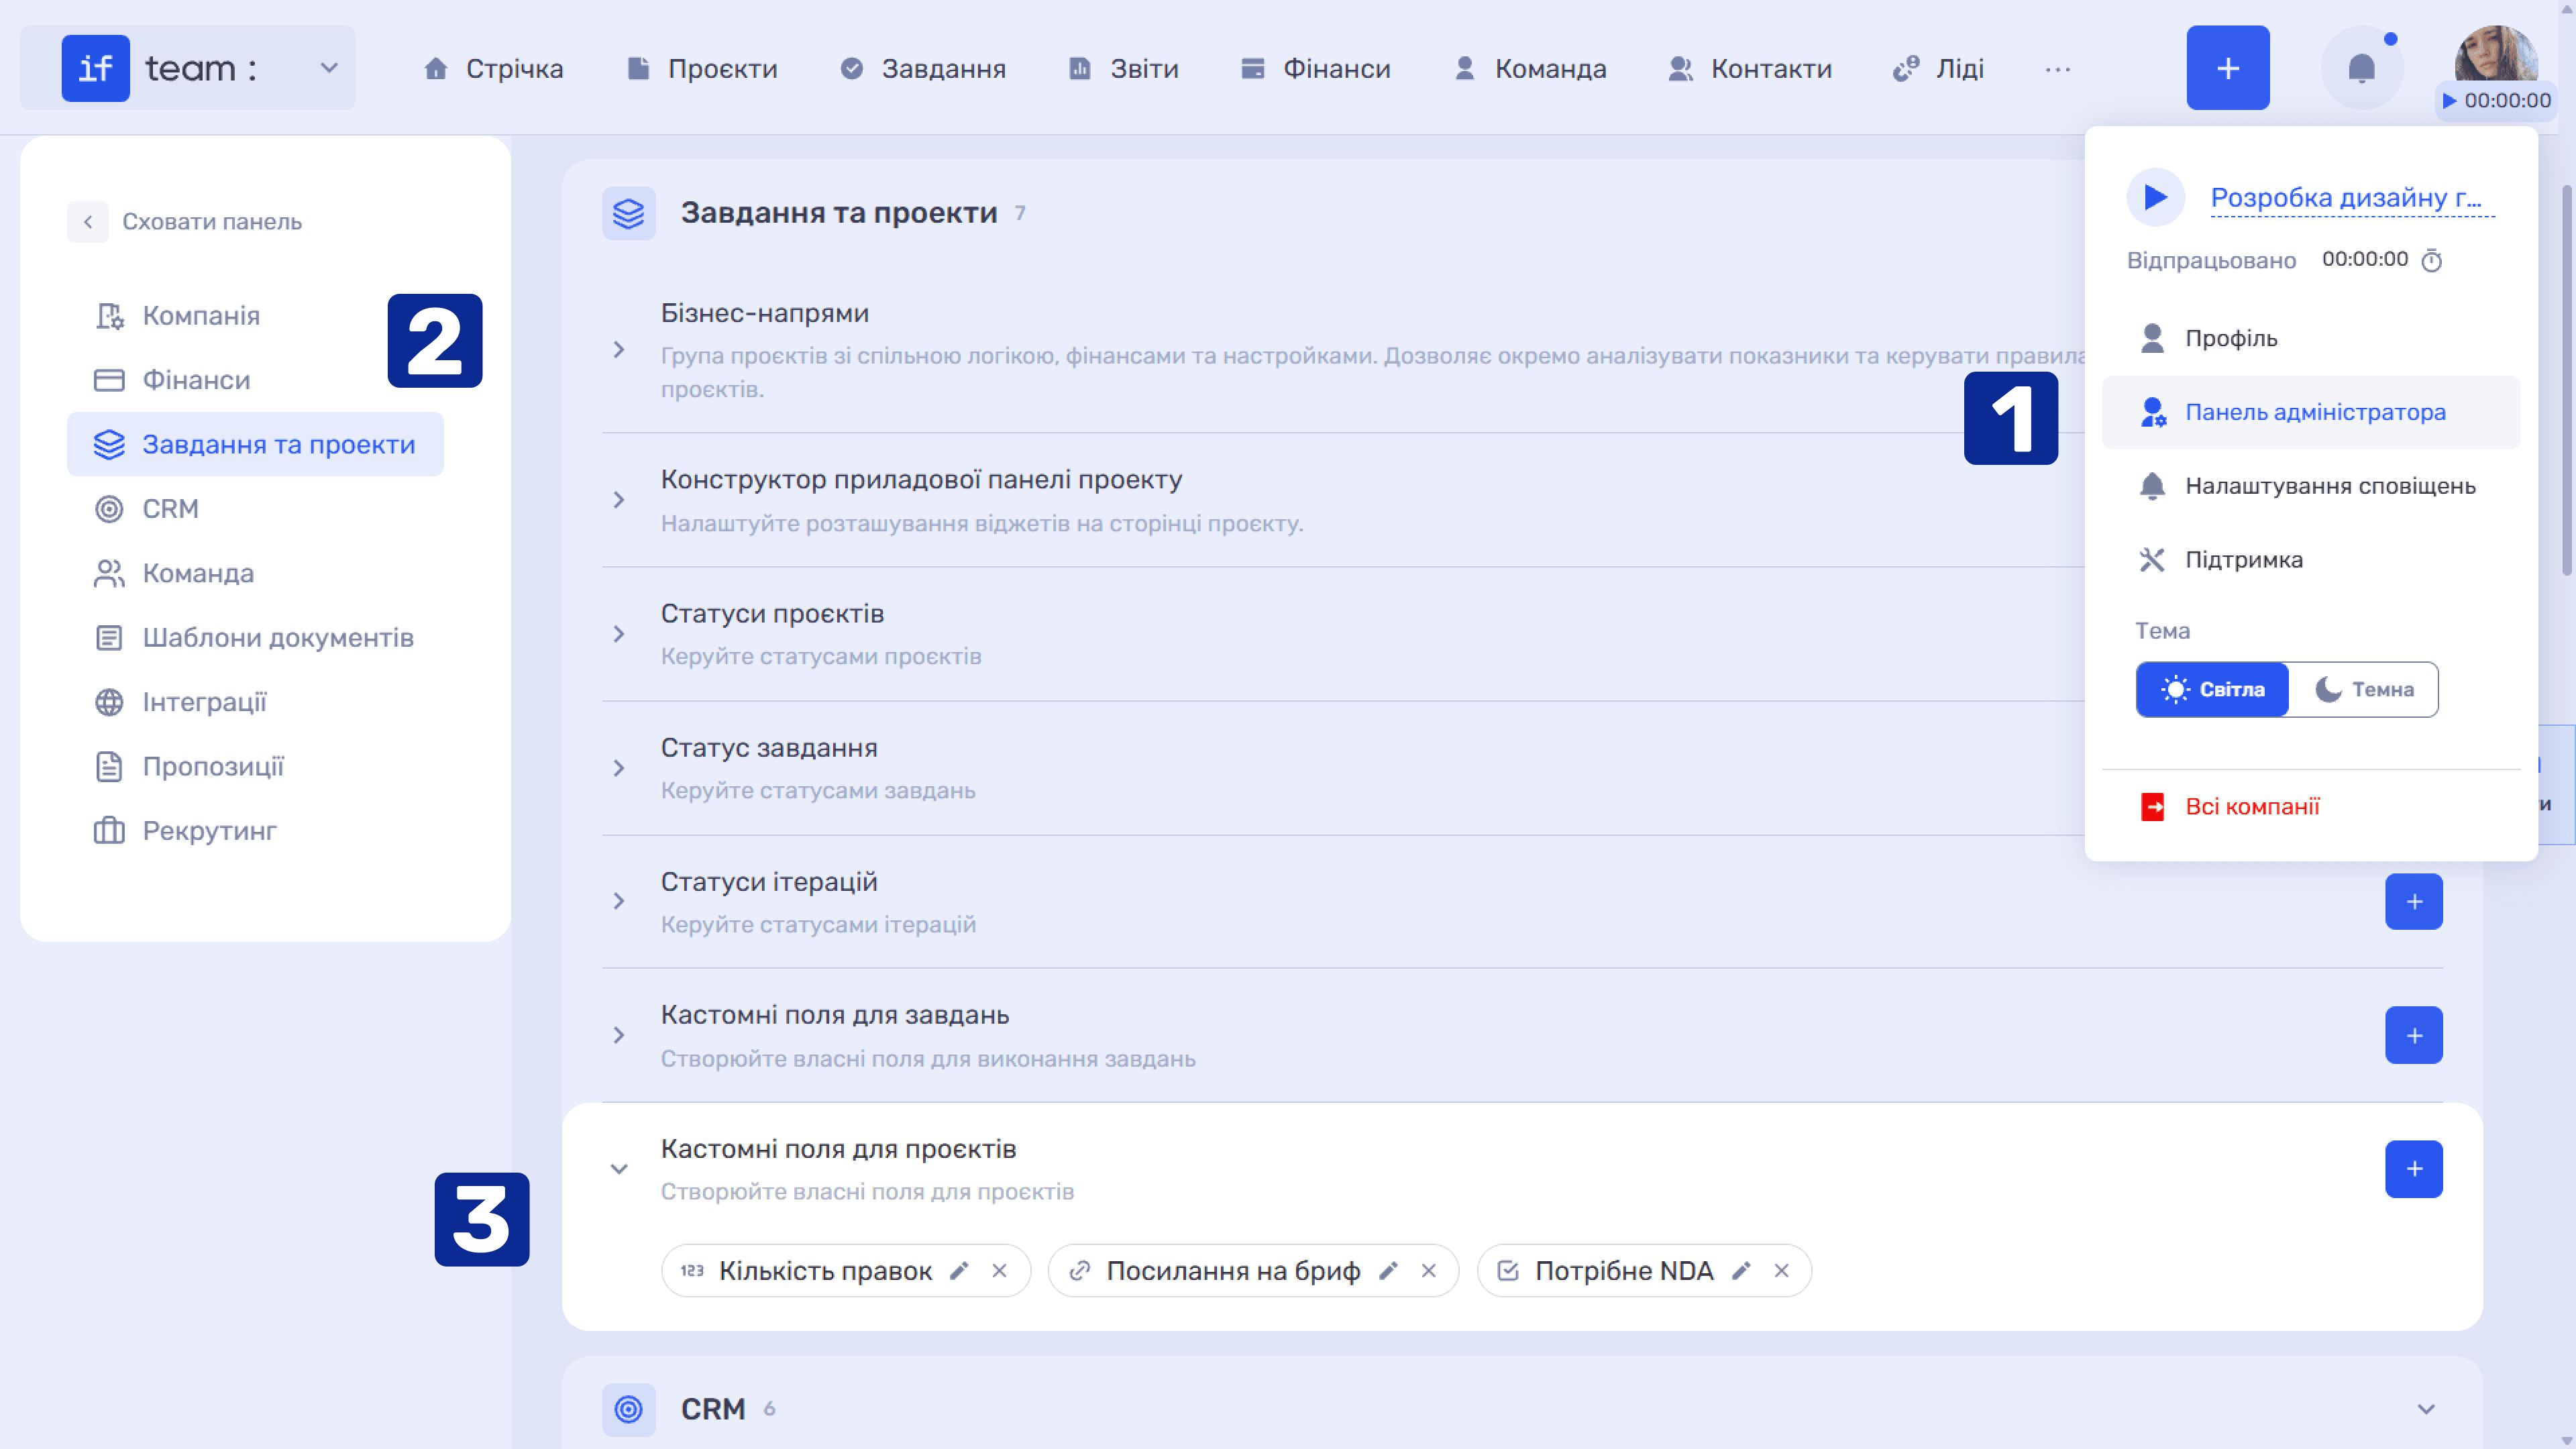
- Click your profile avatar and select Admin Panel.
- In the left sidebar, go to Tasks & Projects.
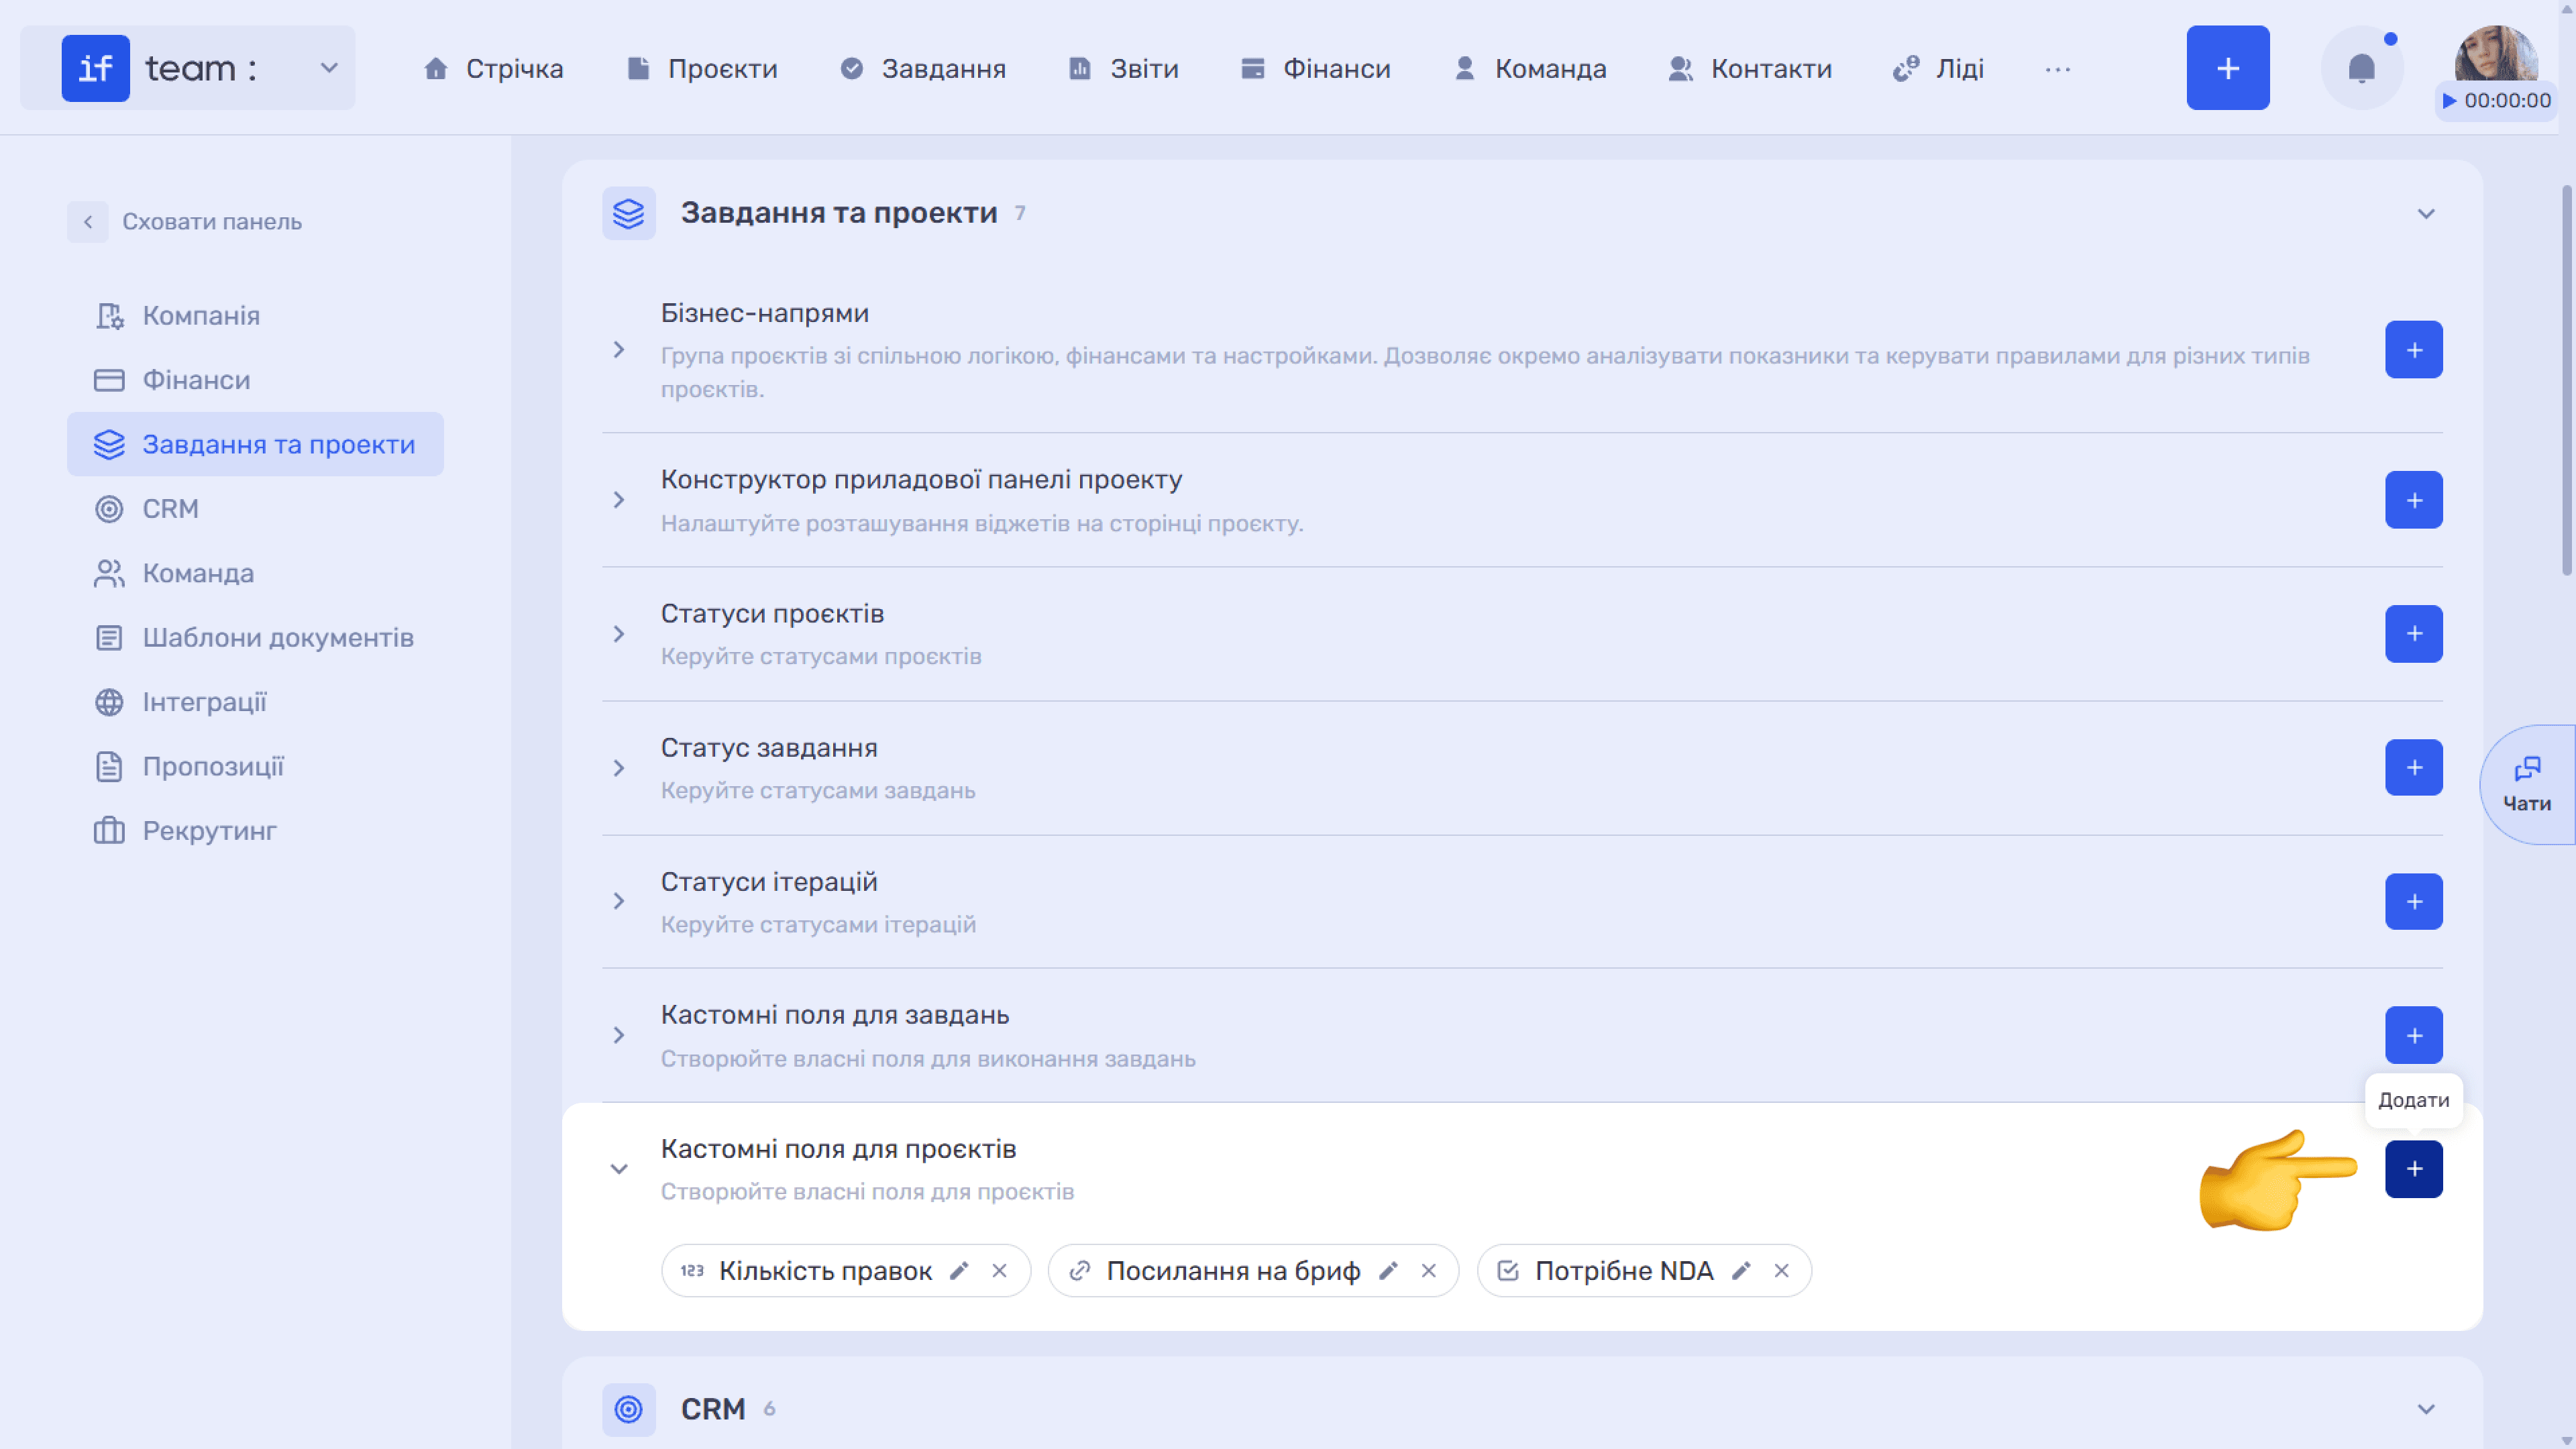
- Expand Custom Fields for Projects.
- Click + to add a new field.
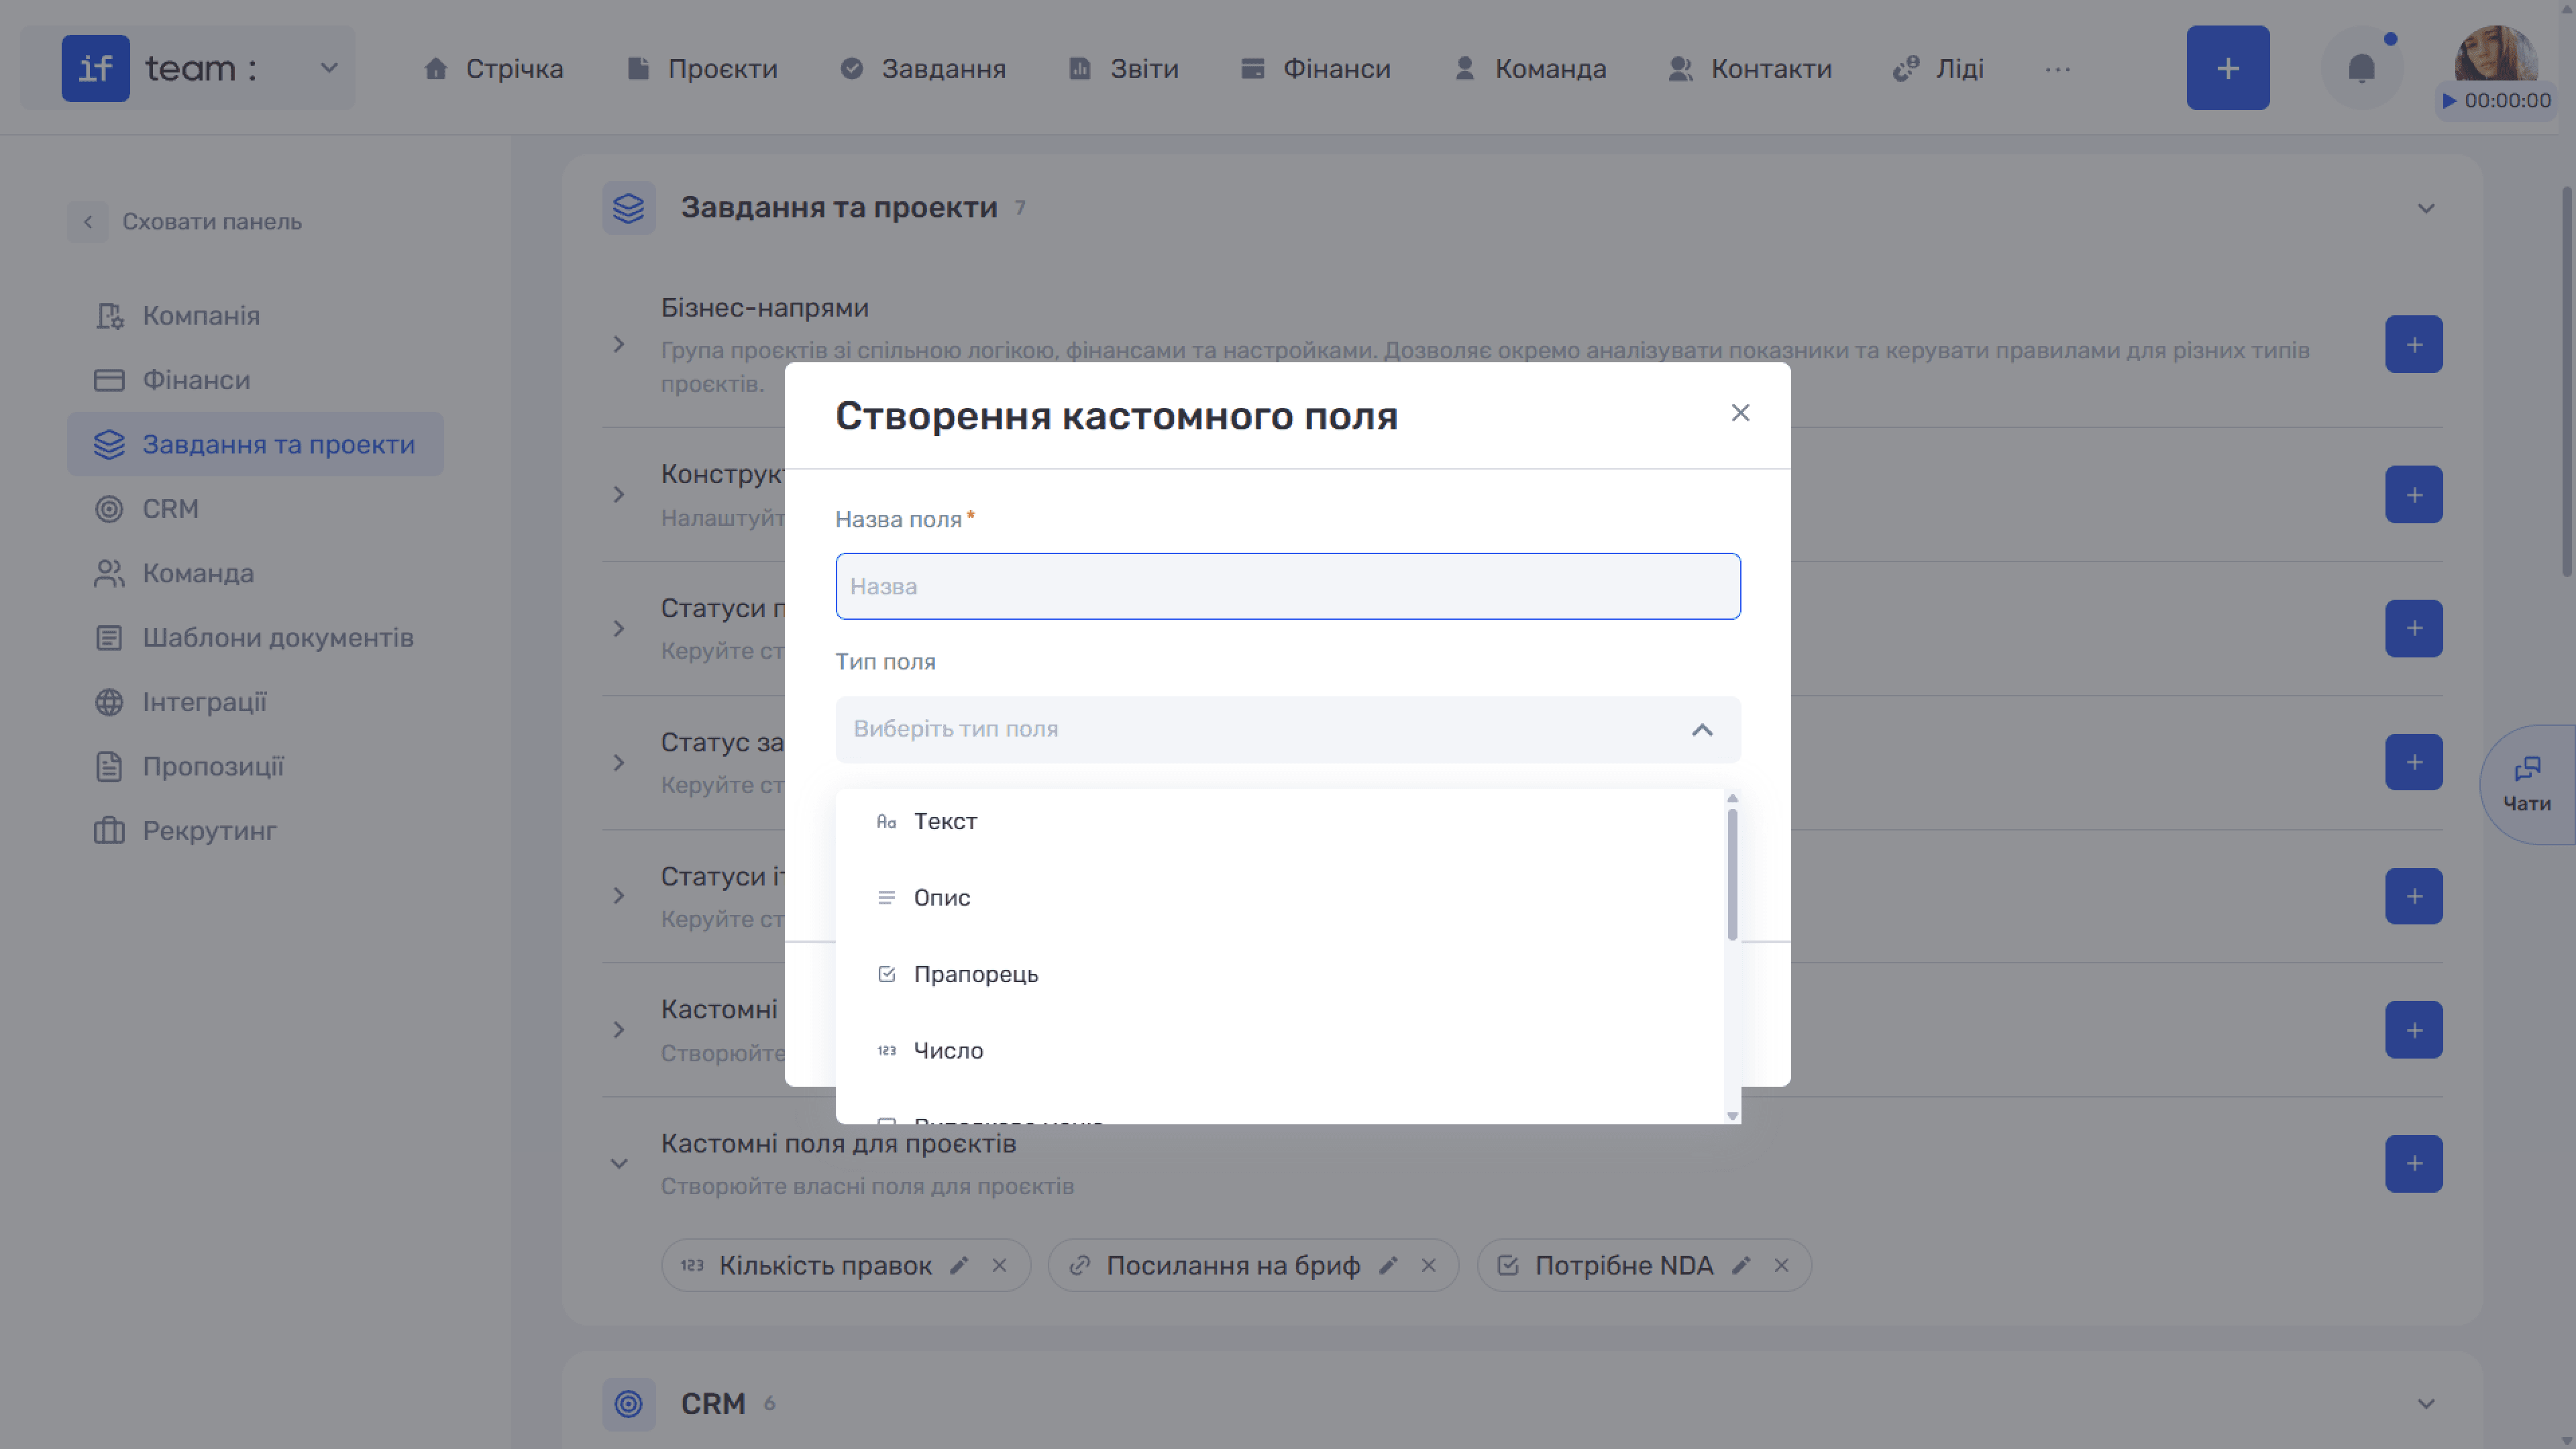
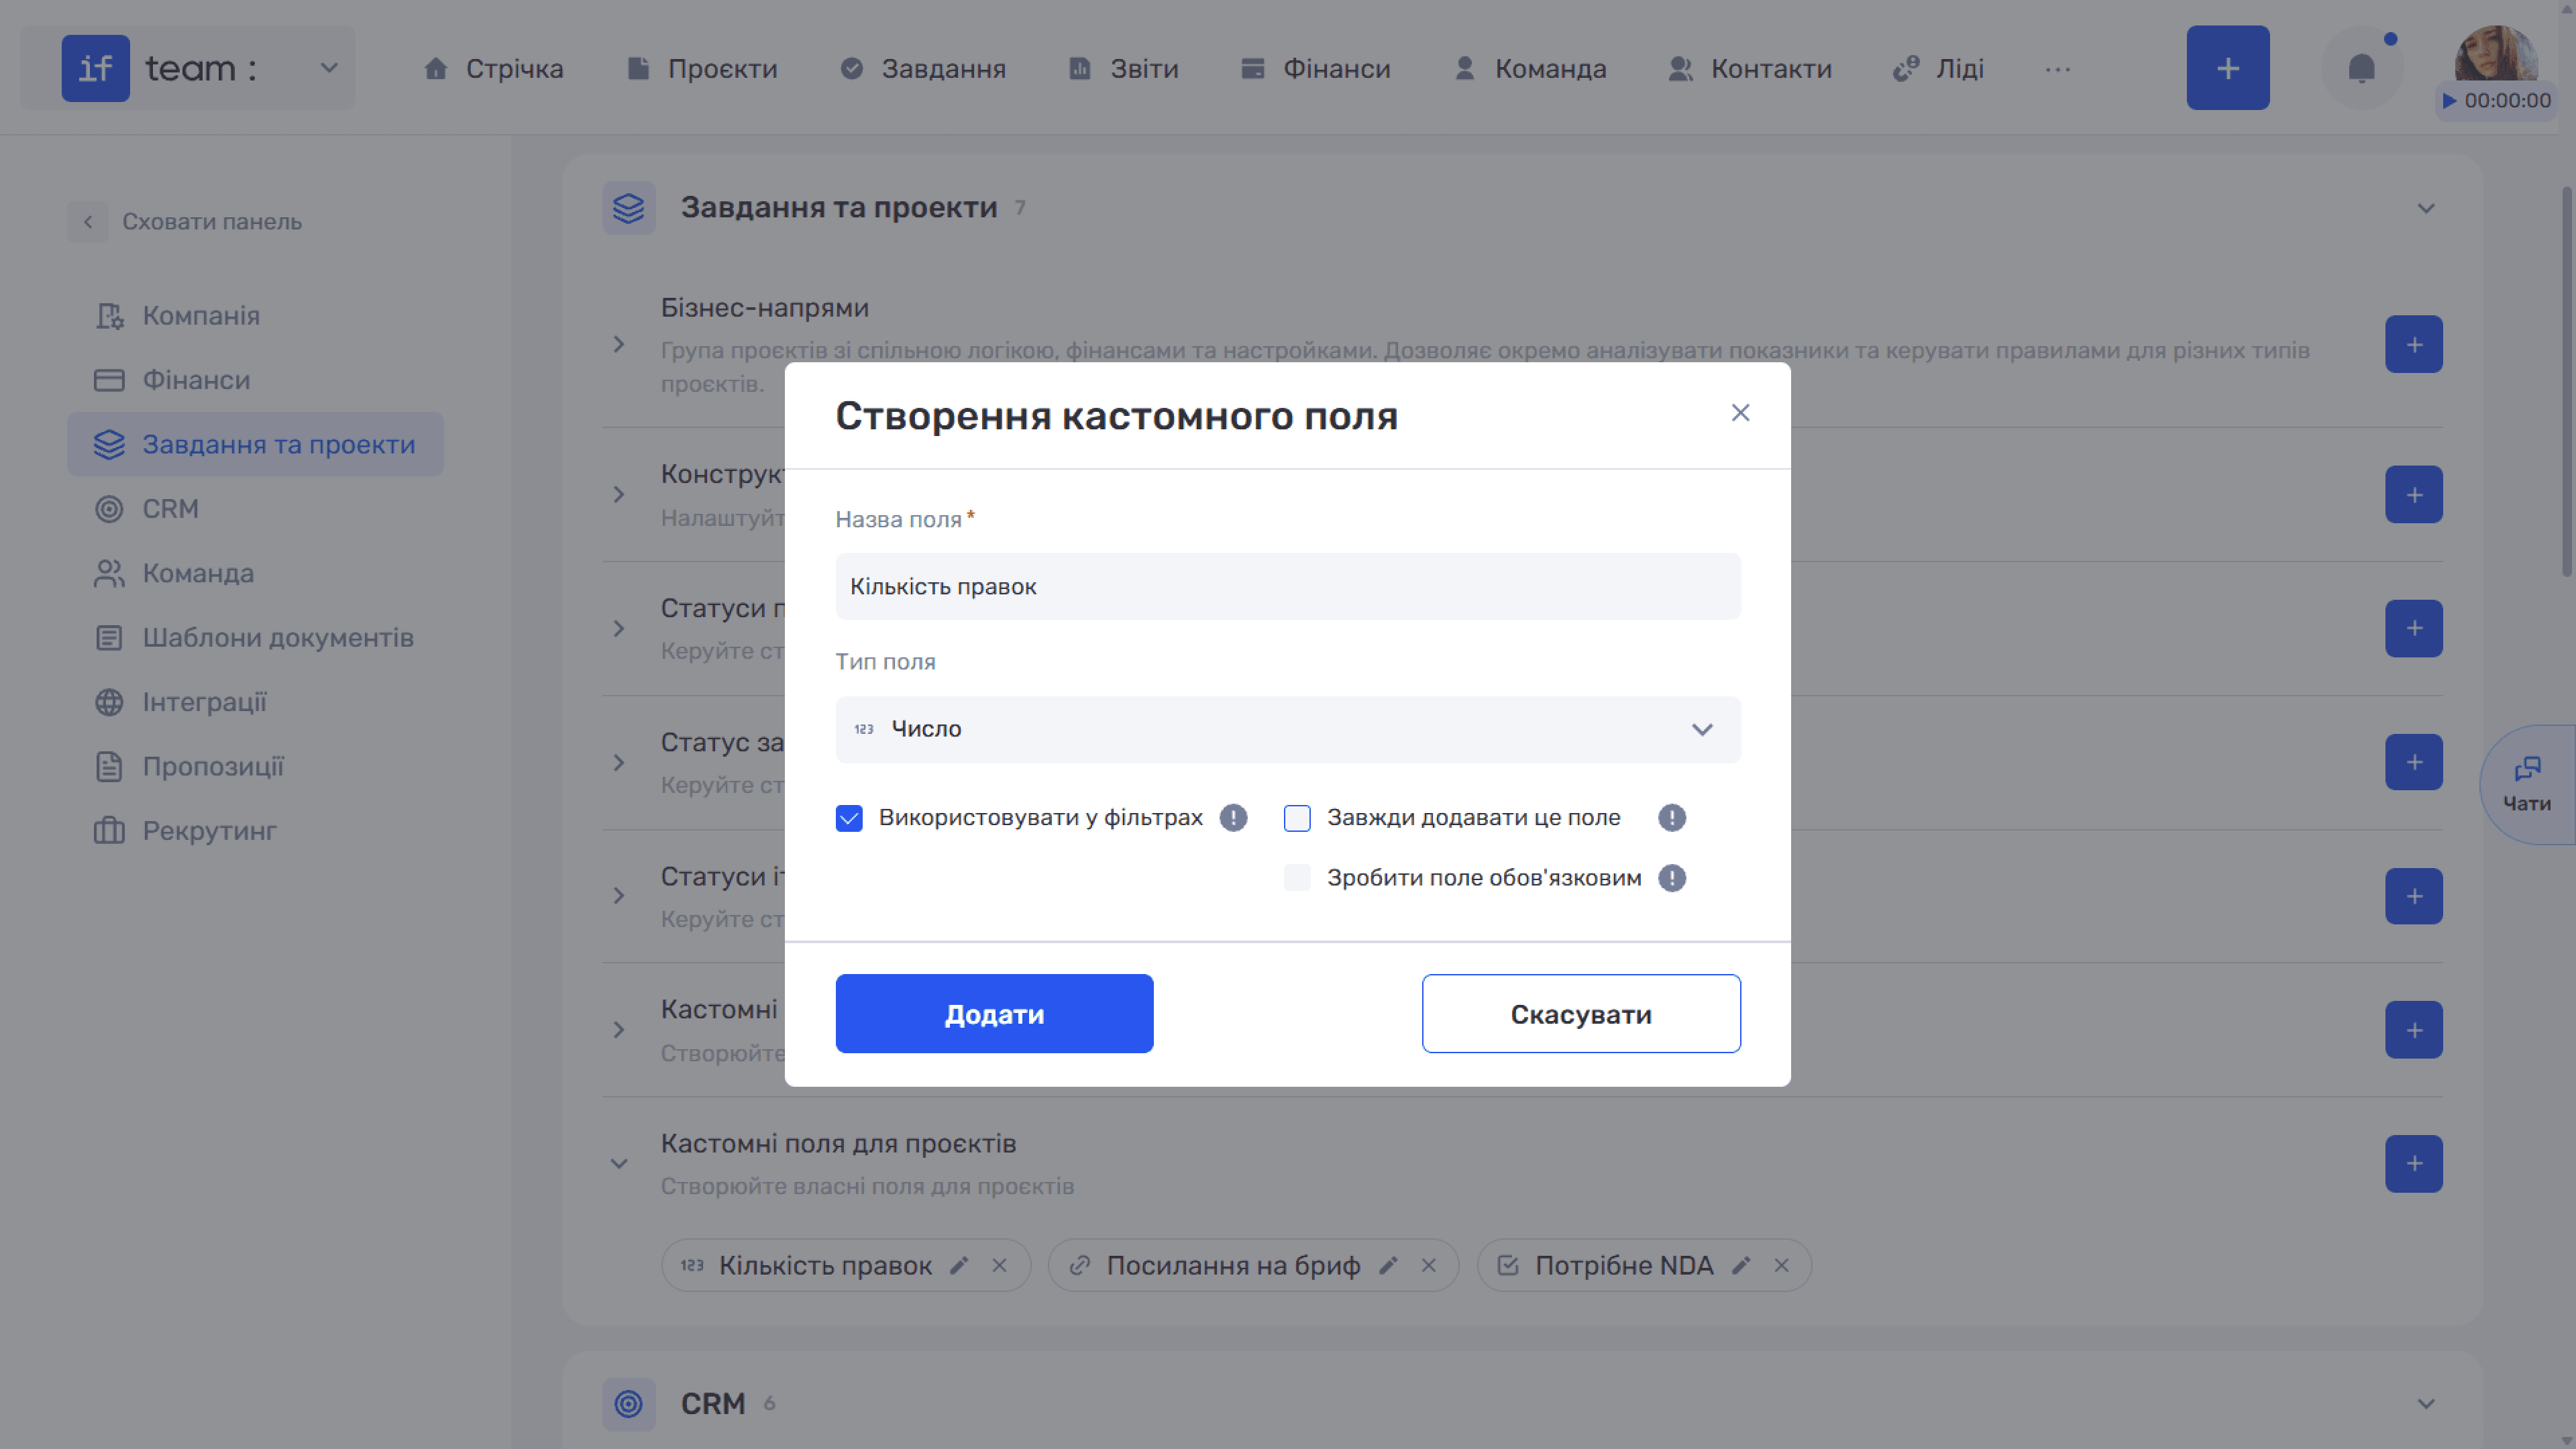
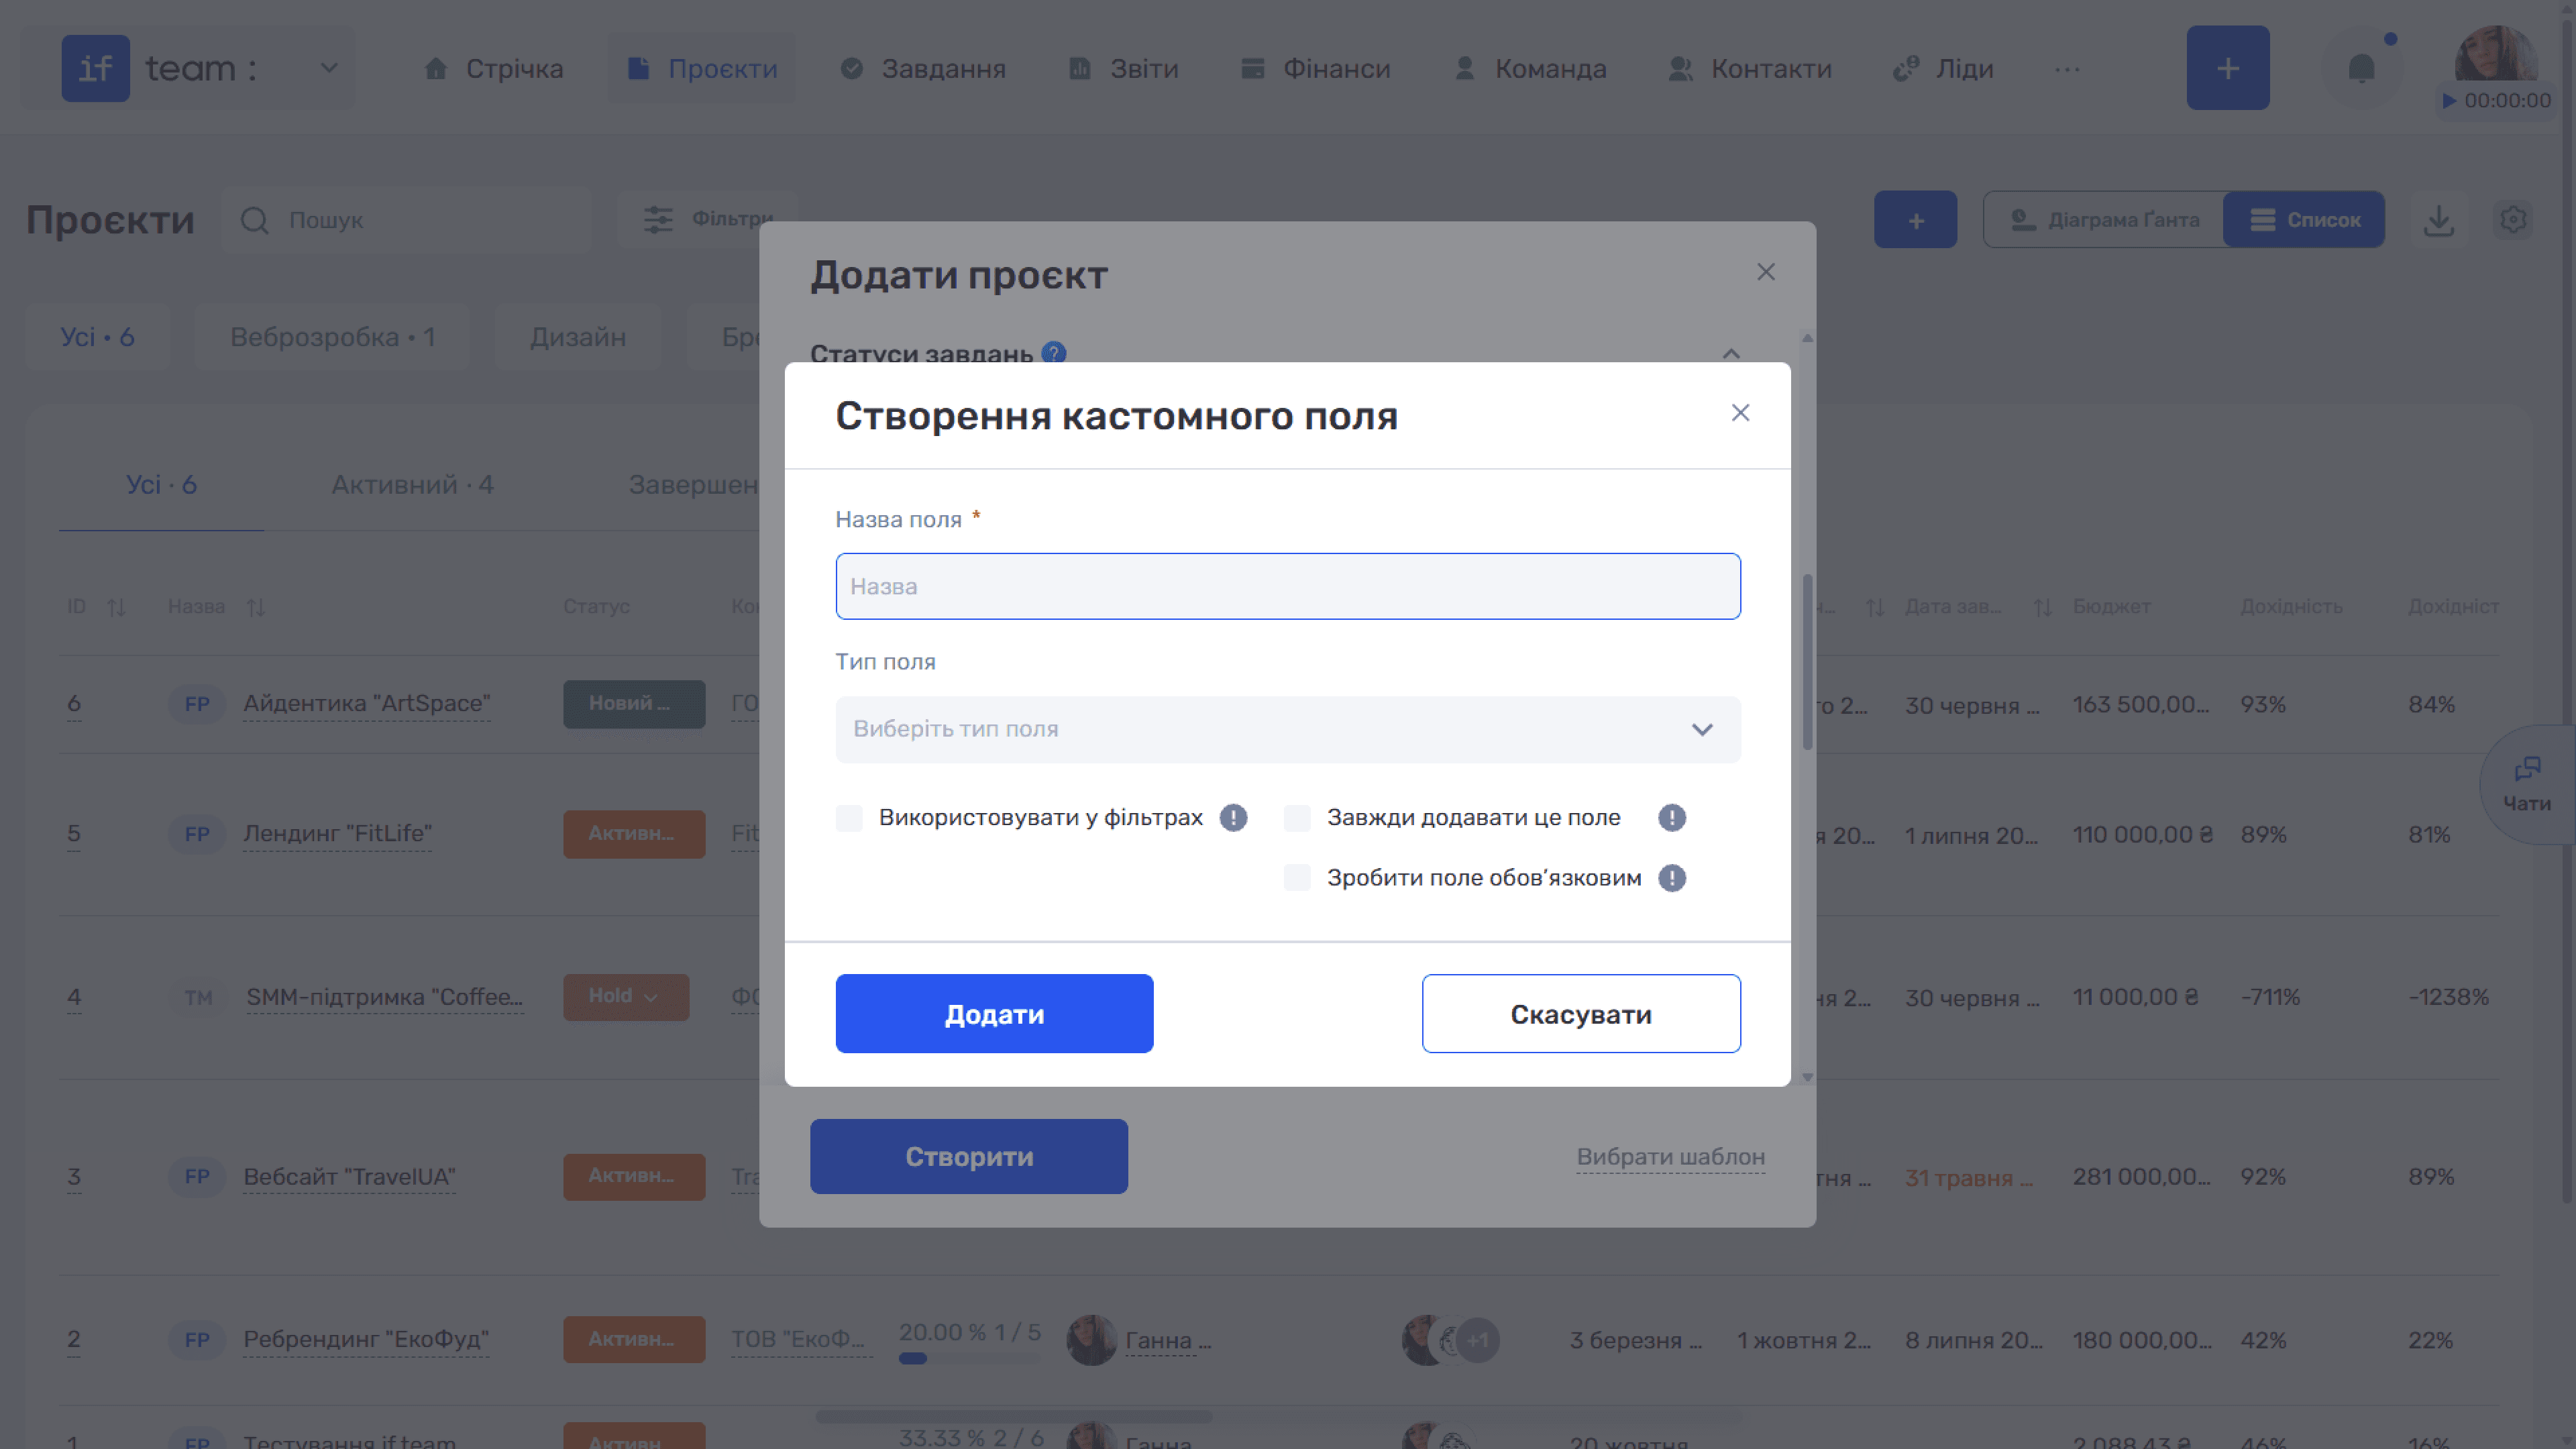
- In the Create Custom Field modal, complete the following fields:
- Field Name is required.
- Field Type: select an option from the drop-down list, such as text, description, checkbox, or number.
- Enable additional options if needed:
- Use in Filters makes the field available as a filtering parameter.
- Always Add This Field automatically adds the field to every new project creation form.
- Make Field Required prevents the project form from being saved until this field is completed.
- Click Add.
Where Custom Fields Appear
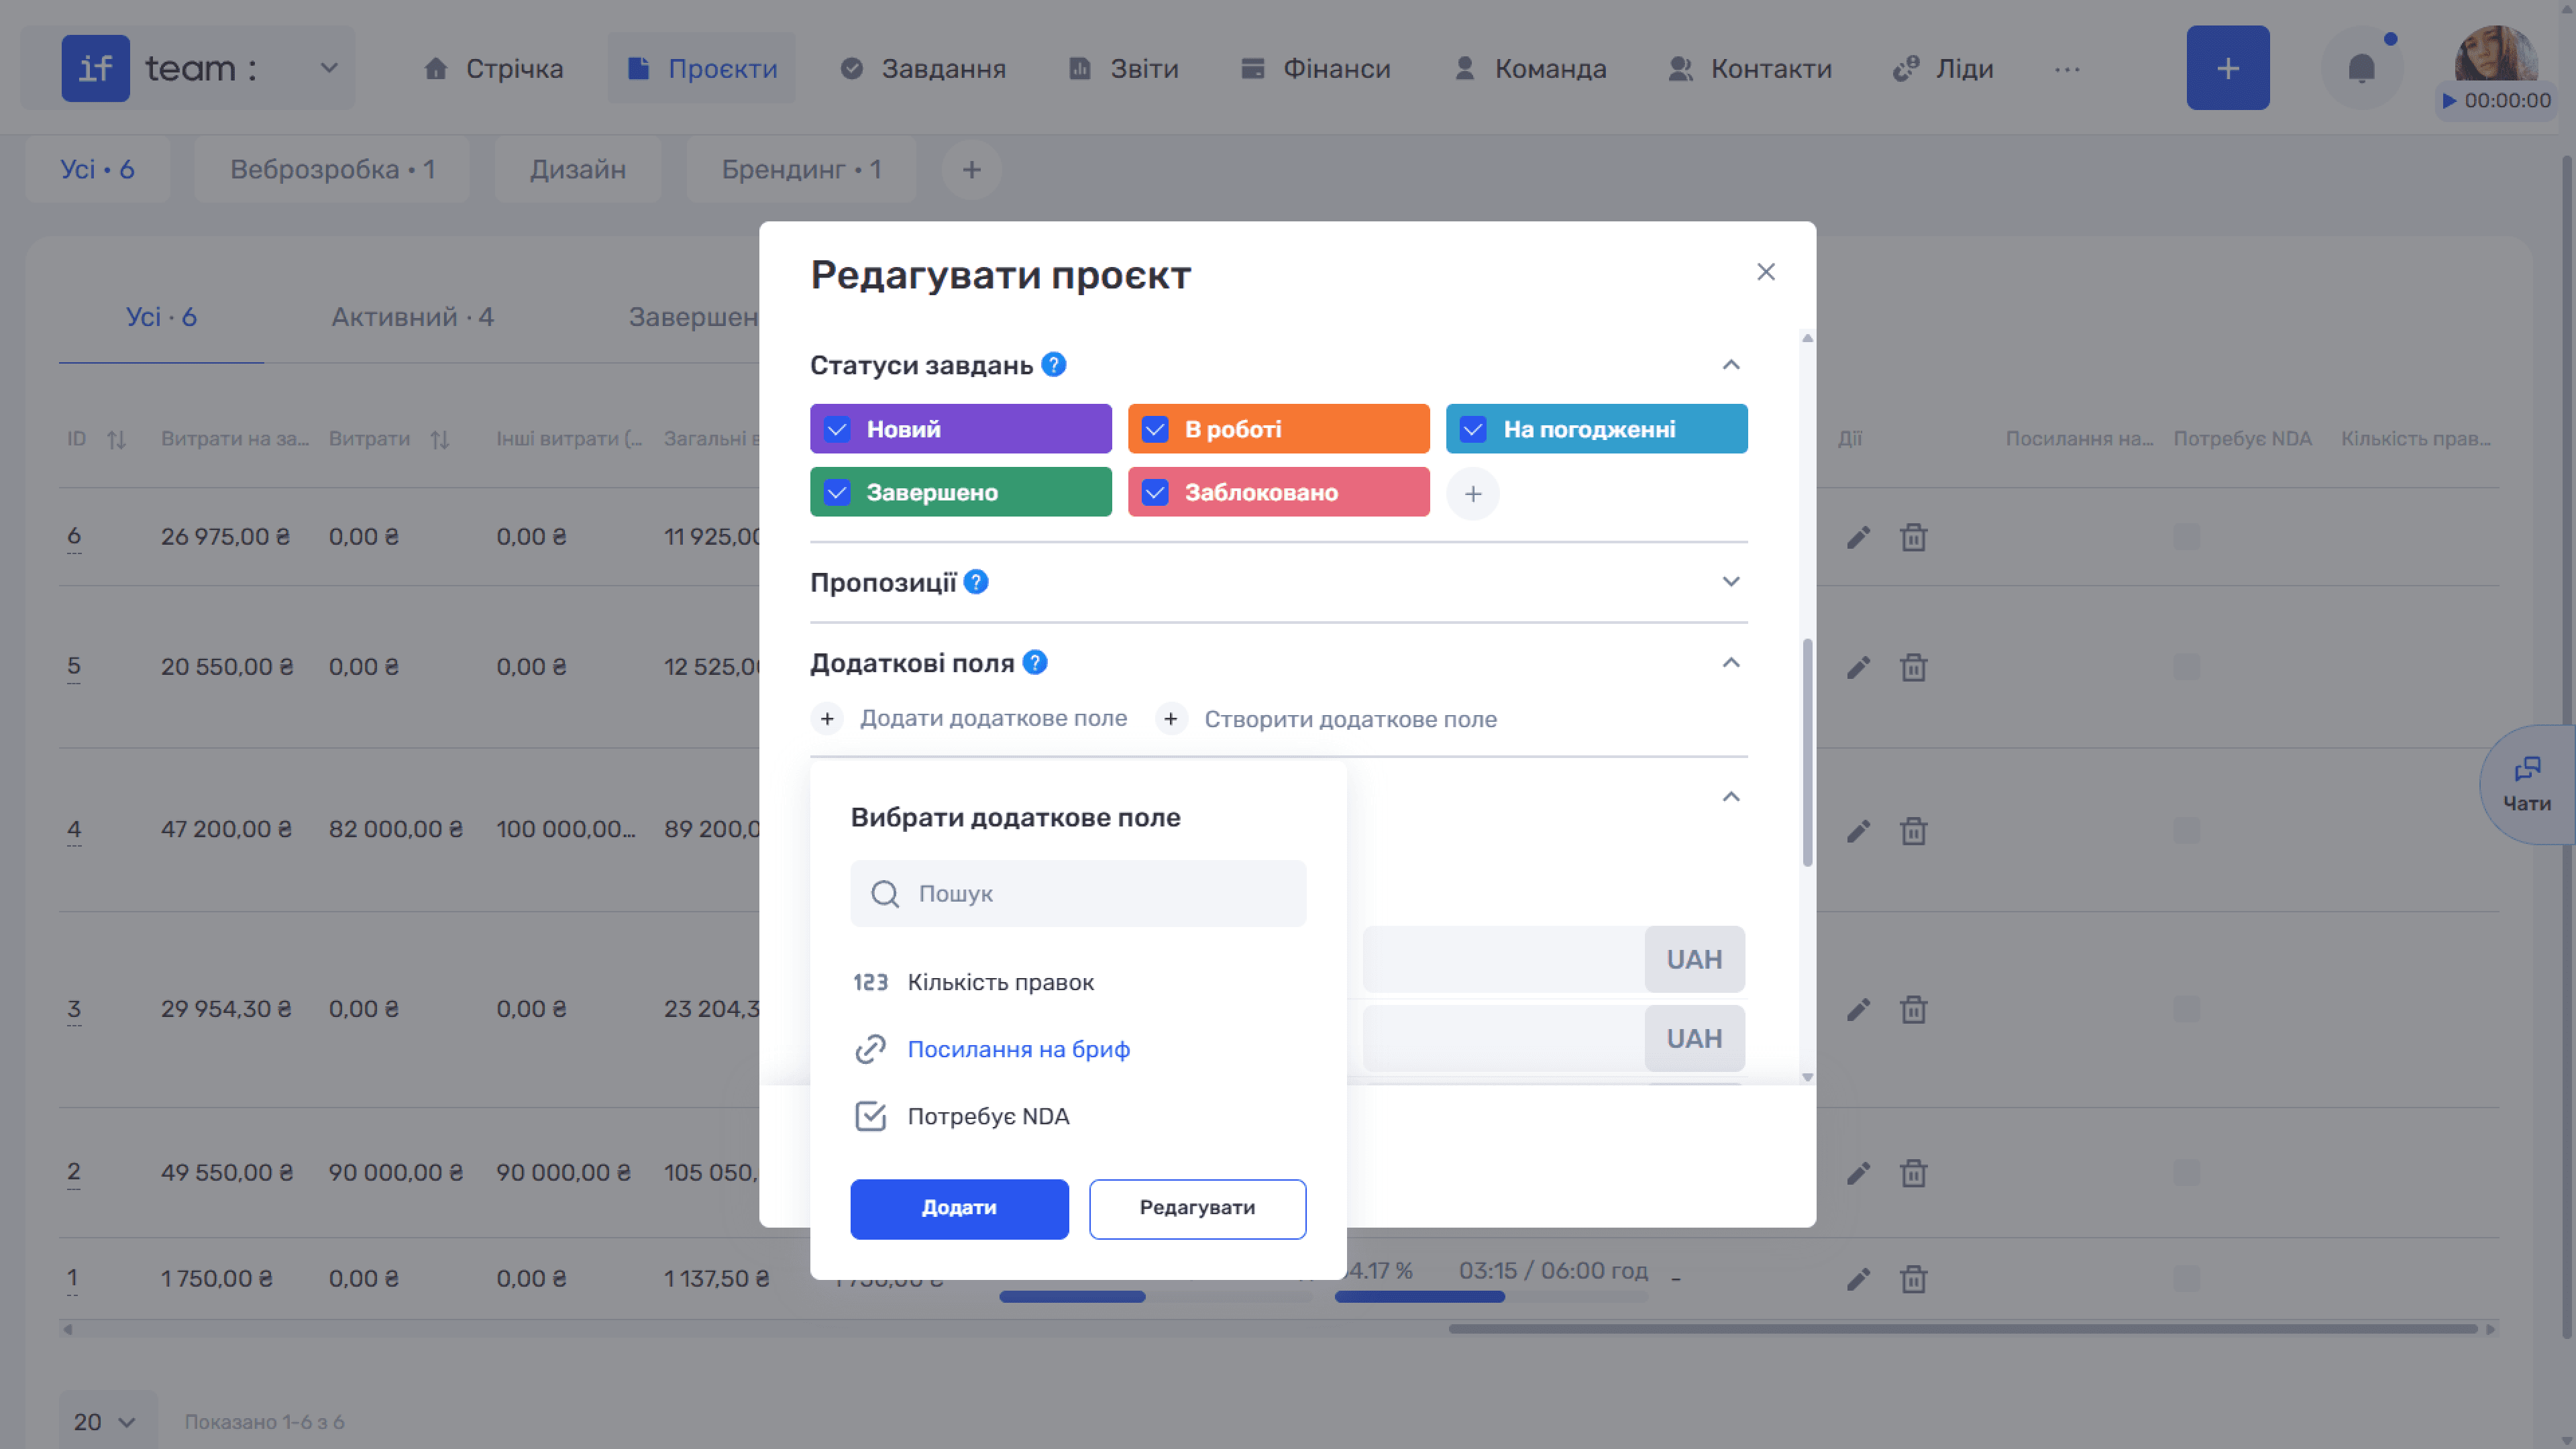
Custom fields created in Admin Panel settings appear in a separate expandable Additional Fields section of the project creation and editing form.
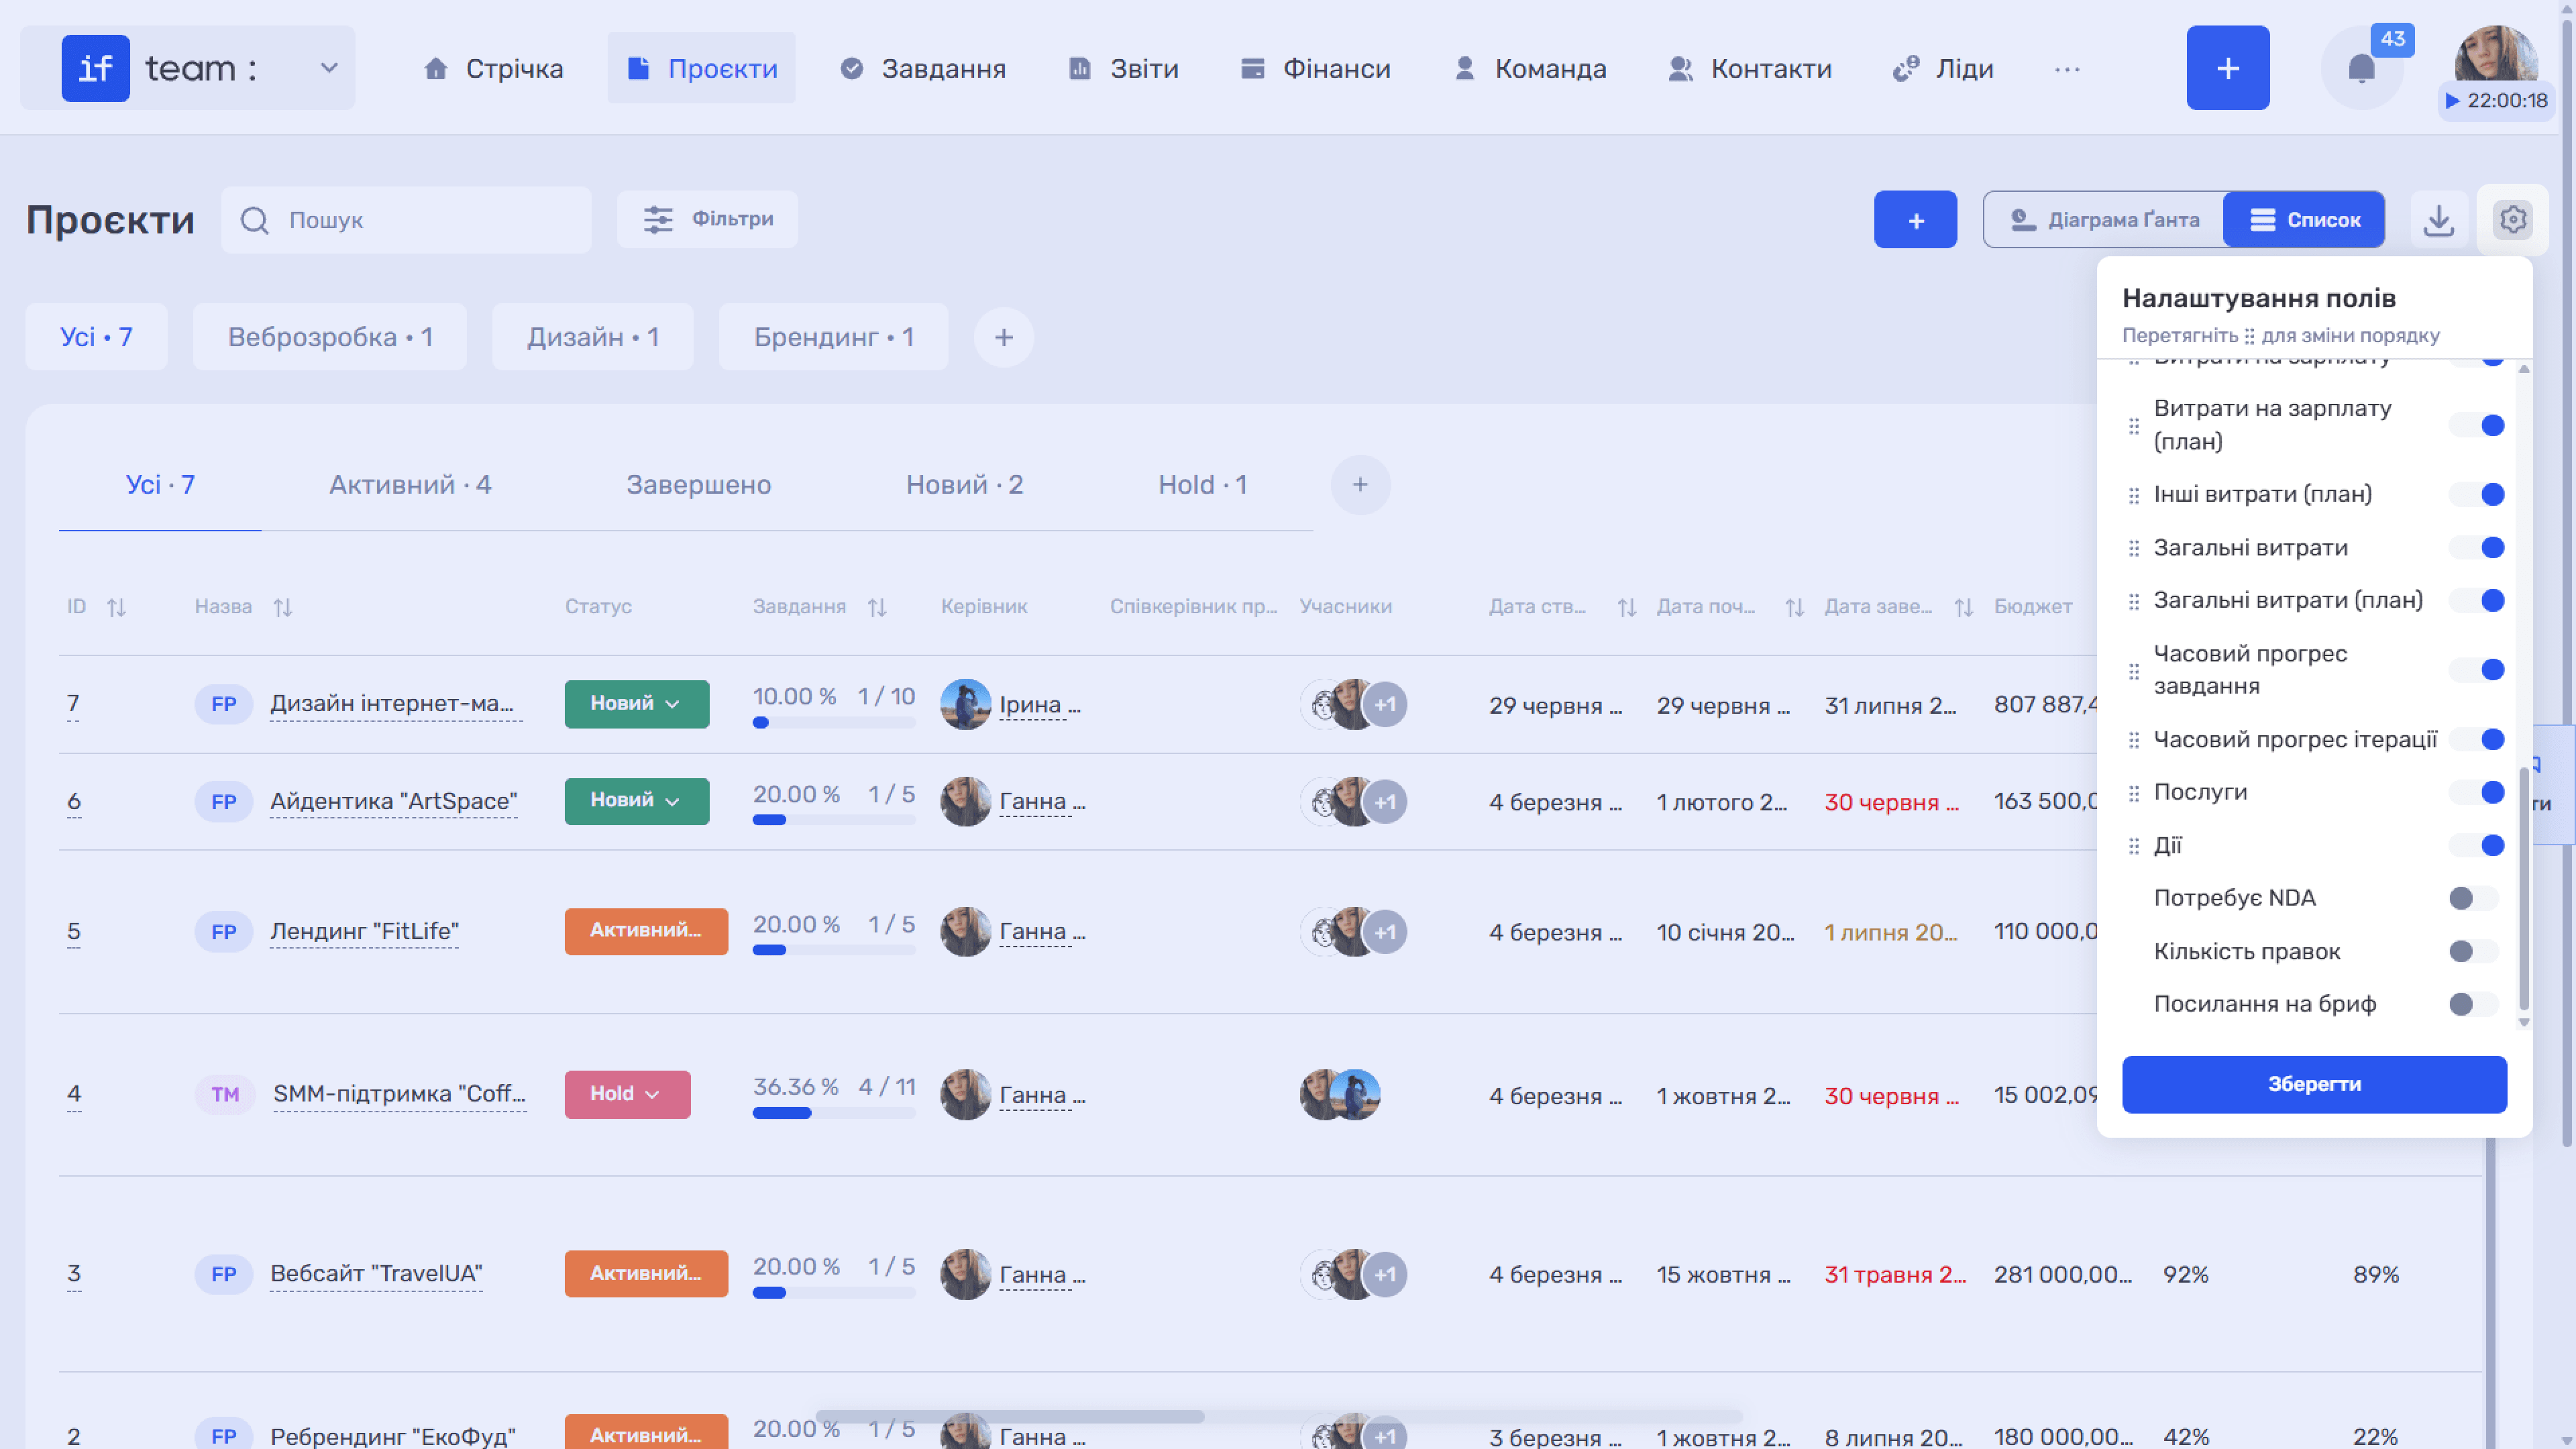
You can also enable or disable custom fields as additional columns in project tables to quickly review data across all projects at once.
How to Edit or Delete a Custom Field
Created fields appear as tags in the settings under Tasks & Projects → Custom Fields for Projects.
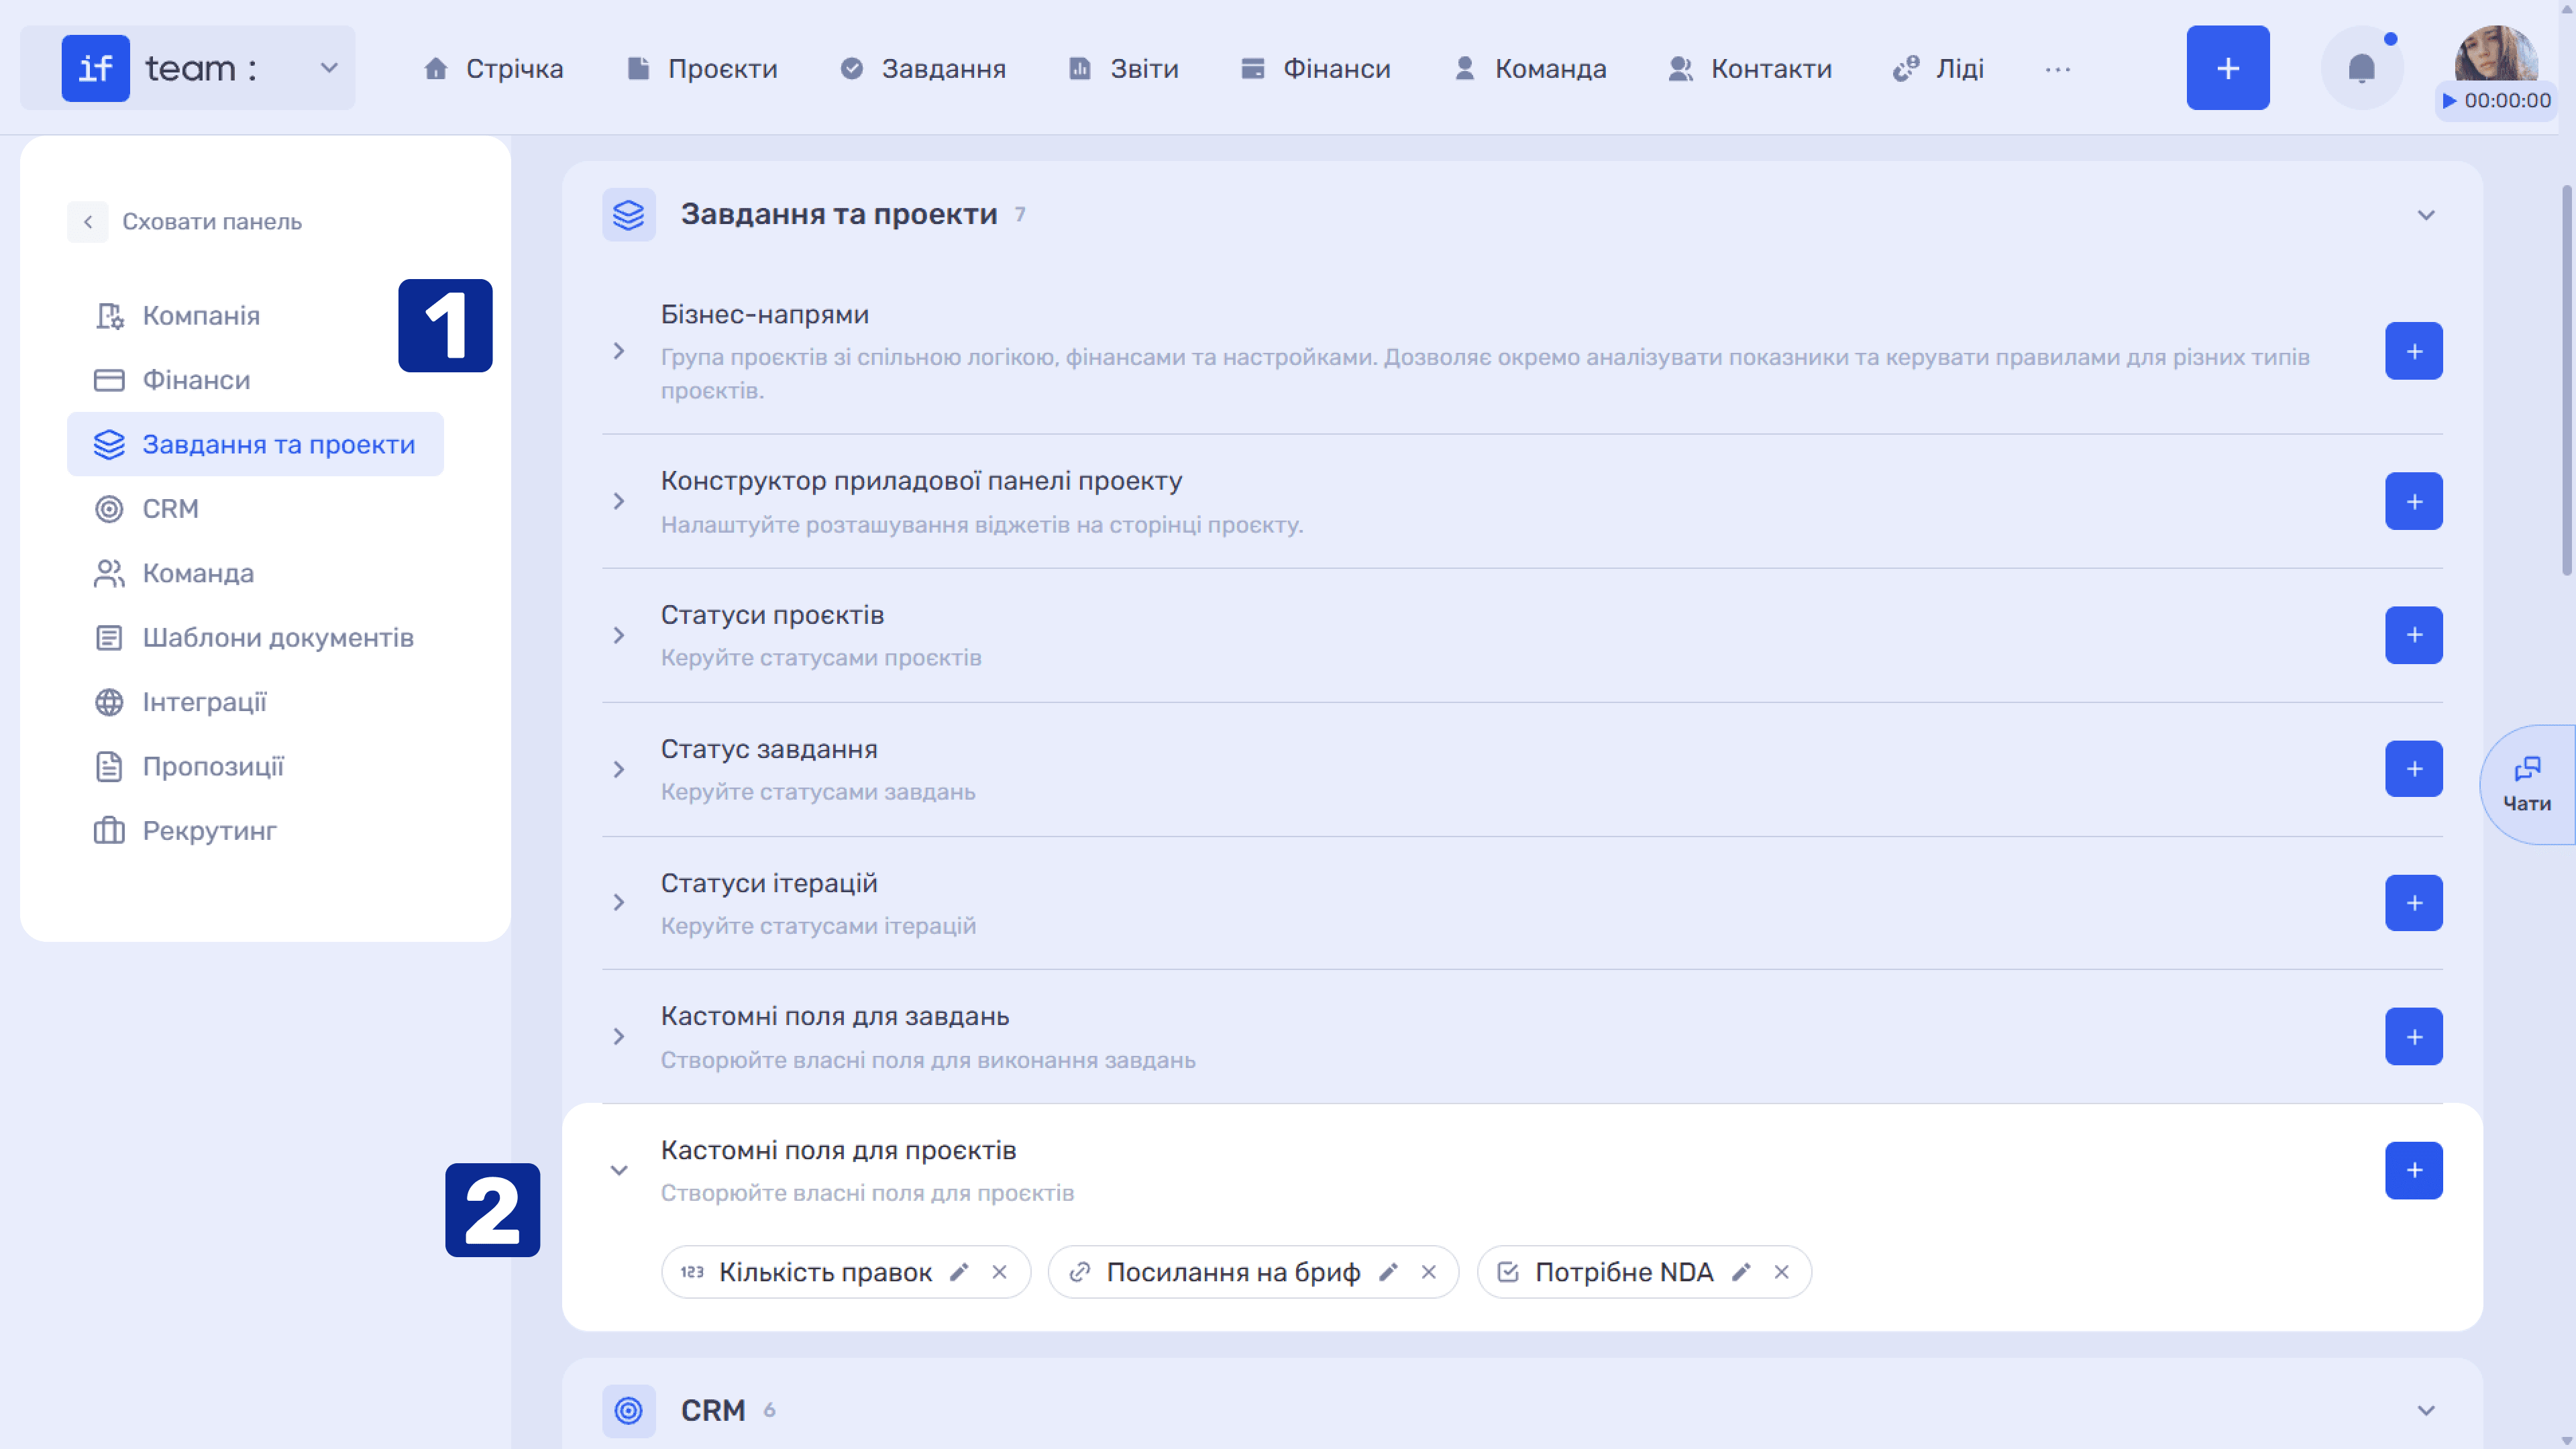
Click the pencil icon (✏) on the required tag to open the Edit Custom Field window, where you can change the name, type, or options.
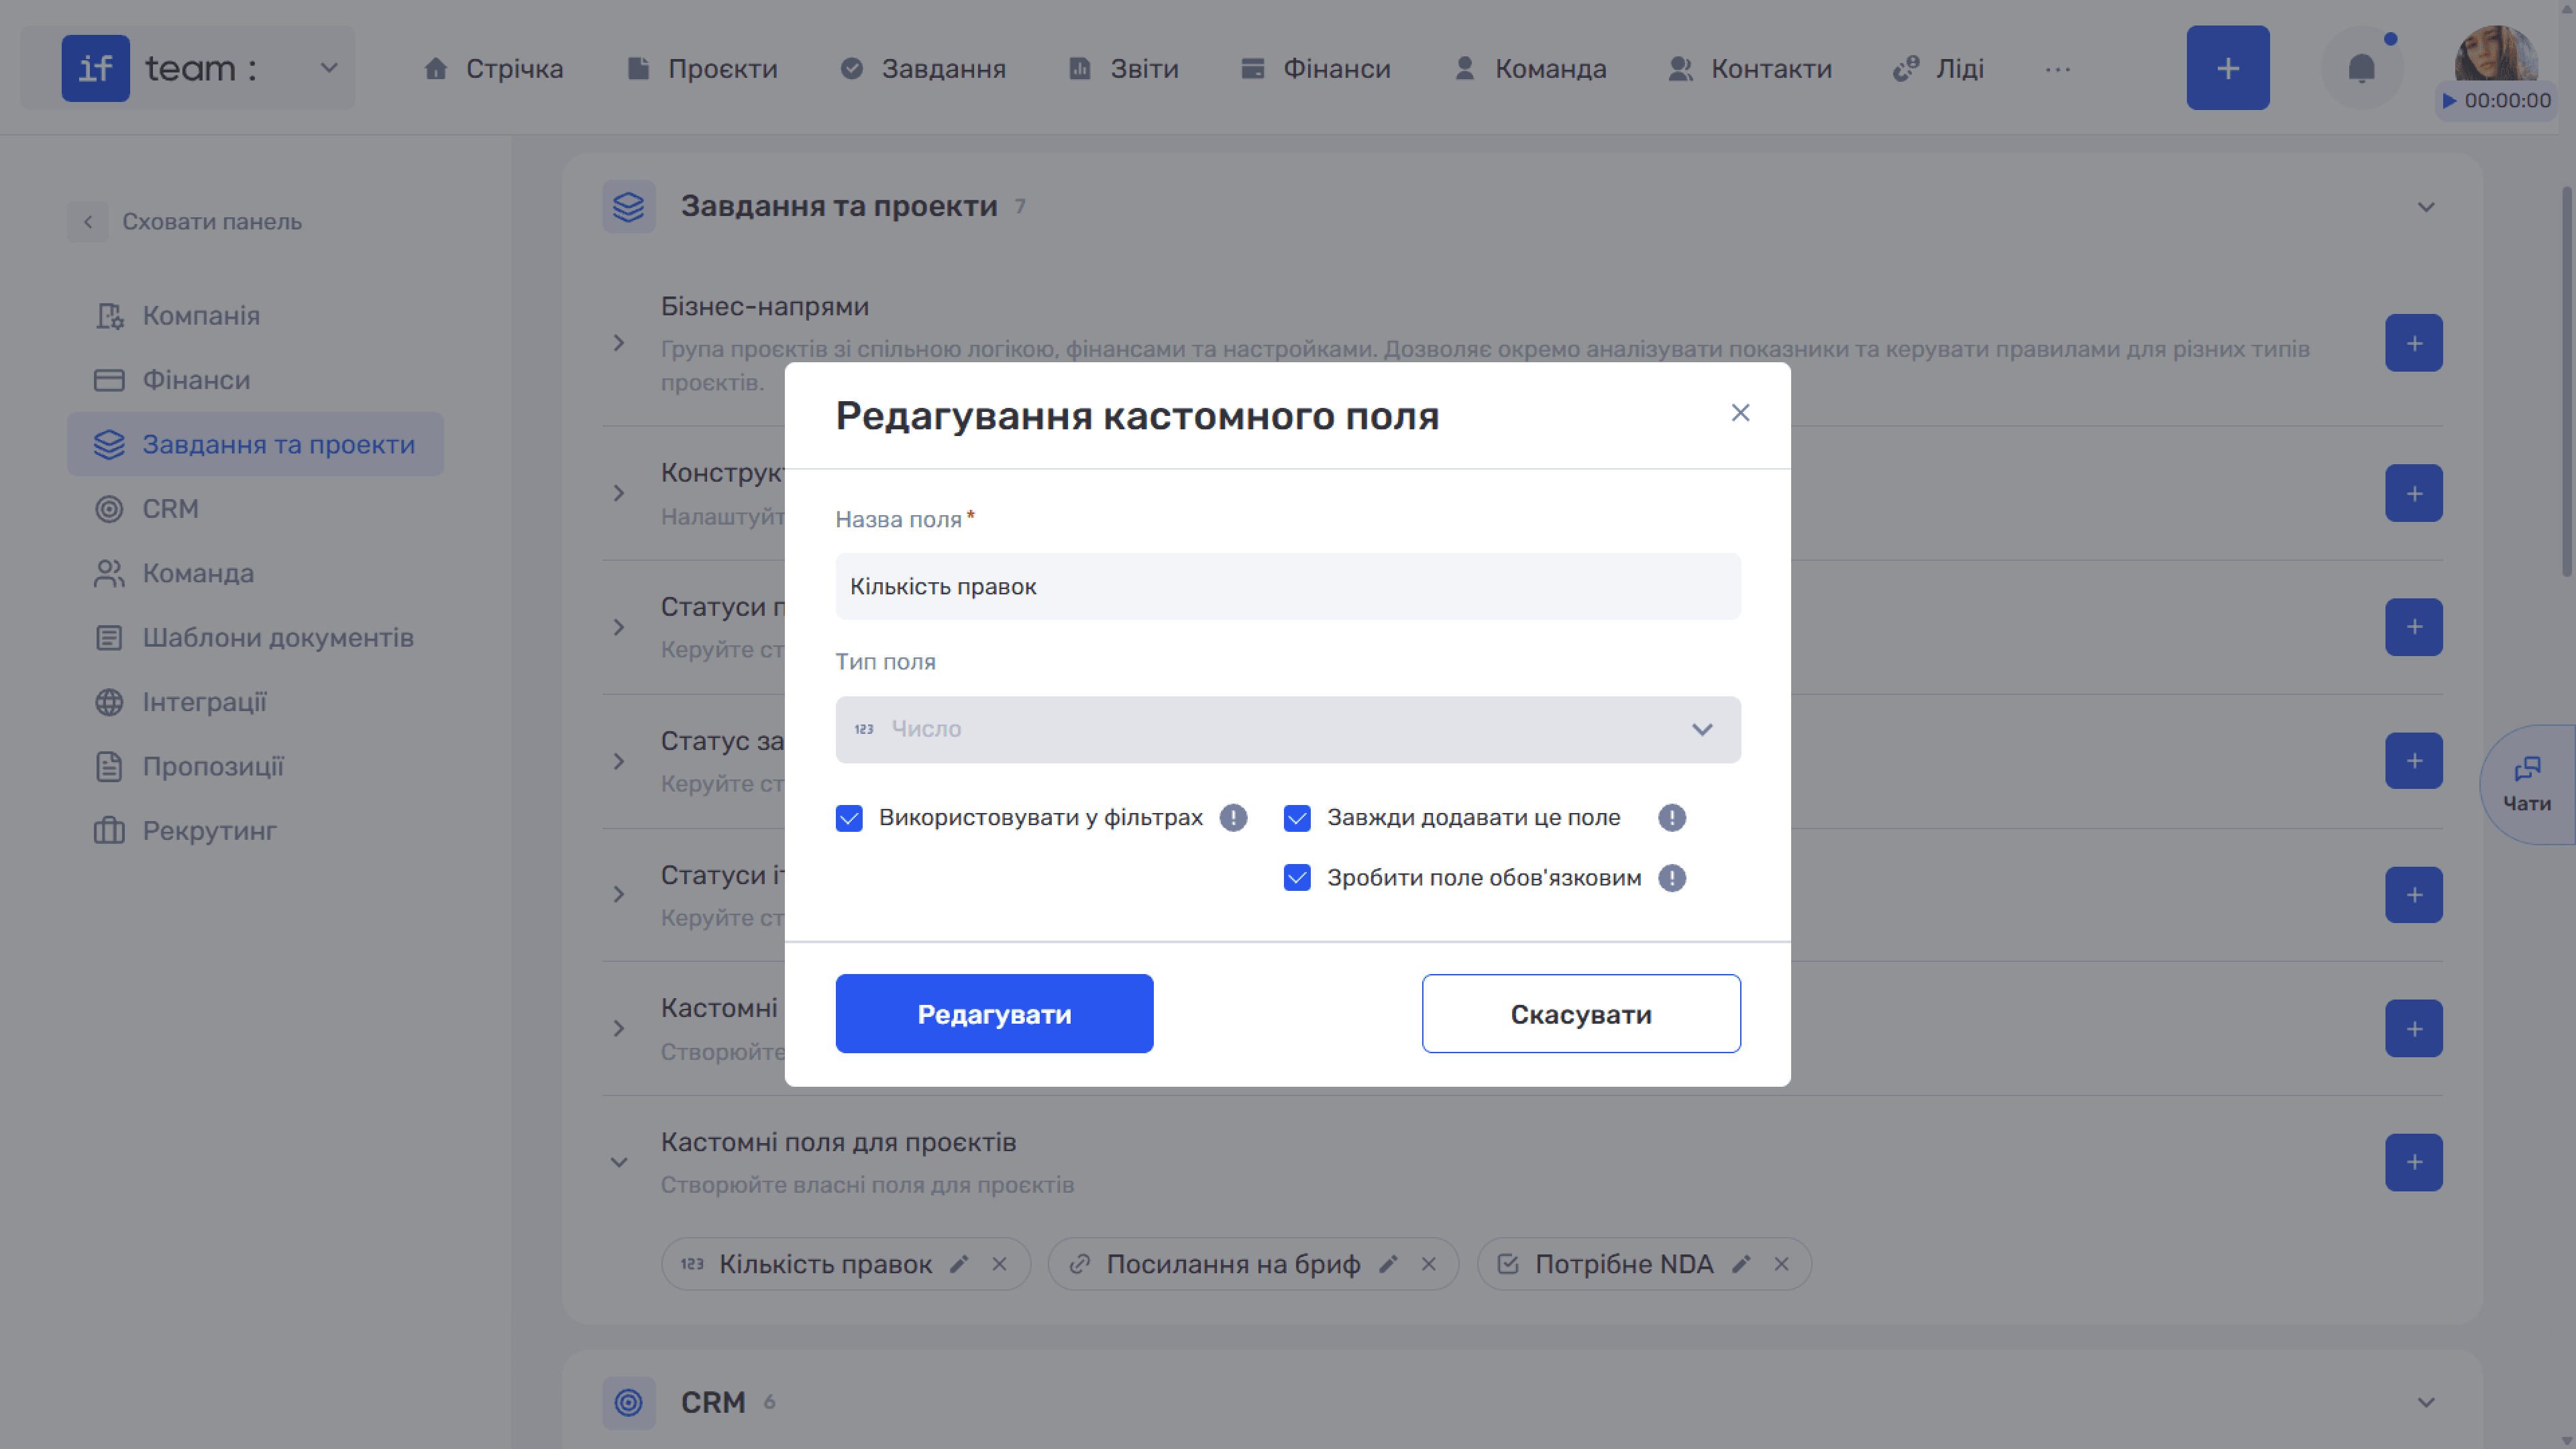
To delete a field, click ✕ on the tag.
Adding Custom Fields While Creating or Editing a Project
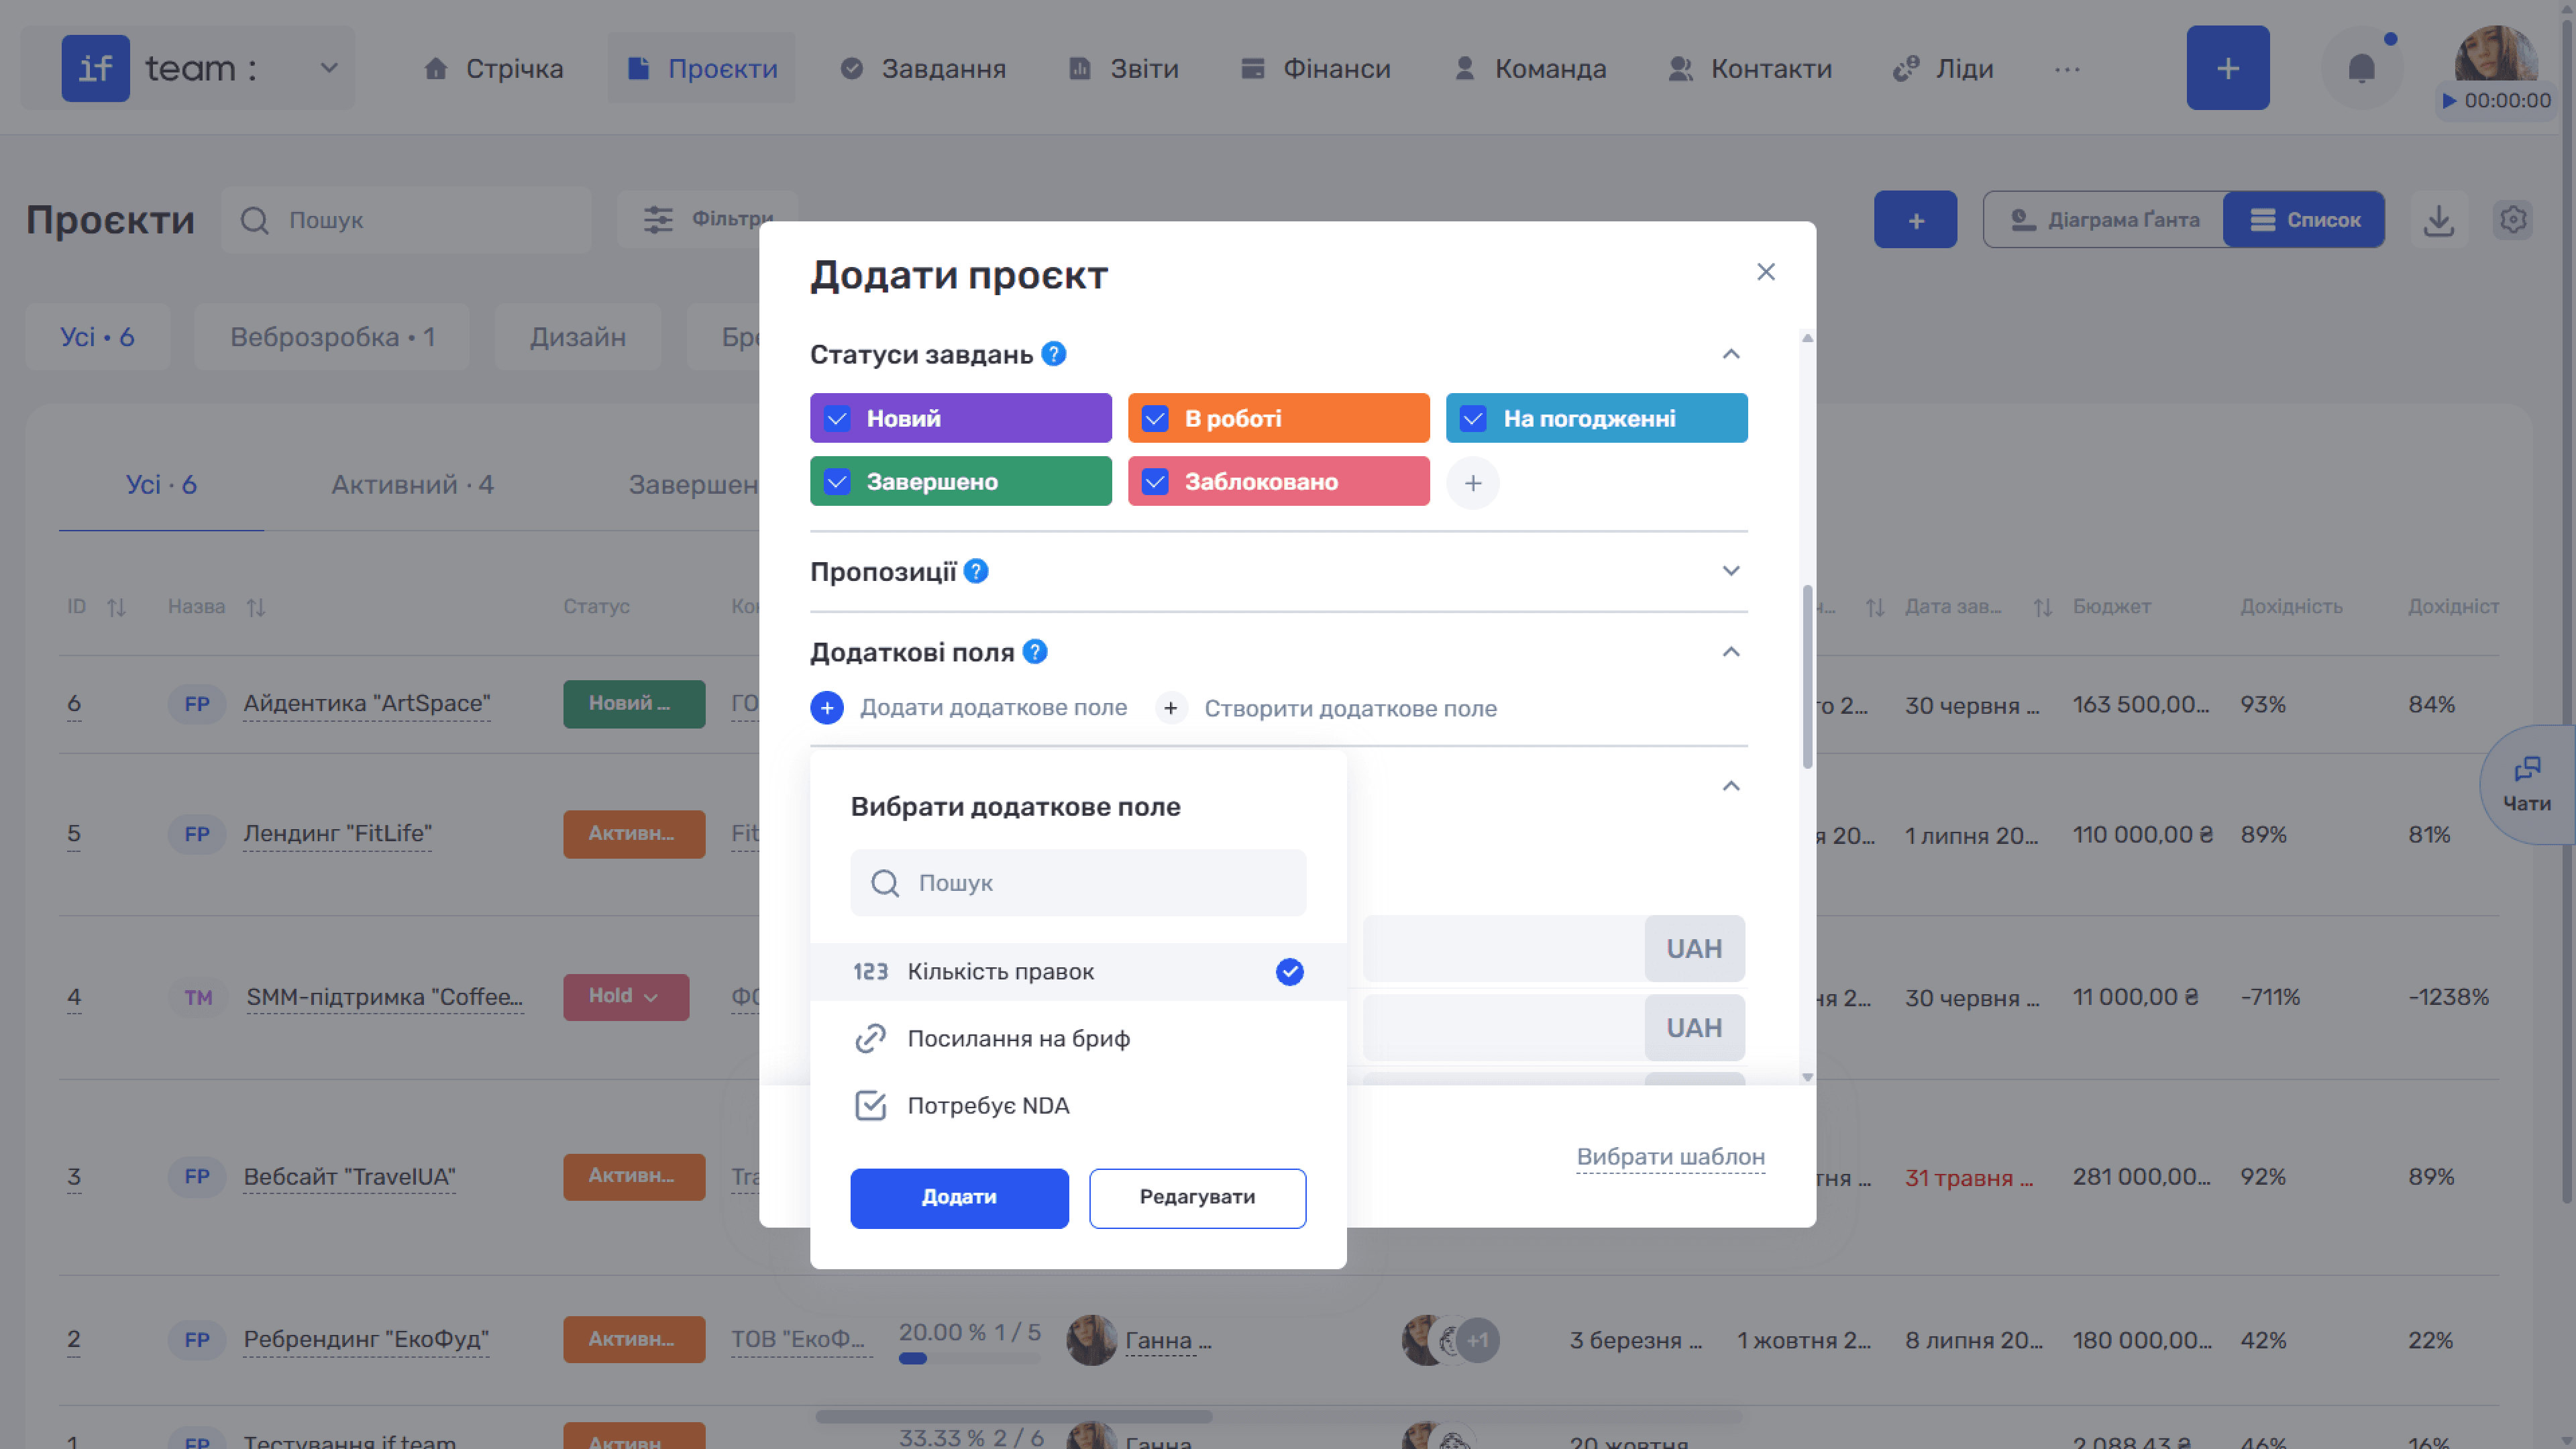
You can add custom fields directly in the project creation or editing form under Additional Fields. Click + Add Additional Field to open the Select Additional Field drop-down list containing fields previously created in the settings. Select the required field and click Add.
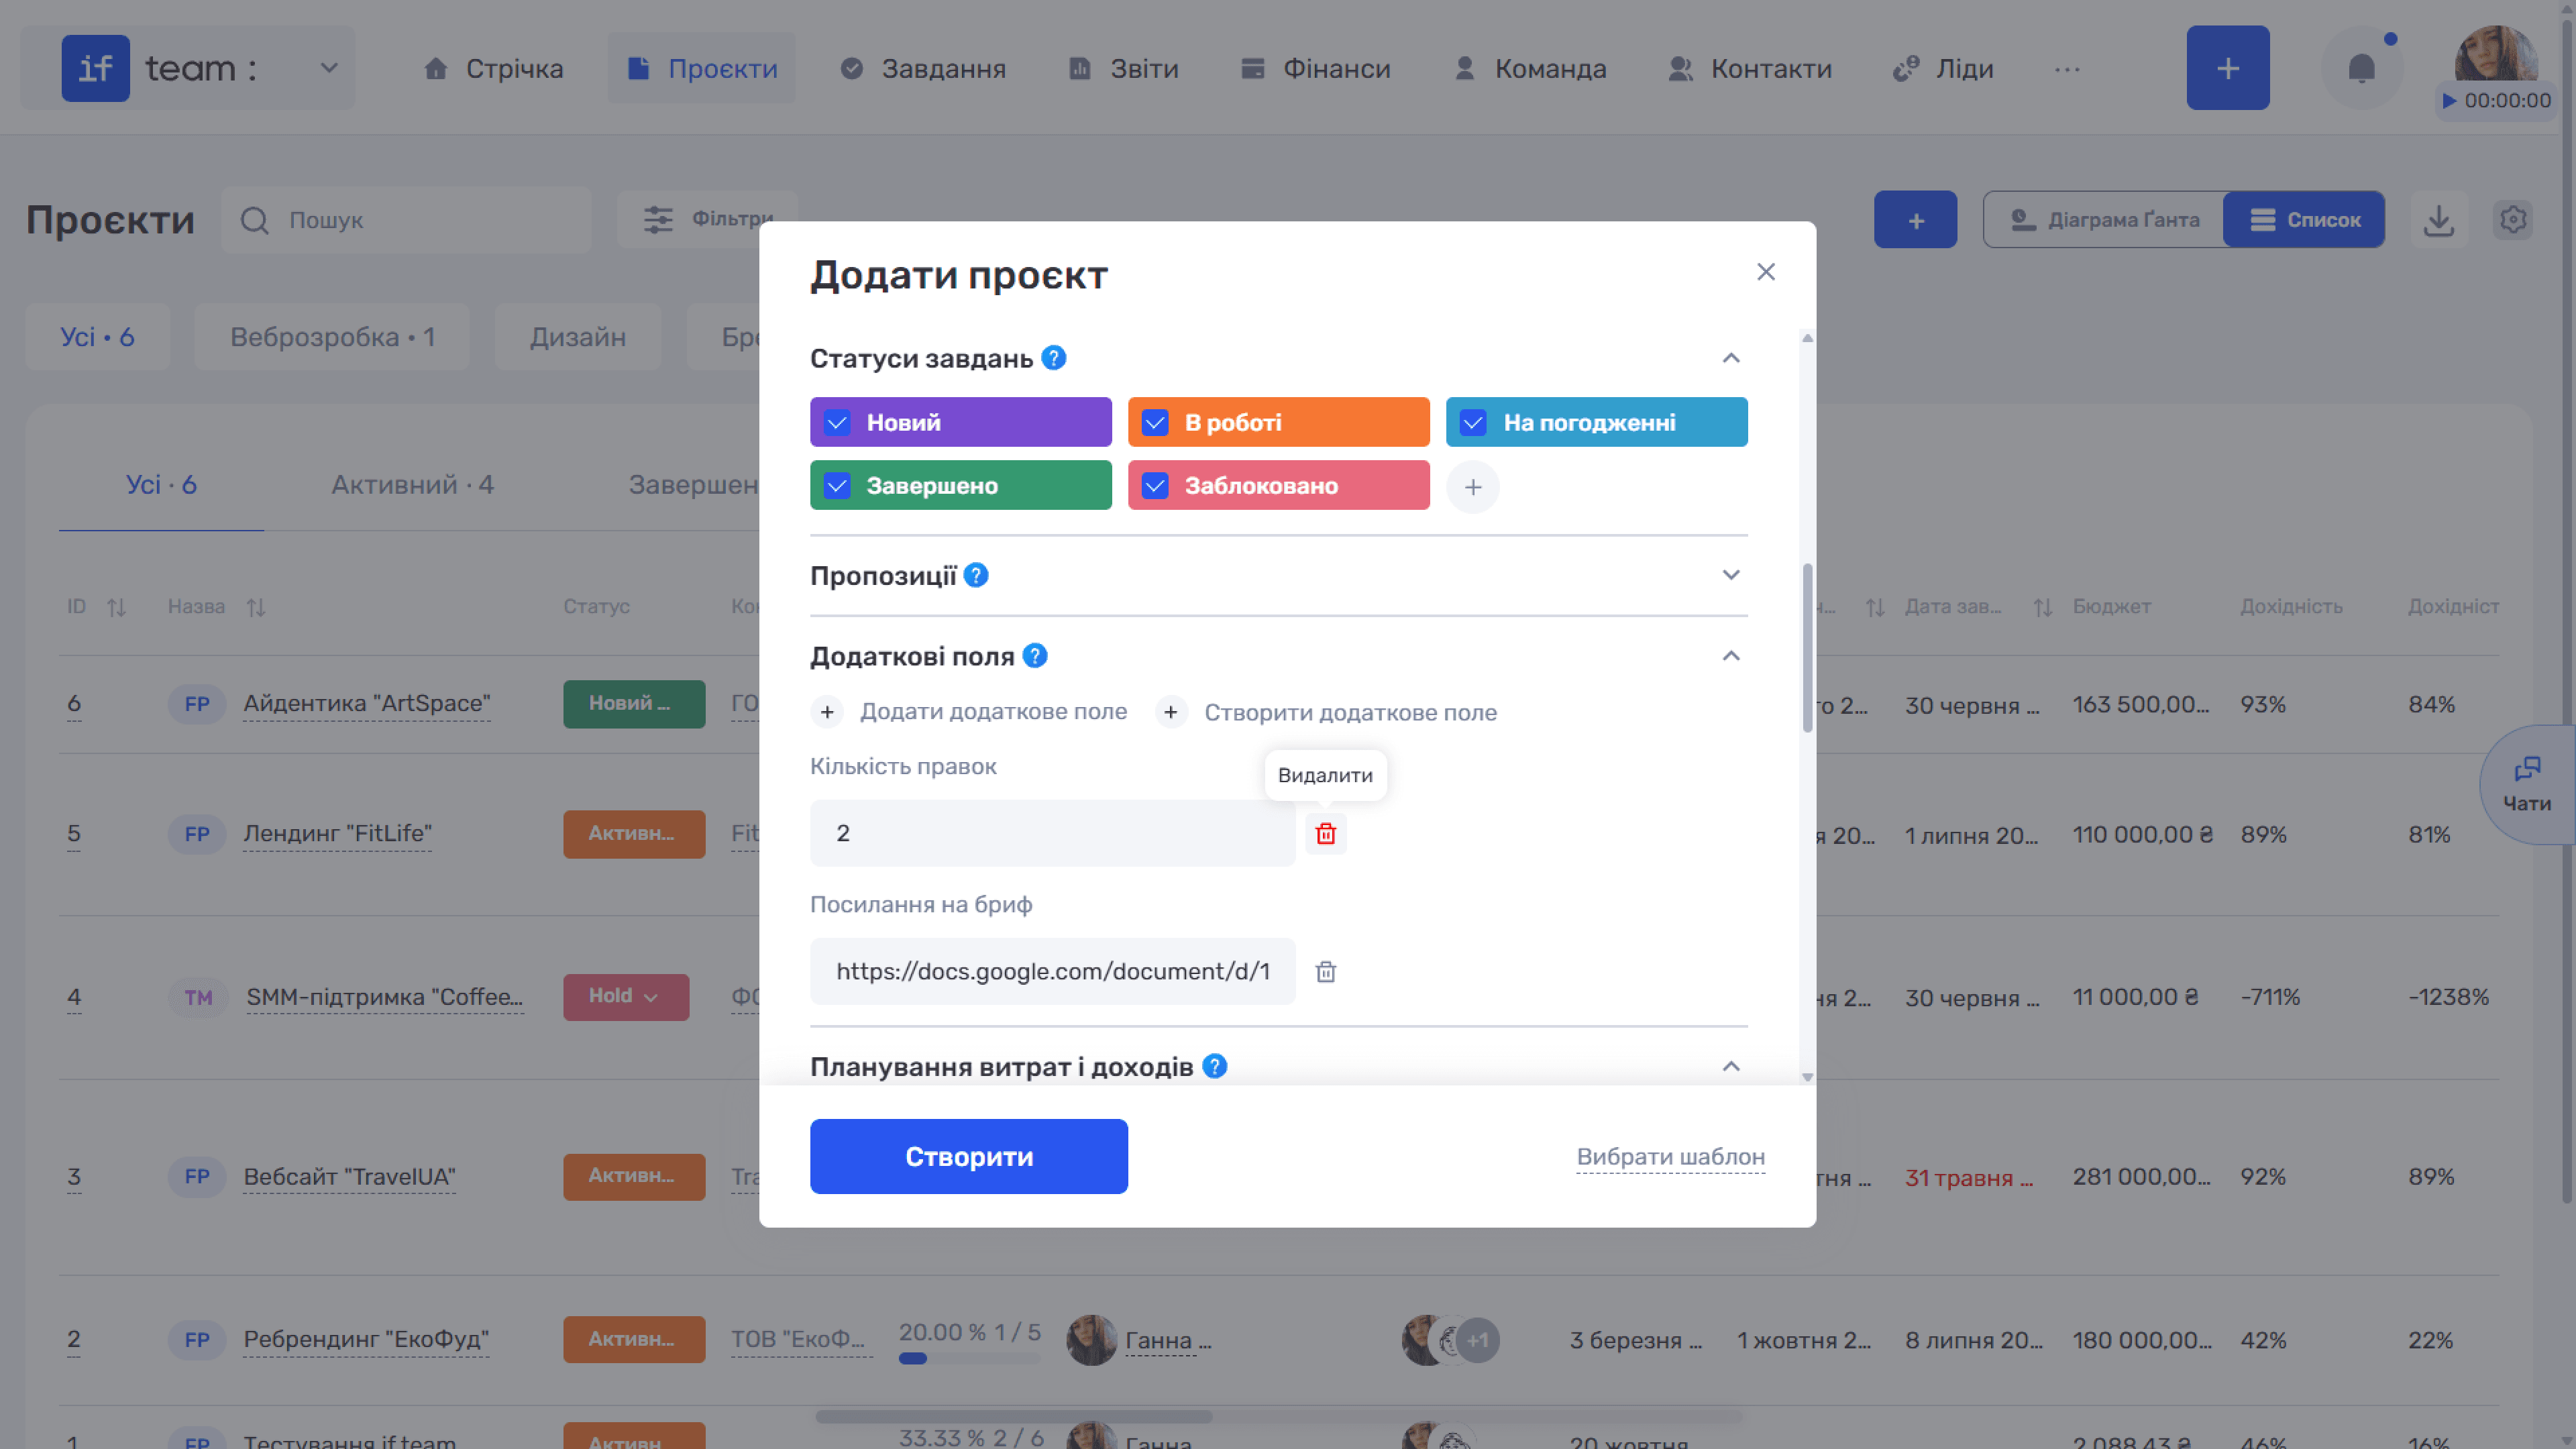
Once added, fields appear directly in the form and are ready to be completed. You can remove any added field from the form by clicking the trash icon (🗑) next to it.
If the required field does not exist yet, click Create Additional Field and complete the fields in the pop-up window.
Still have questions?
Maybe we haven't added this information yet. But you can always reach out:
Request a demo
Submit a request and we'll show you how the service works and its capabilities.
Book a demo