Vacancies
A vacancy is a position you are hiring for: conditions, requirements, number of openings, and responsible recruiters. The section brings together all company vacancies, and each vacancy card shows which candidates are at which selection stage.
The section opens from the item of the same name in the module's left panel.
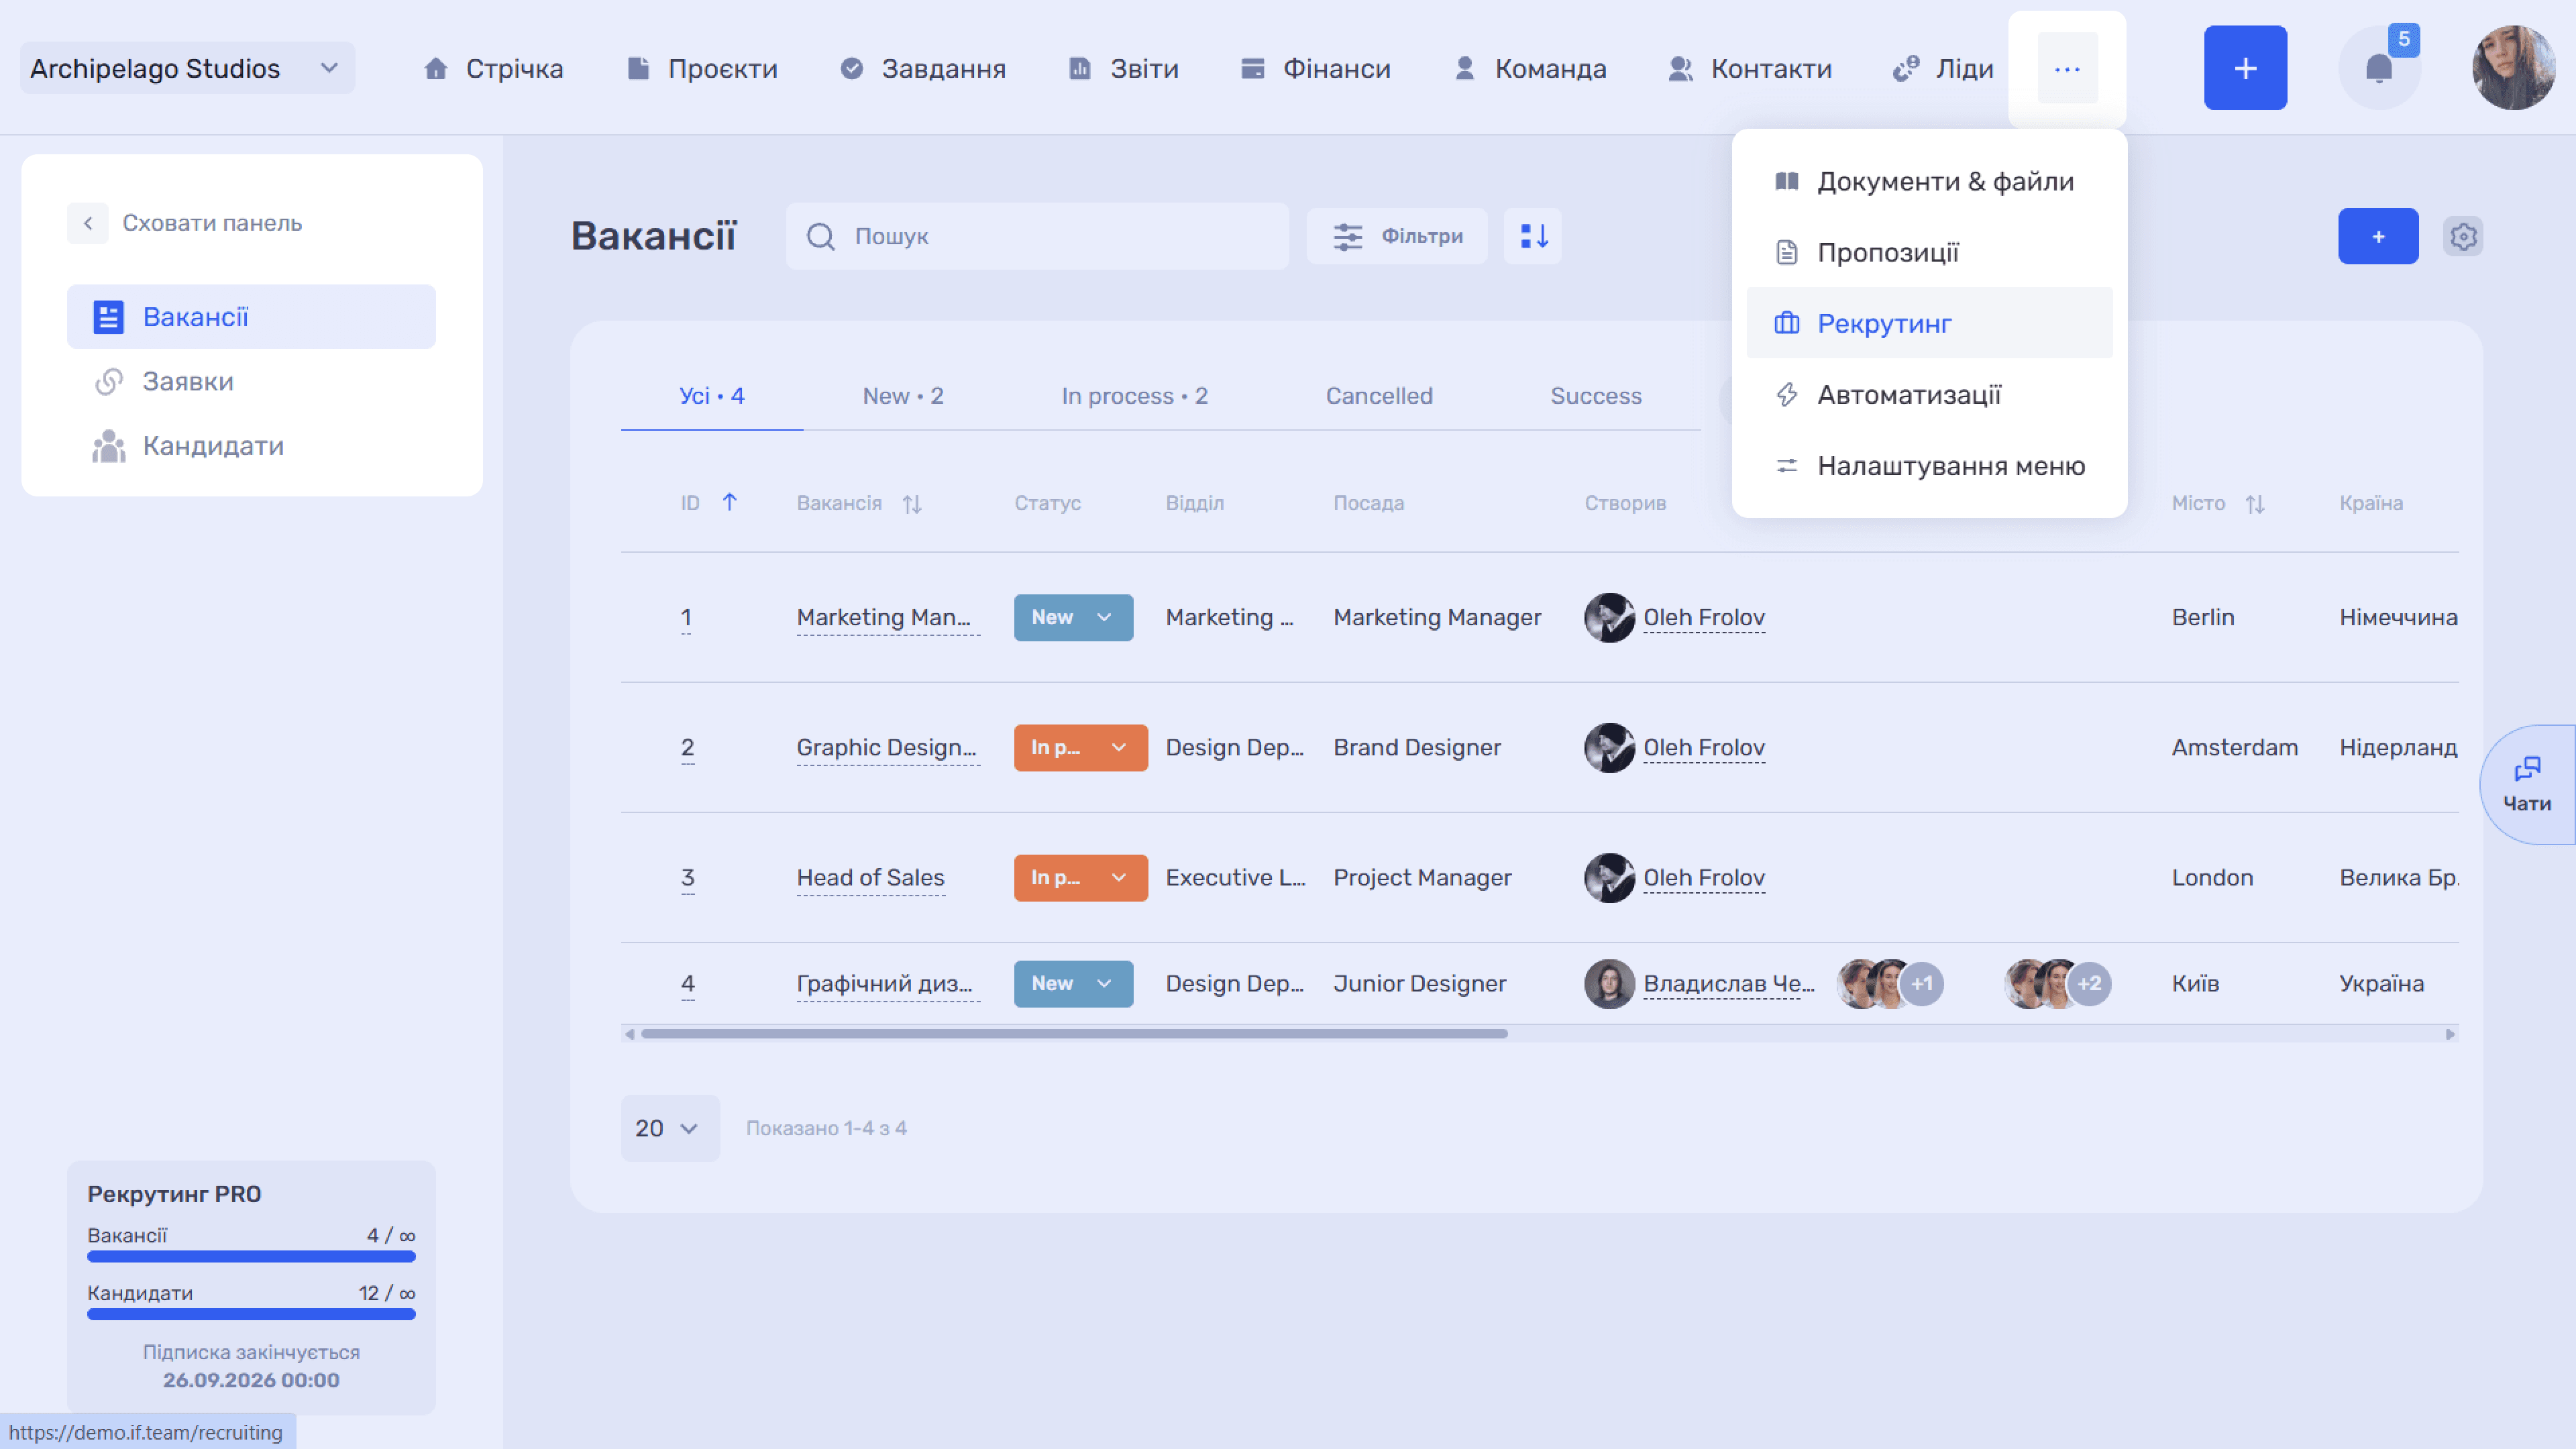
Vacancy list
Status tabs
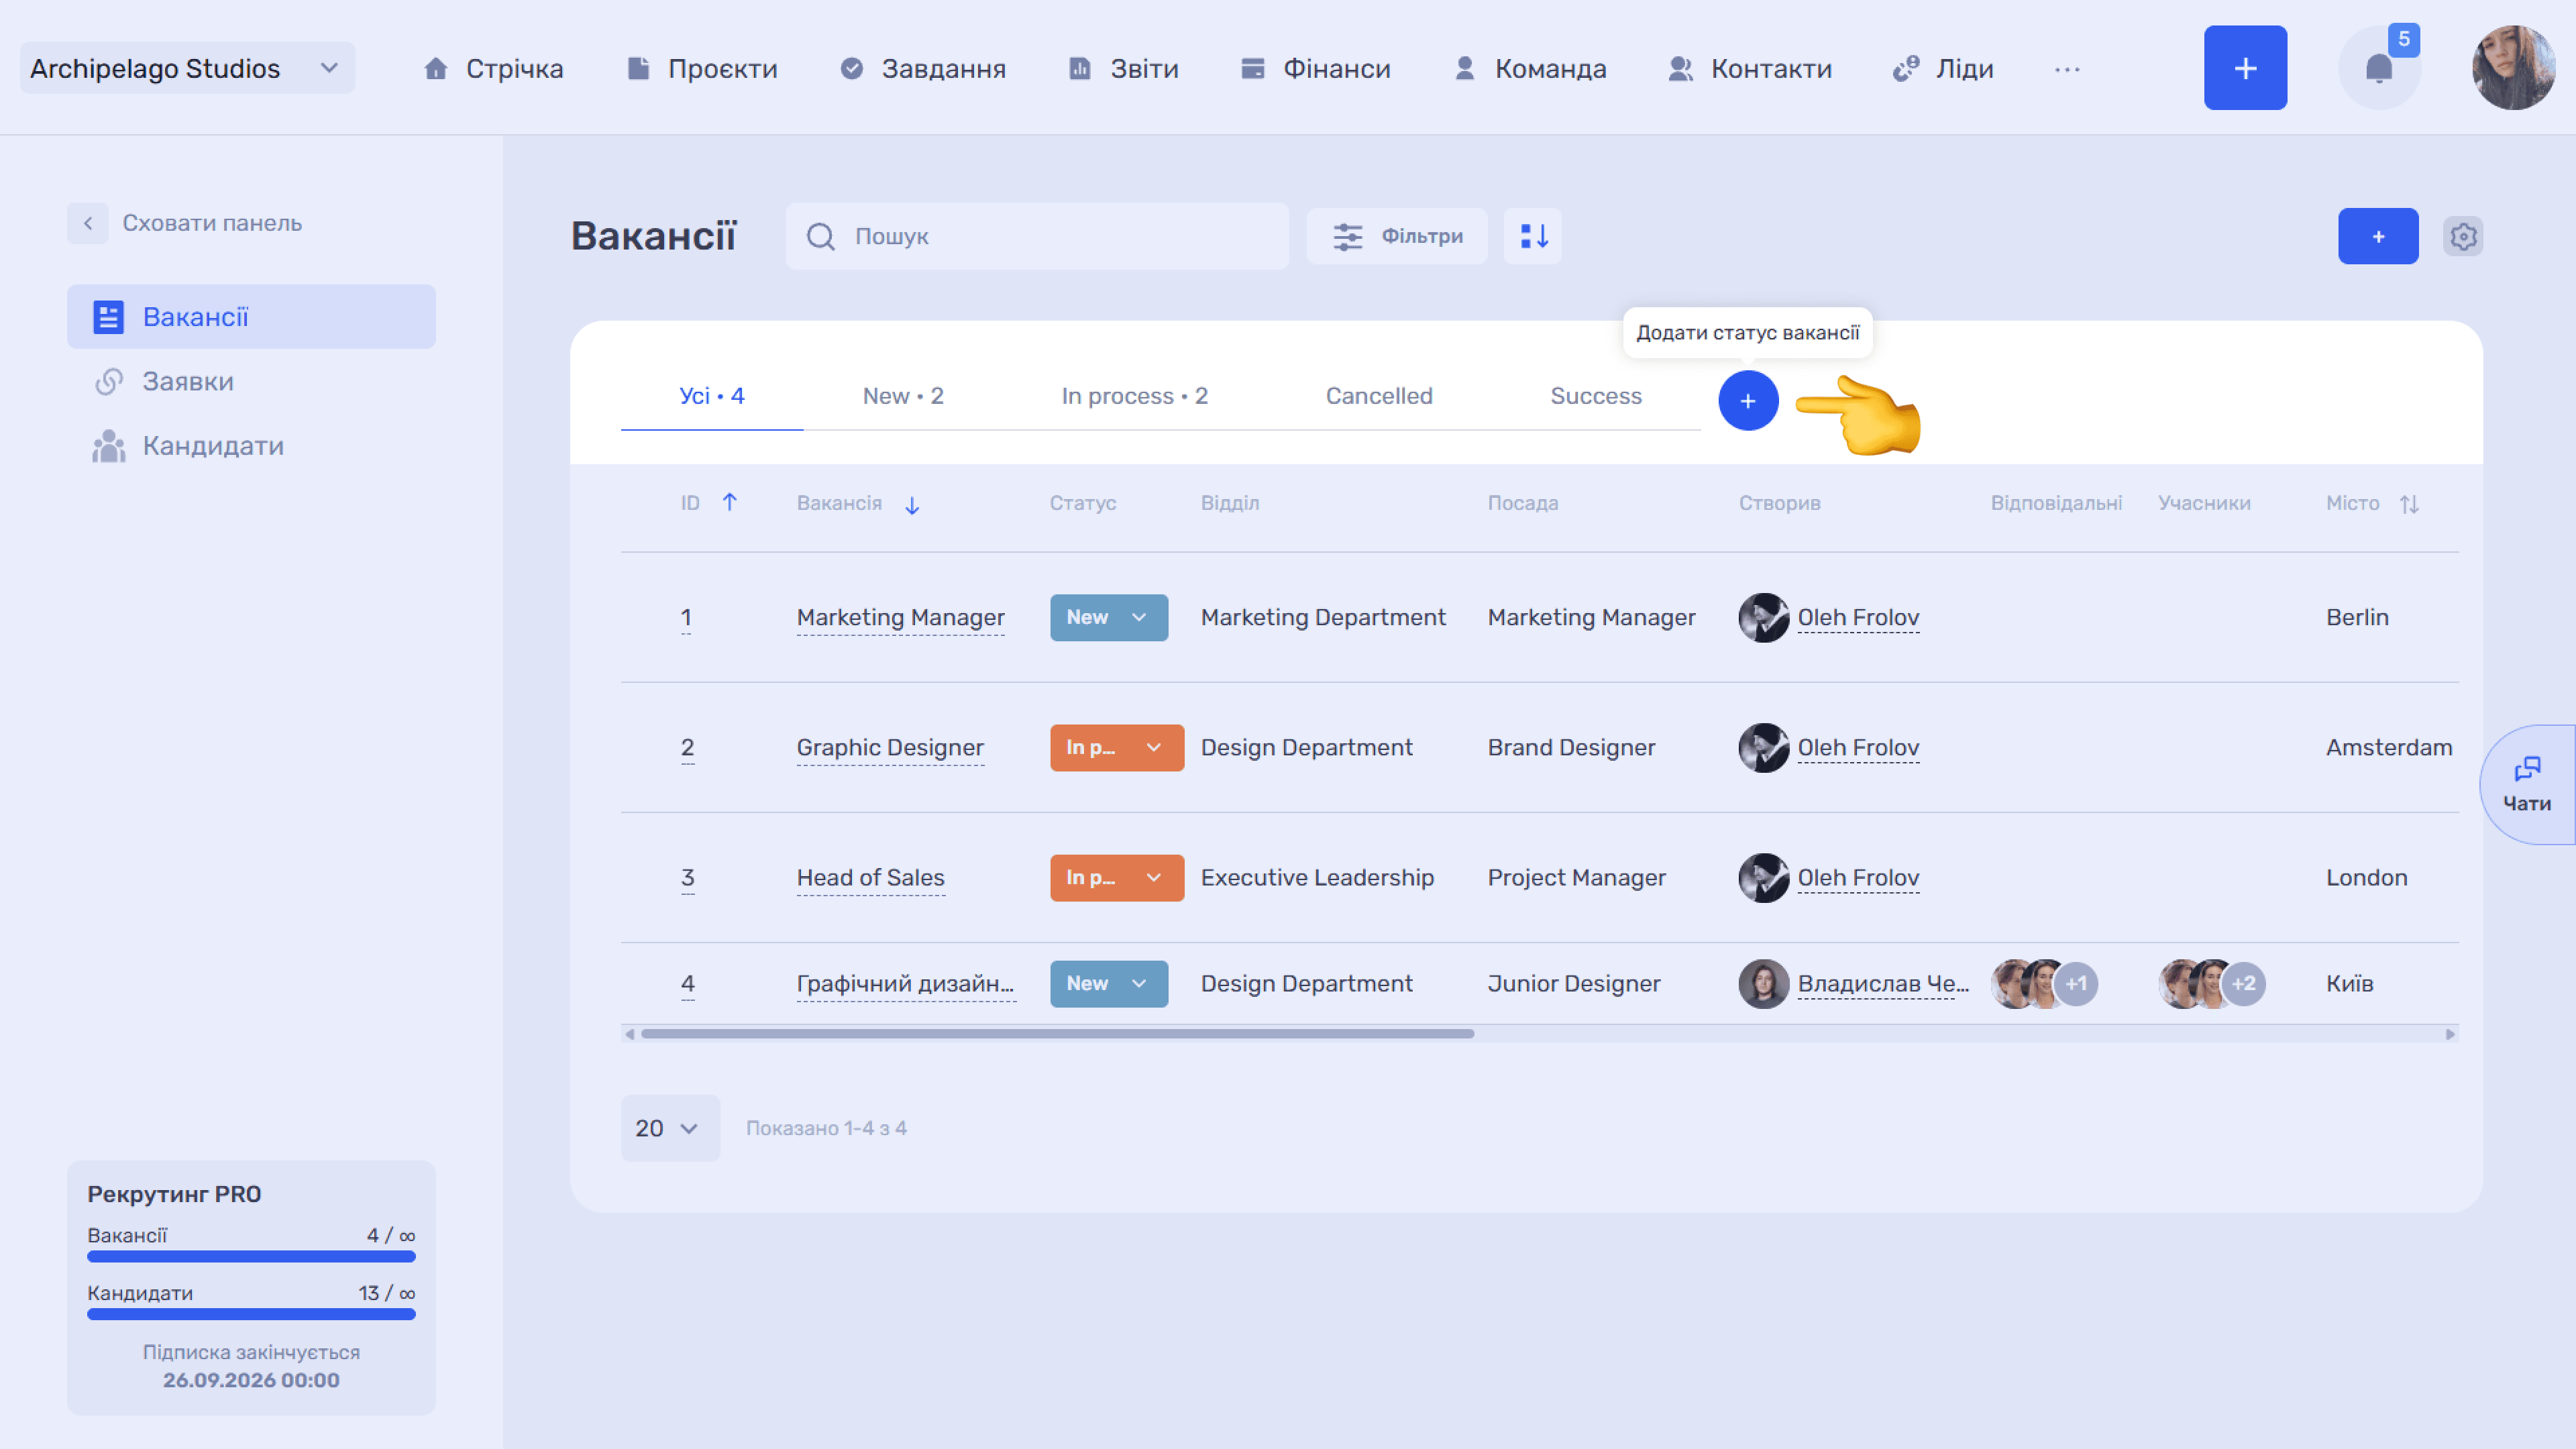
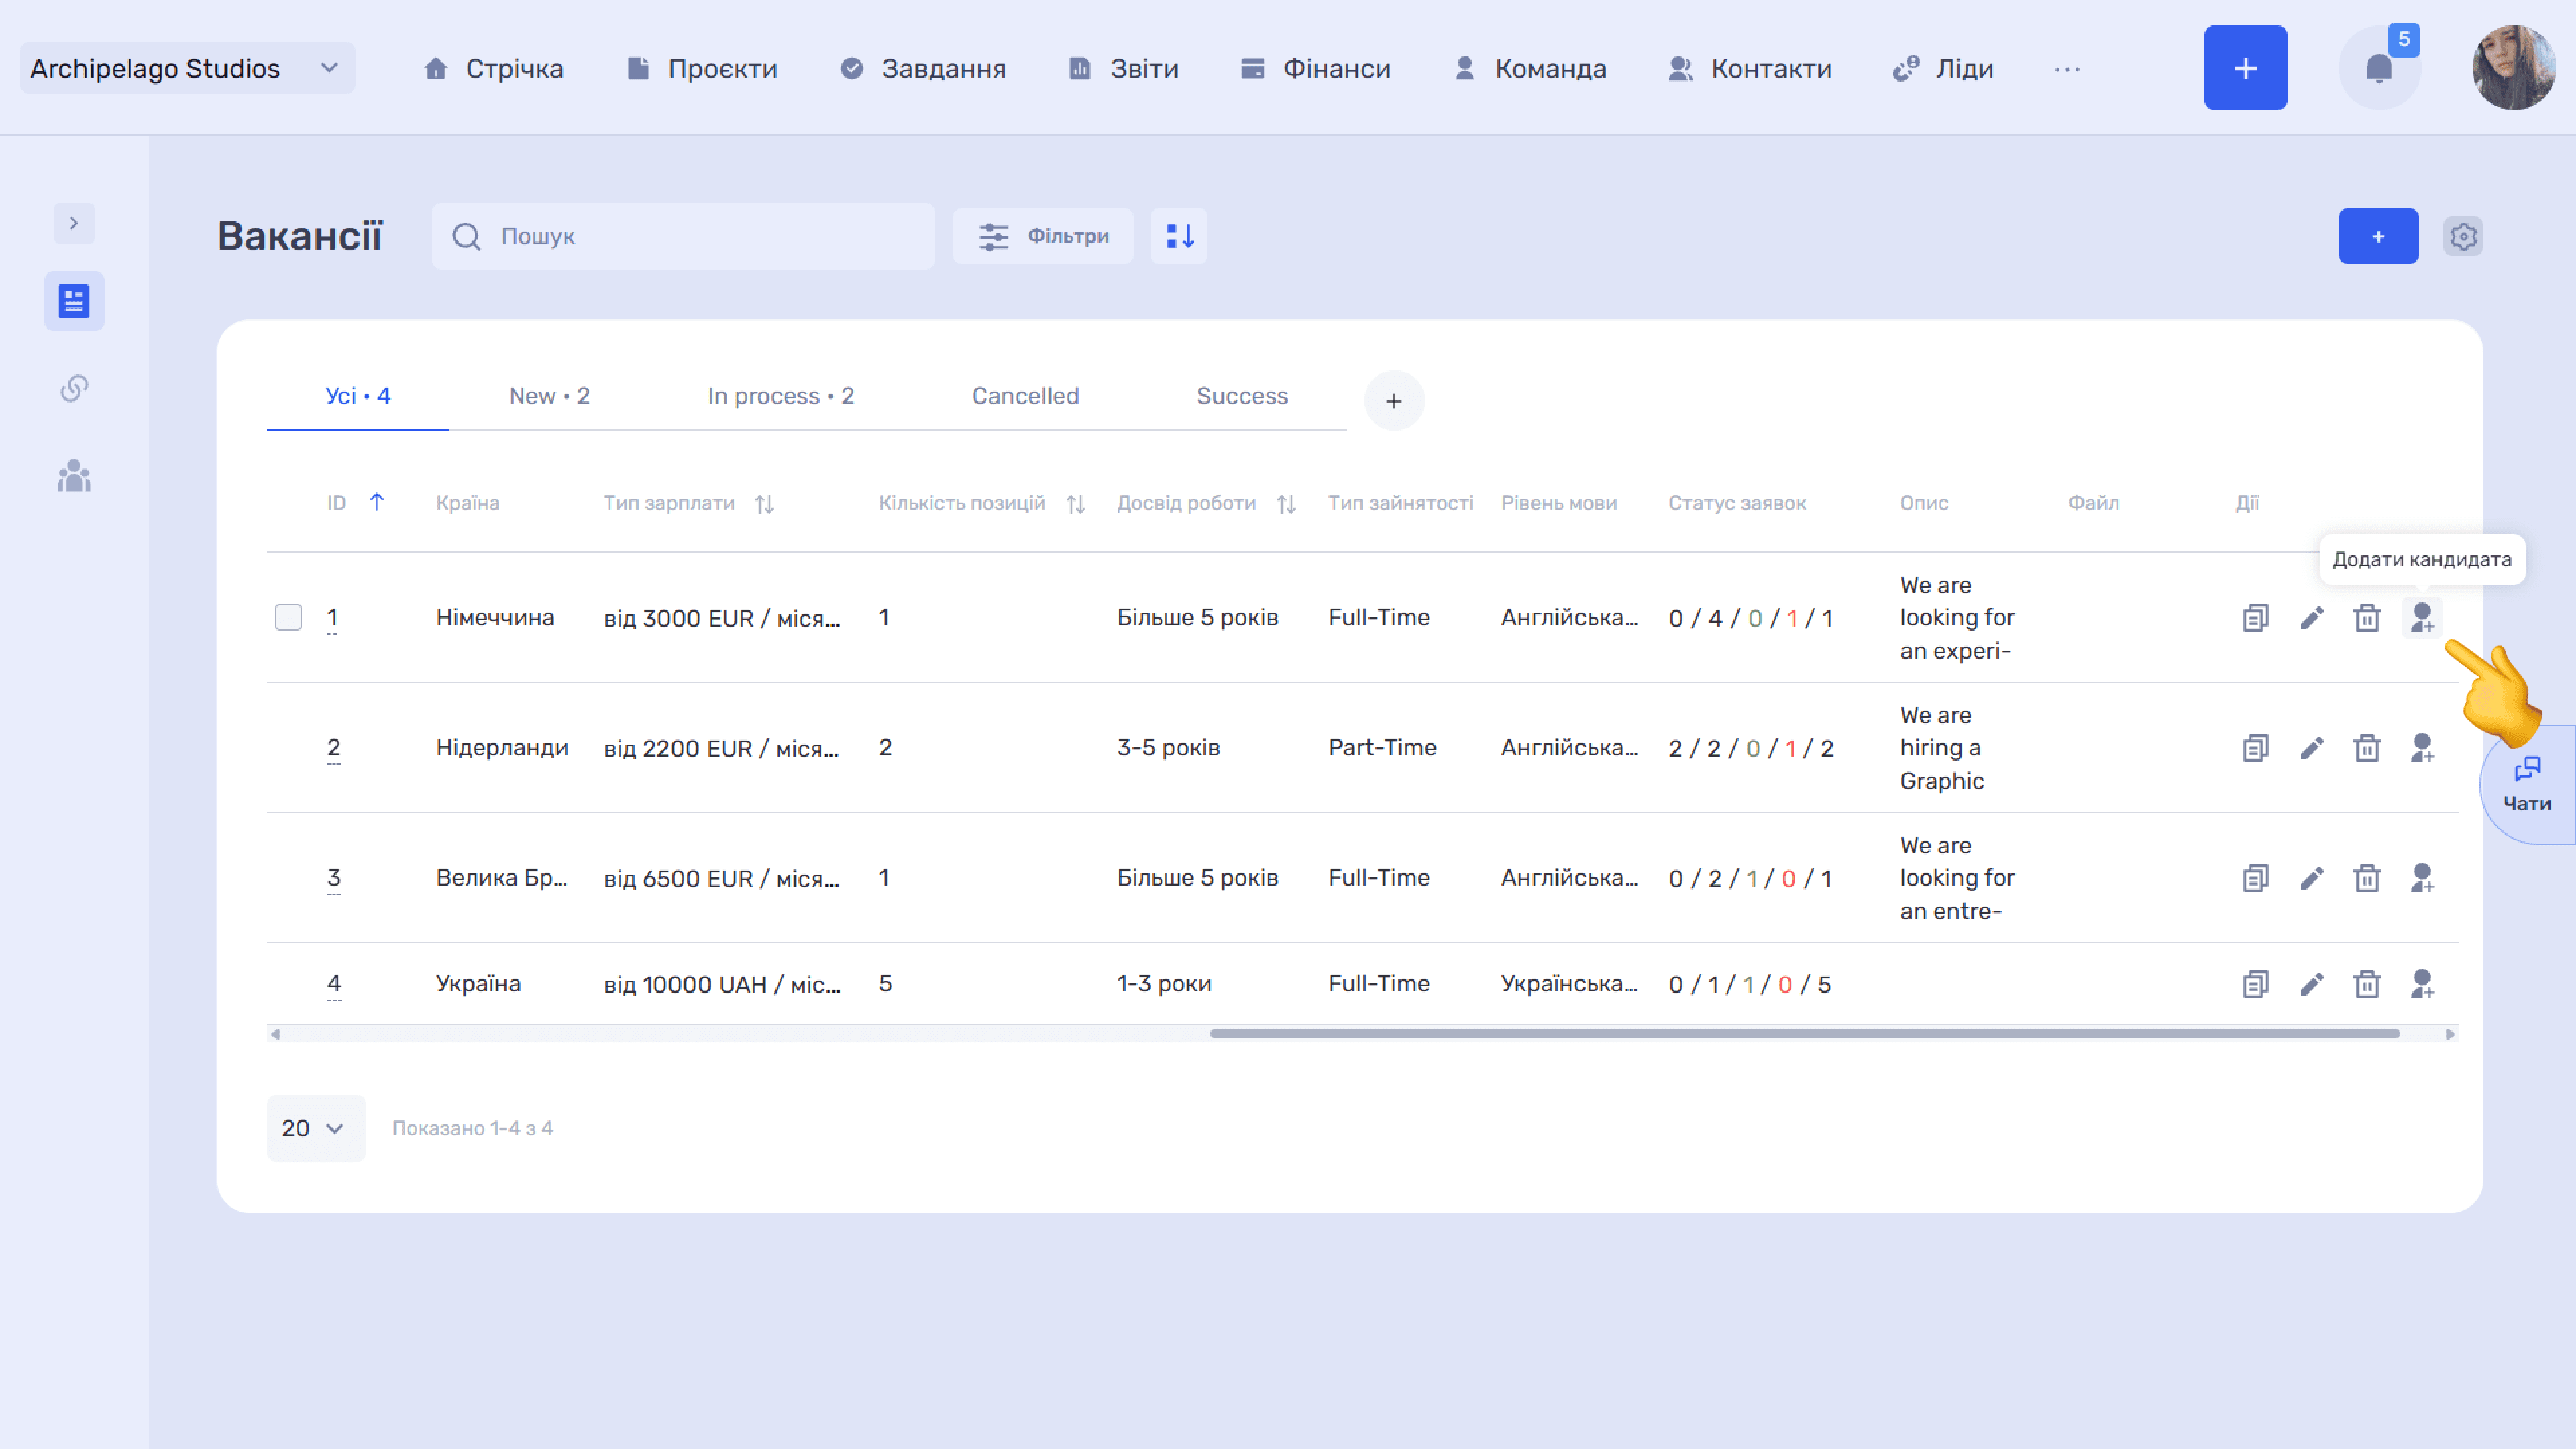
Above the table is the All tab and a separate tab for each vacancy status. The number next to the name shows how many vacancies are in that status. To the right of the tabs is the + button, which lets you Add a vacancy status.
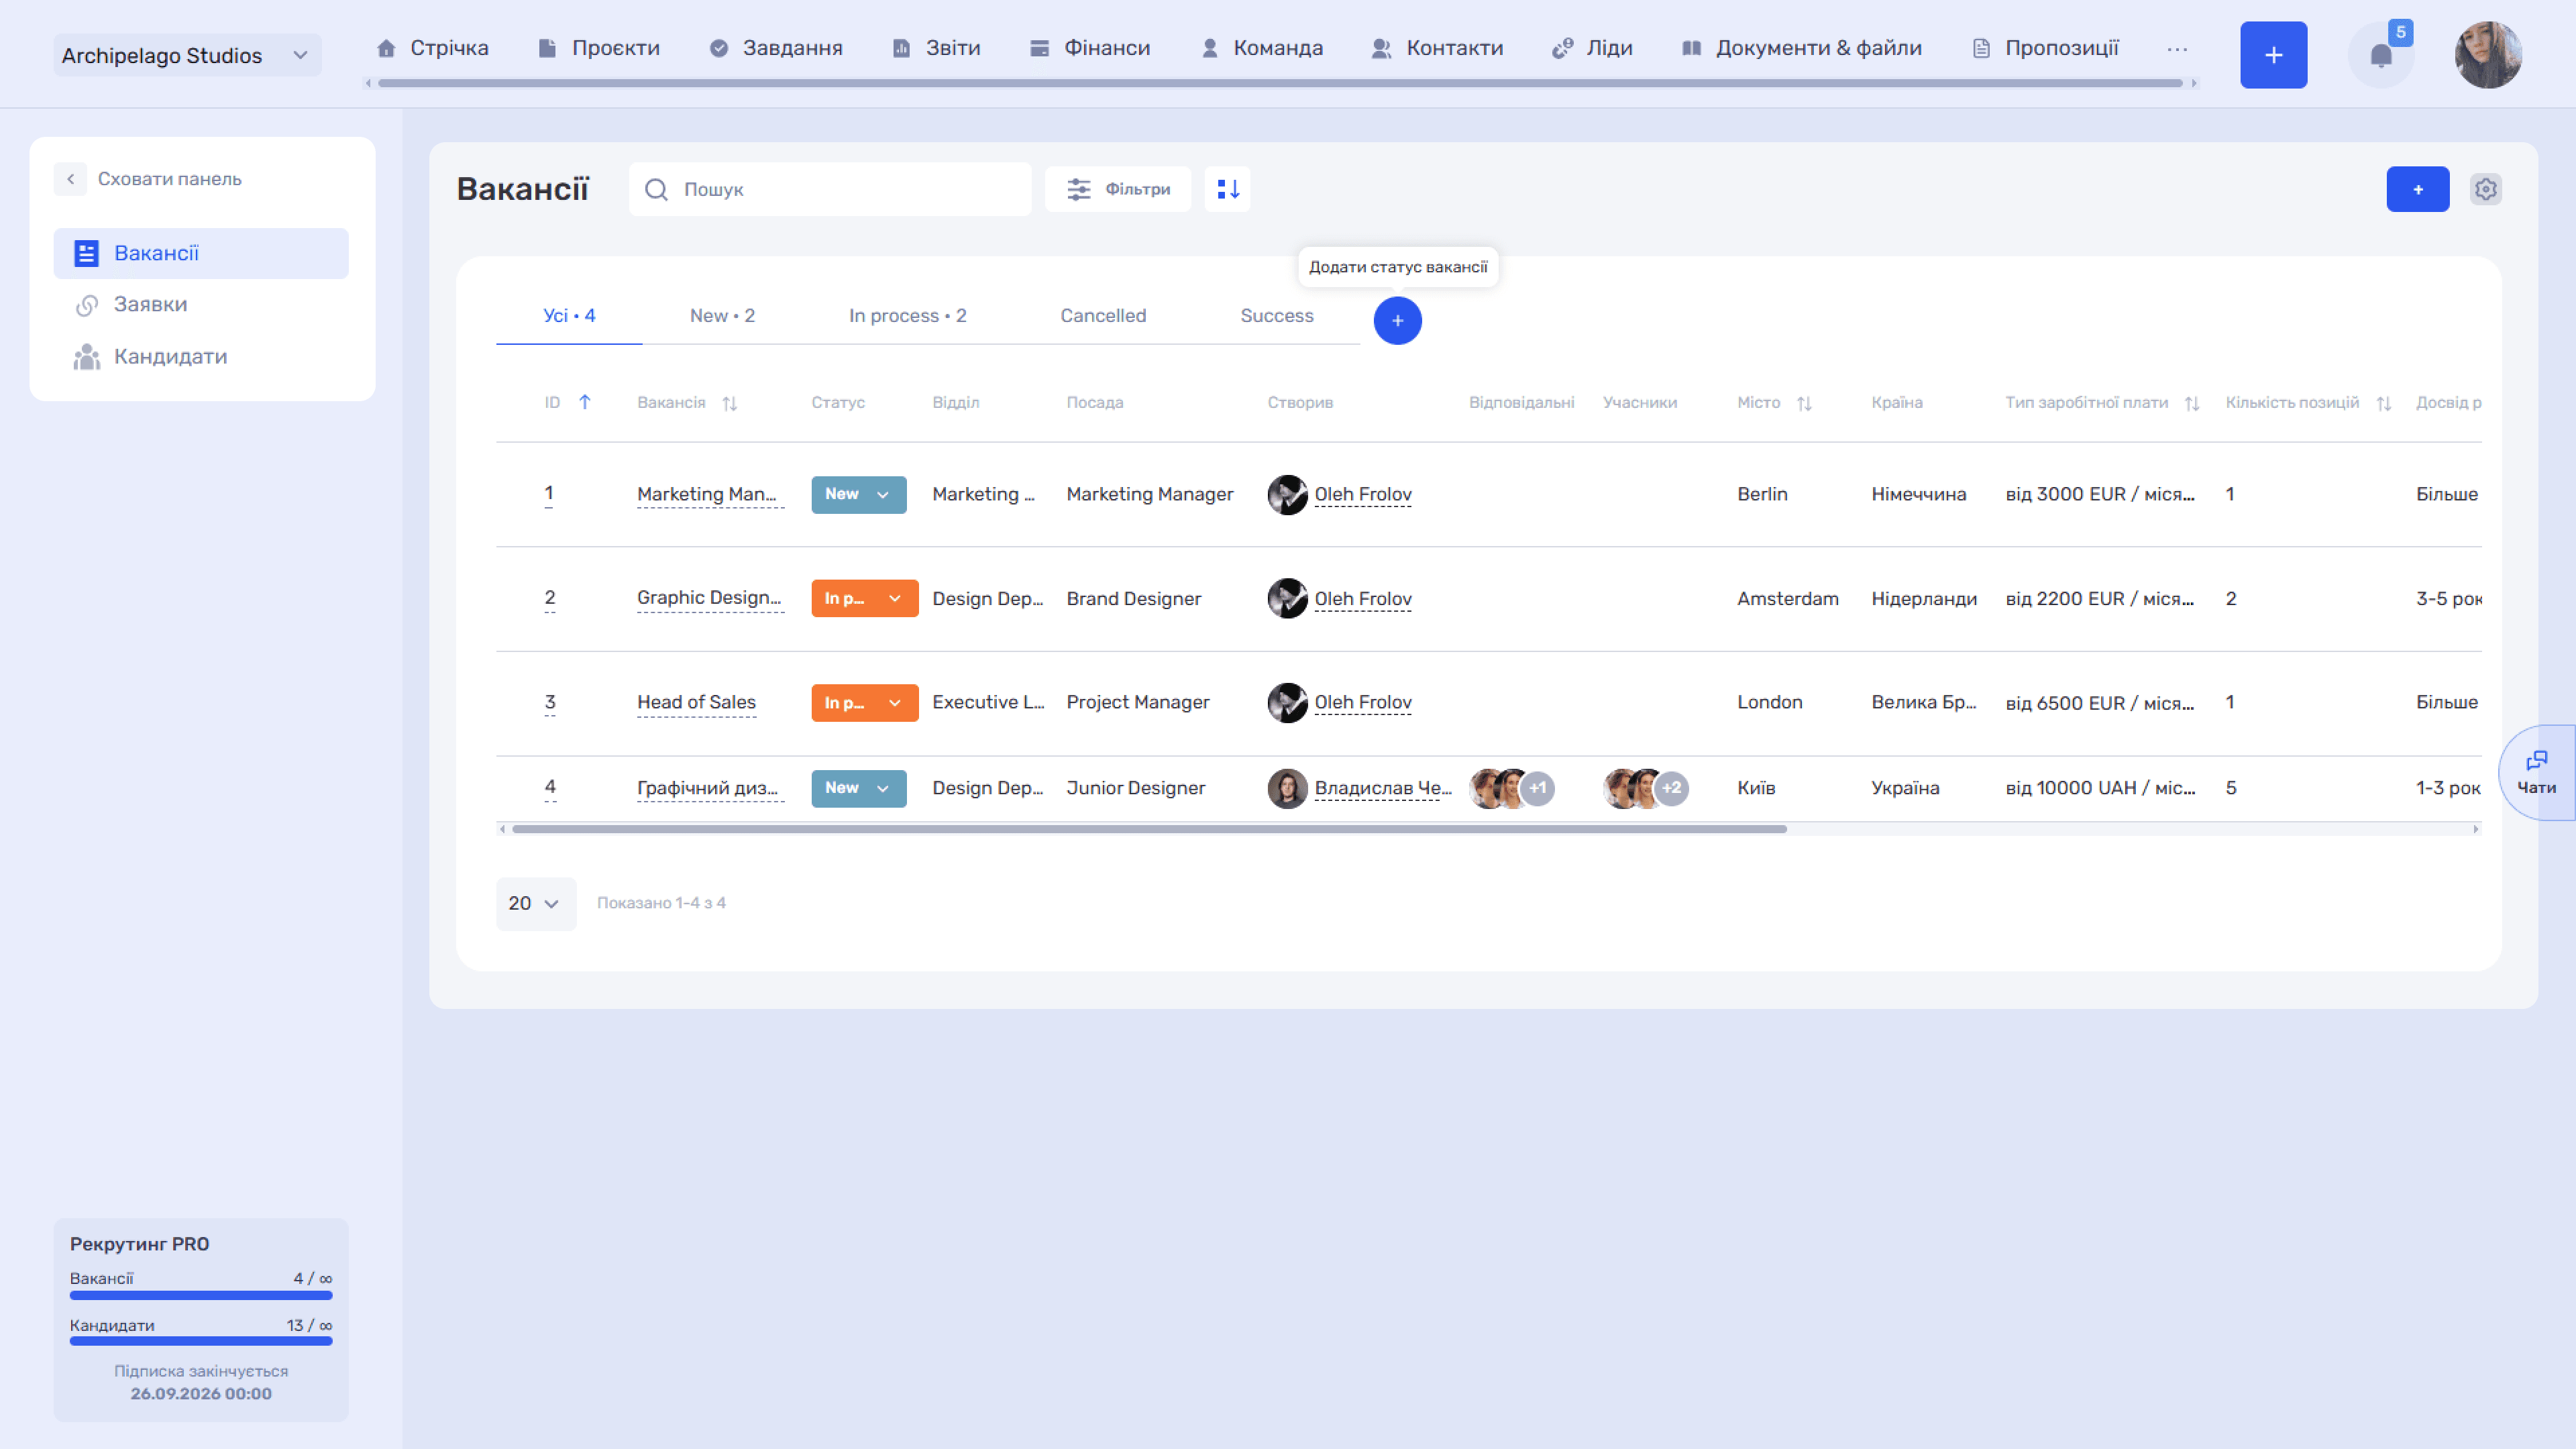
Table columns
- ID — the vacancy's sequence number
- Vacancy — the name; the link opens the vacancy card
- Status — the current status; can be changed right from the list
- Department — the department the position belongs to
- Position — a position from the company list
- Created by — the vacancy author
- Responsible — recruiters assigned to the vacancy
- Members — employees with access to the vacancy but no responsibility for hiring
- City / Country — the position's location
- Salary type — the amount and frequency — for example, "from 10,000 UAH / month"
- Number of positions — how many people are planned to be hired
- Work experience — the experience requirement
- Employment type — Full-Time, Part-Time, Contract, etc.
- Language level — language requirements
- Application status — a summary of applications — see below
- Description — the beginning of the vacancy description
- File — attached files
- Actions — 🗐 copy, edit, delete, + add a candidate
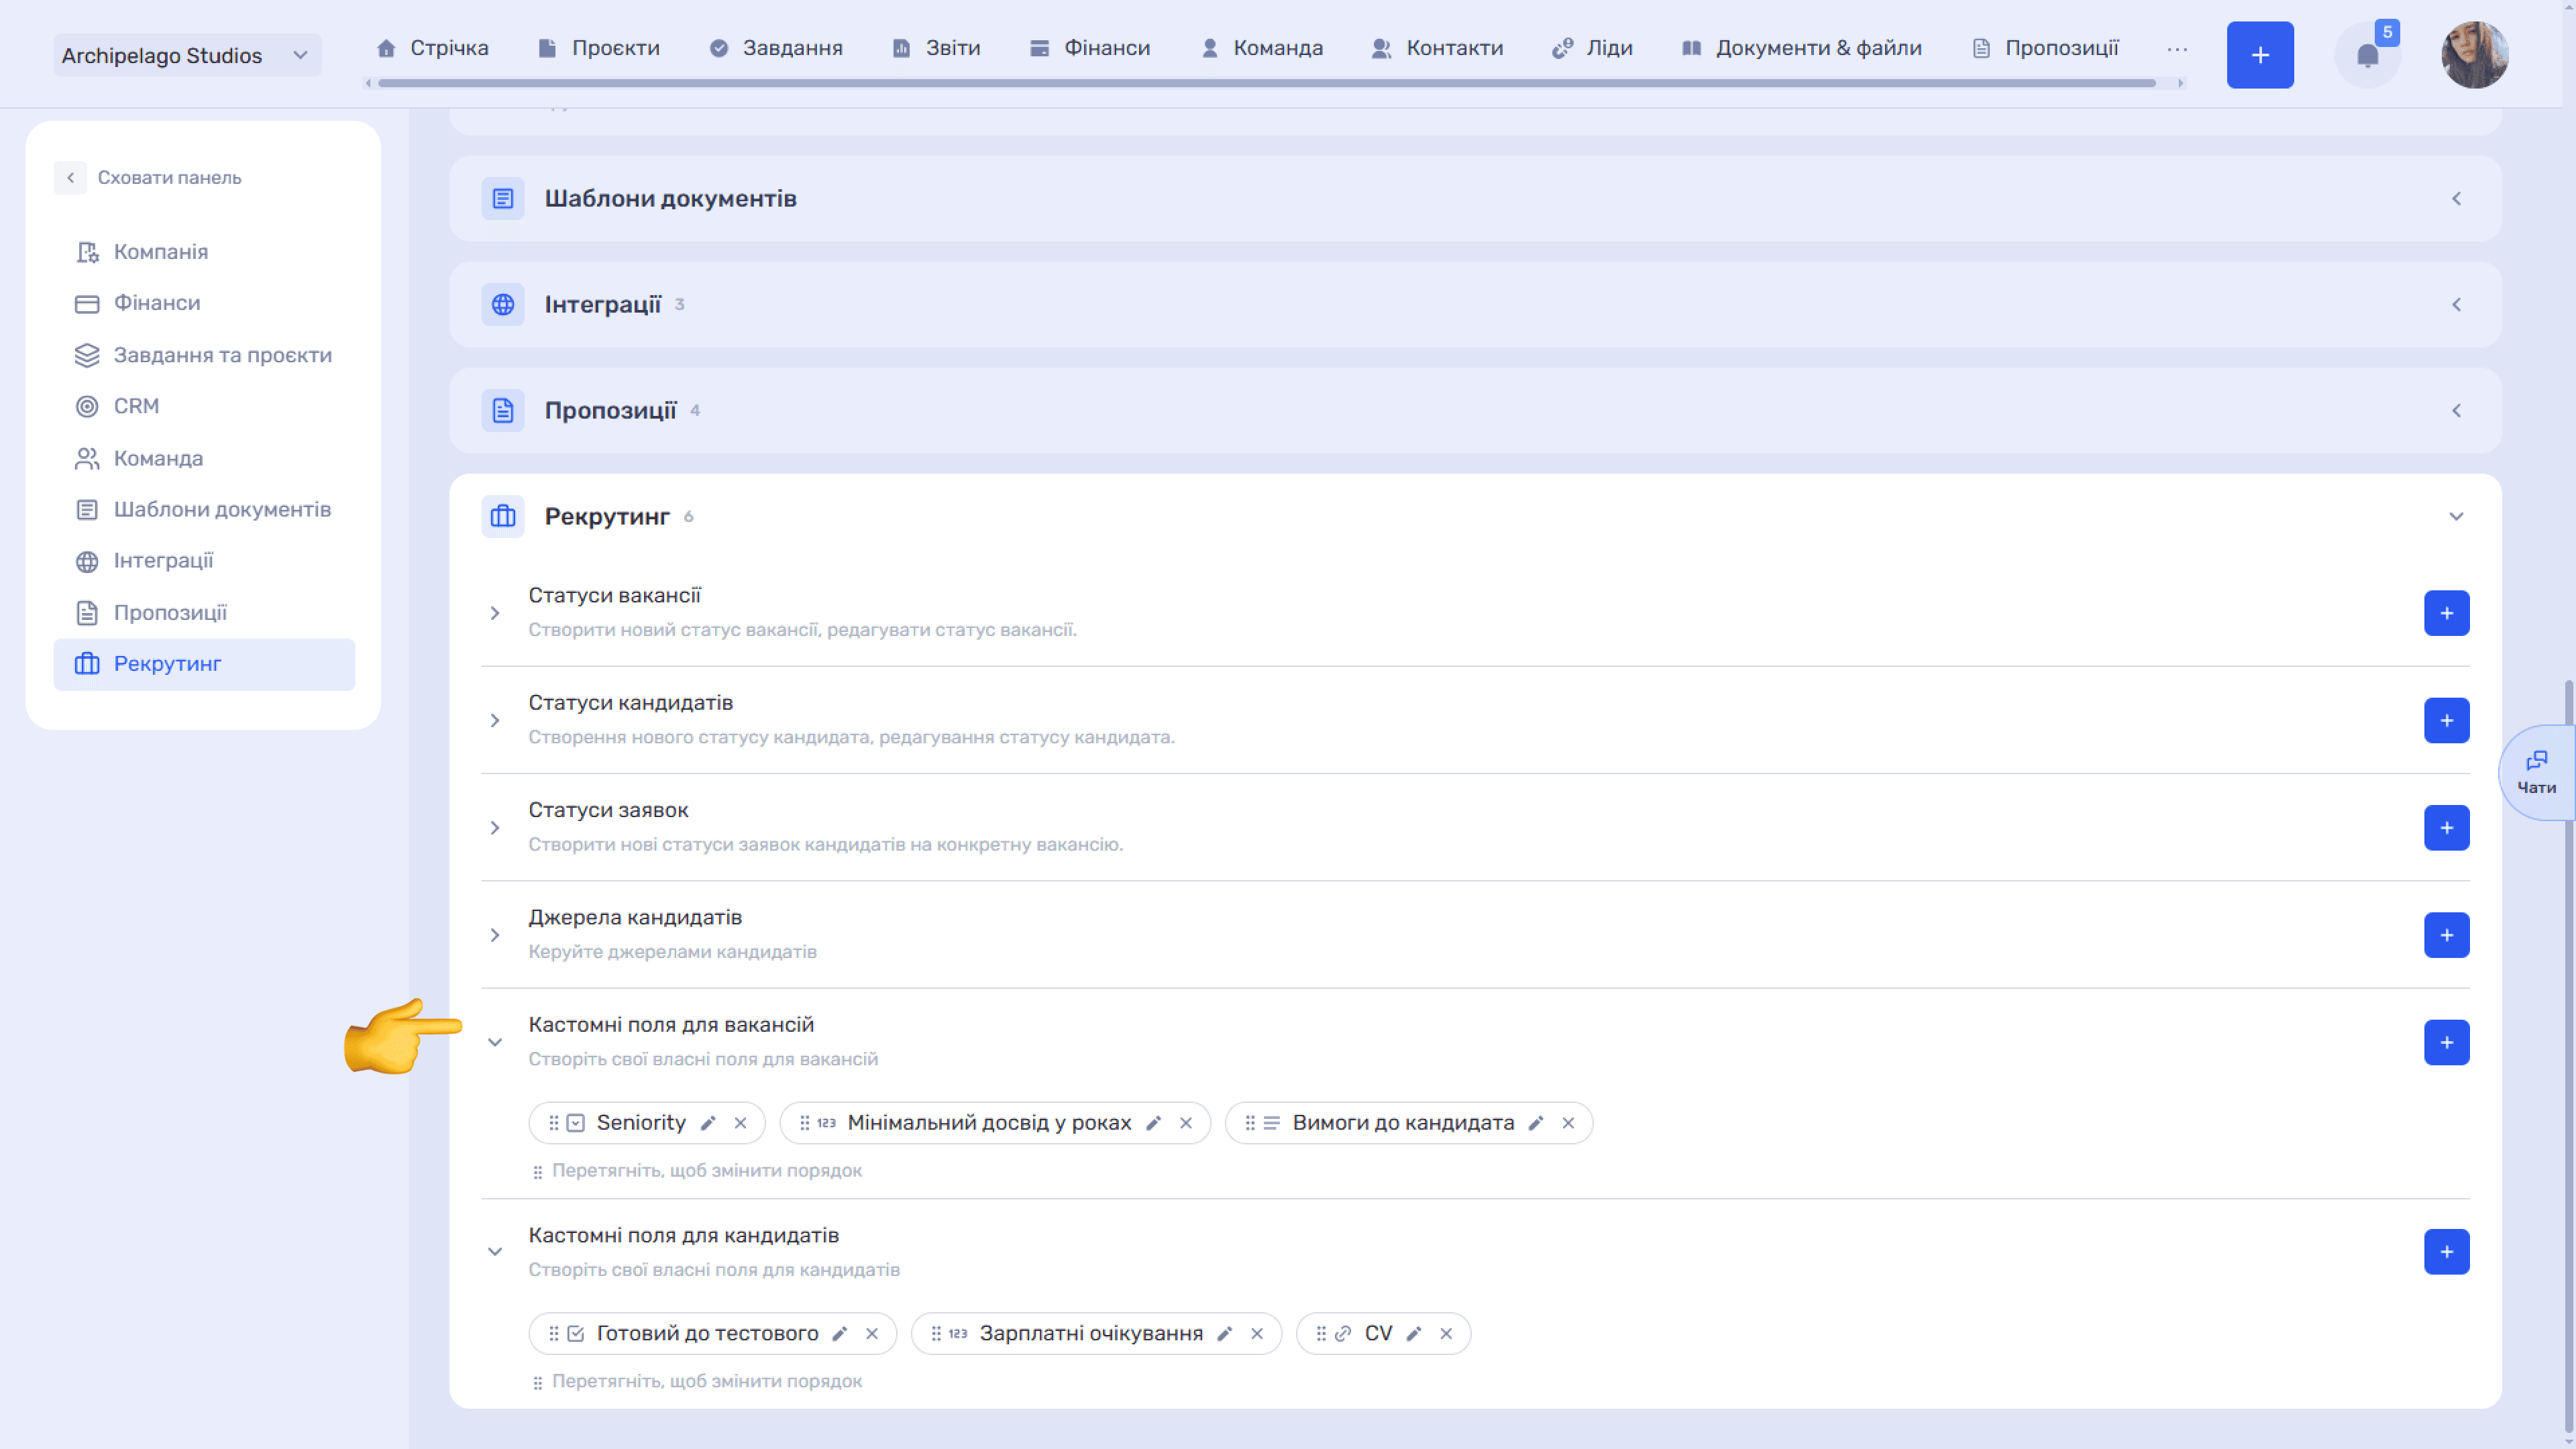
Custom field columns (for example, "Seniority", "Minimum experience in years", and "Candidate requirements") are configured in the admin panel (Settings → Recruiting → Custom fields for vacancies) and enabled in Field settings (see Admin Panel → Recruiting).
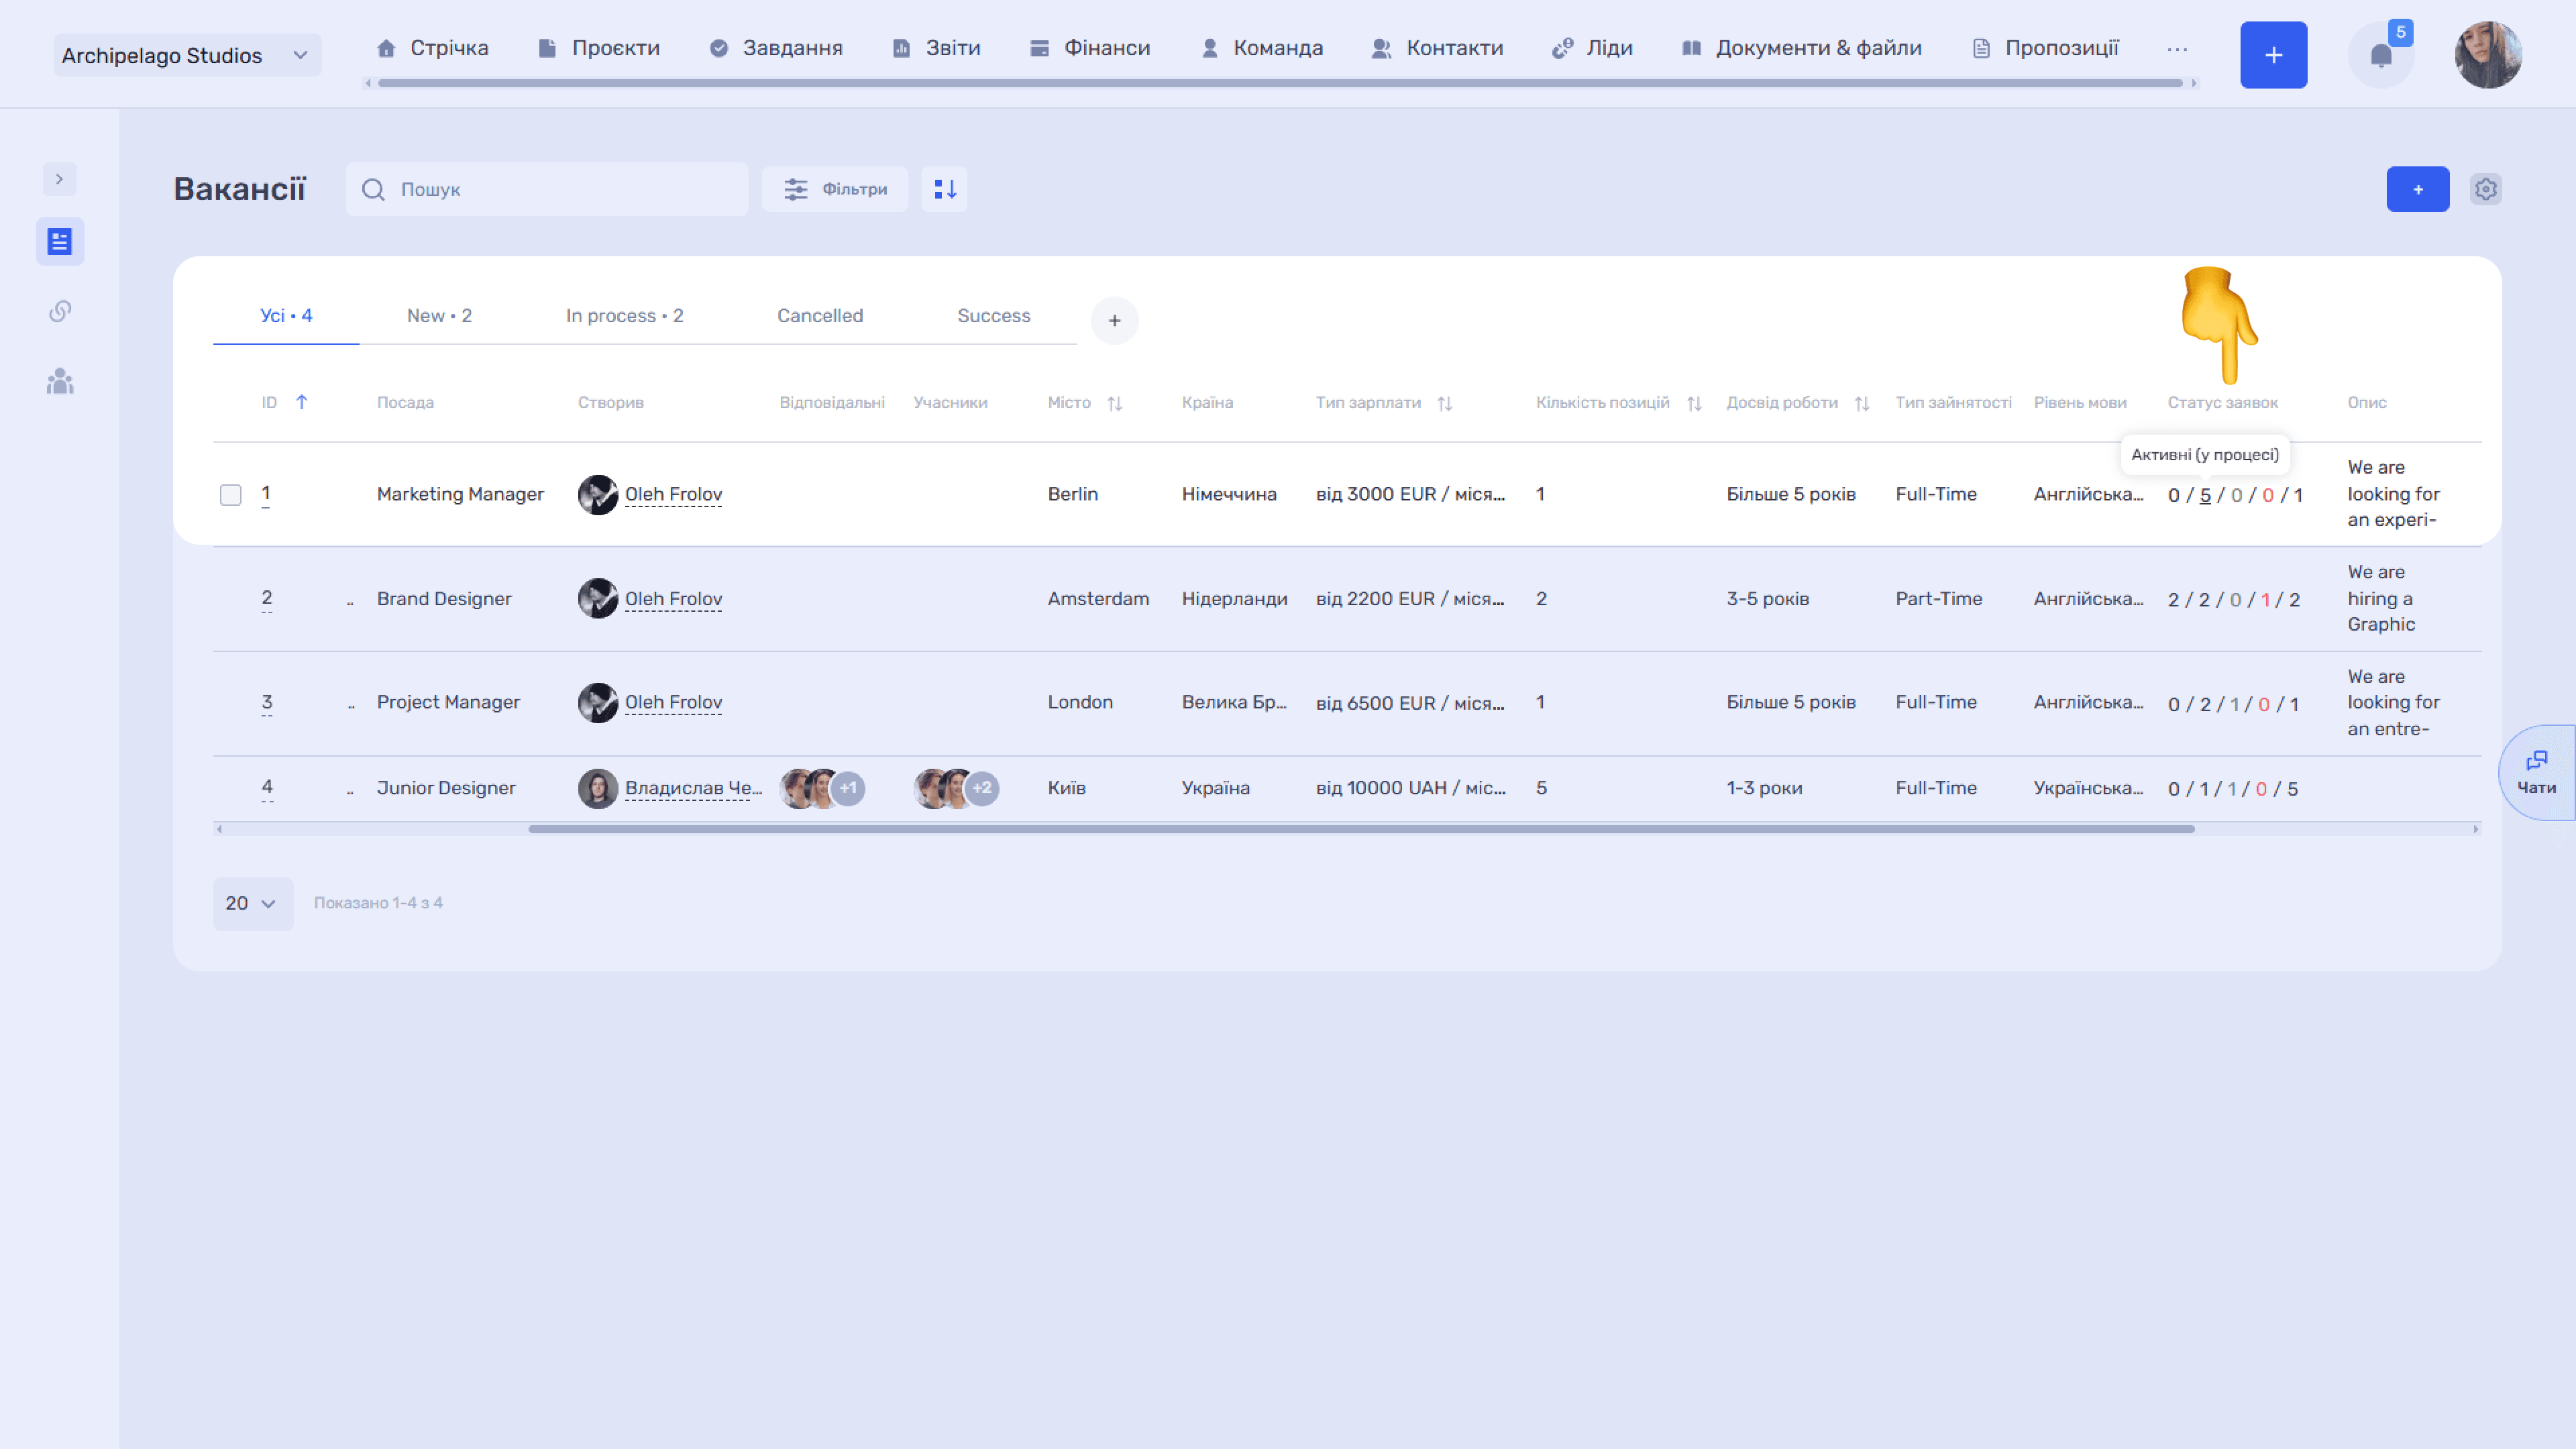
The Application status column
These are five numbers separated by slashes: the first four are the number of applications for this vacancy in each status group, and the fifth is the number of openings. Hovering over each shows a hint:
1 — New;
2 — Active (in progress);
3 — Accepted (hired);
4 — Rejected;
5 — Openings in the vacancy.
The counters count groups, not individual statuses. If the Active group in your funnel contains several stages — for example, In process and Interview — all applications from them go into the same second number. A candidate moving between stages within a group does not affect the column; it changes only when an application moves to another group.
For example, 0 / 5 / 0 / 0 / 1 means: no new applications, five in progress (at any of the active stages), none hired or rejected, one opening in the vacancy.
Search, filters, and table view
Search at the top looks up vacancies by name.
Filters
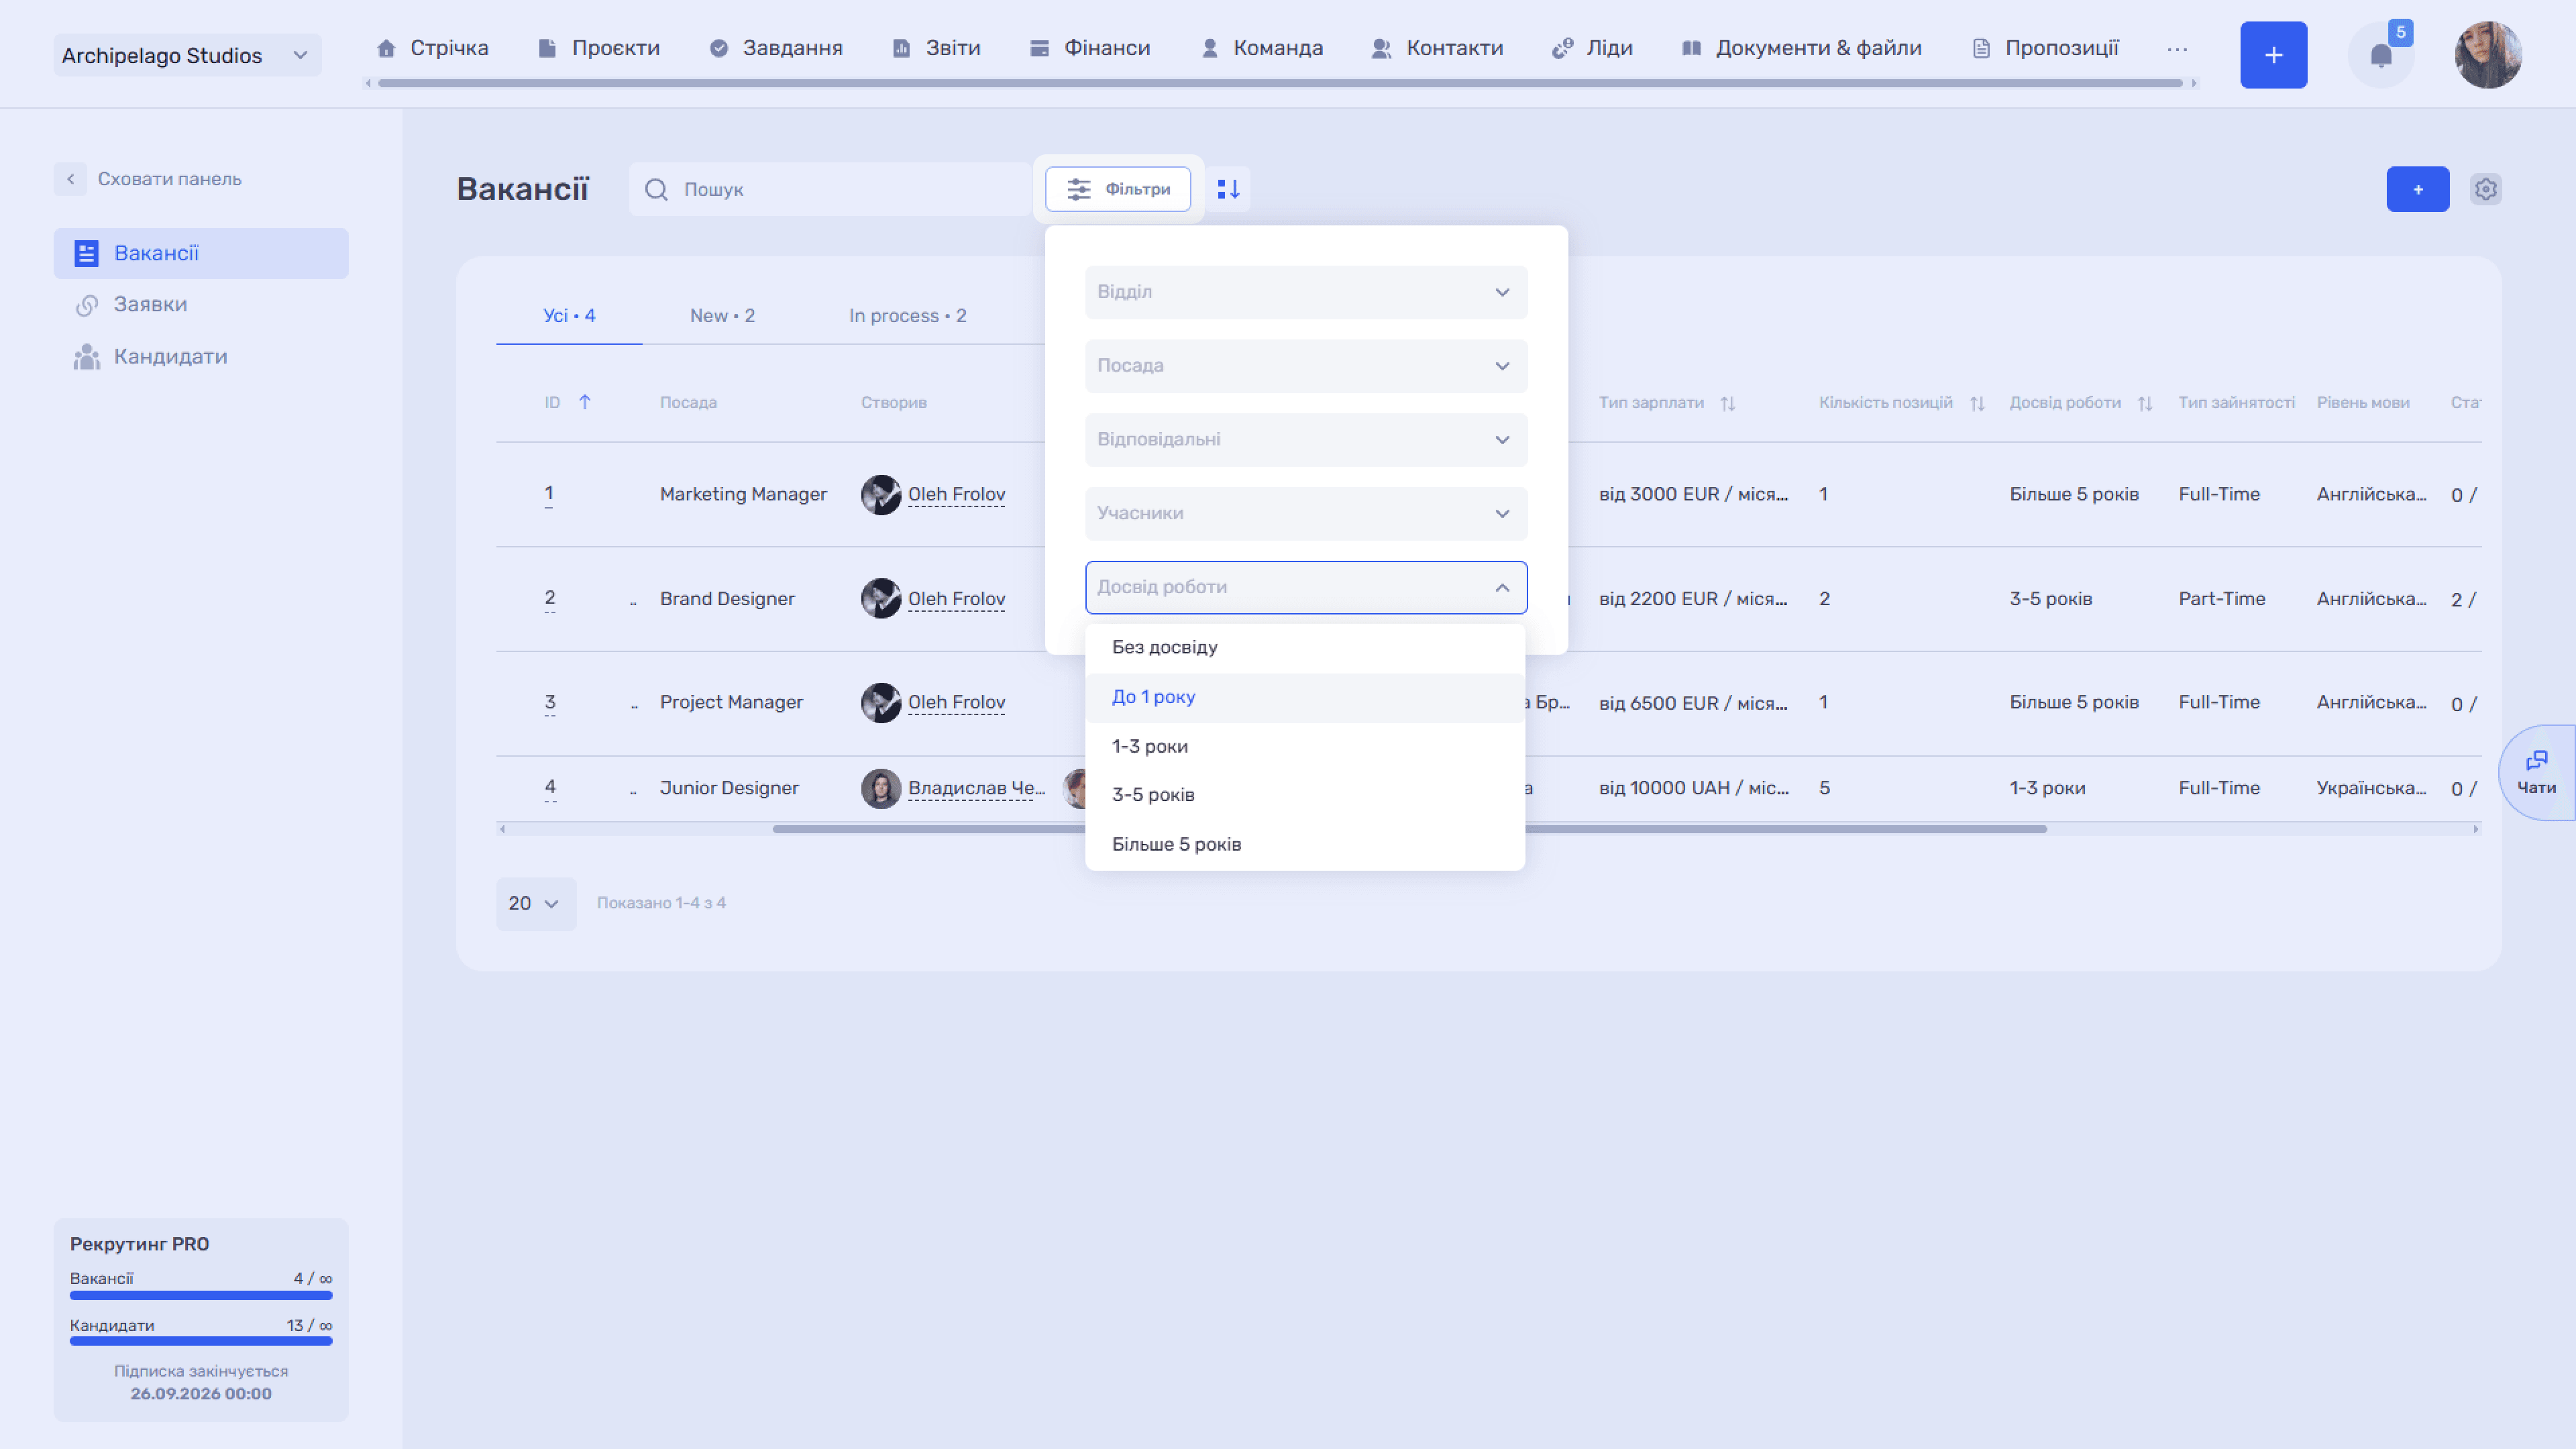
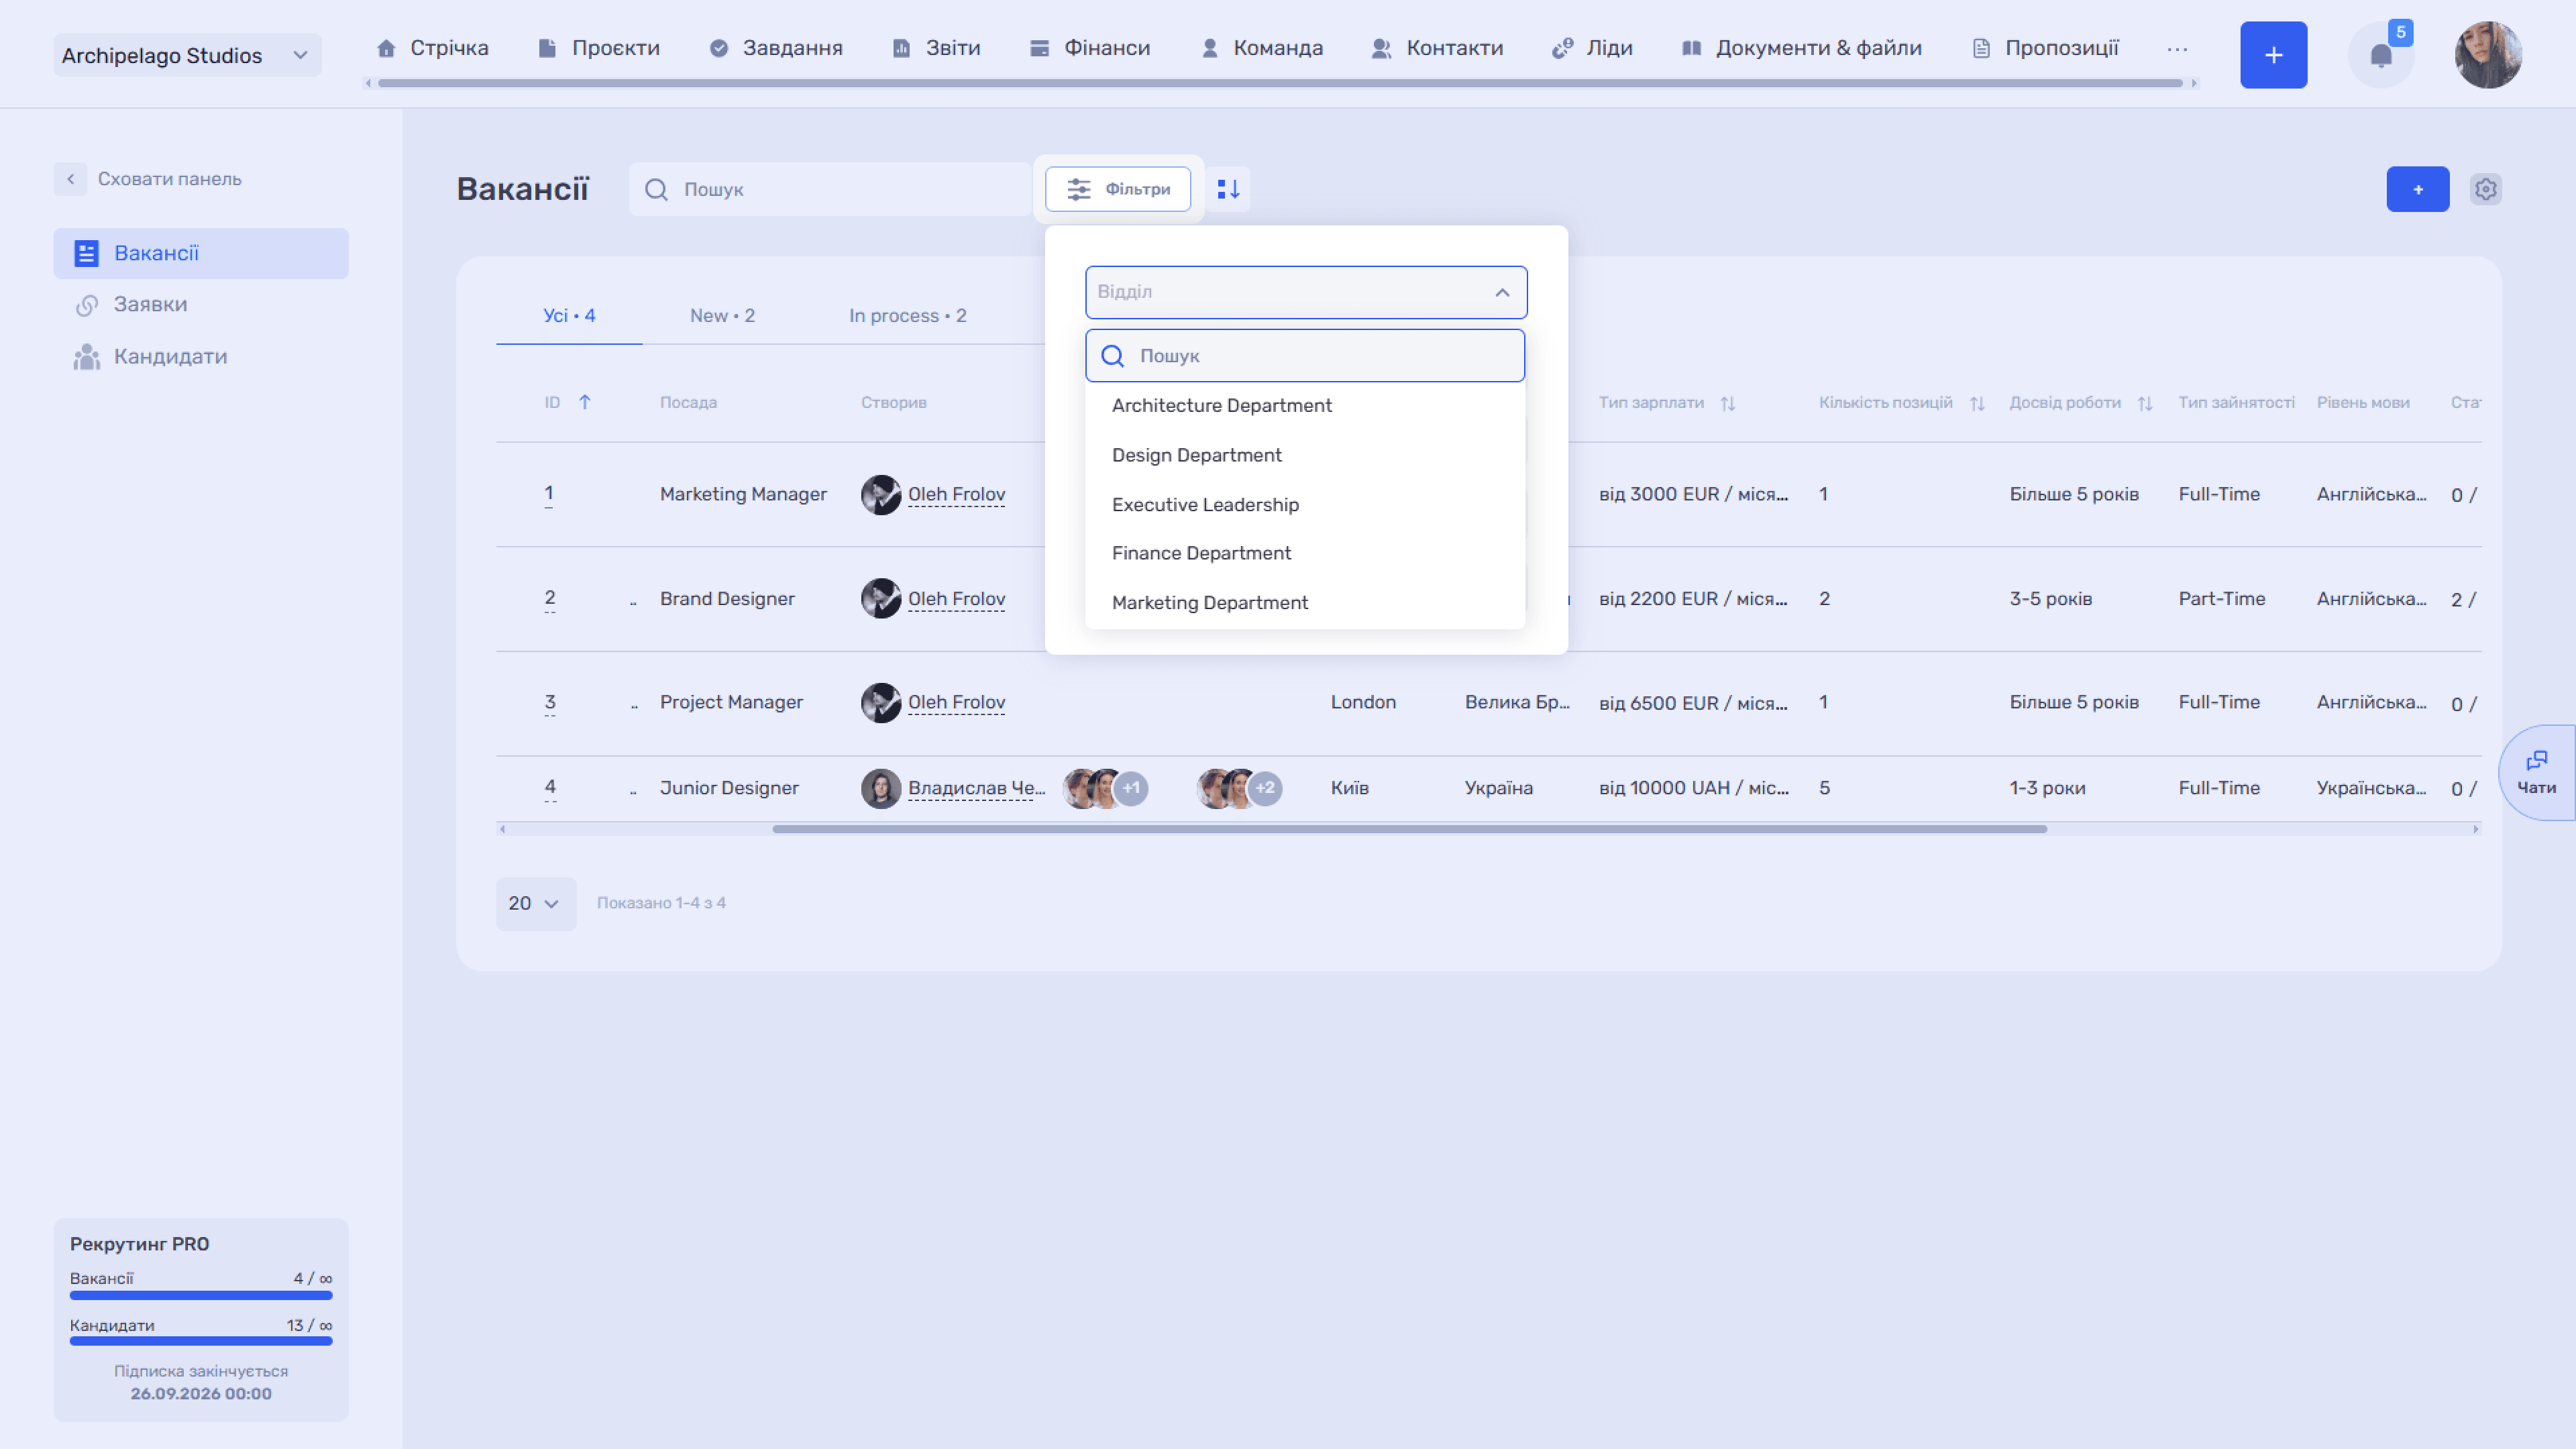
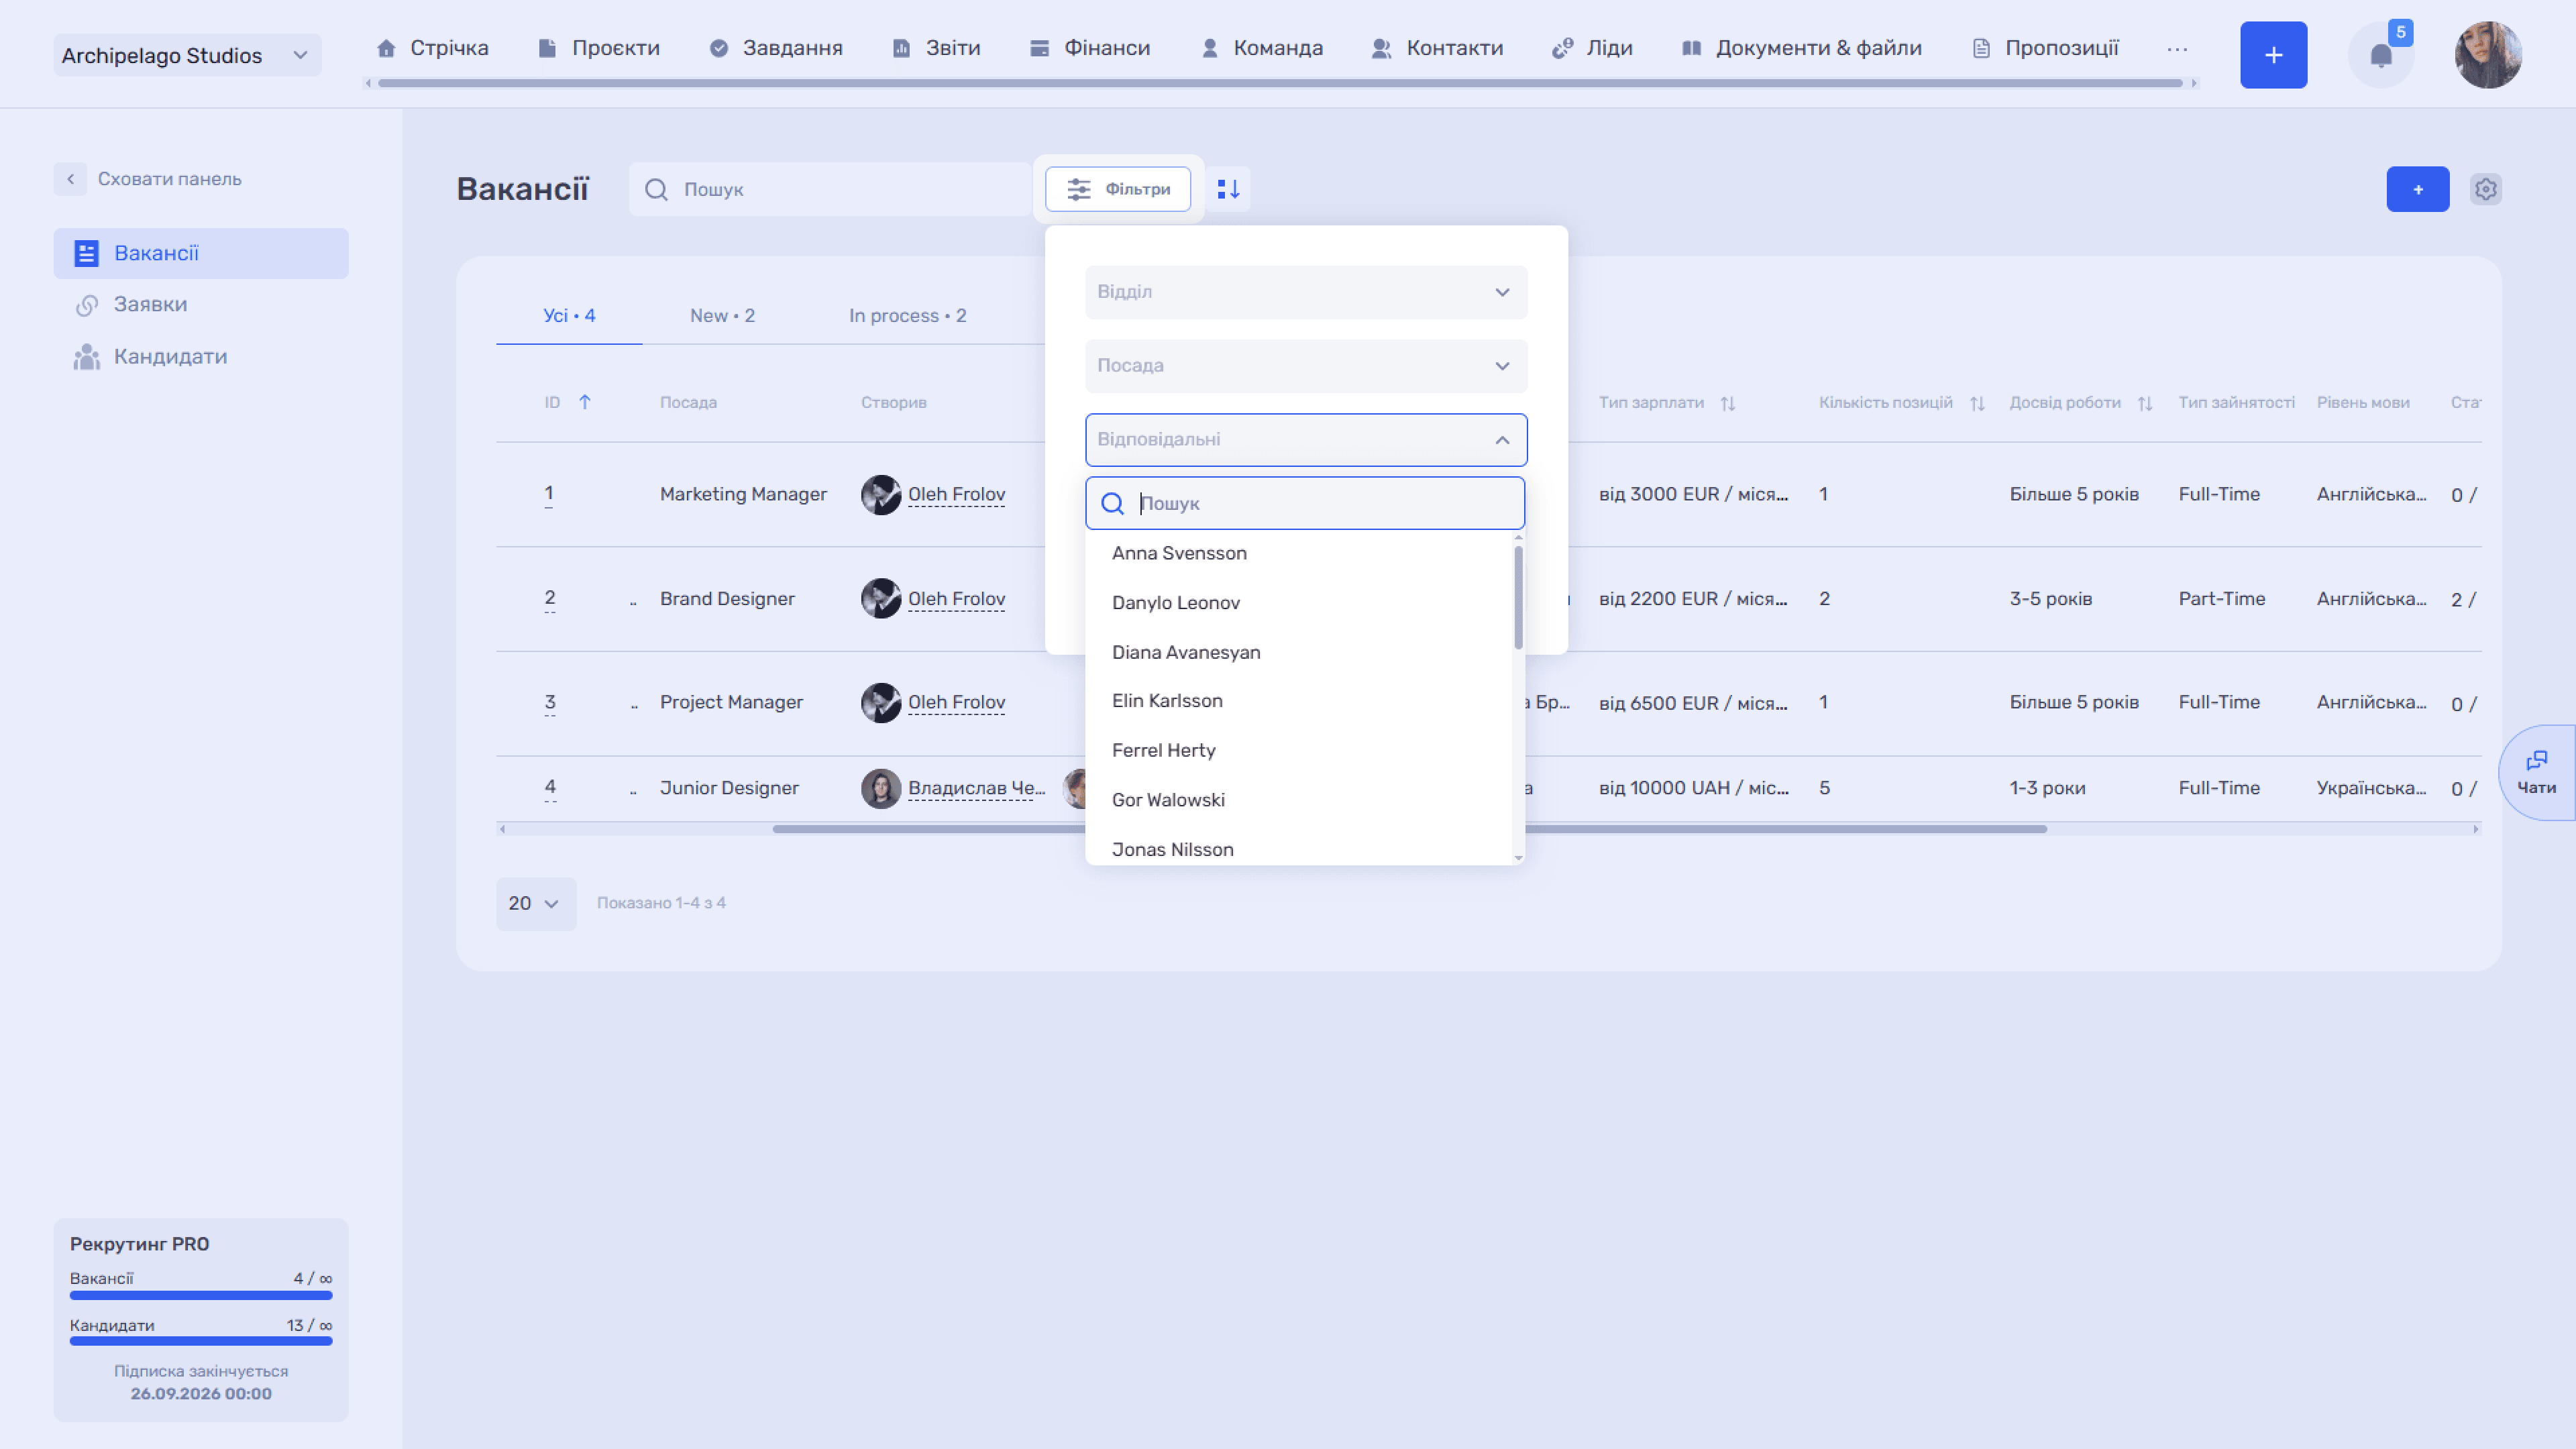
The Filters button opens a panel with parameters: Department, Position, Responsible, Members, and Work experience. The department and employee lists have their own search.
Sorting
The ⇵ icon next to the filters opens the Sorting panel with toggles: ID, Vacancy, City, Salary type, Number of positions, and Work experience. An enabled parameter is highlighted, and the arrow on the right switches the direction (ascending / descending).
Several parameters can be enabled — sorting becomes multi-level, and the priority order is changed by dragging the ⠿ icon. The Reset all link turns everything off.
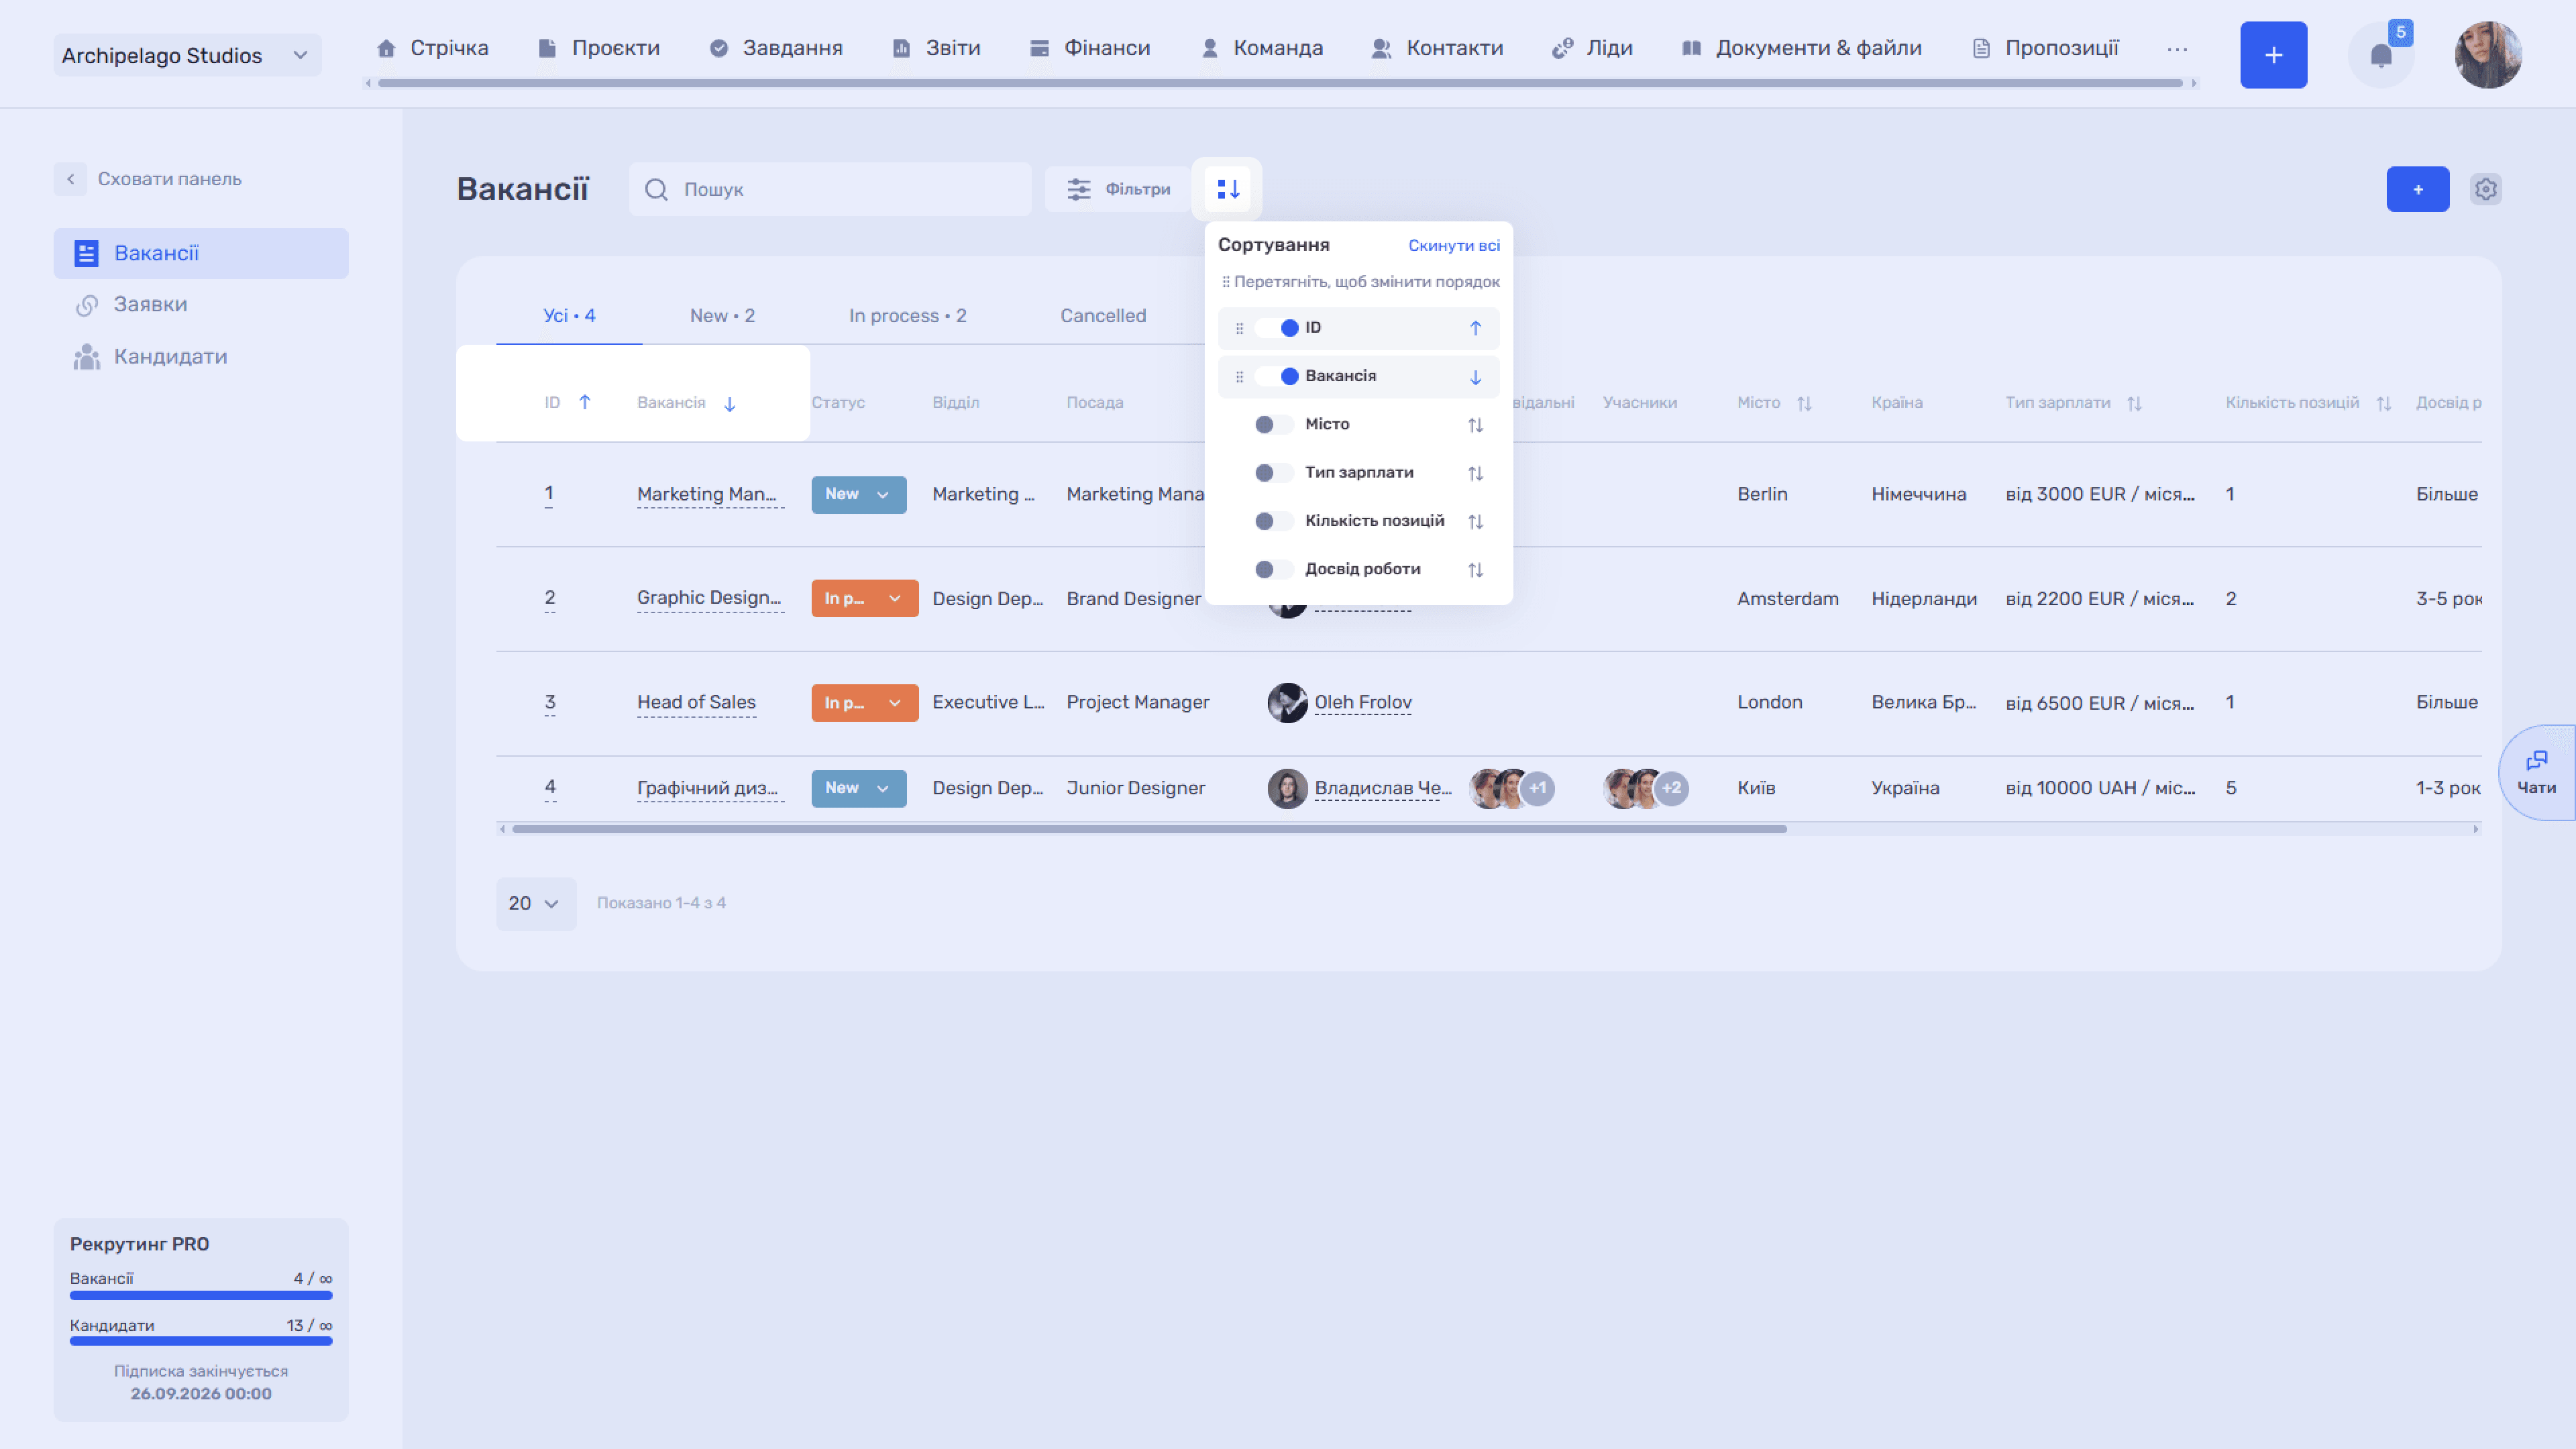
Individual columns also have a ⇅ icon right in the header — this is quick sorting by a single field.
Field settings
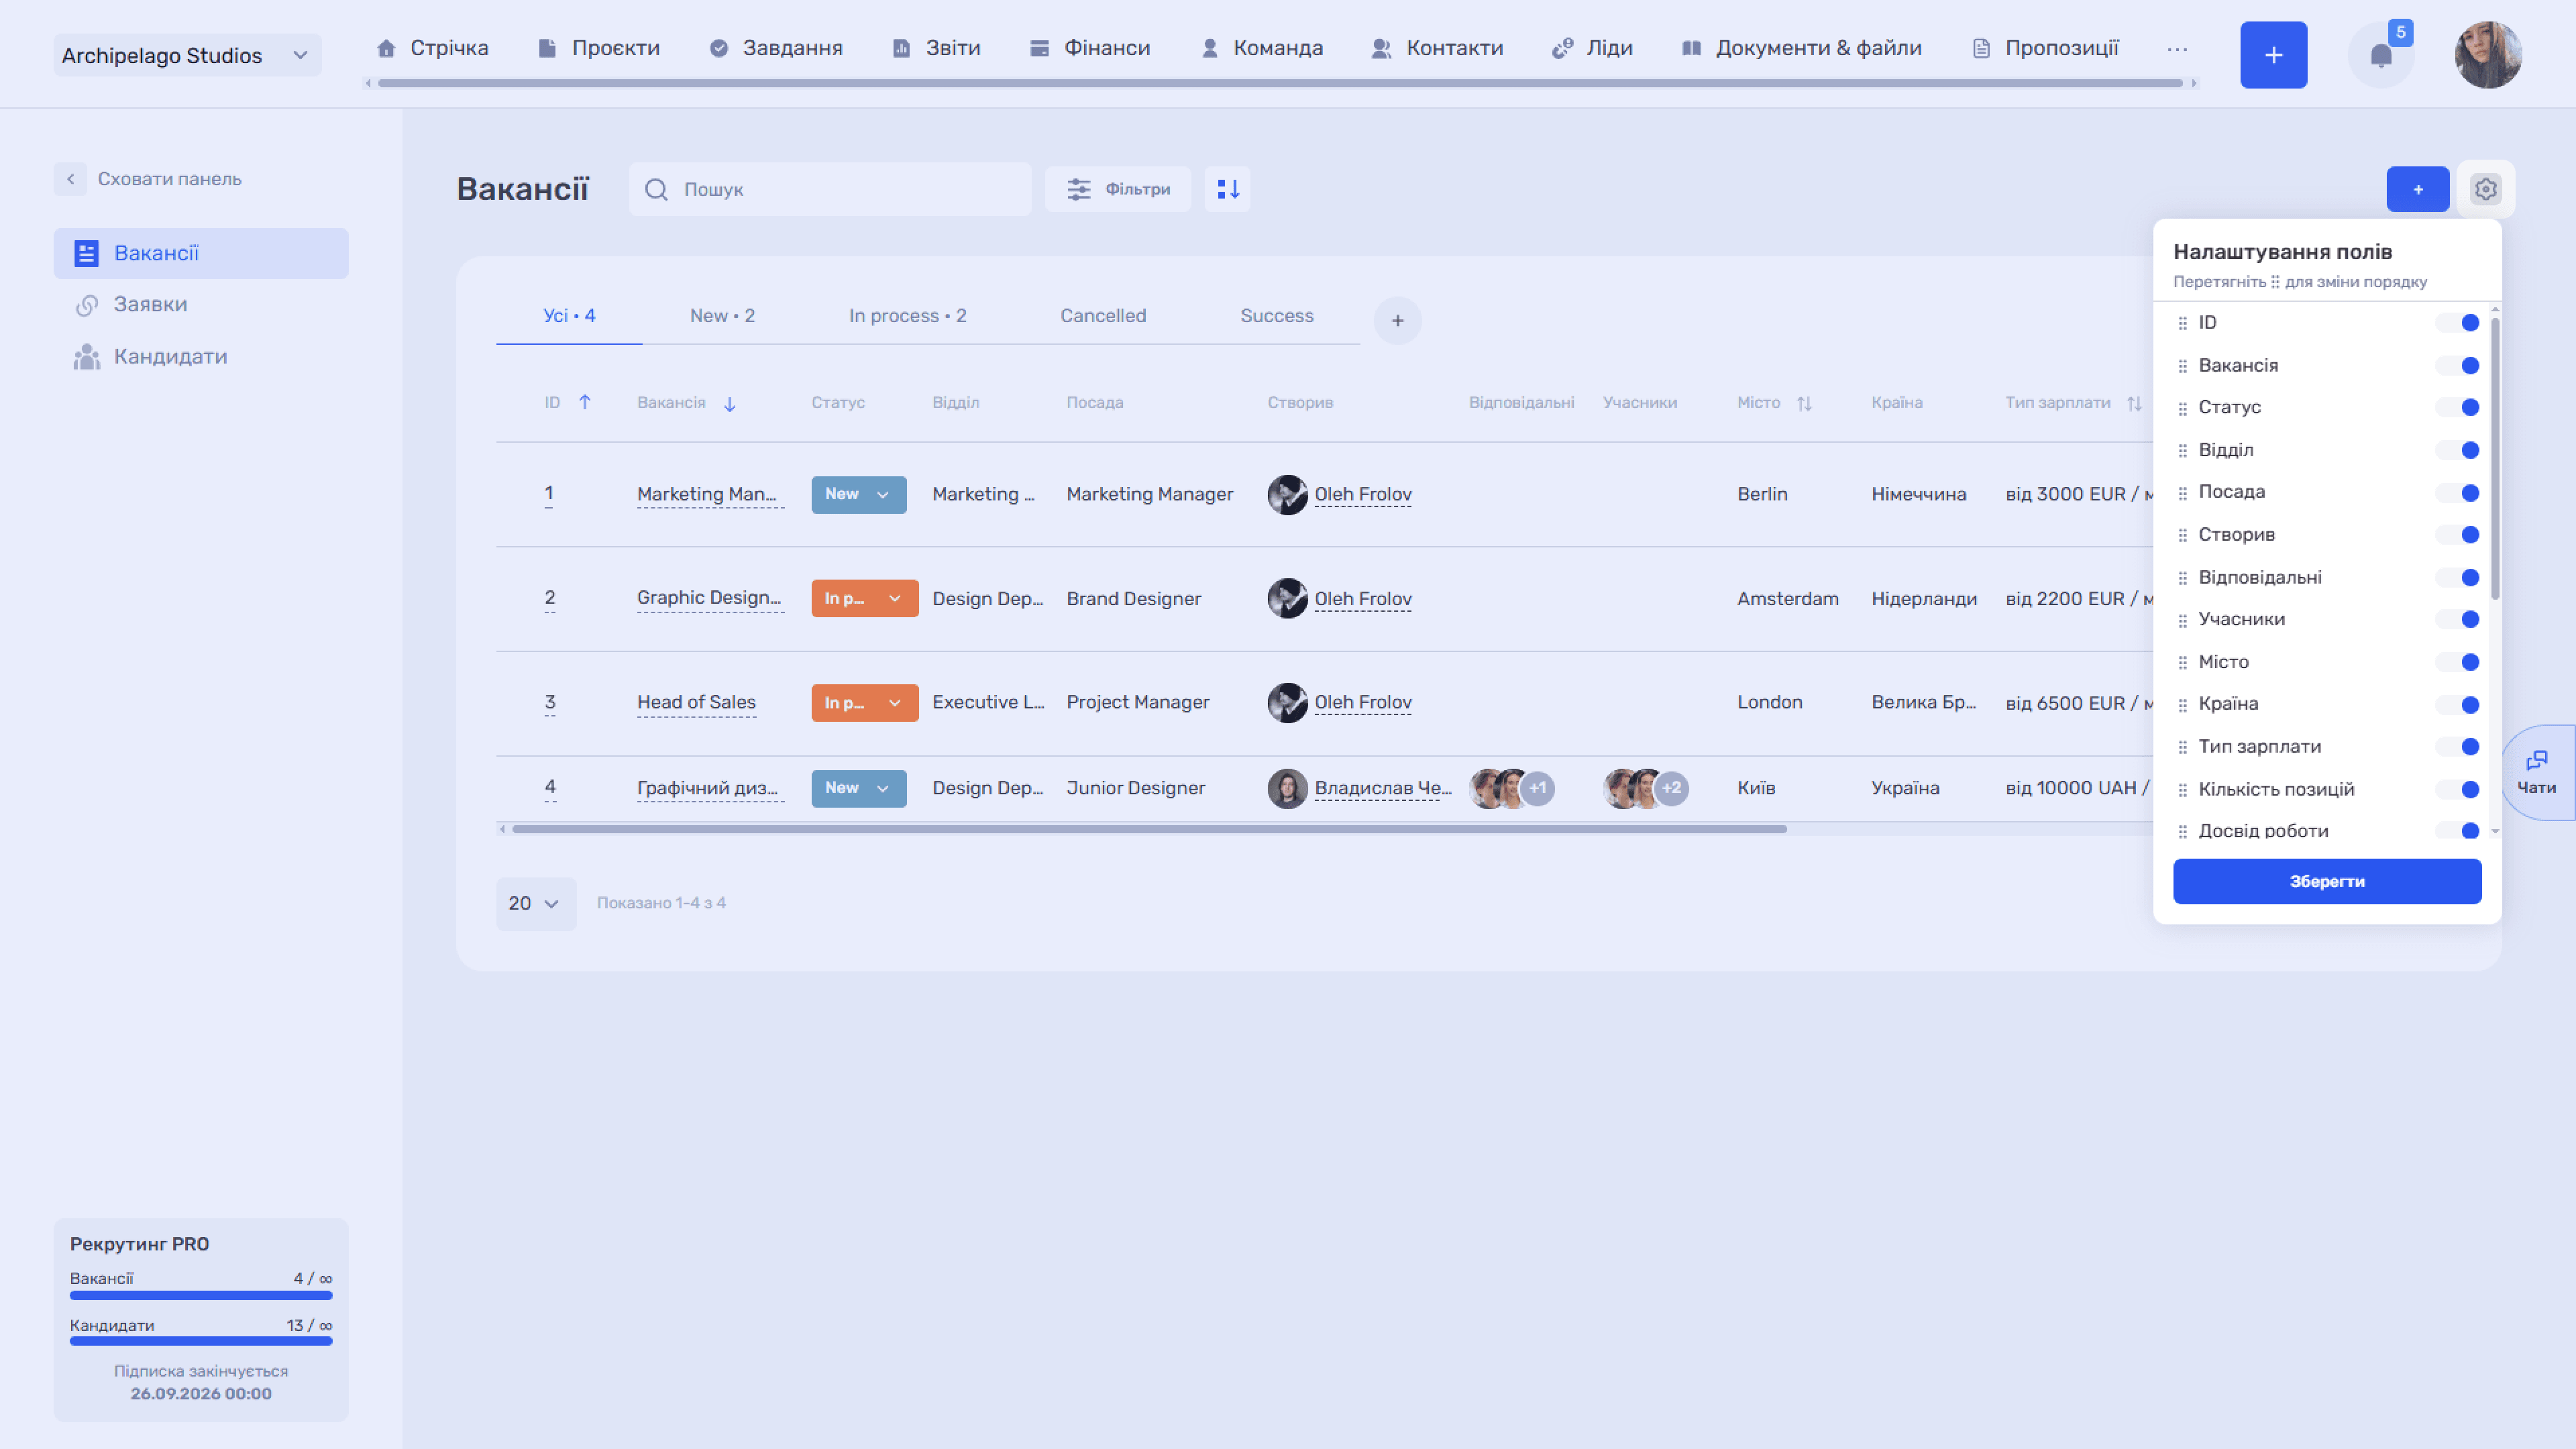
The settings icon opens Field settings: columns are switched on and off with toggles, and their order is changed by dragging the ⠿ icon. Apply changes with Save.
Bulk actions
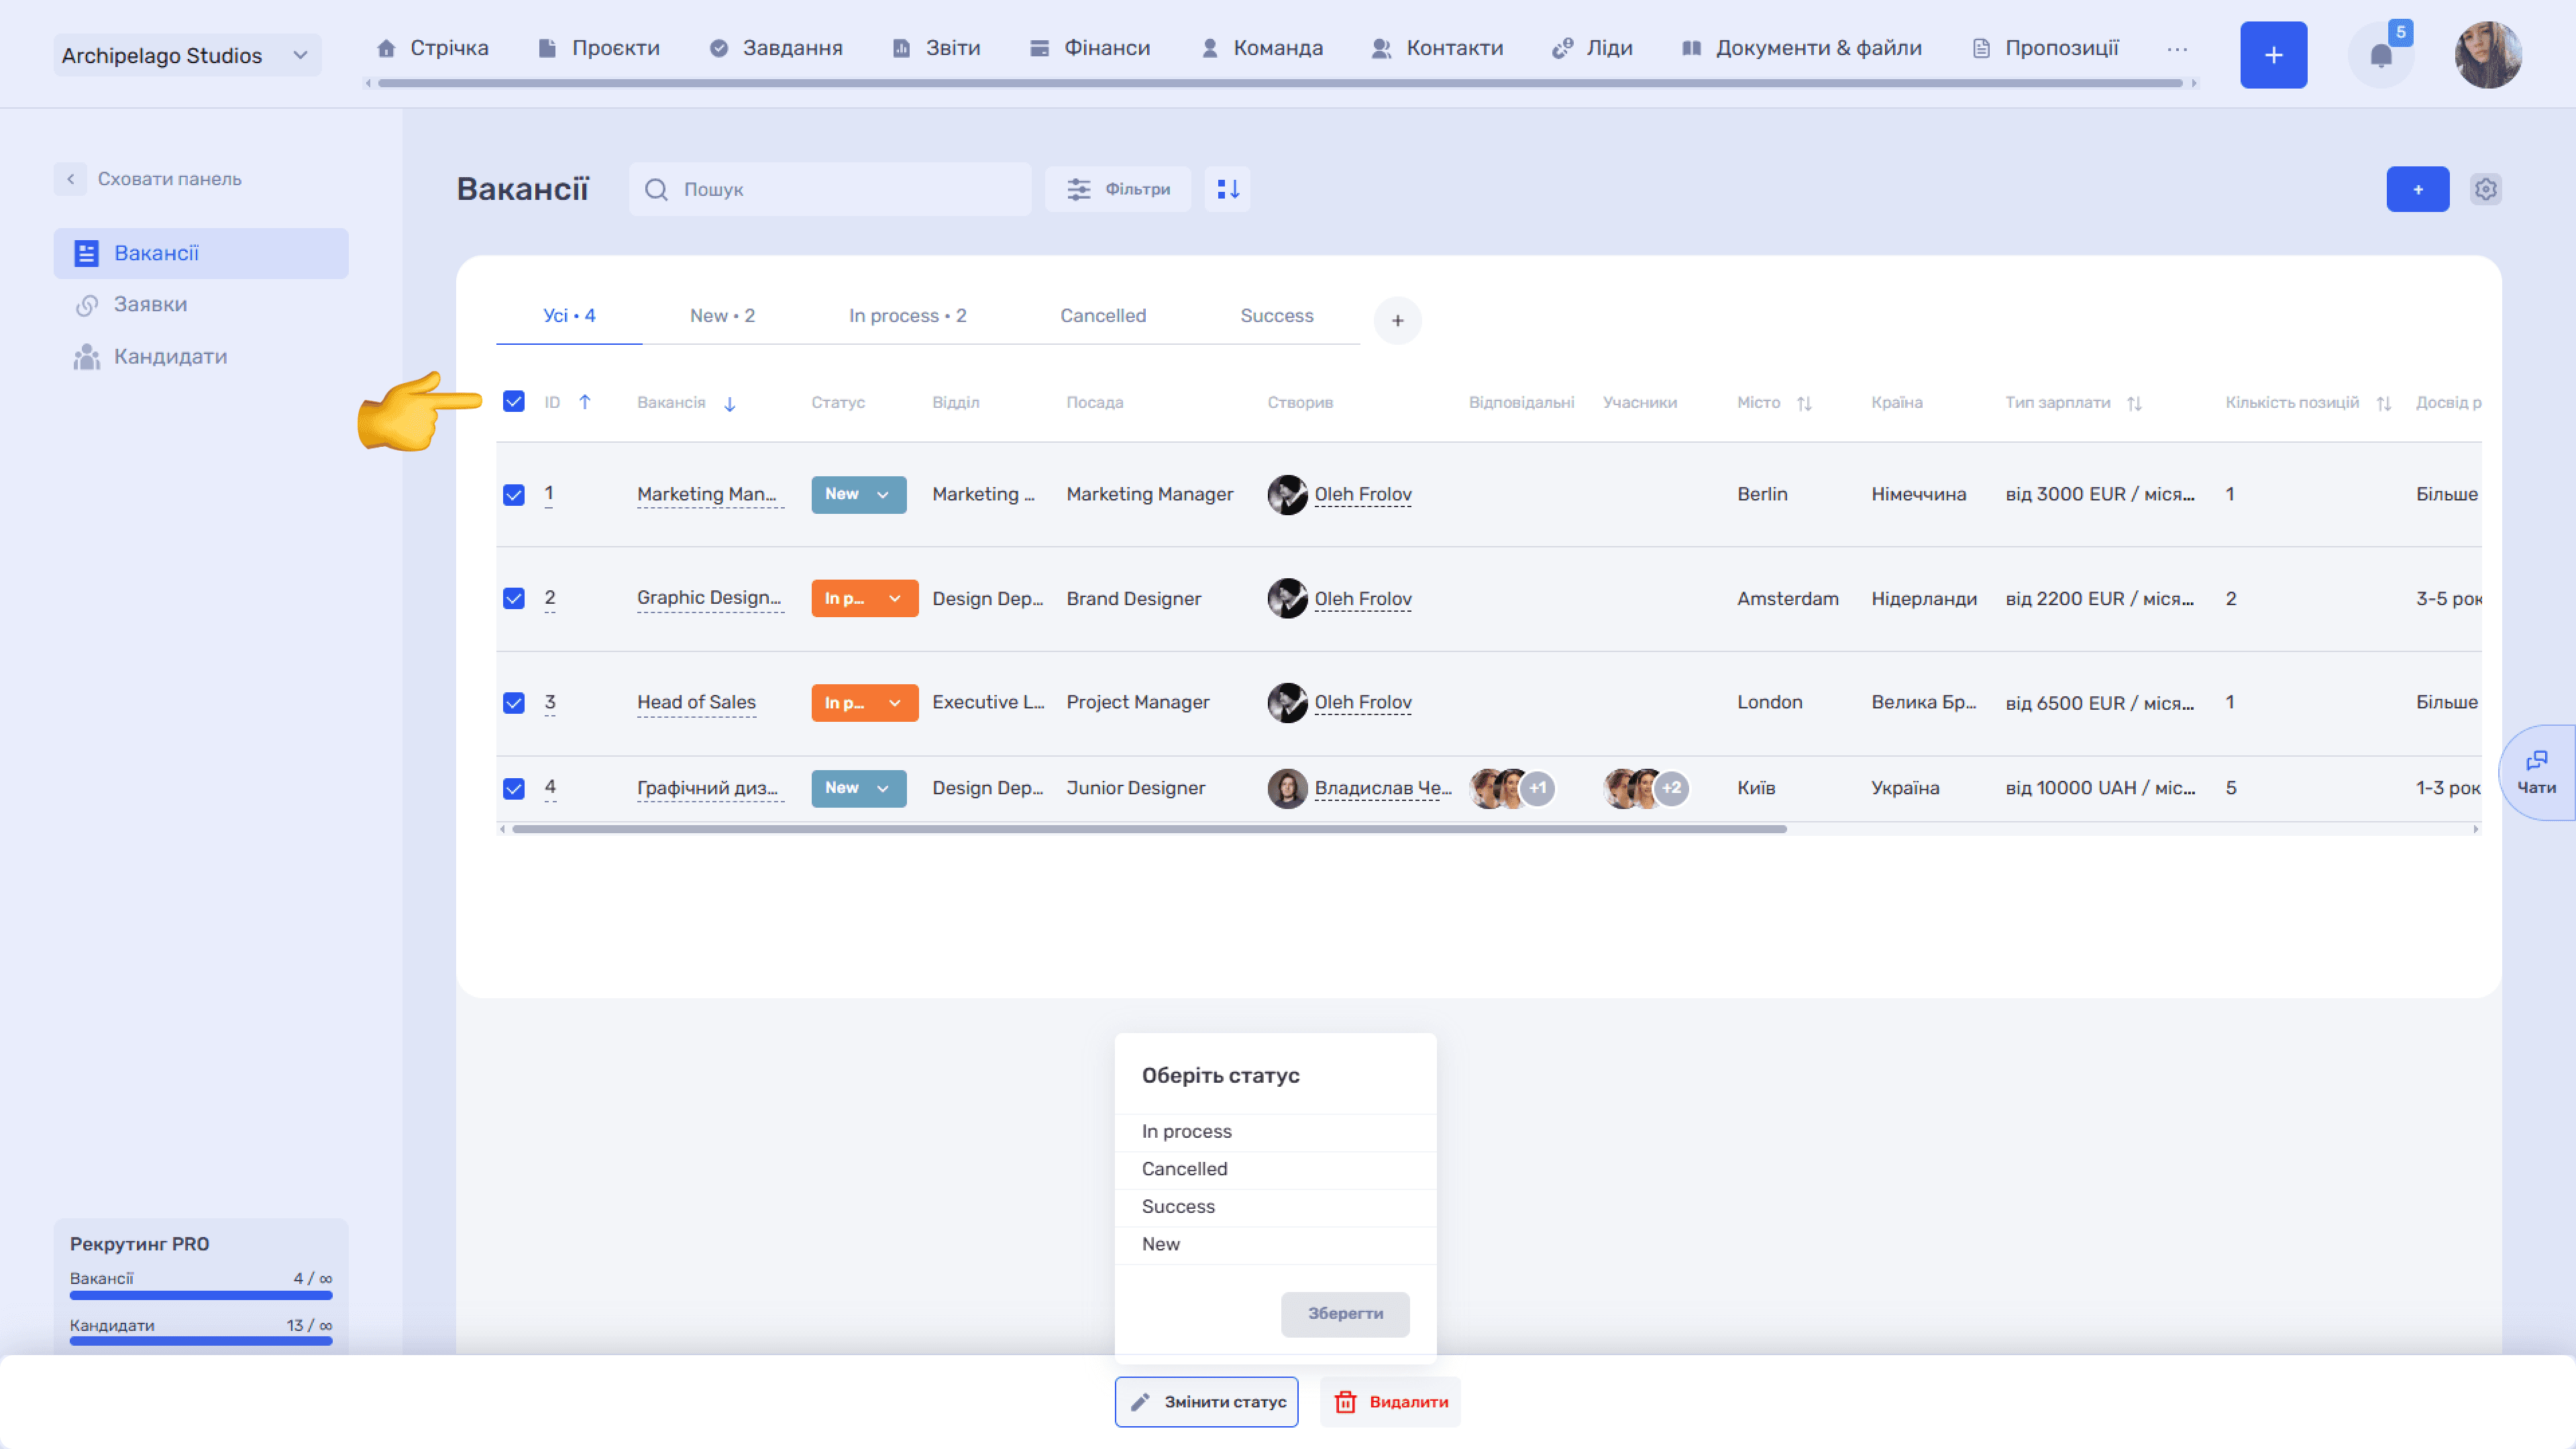
Hovering over a row shows a checkbox to the left of the ID. The checkbox in the table header selects all rows at once. After selecting, a panel with two actions appears at the bottom of the screen:
- Change status — opens the Select status list; the selected status is applied with Save;
- Delete — deletes the selected vacancies.
Vacancy statuses
Changing the status
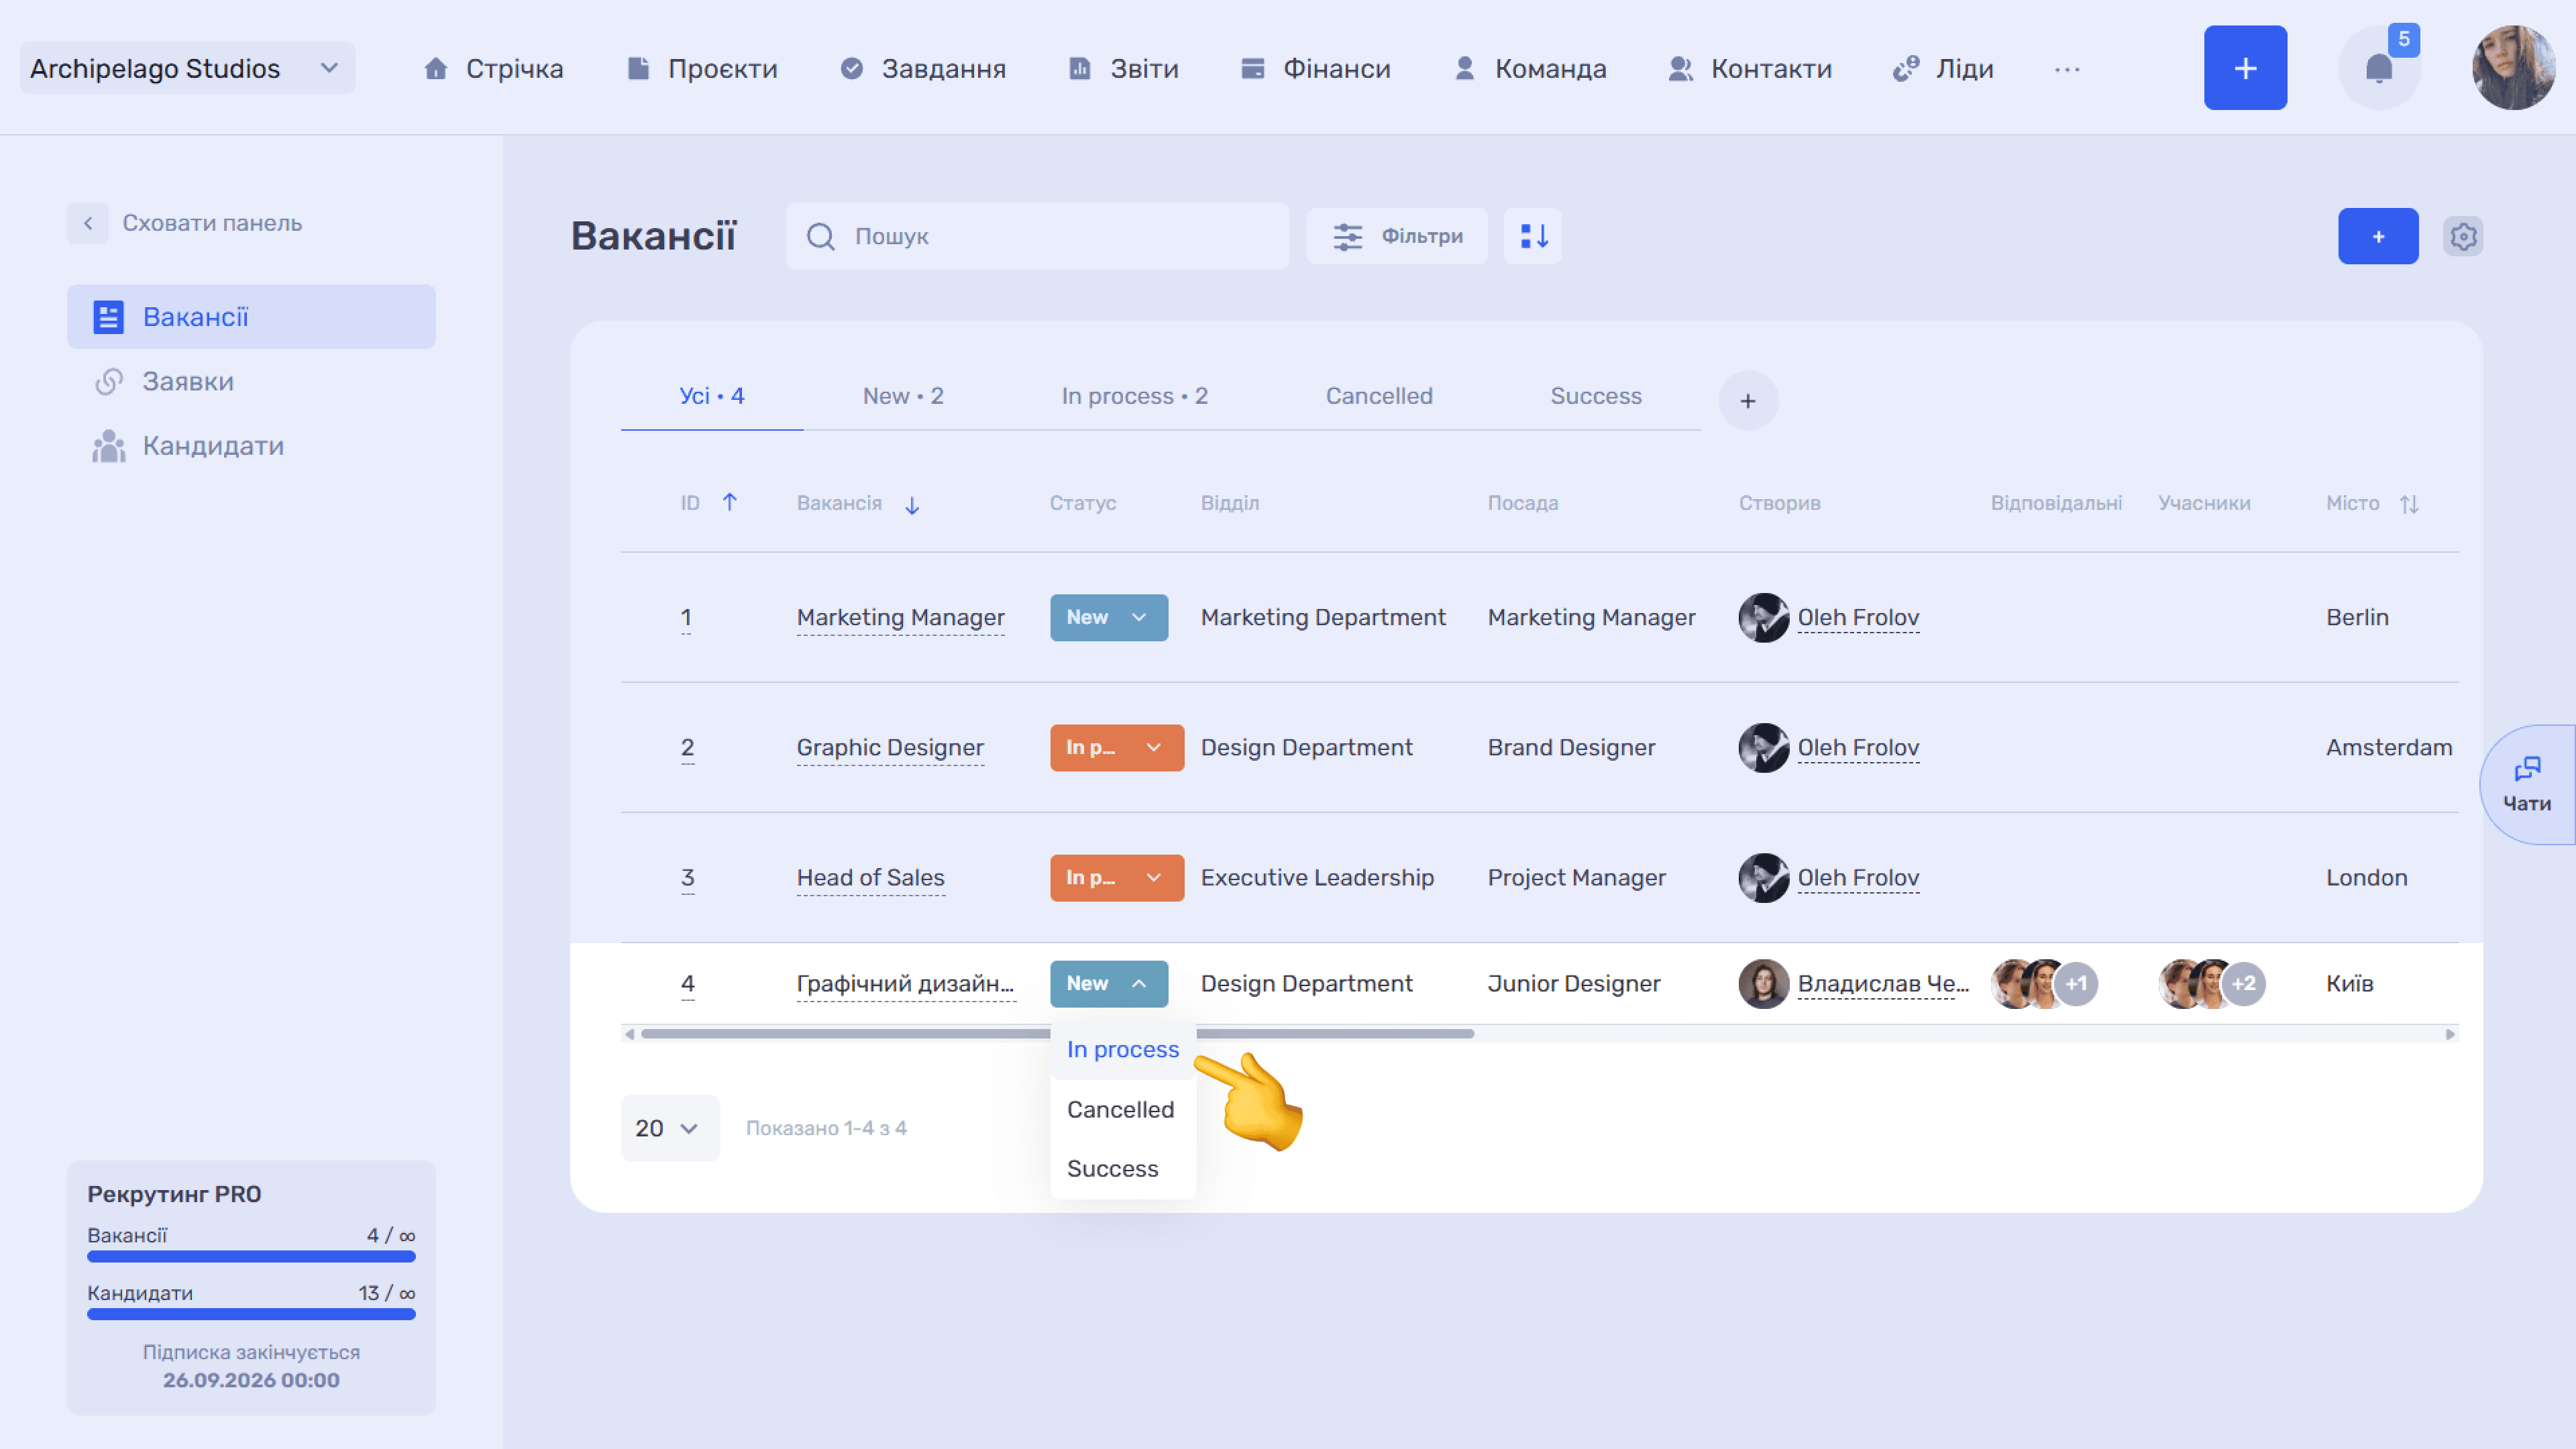
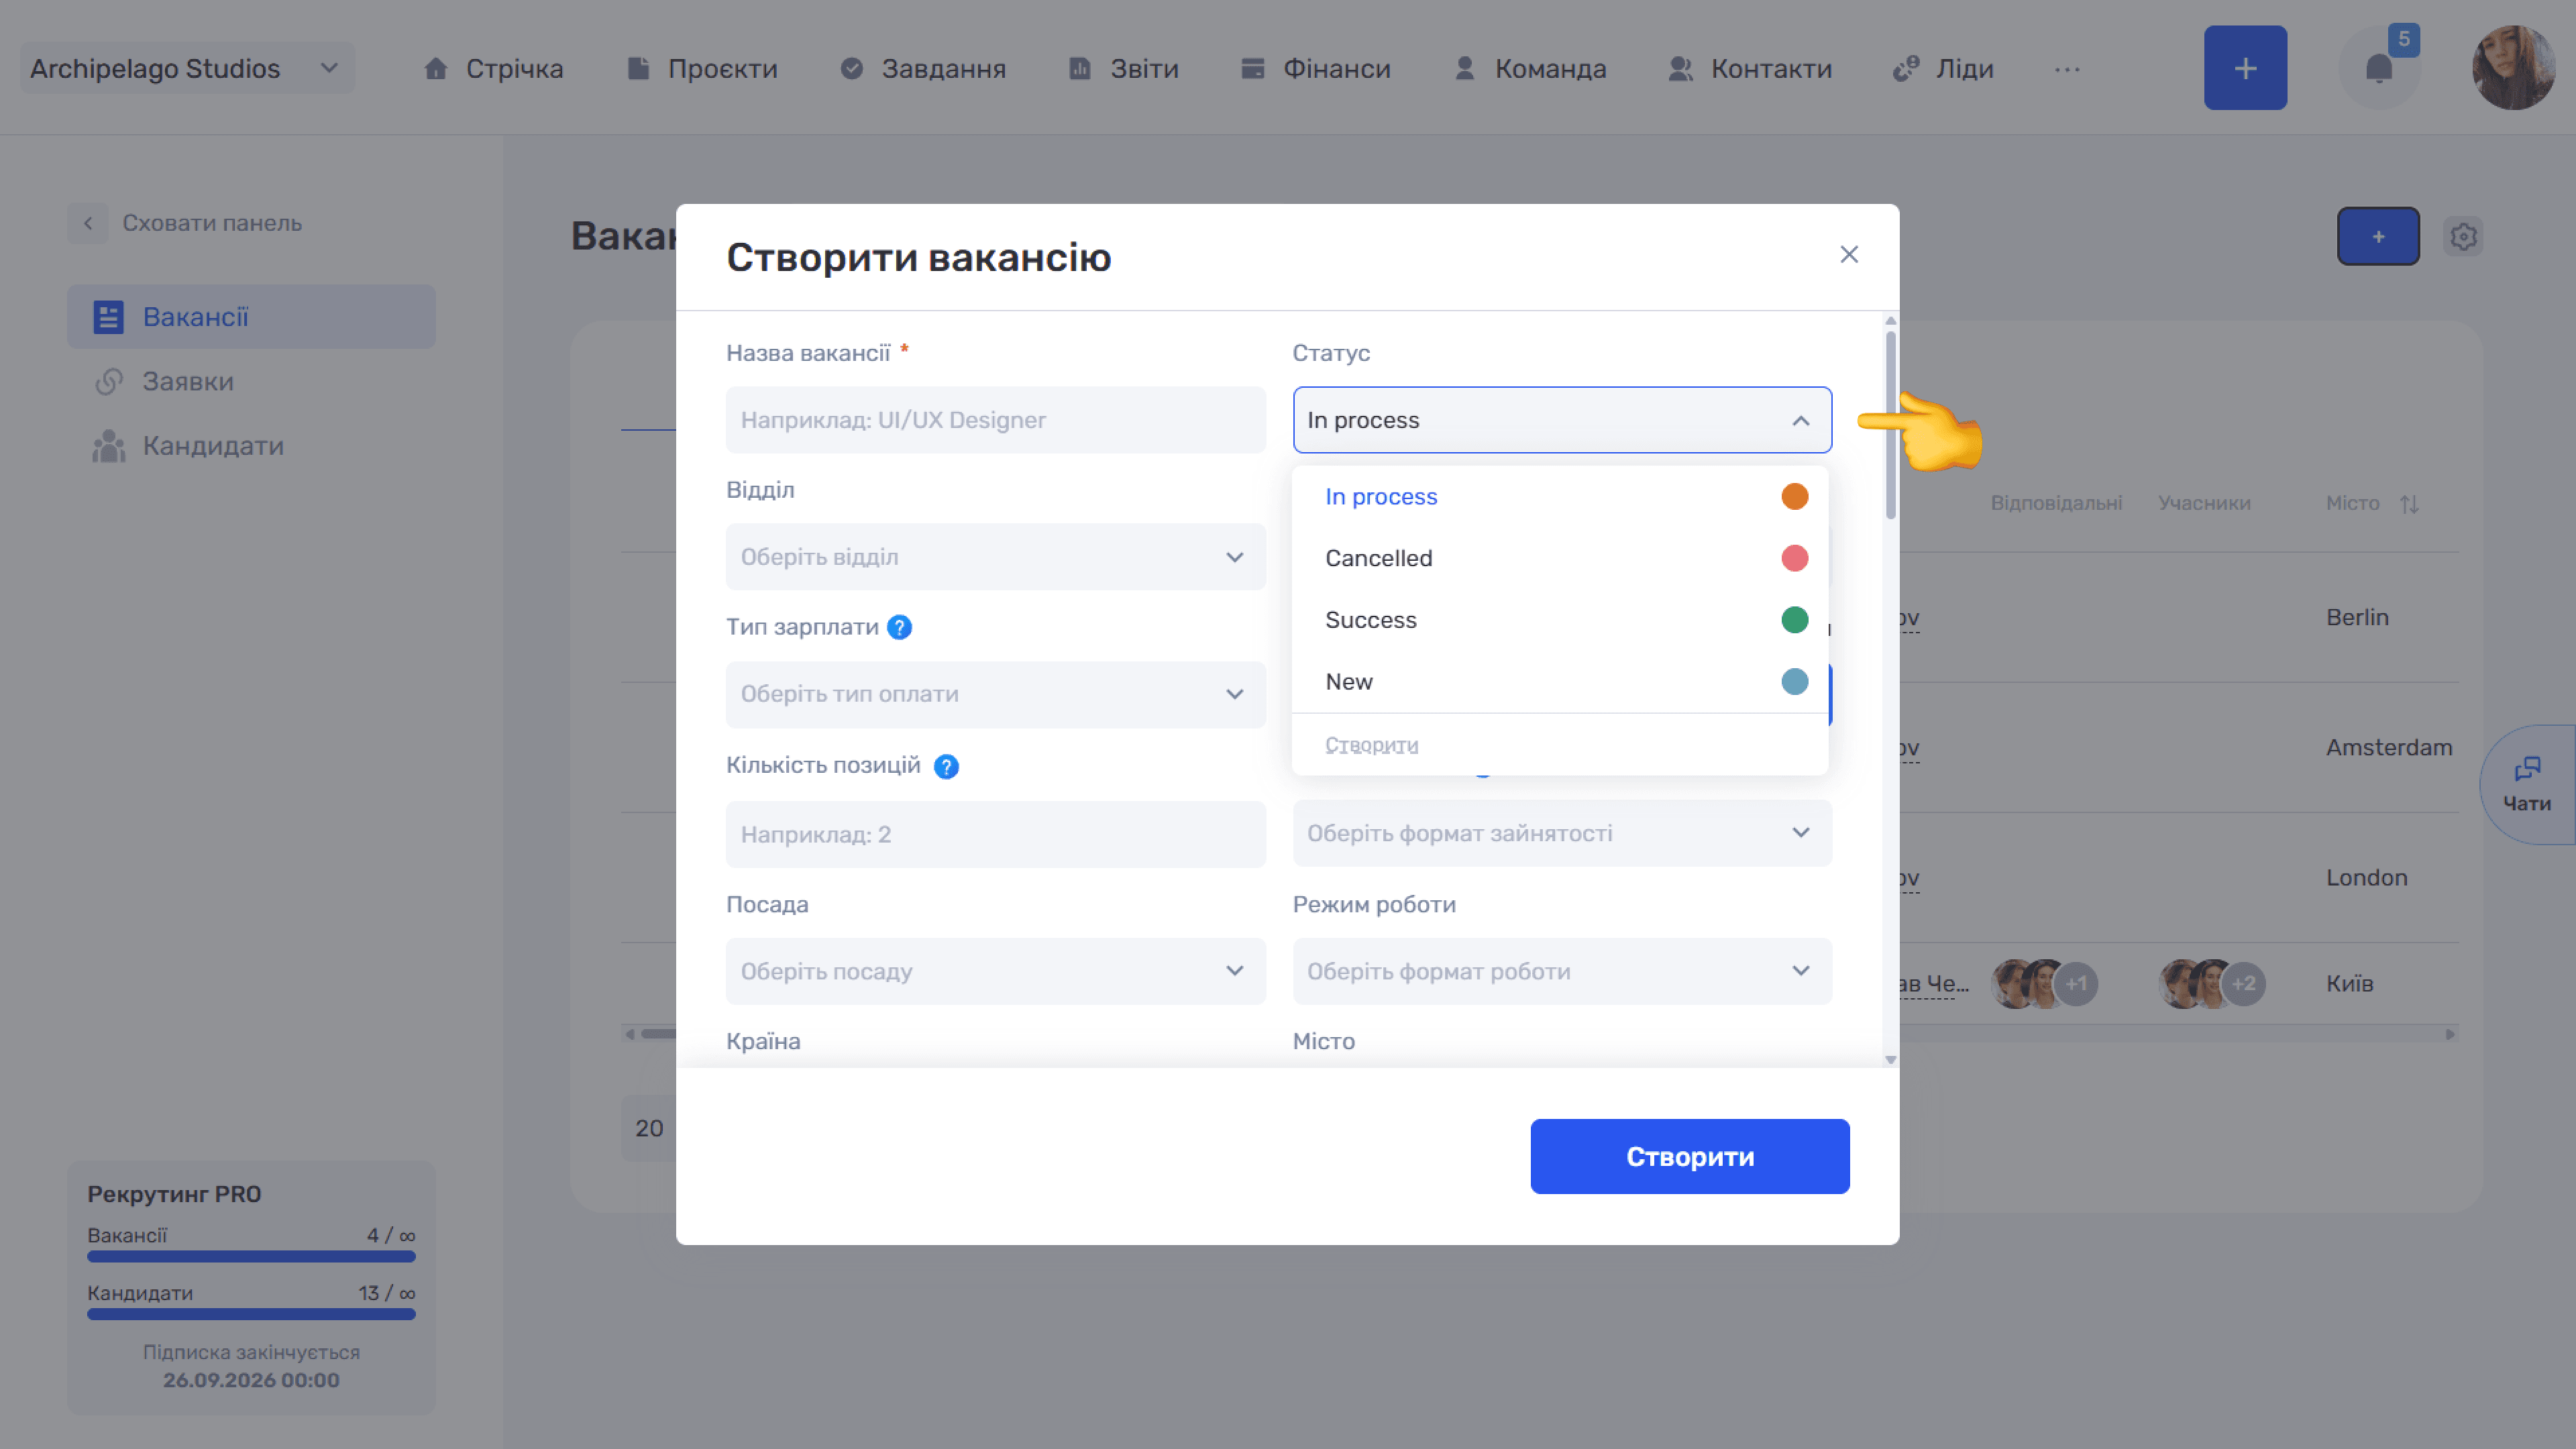
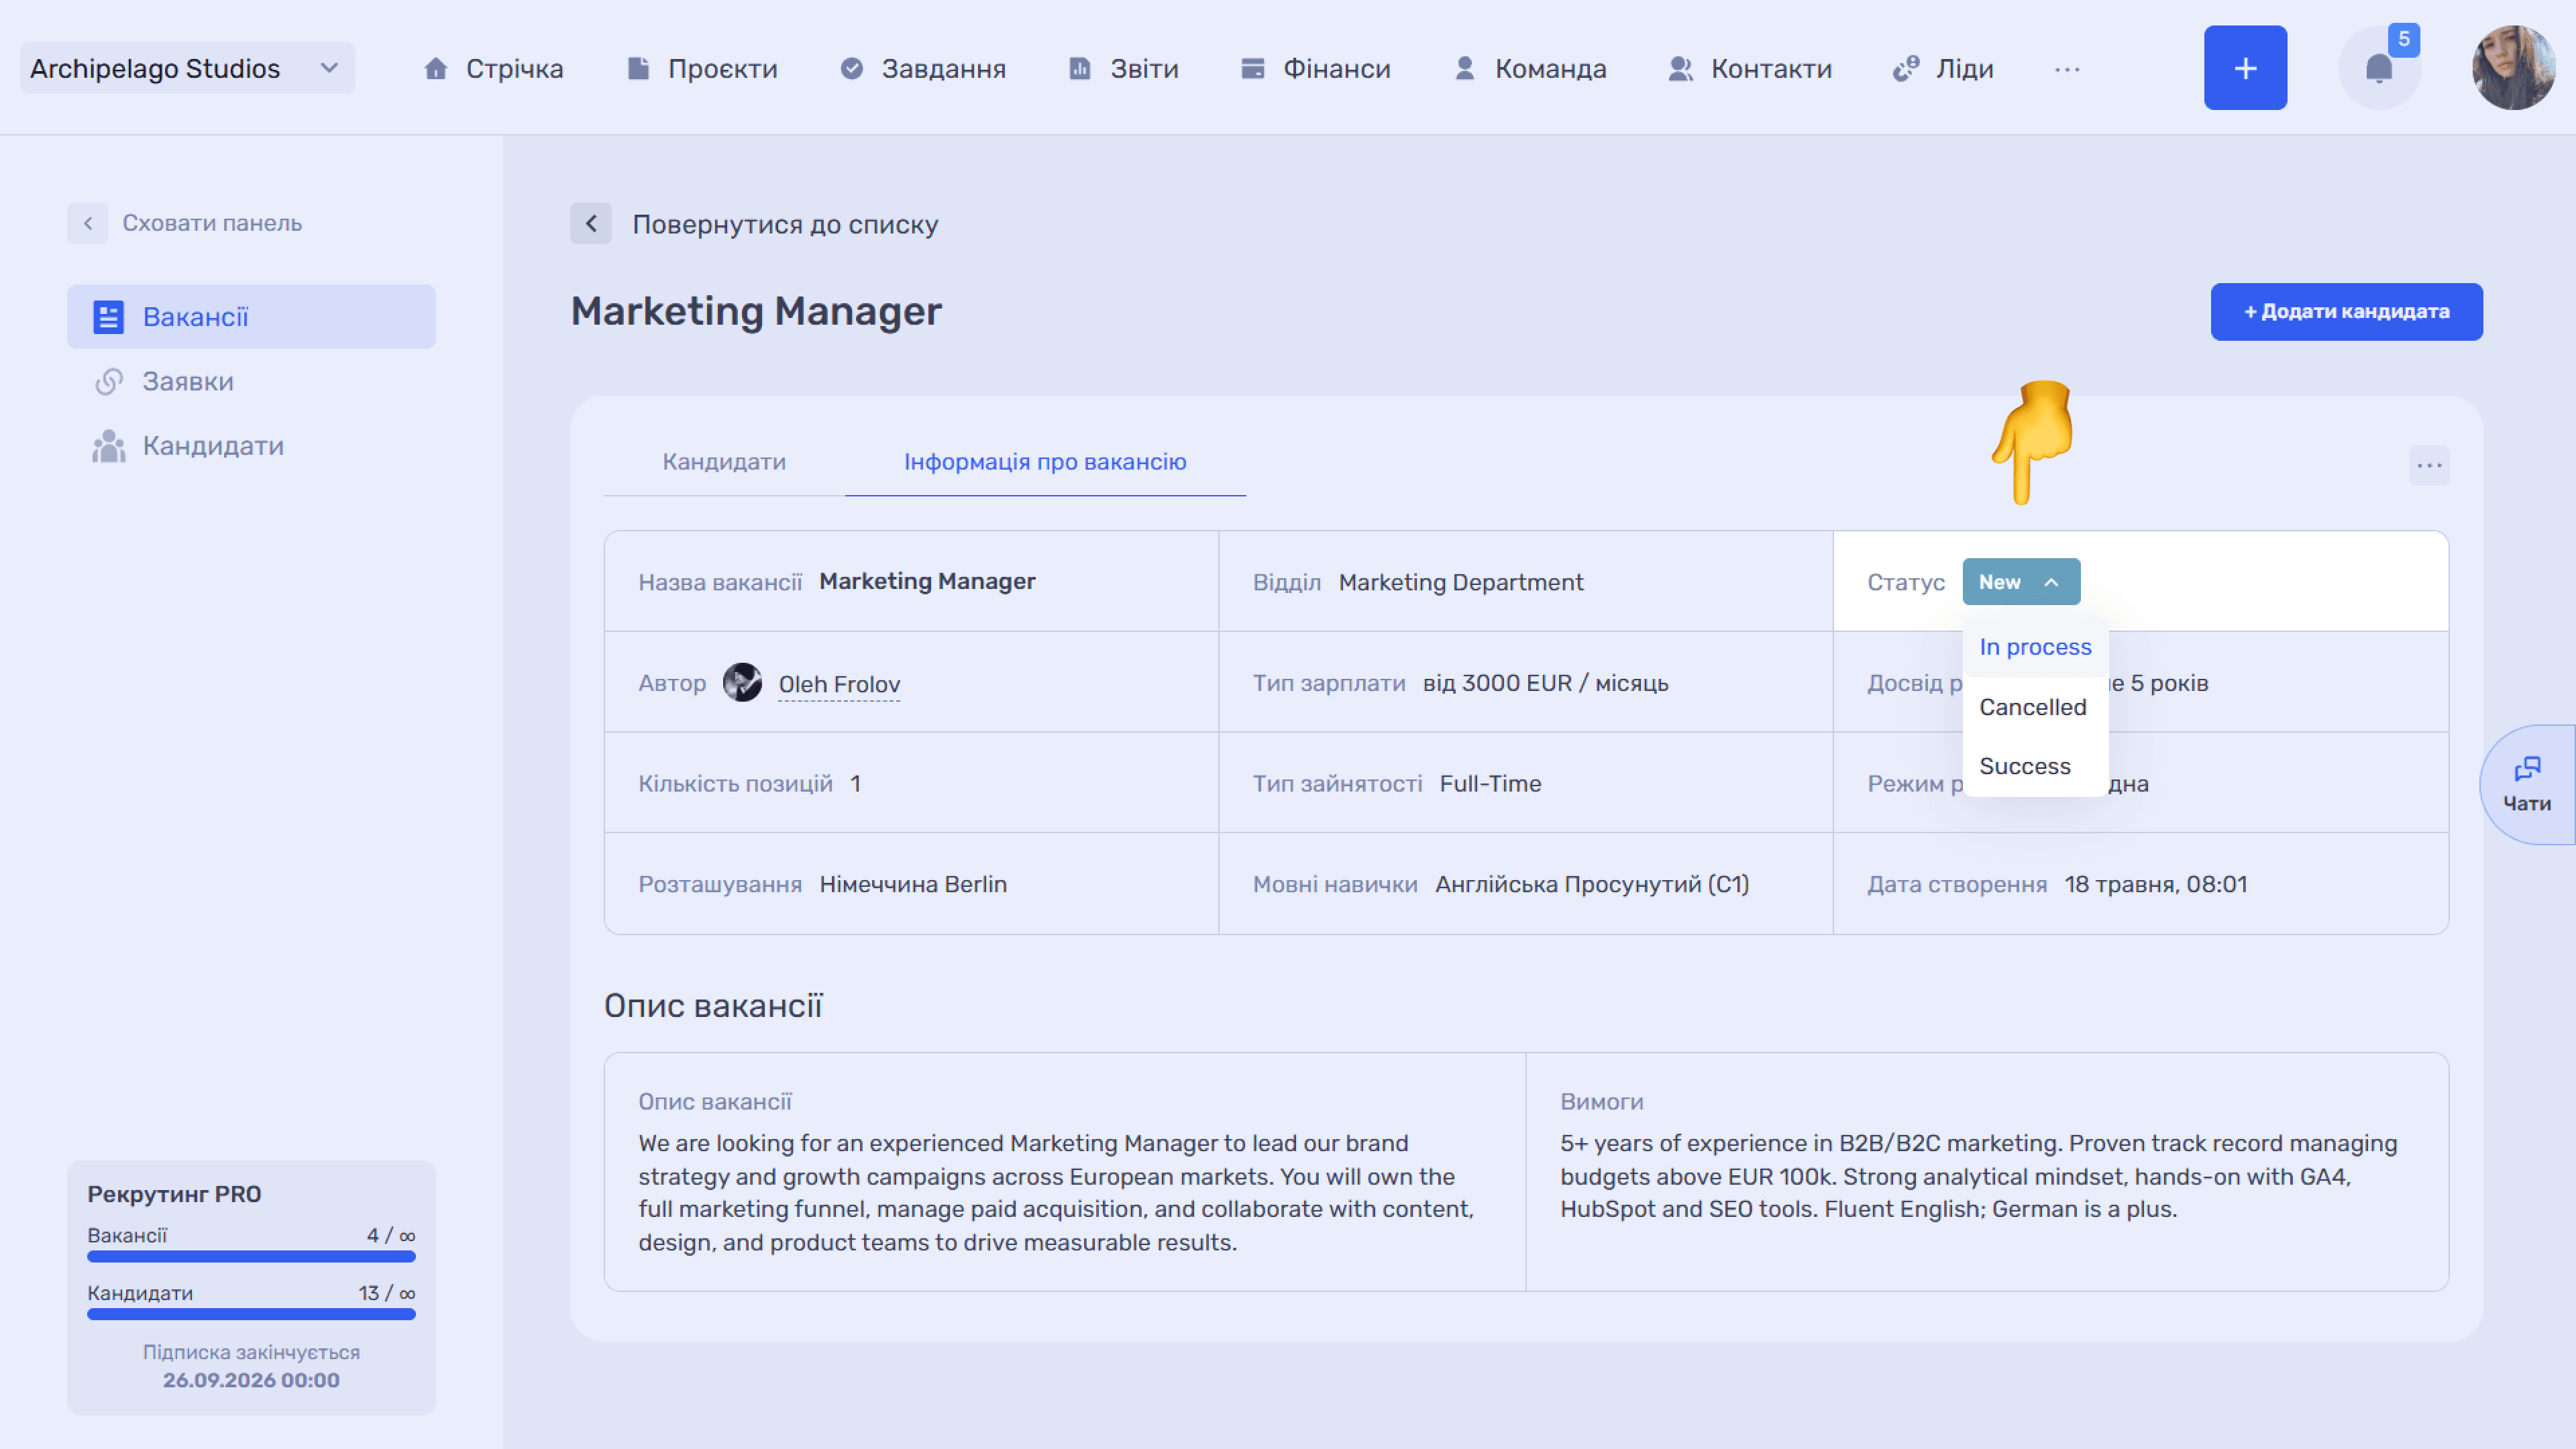
The status is changed right in the list row — click the badge and select another one from the list.
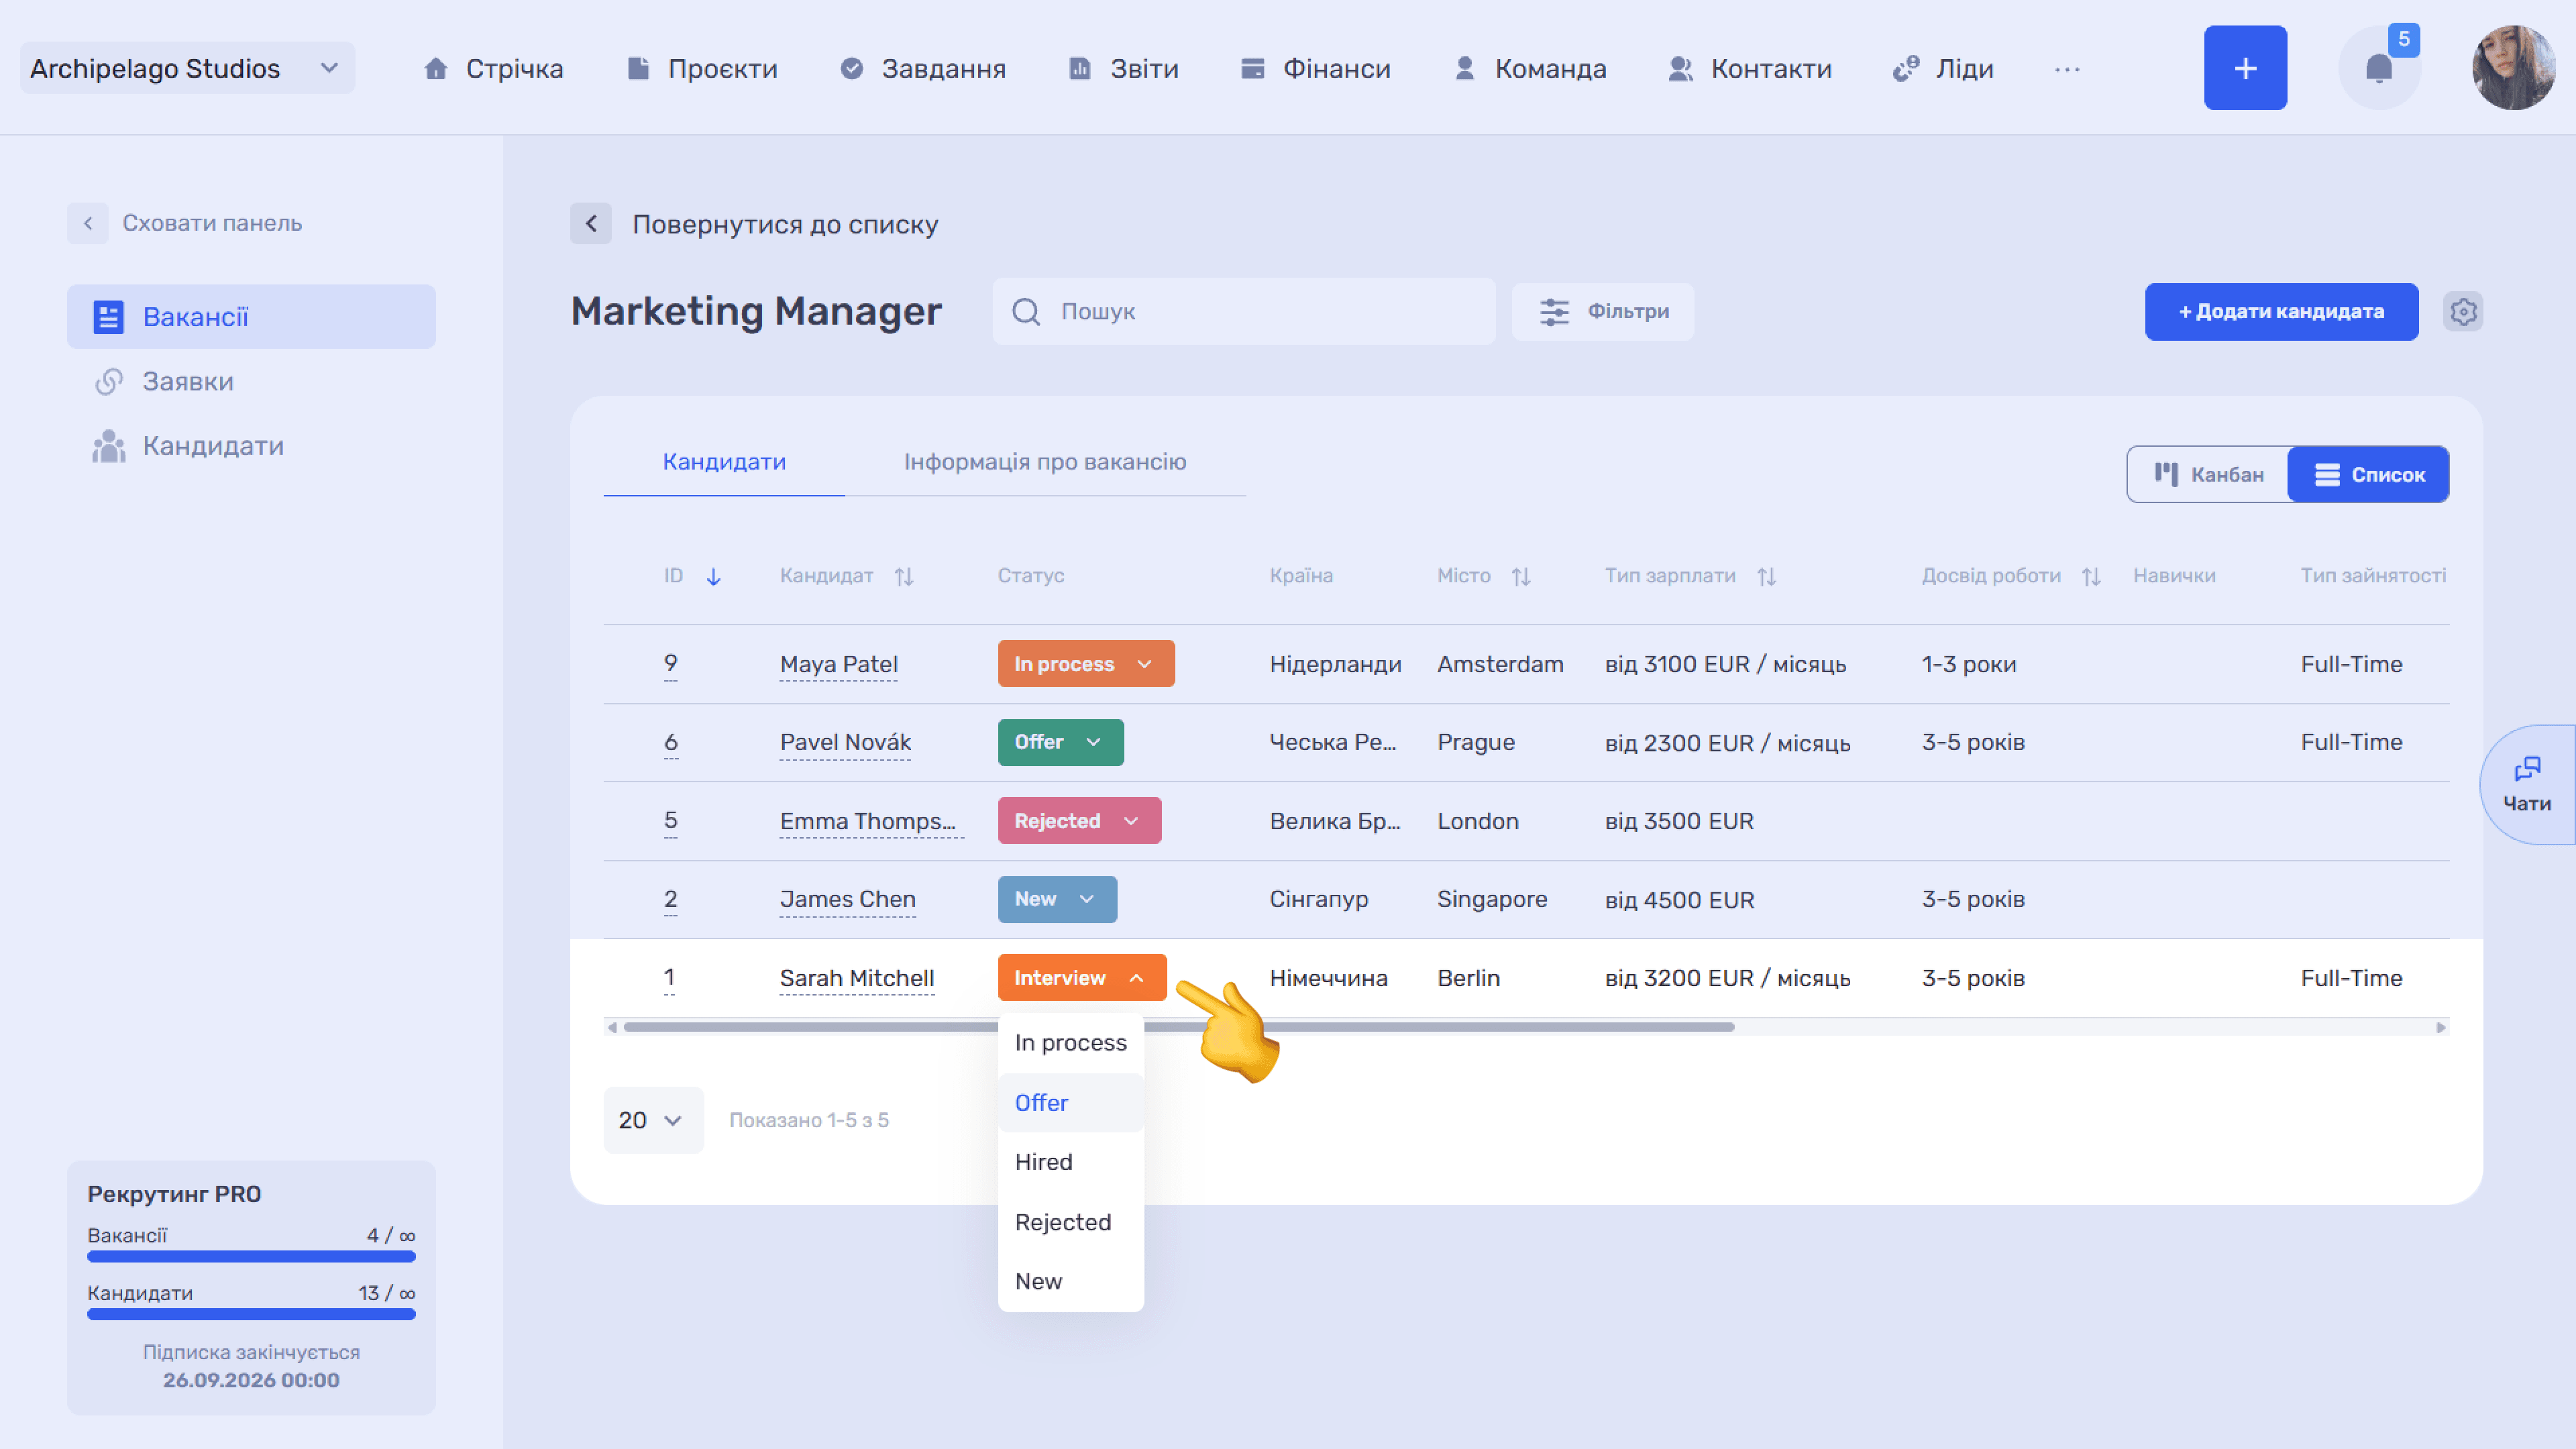
The same selector is available in the creation form and in the vacancy card.
Creating a status
The + button to the right of the tabs opens the Add vacancy status window:
- Status name — a preview of the badge is shown right under the field;
- Color — a palette of preset shades;
- Status group — defines which group the new status belongs to.
Status group defines how the system treats the status in vacancy analytics. Four groups are available: New, Active, Closed successfully, Closed unsuccessfully. You can create as many of your own statuses in each group as you like — for example, two different rejection reasons in the Closed unsuccessfully group.
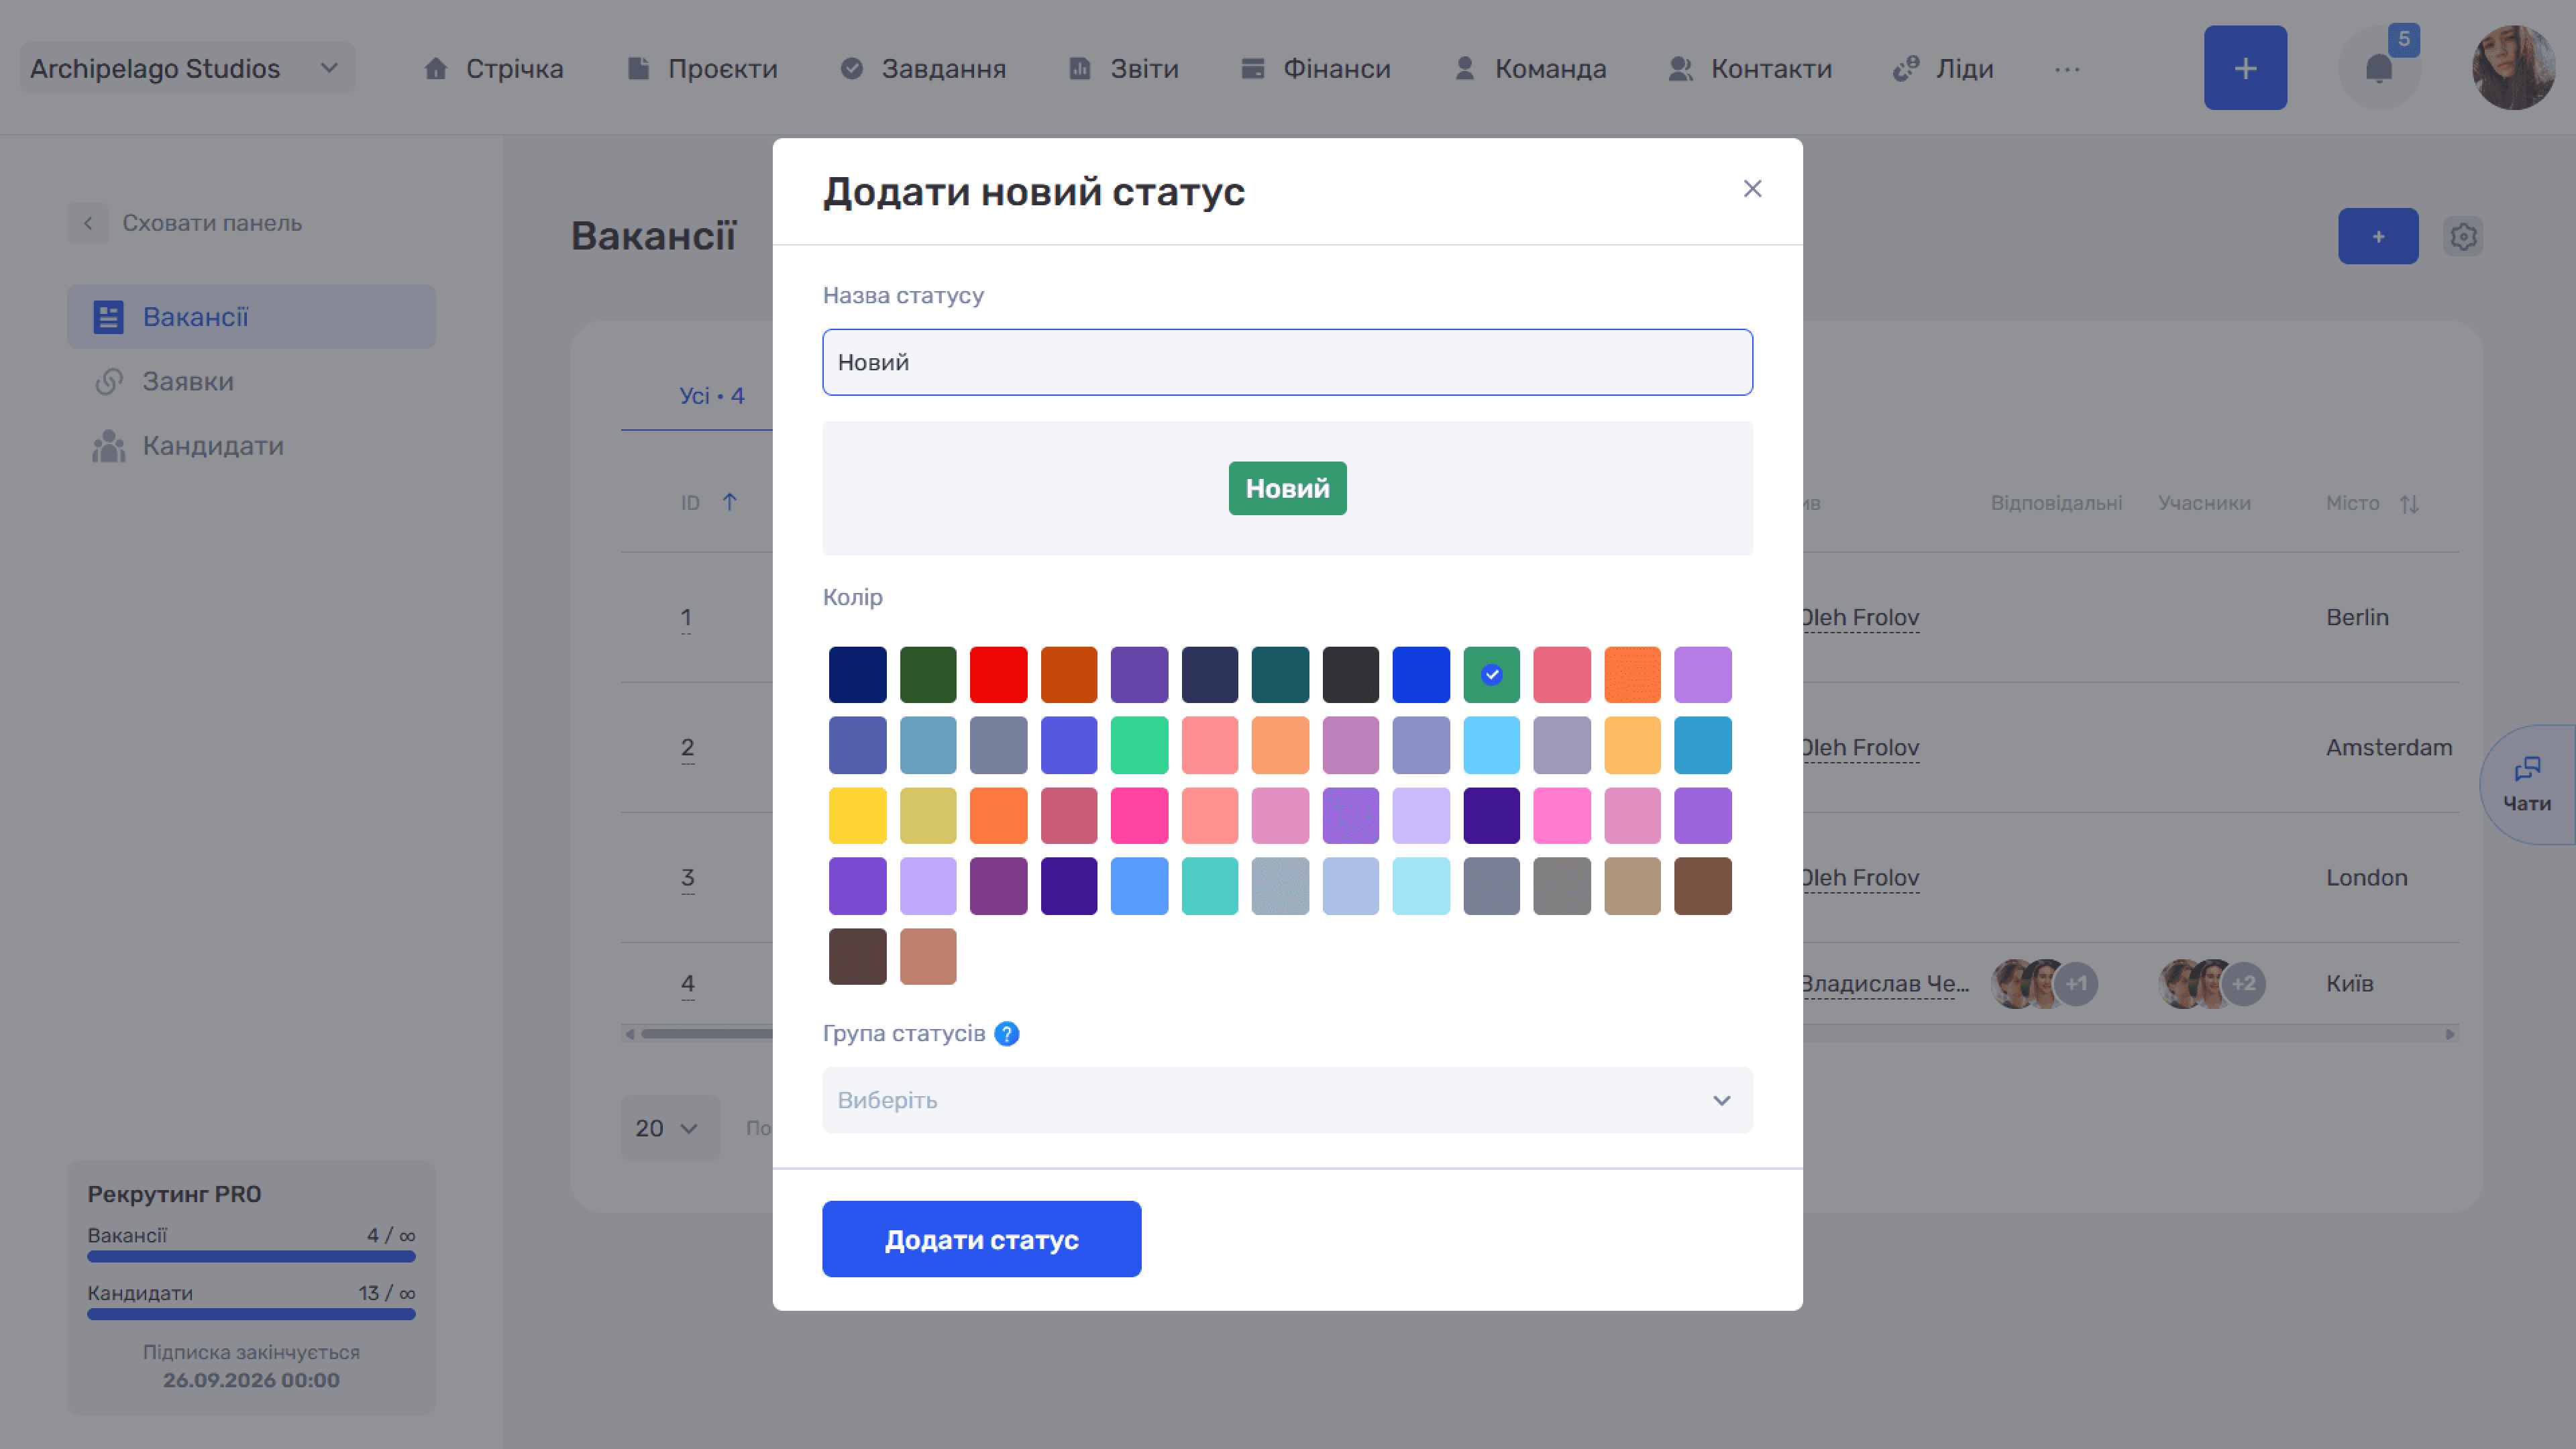
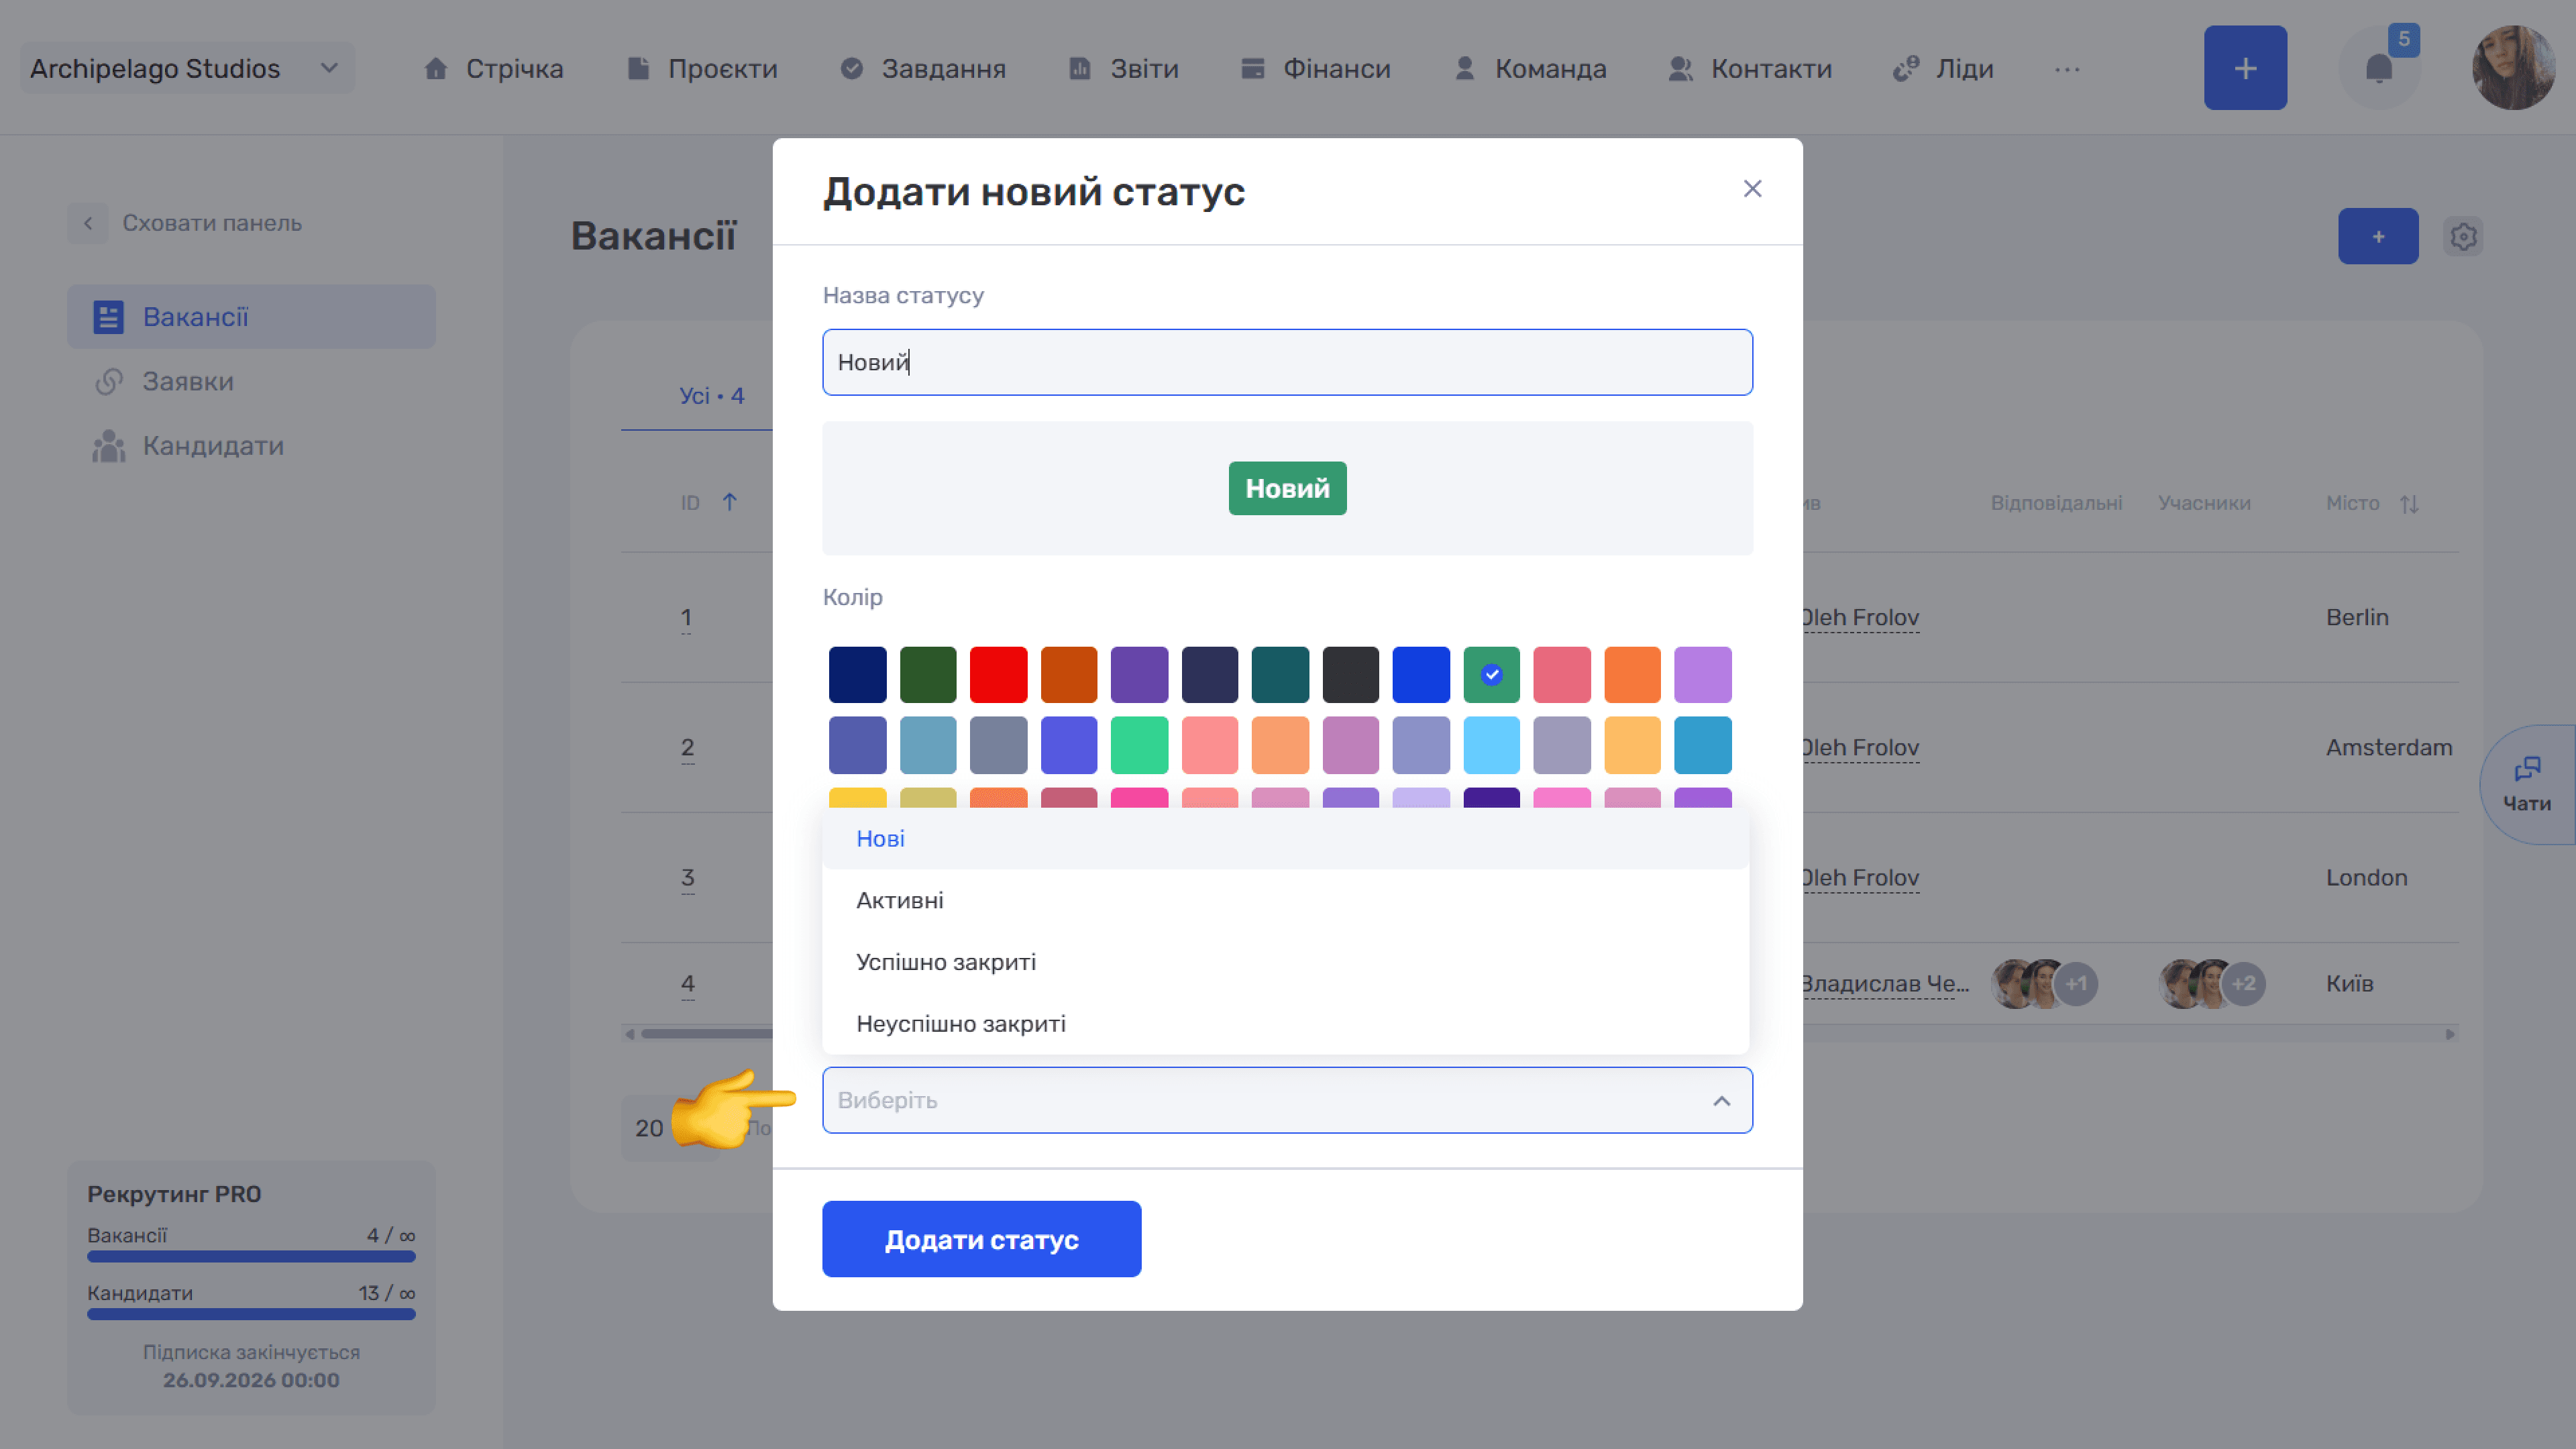
The Add vacancy status button creates the status, and it immediately appears as a separate tab above the table.
Please note
The full list of statuses, groups, and the rest of the module's reference data are configured centrally — see Admin Panel → Recruiting.
Creating a vacancy
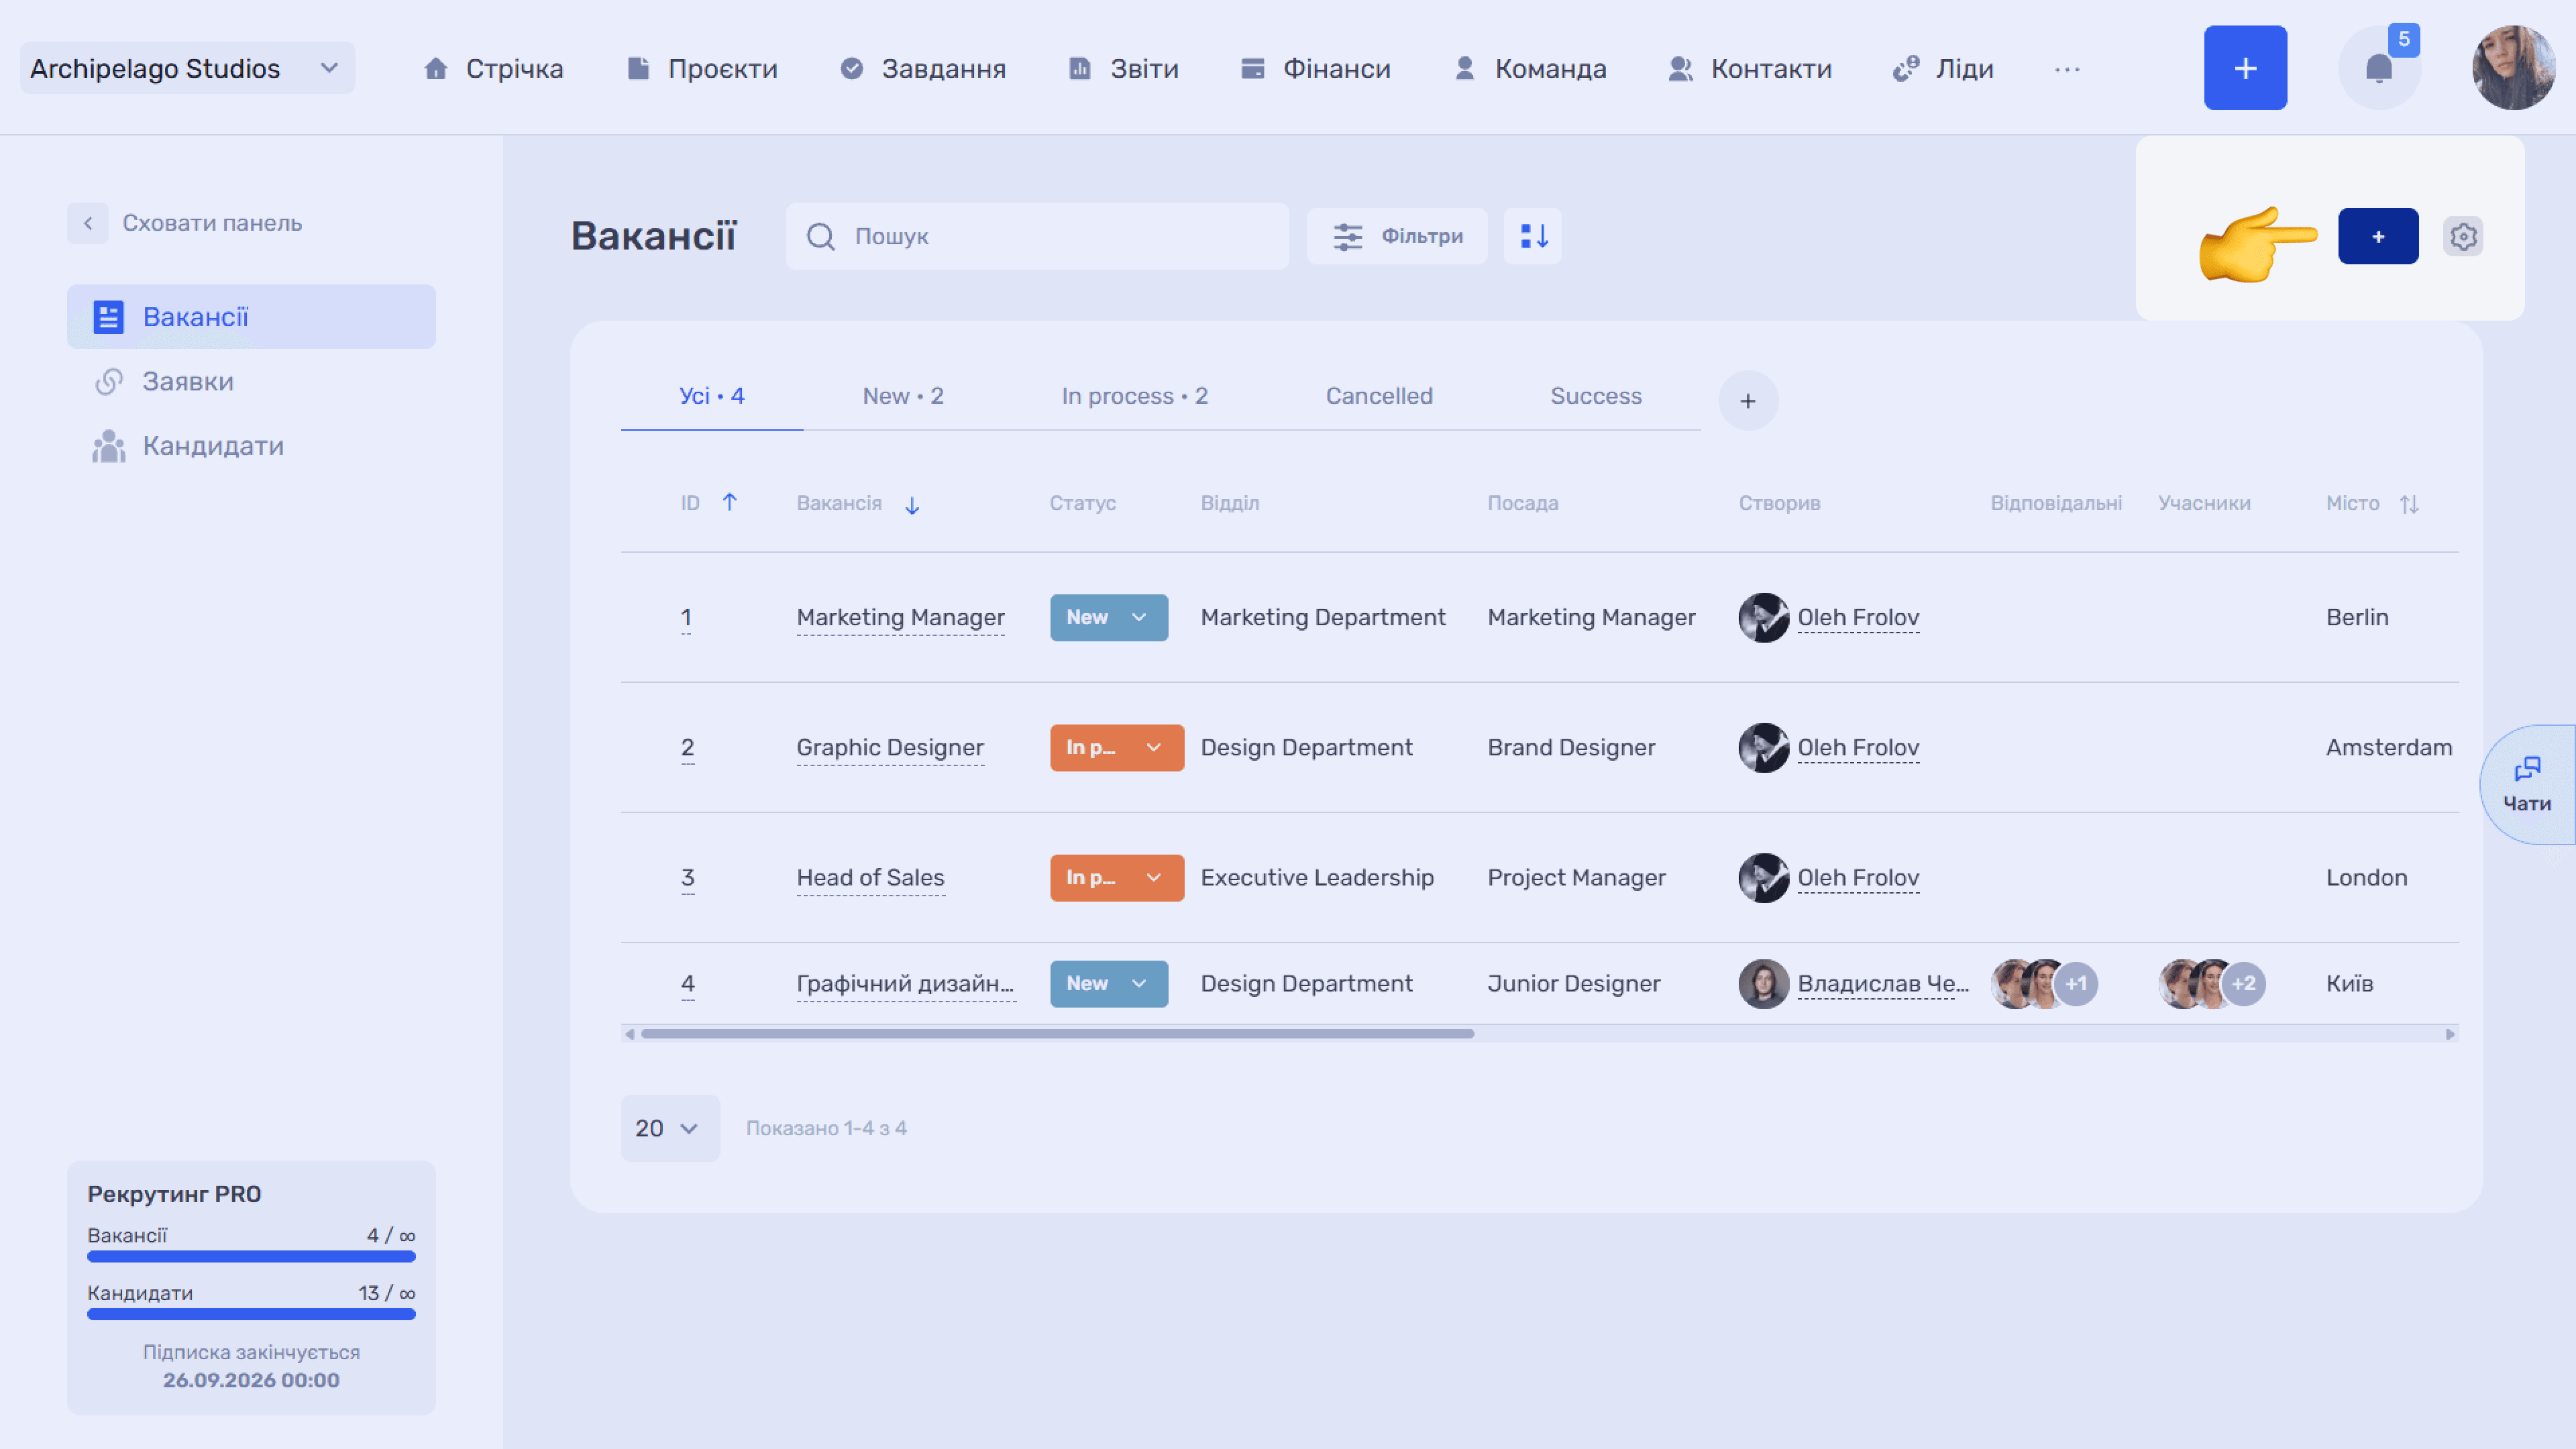
The + button to the right of the filters opens the Create vacancy window.
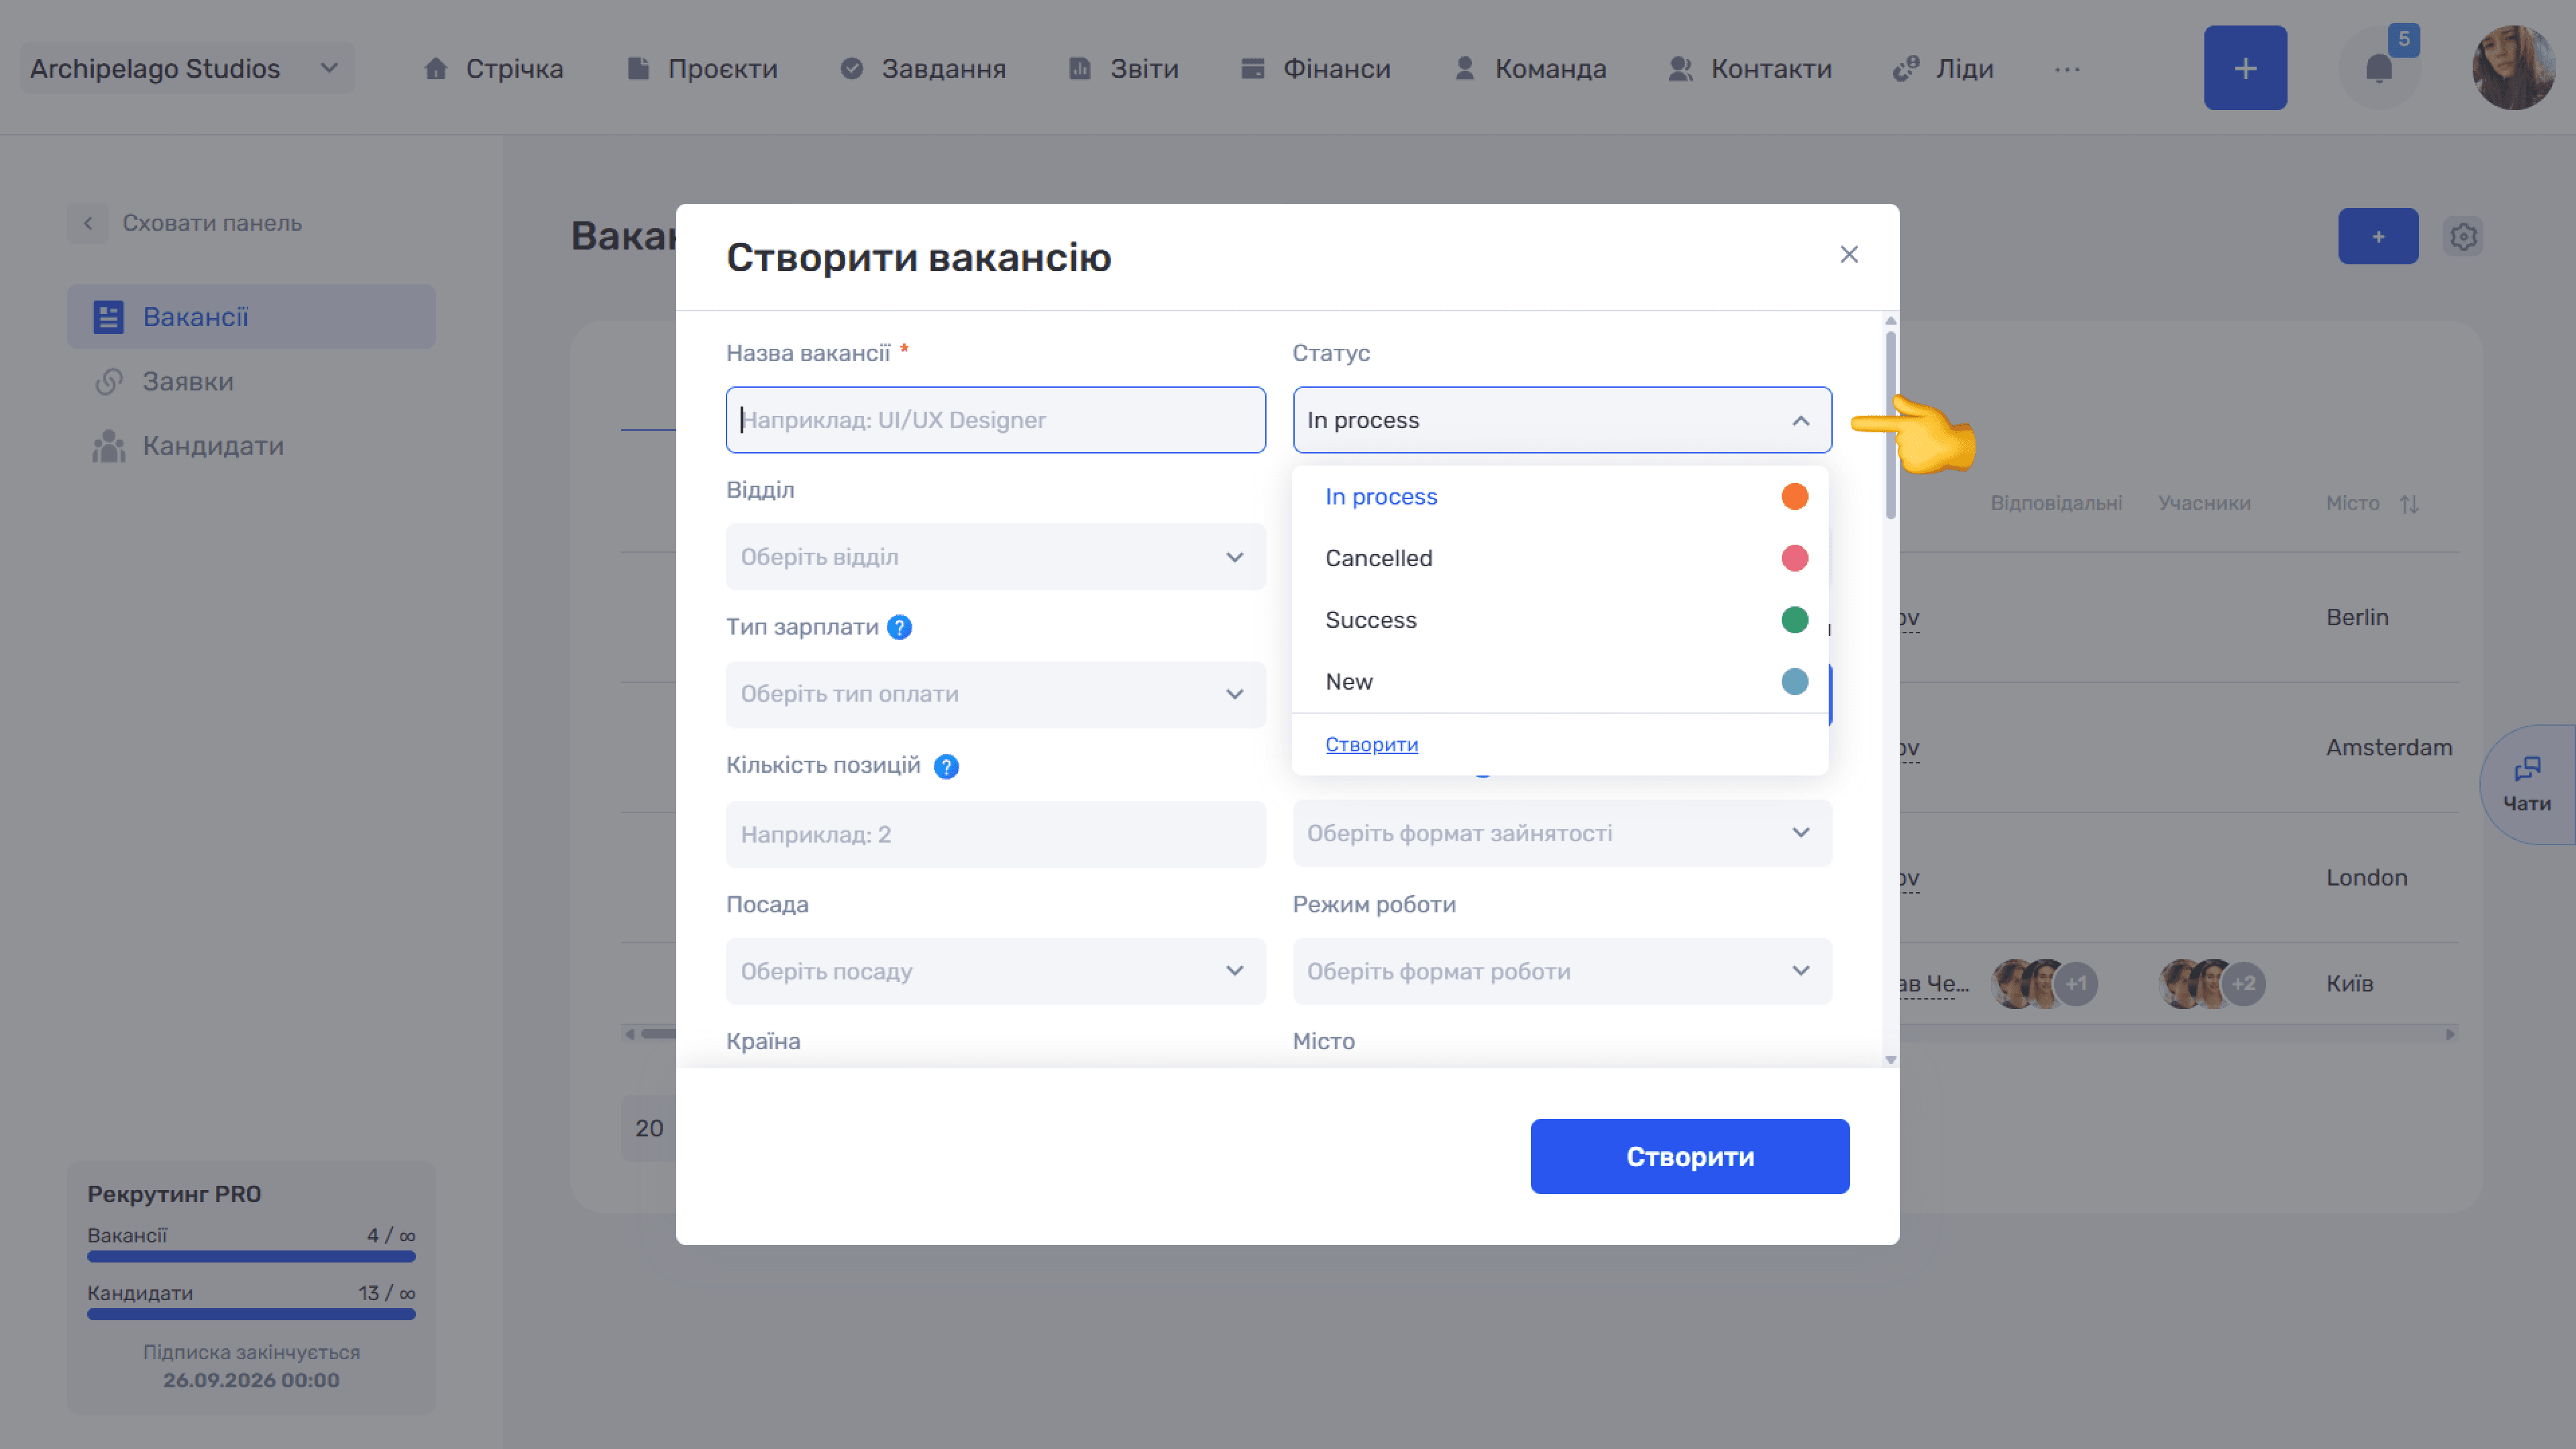
Main fields
- Vacancy name (required);
- Status — from a list with color markers; at the bottom of the list is a Create item for a new status without leaving the form;
- Department — from the list of company departments;
- Position — from the list of company positions;
- Number of positions — how many candidates are planned to be hired for this vacancy.
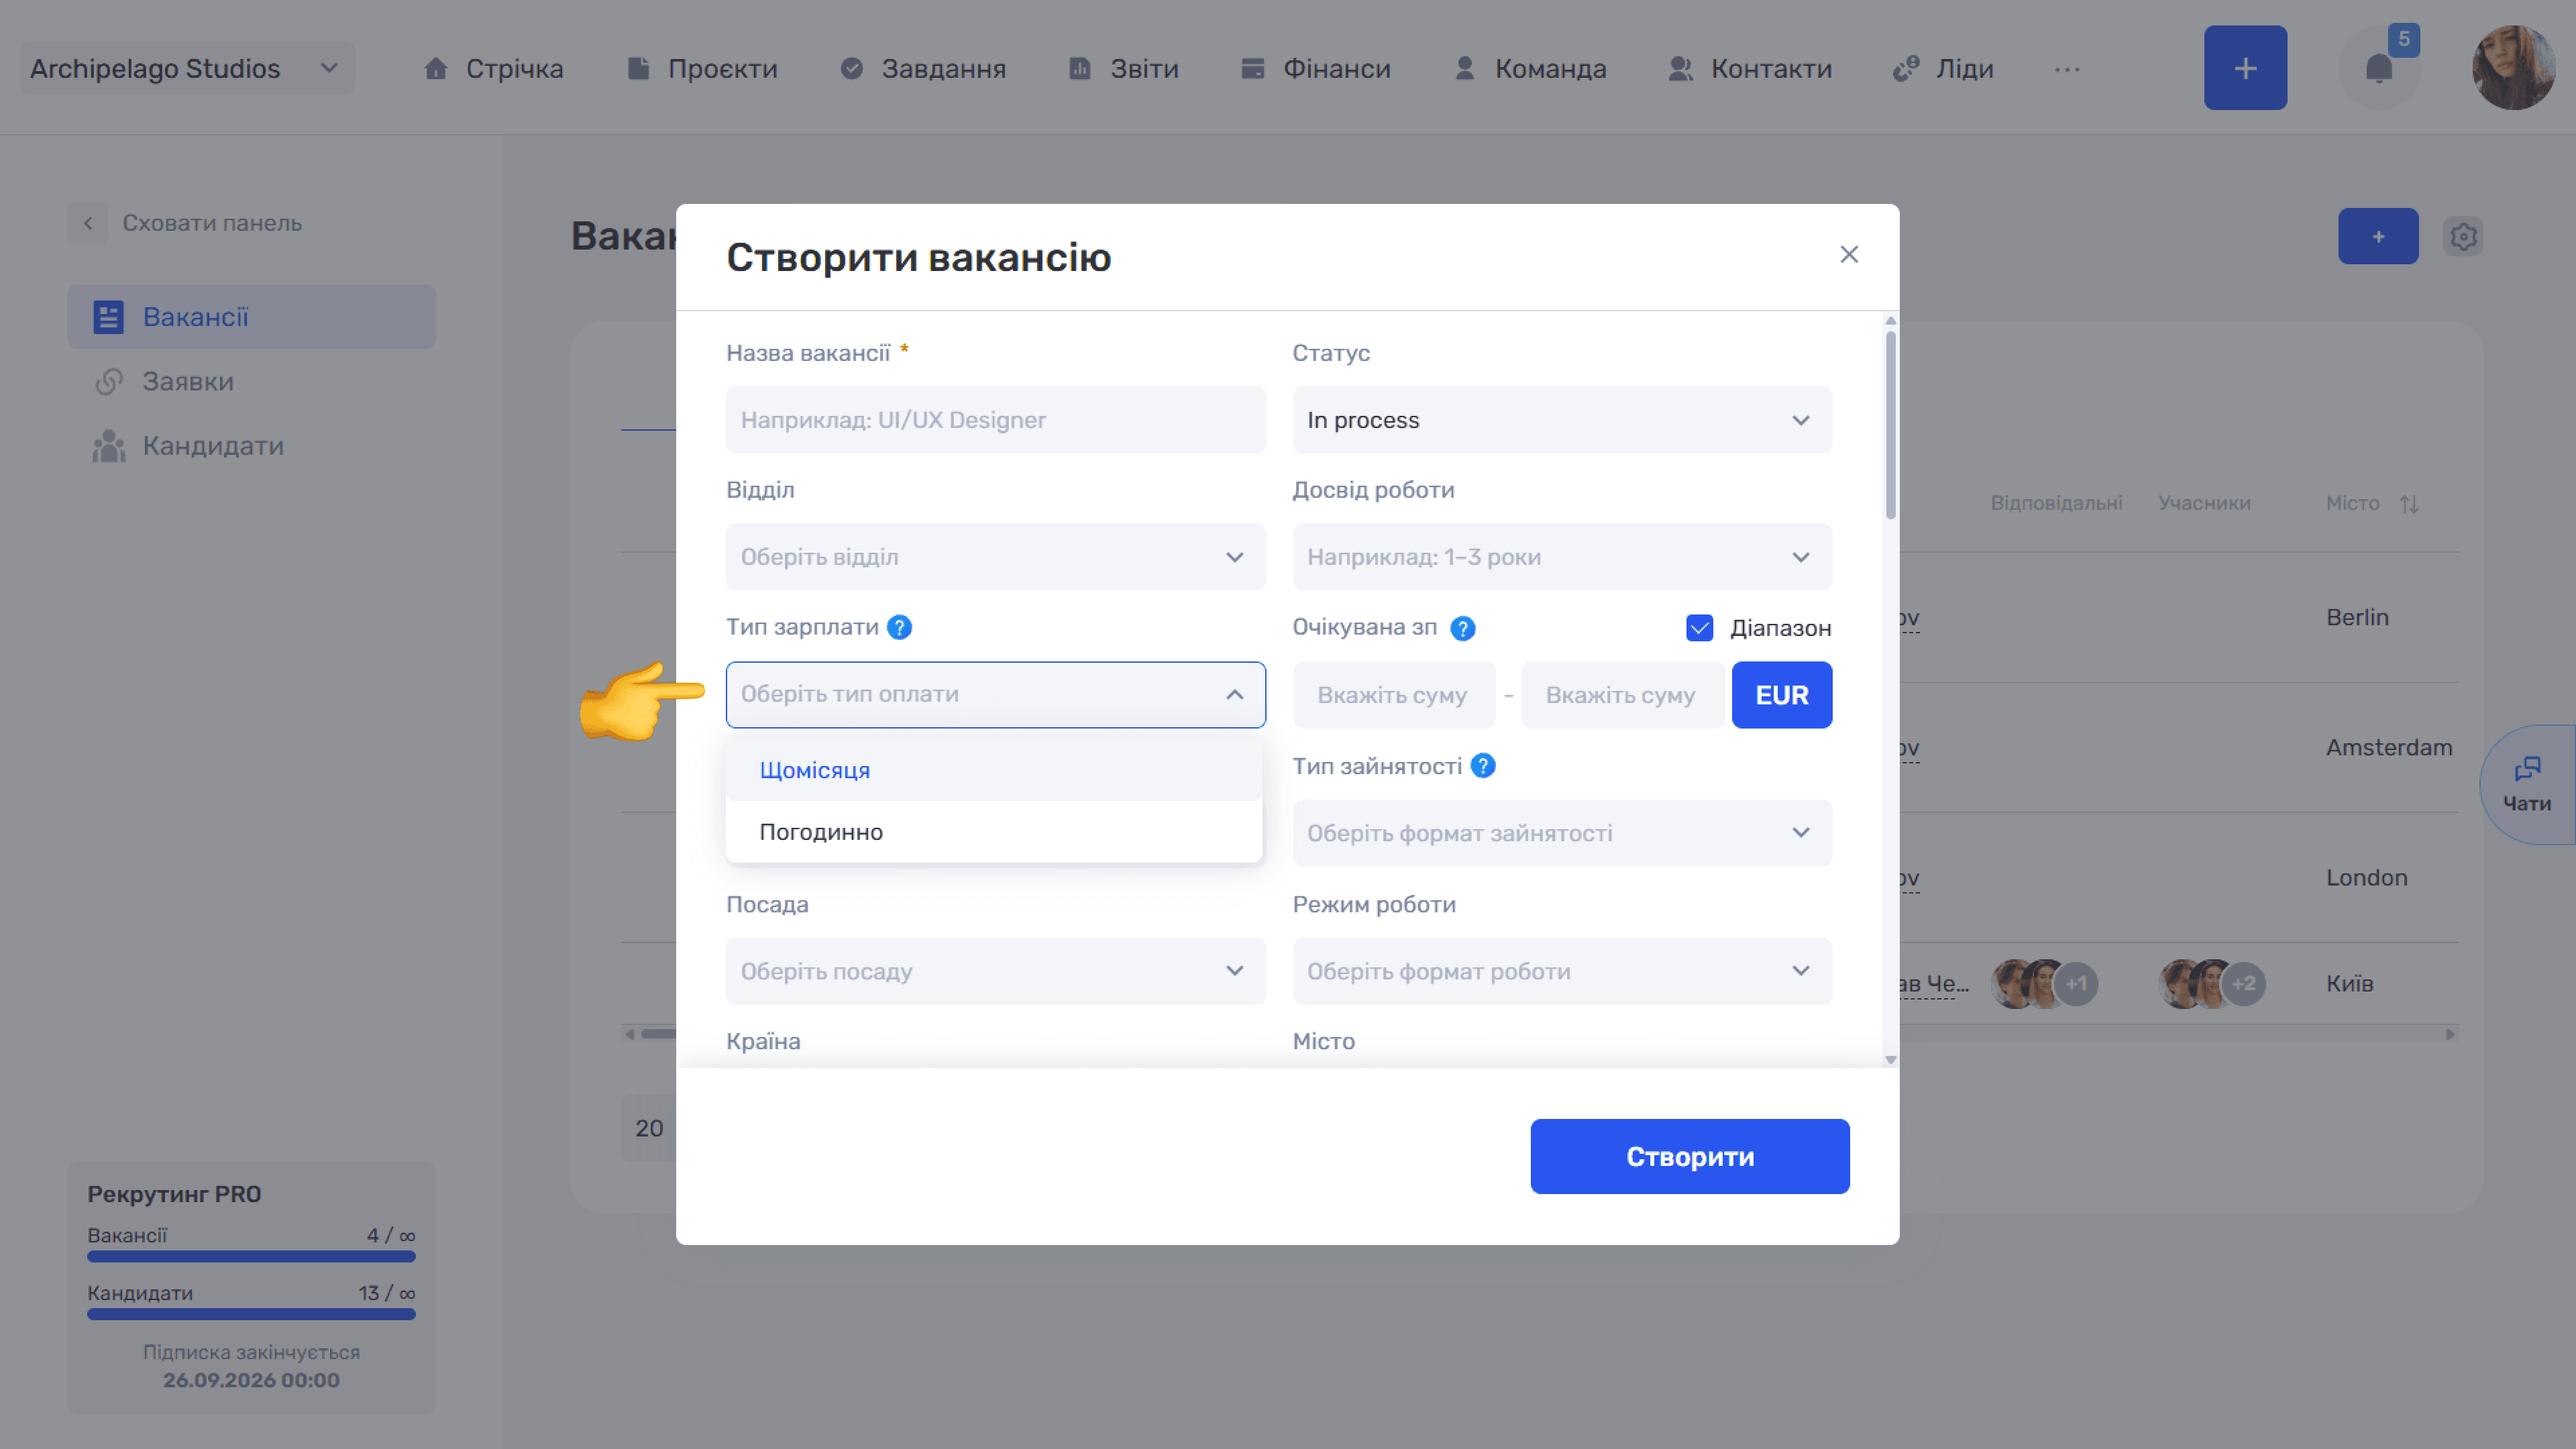
Pay
- Salary type — Monthly or Hourly. Affects how pay is calculated: monthly — a fixed amount, hourly — by hours worked.
- Expected salary — an amount with a currency selector (USD, EUR, GBP, UAH). The Range checkbox splits the field in two — minimum and maximum.
Working conditions
- Work experience — No experience, Up to 1 year, 1–3 years, 3–5 years, More than 5 years;
- Employment type — the employee's work schedule (hours per day, working days, vacation days). Affects salary calculation, workload control, and vacation tracking;
- Work mode — Remote, In office, Hybrid;
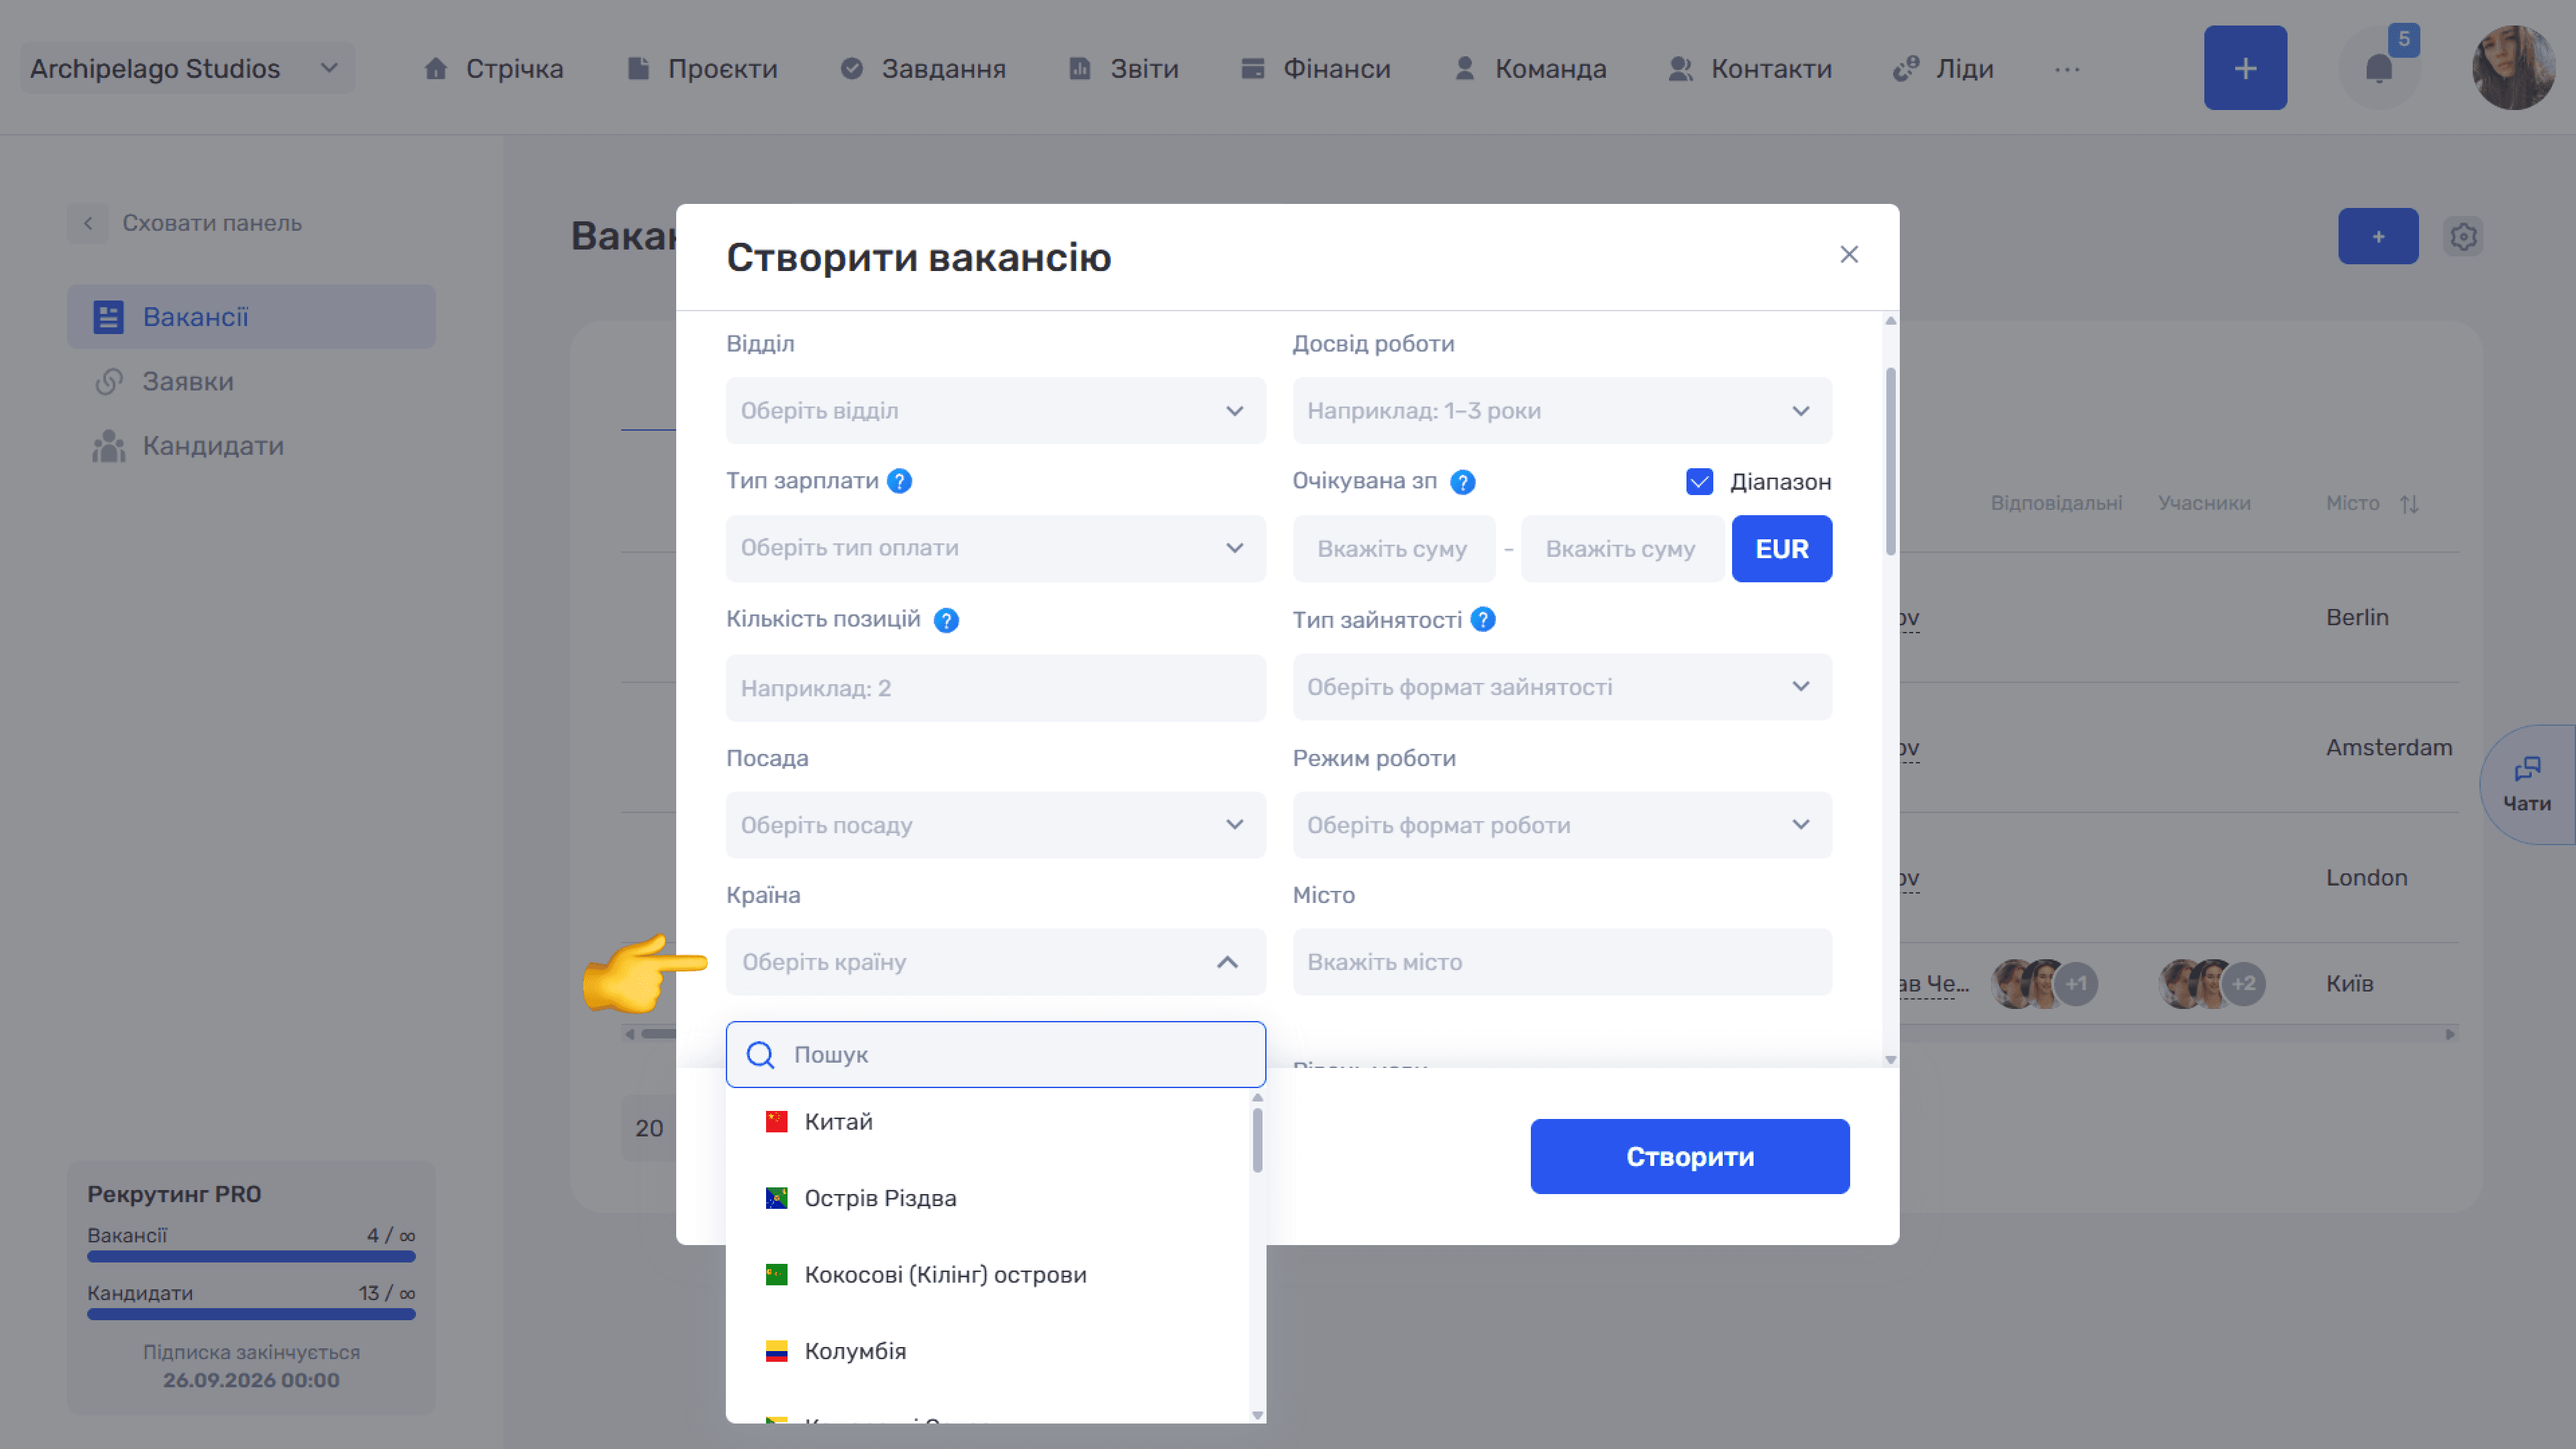
- Country — a list with search and flags;
- City — entered as text.
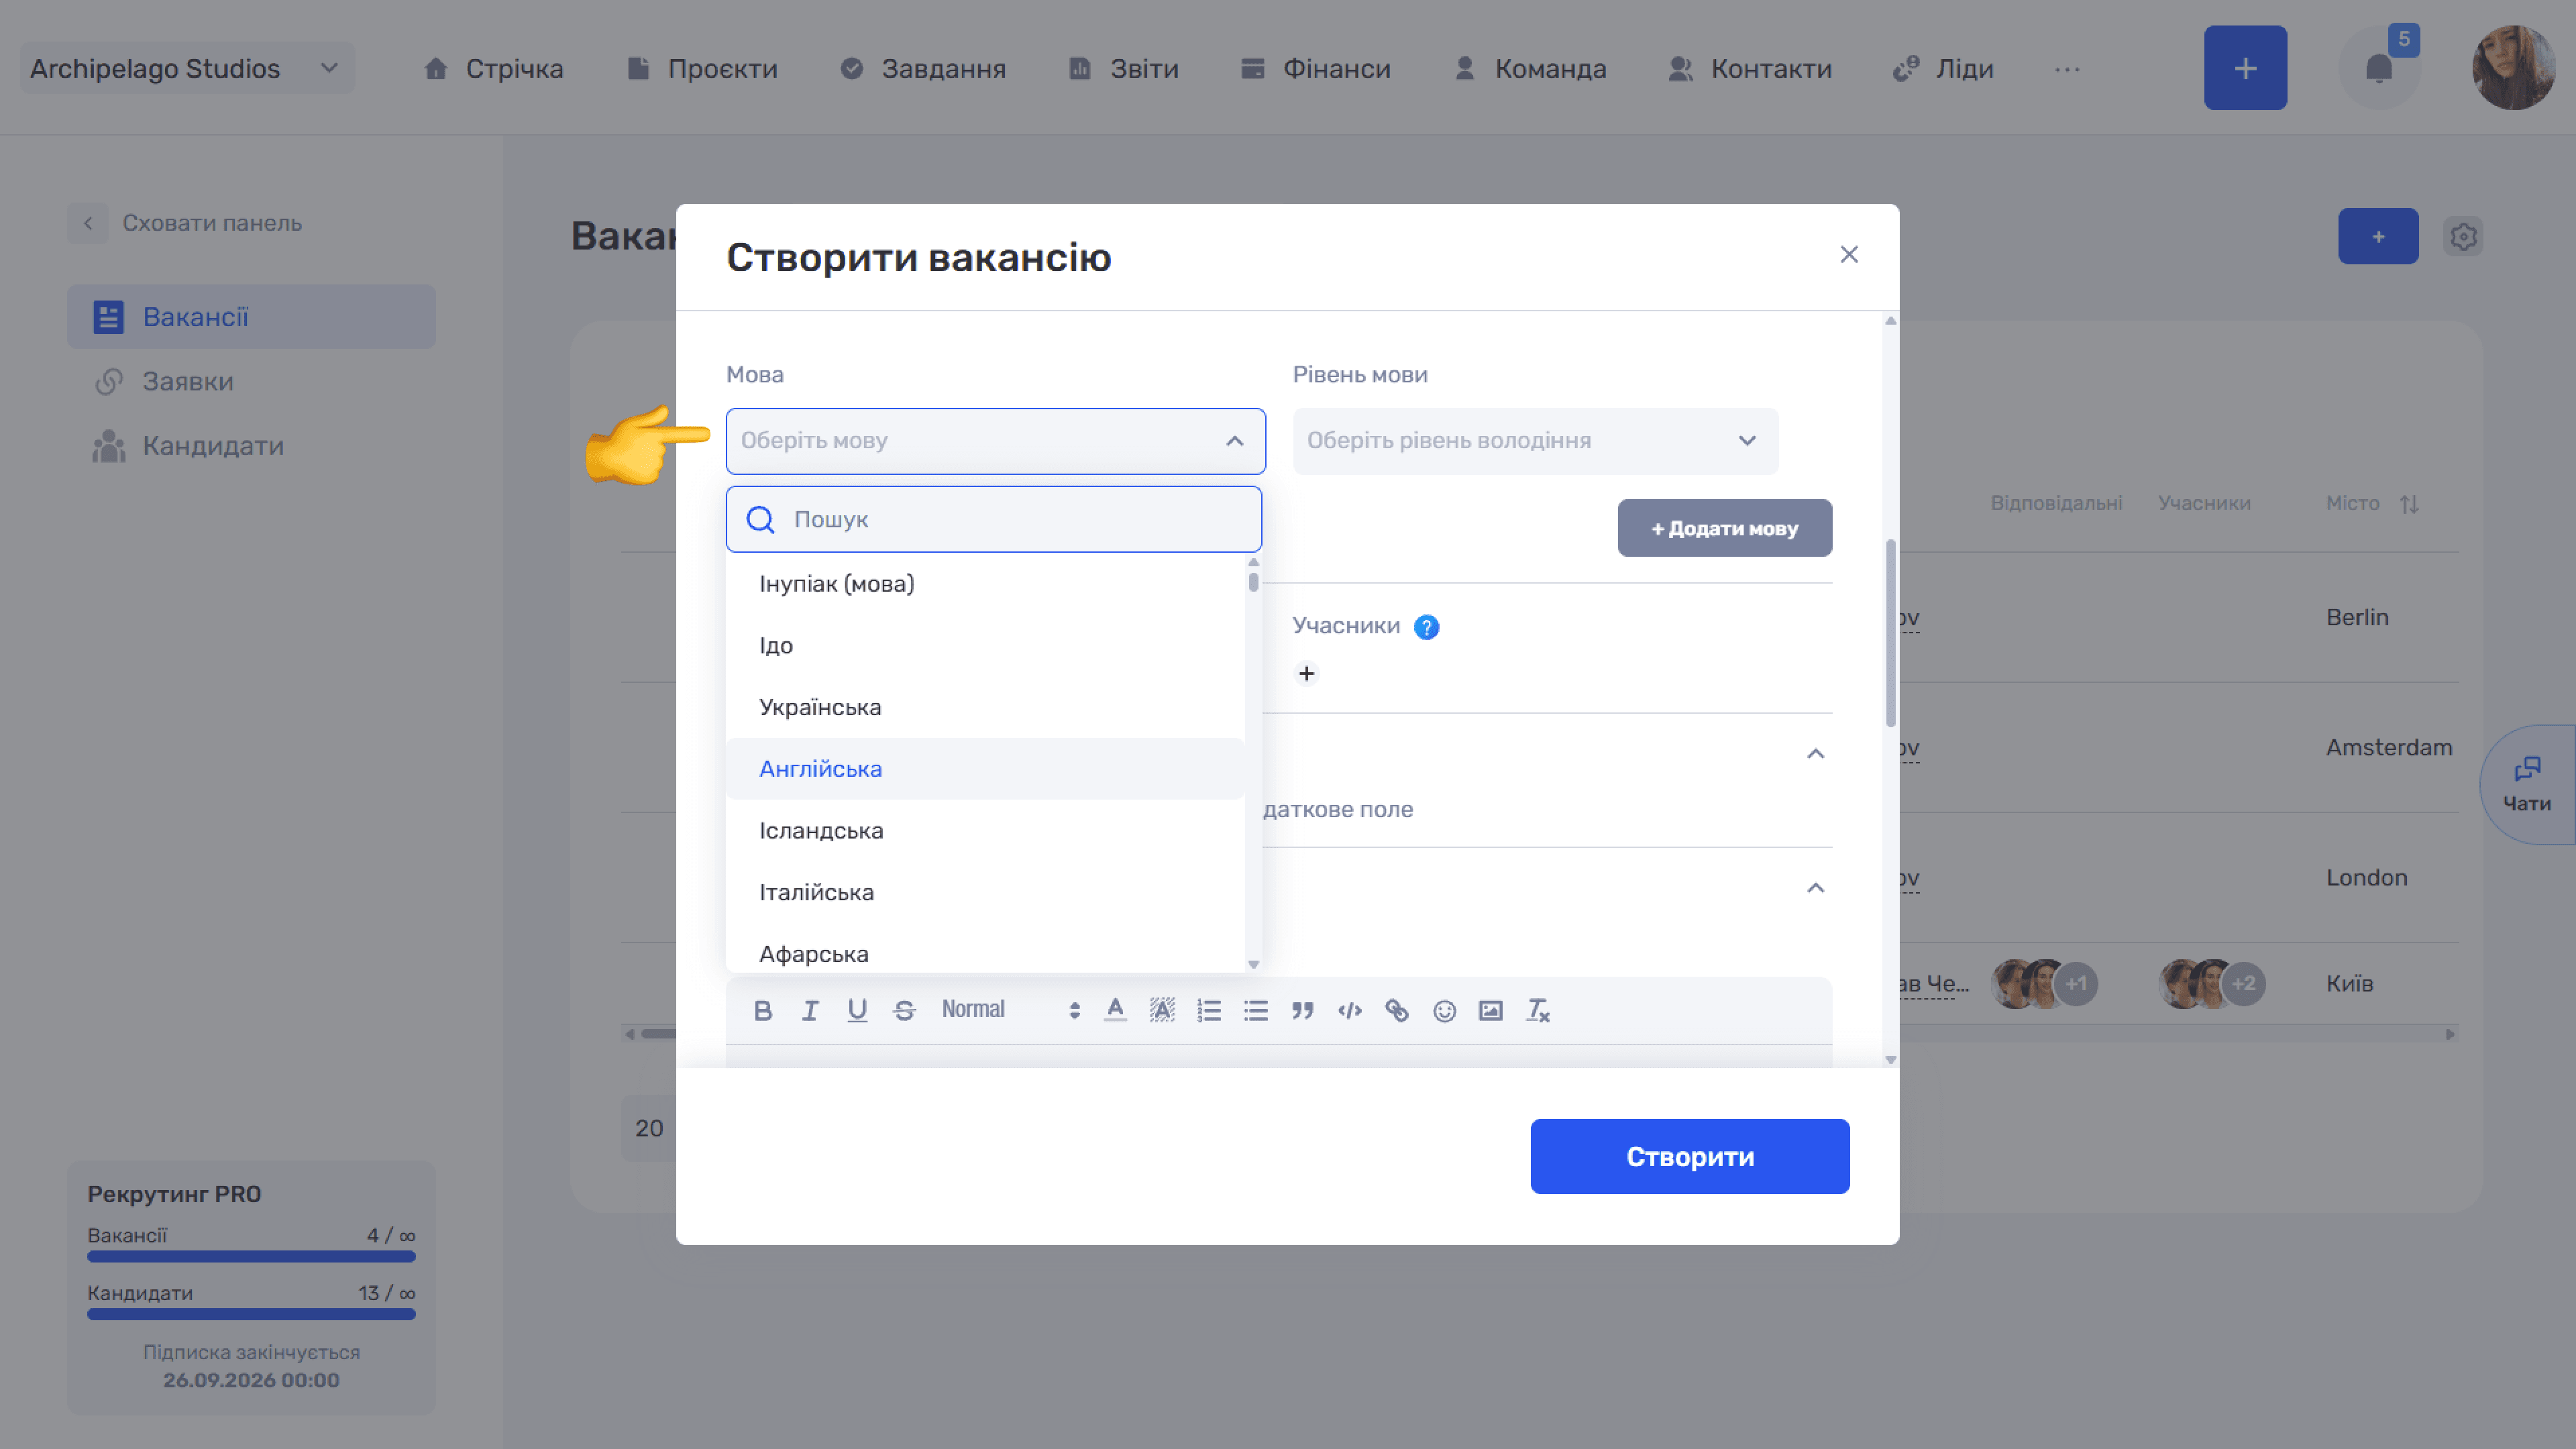
Language requirements
A pair of fields, Language and Language level (Beginner A1, Elementary A2, Intermediate B1, Upper-intermediate B2, Advanced C1, Proficient C2, Native). The + Add language button adds another pair, and the icon on the right removes it.
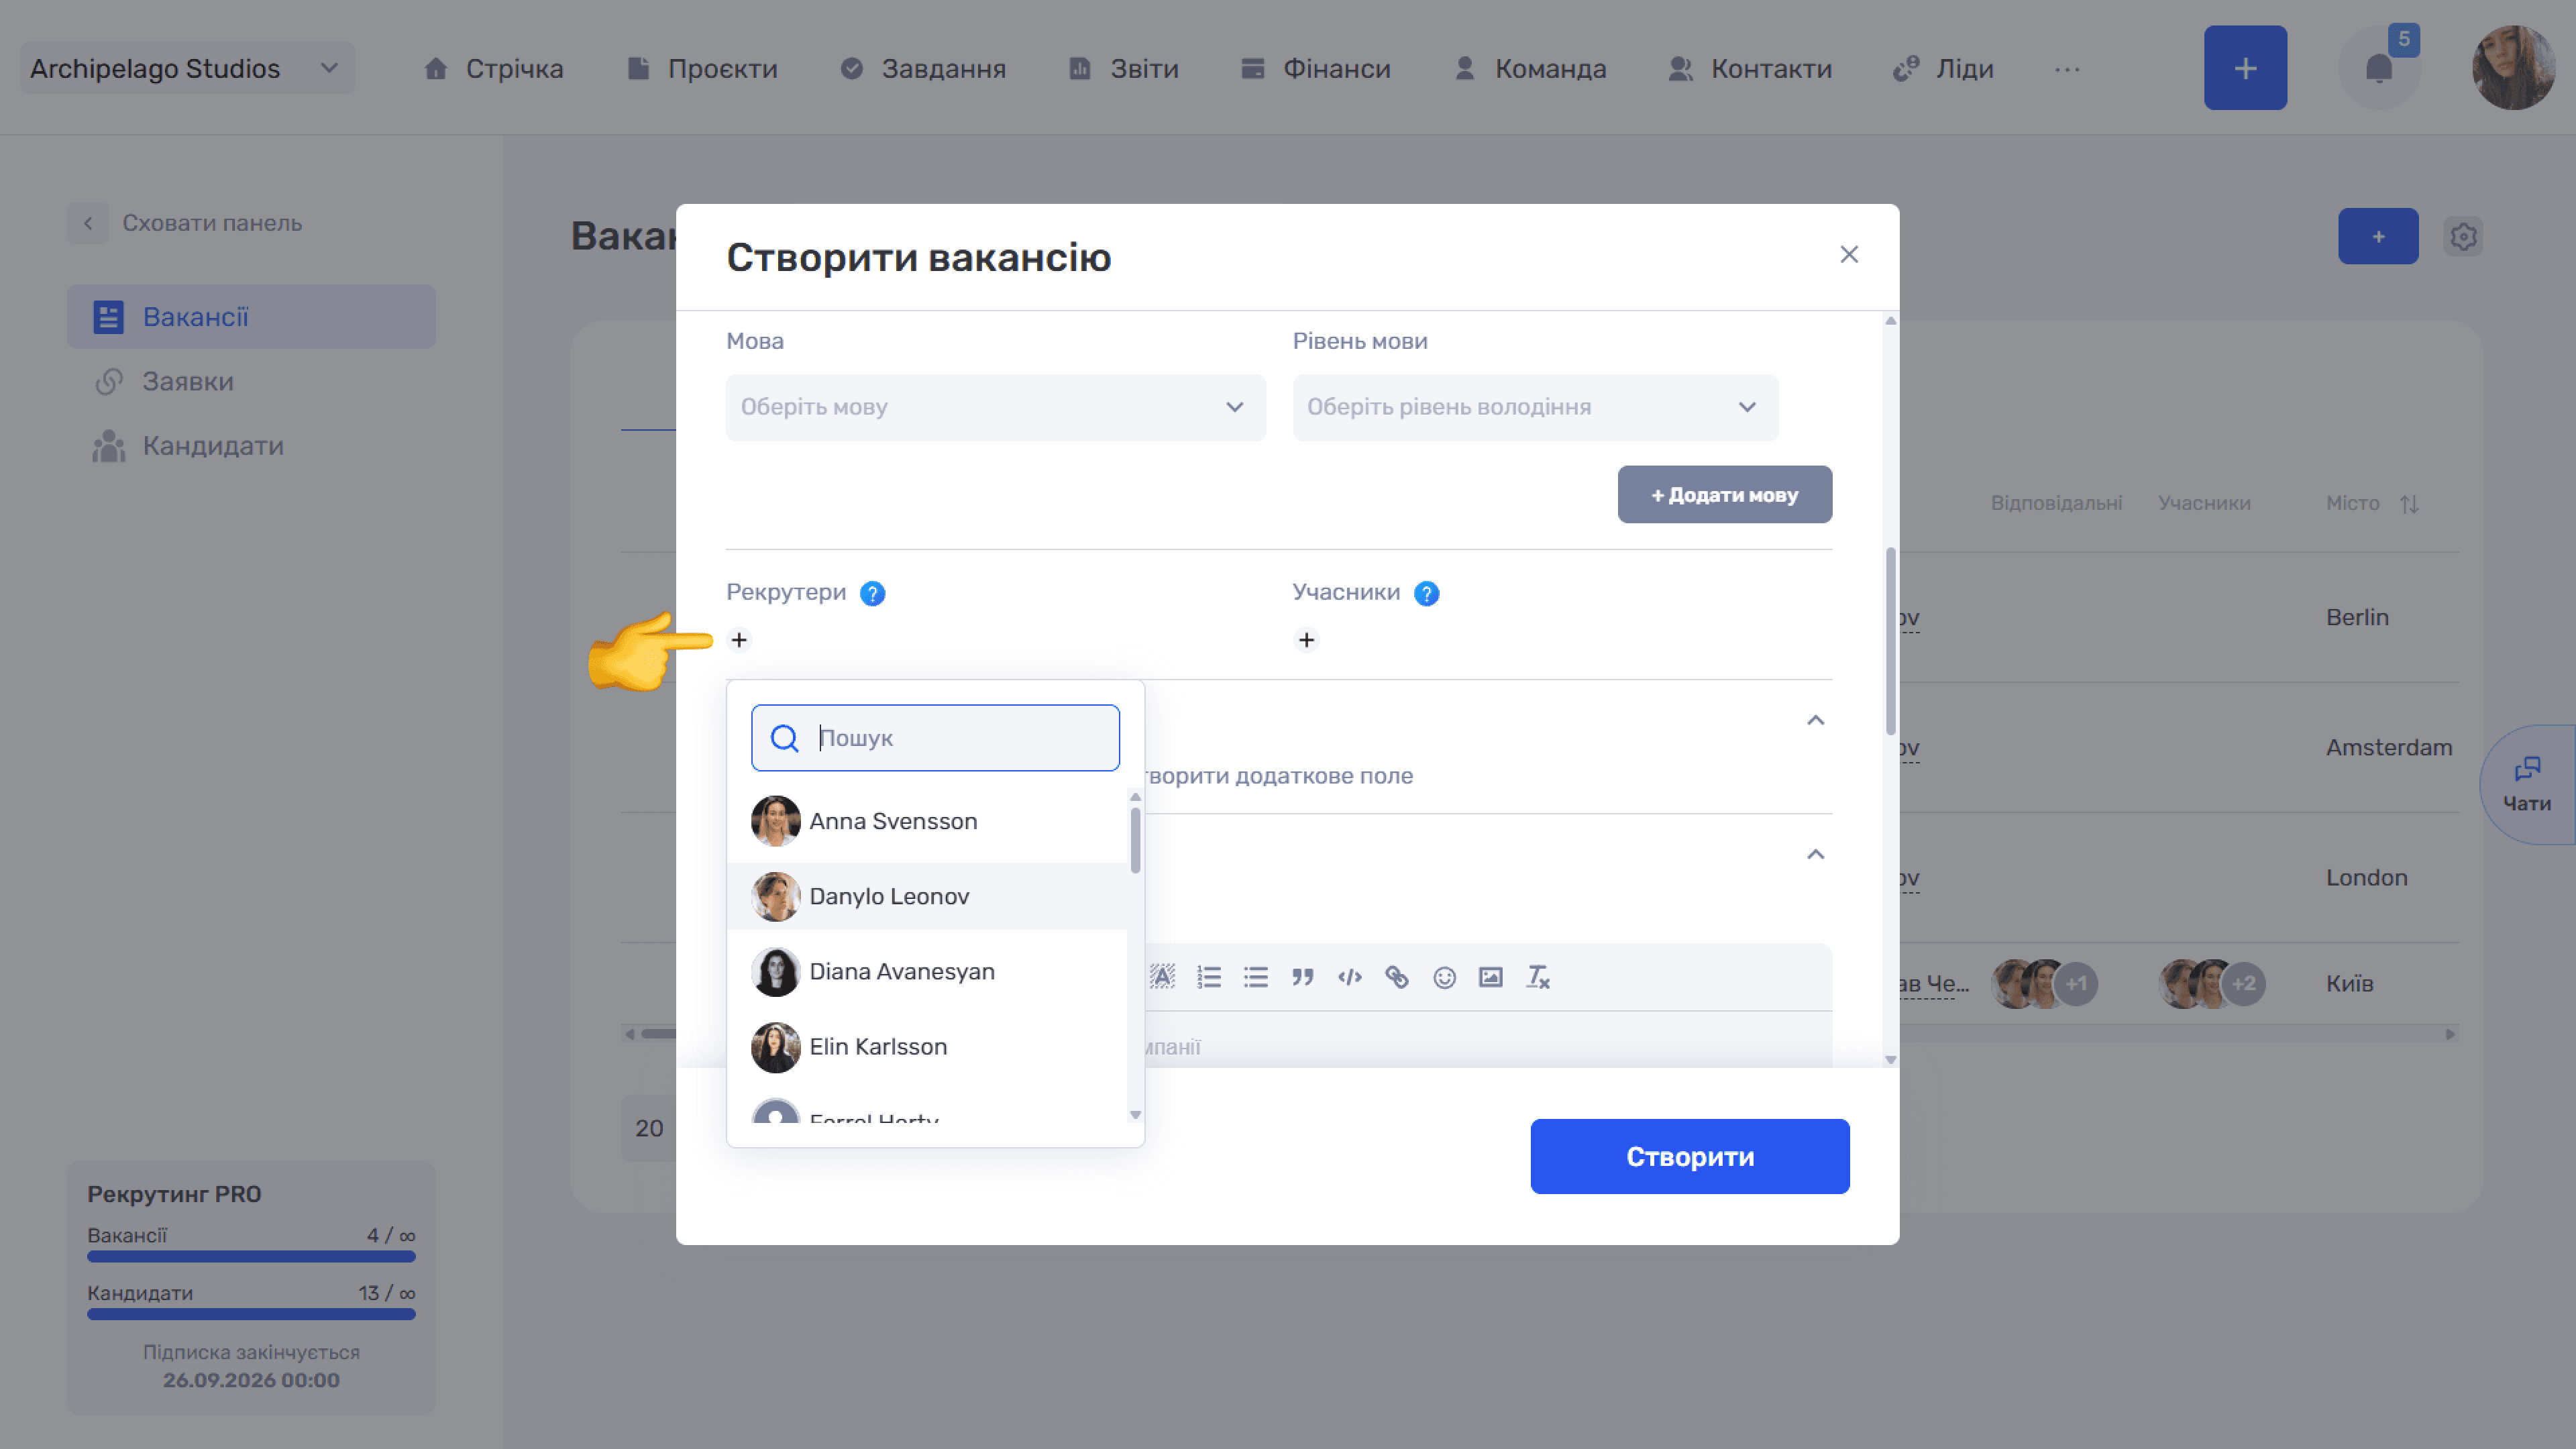
Vacancy team
- Recruiters — responsible for running the vacancy and the hiring process. They usually have full access to candidates, statuses, and communication;
- Members — observers or stakeholders with access to the vacancy and candidates but no responsibility for hiring.
Both lists open with the + button and have an employee search.
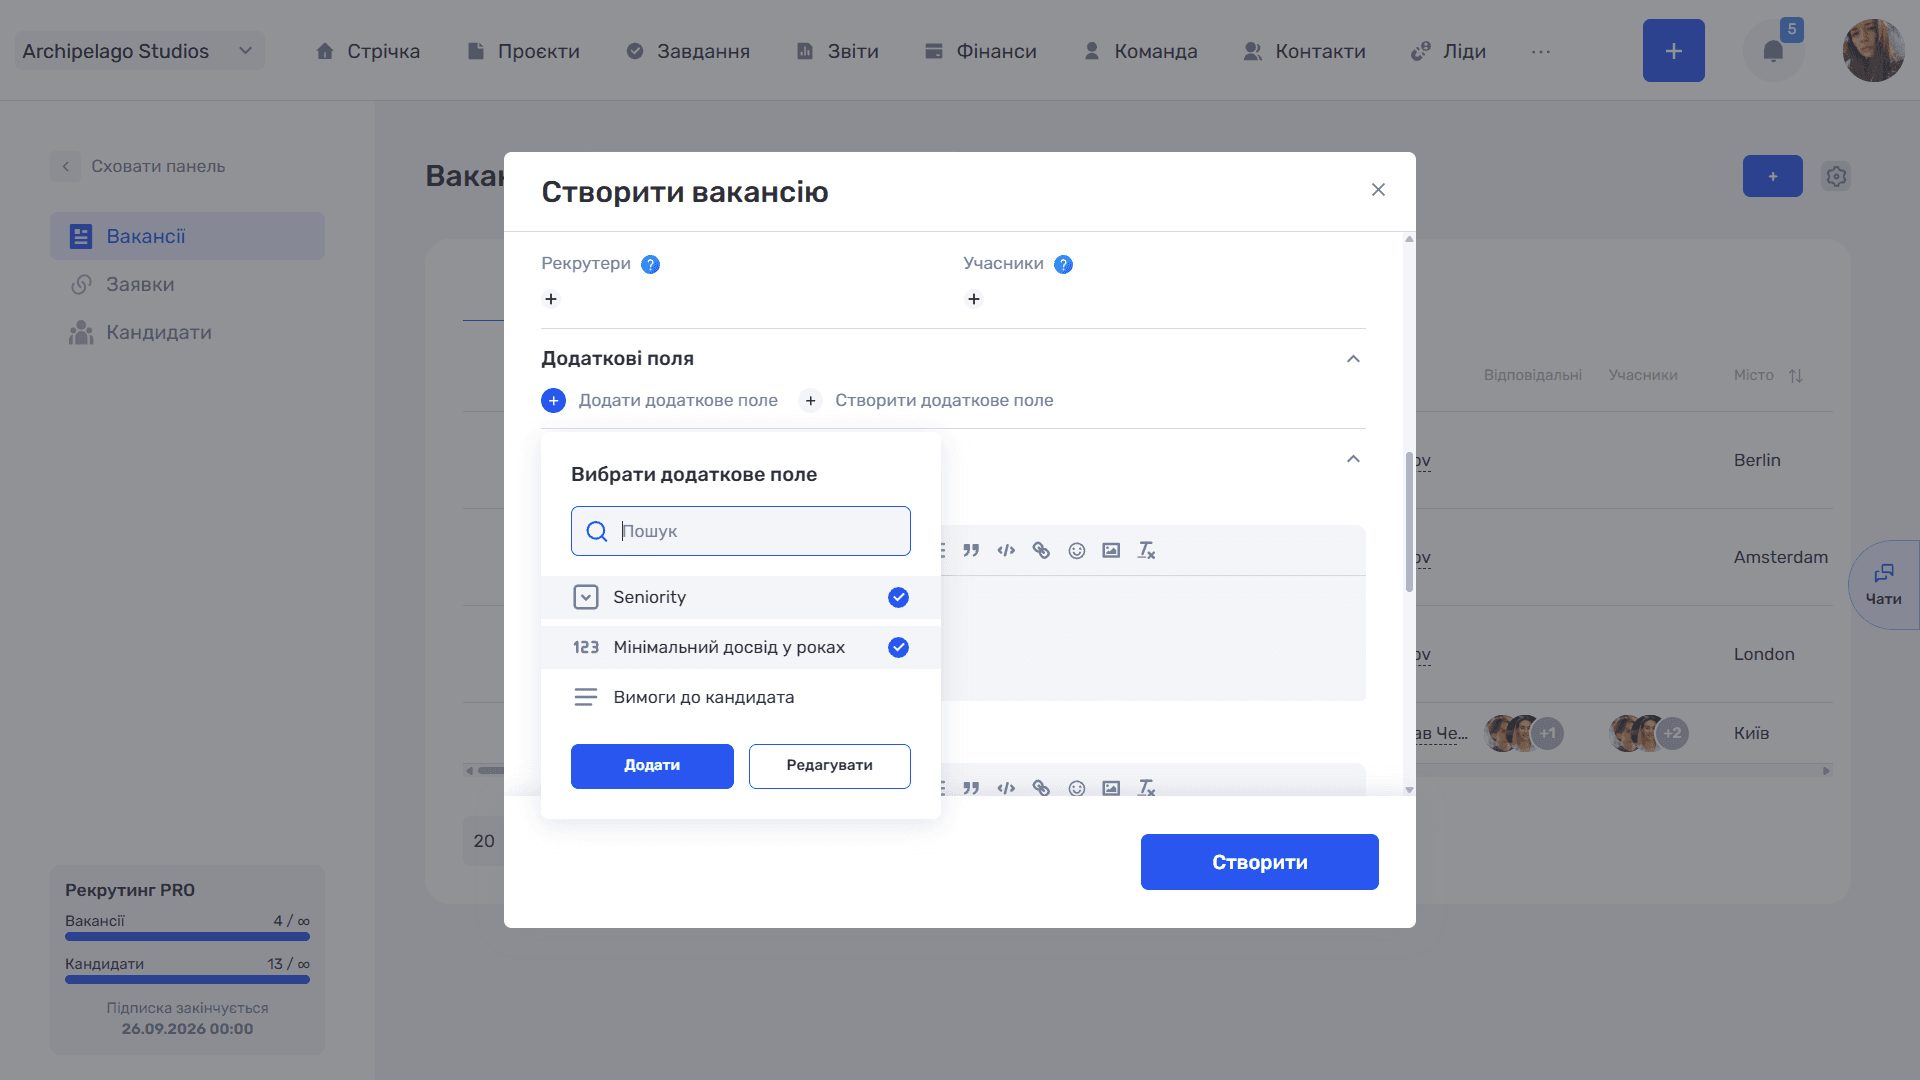
Additional fields
The block works the same way as in the other modules.
Add additional field opens the Select additional field window with a search and a list of available fields (each with an icon of its type). Clicking selects a field, and the Add button attaches the selected ones. The Edit button takes you to the field settings in the admin panel.
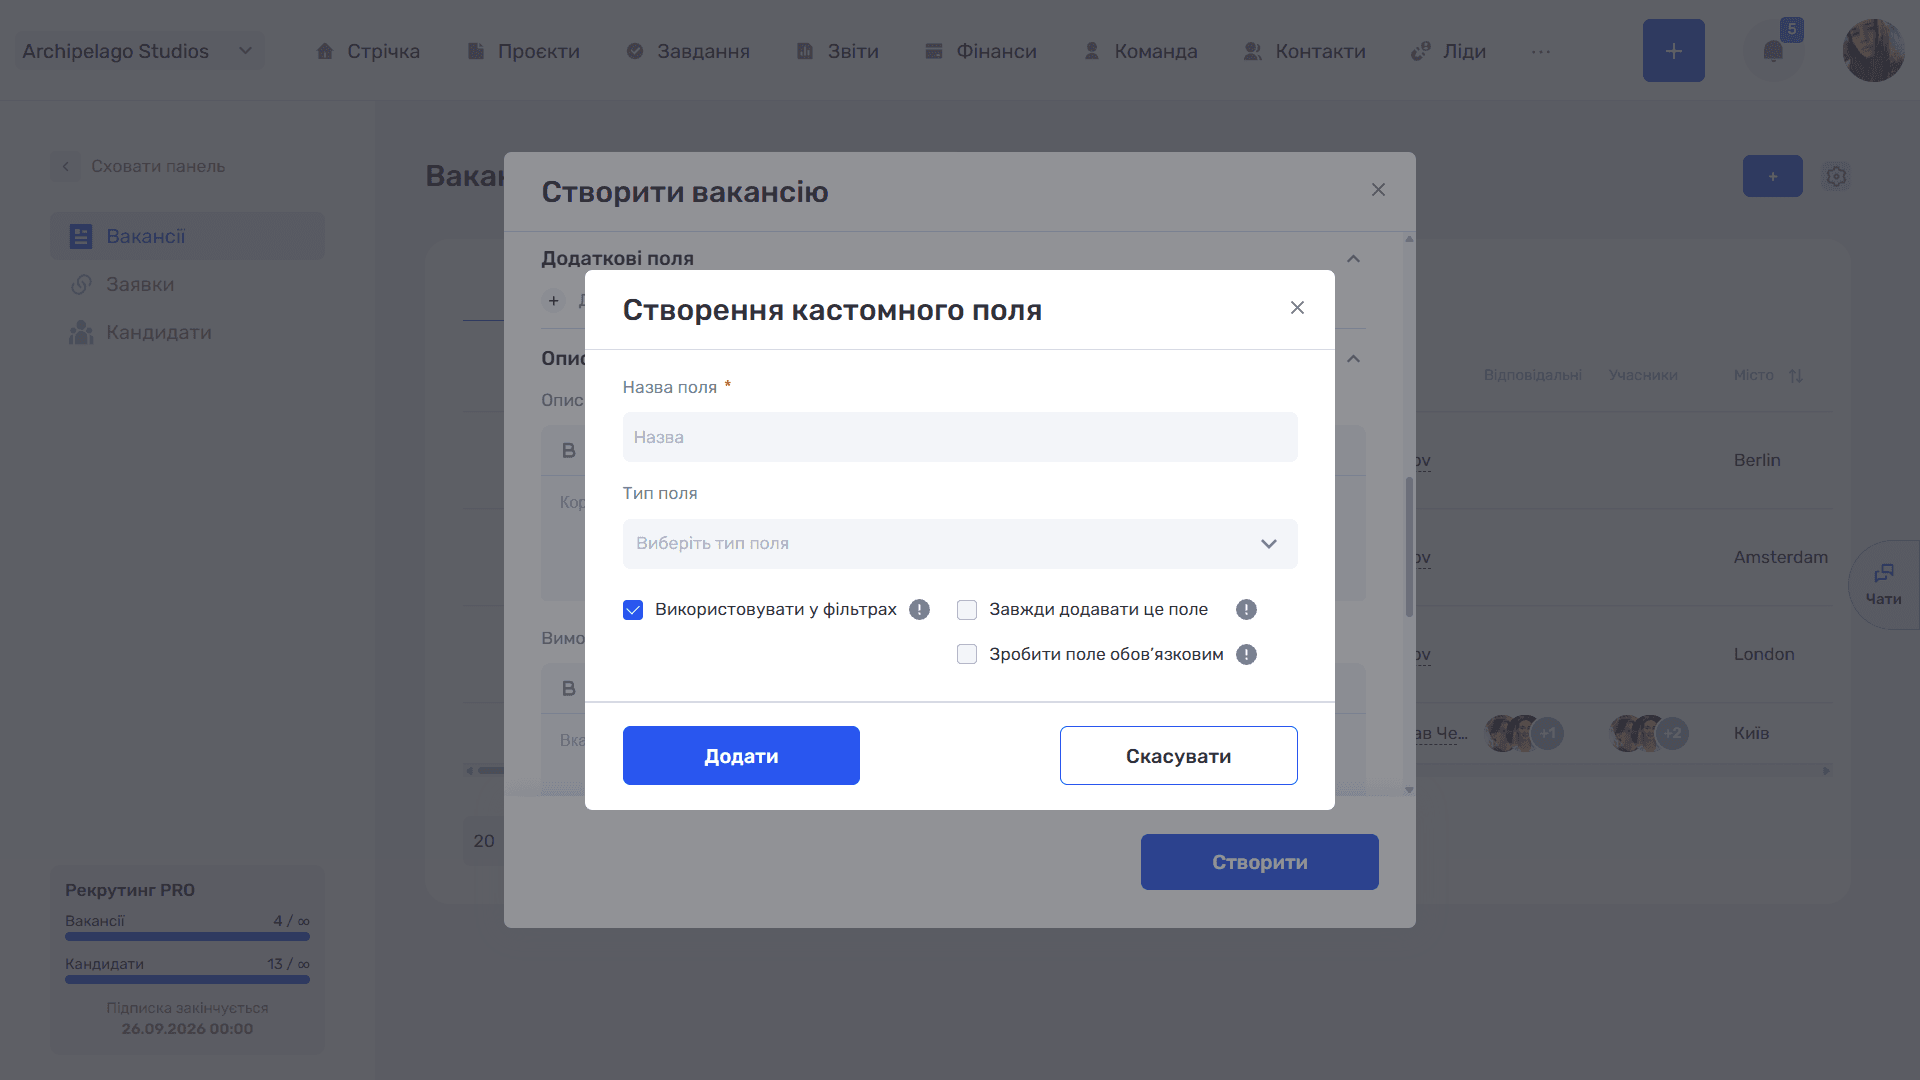
Create additional field opens the Create custom field window:
- Field name (required);
- Field type — from the list of types;
- Use in filters — the field becomes available in the filter panel;
- Always add this field — the field is added to every new vacancy;
- Make the field required — the vacancy cannot be saved without it.
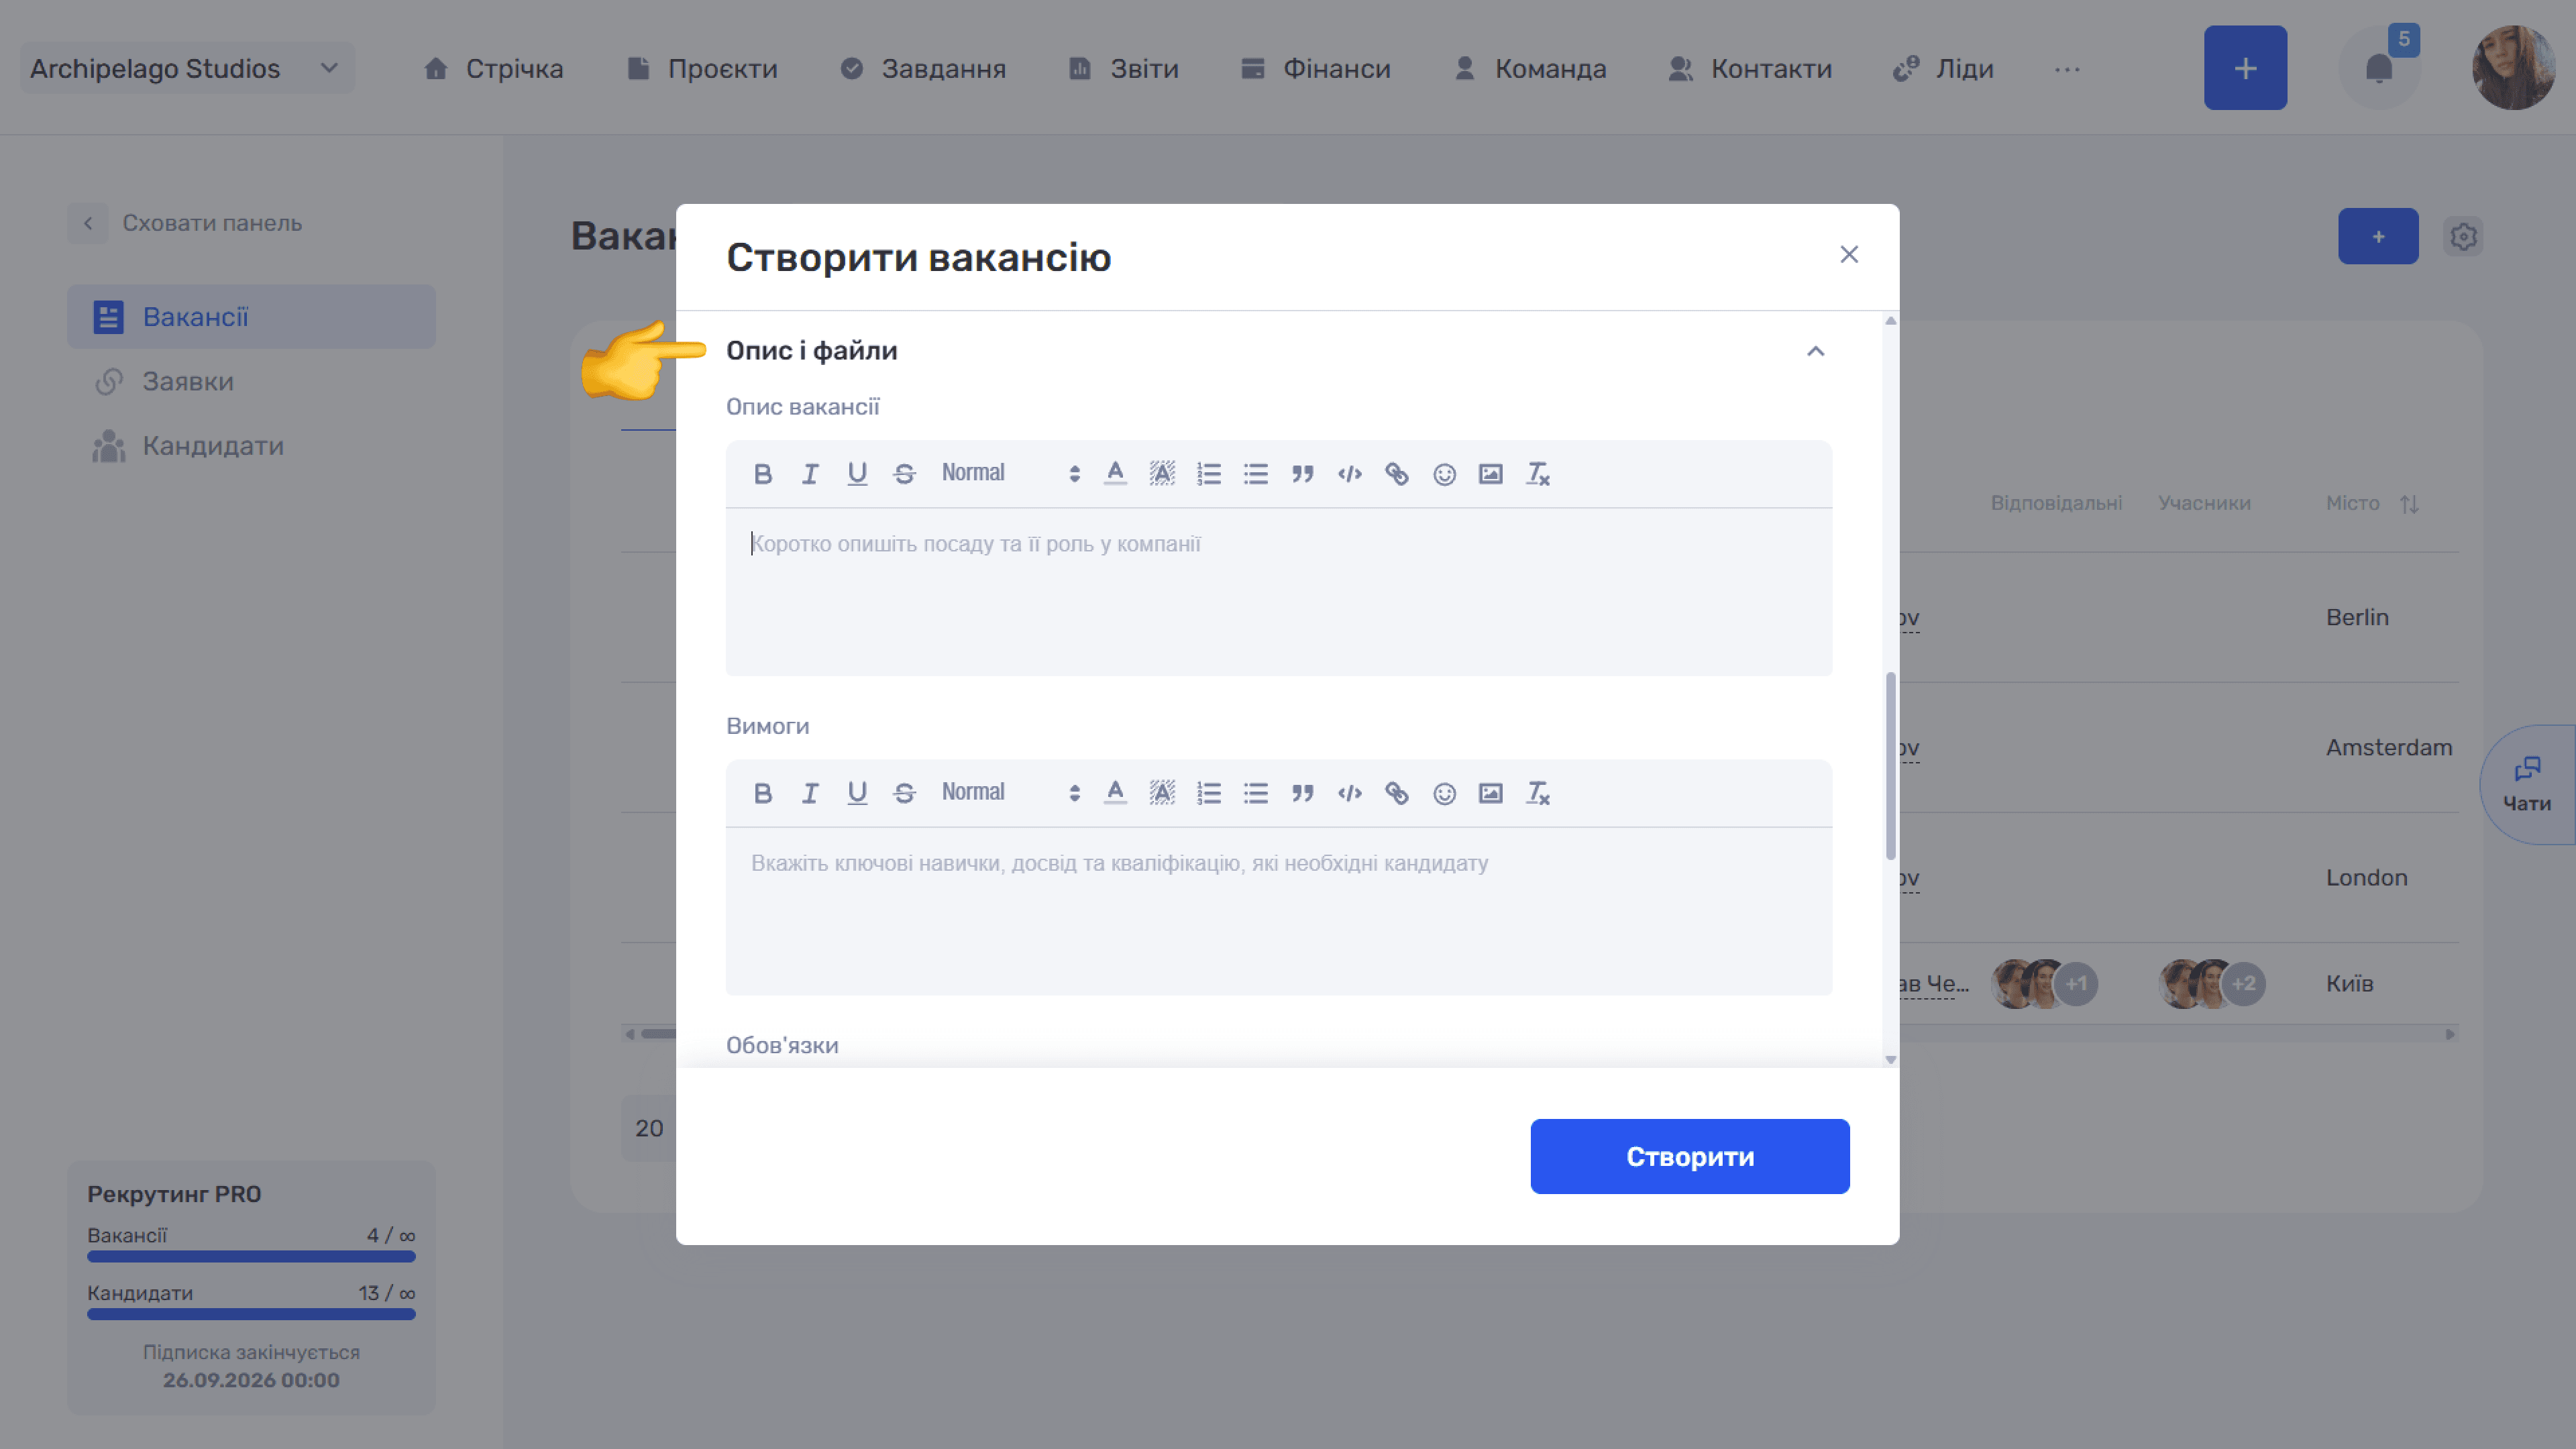
Description and files
A collapsible block with four text editors:
- Vacancy description — briefly about the position and its role in the company;
- Requirements — key skills, experience, and qualifications;
- Responsibilities — the main tasks of the position;
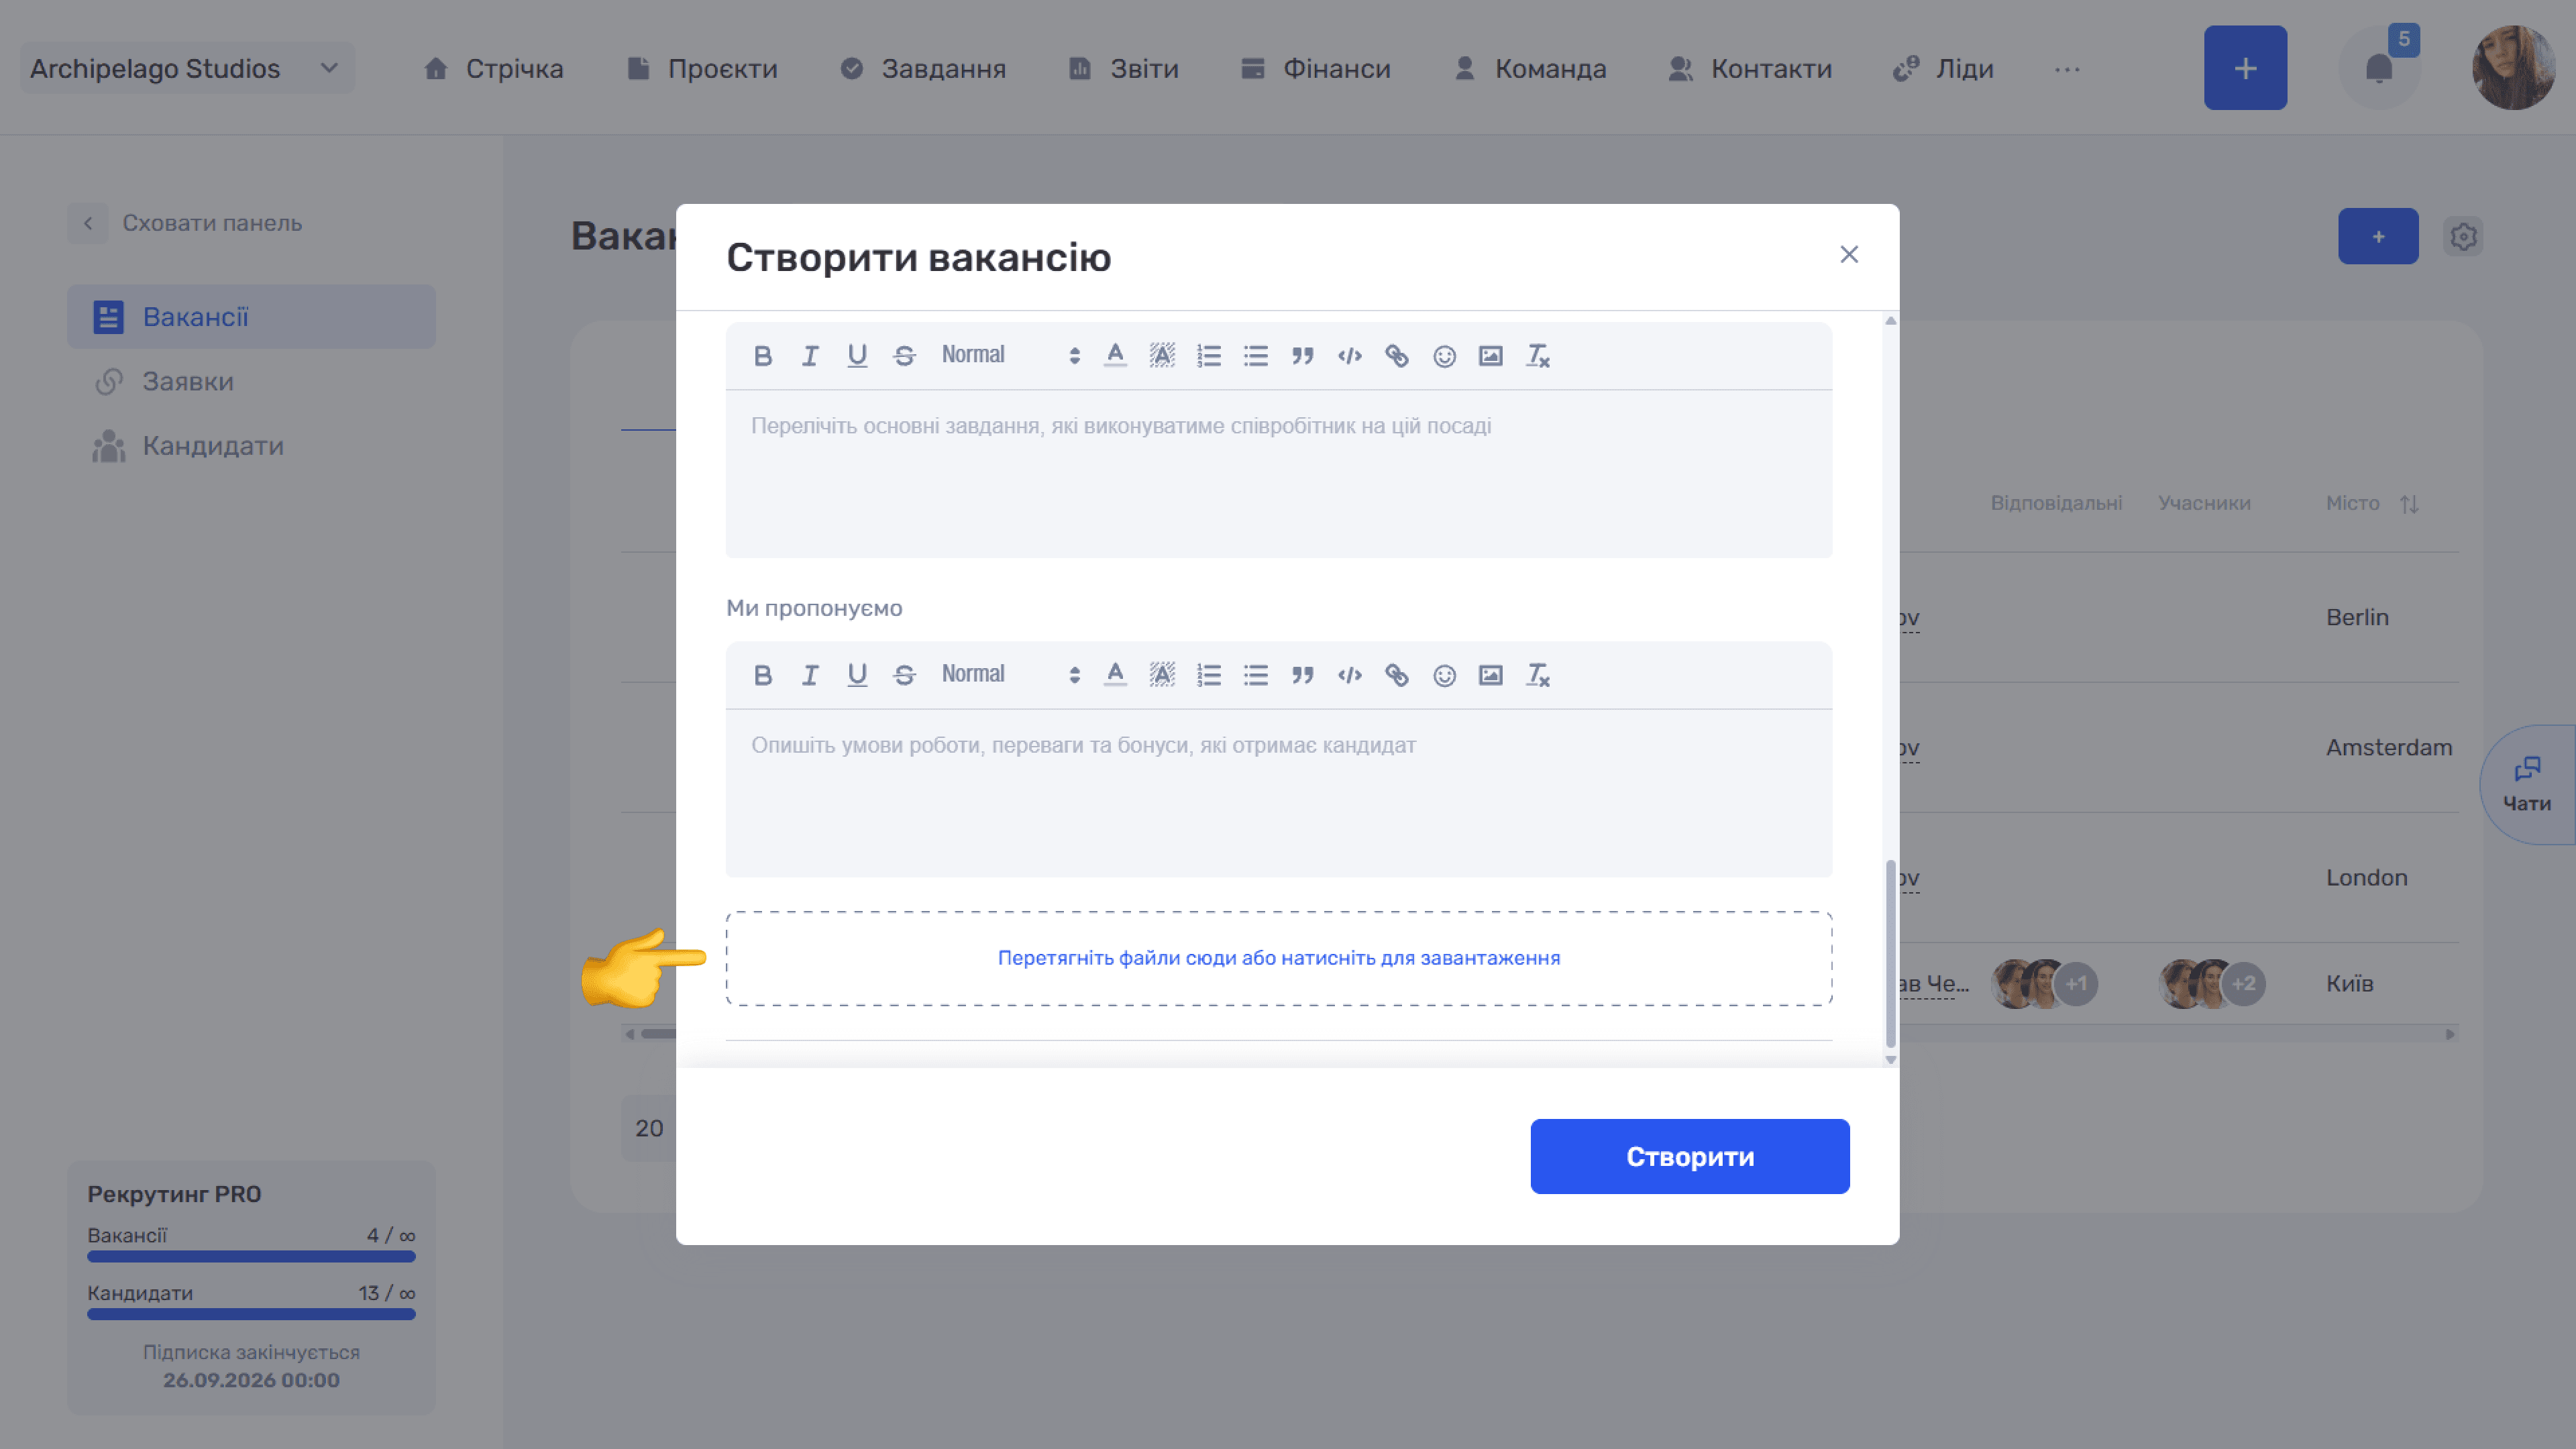
- We offer — working conditions, benefits, and bonuses.
At the bottom is the Drag files here or click to upload zone.
The Create button saves the vacancy.
Vacancy card
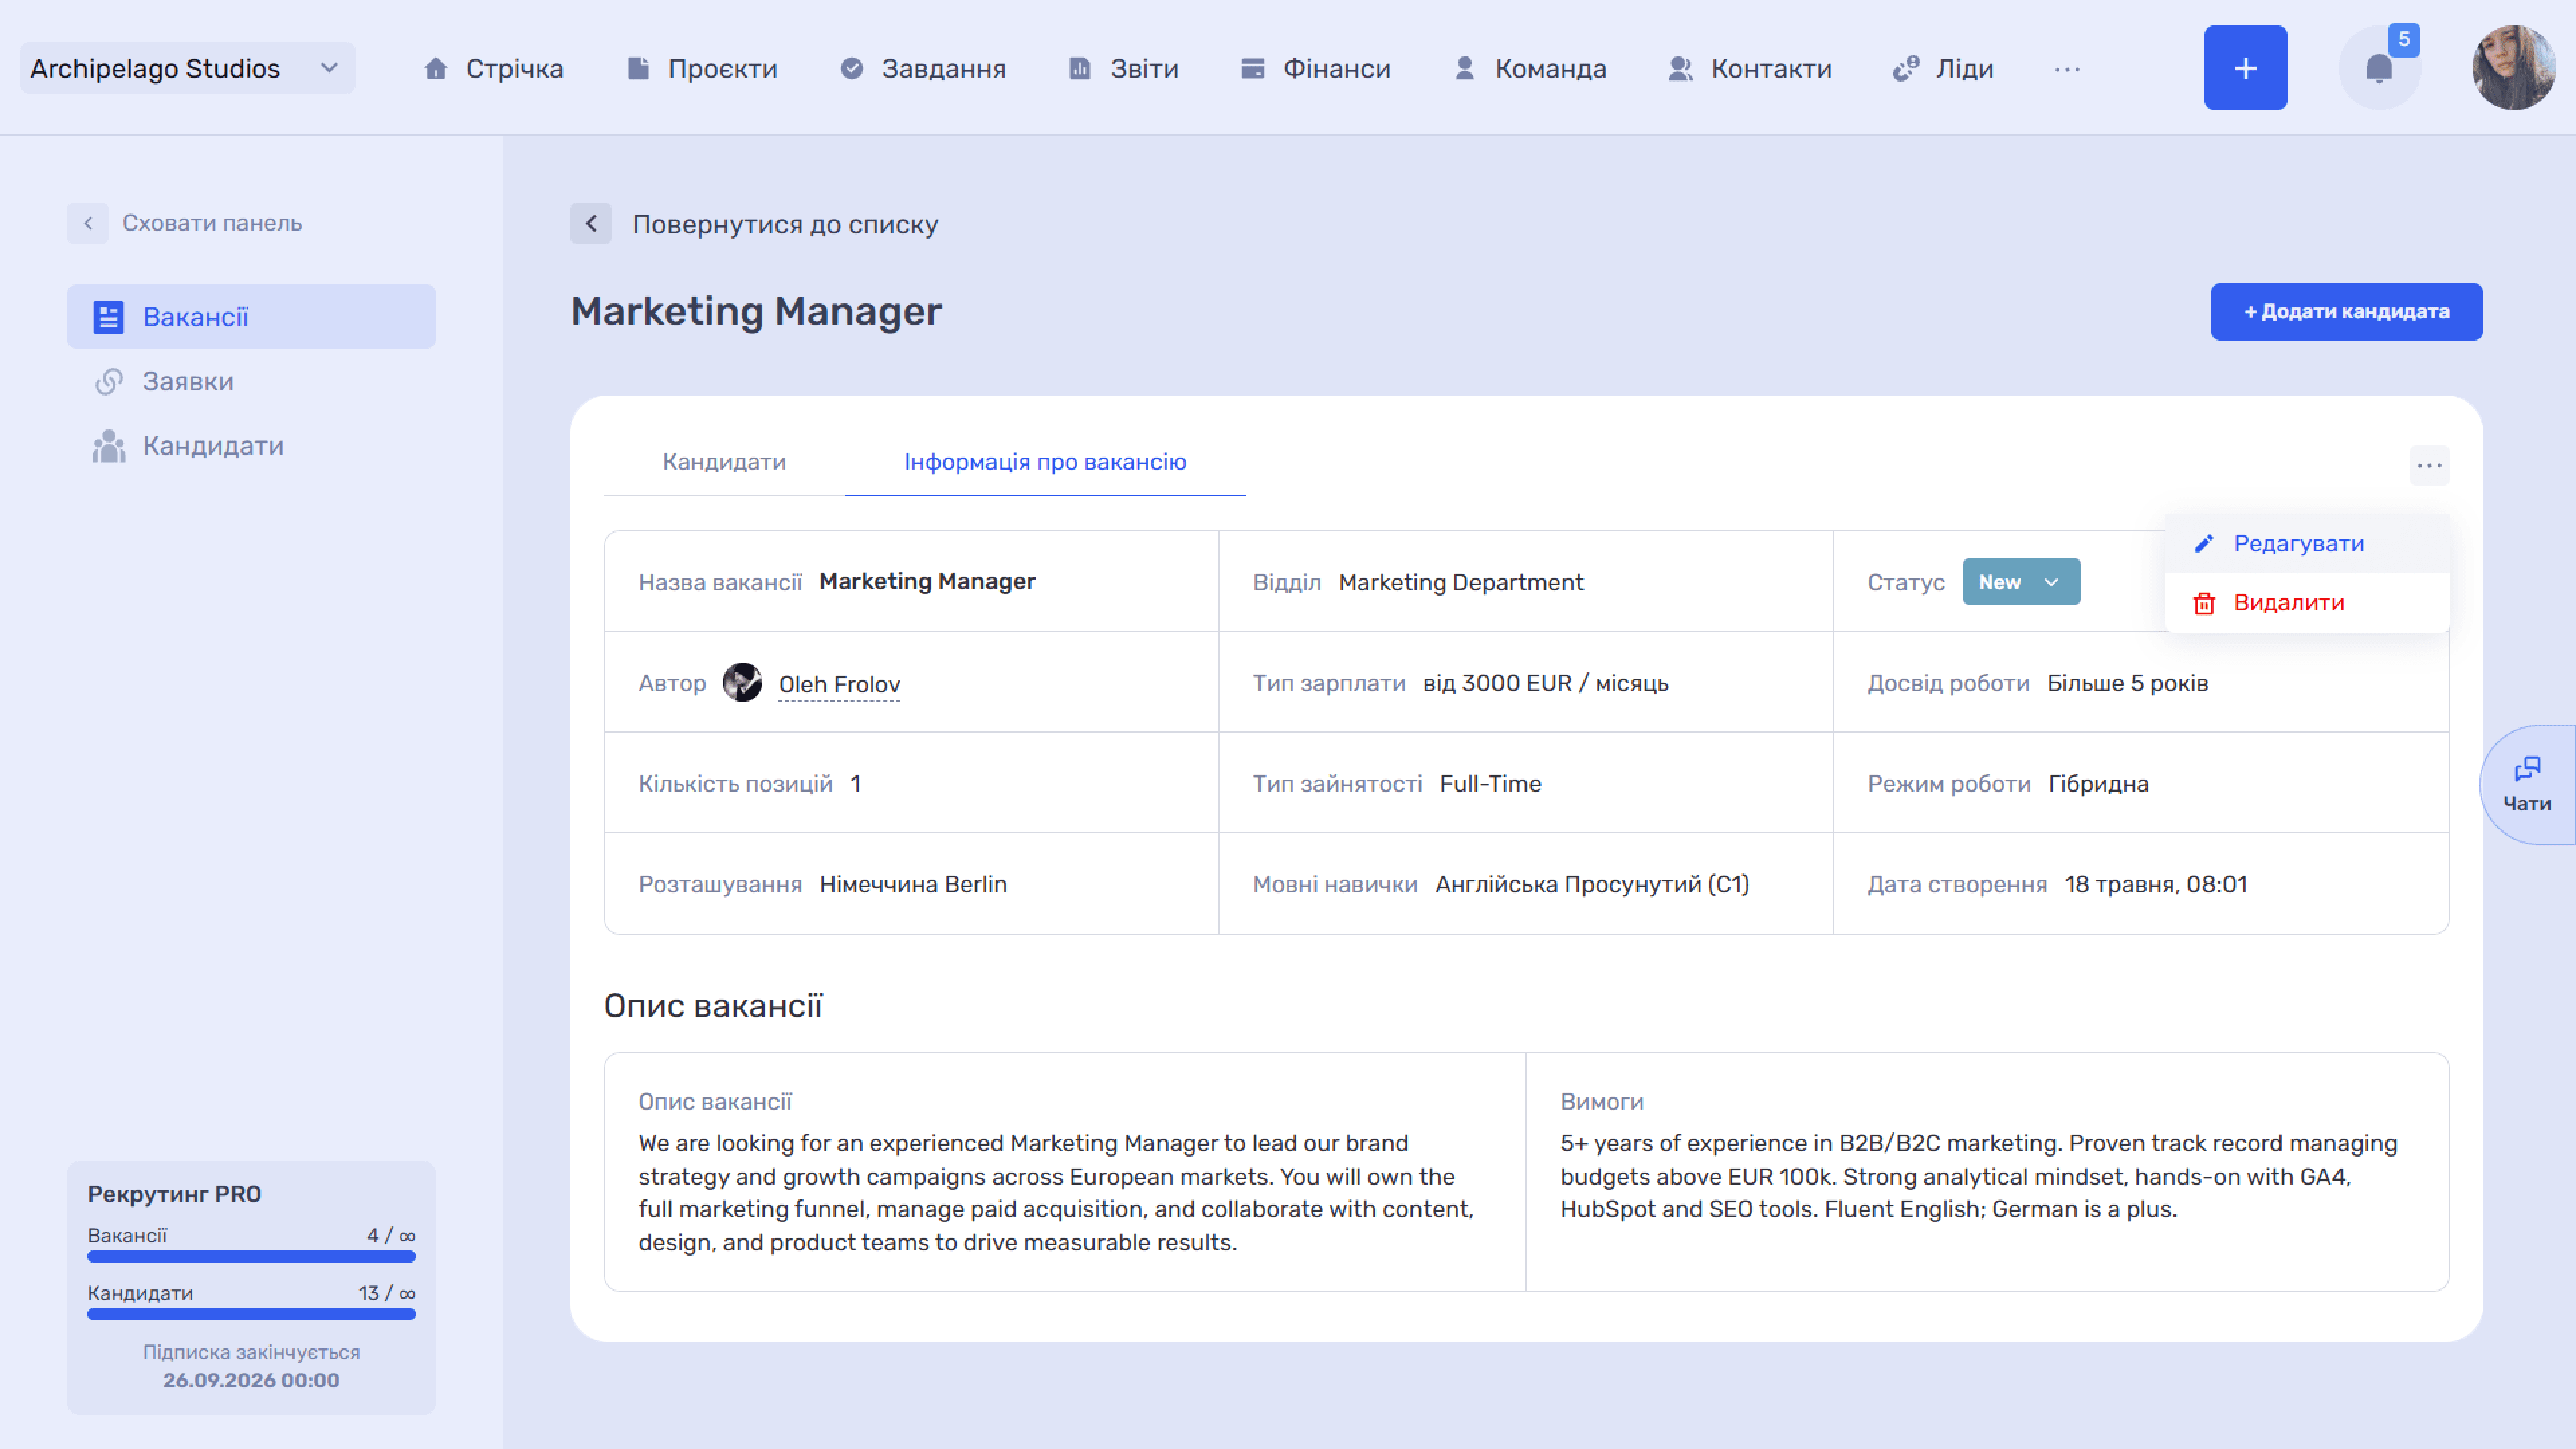
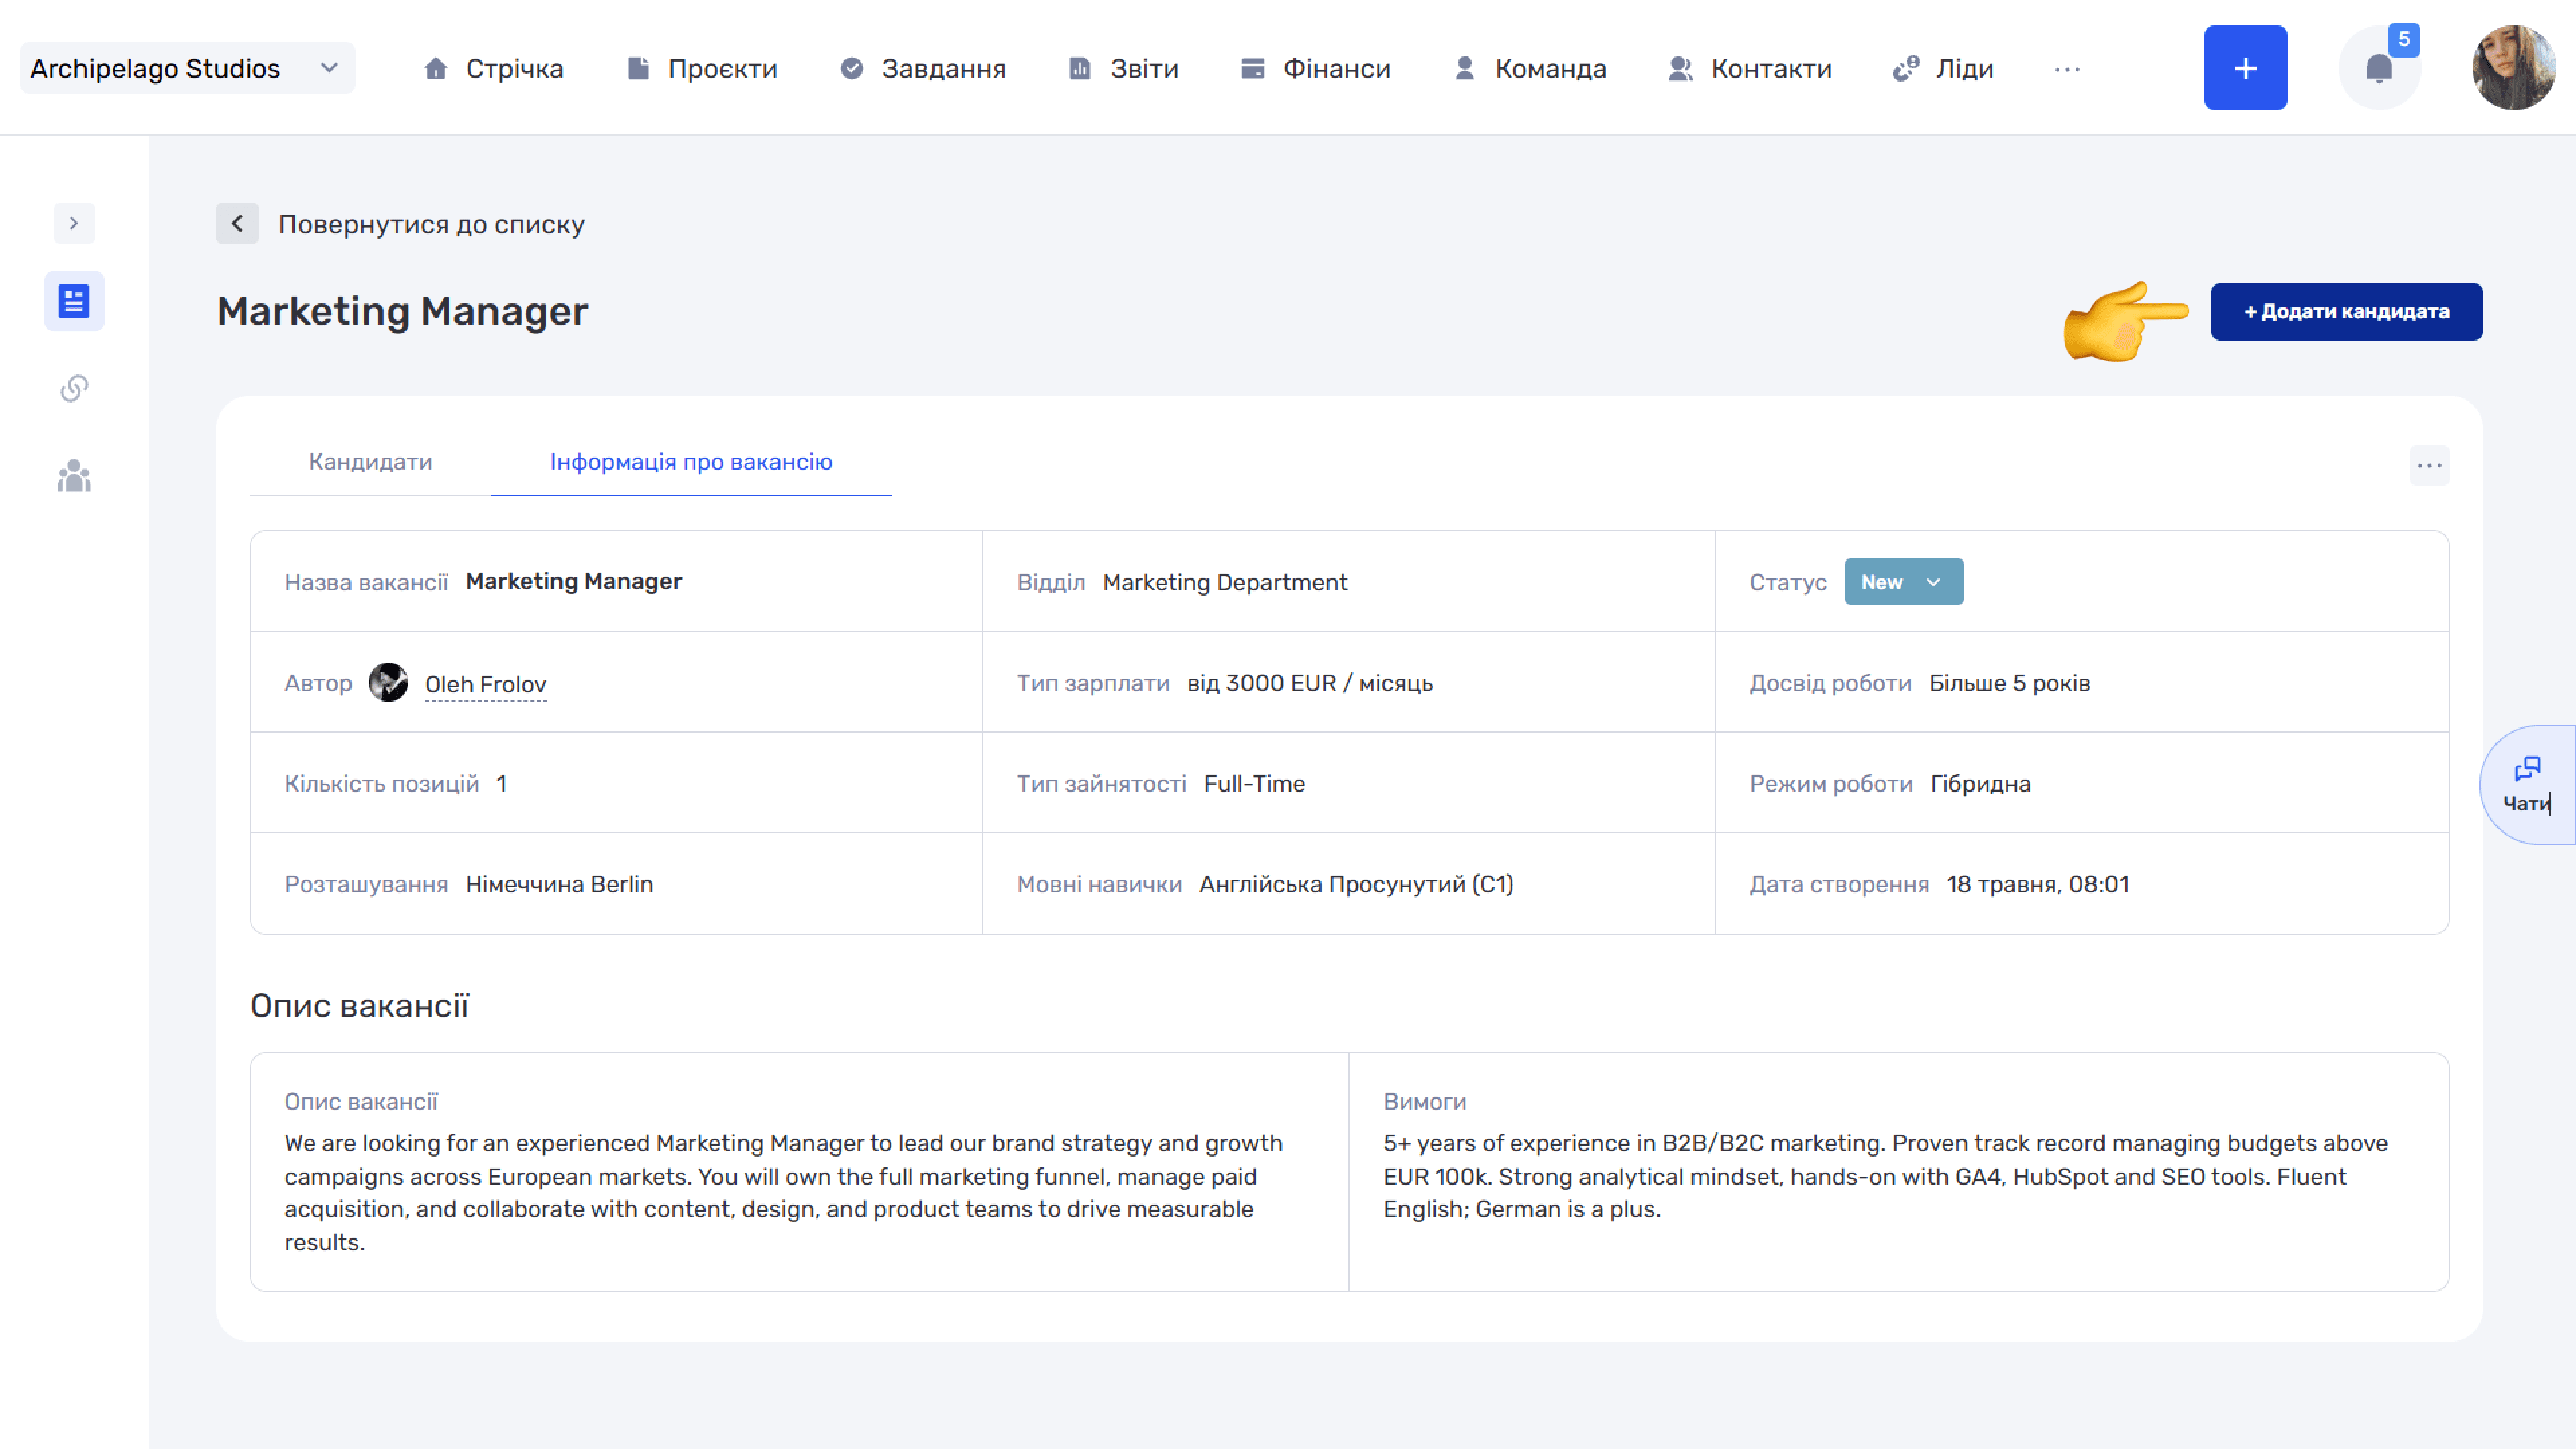
Clicking the name in the list opens the card. At the top are the Back to list link, the vacancy name, search, Filters, the + Add candidate button, and the settings icon. Below are two tabs: Candidates and Vacancy information.
Vacancy information
A summary of the vacancy: Vacancy name, Department, Status (can be changed right here), Author, Recruiters, Members, Salary type, Work experience, Number of positions, Employment type, Work mode, Location, Language skills, and Created.
The ... icon on the right opens a menu with two actions: Edit and Delete.
Vacancy candidates
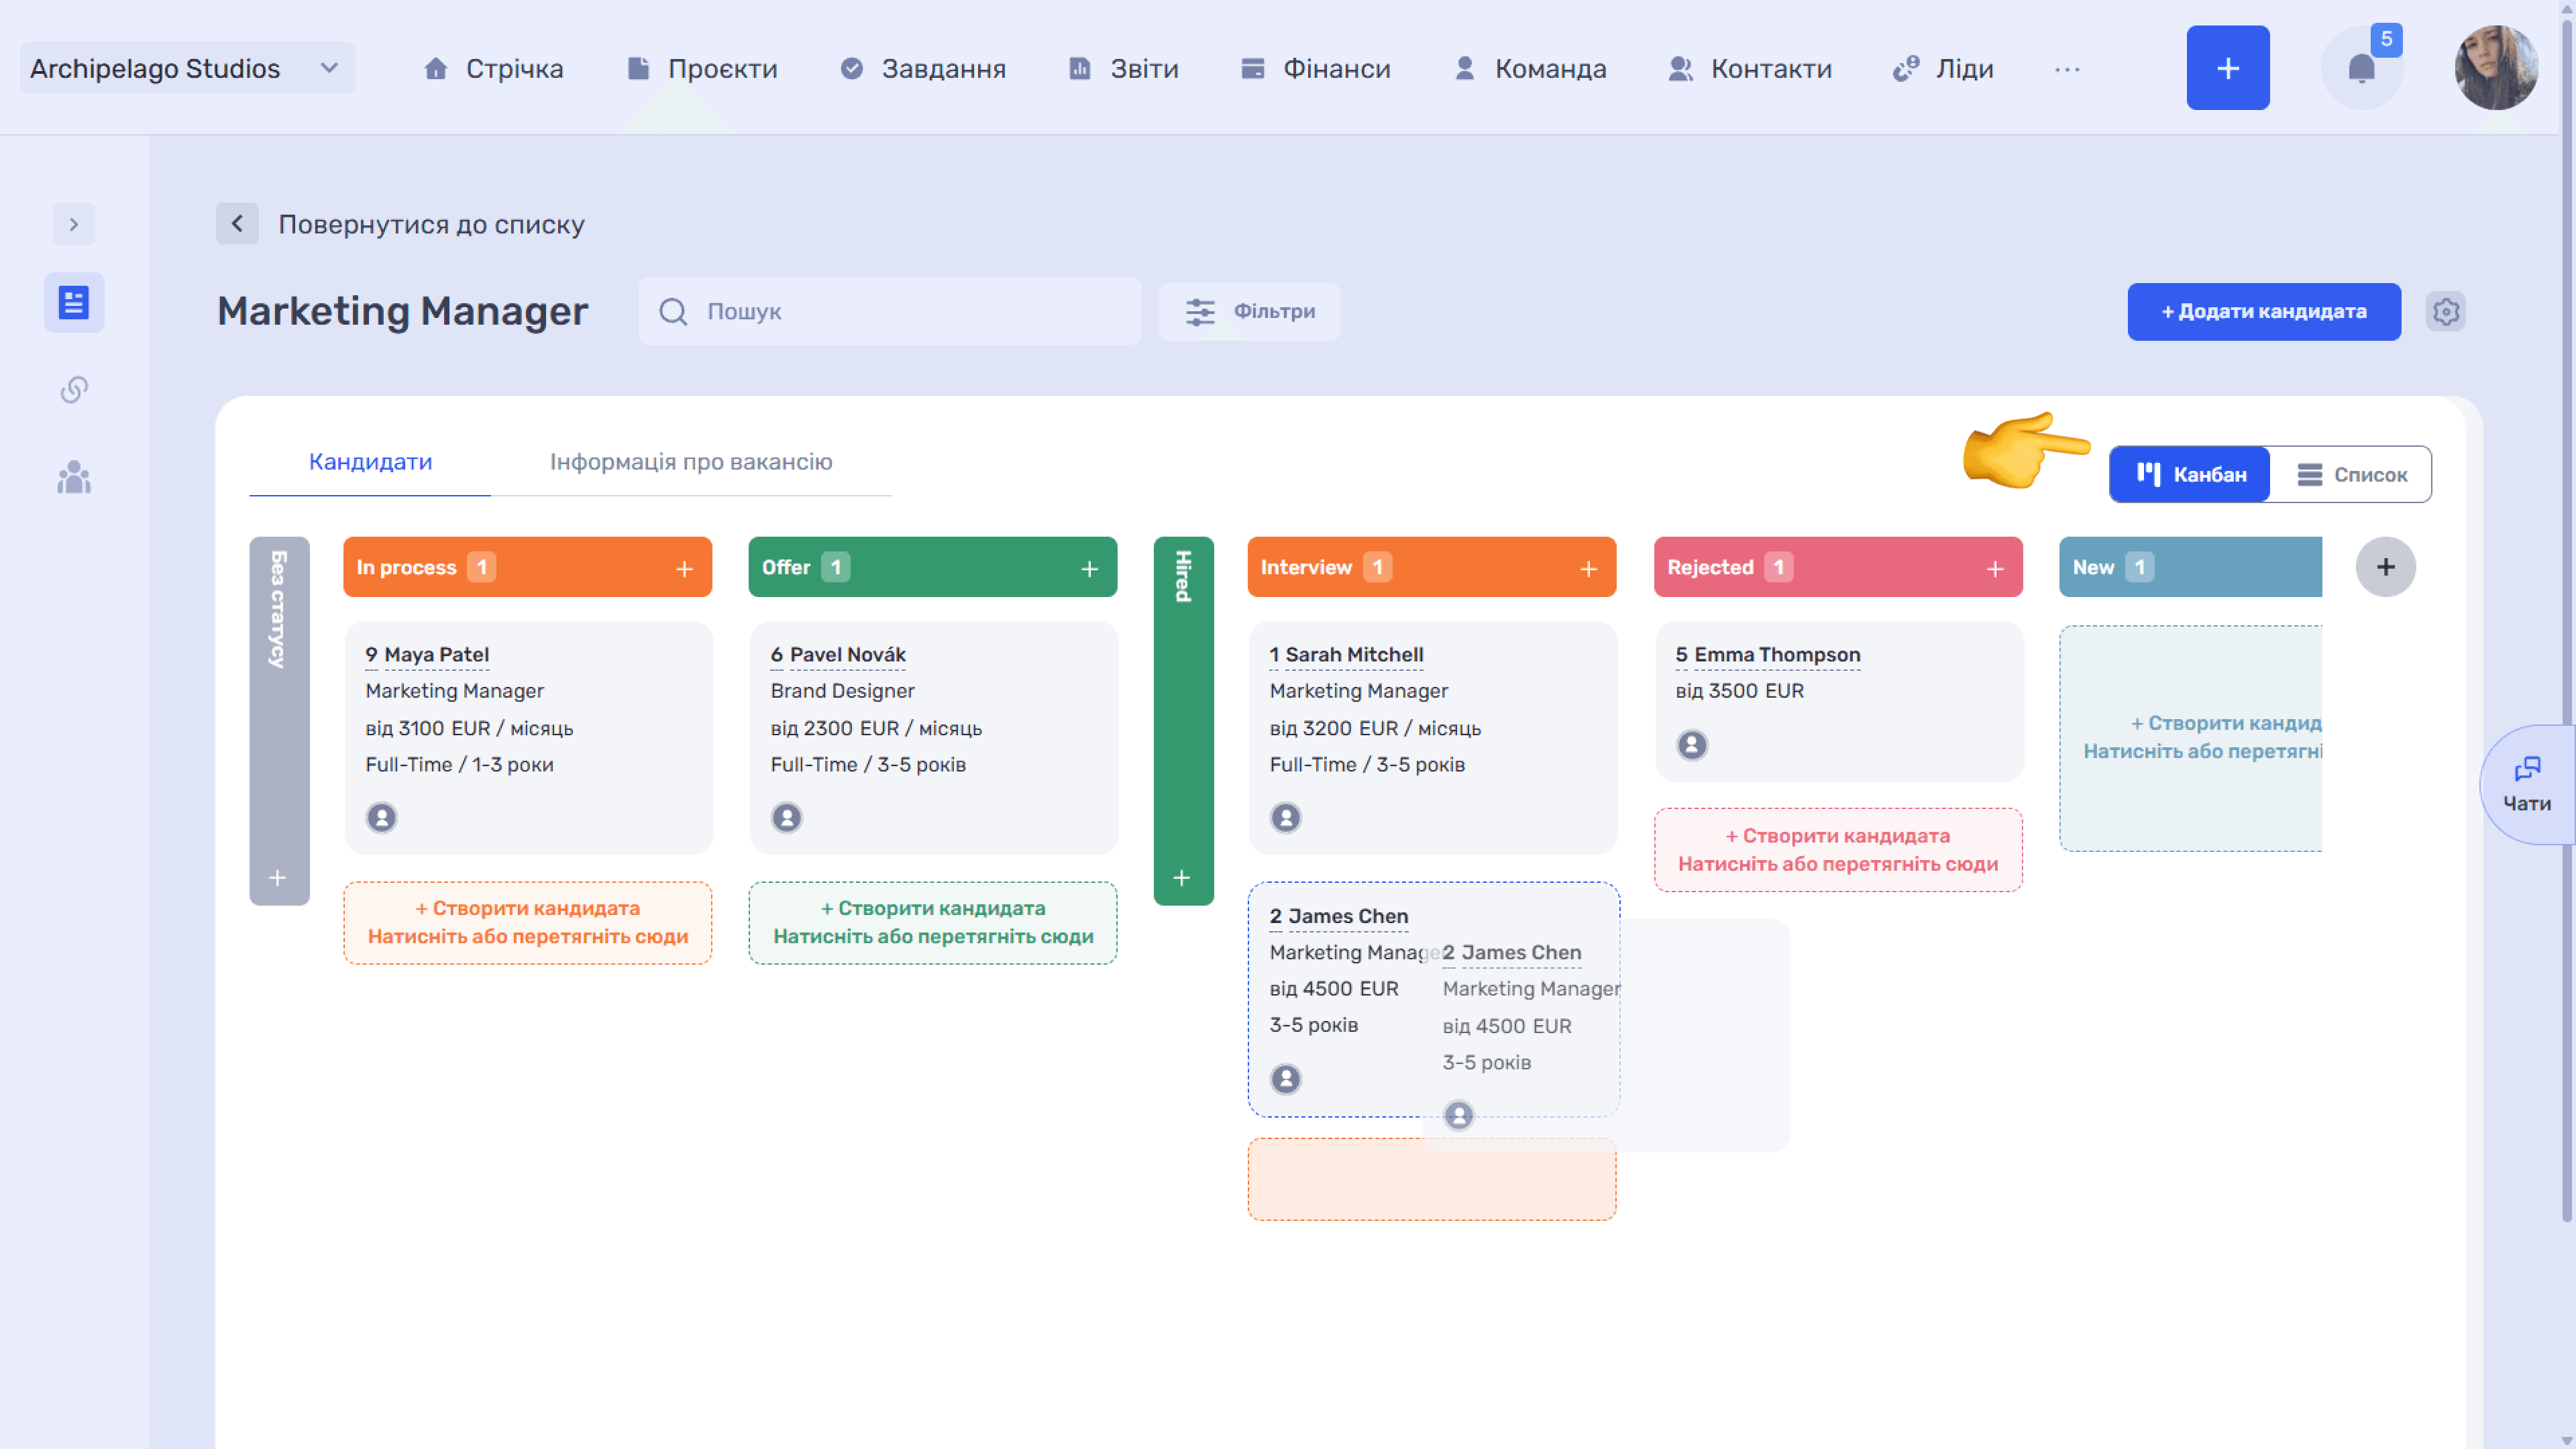
The tab shows candidates who applied or were added to this vacancy. The switch on the right sets the view: Kanban or List.
The List has the same columns as the Candidates section, and the Status column here shows the selection stage for this vacancy.
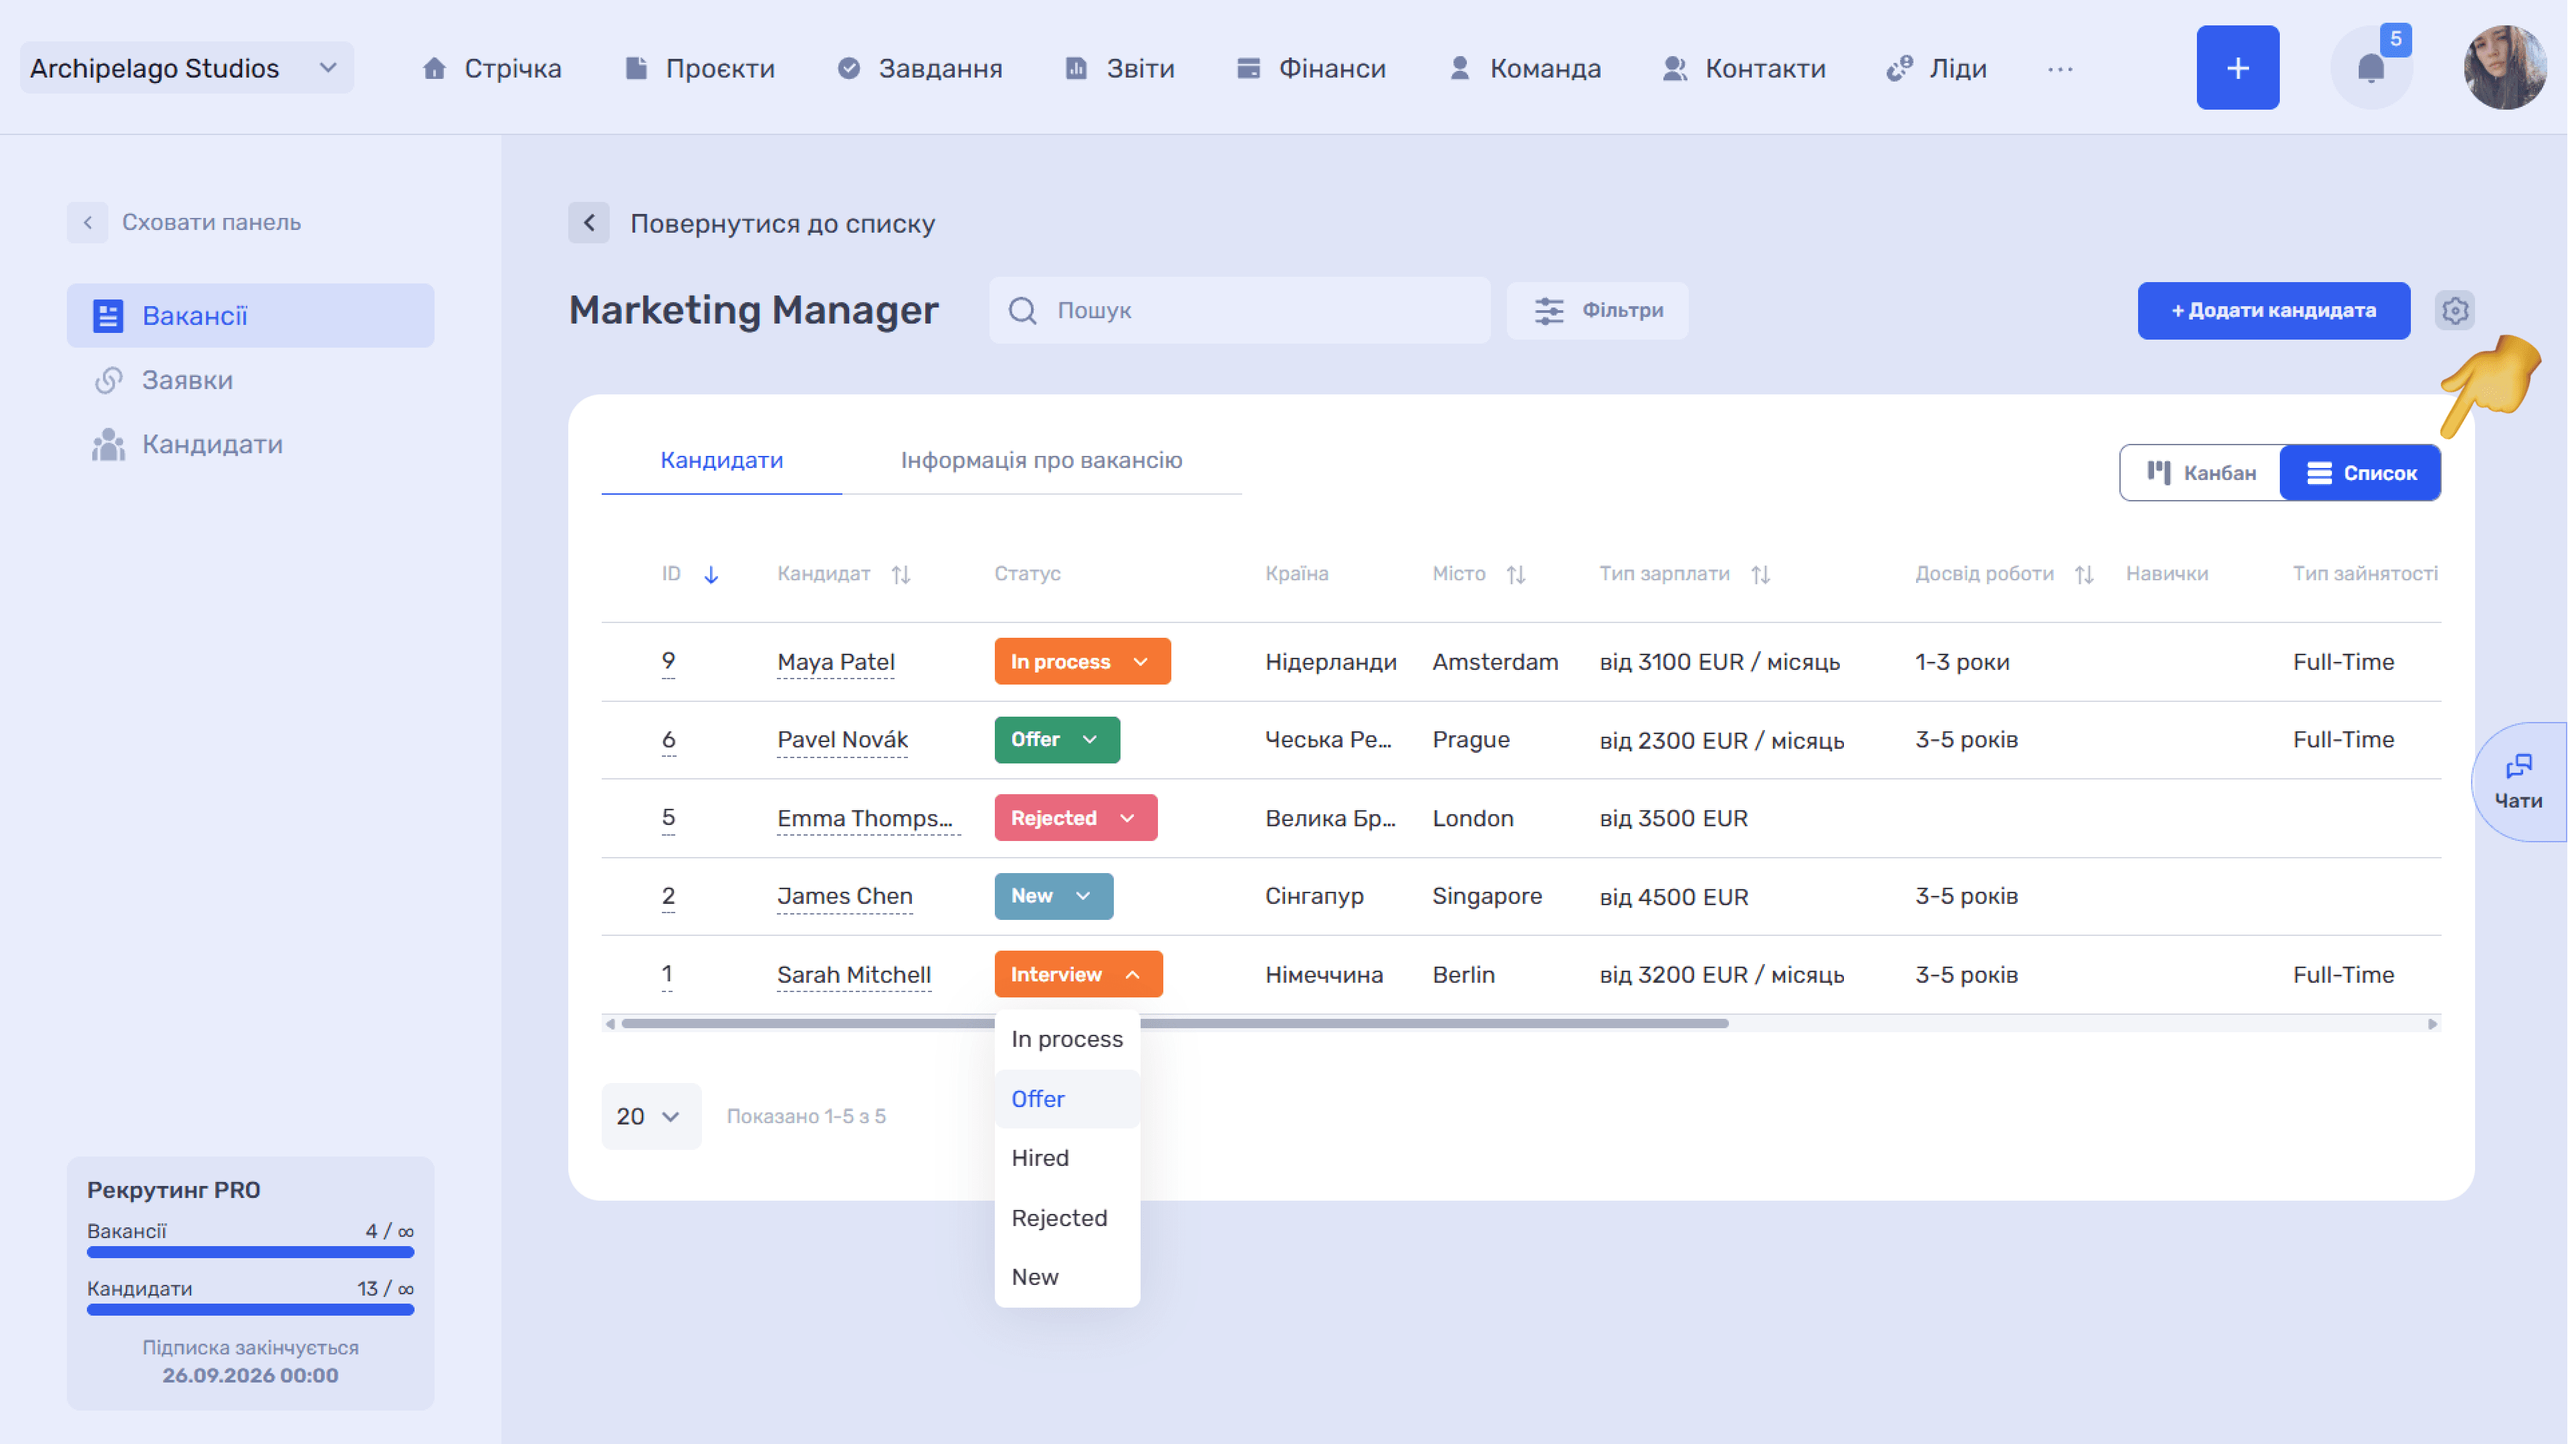
The Actions column has: 🗐 copy, edit, delete, convert to employee, ➜ attach to a vacancy.
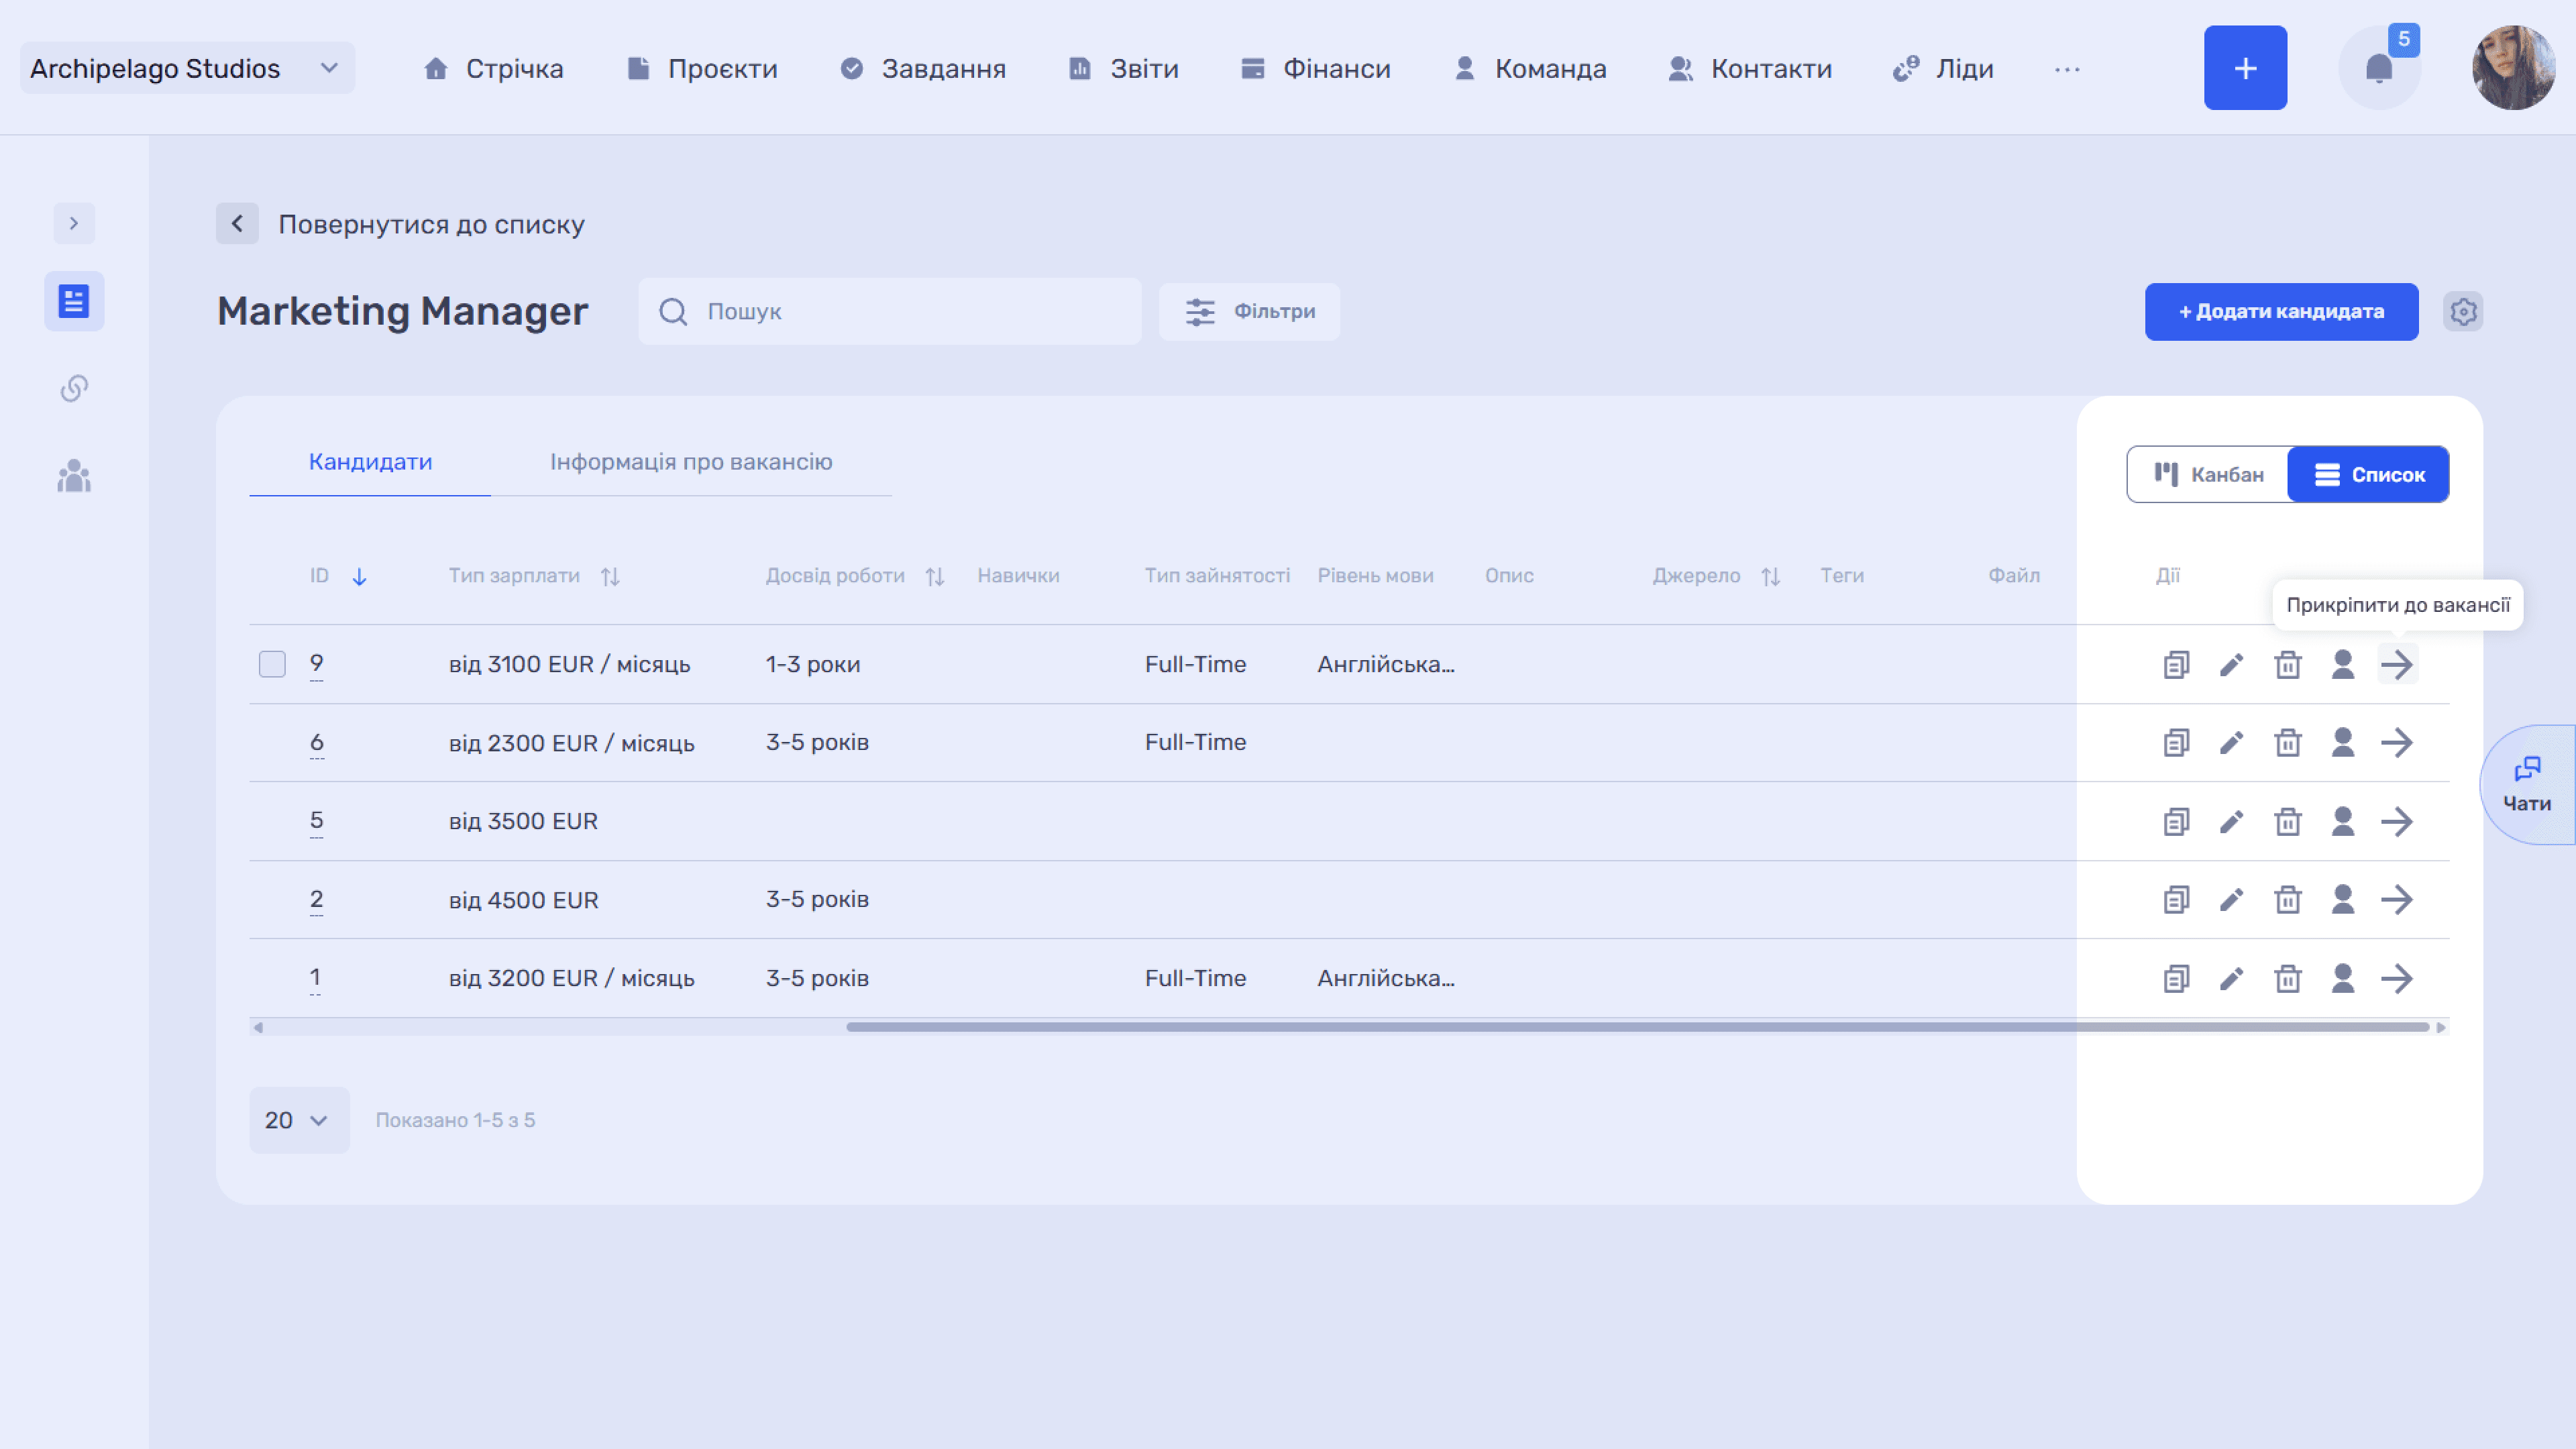
To quickly find and narrow down candidates, the tab has filters by Candidate, Work experience, Position, Tags, Skills, Country, and City. Several filters can be applied at once.
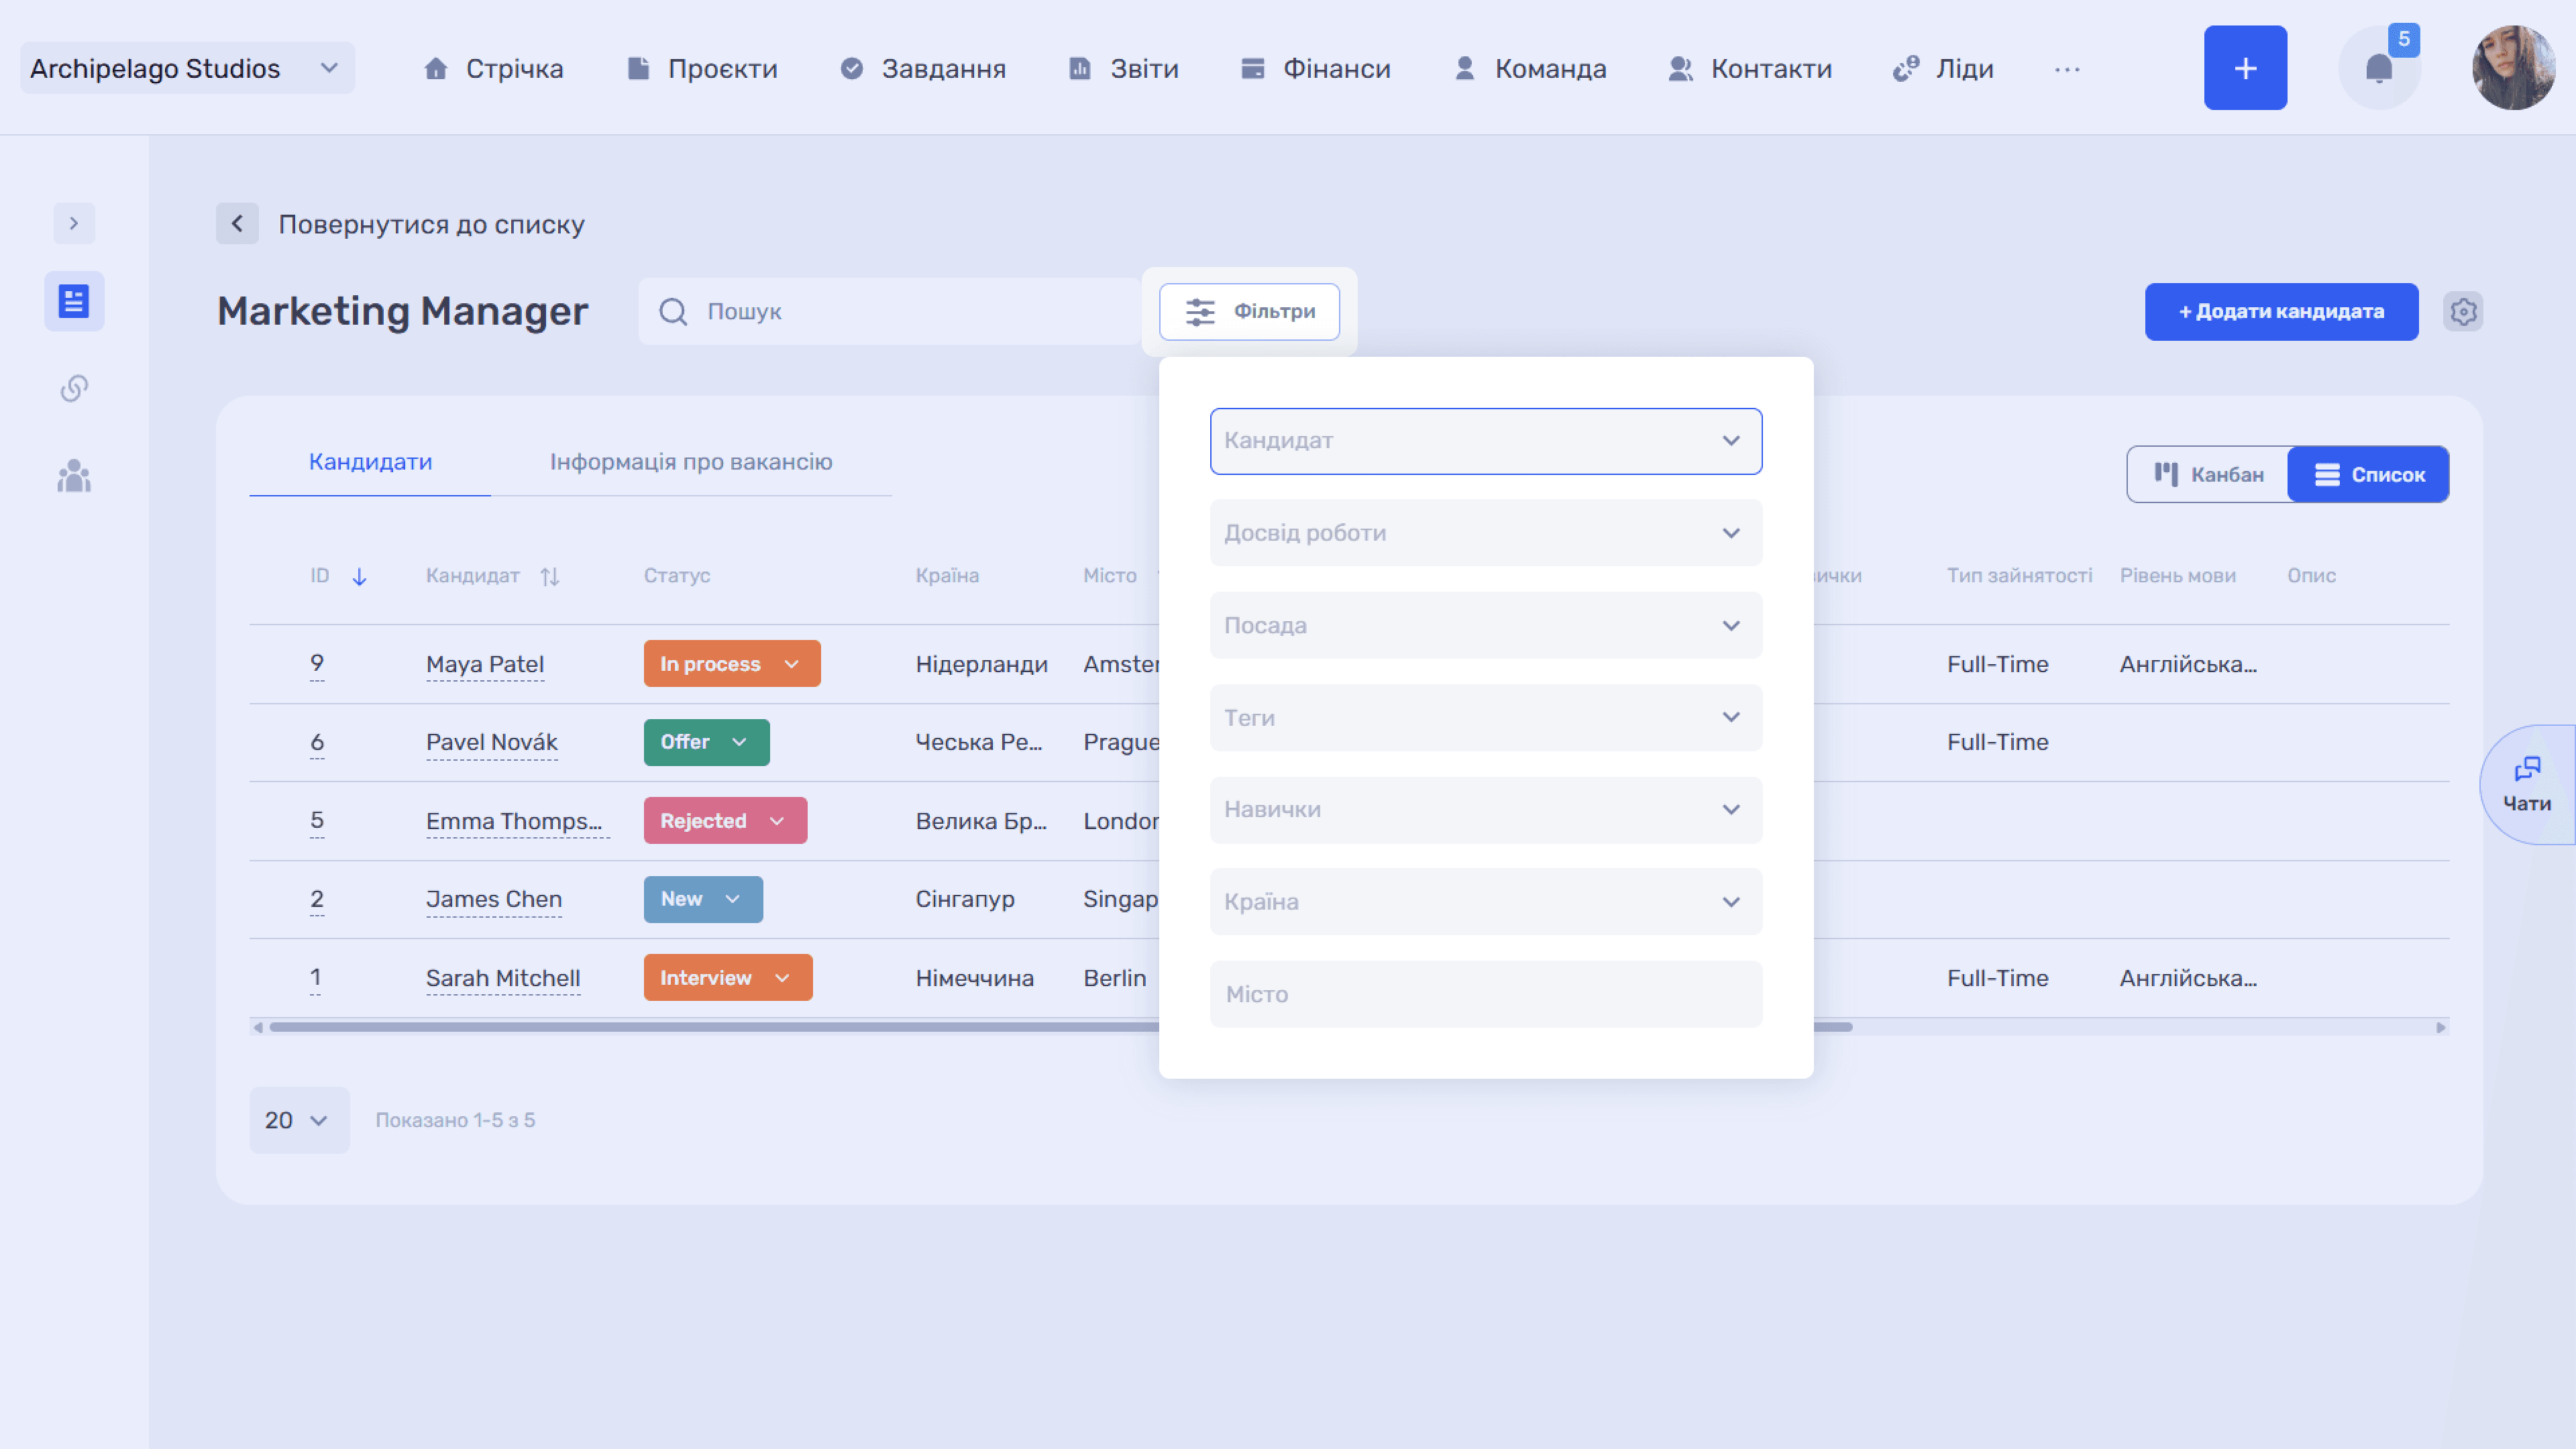
The Kanban lays candidates out in stage columns: No status, New, In process, Interview, Offer, Hired, Rejected. Empty columns are collapsed into narrow vertical strips. Each column header has a counter and +, and a candidate card shows the ID, name, position, expected salary, employment type, and experience.
The + Create candidate / Click or drag here block lets you either create a candidate right in this status or drag an existing one. The + button to the right of all columns adds a new stage.
Adding a candidate
The + Add candidate button in the vacancy card and the + icon in a vacancy list row open the same Create candidate form — see Candidates.
Still have questions?
Maybe we haven't added this information yet. But you can always reach out:
Request a demo
Submit a request and we'll show you how the service works and its capabilities.
Book a demo