Applications
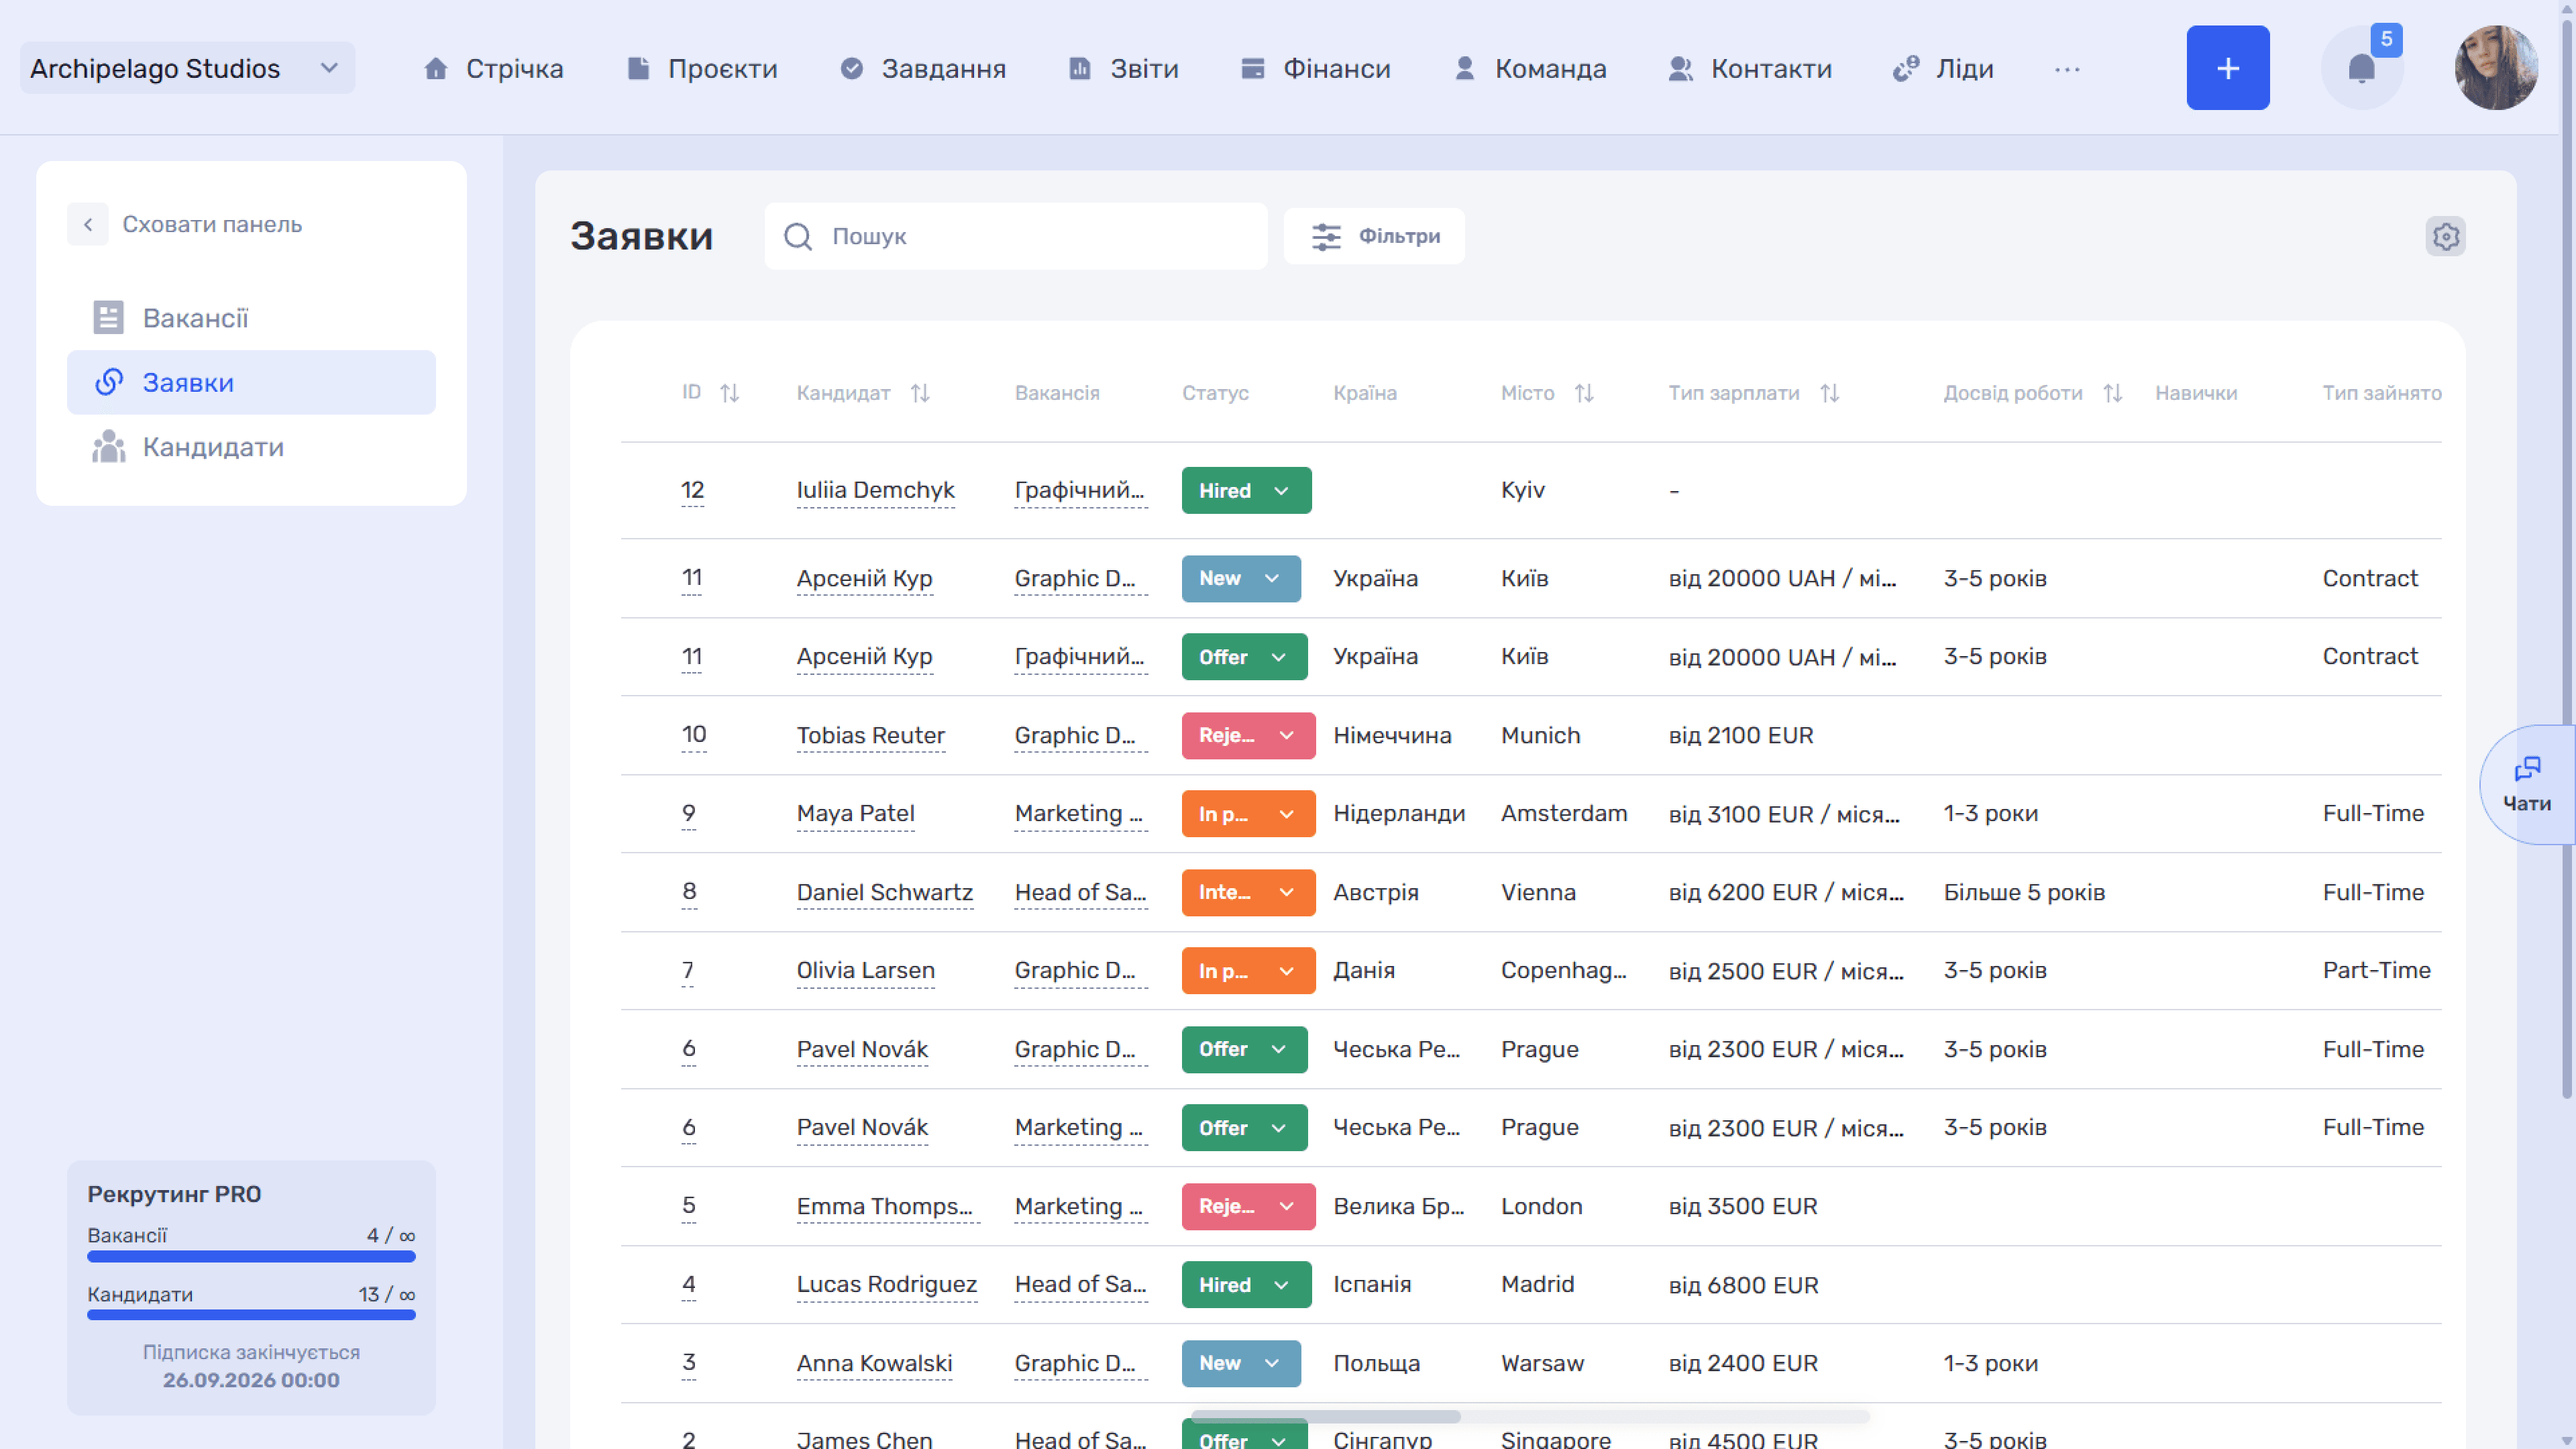
The section shows all "candidate — vacancy" links in one list. It is the recruiter's workspace: here you can see who is on which vacancy and at which stage.
How an application is created
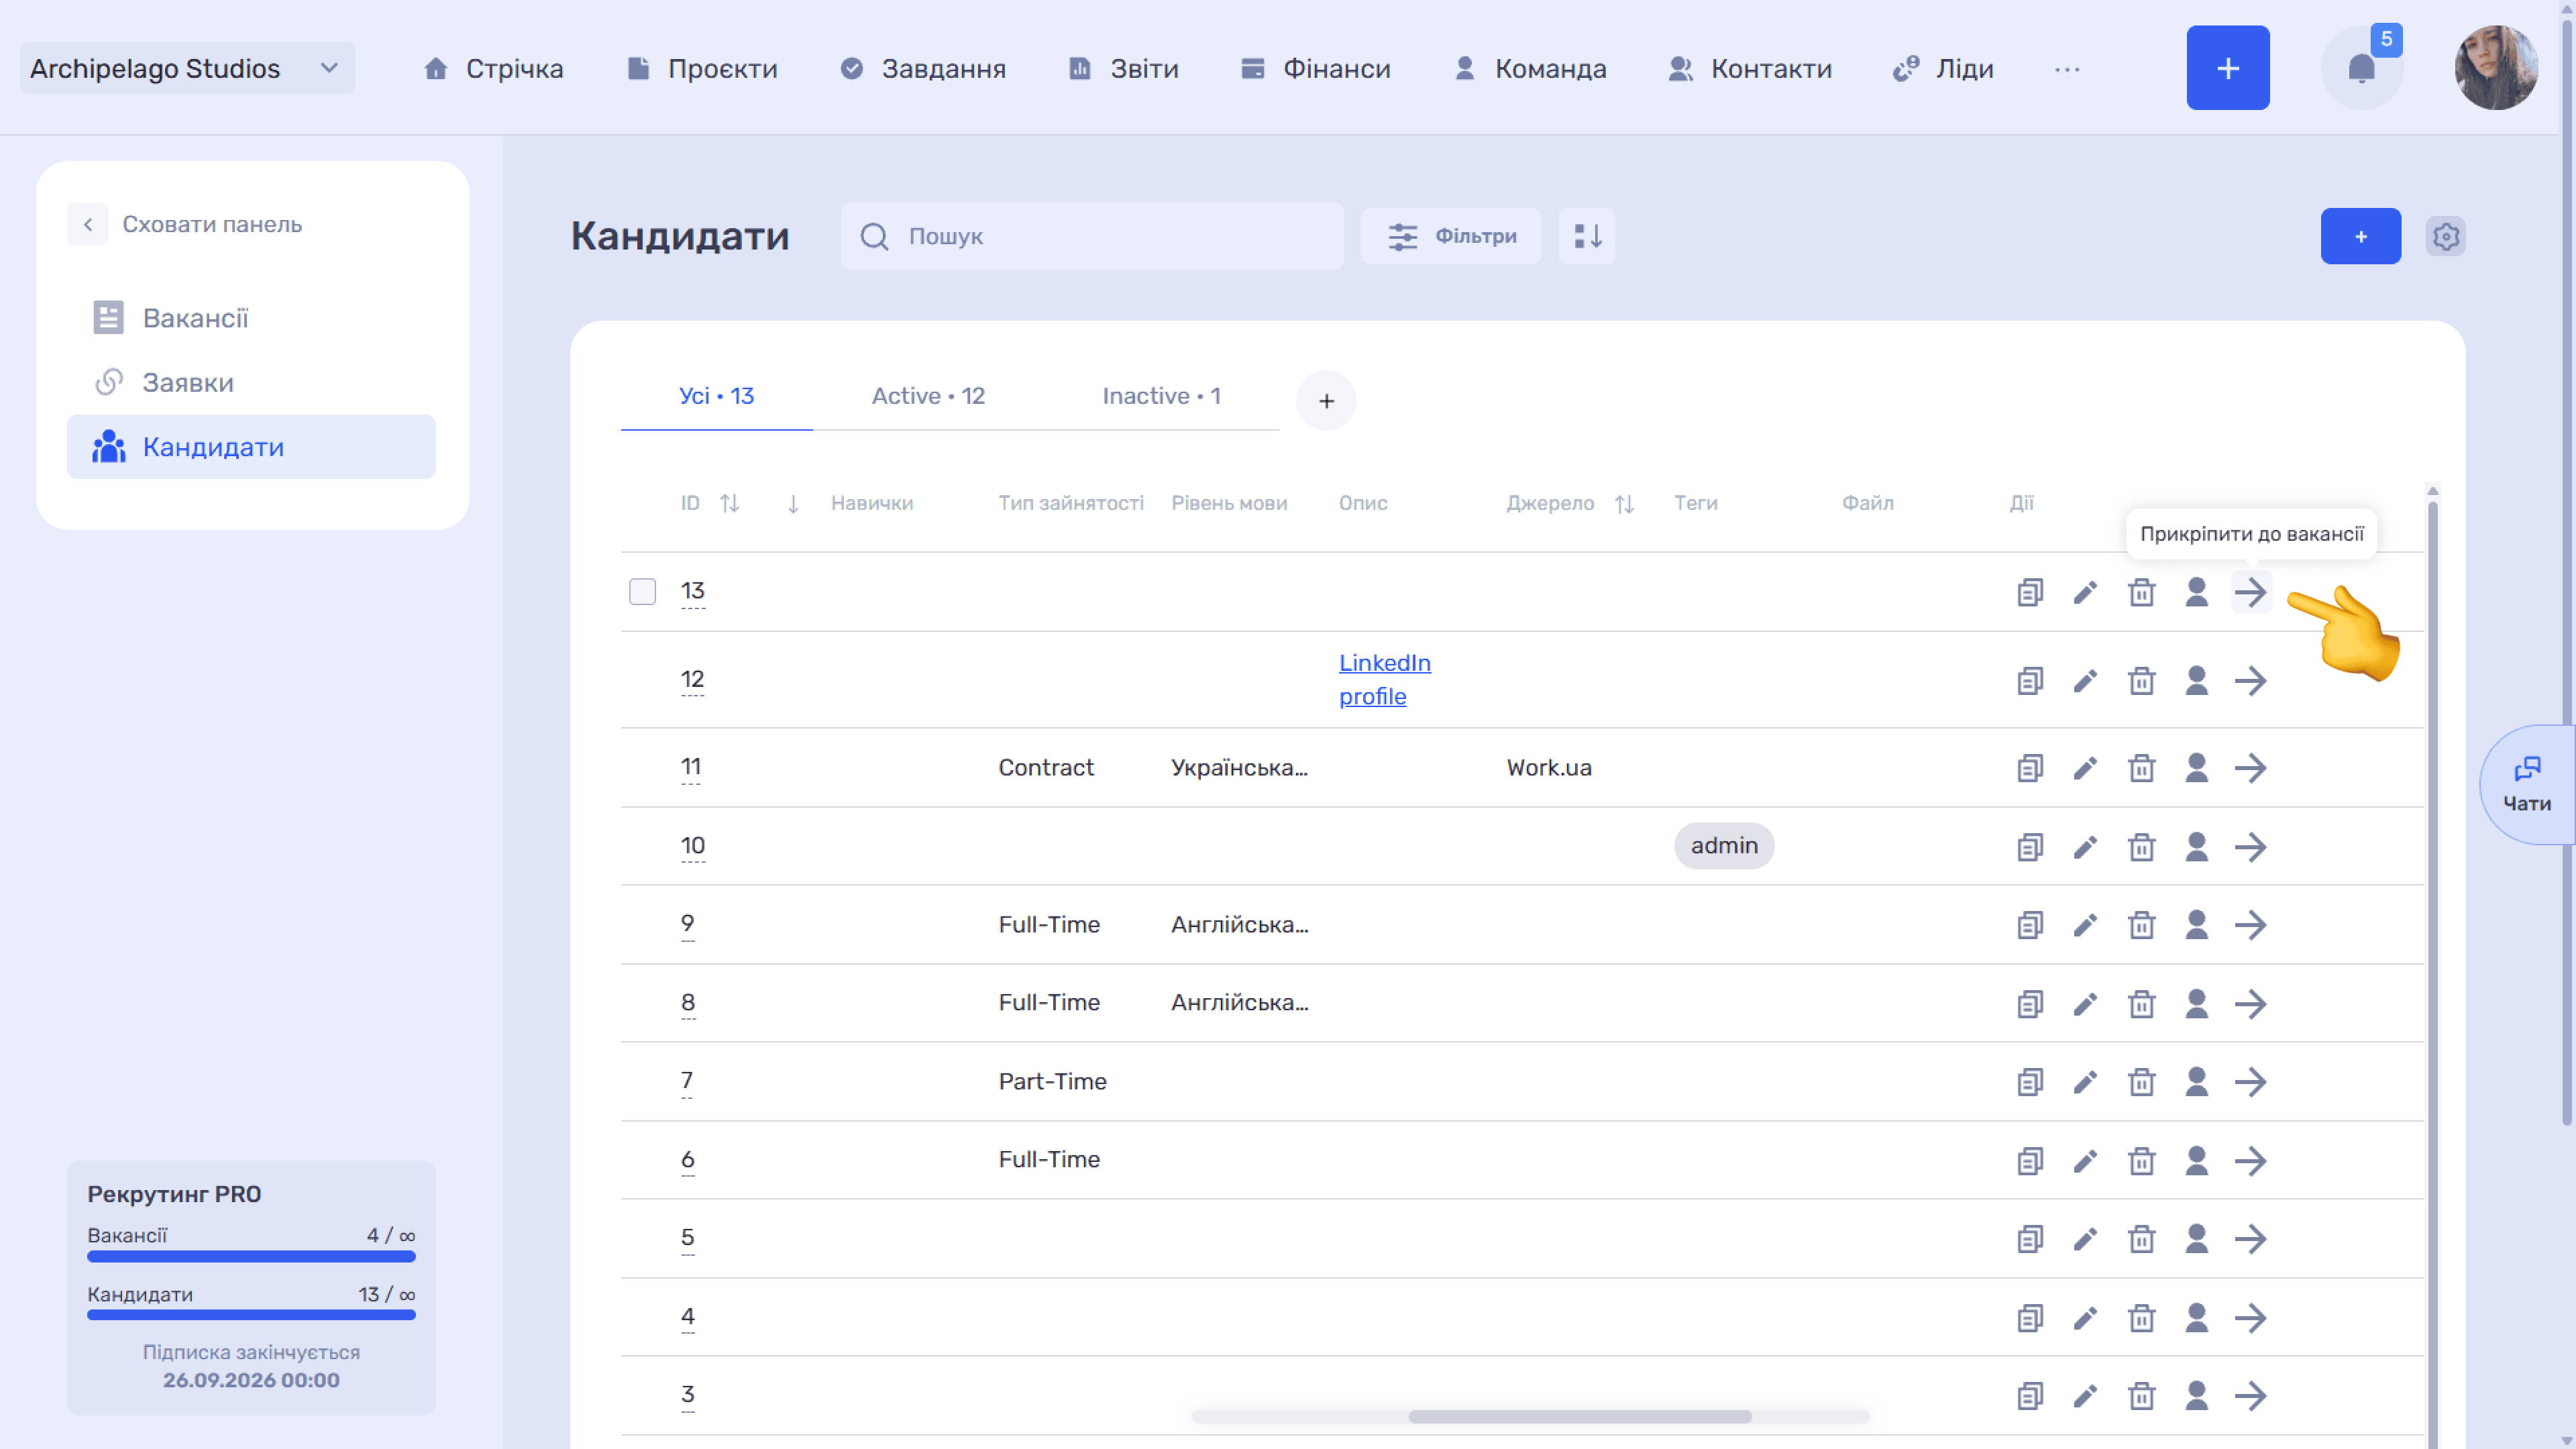
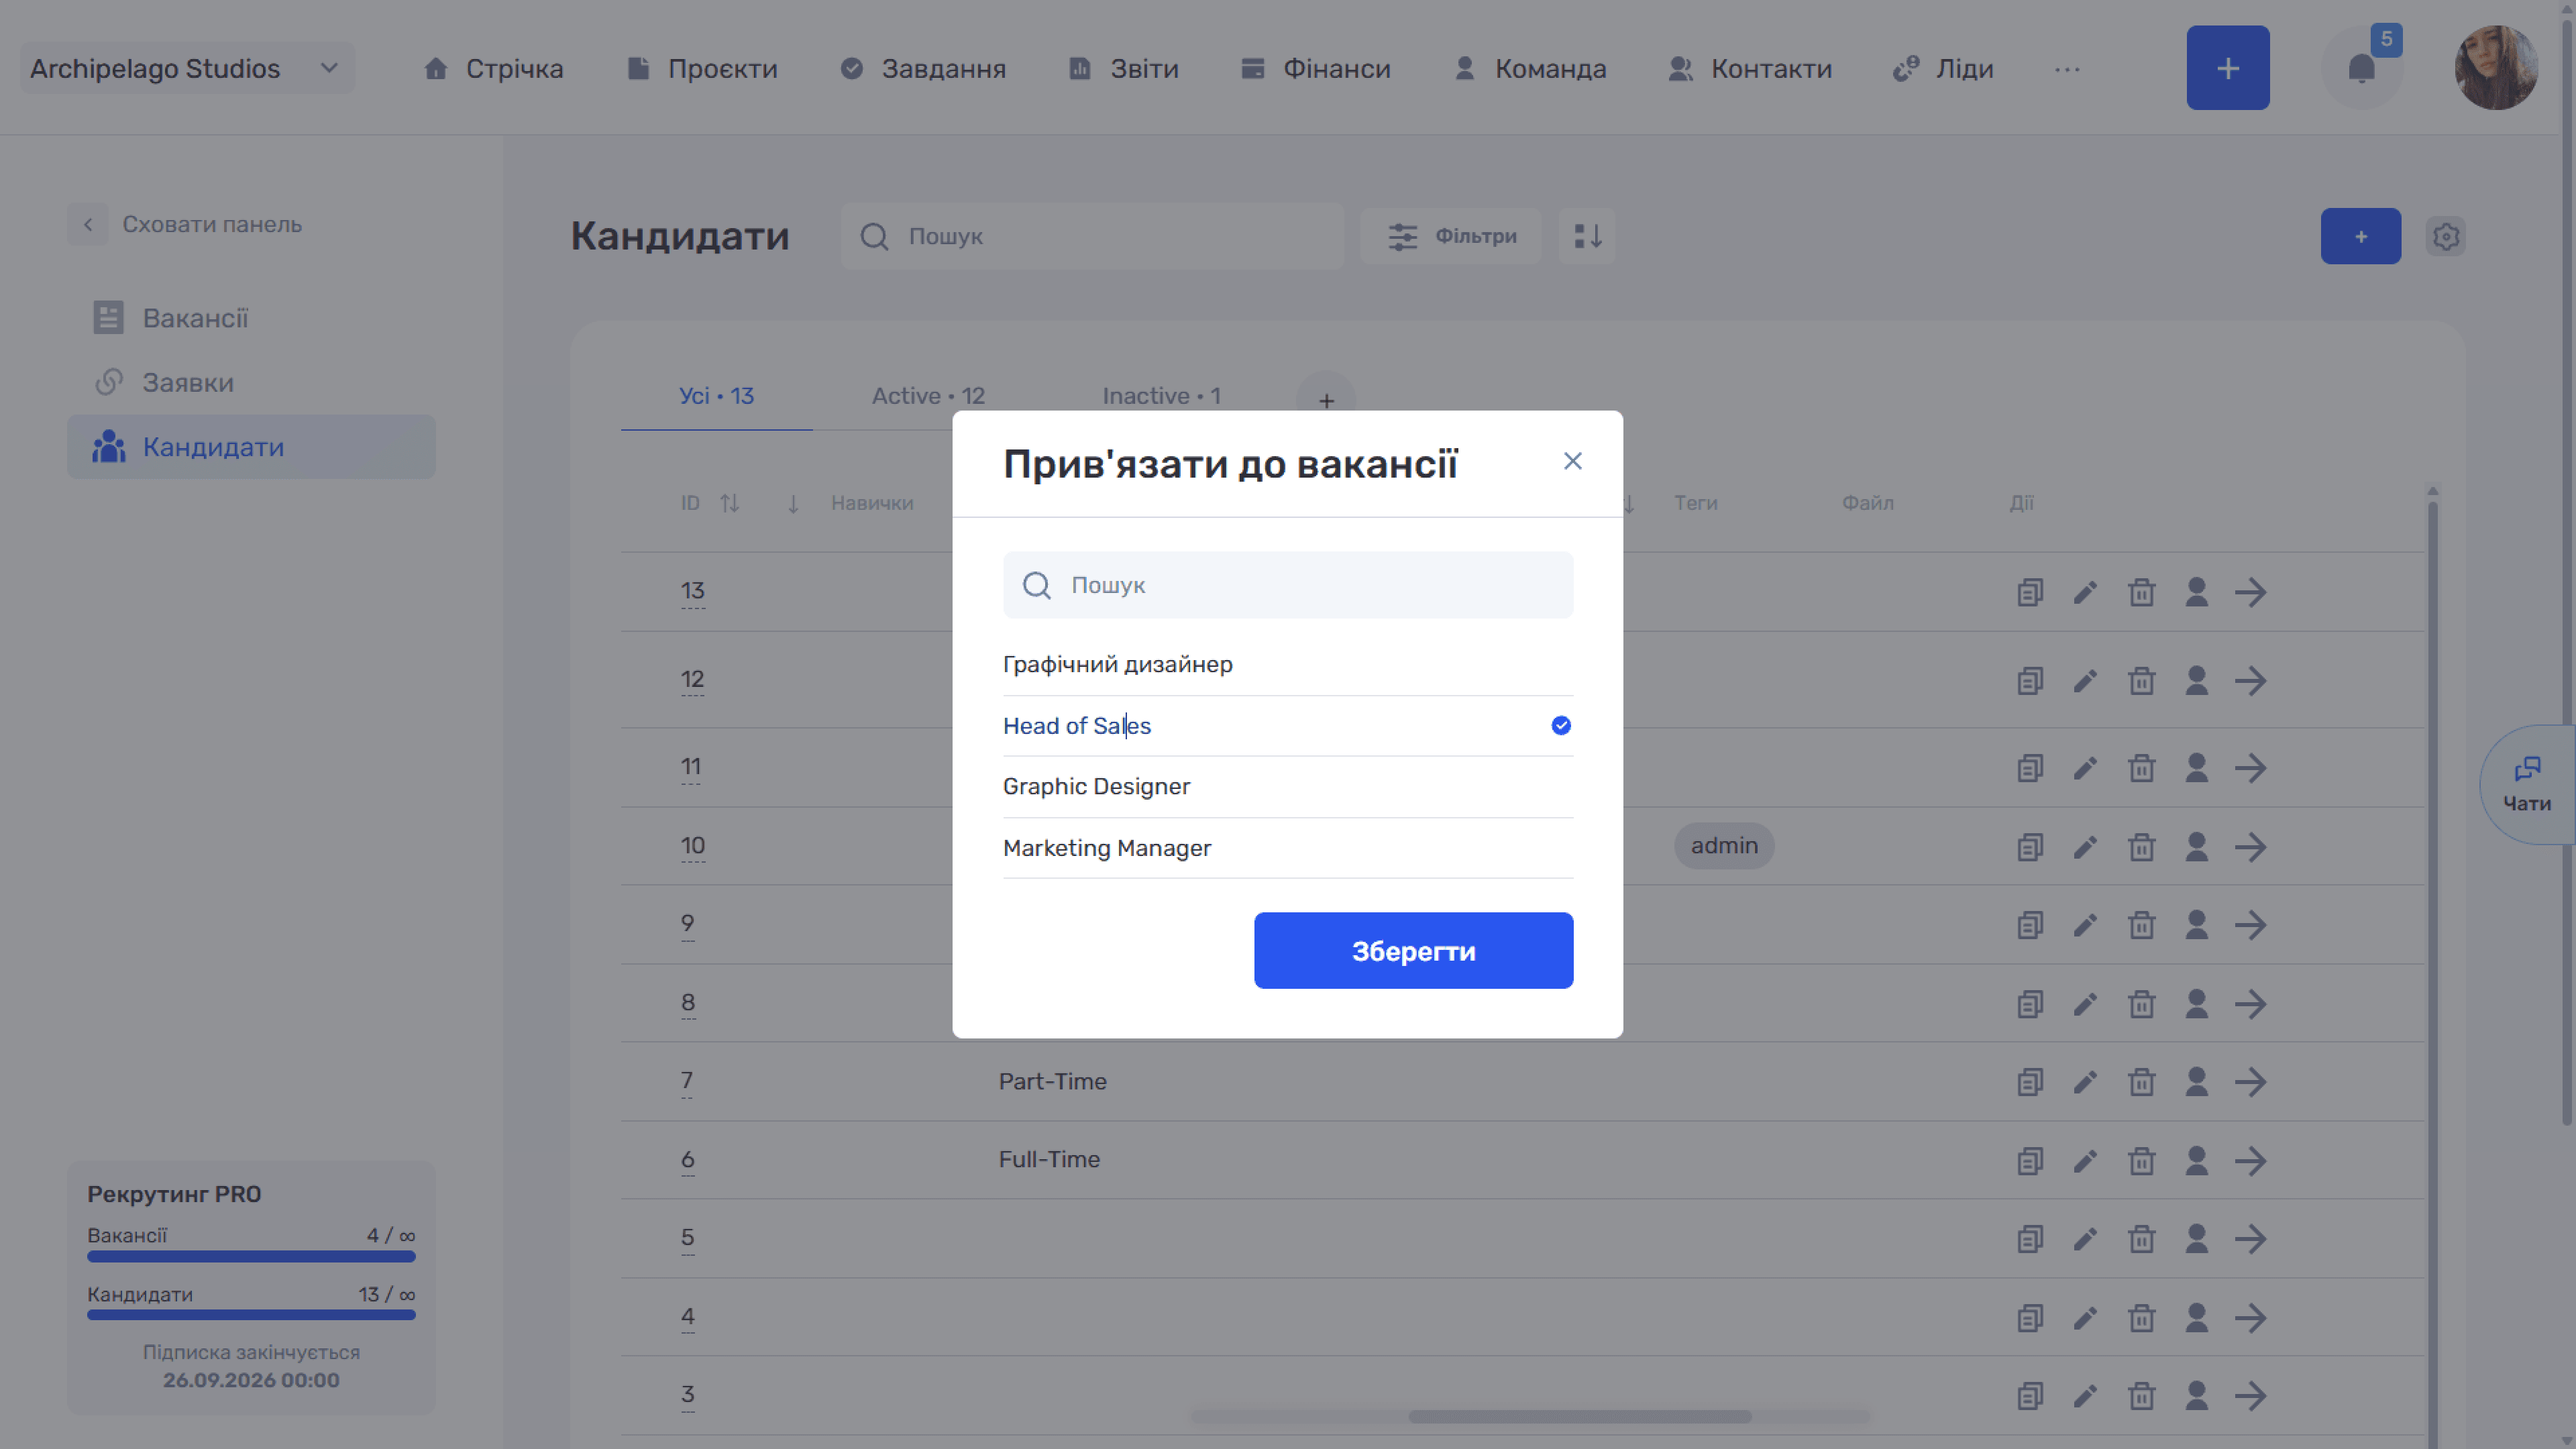
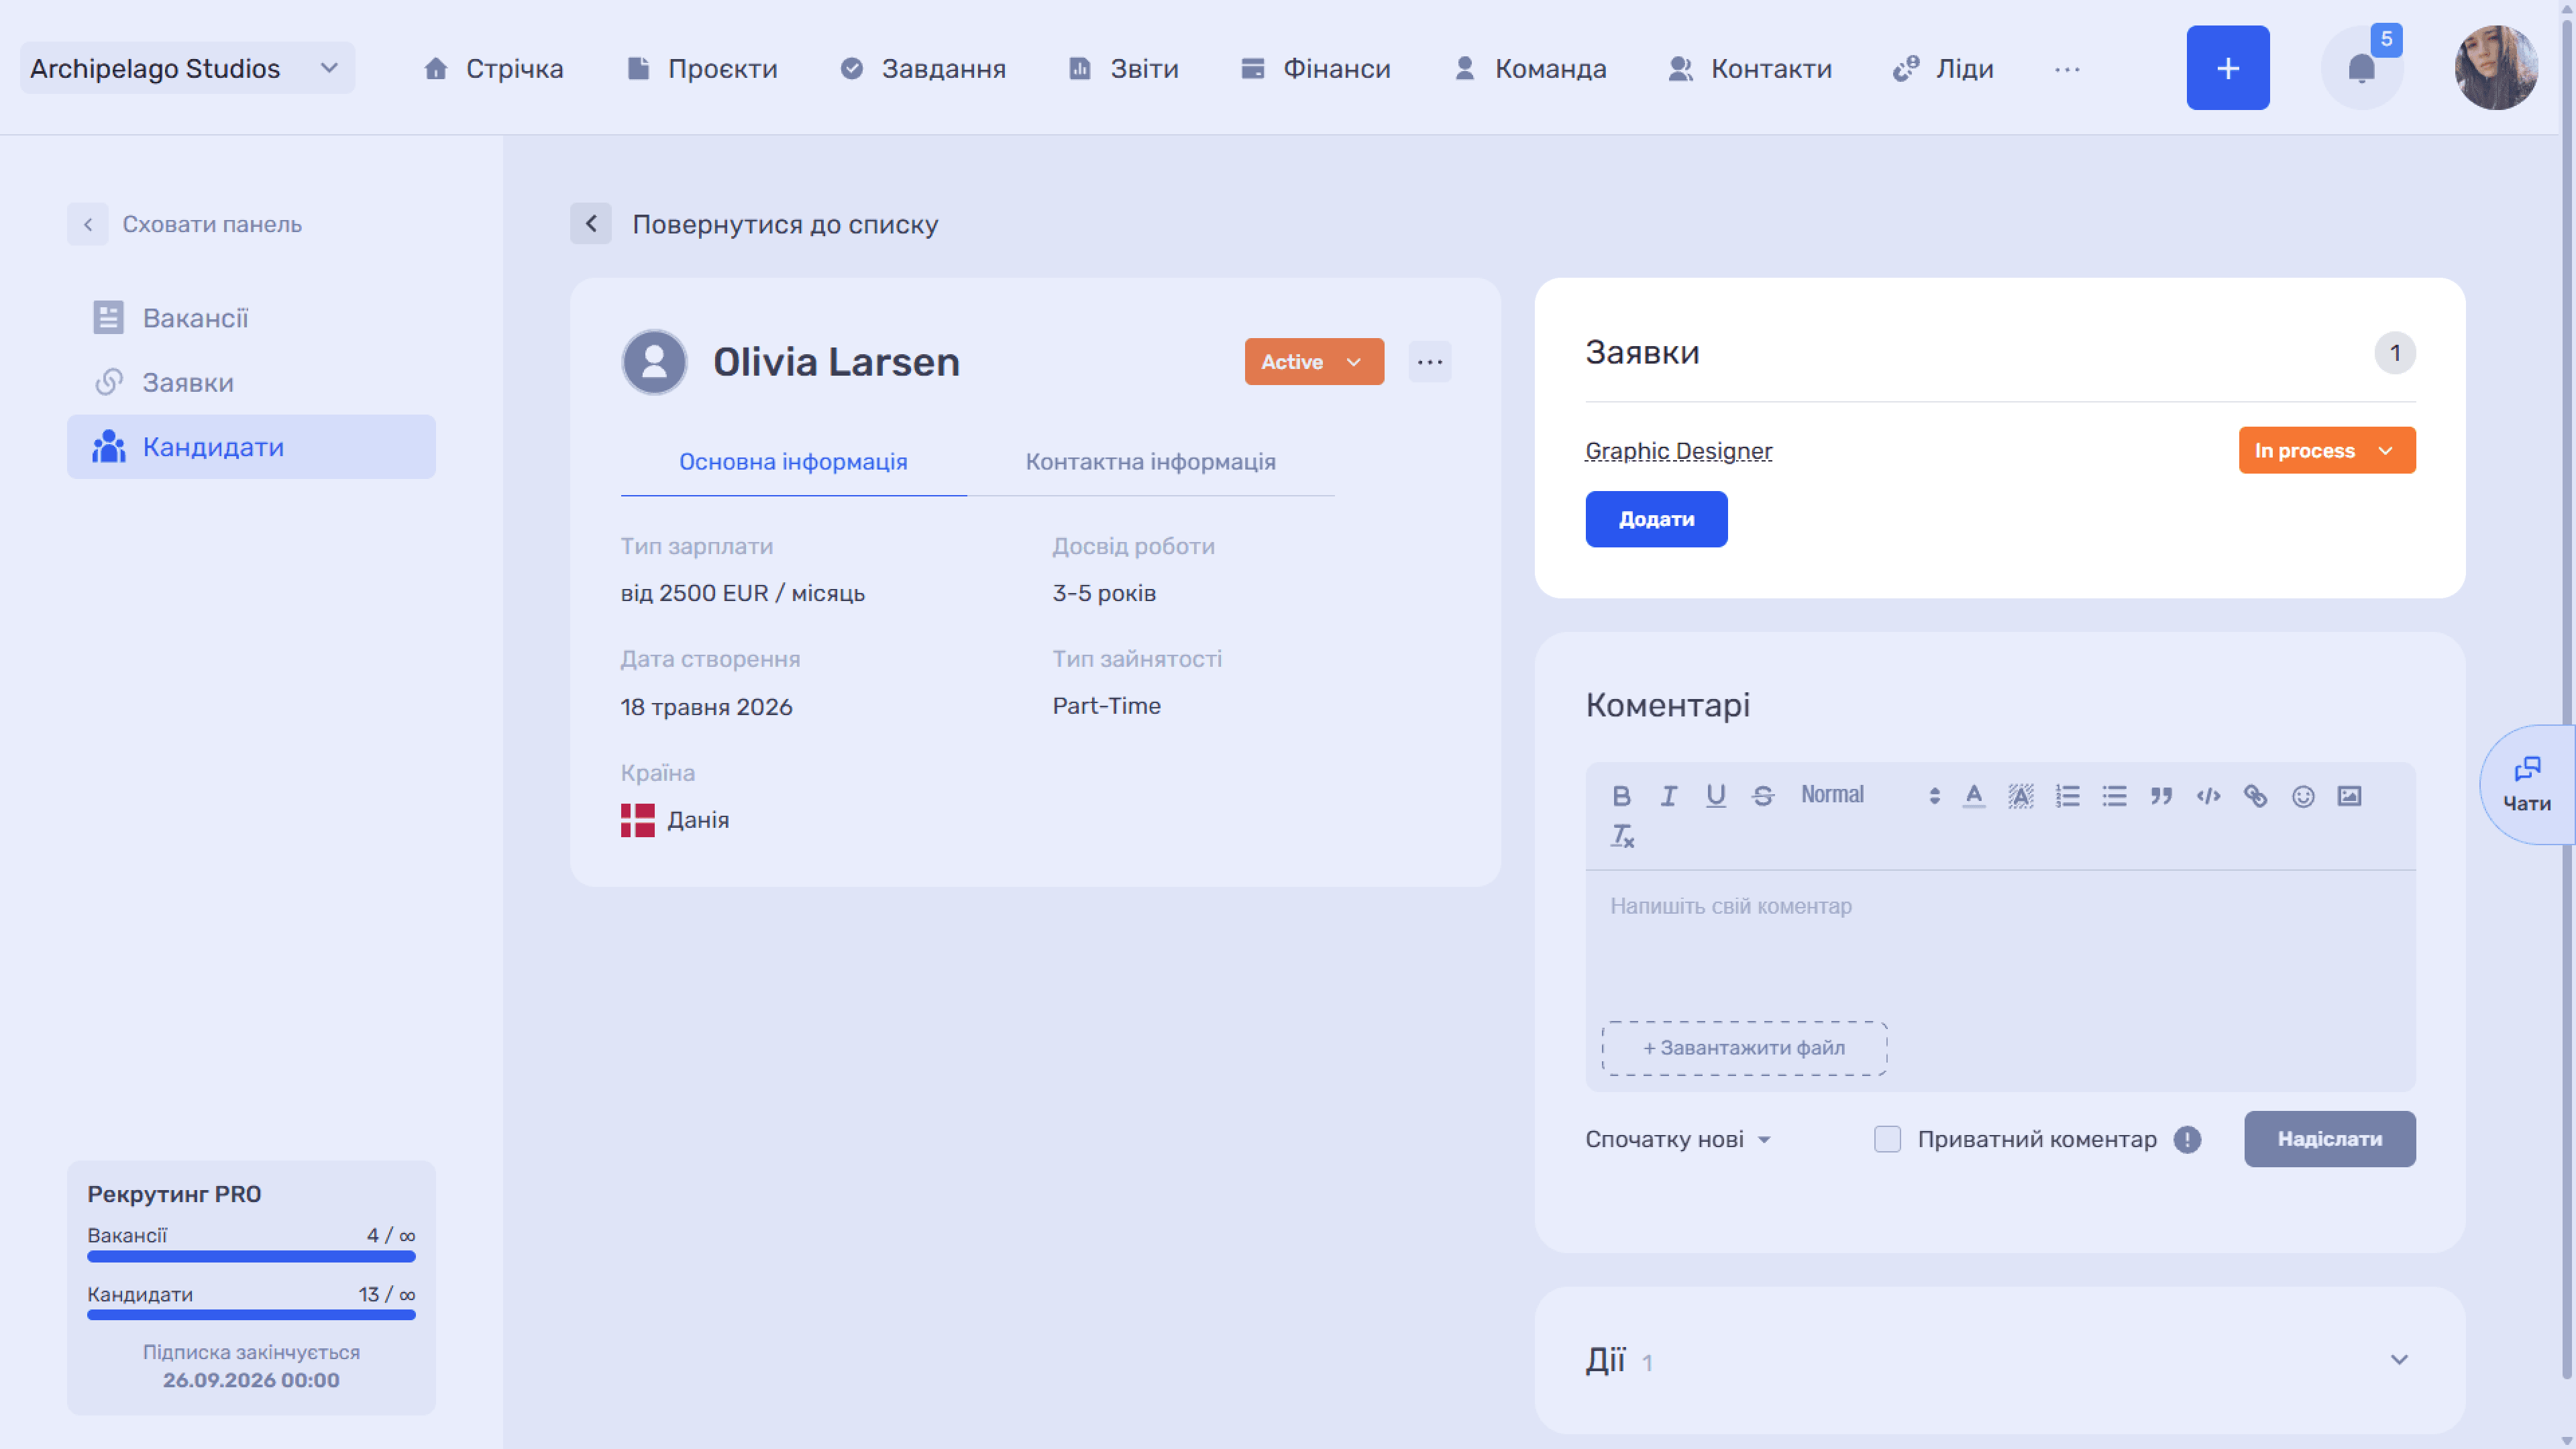
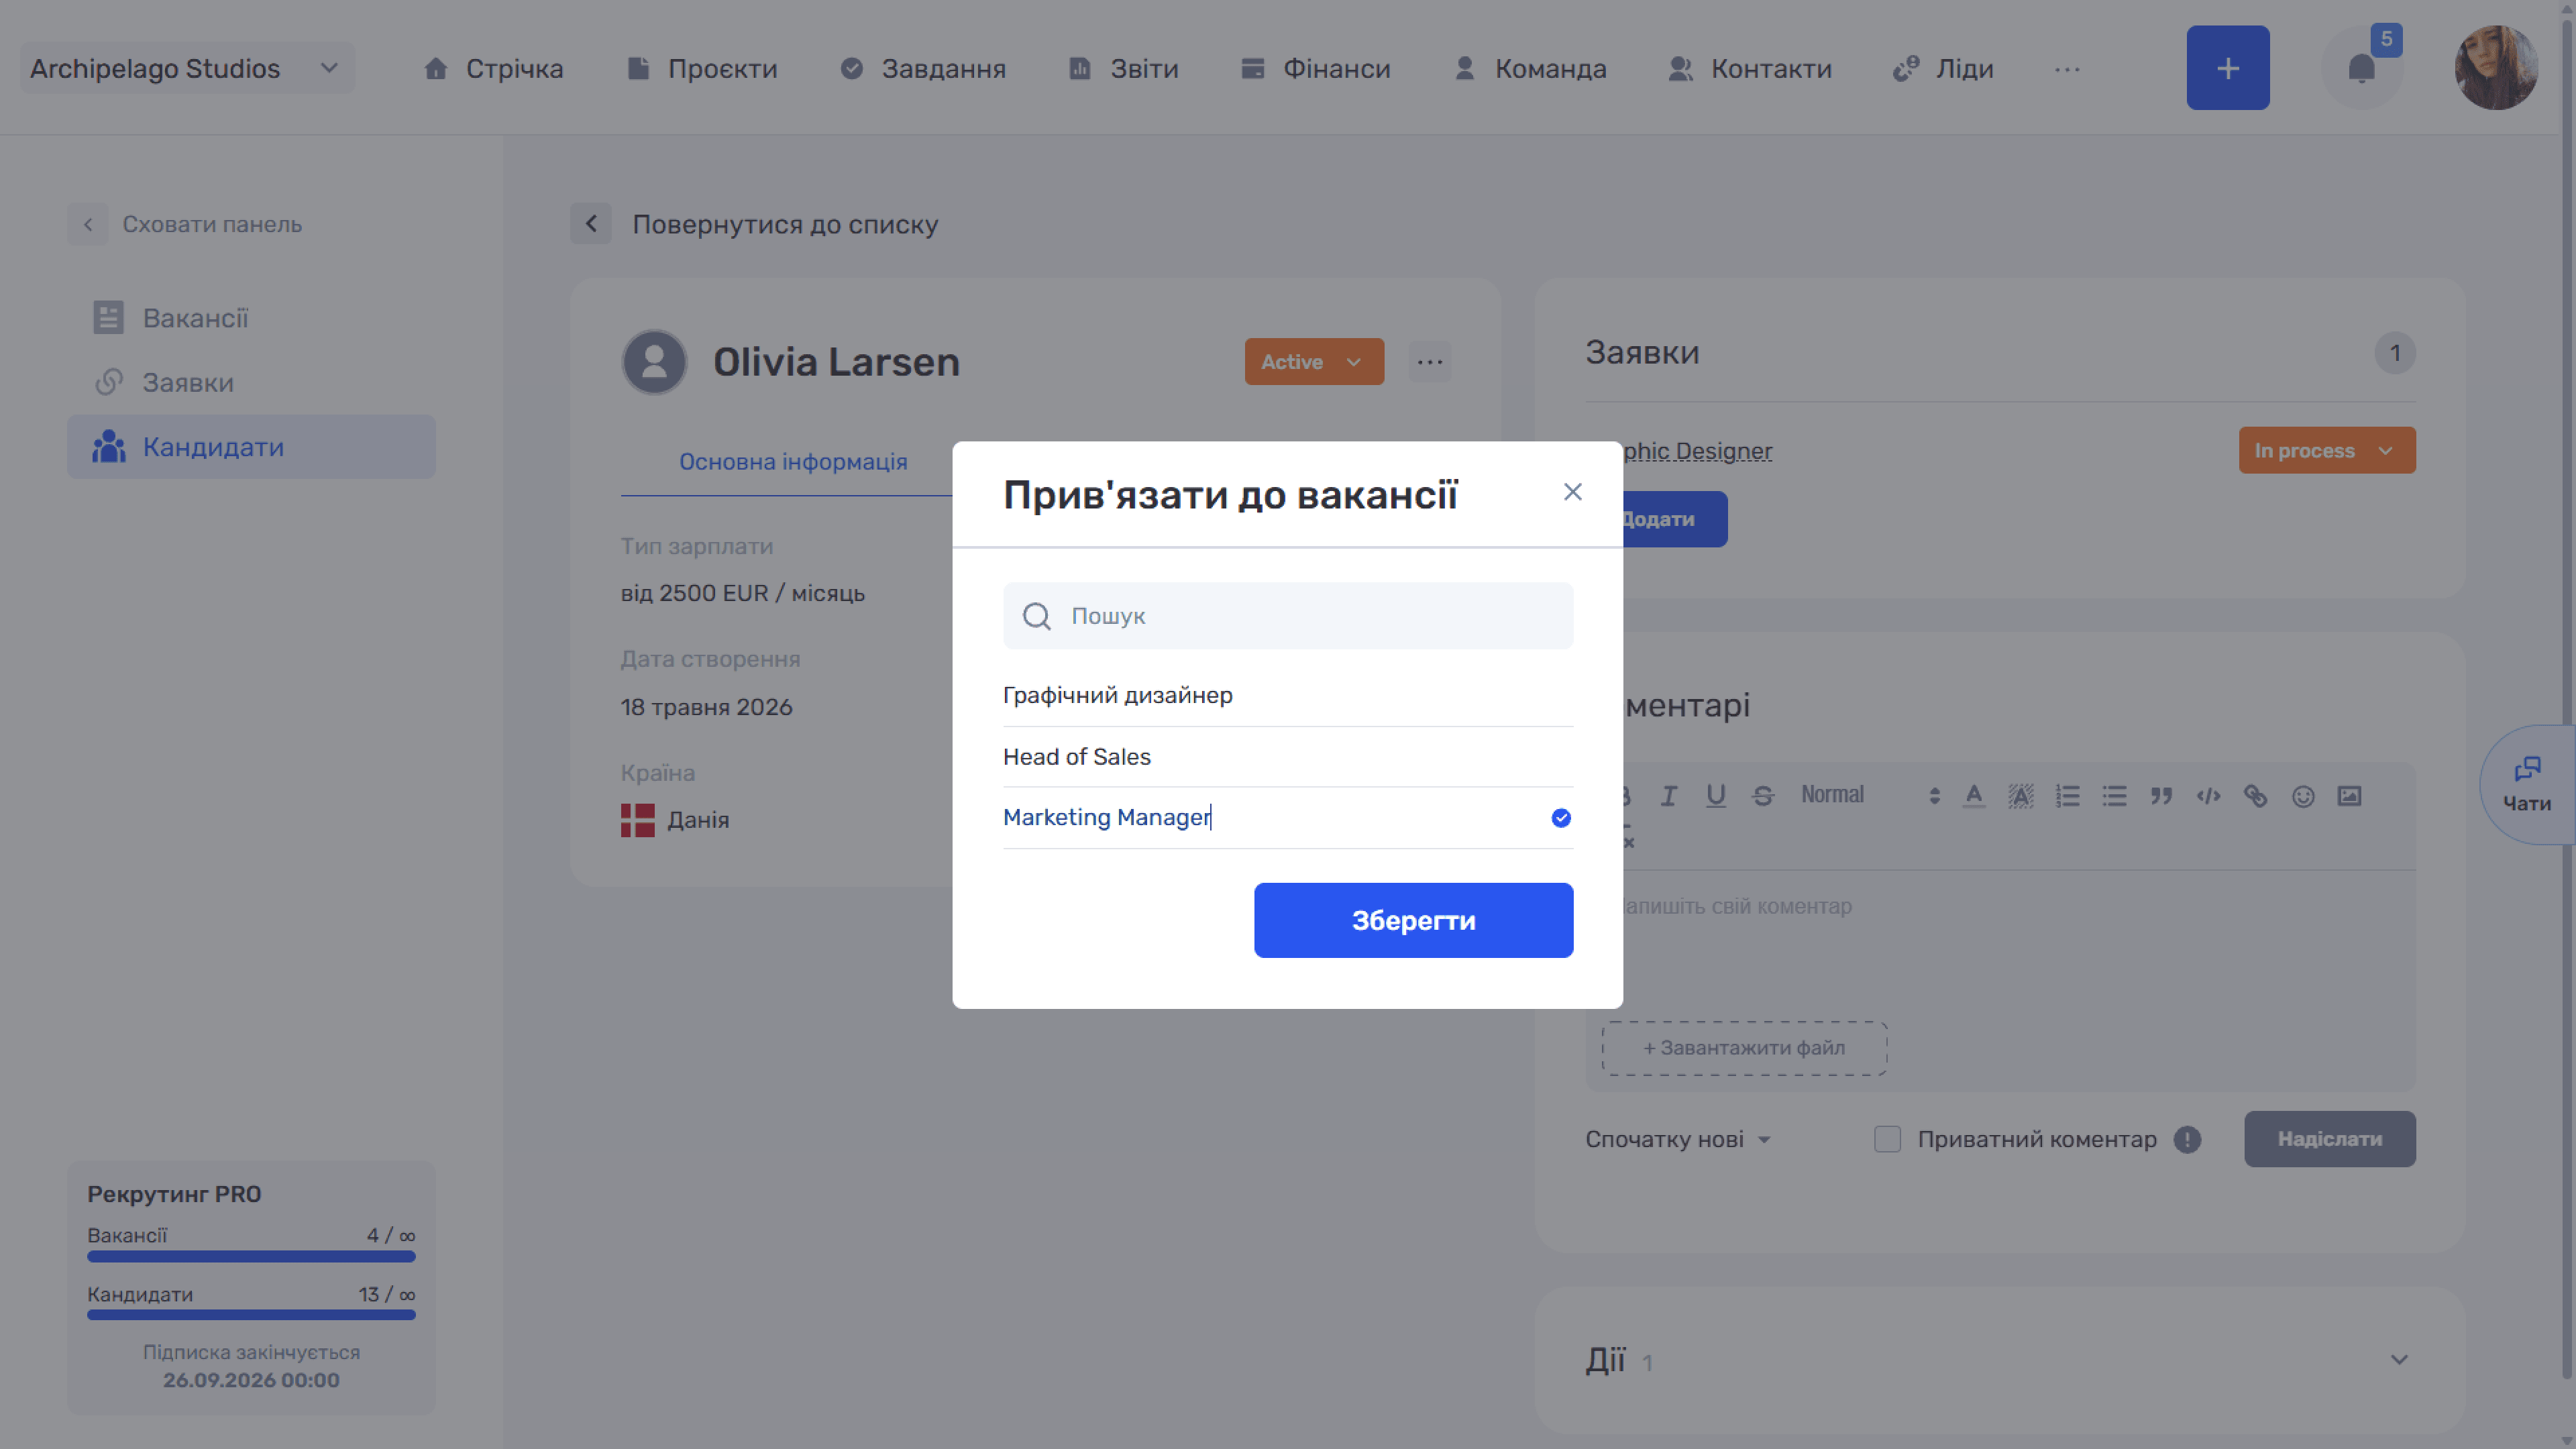
An application is not created with a separate button — it appears the moment a candidate and a vacancy are linked. The link can be started from either side:
- from the candidate side — the ➜ icon (Attach to vacancy) in a candidate list row, or the Add button in the Applications block of their card;
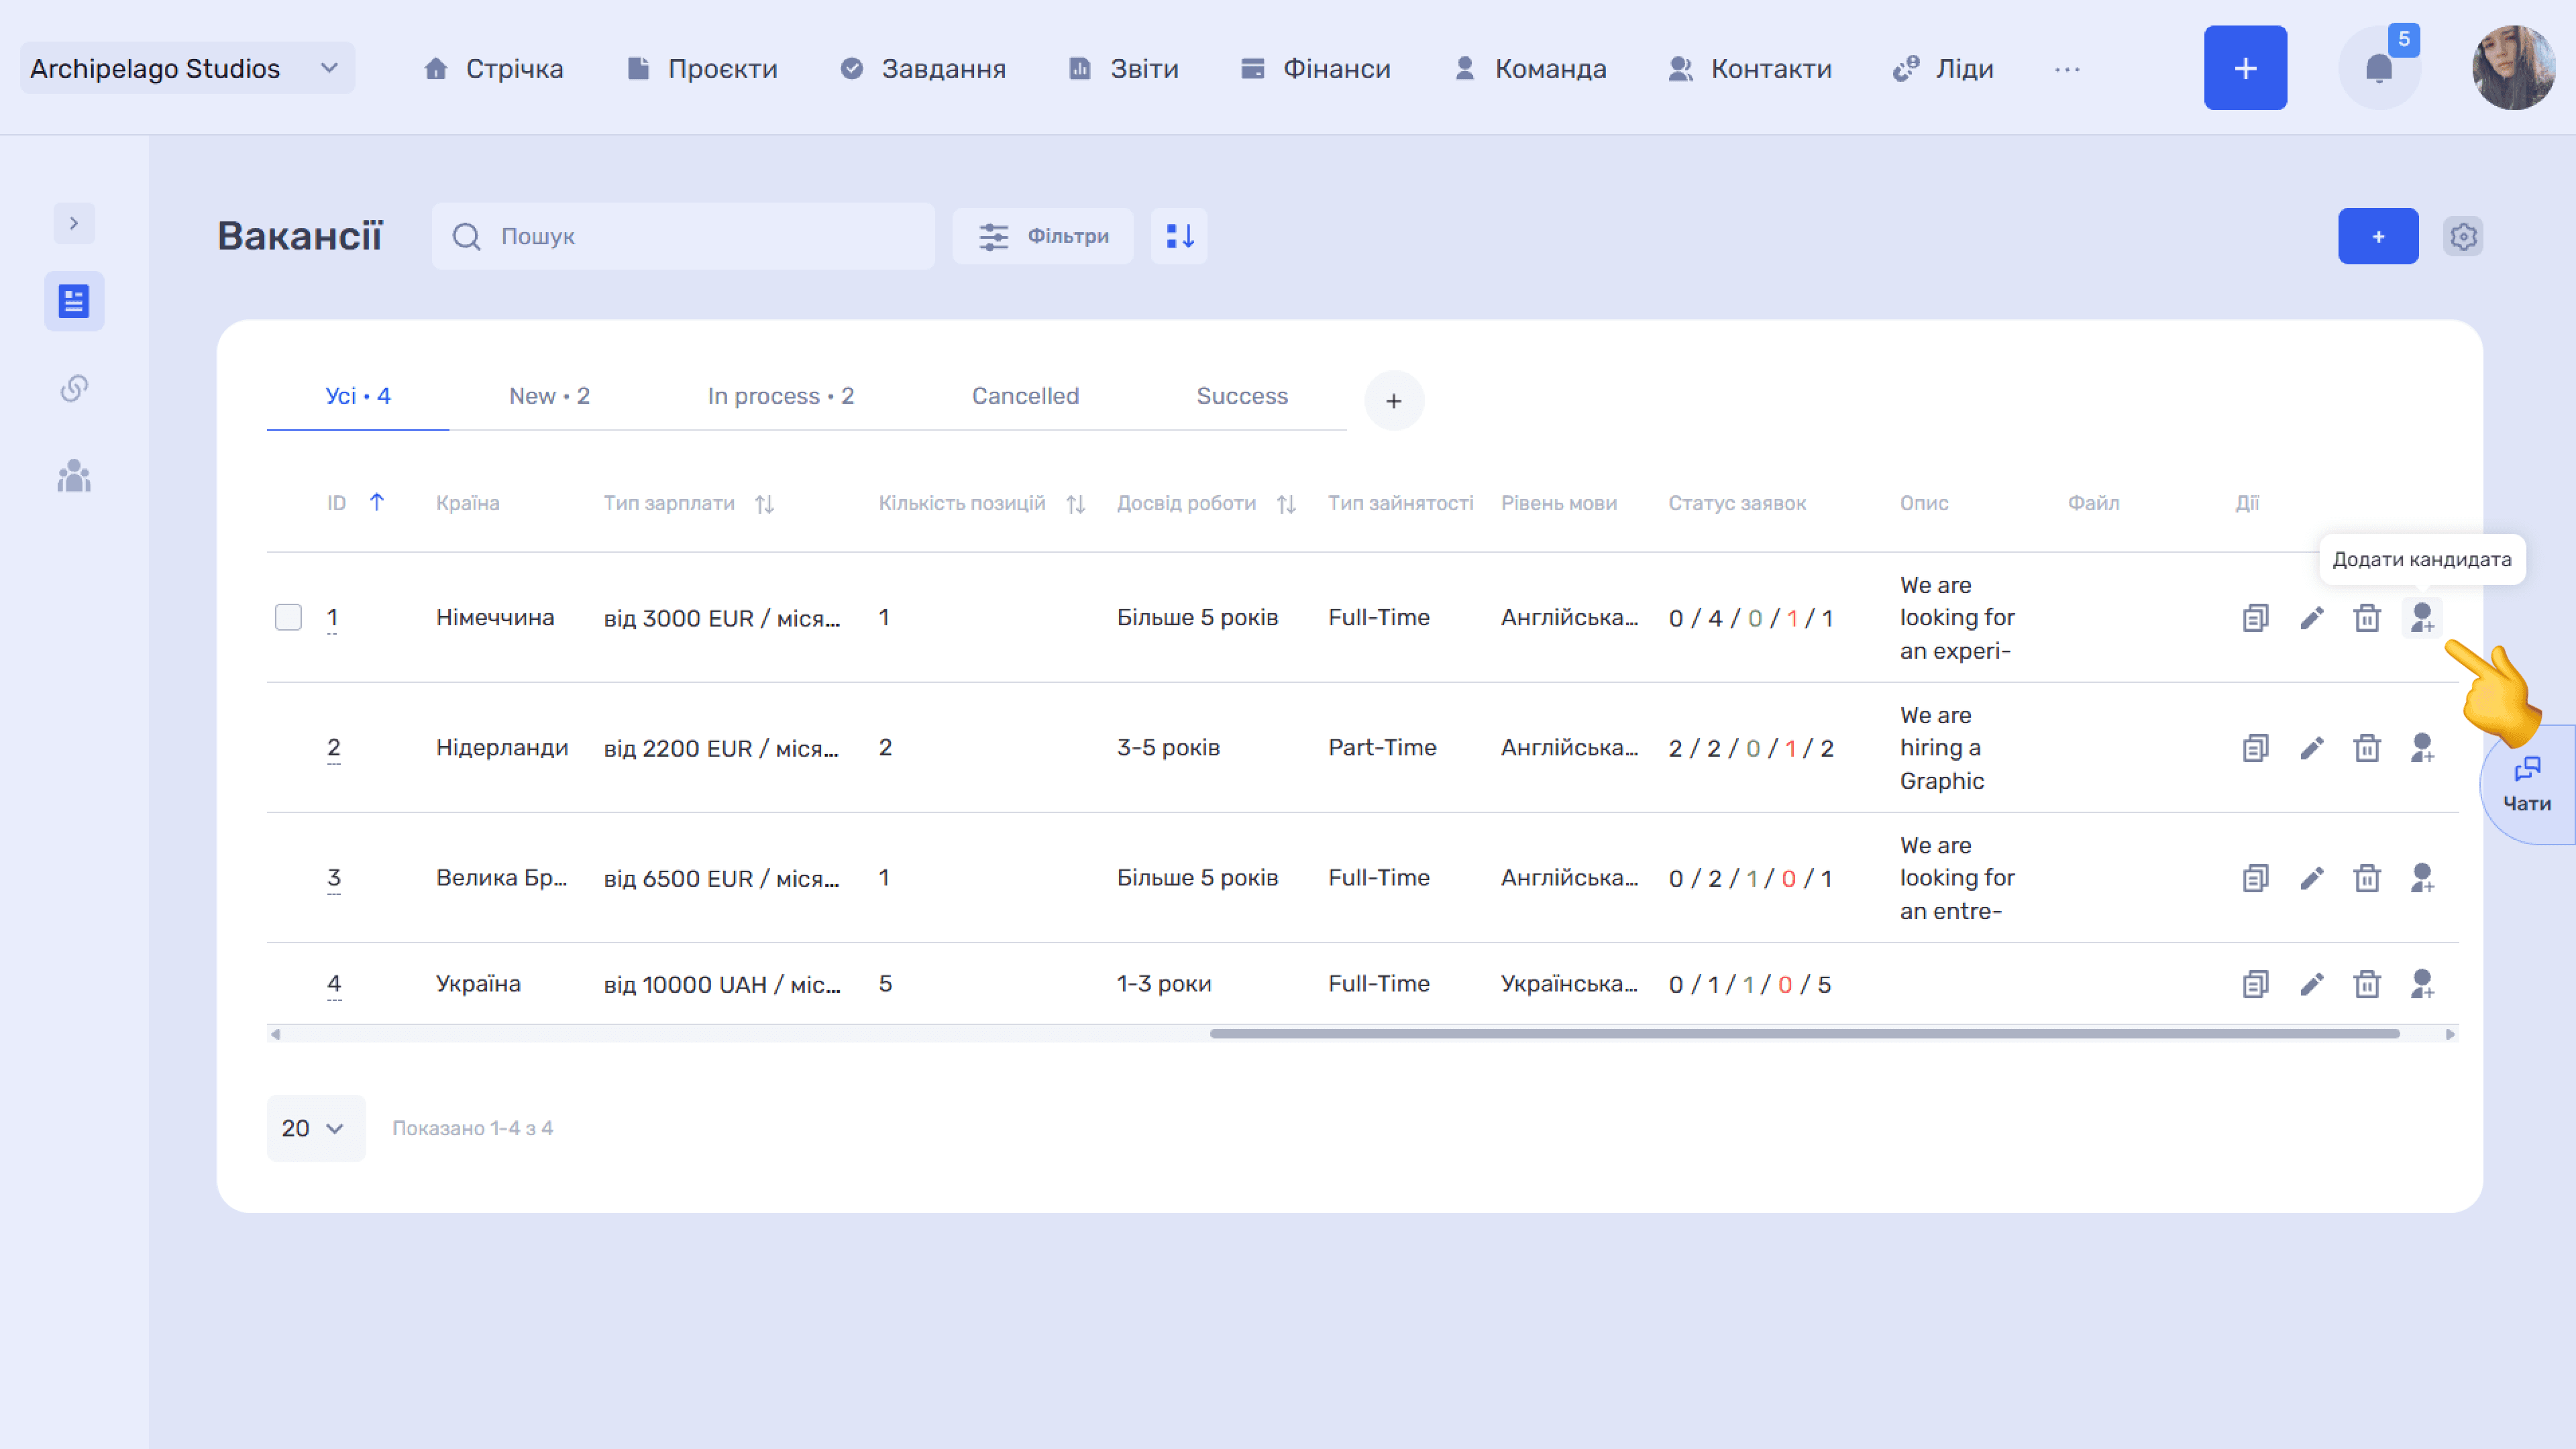
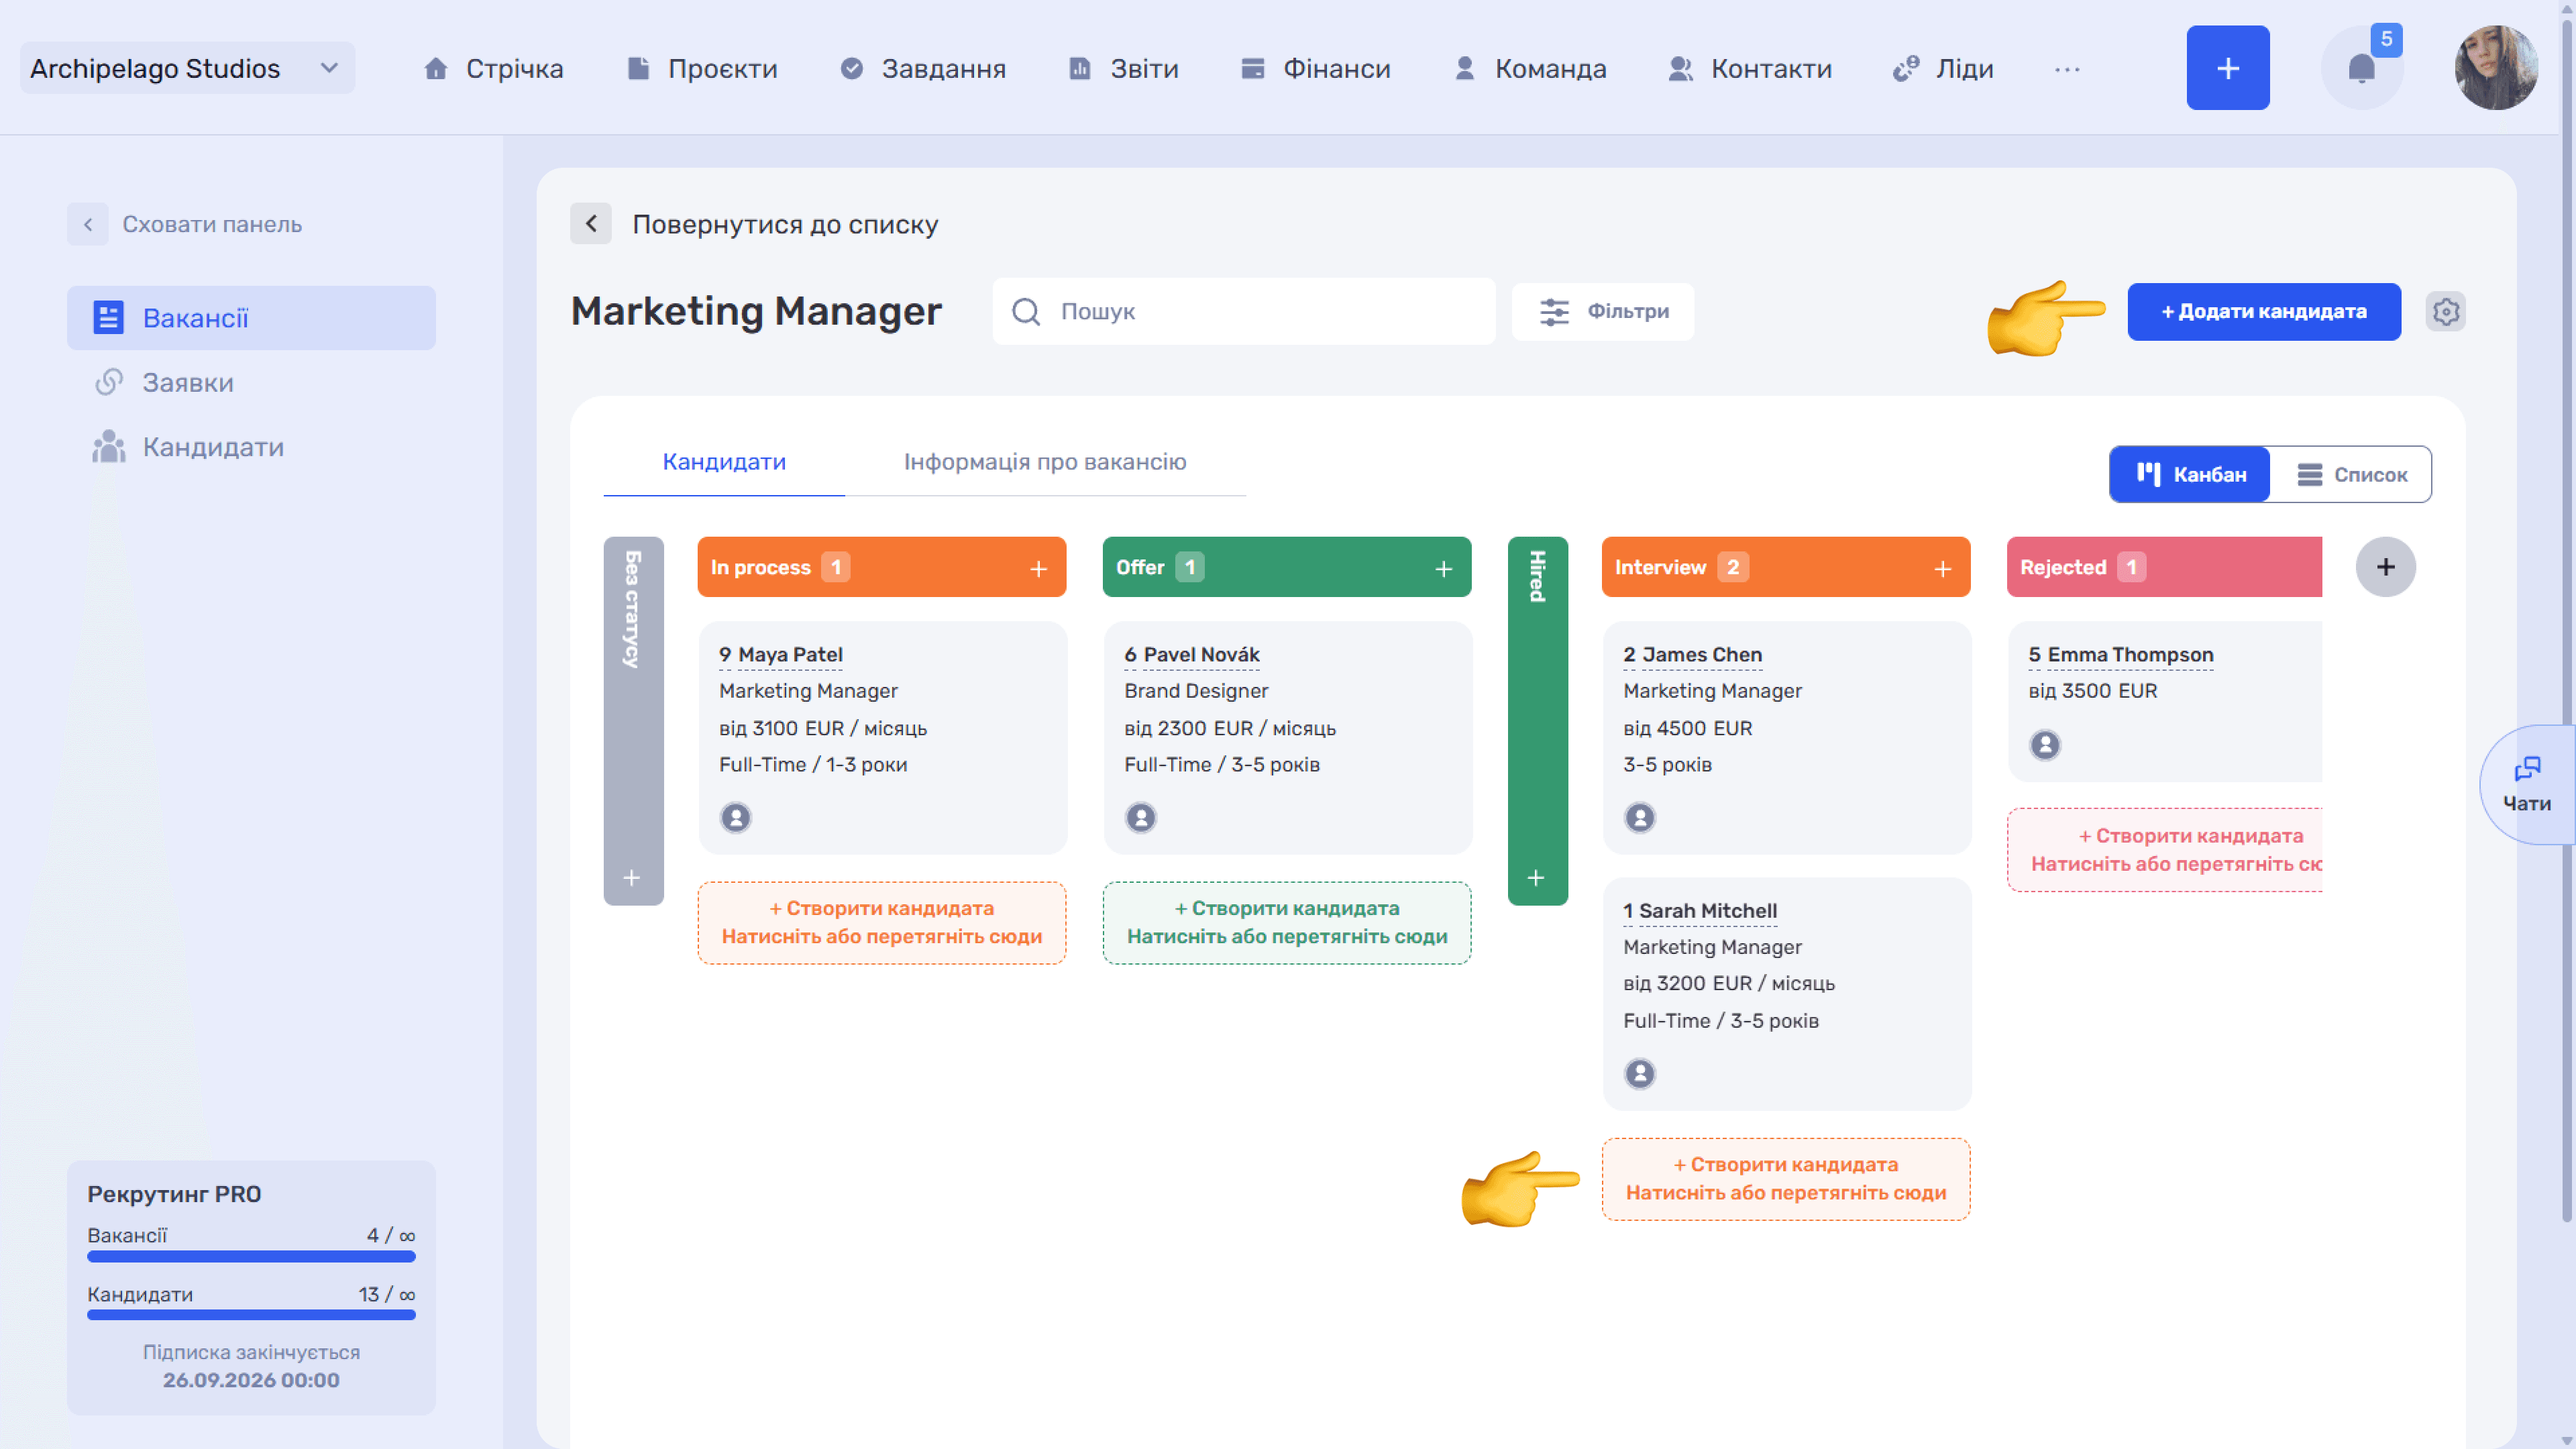
- from the vacancy side — the + Add candidate button in the vacancy card, the + icon in a vacancy list row, or + Create candidate in a Kanban column;

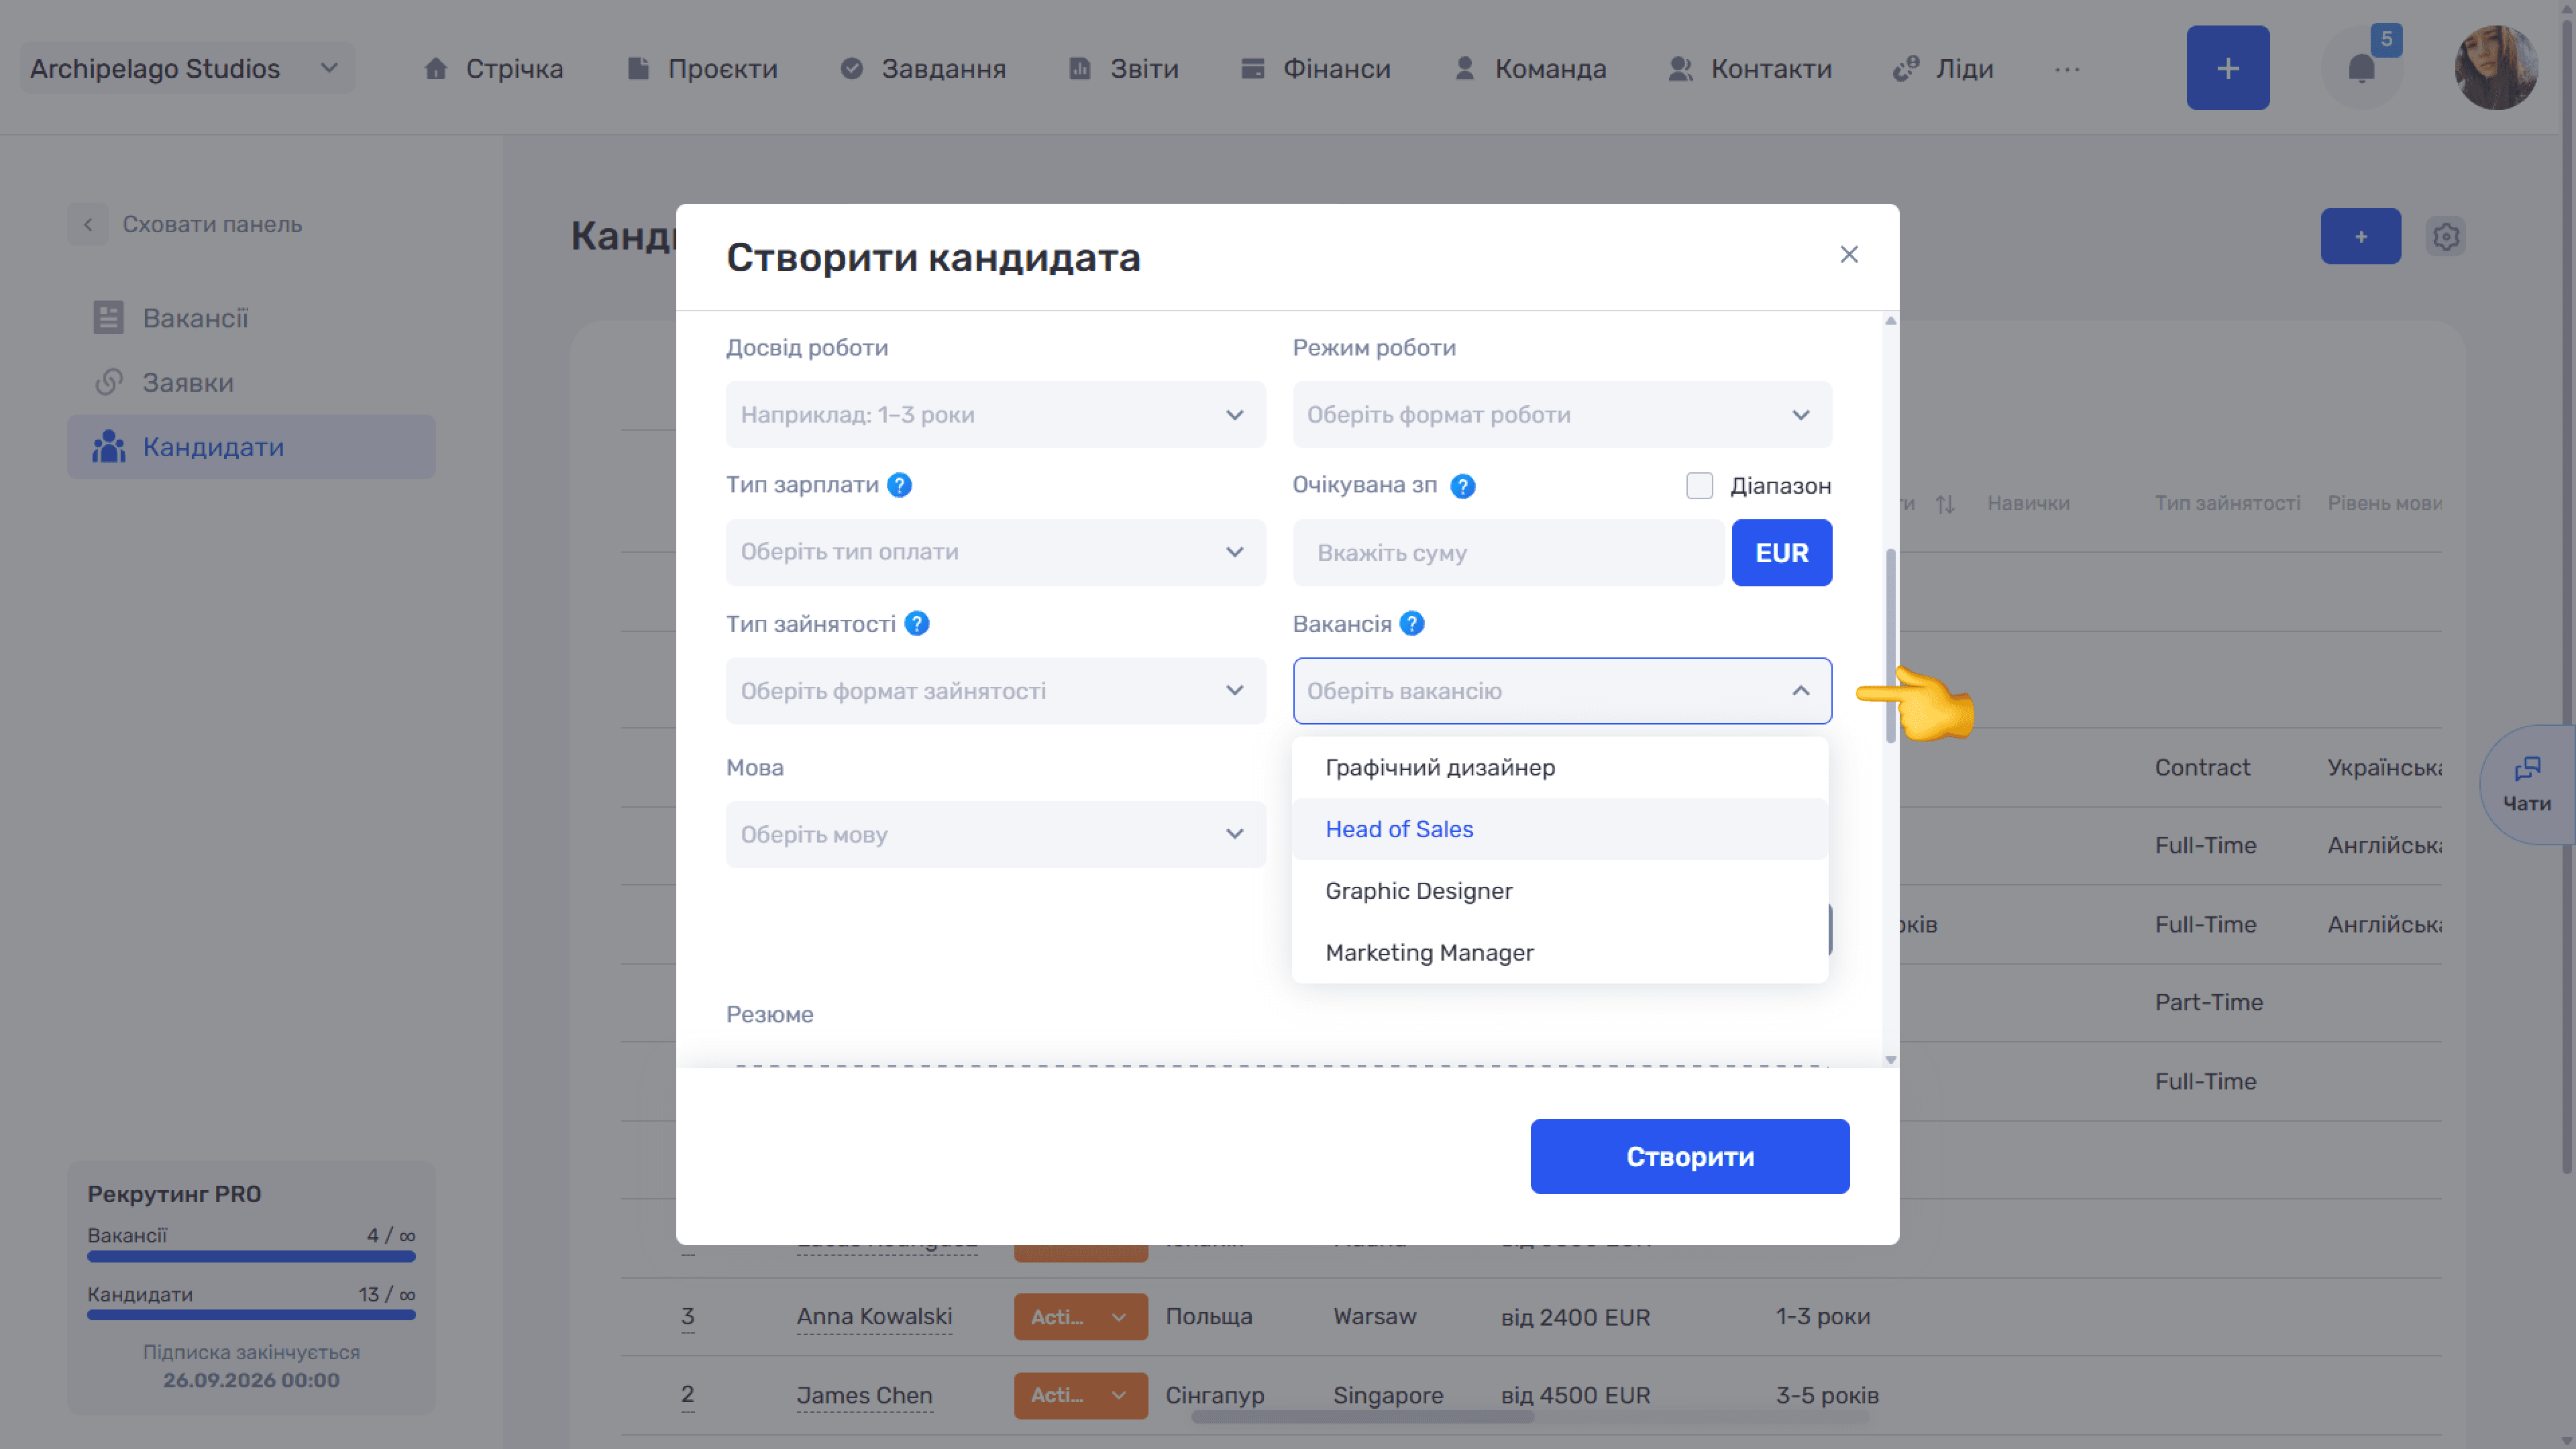
- when creating a candidate — if you fill in the Vacancy field in the form, the application is created right away.
One candidate can have several applications — one for each vacancy they are being considered for — and be at different selection stages at the same time.
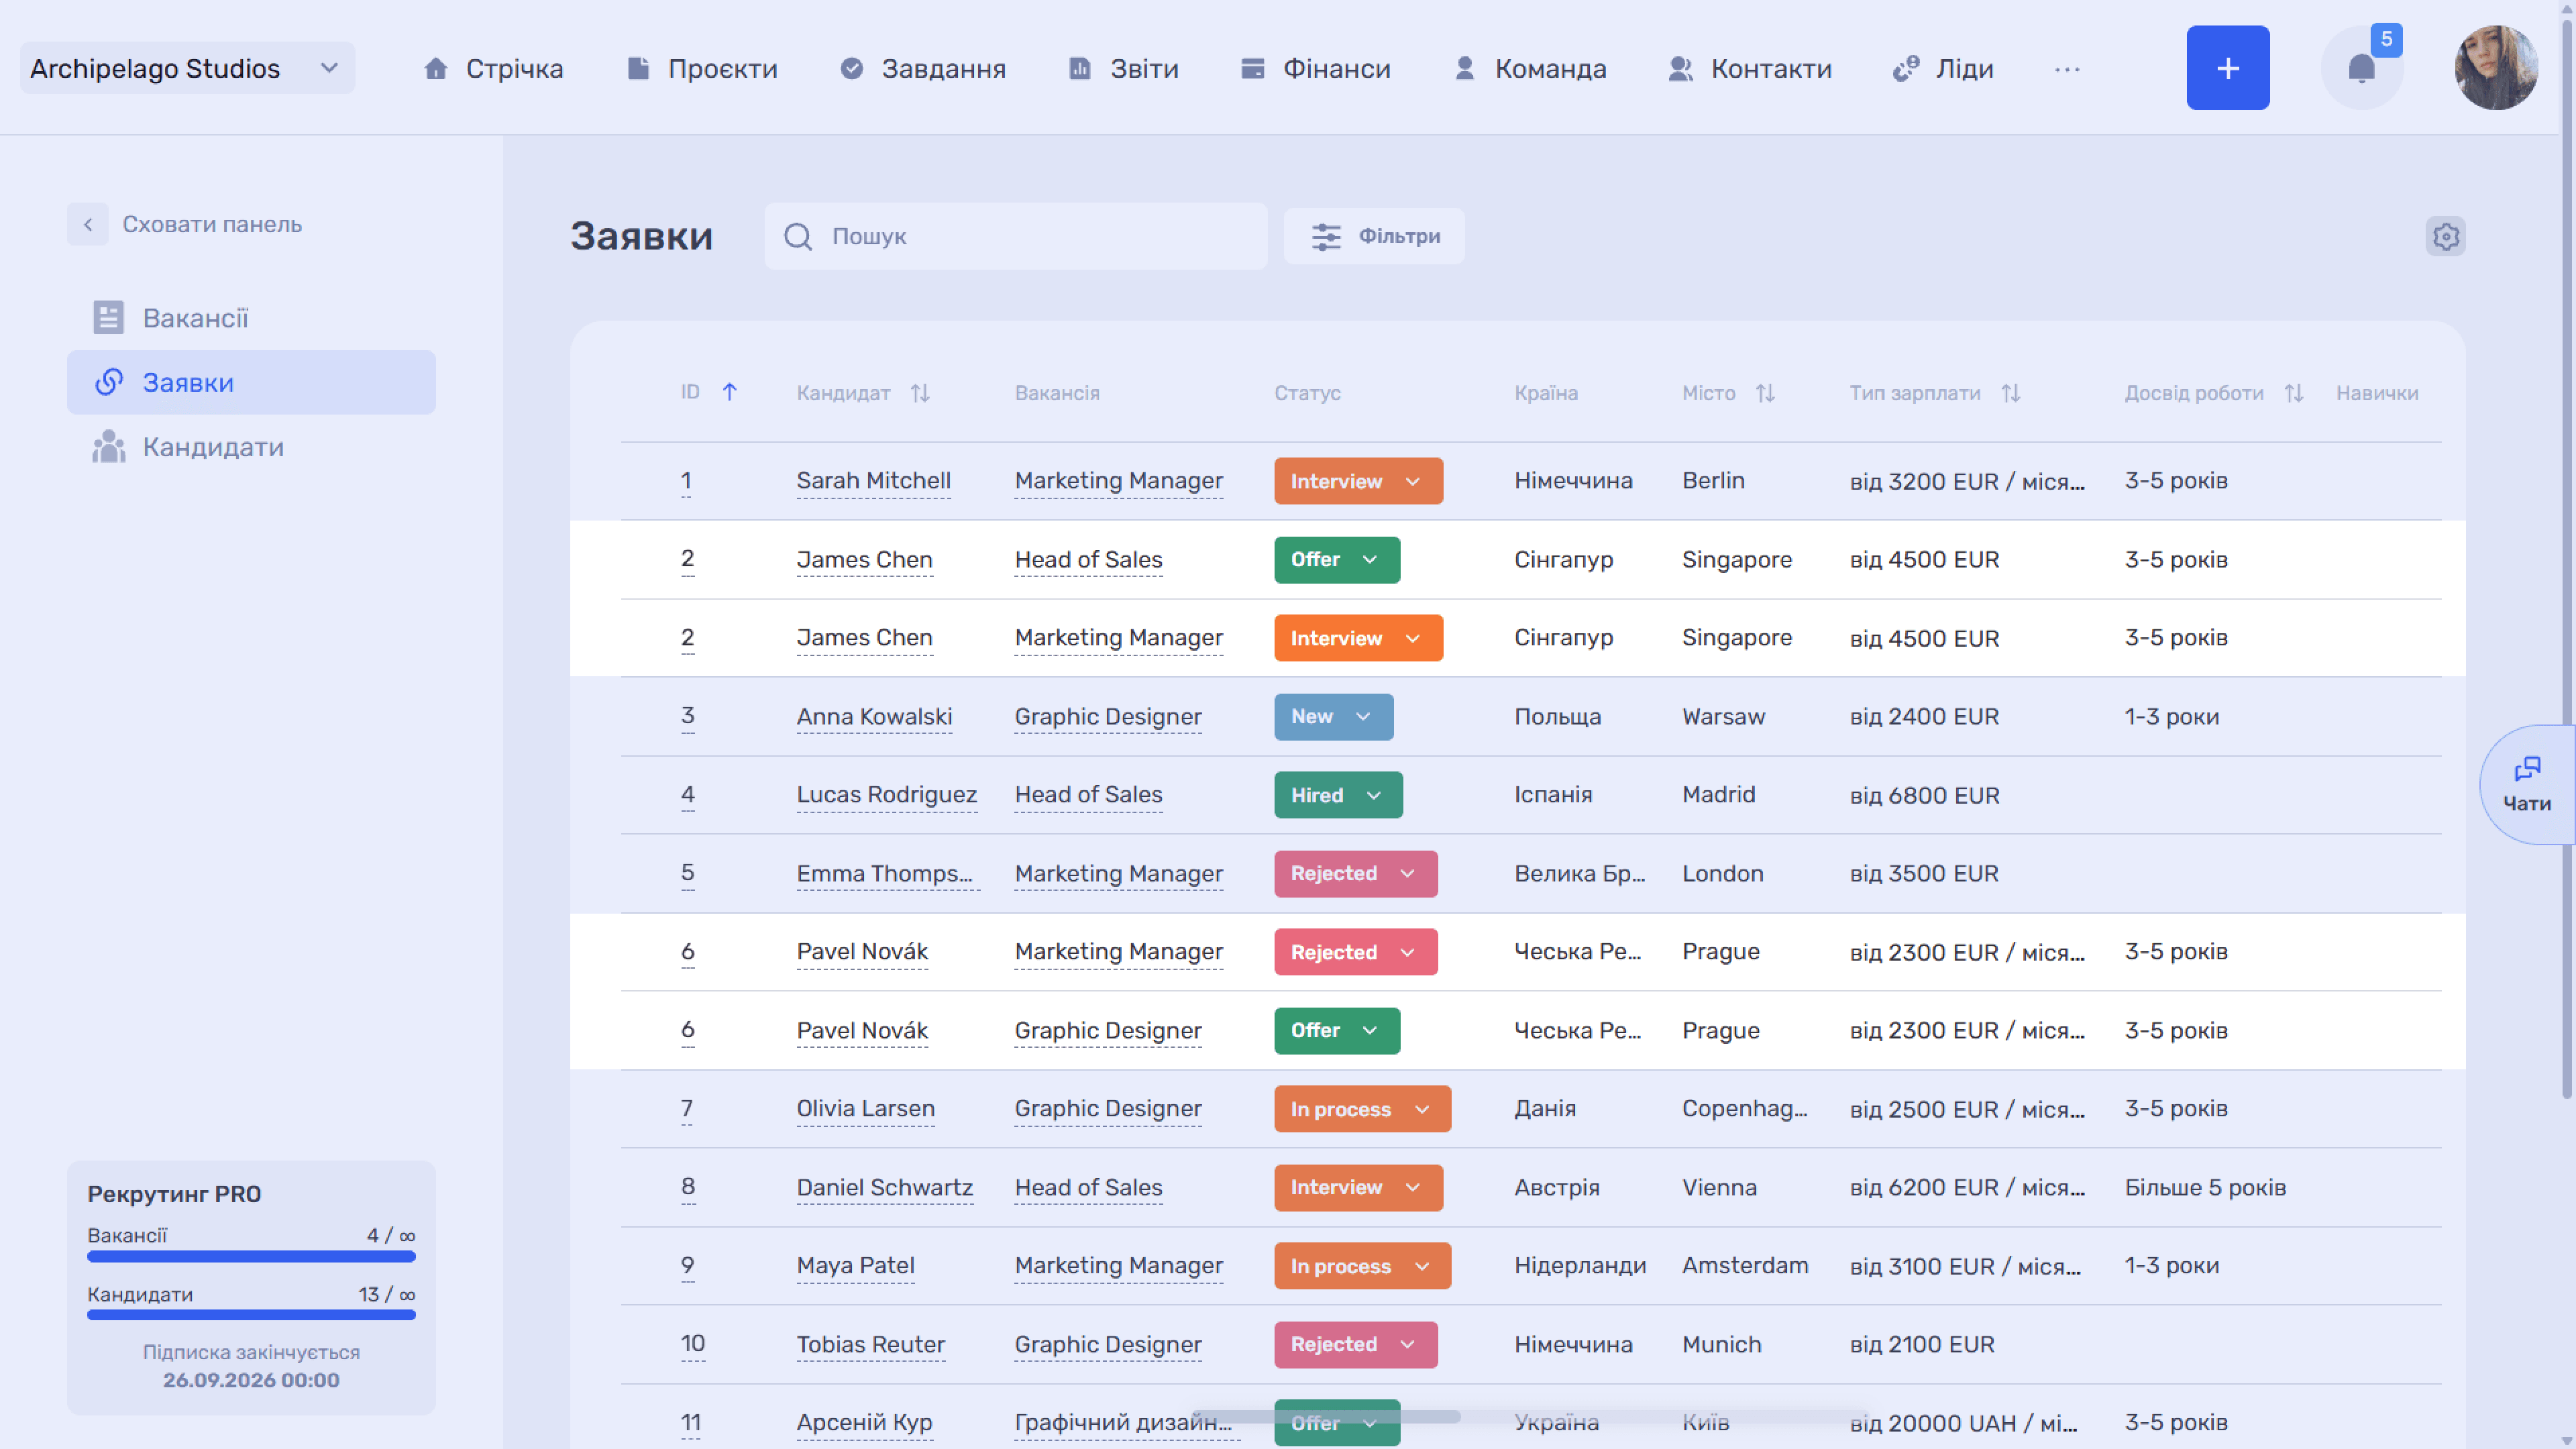
Application list
The section shows a table of all candidate applications to vacancies. Each application has columns whose width can be adjusted with the cursor: ID, Candidate, Vacancy, Status, Country, City, Salary type, Work experience, Skills, Employment type, Language level, Description, Source, Tags, File, and Actions.
Some columns support sorting, and the application status can be changed right from the list.
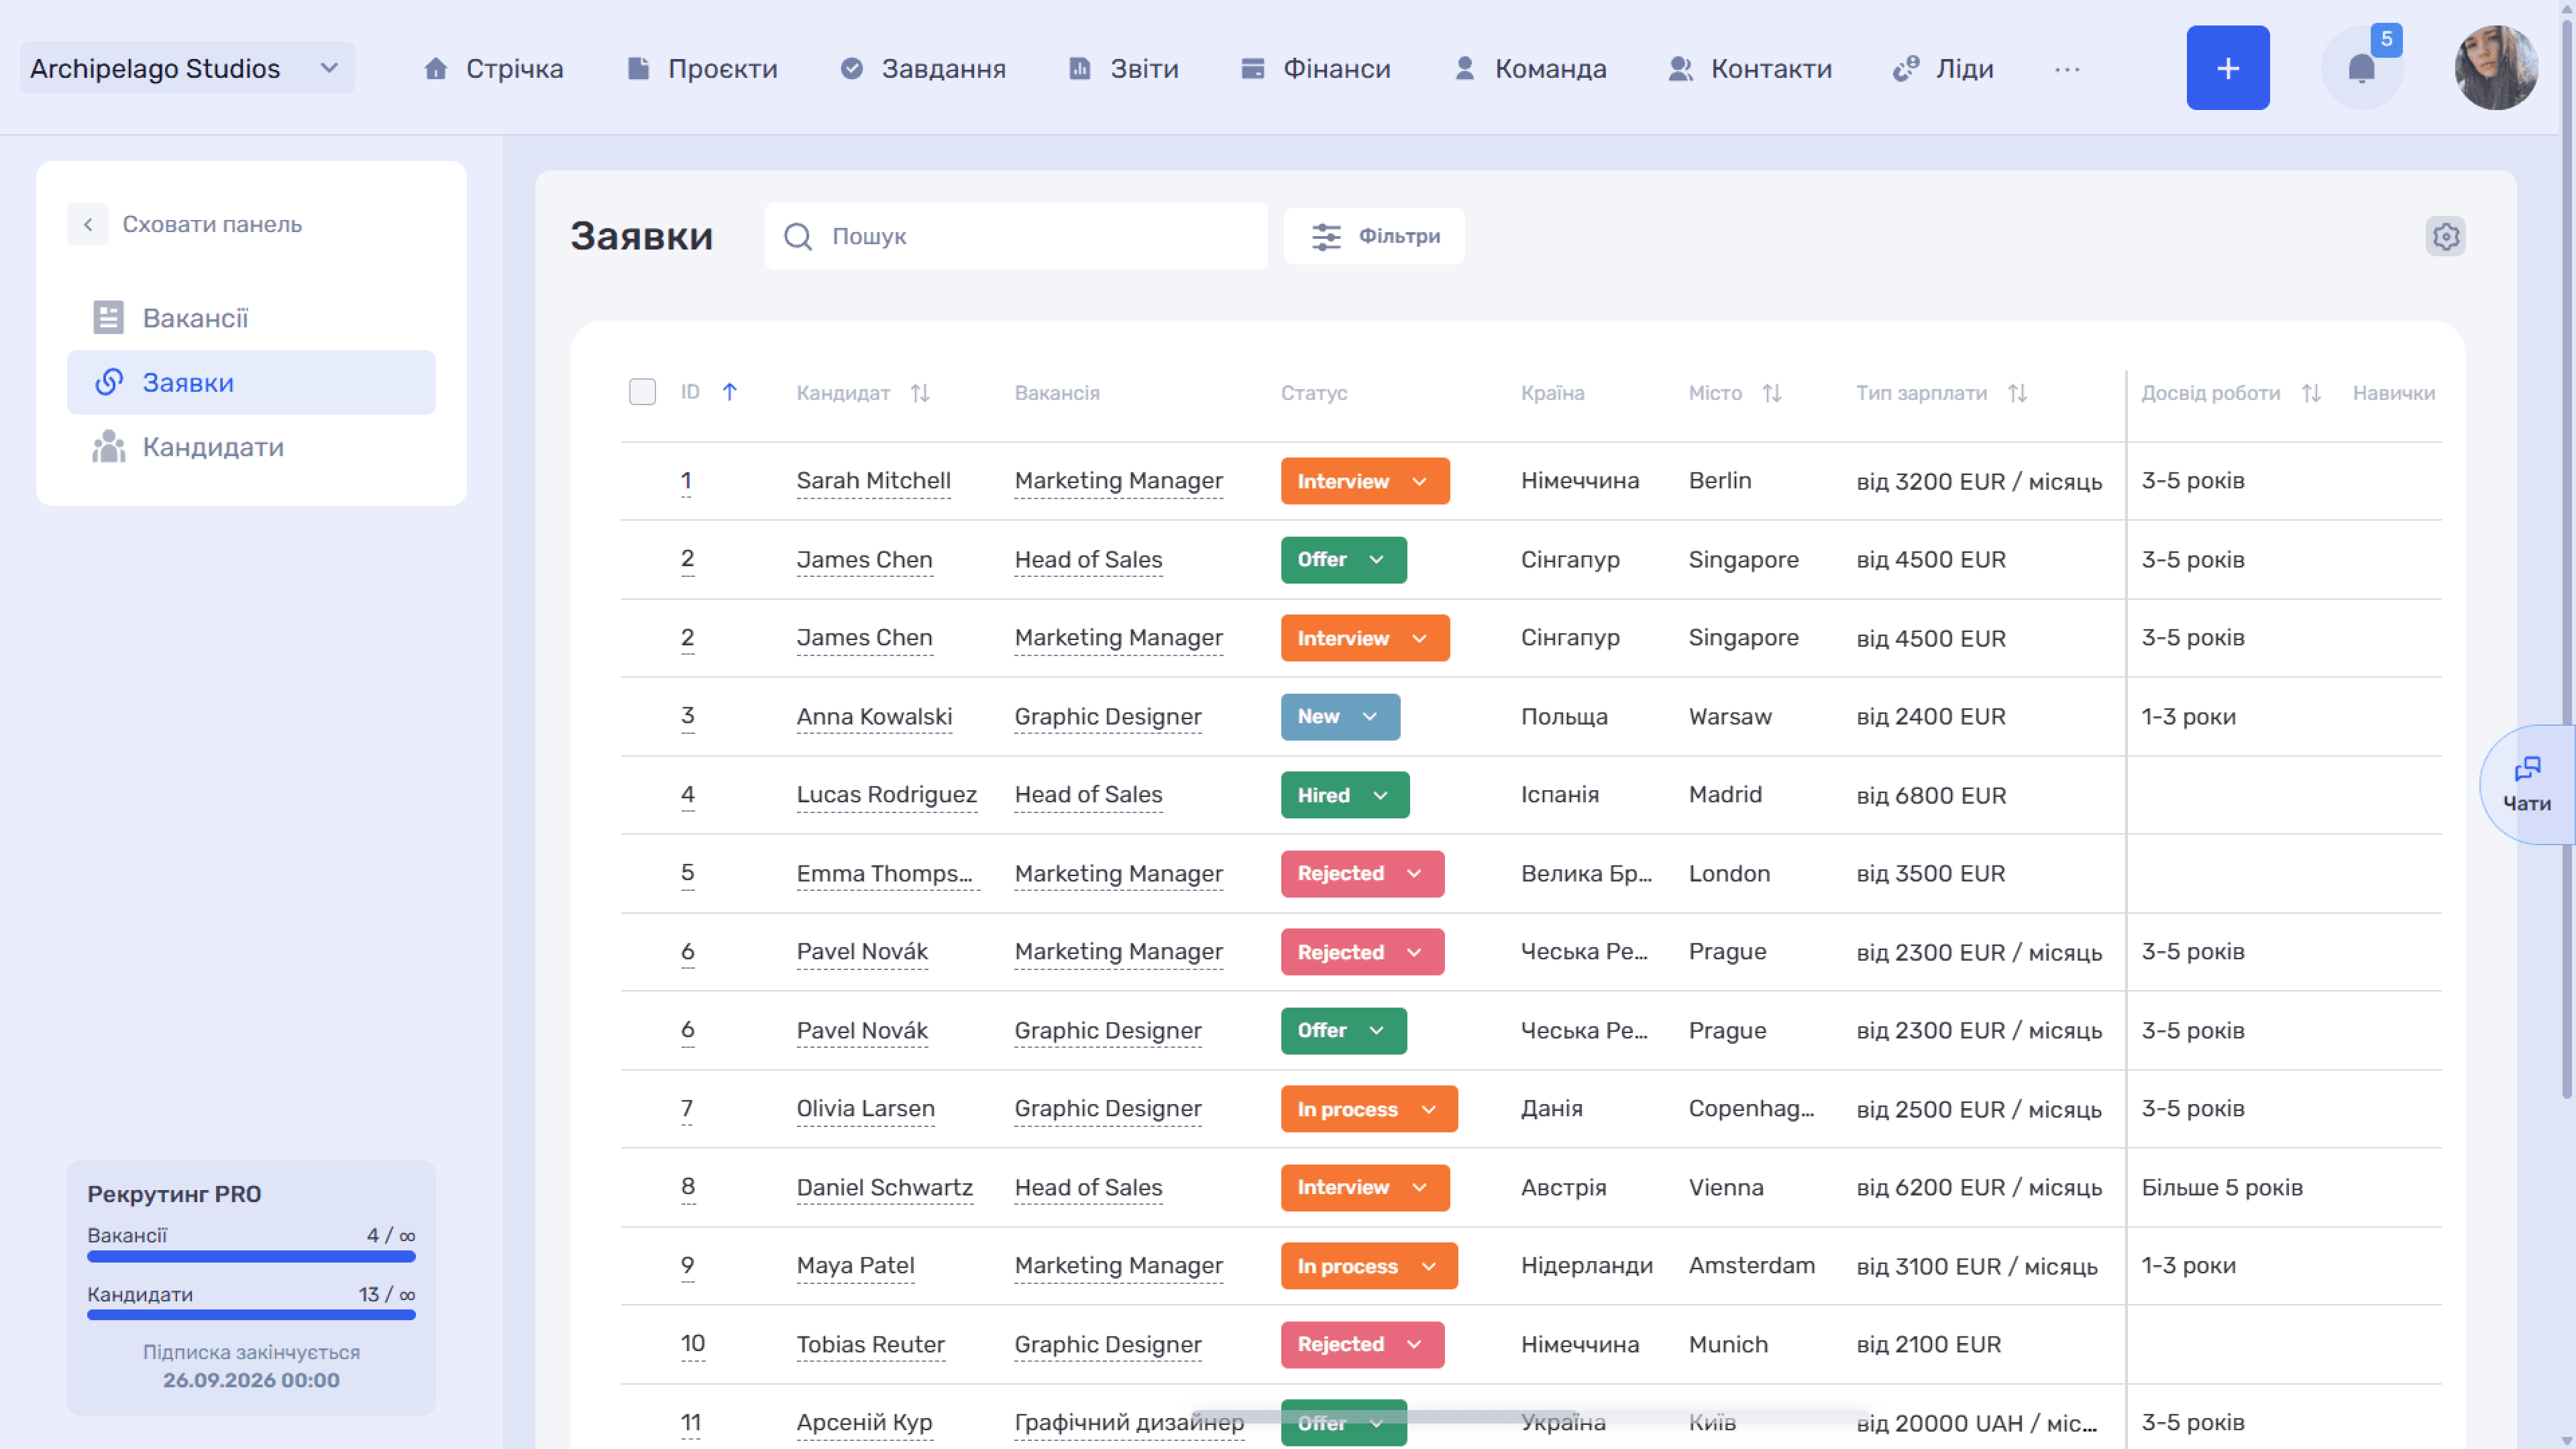
Status is the selection stage, changed right in the row. One candidate can appear in the list several times — one row for each vacancy they applied to.
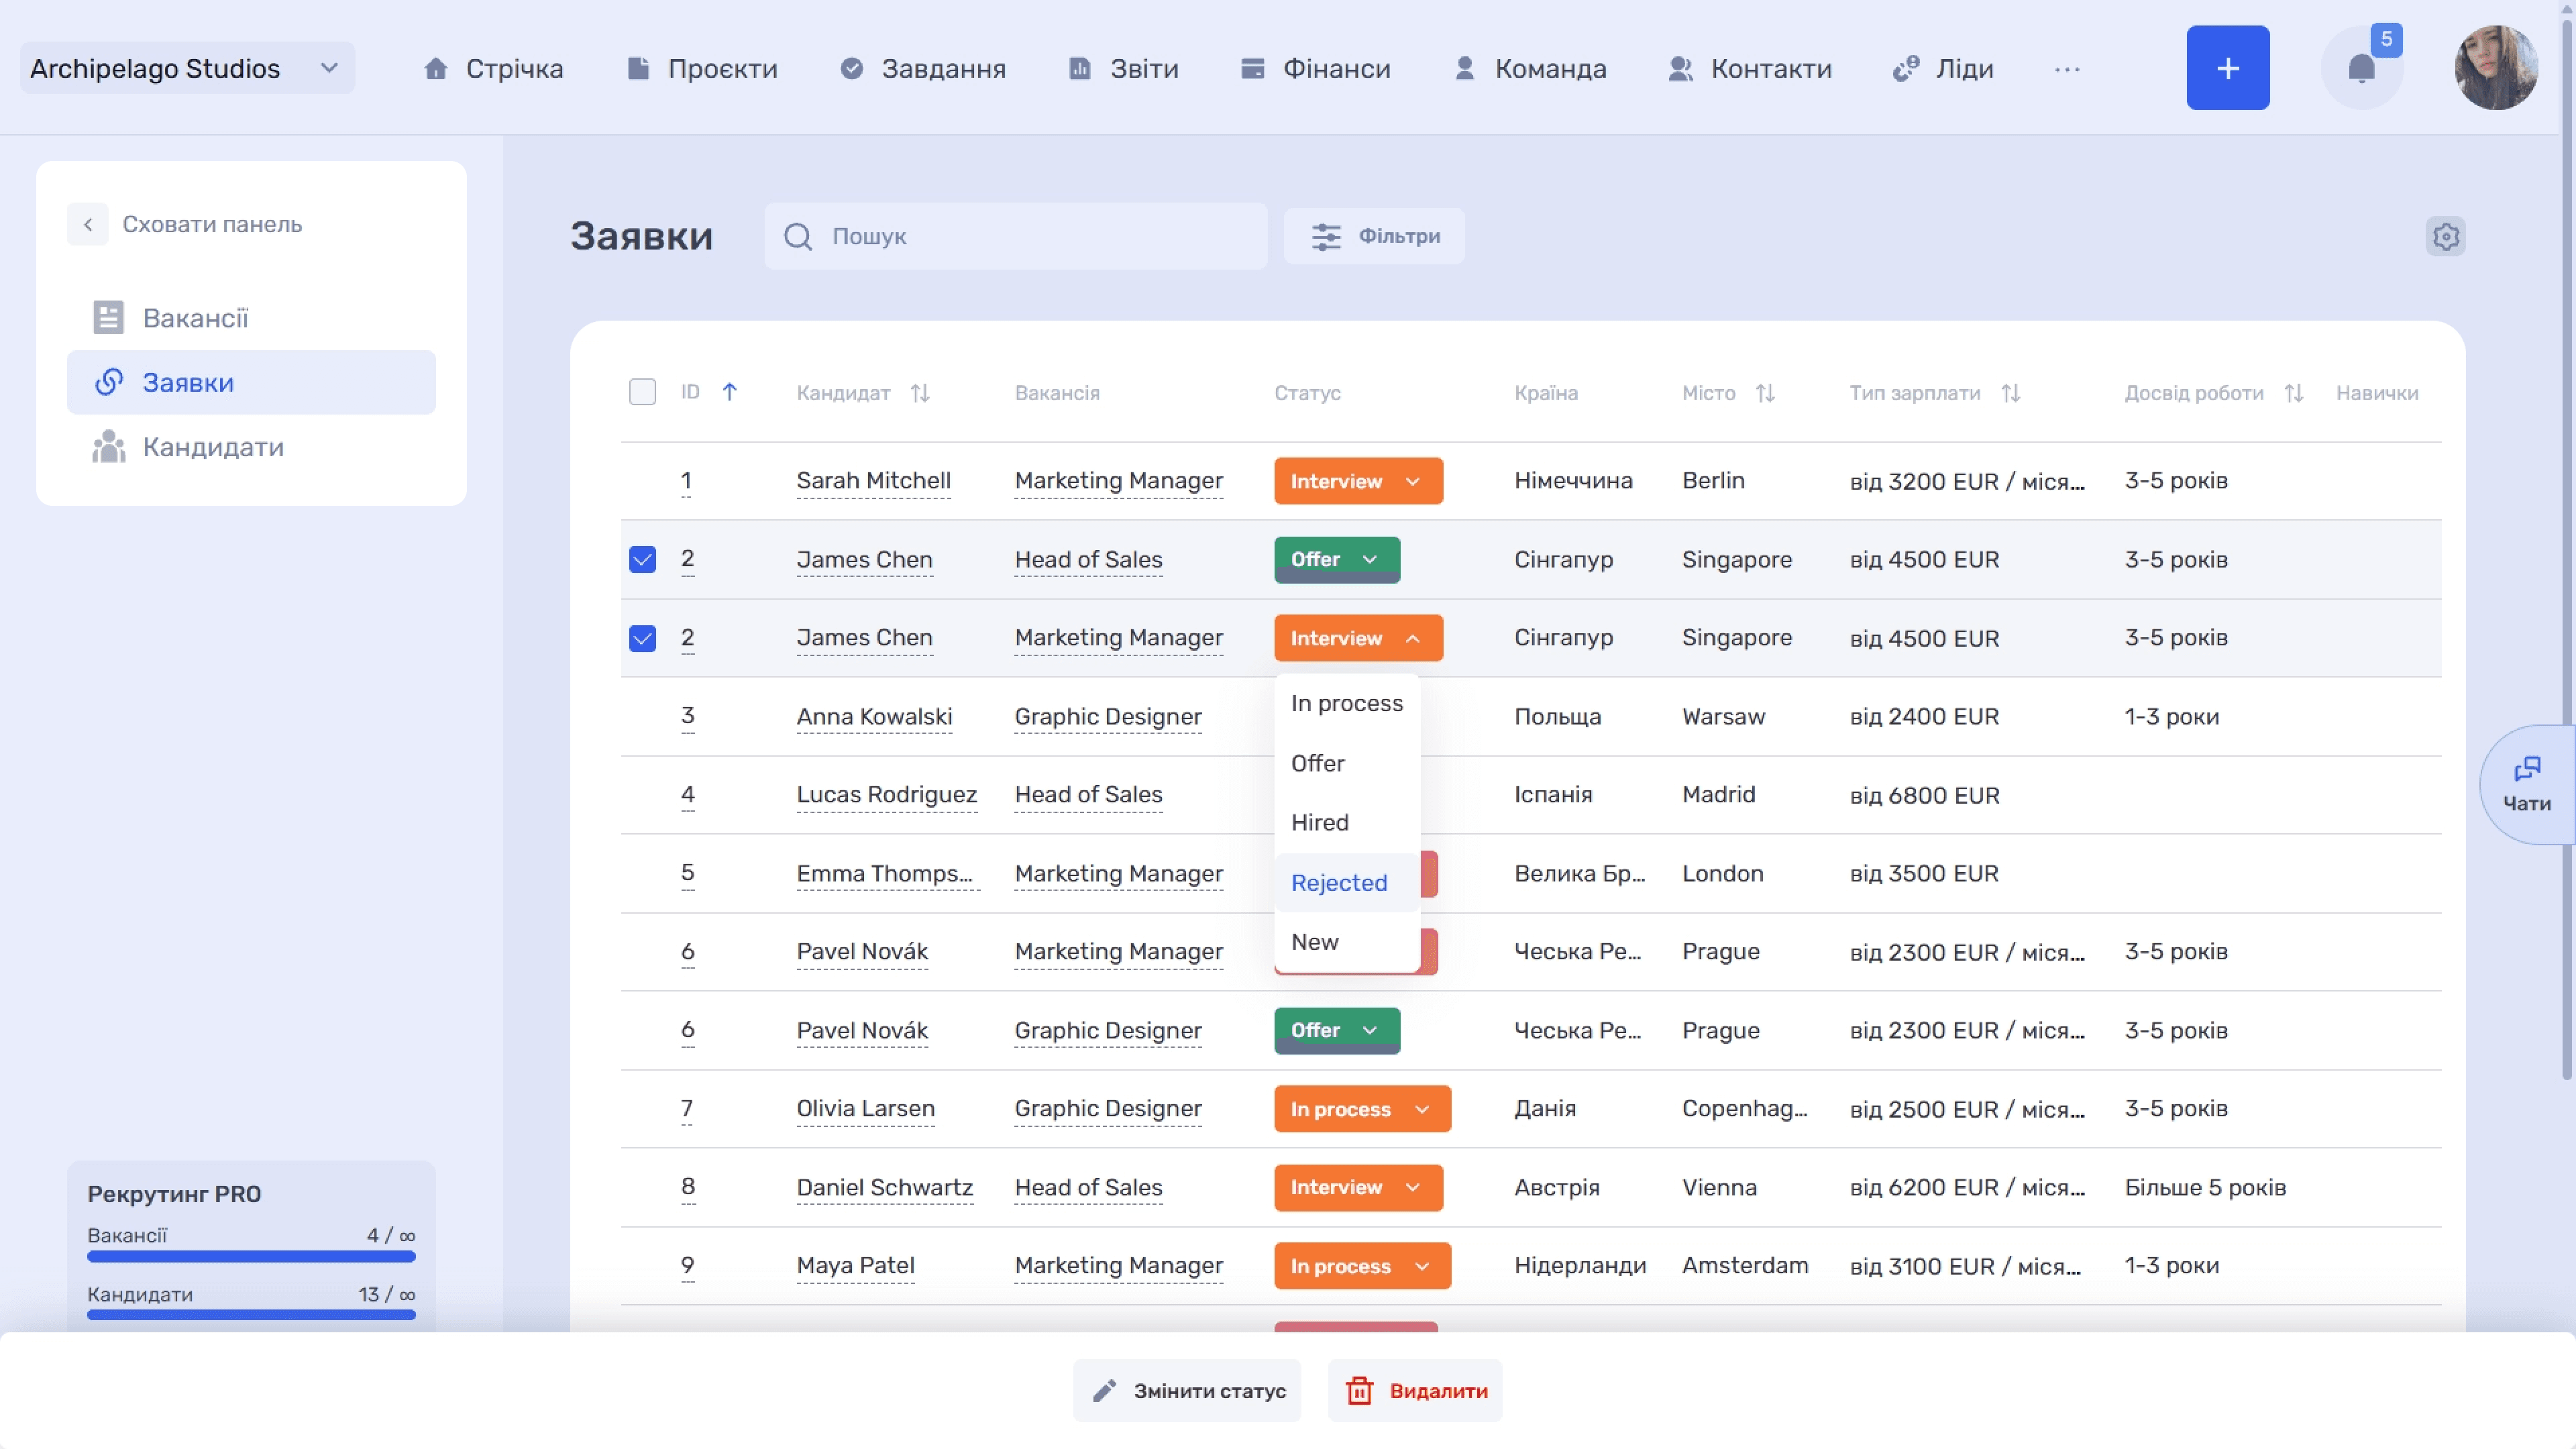
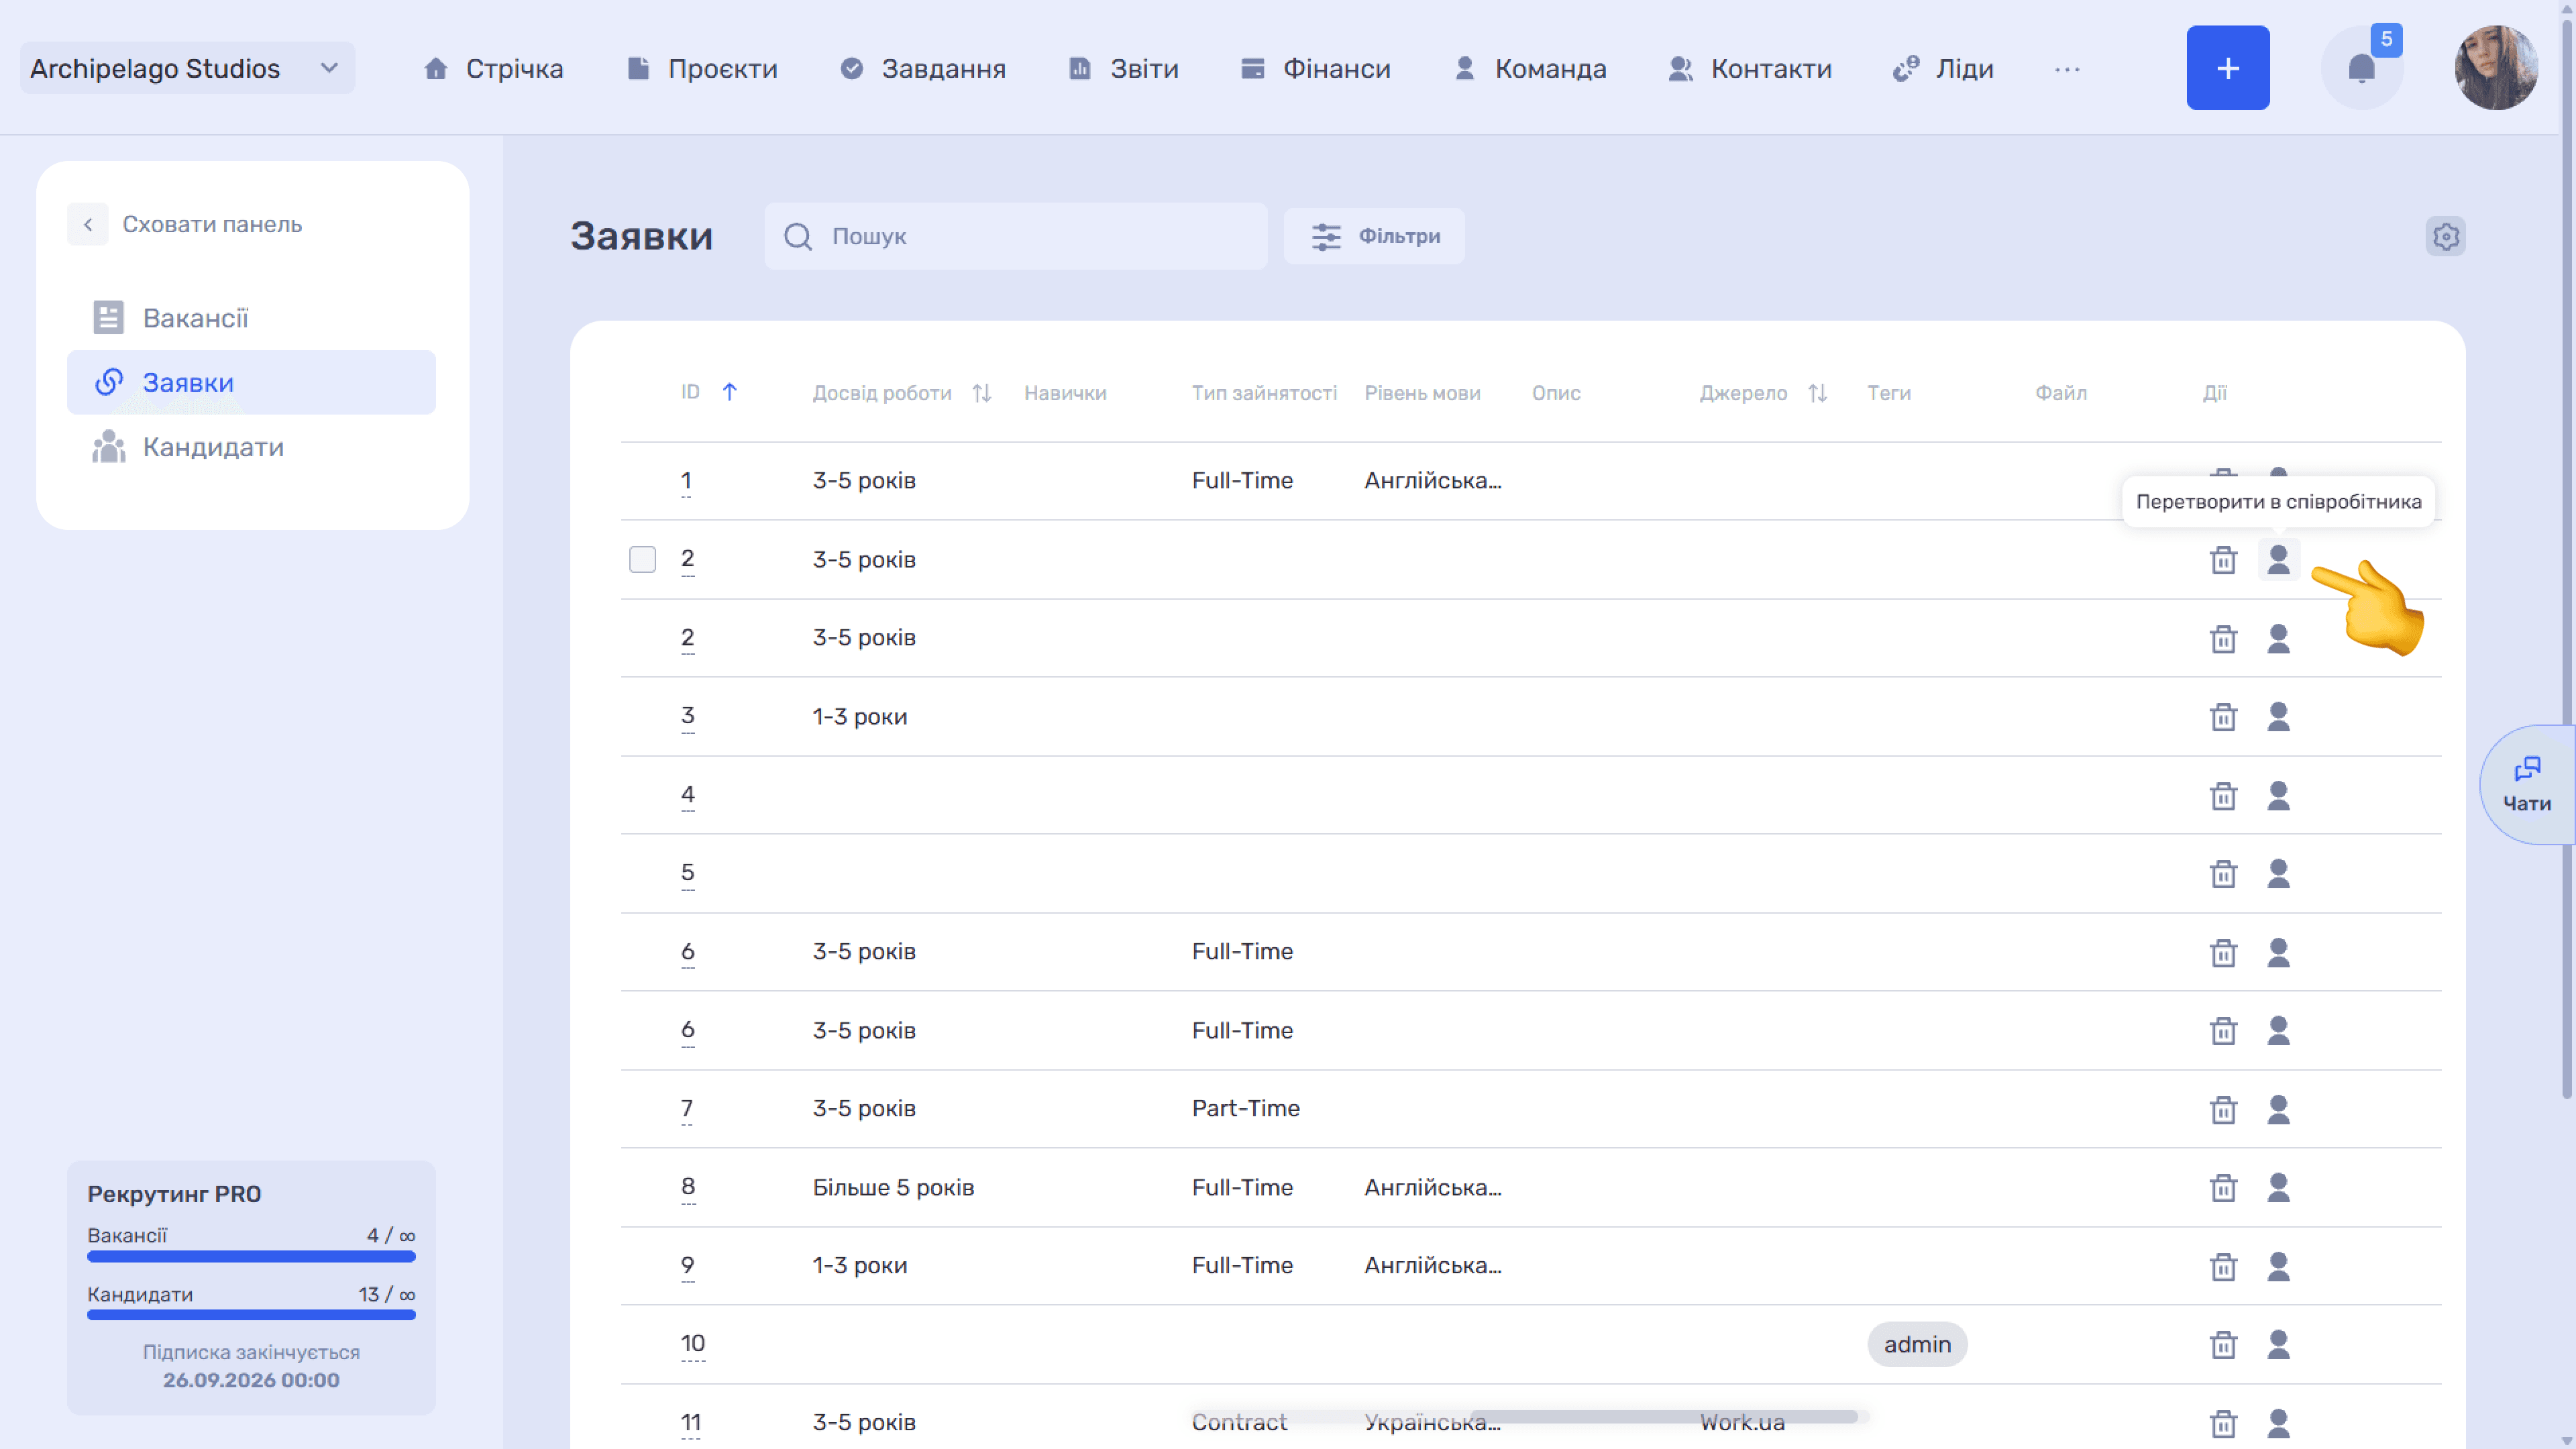
The Actions column has two icons: delete the application and convert to employee.
Search, filters, and table view
When there are many applications, scrolling through the whole list is inconvenient — use search and filters to find the one you need quickly.
Search at the top of the page works across the application list: start typing a candidate name or vacancy title, and the table narrows to matching rows right away.
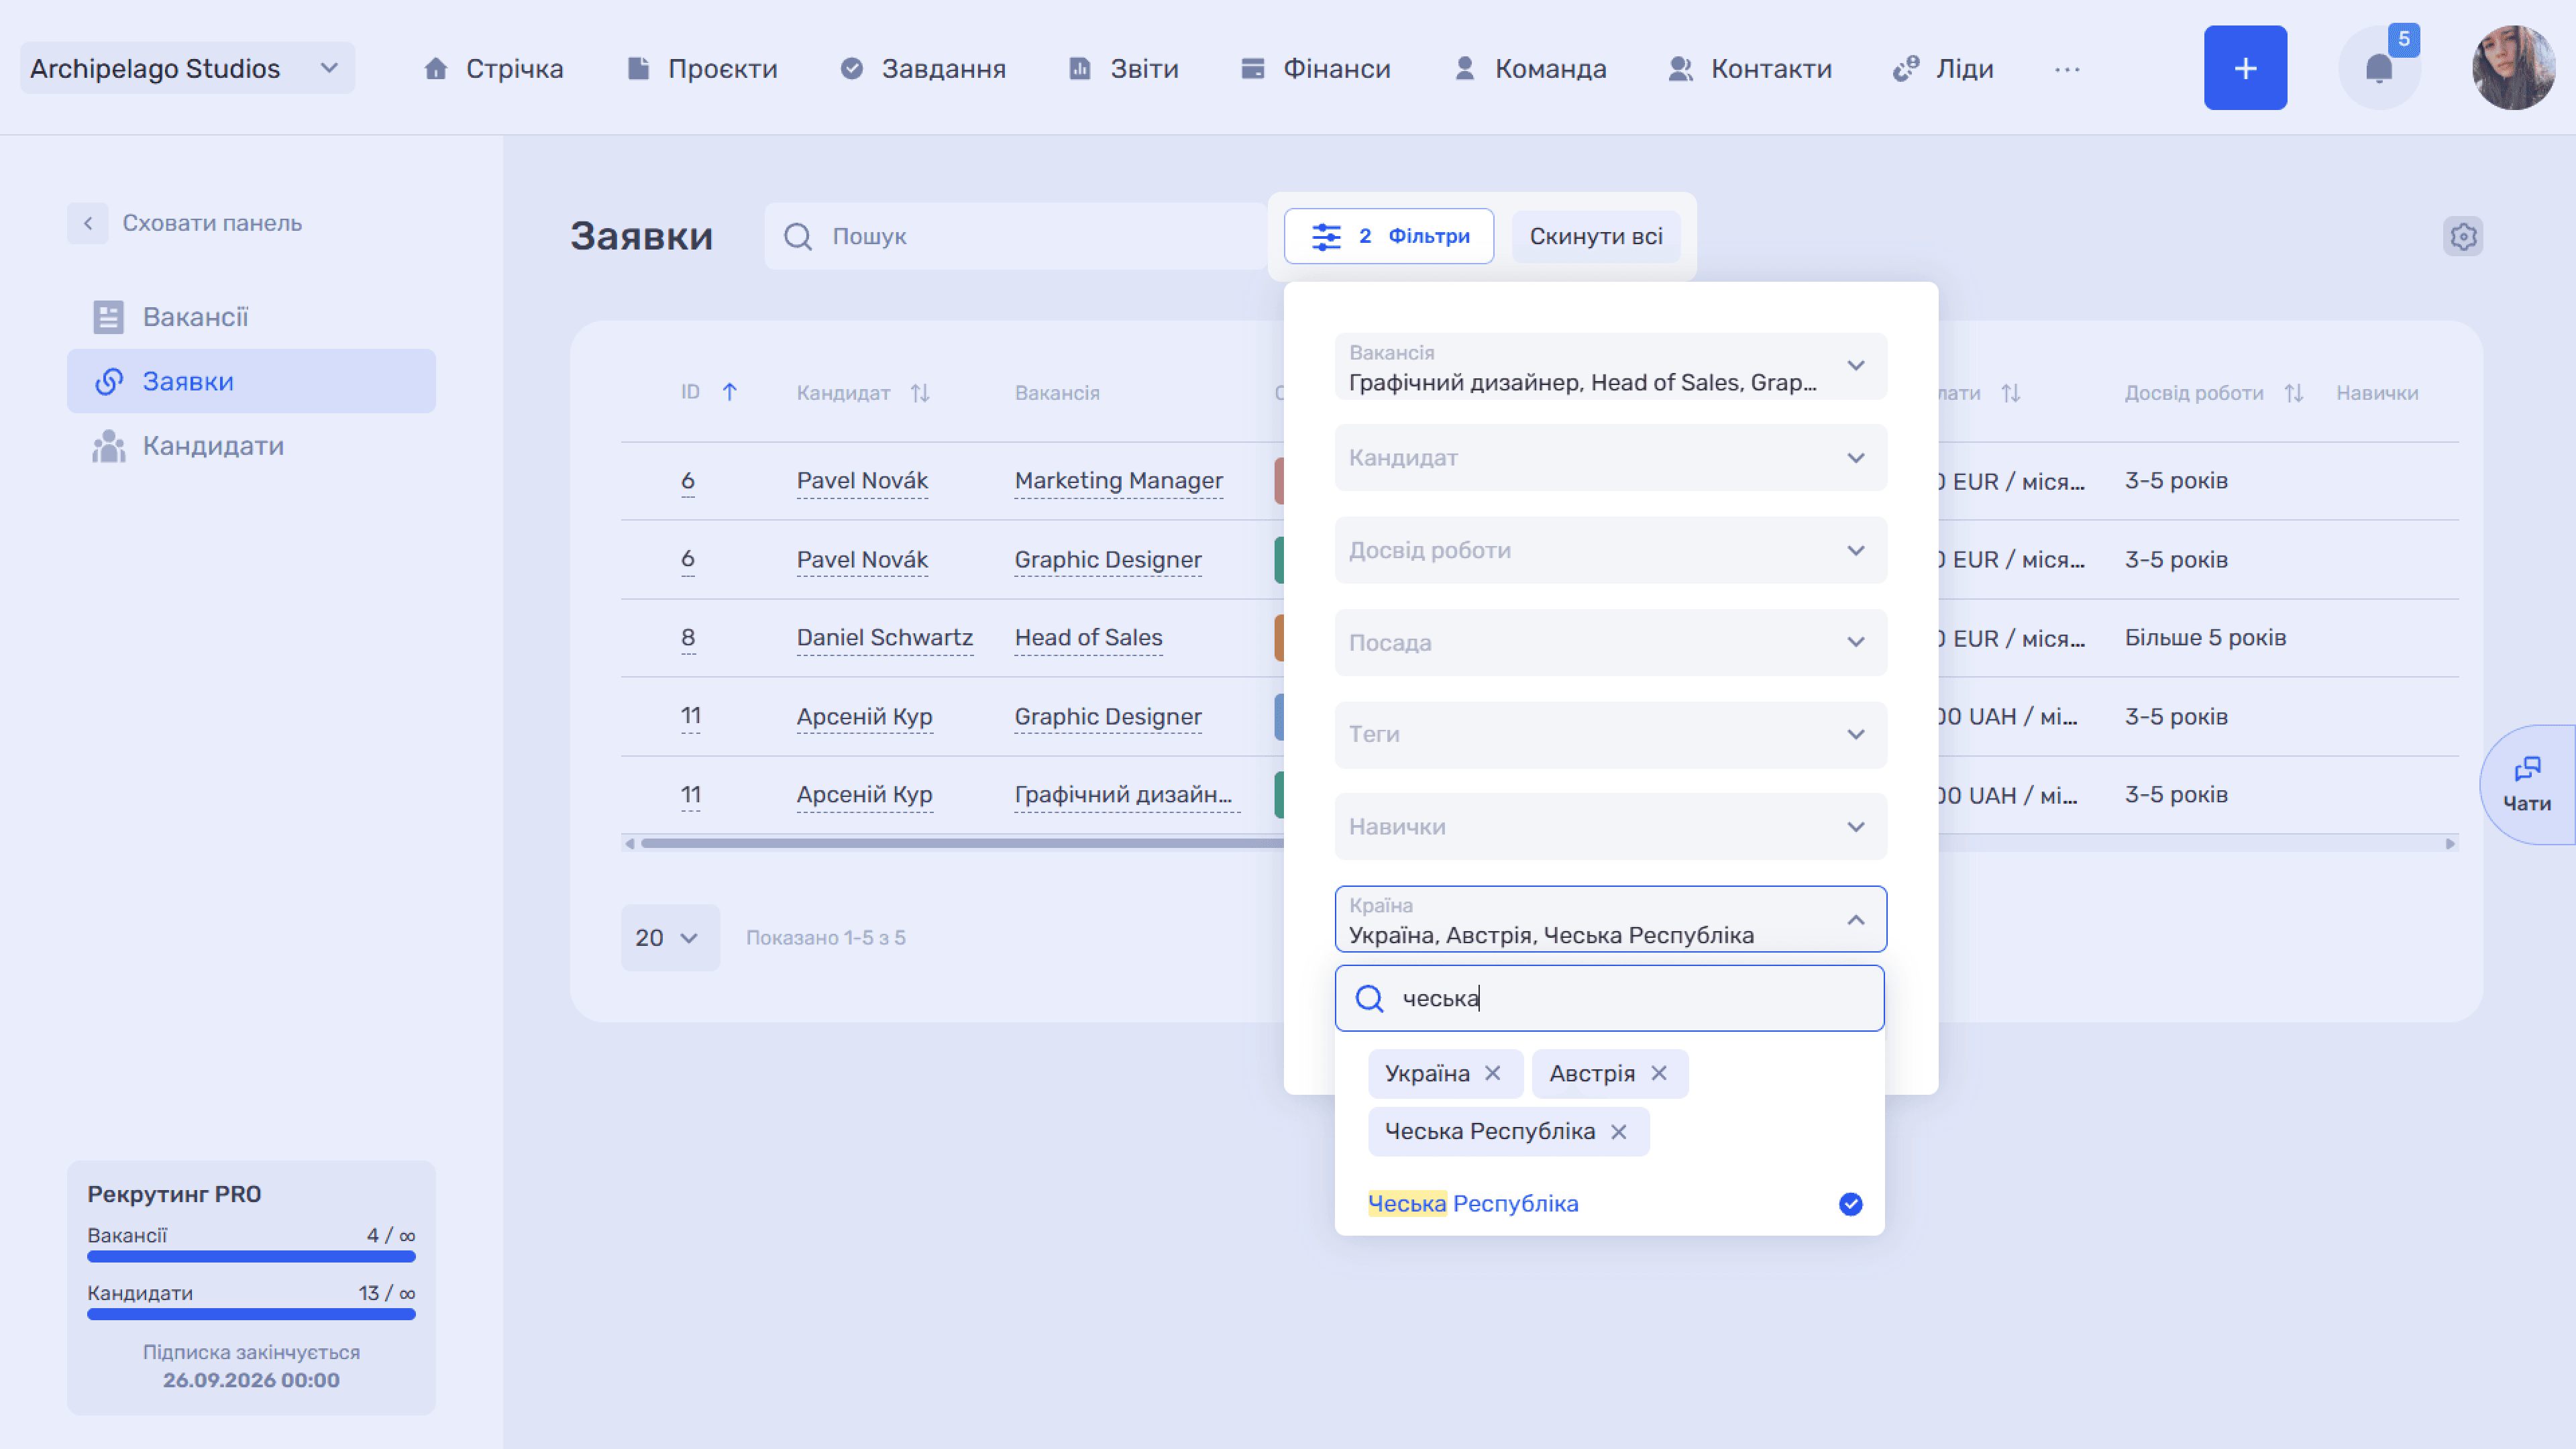
Filters let you select applications by several parameters at once. Click the Filters button to the right of the search — a panel opens with the fields Vacancy, Candidate, Work experience, Position, Tags, Skills, Country, and City.
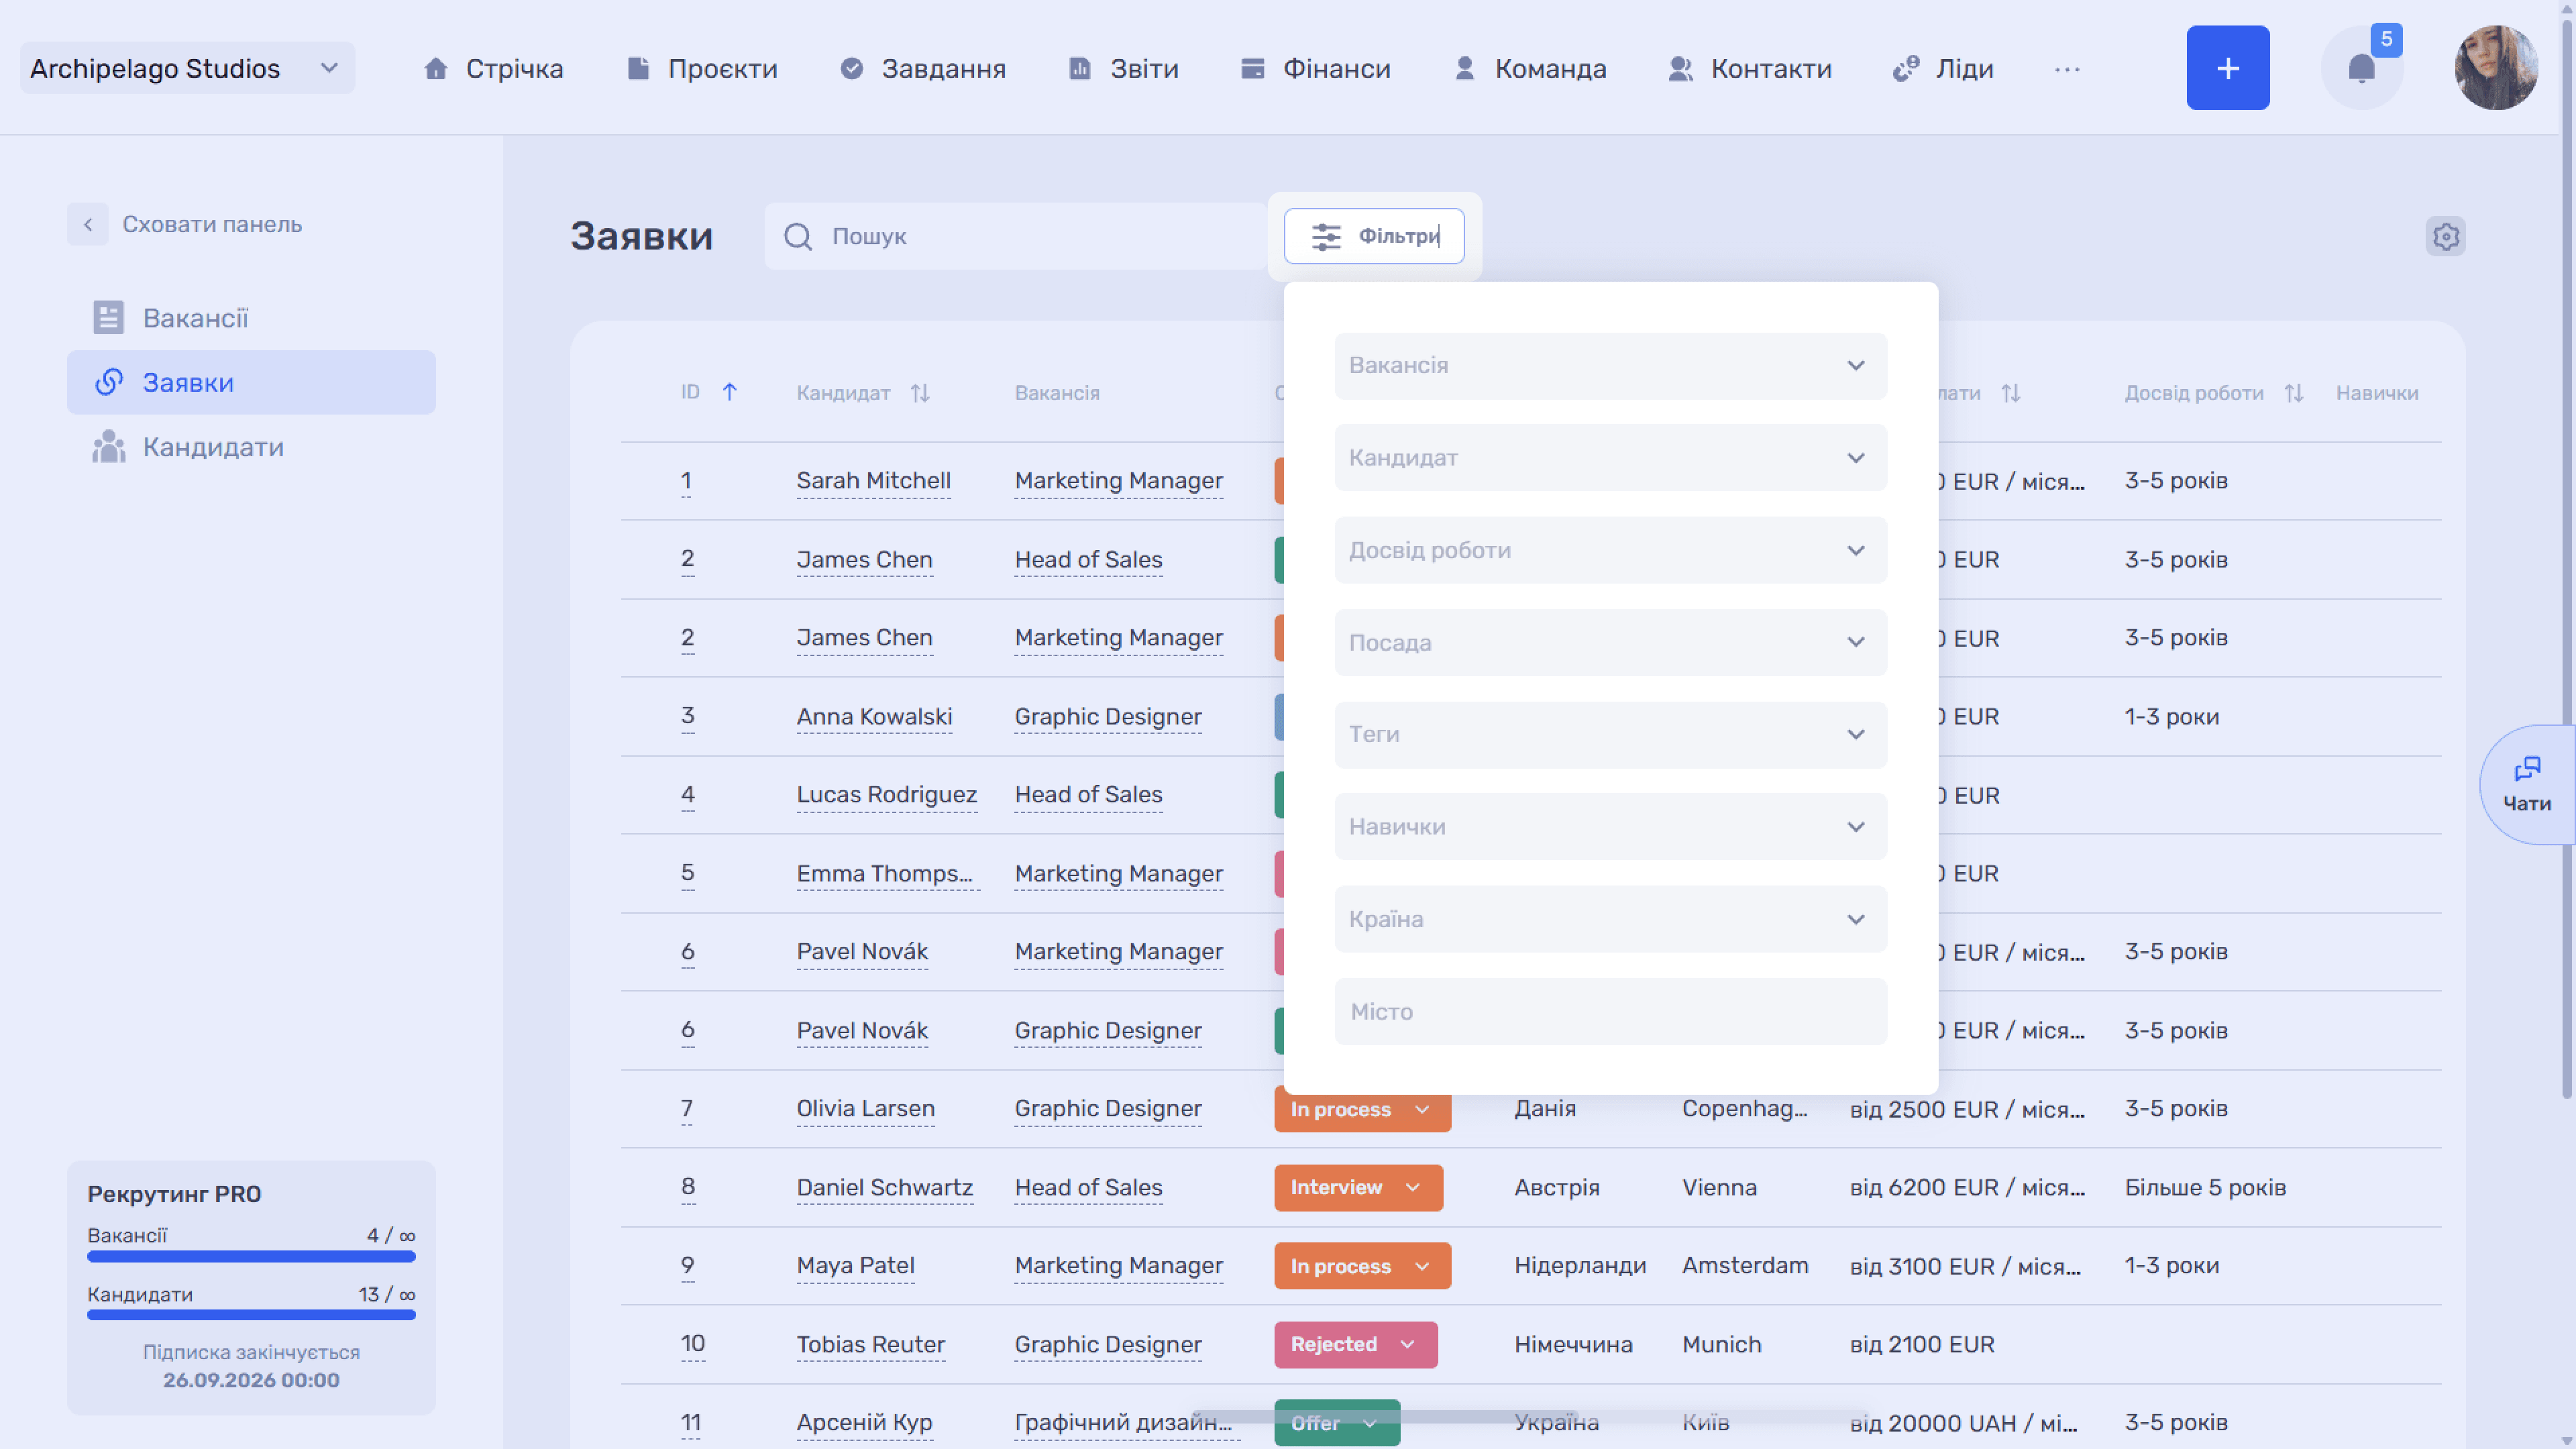
You can apply several filters at once. To return to the full list, clear the selected values.
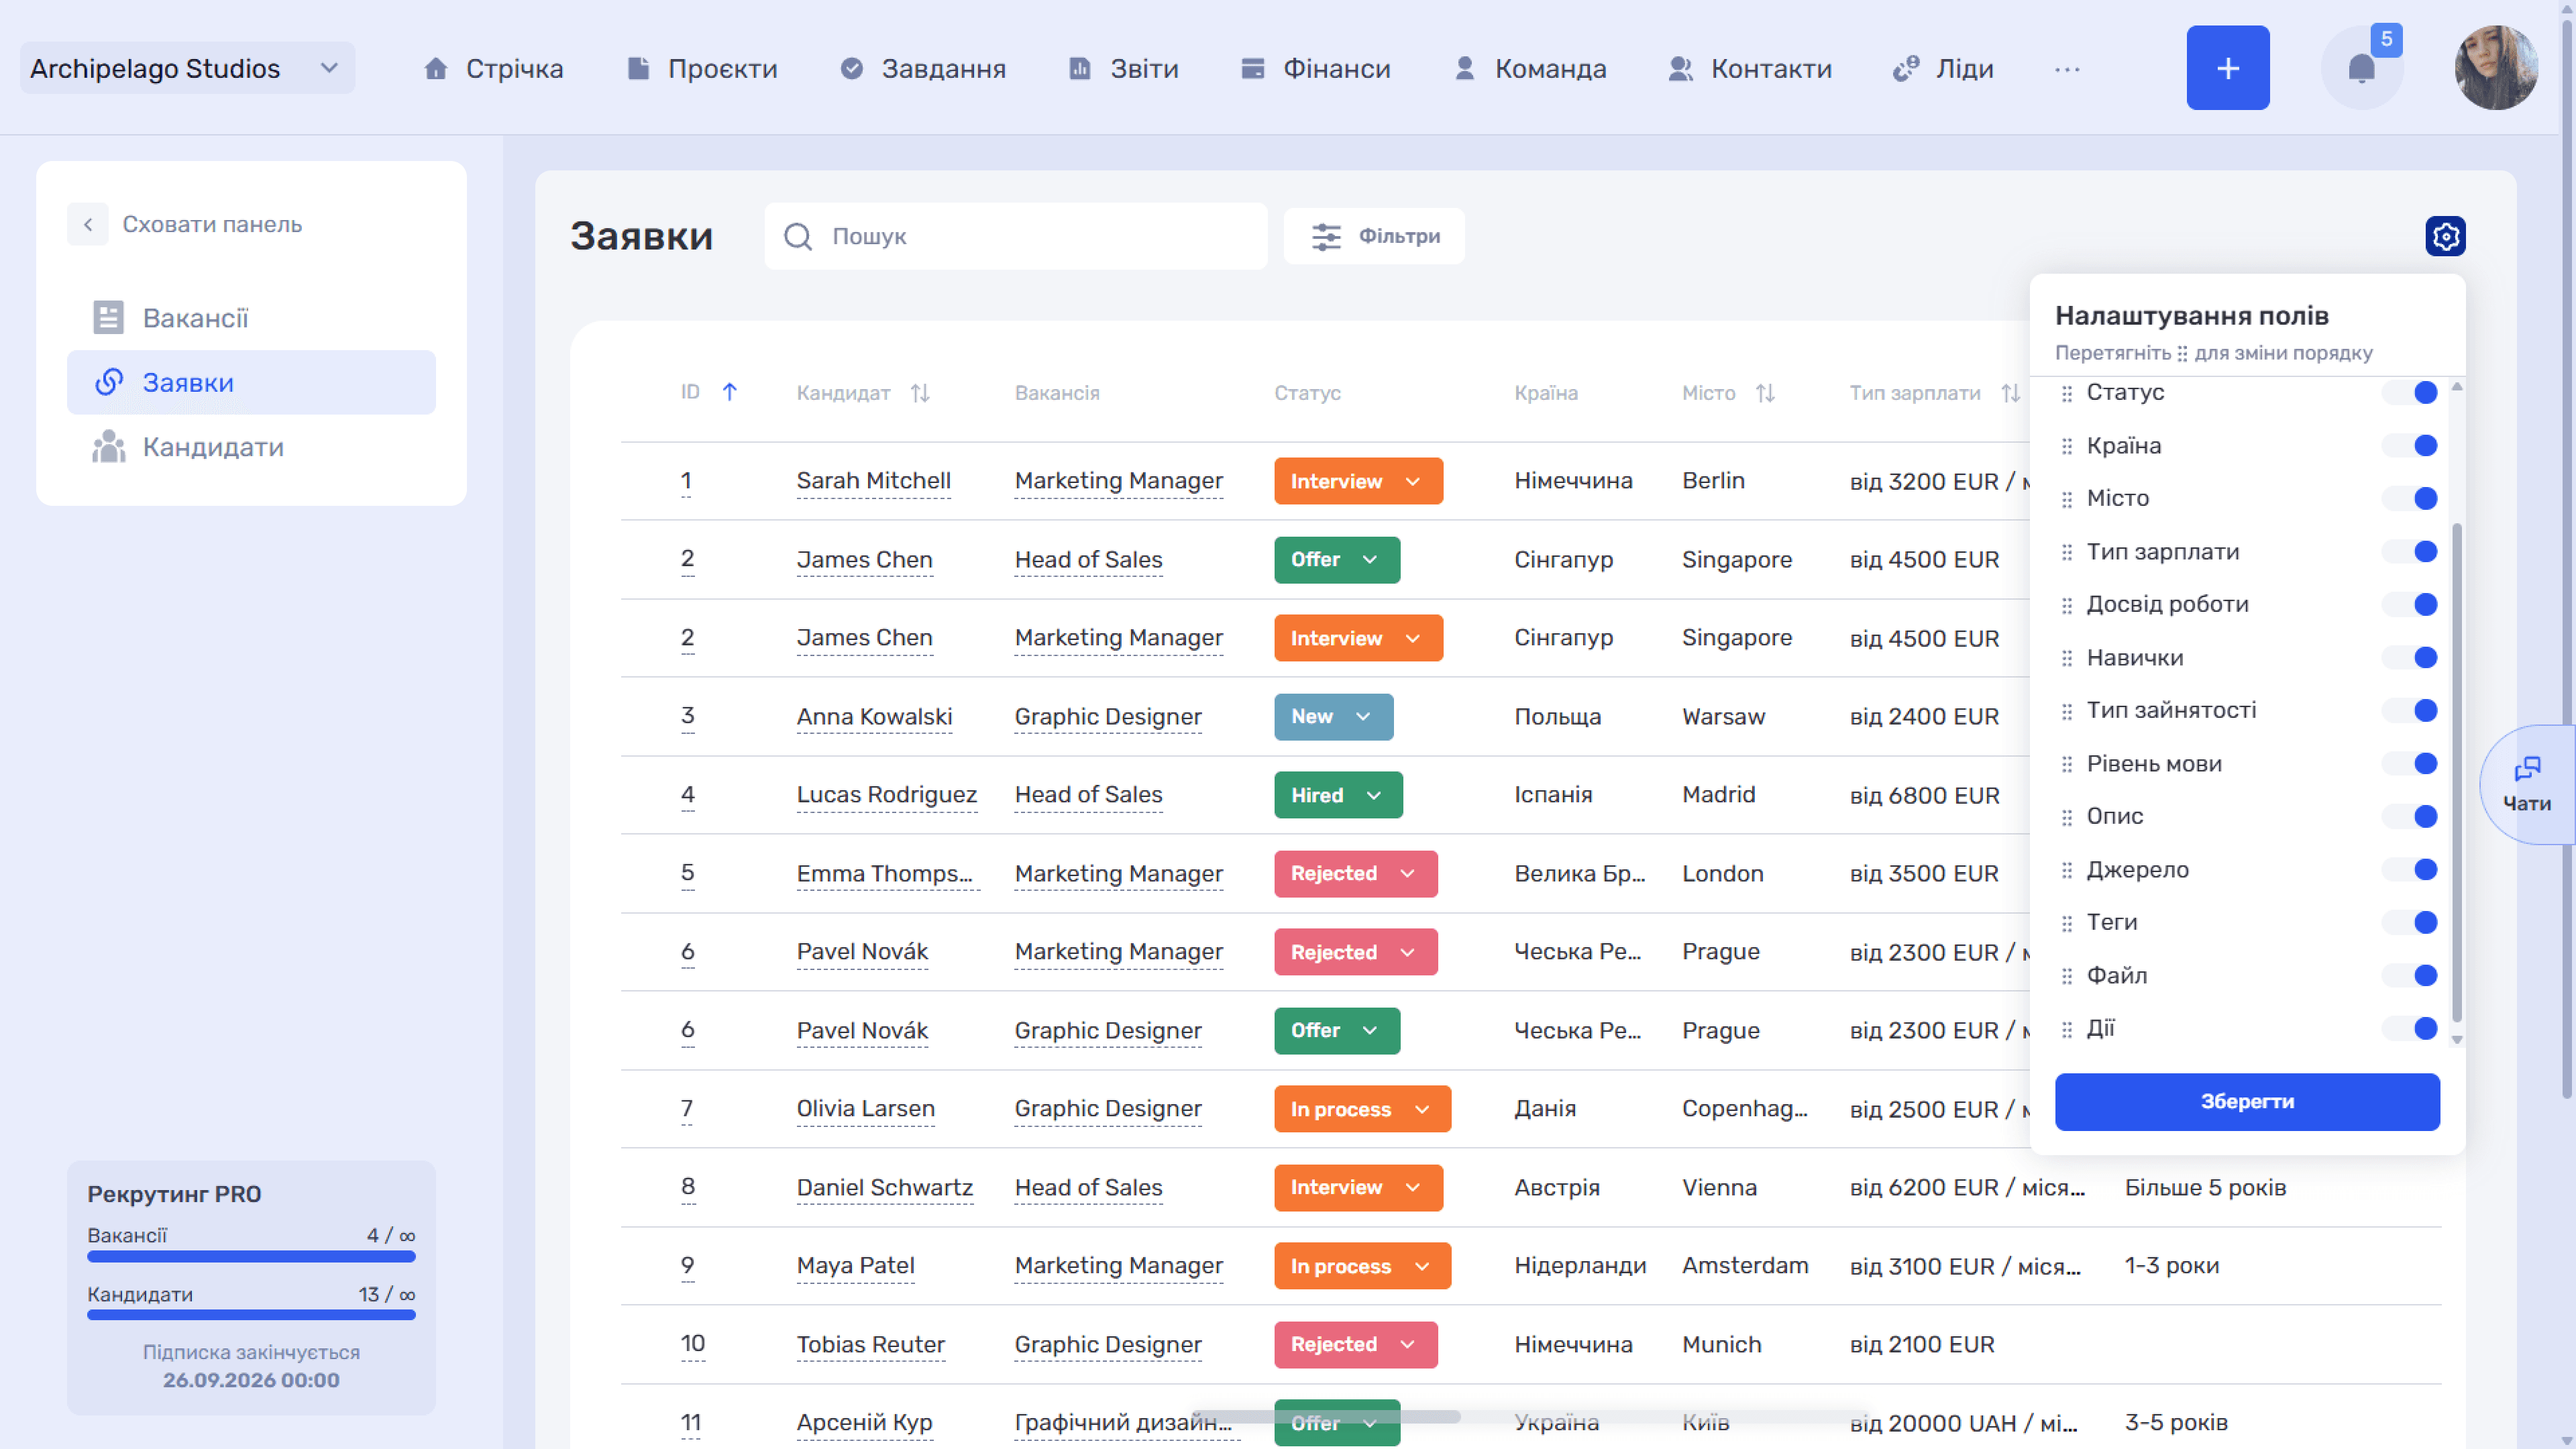
If you do not need some columns or want to see them in a different order, customize the table view. The settings icon on the right opens the Field settings panel: toggles switch individual columns on and off, and dragging by ⠿ changes their order. Settings are saved for your account — other employees see the table in their own view. Apply changes with Save.
Bulk actions
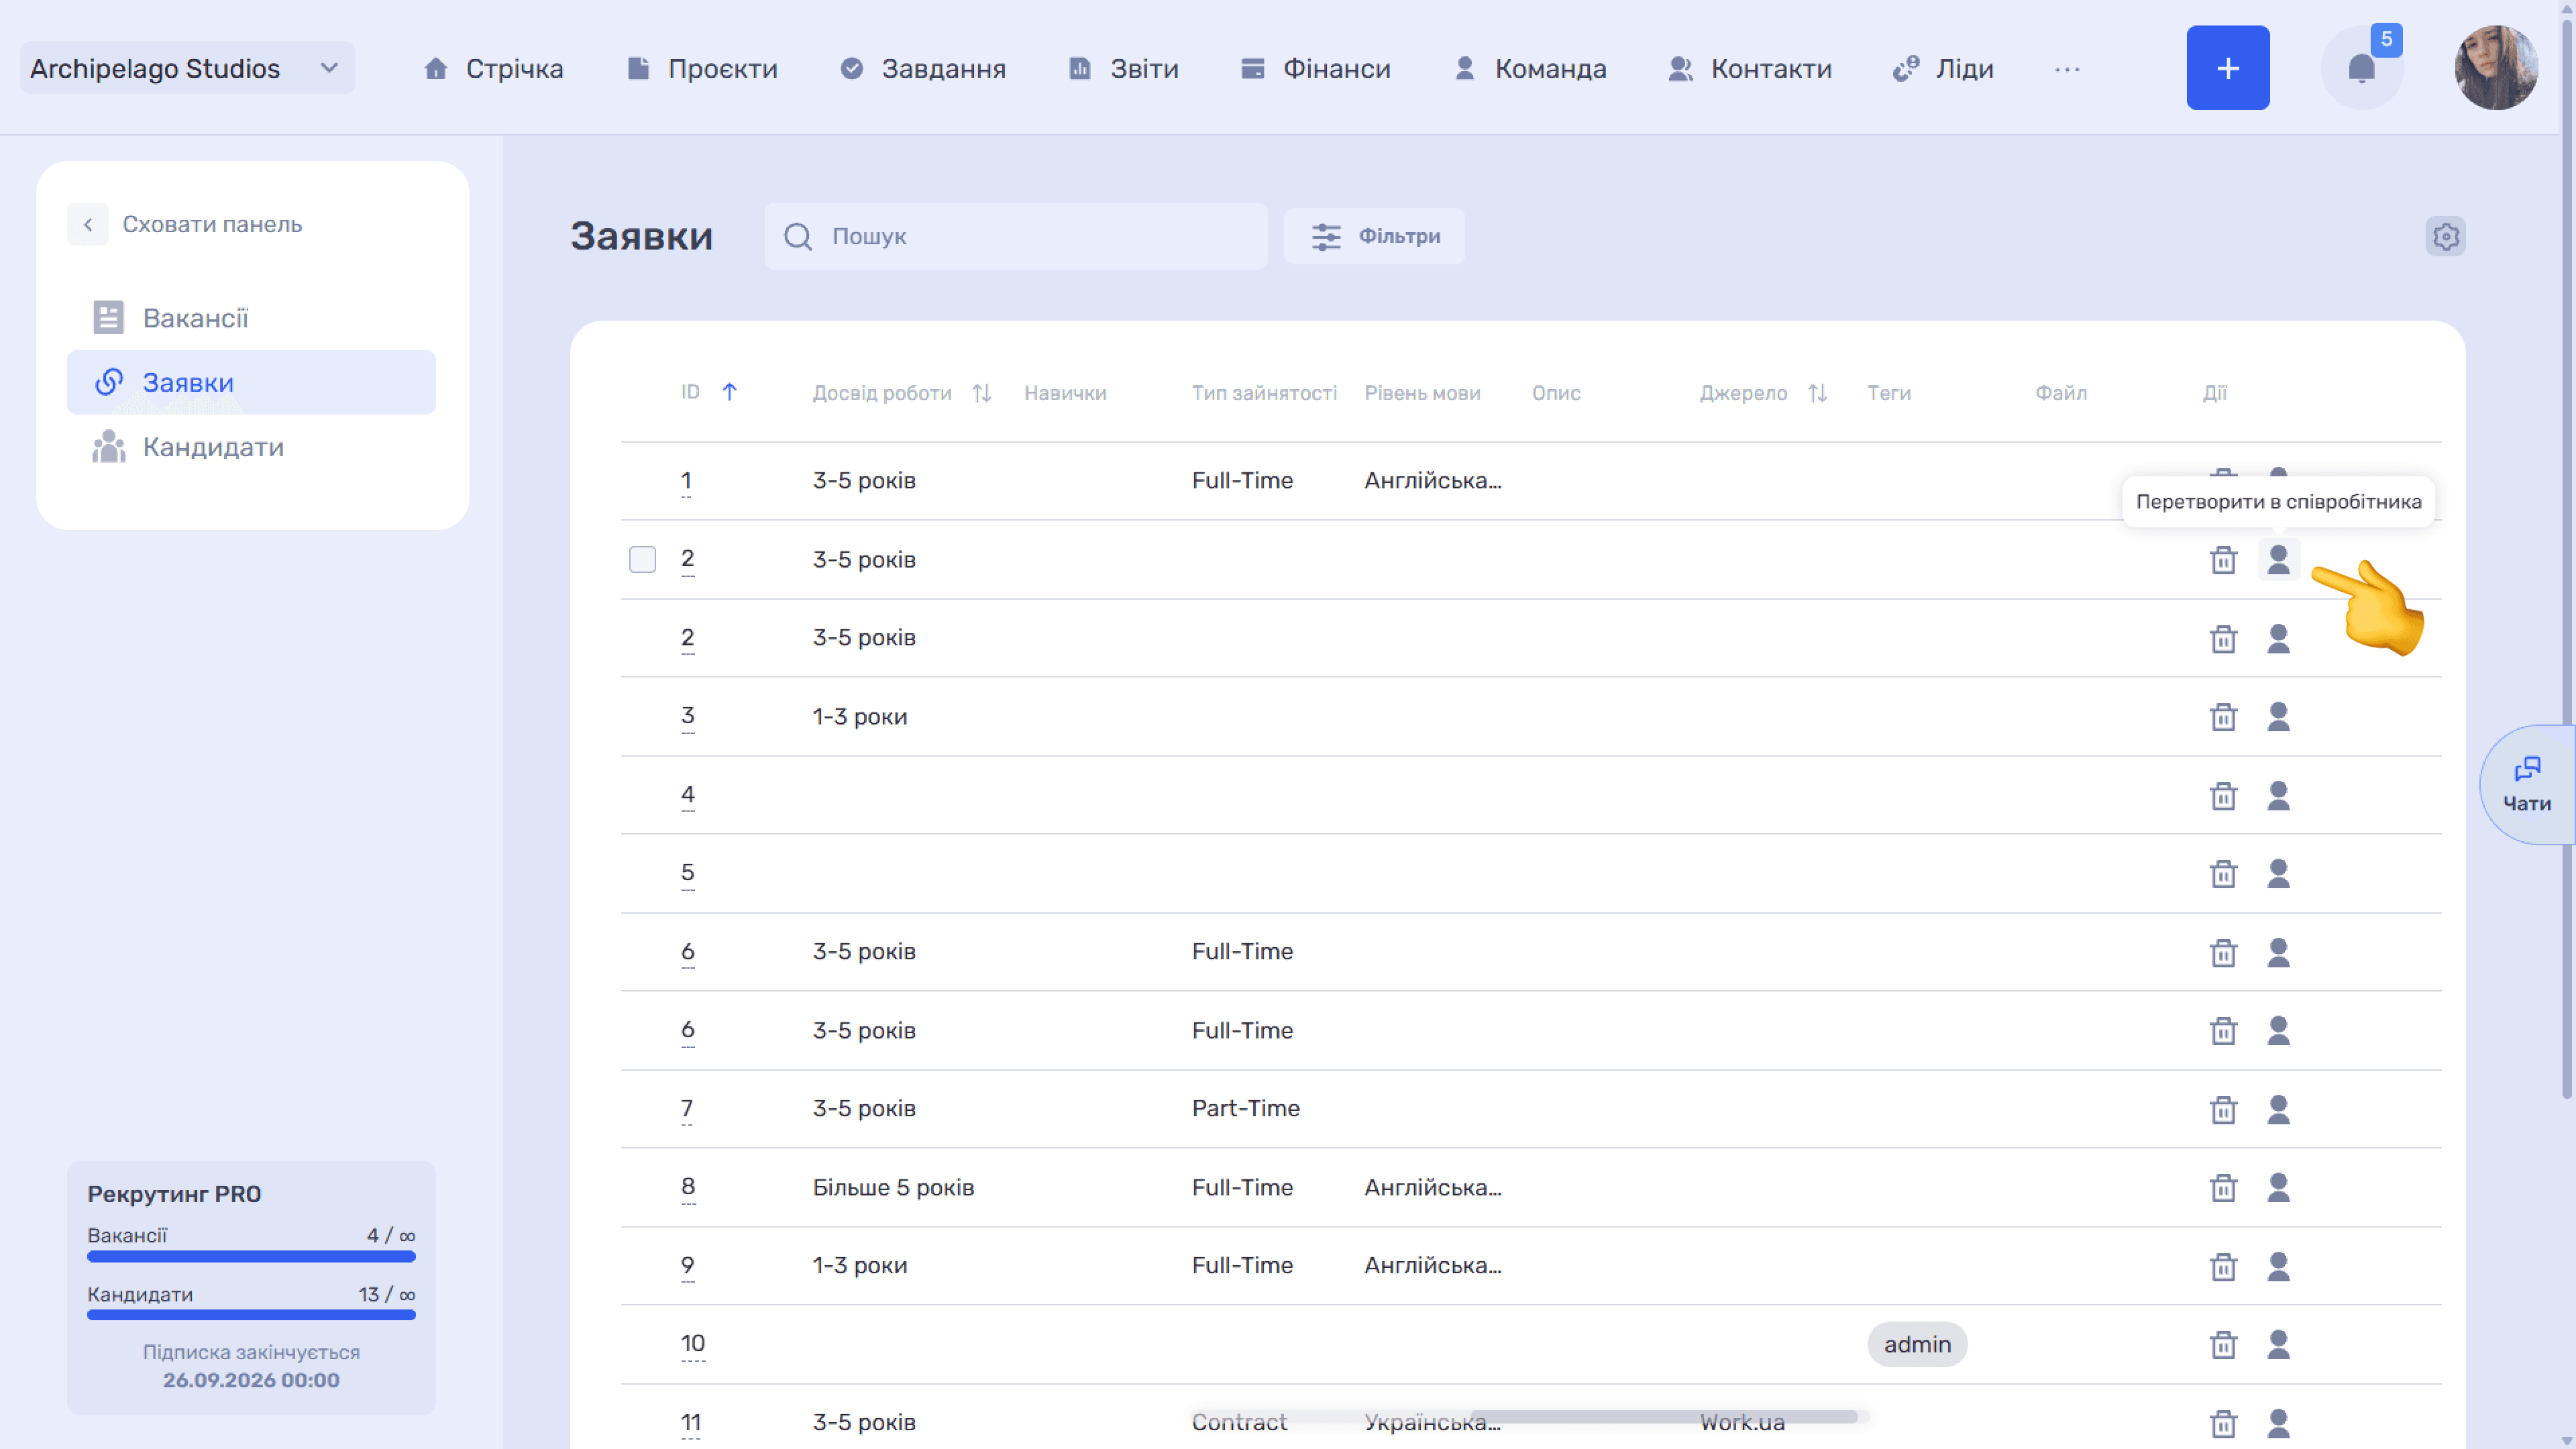
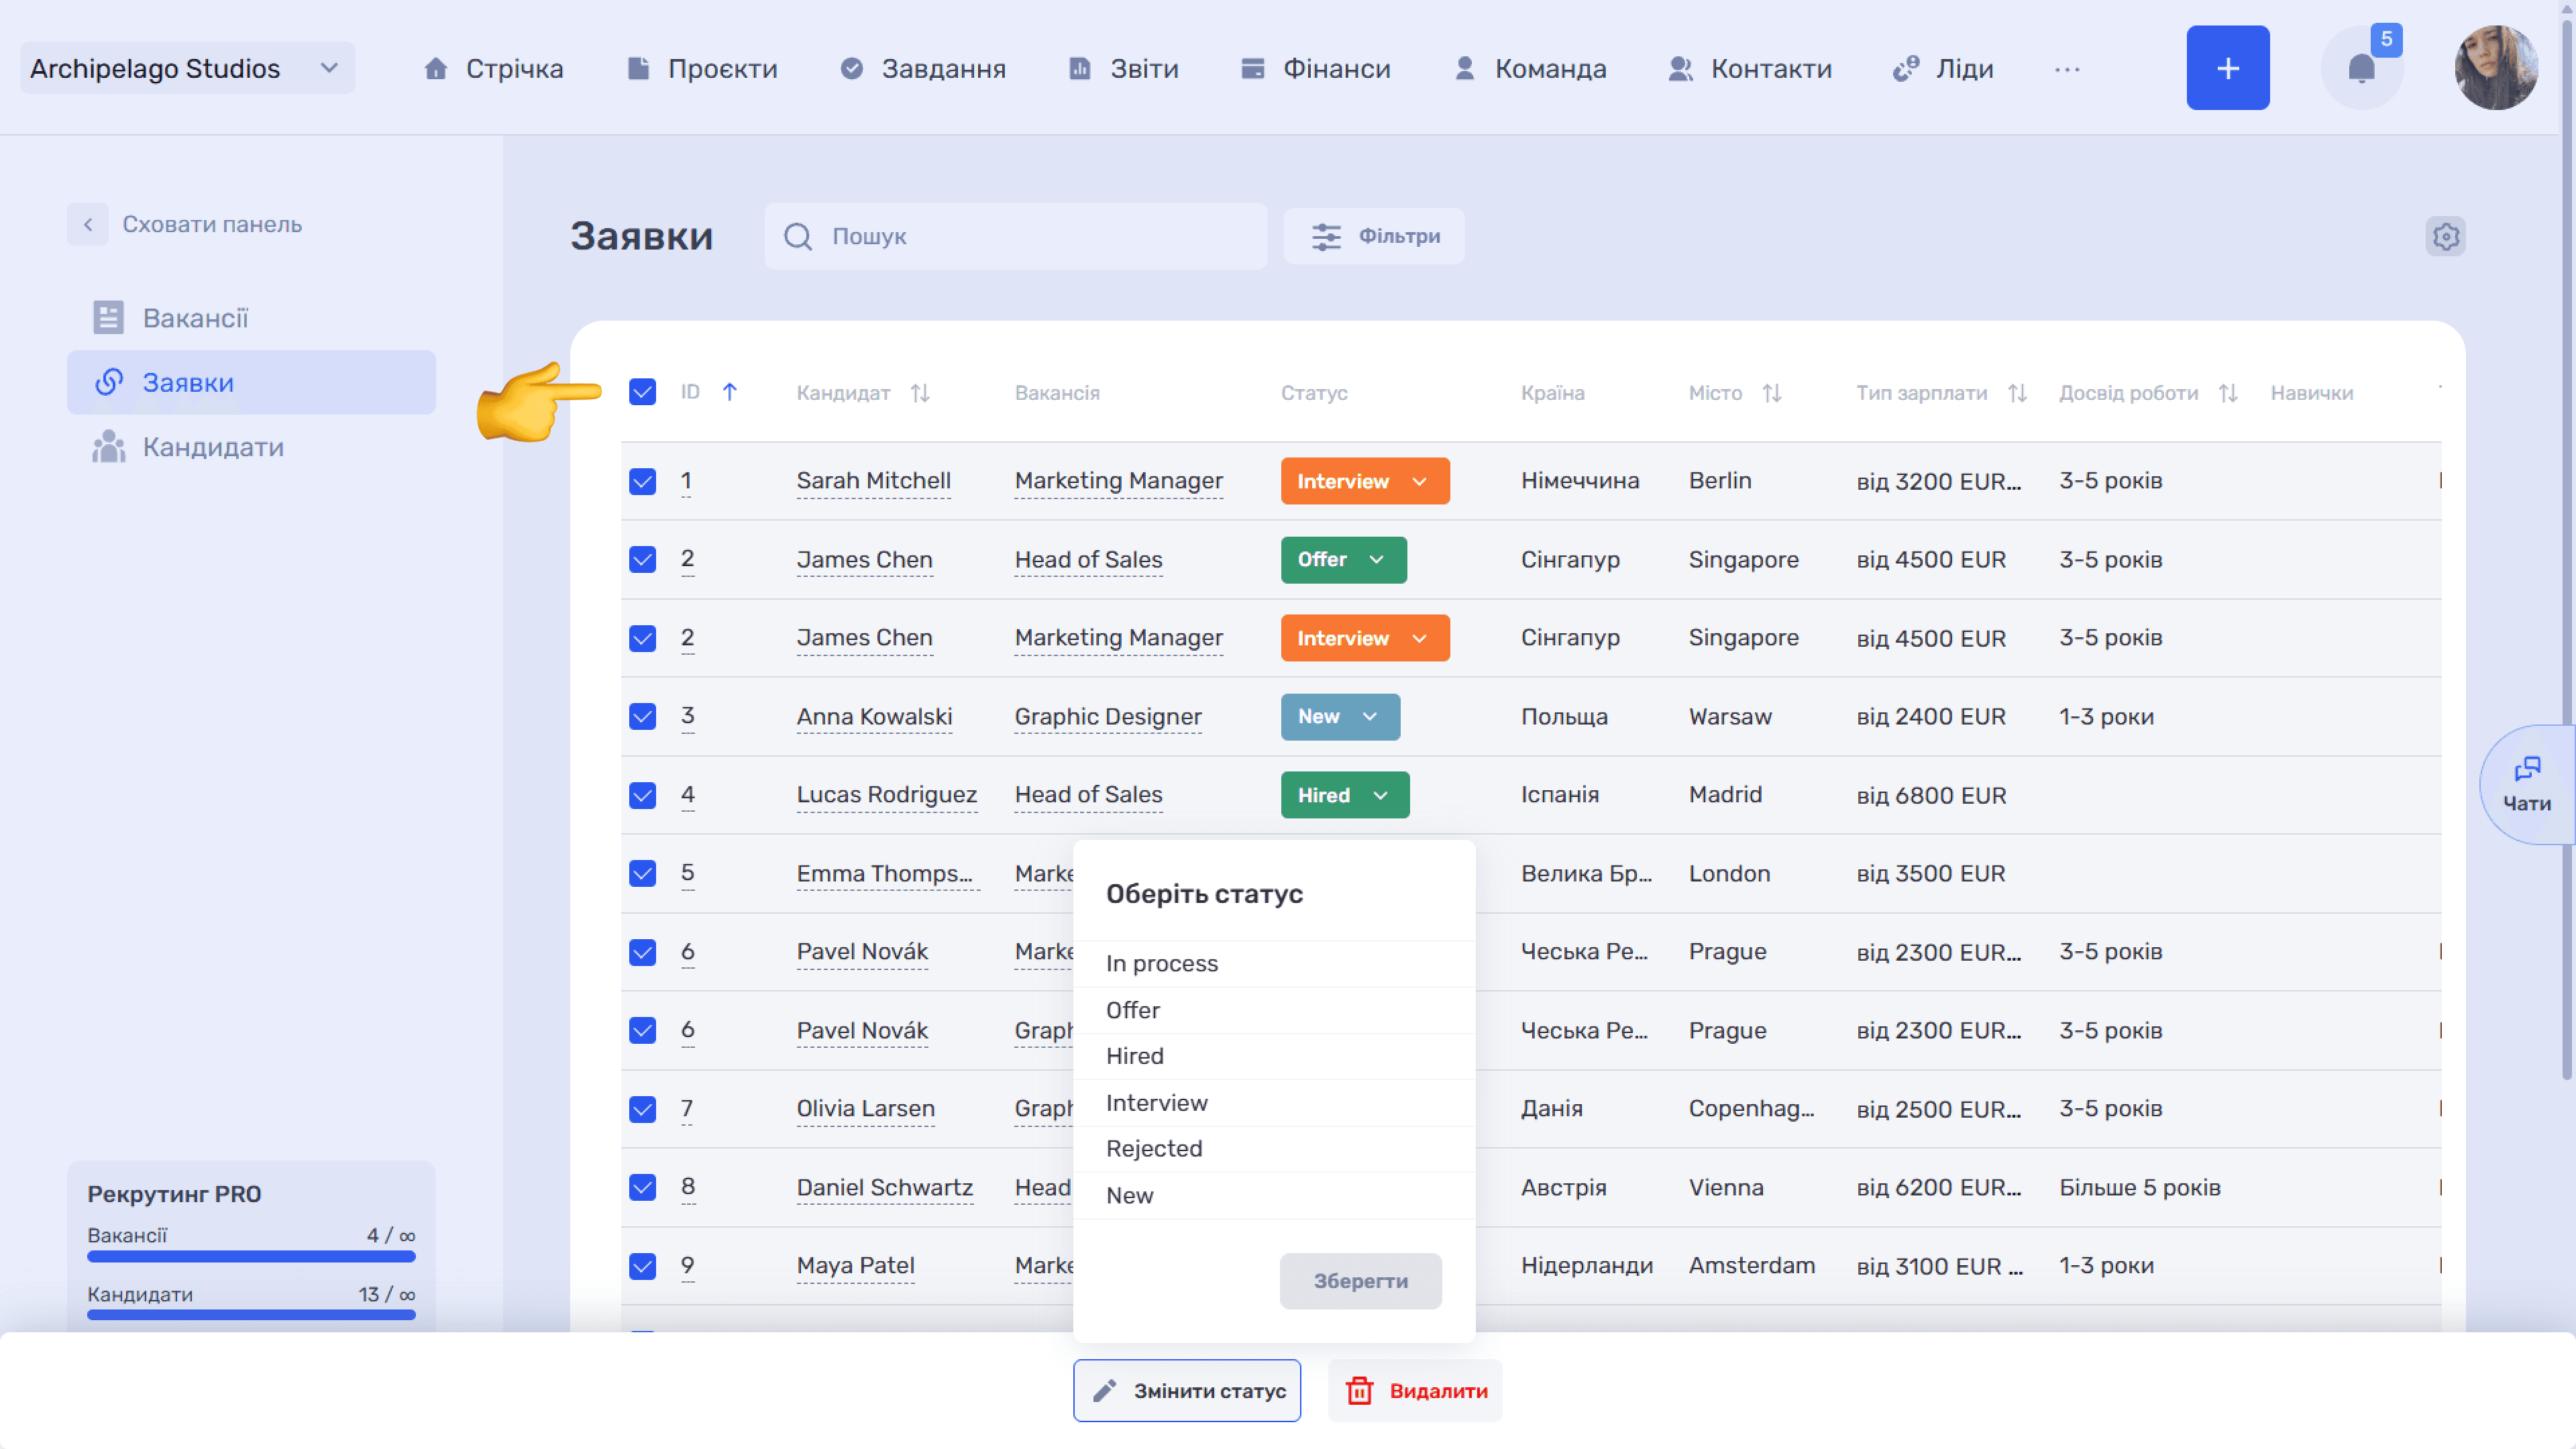
The checkbox in the table header selects all applications, and a checkbox in a row selects just that one. A panel with Change status and Delete actions appears at the bottom.
Application card
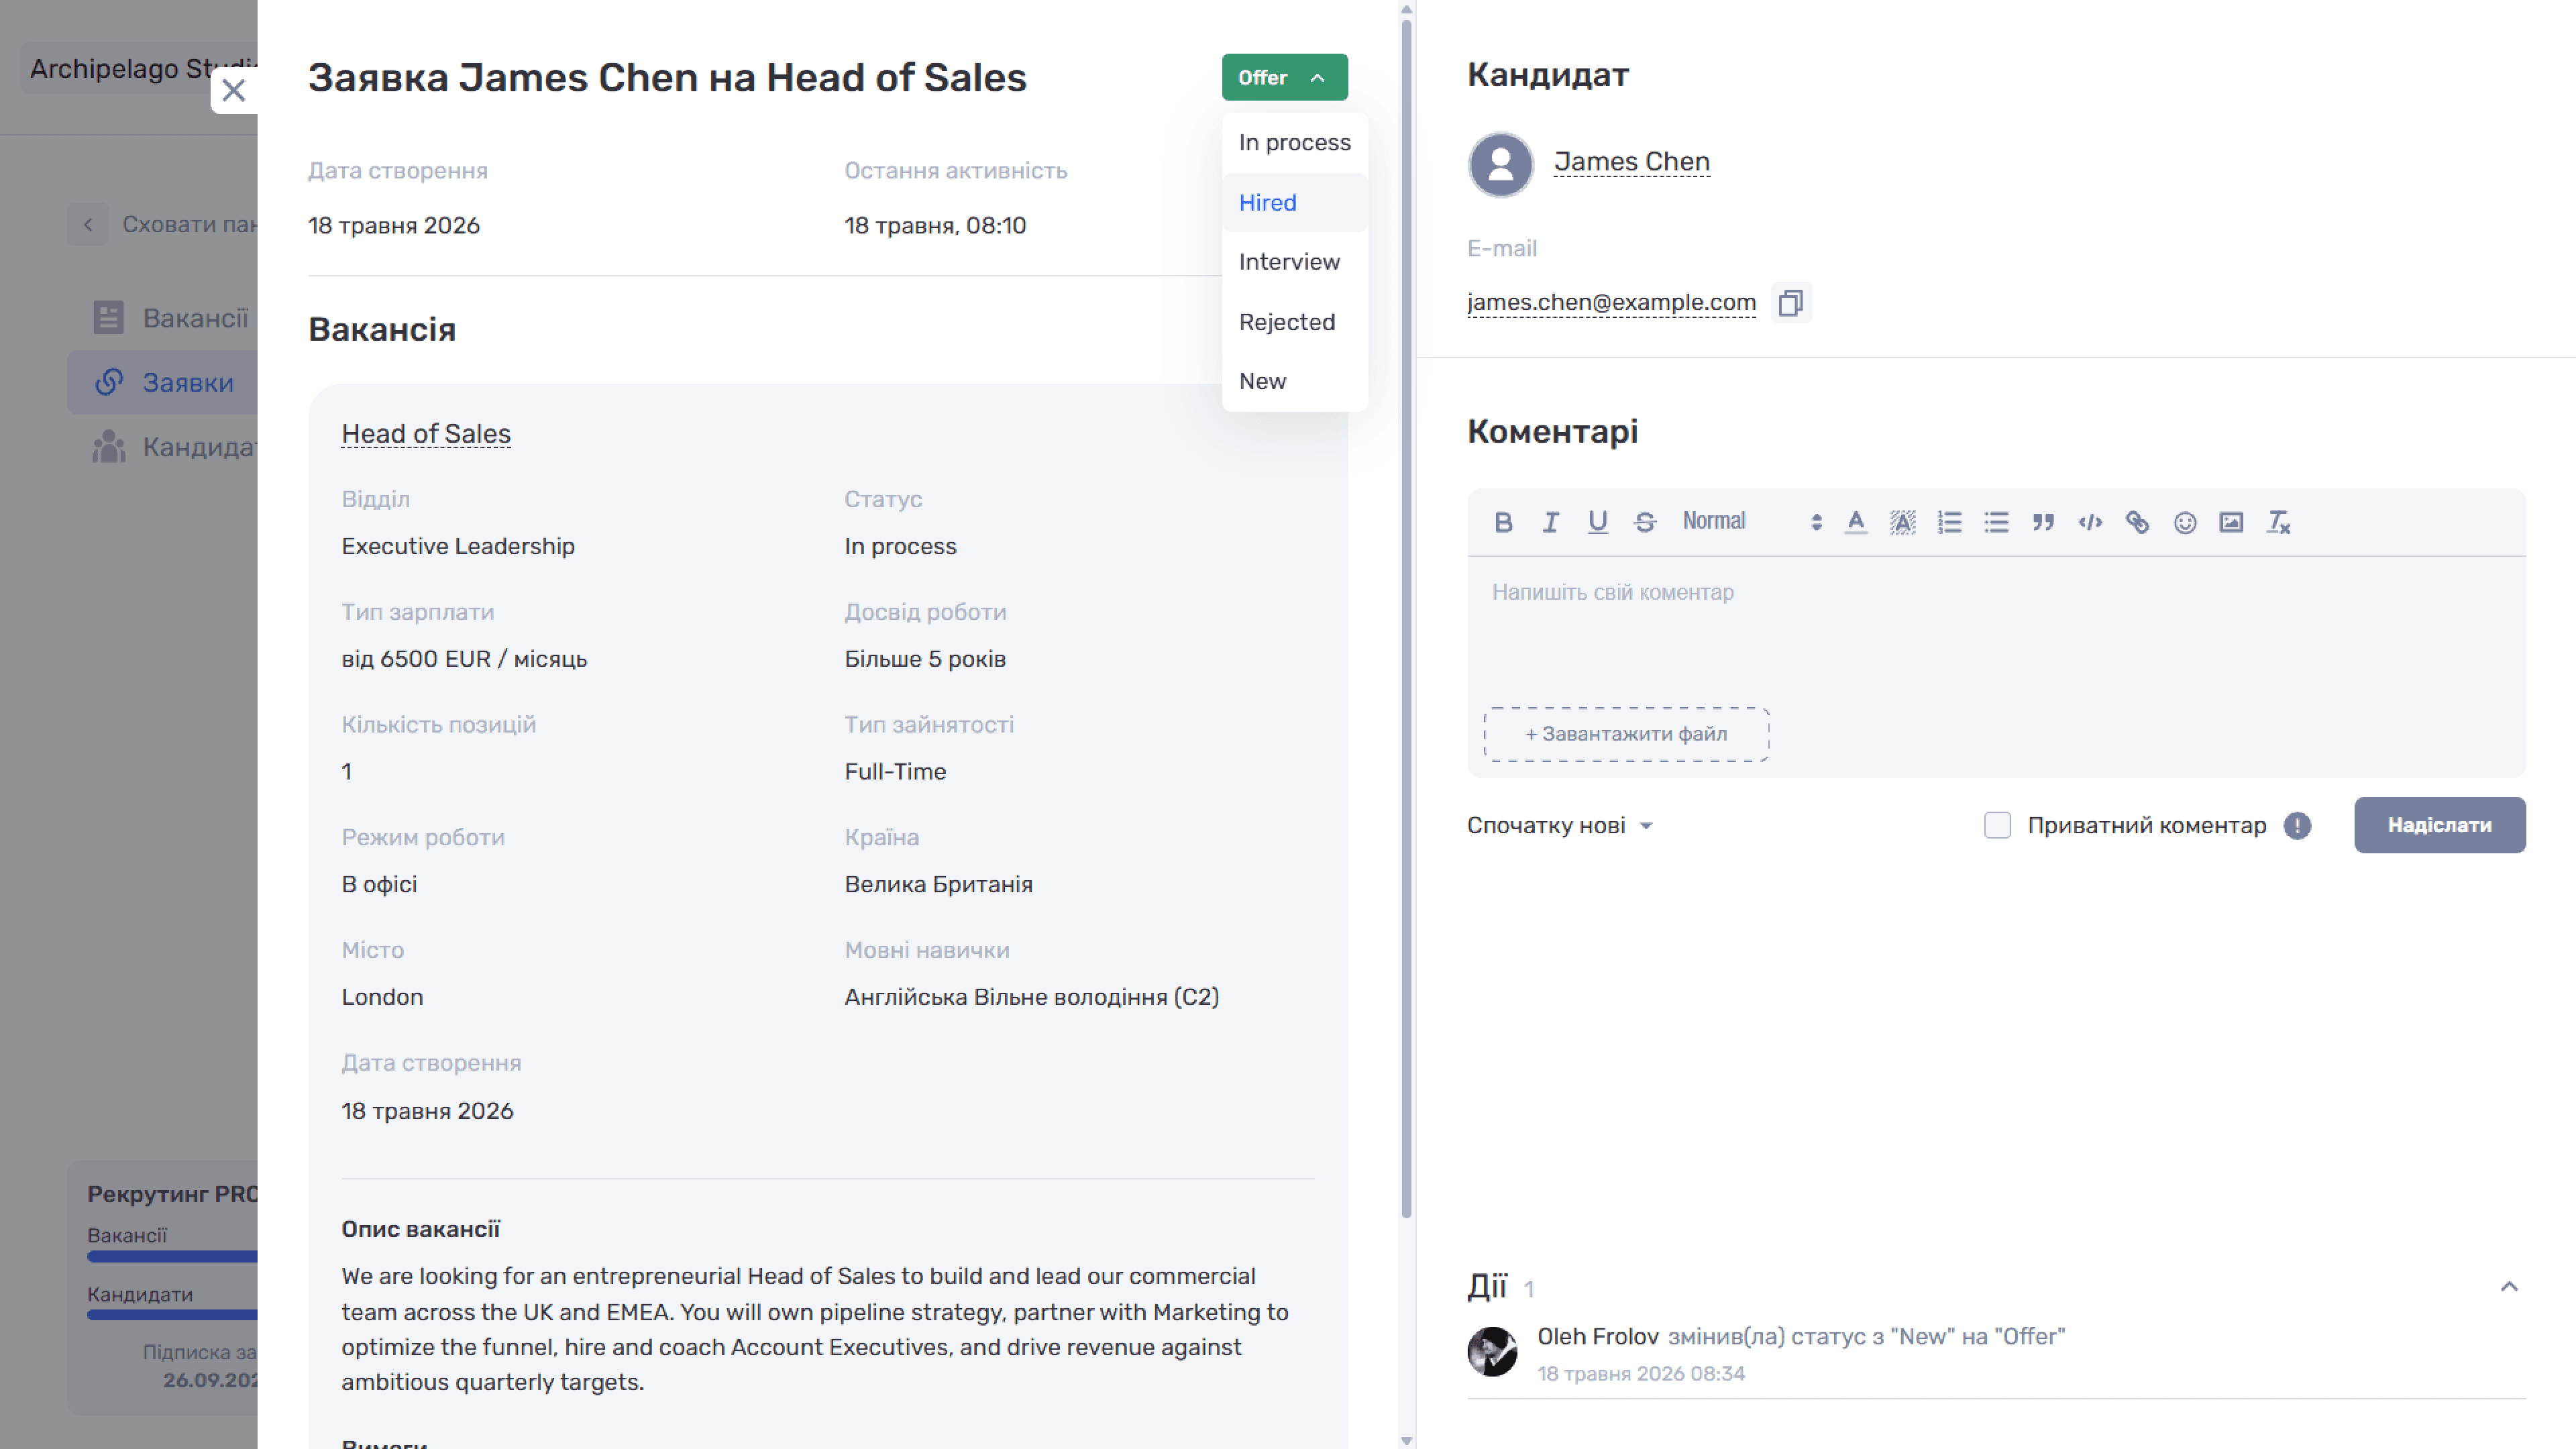
Clicking a candidate name or vacancy title in the list opens the application card. The title is generated automatically: "Application of {candidate} for {vacancy}". At the top are Created and Last activity.
The status badge to the right of the title opens the list of stages, for example: In process, Offer, Interview, etc. The list of statuses comes from the settings (Admin Panel → Recruiting → Application statuses), so it may differ in your company. Every change is recorded in the Actions block.
The Vacancy block duplicates the key parameters of the position: the name linking to the vacancy card, Department, Status, Salary type, Work experience, Number of positions, Employment type, Work mode, Country, City, Language skills, and Created.
On the right are the Candidate block with a link to their card, Comments, and a collapsible Actions block with the history of stage transitions: who changed the application status and when.
Converting a candidate into an employee
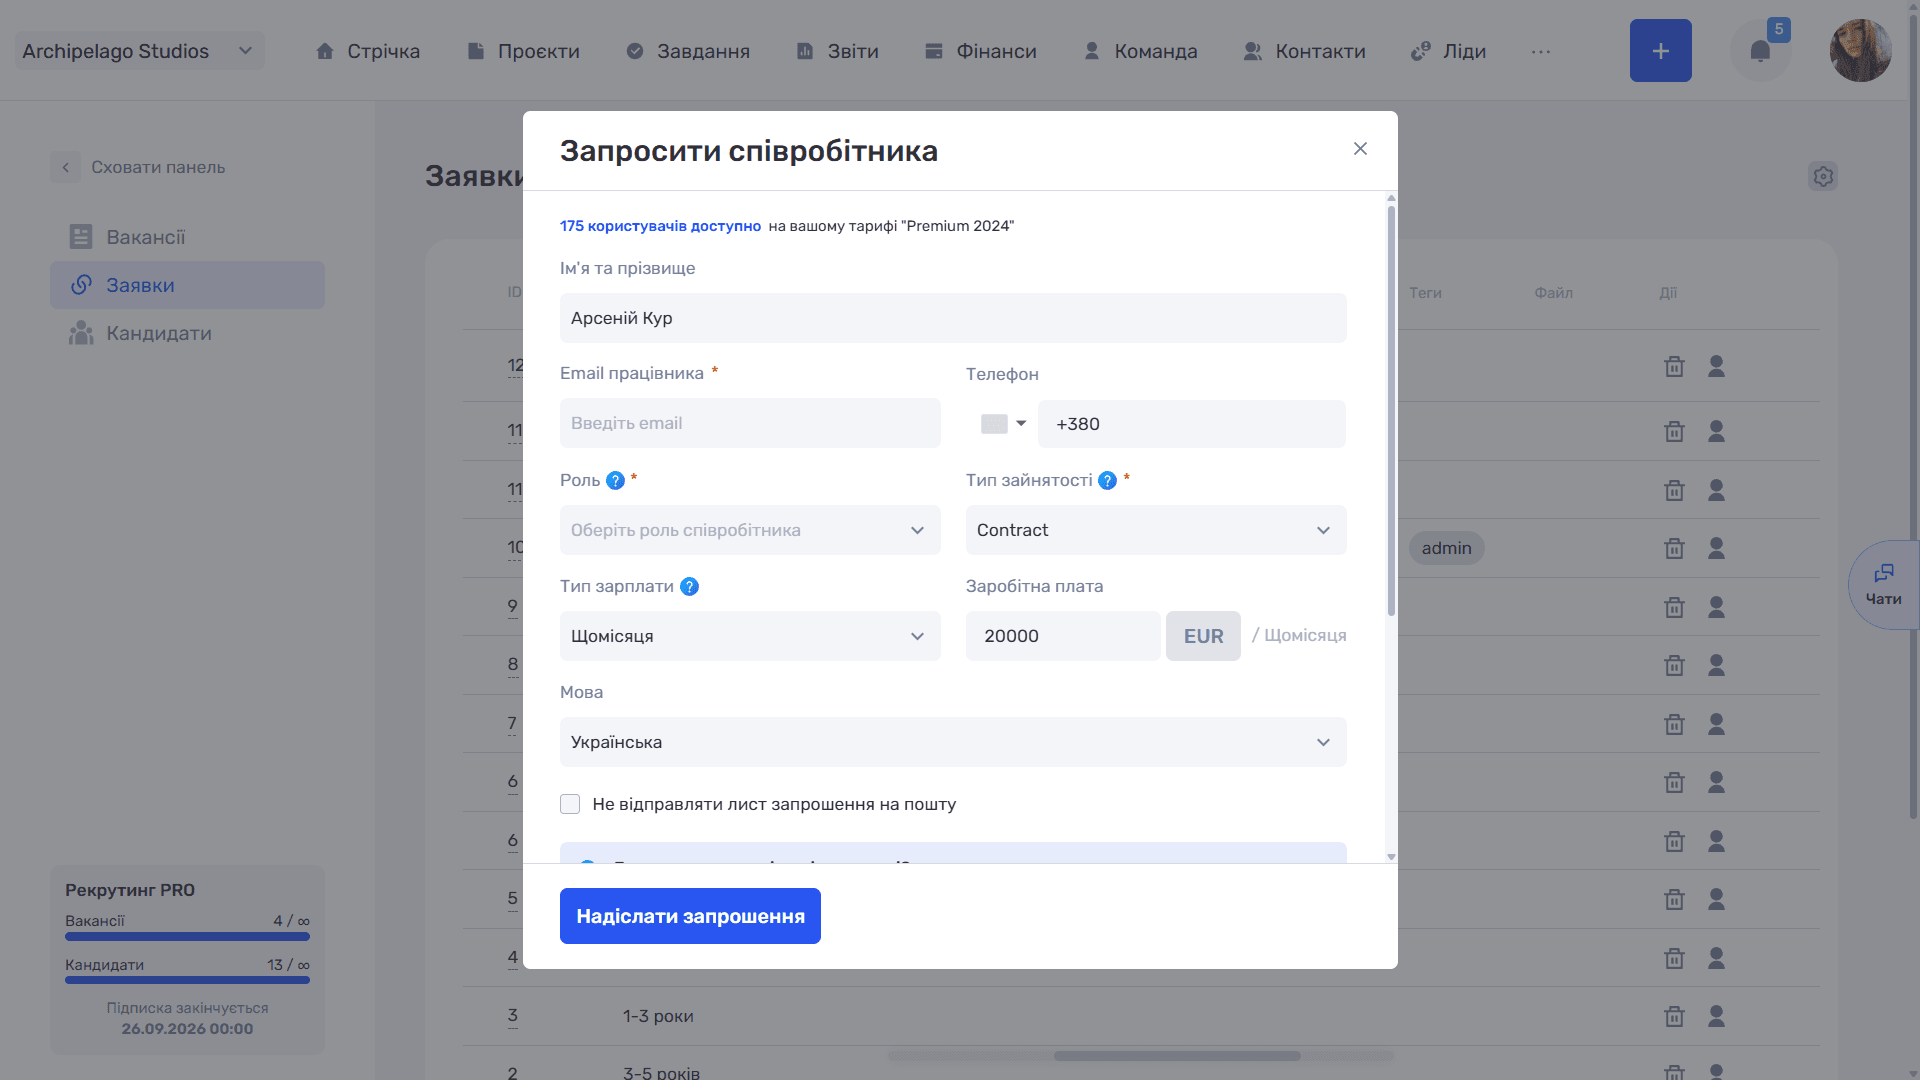
The icon in an application row opens the Invite employee window.
At the top you can see how many users are available on your plan.
Form fields:
- First and last name — filled in from the candidate card;
- Employee email (required);
- Phone with a country code selector;
- Role (required) — defines access rights and capabilities in the system (separately for viewing, creating, editing, and deleting different types of data);
- Employment type (required);
- Salary type — Monthly or Hourly;
- Salary with a currency selector;
- Language — the interface language for the new employee;
- Do not send an invitation email — create the account without an email invitation;
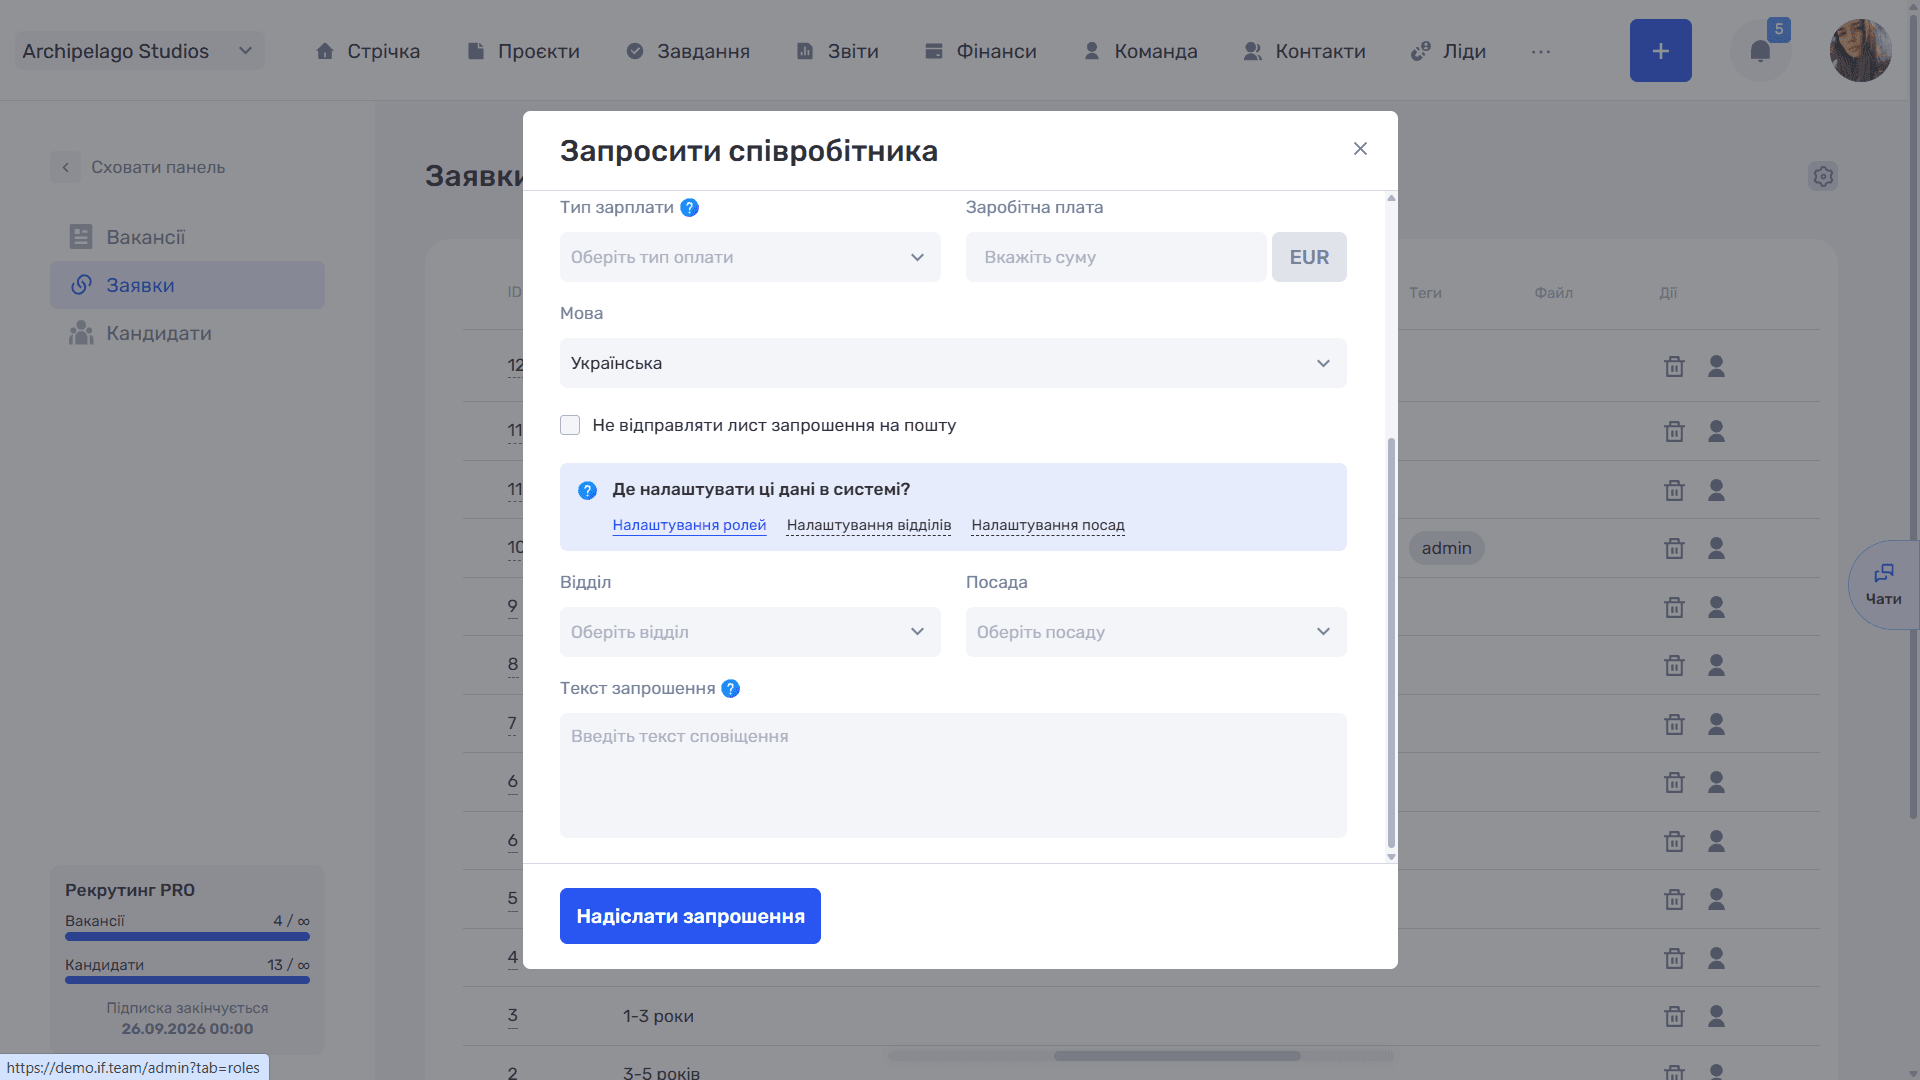
- Department and Position;
- Invitation text — free text added to the invitation email.
Between the fields is the Where to configure this data in the system? info block with links to Role settings, Department settings, and Position settings.
The Send invitation button completes the action.
Please note
After the invitation is sent, the employee appears in the Team module. The candidate stays in the recruiting database together with their applications — the record is neither deleted nor archived.
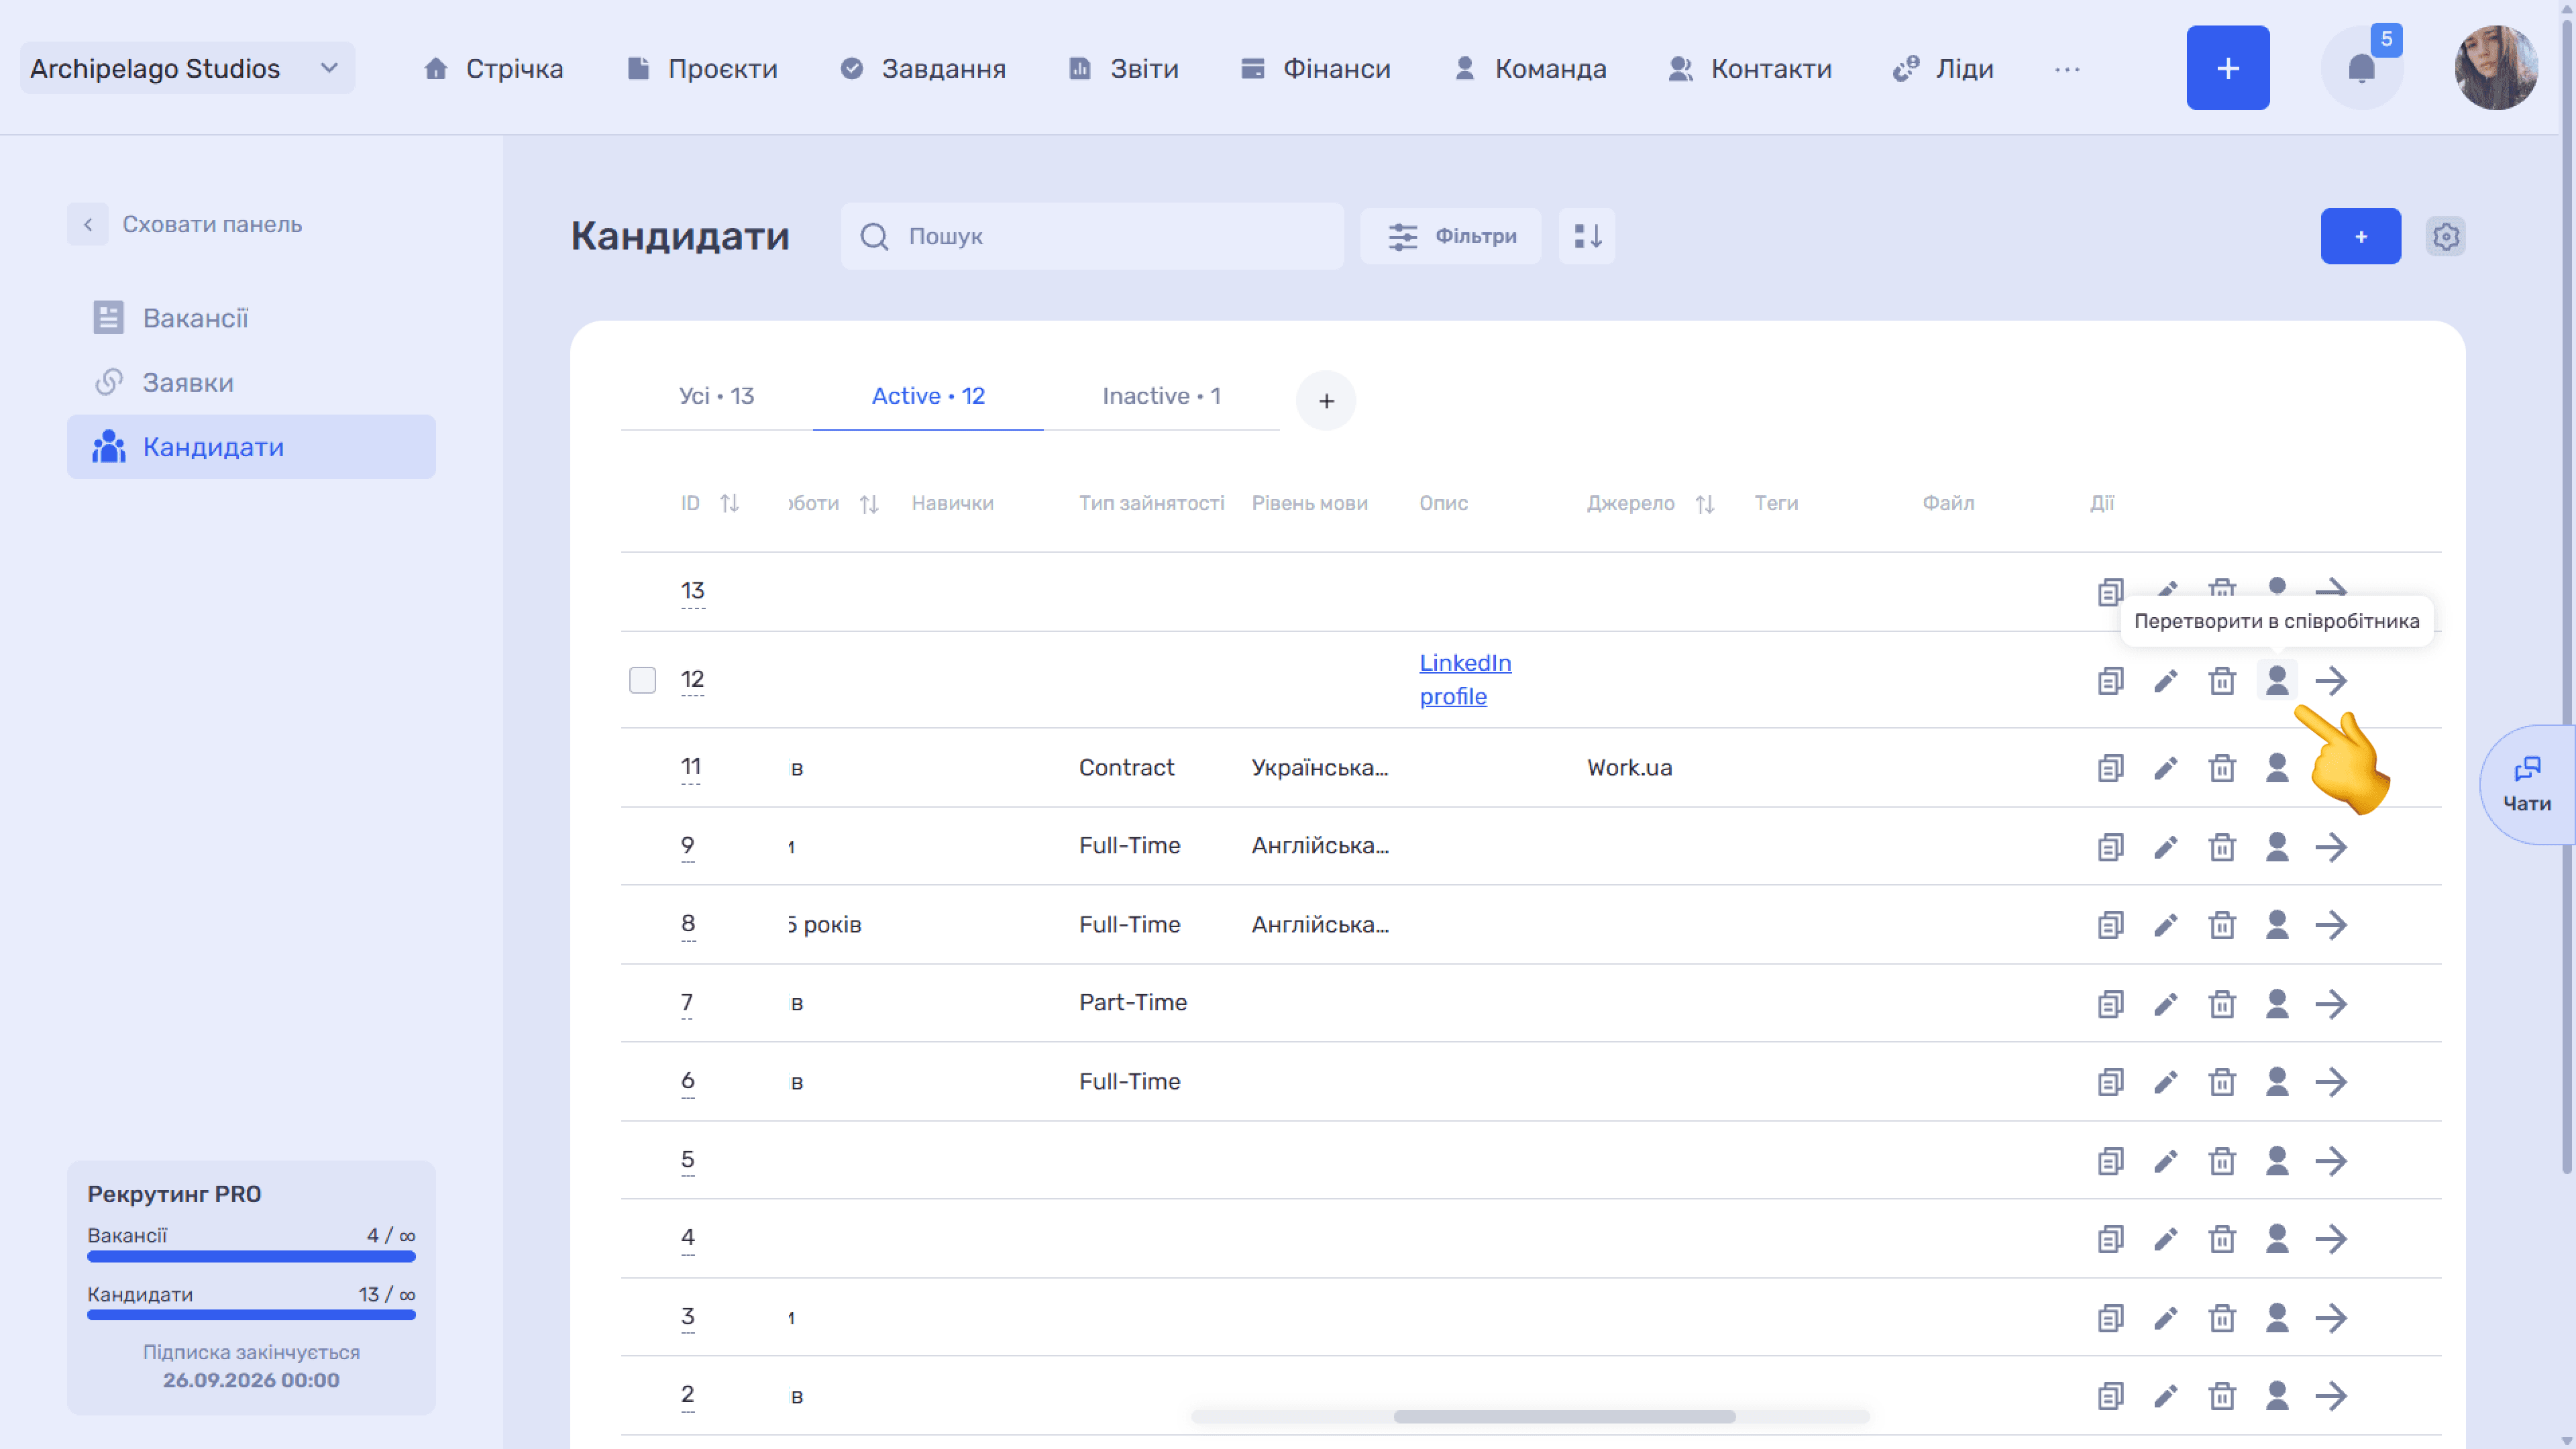
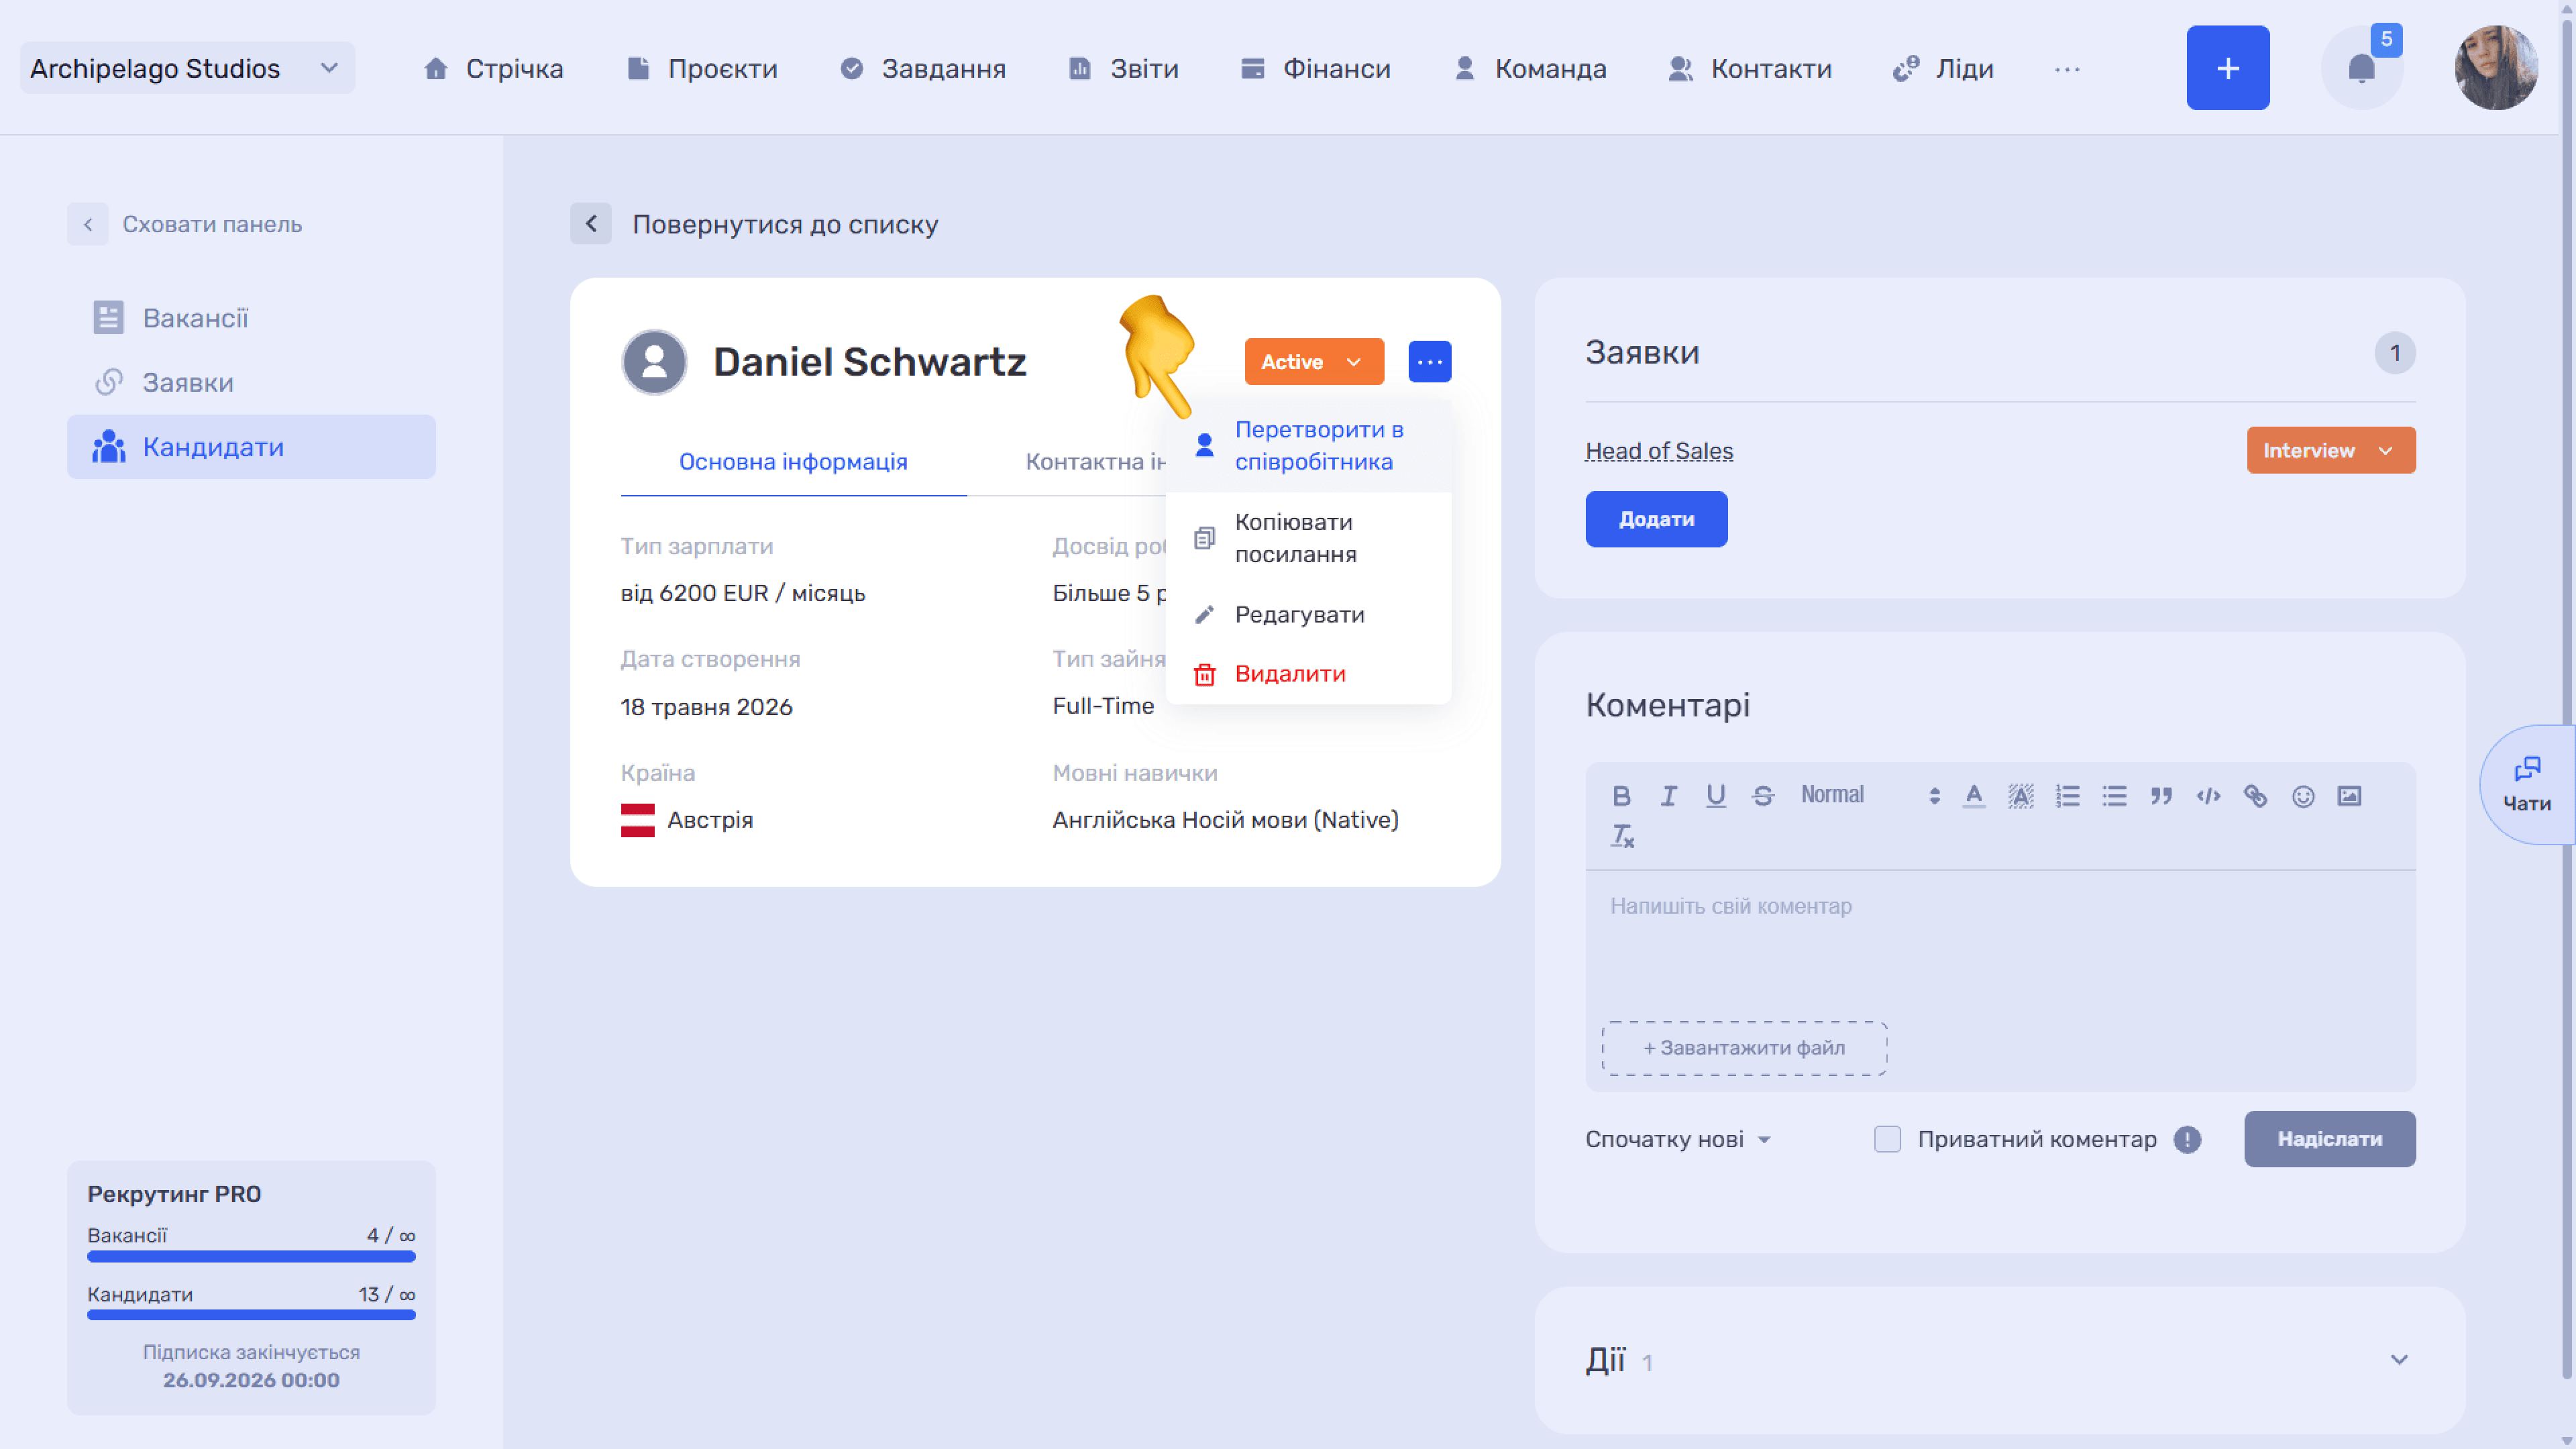
The icon in the candidate list and the Convert to employee item in the "..." menu of the candidate card open the same Invite employee window.
The application status does not change — you need to move it to the Hired stage manually.
Still have questions?
Maybe we haven't added this information yet. But you can always reach out:
Request a demo
Submit a request and we'll show you how the service works and its capabilities.
Book a demo