Custom Fields for Leads
If the standard fields are not enough for your company, add your own—for example, “Client Industry,” “Implementation Time Frame,” or “Competitors in the Tender.”
Where Custom Fields Are Created
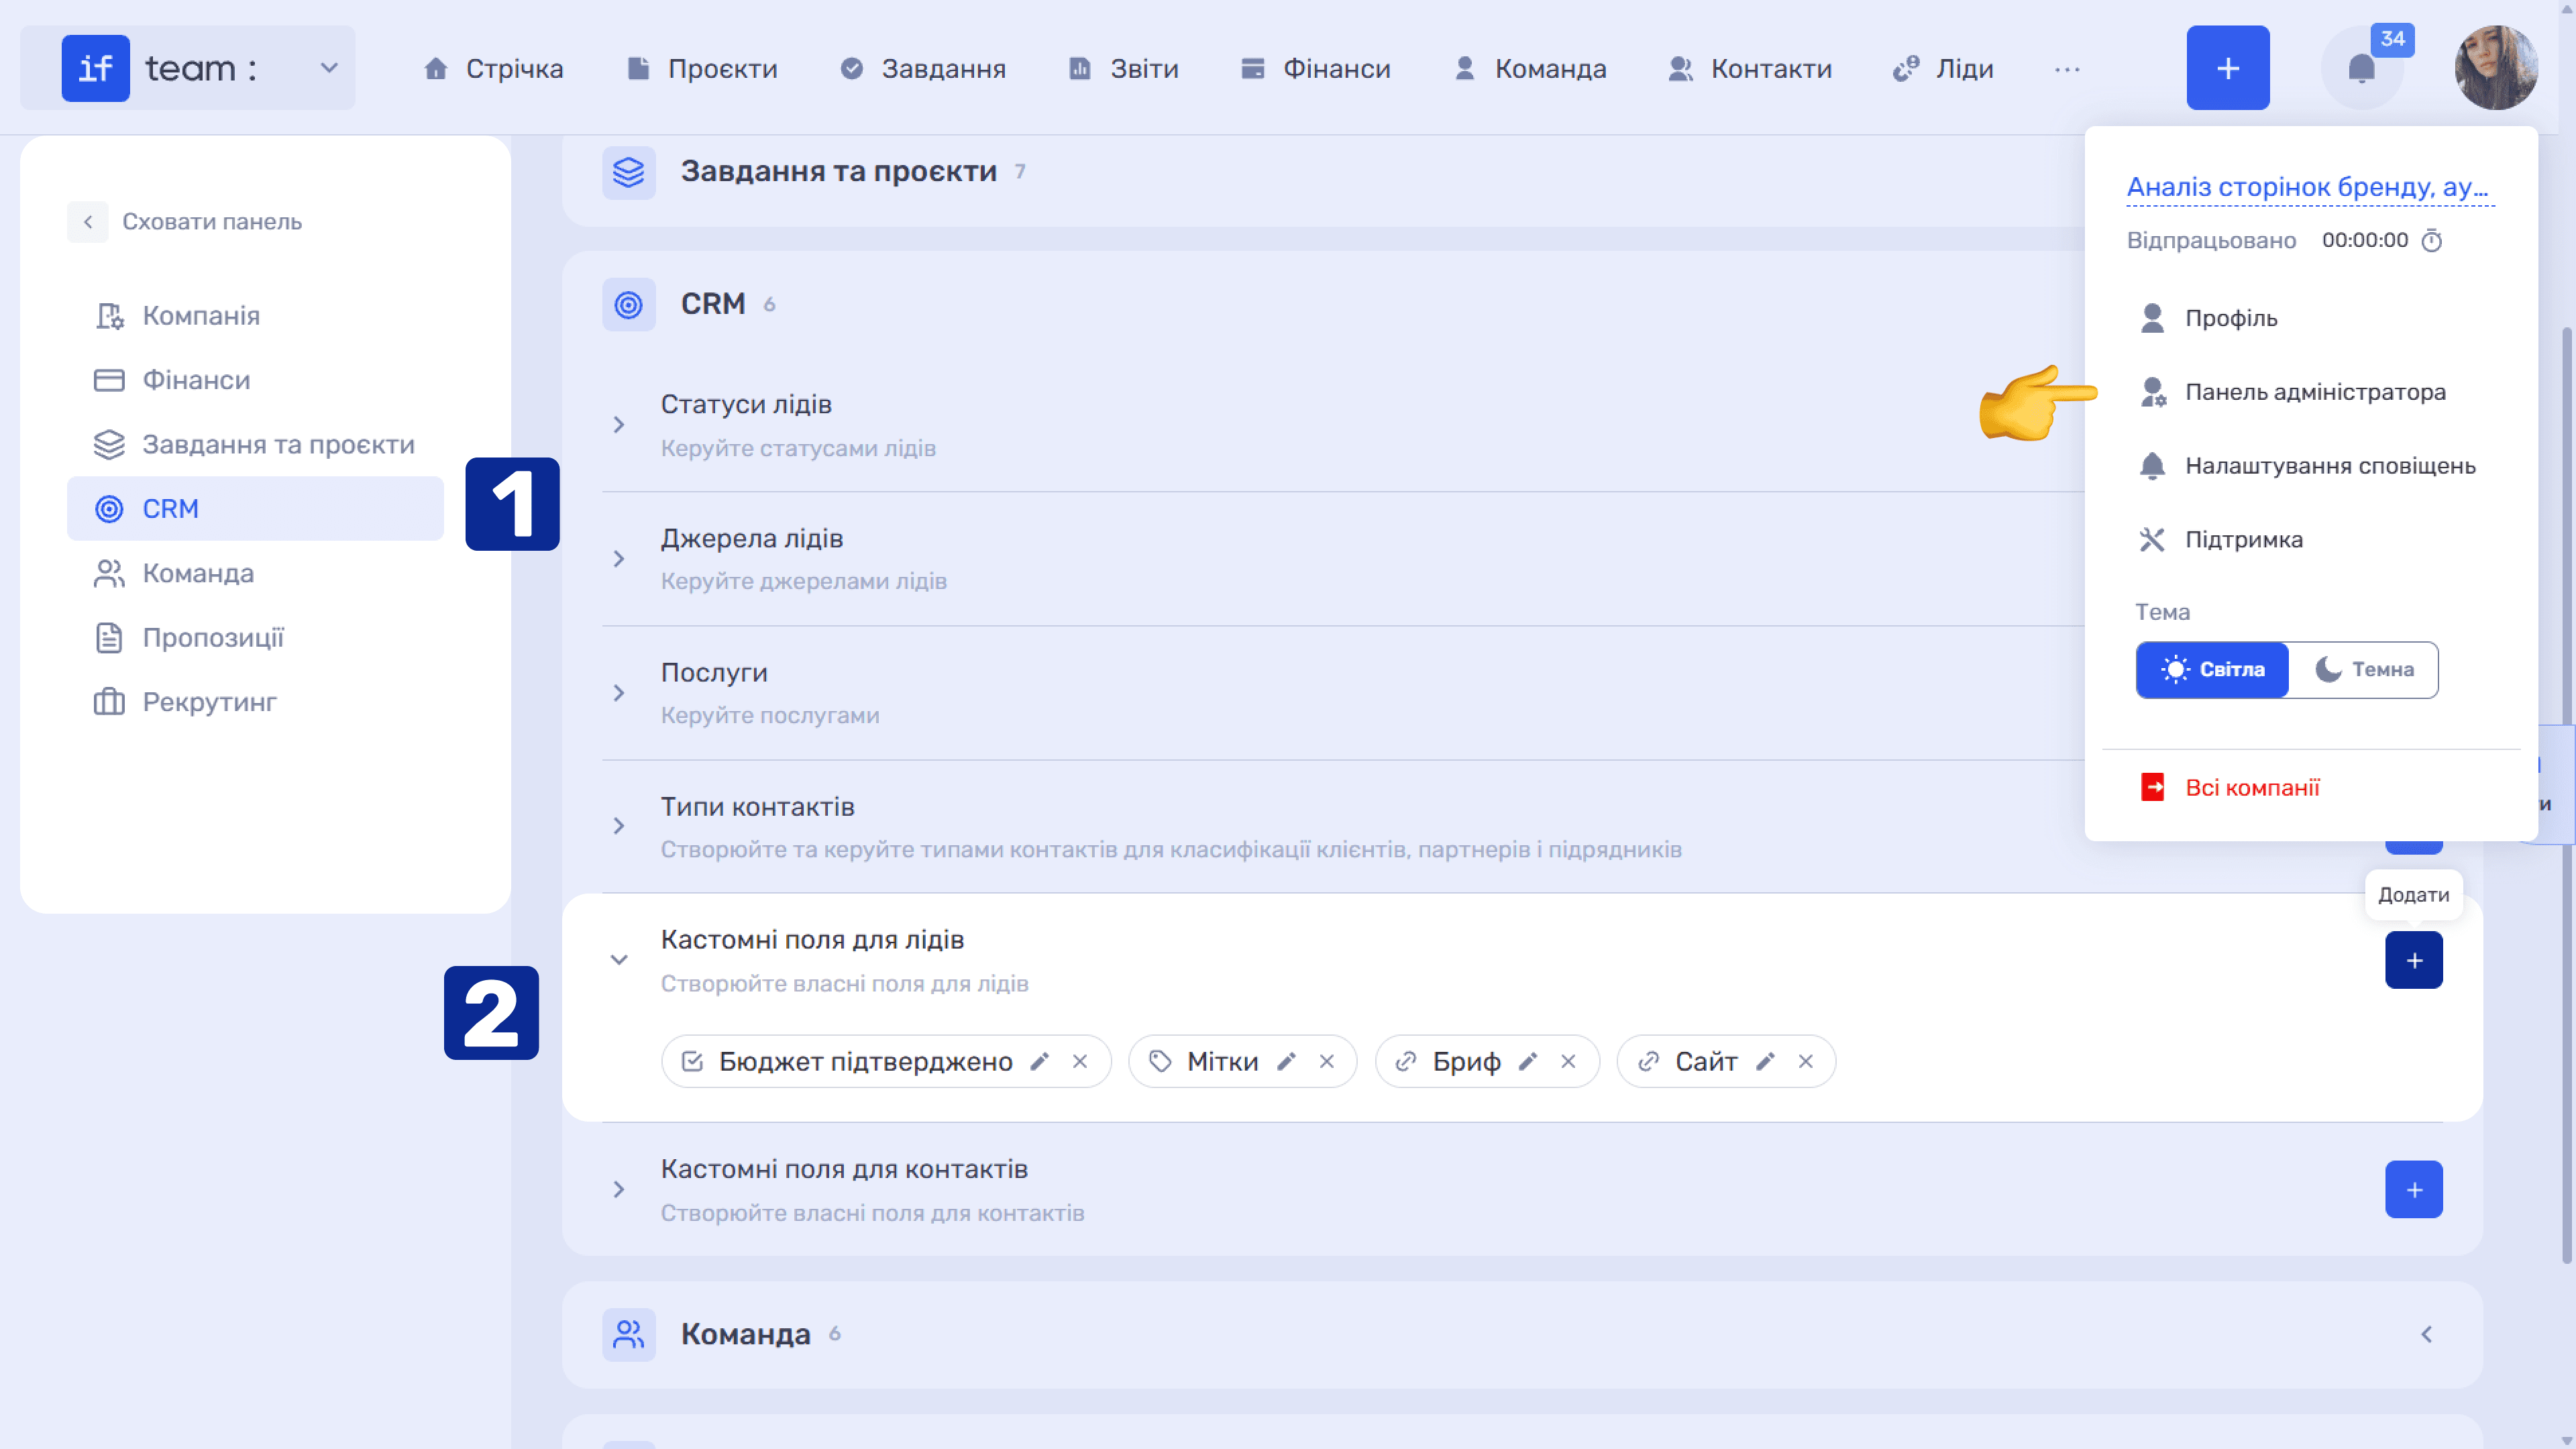
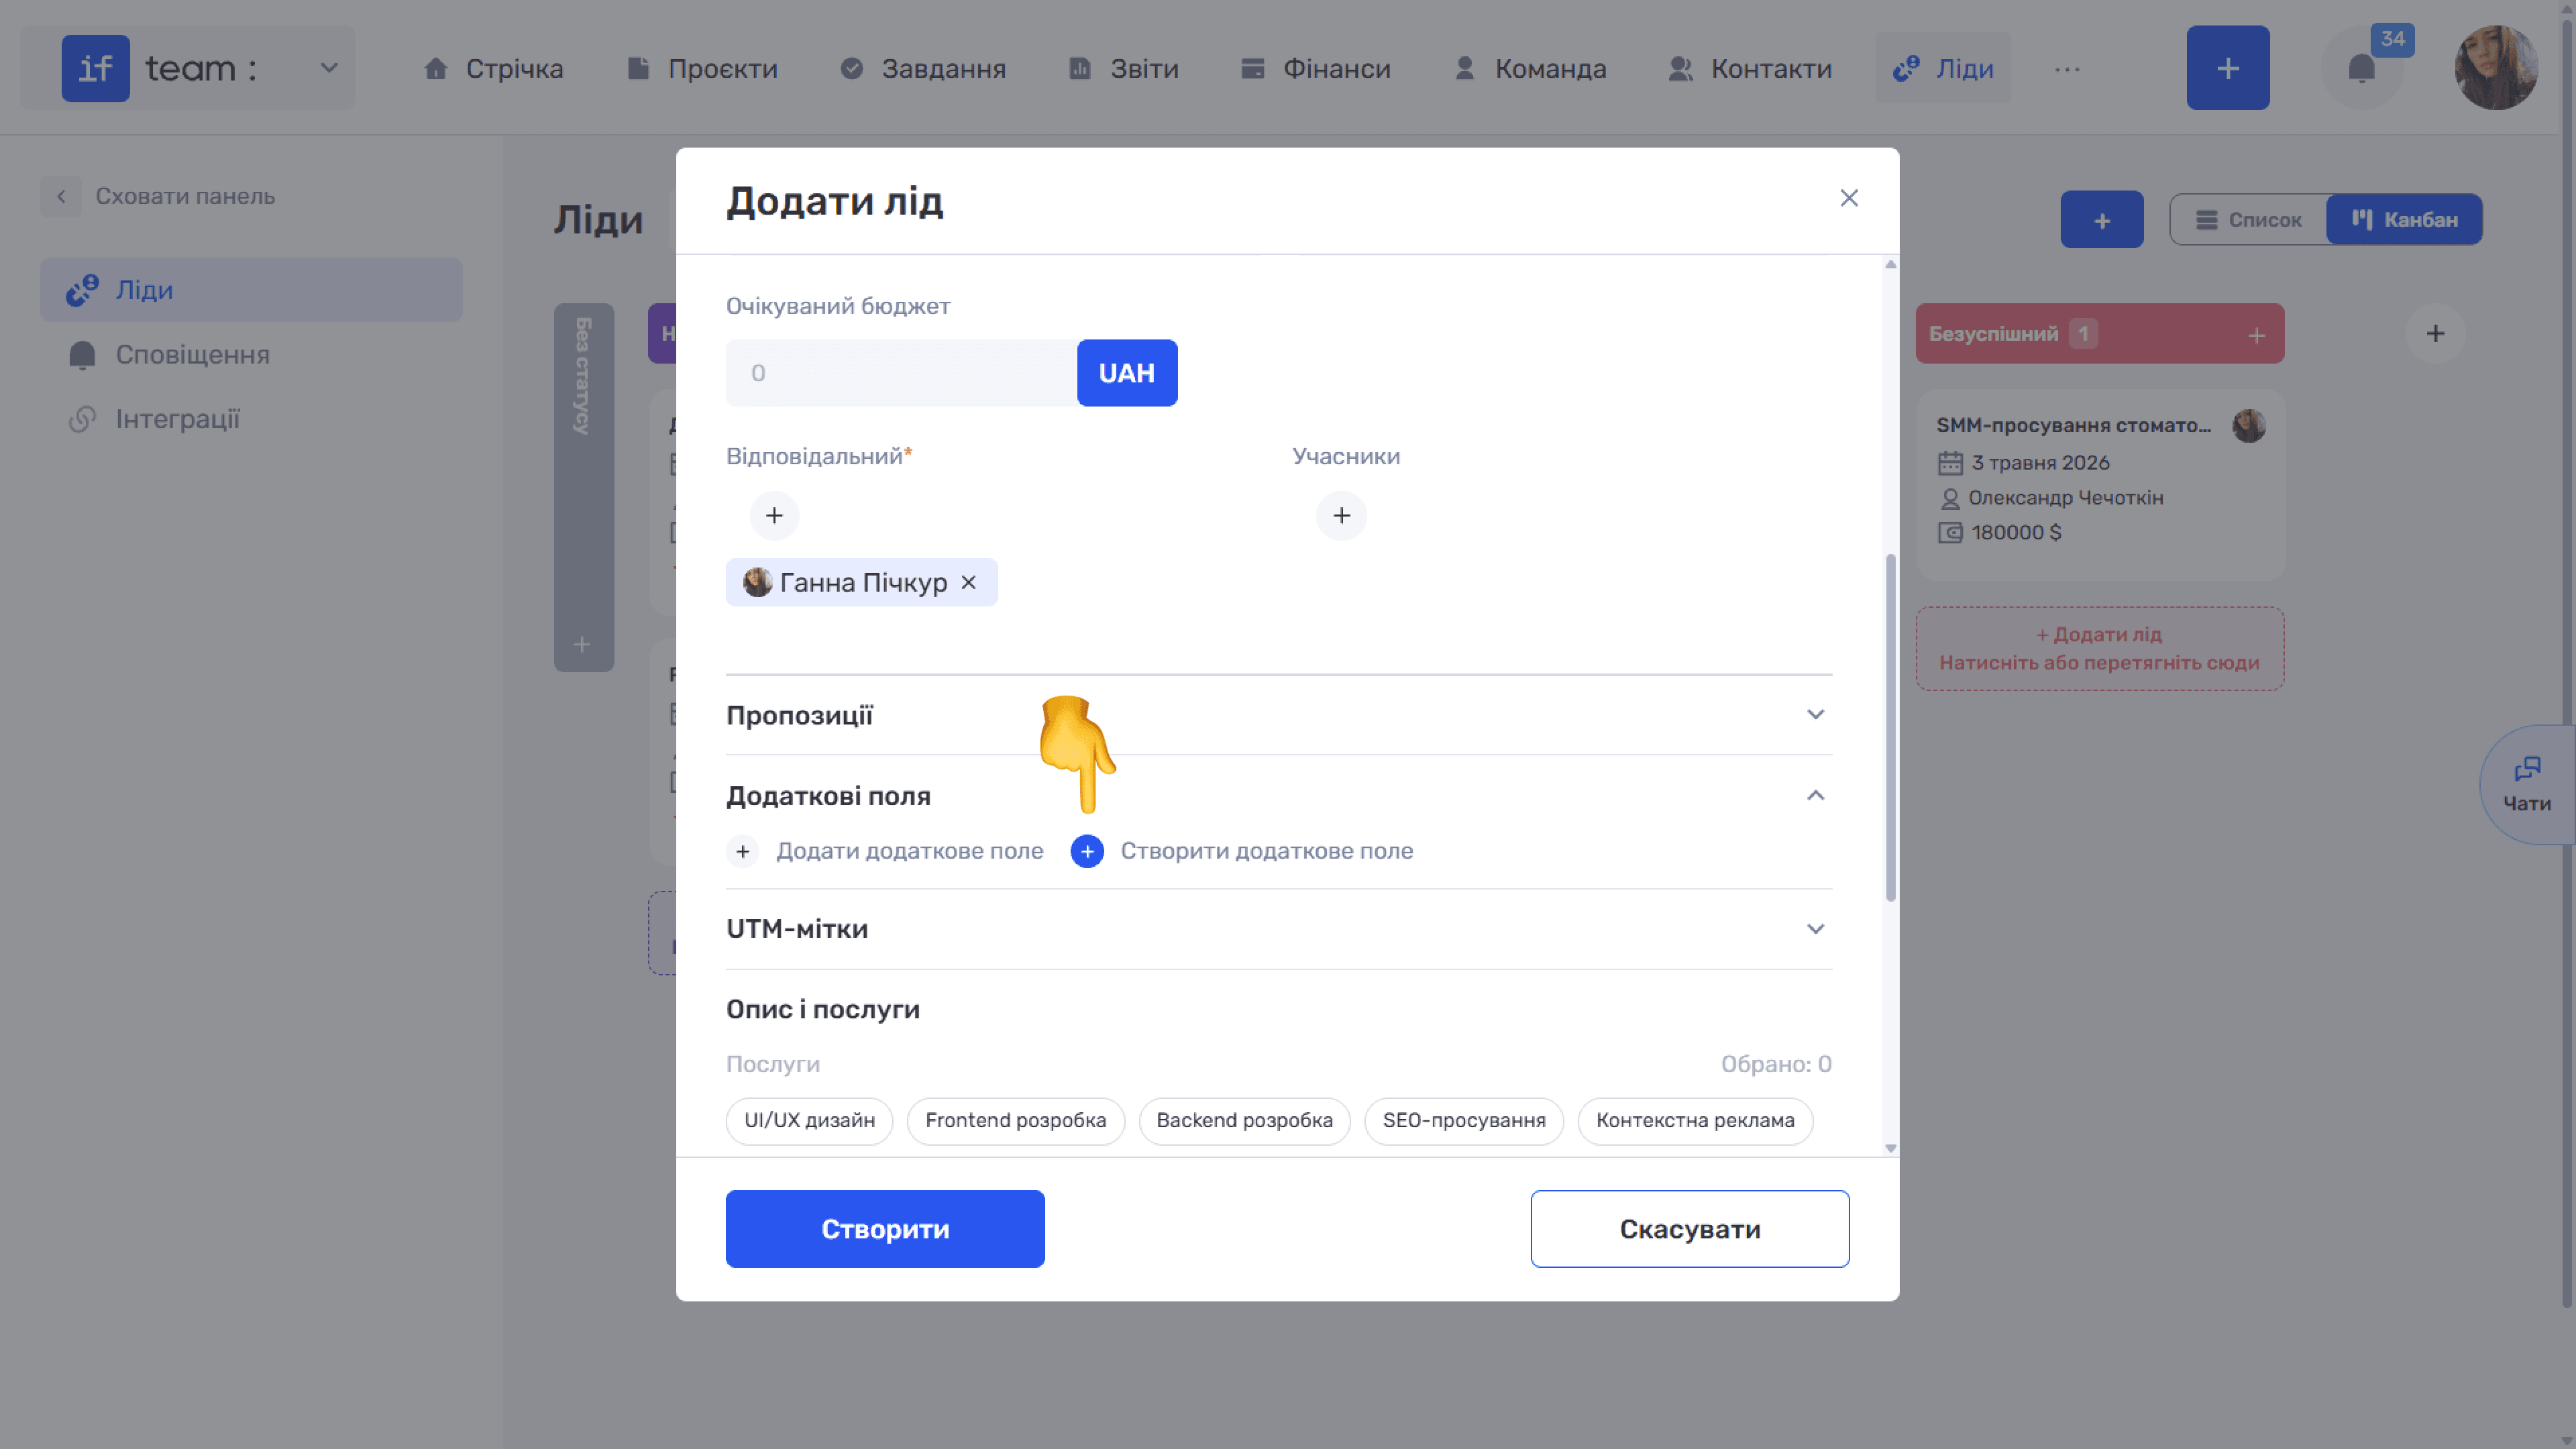
Go to Admin Panel → “Settings” → “CRM” → “Custom Fields for Leads” → “+.” The “+ Create Additional Field” link in the lead creation and editing form produces the same result.
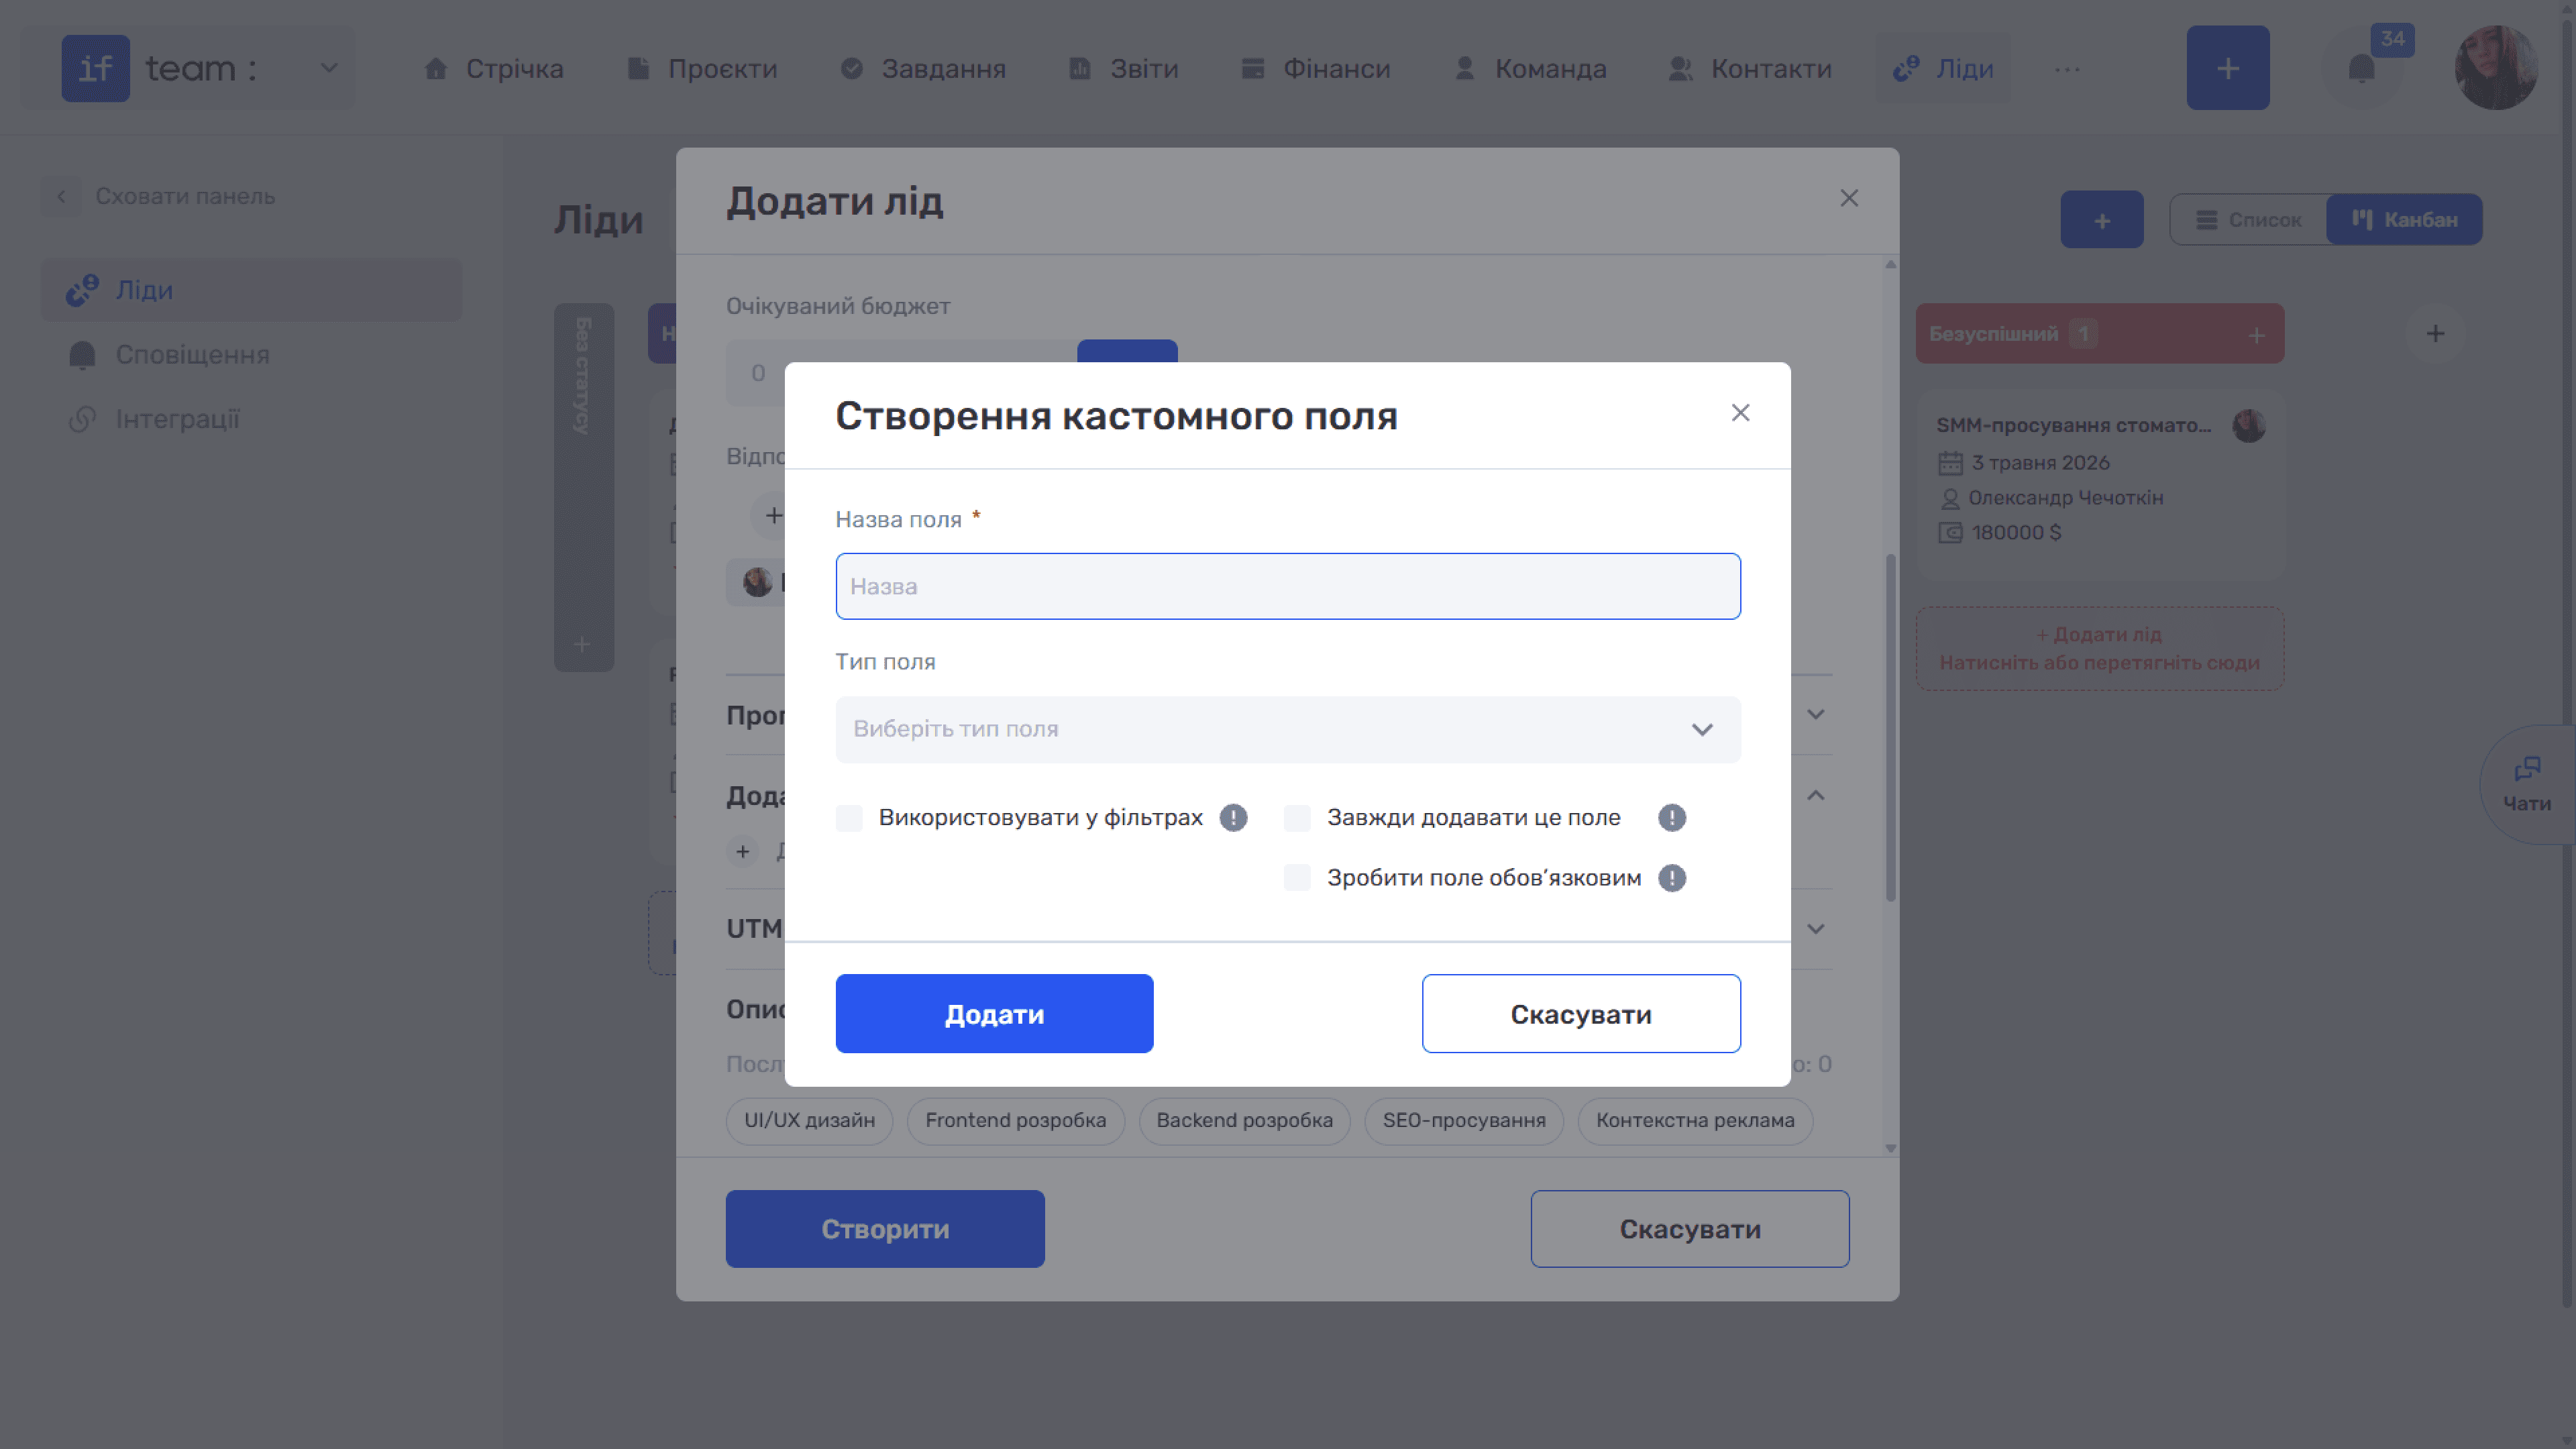
In the “Create Custom Field” window, enter the required Field Name and select a Field Type: Text · Description · Checkbox · Number · Drop-down Menu · Date · Date and Time · Time · Link · Labels · Members · Contacts. The last two types store a relationship with a specific employee or contact in the database rather than plain text.
Below are three switches:
- “Use in Filters” makes the field available in the “Filters” panel.
- “Always Add This Field” automatically adds the field to every new lead.
- “Make This Field Required” prevents the lead from being saved without it.
Click “Add.”
How to Use Custom Fields
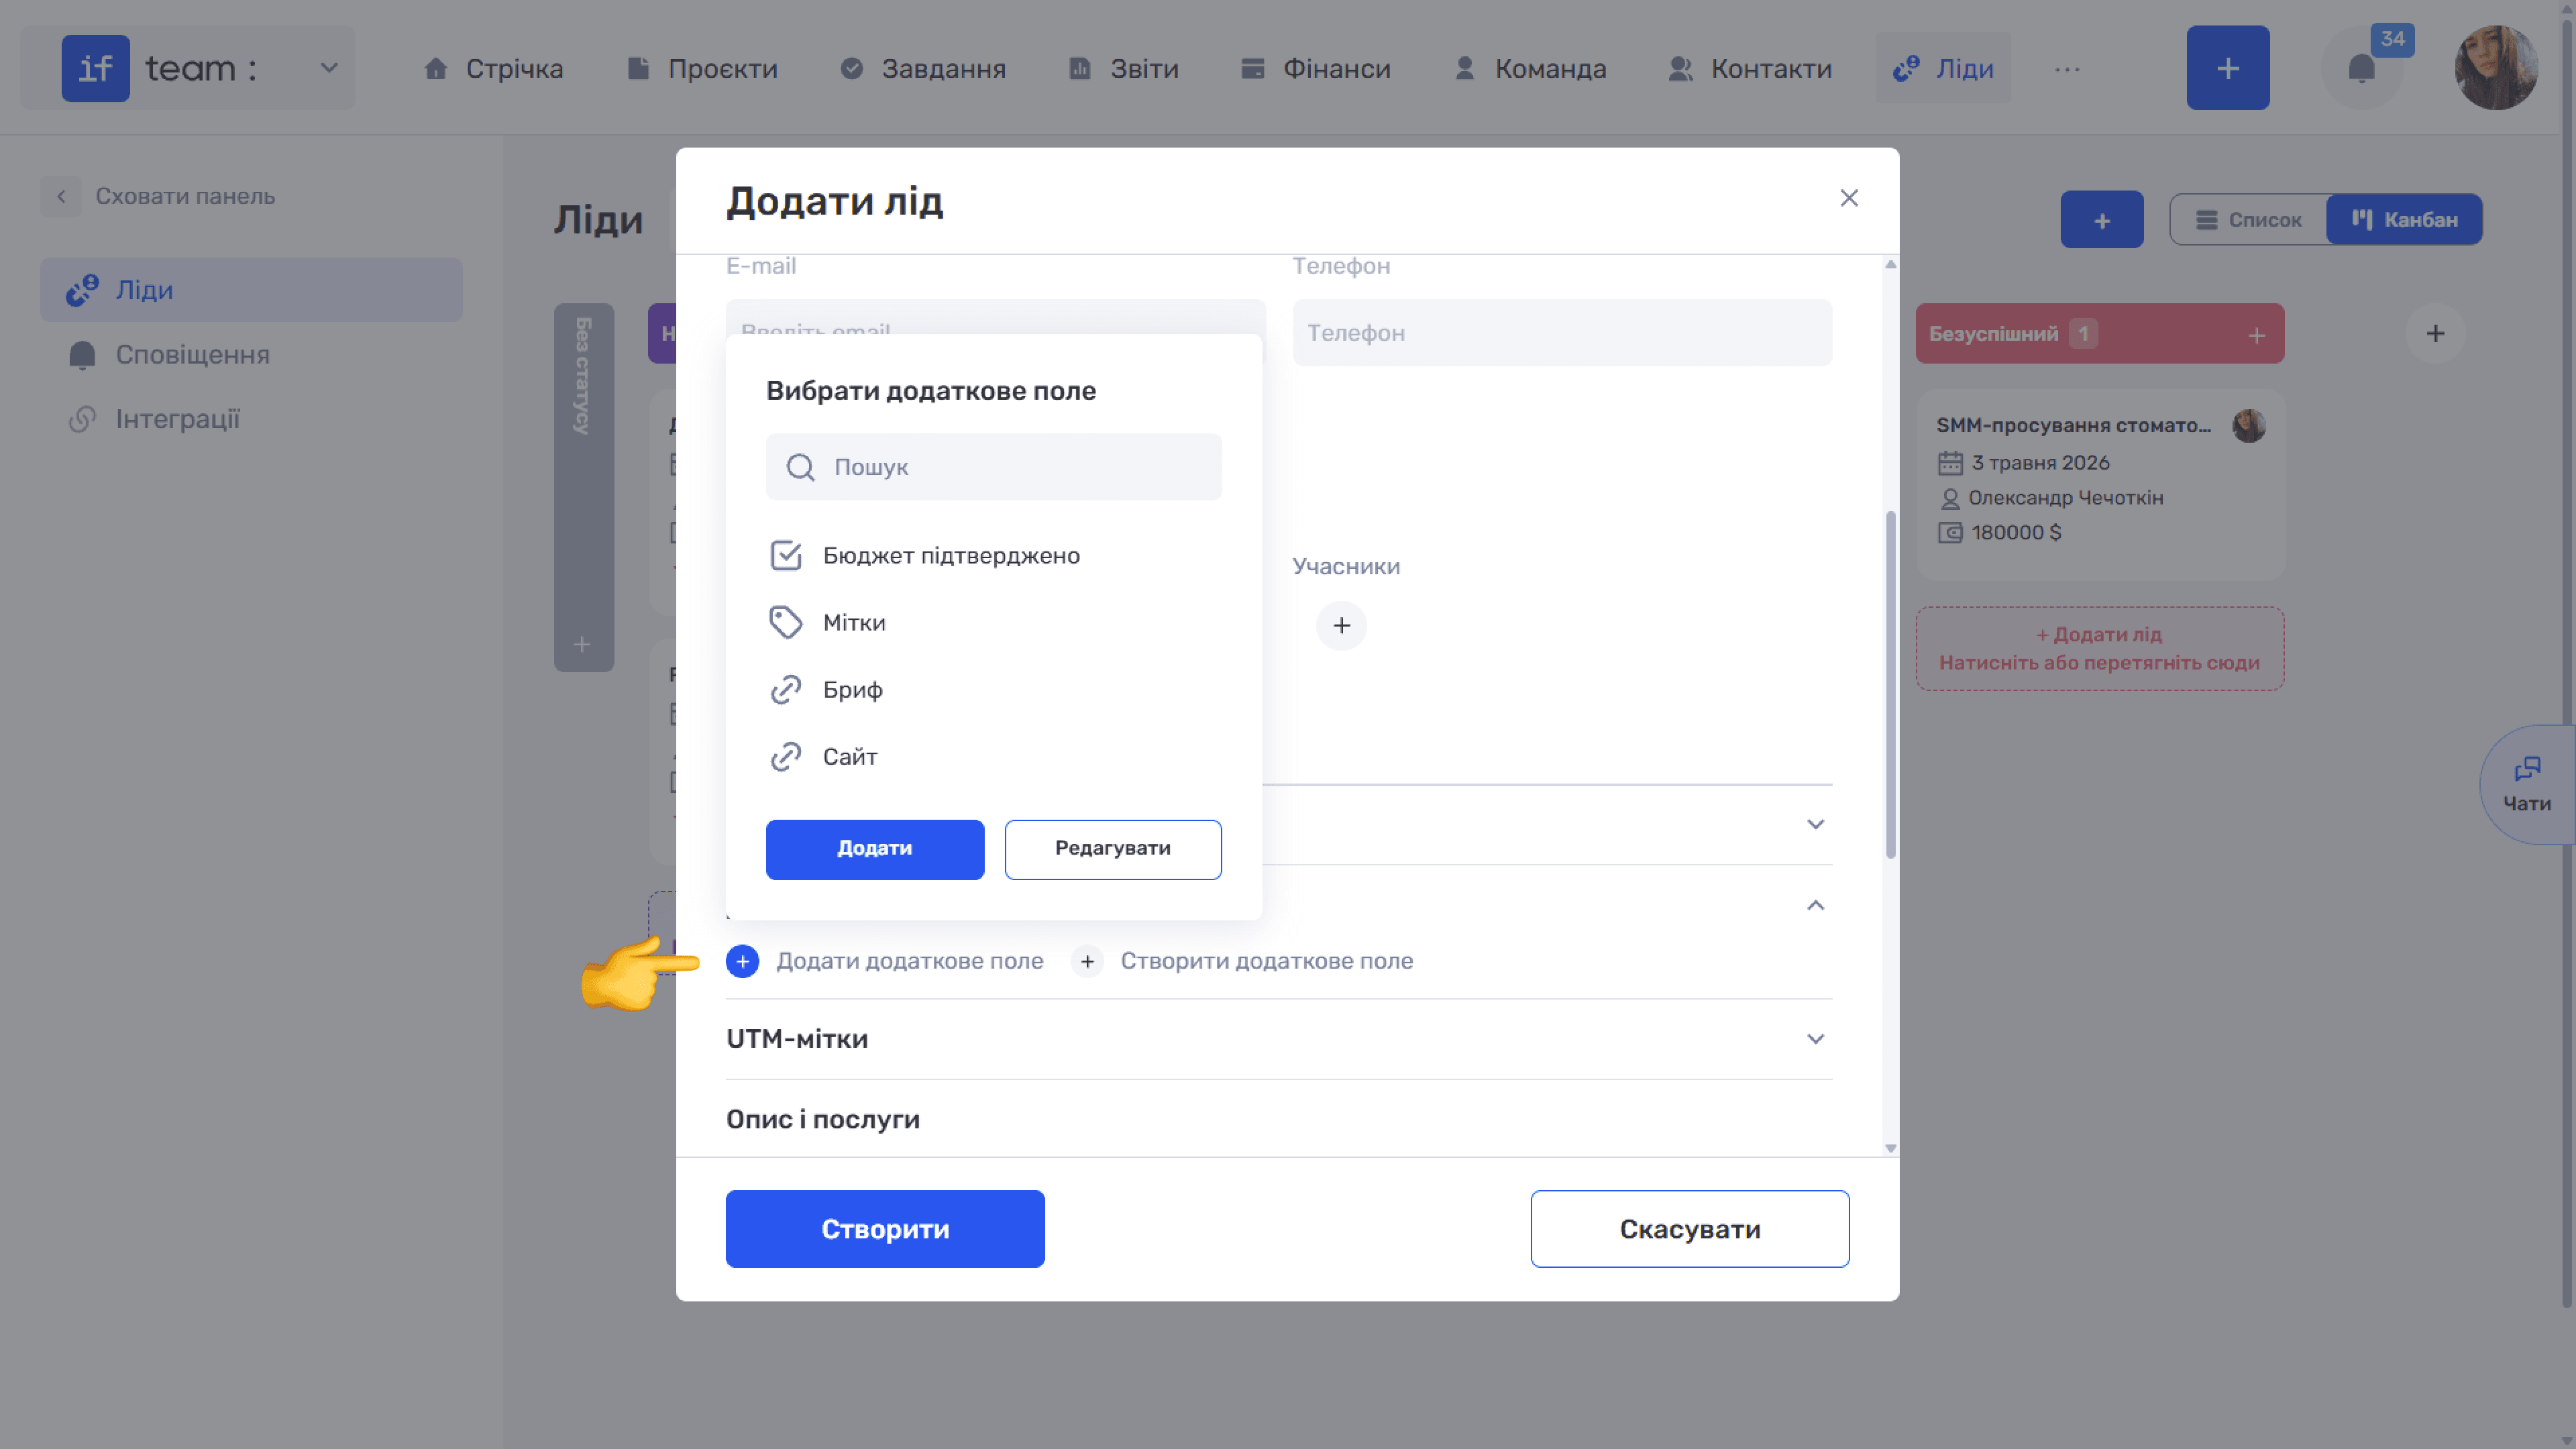
In the lead form, expand “Additional Fields” and click “+ Add Additional Field.” Selected values are inserted into generated documents; see Generating Documents from a Lead. If filtering is enabled for the field, it is also available in the “Filters” panel.
Please note
Be careful with required fields. If you make a custom field required, existing integrations will be marked in red with (!) and will need to be reconfigured because submissions from external sources do not know about the new field. After creating such a field, check “Integrations” immediately.
Please note
Custom fields are configured separately for each entity. Fields for leads do not appear in contacts, which have their own Custom Fields for Contacts.
Still have questions?
Maybe we haven't added this information yet. But you can always reach out:
Request a demo
Submit a request and we'll show you how the service works and its capabilities.
Book a demo