Adding a Lead
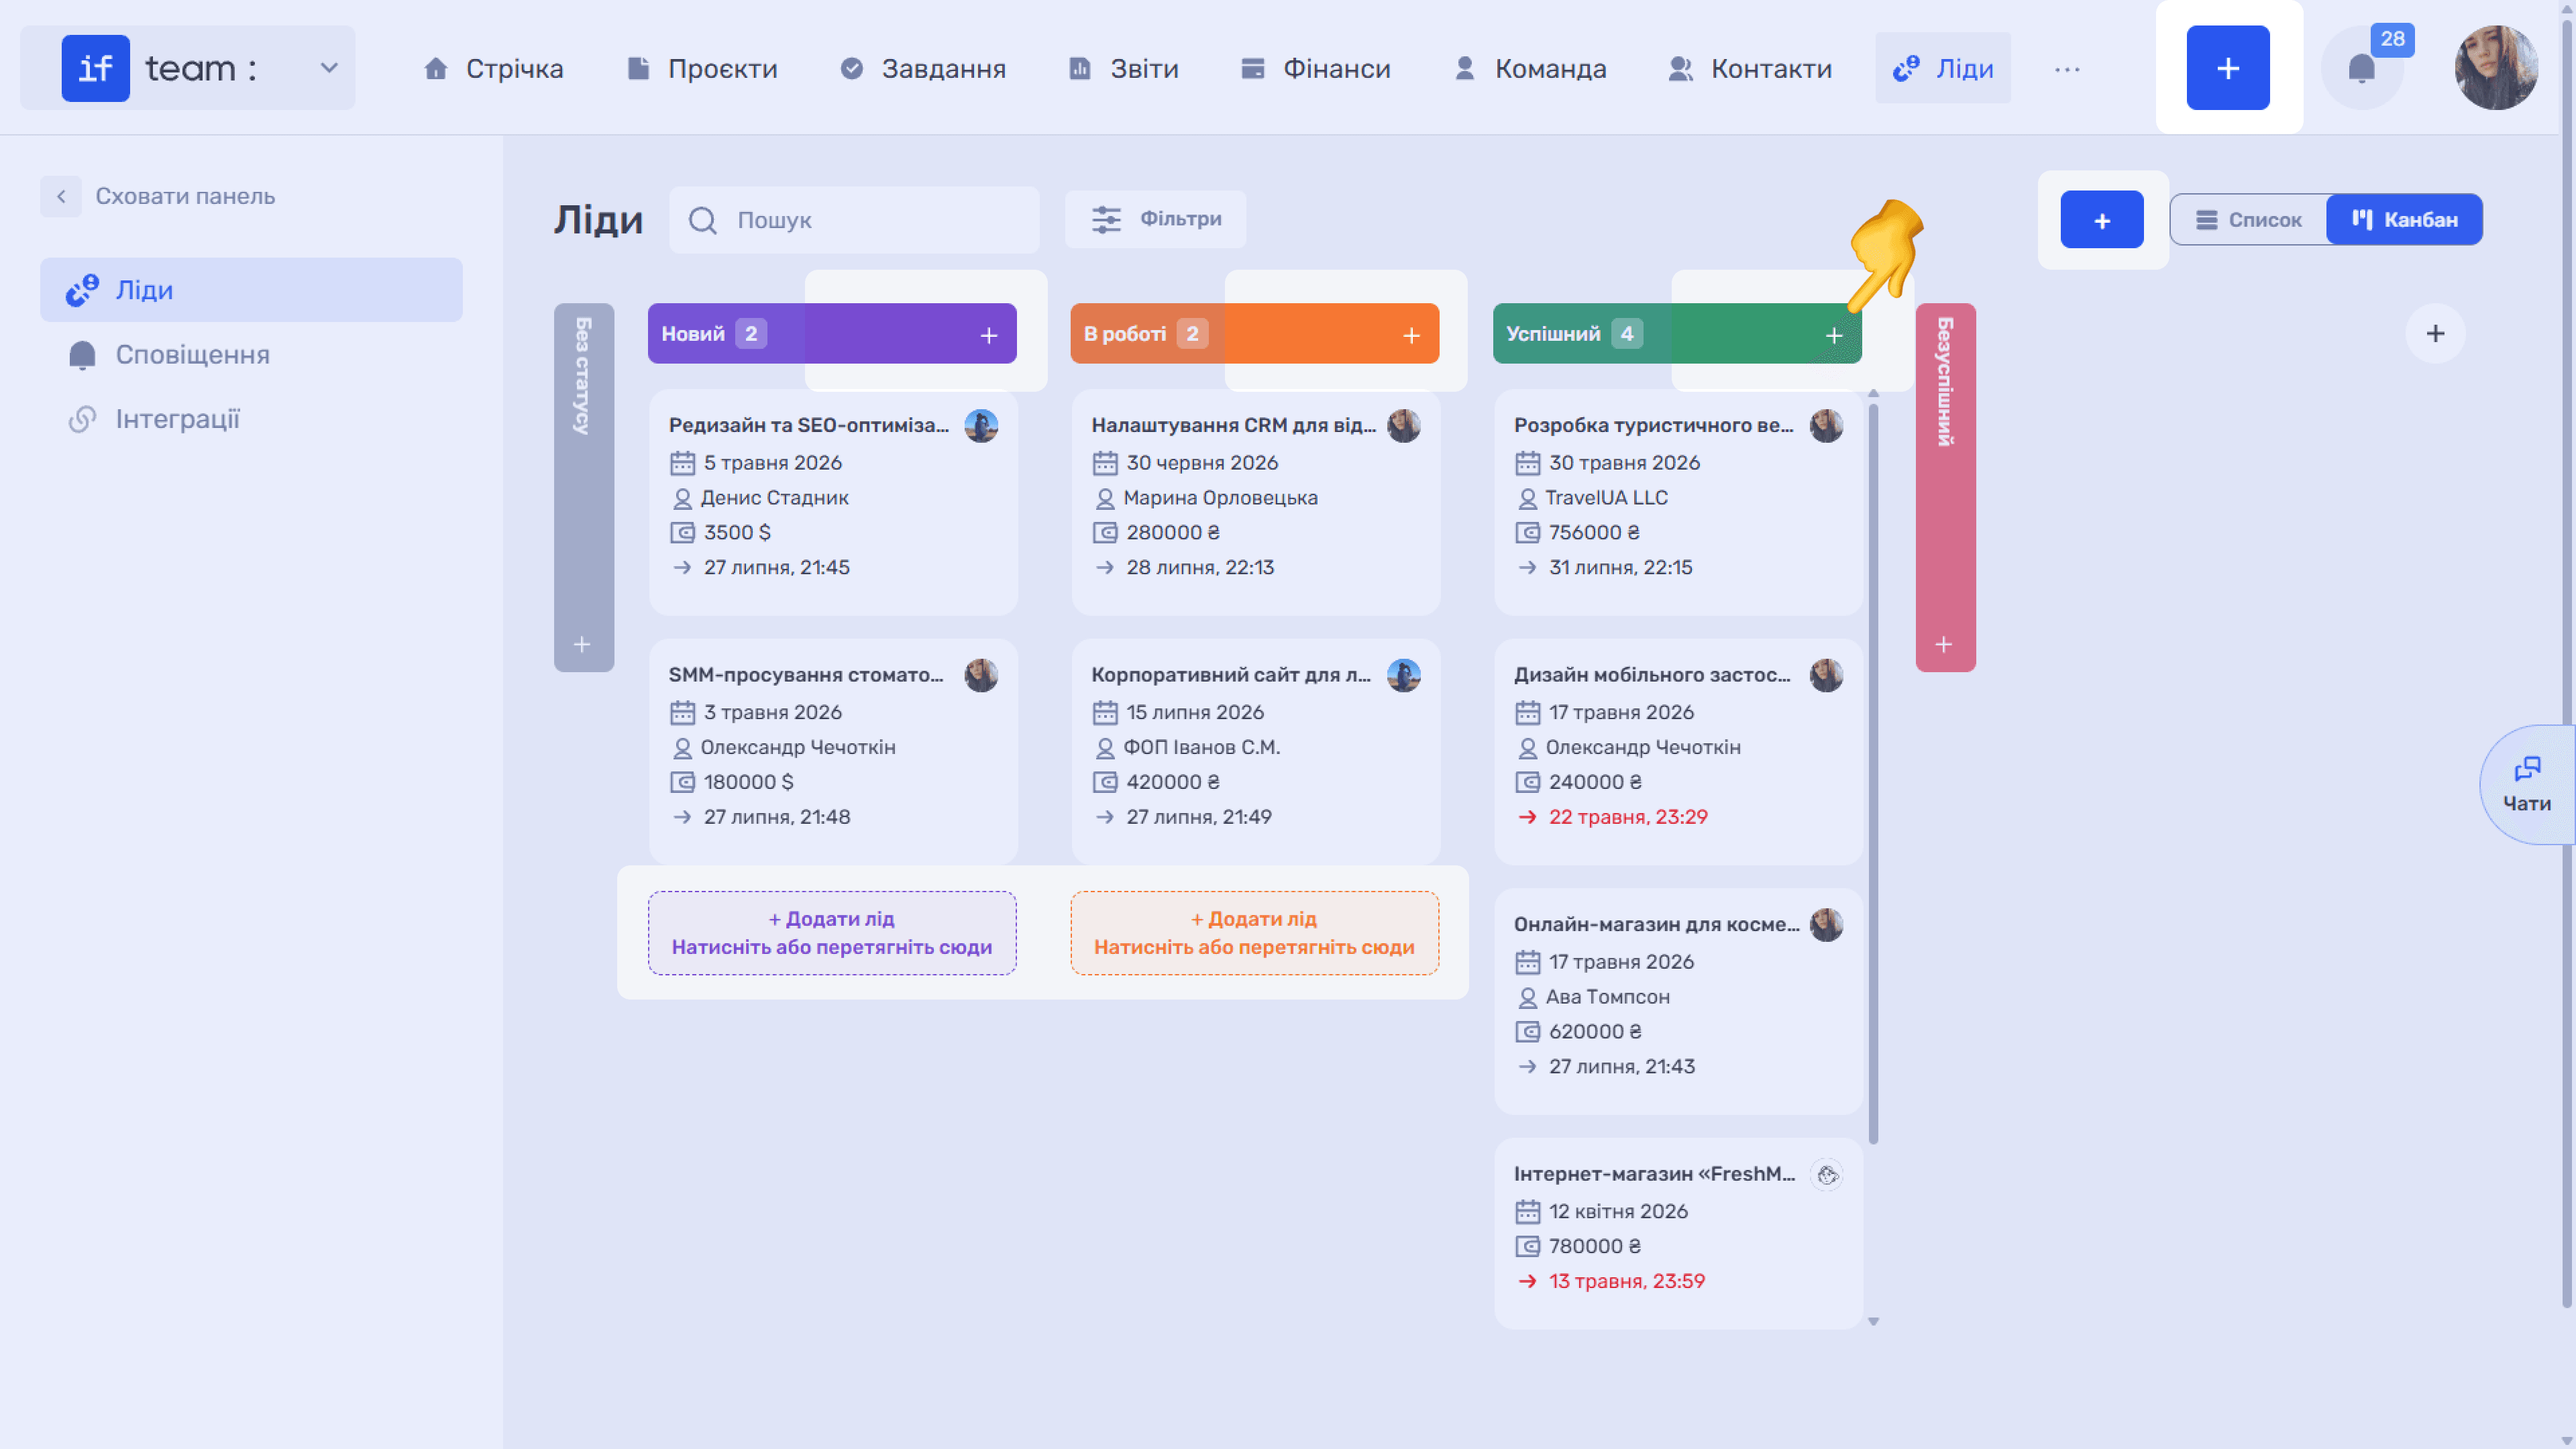
Click “+” at the top of the section, or “+ Add Lead” in the required Kanban column, to open the “Add Lead” window.
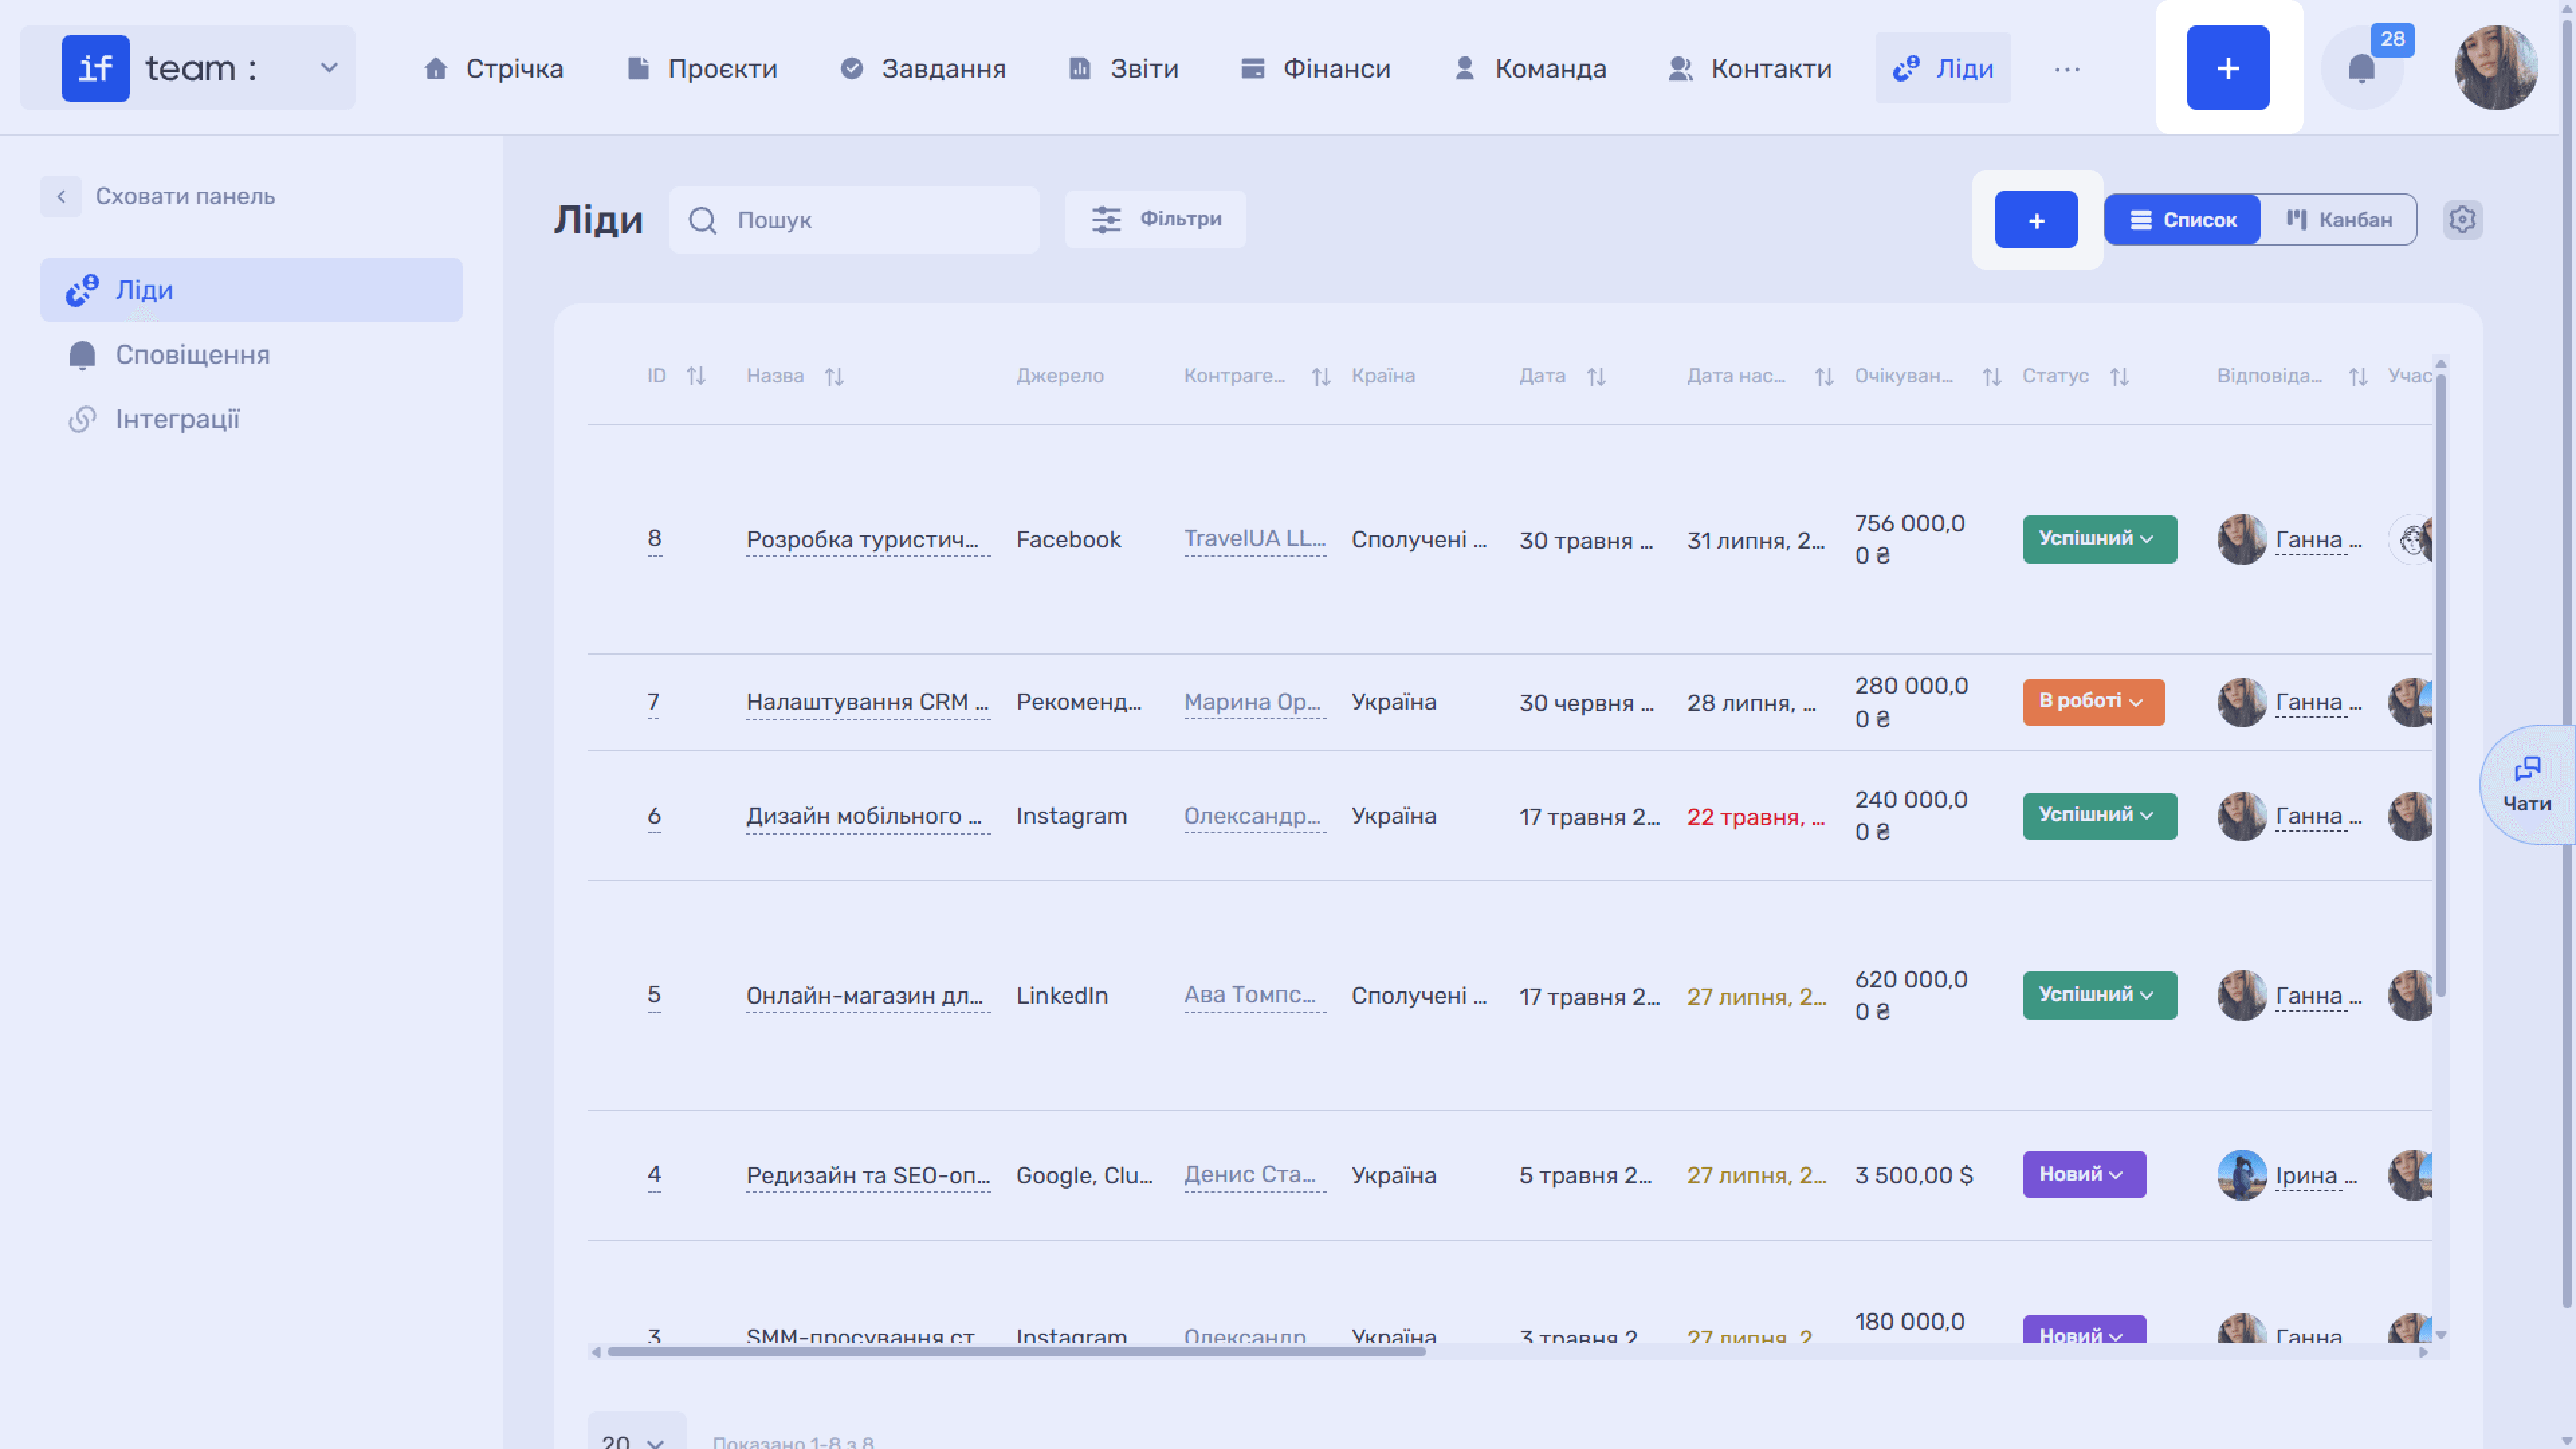
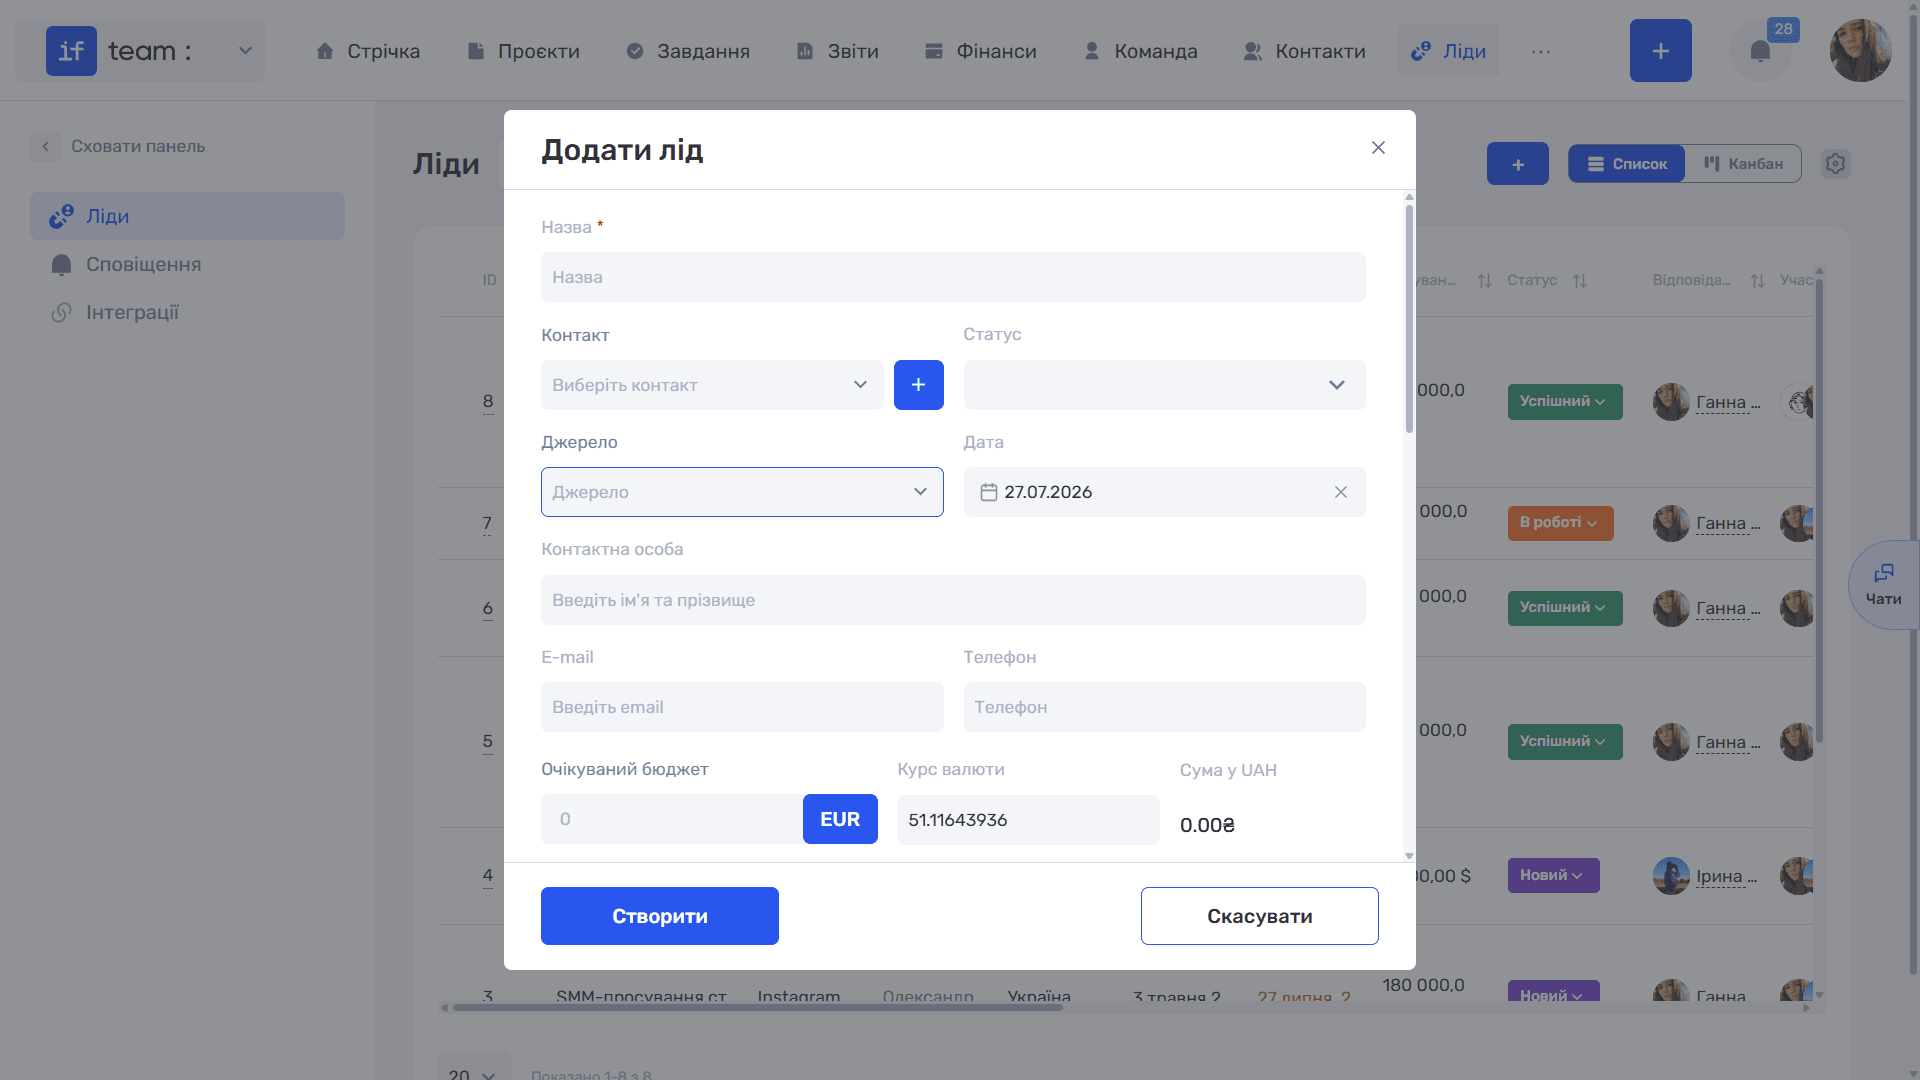
Complete the main fields:
- Name briefly describes the inquiry and is required.
- Contact is the counterparty from the CRM database. If the contact does not exist yet, click the adjacent “+” to open the contact creation form.
- Status is the pipeline stage. If no status is selected, the lead appears in the “No Status” Kanban column.
- Source indicates where the inquiry came from, such as Google, Instagram, Facebook, LinkedIn, email, customer referral, or Clutch. Configure sources in the Admin Panel under “Settings” → “CRM” → “Lead Sources.”
- Date is the inquiry date and defaults to today.
- Contact Person, Email, and Phone contain the details of the person with whom you communicate.
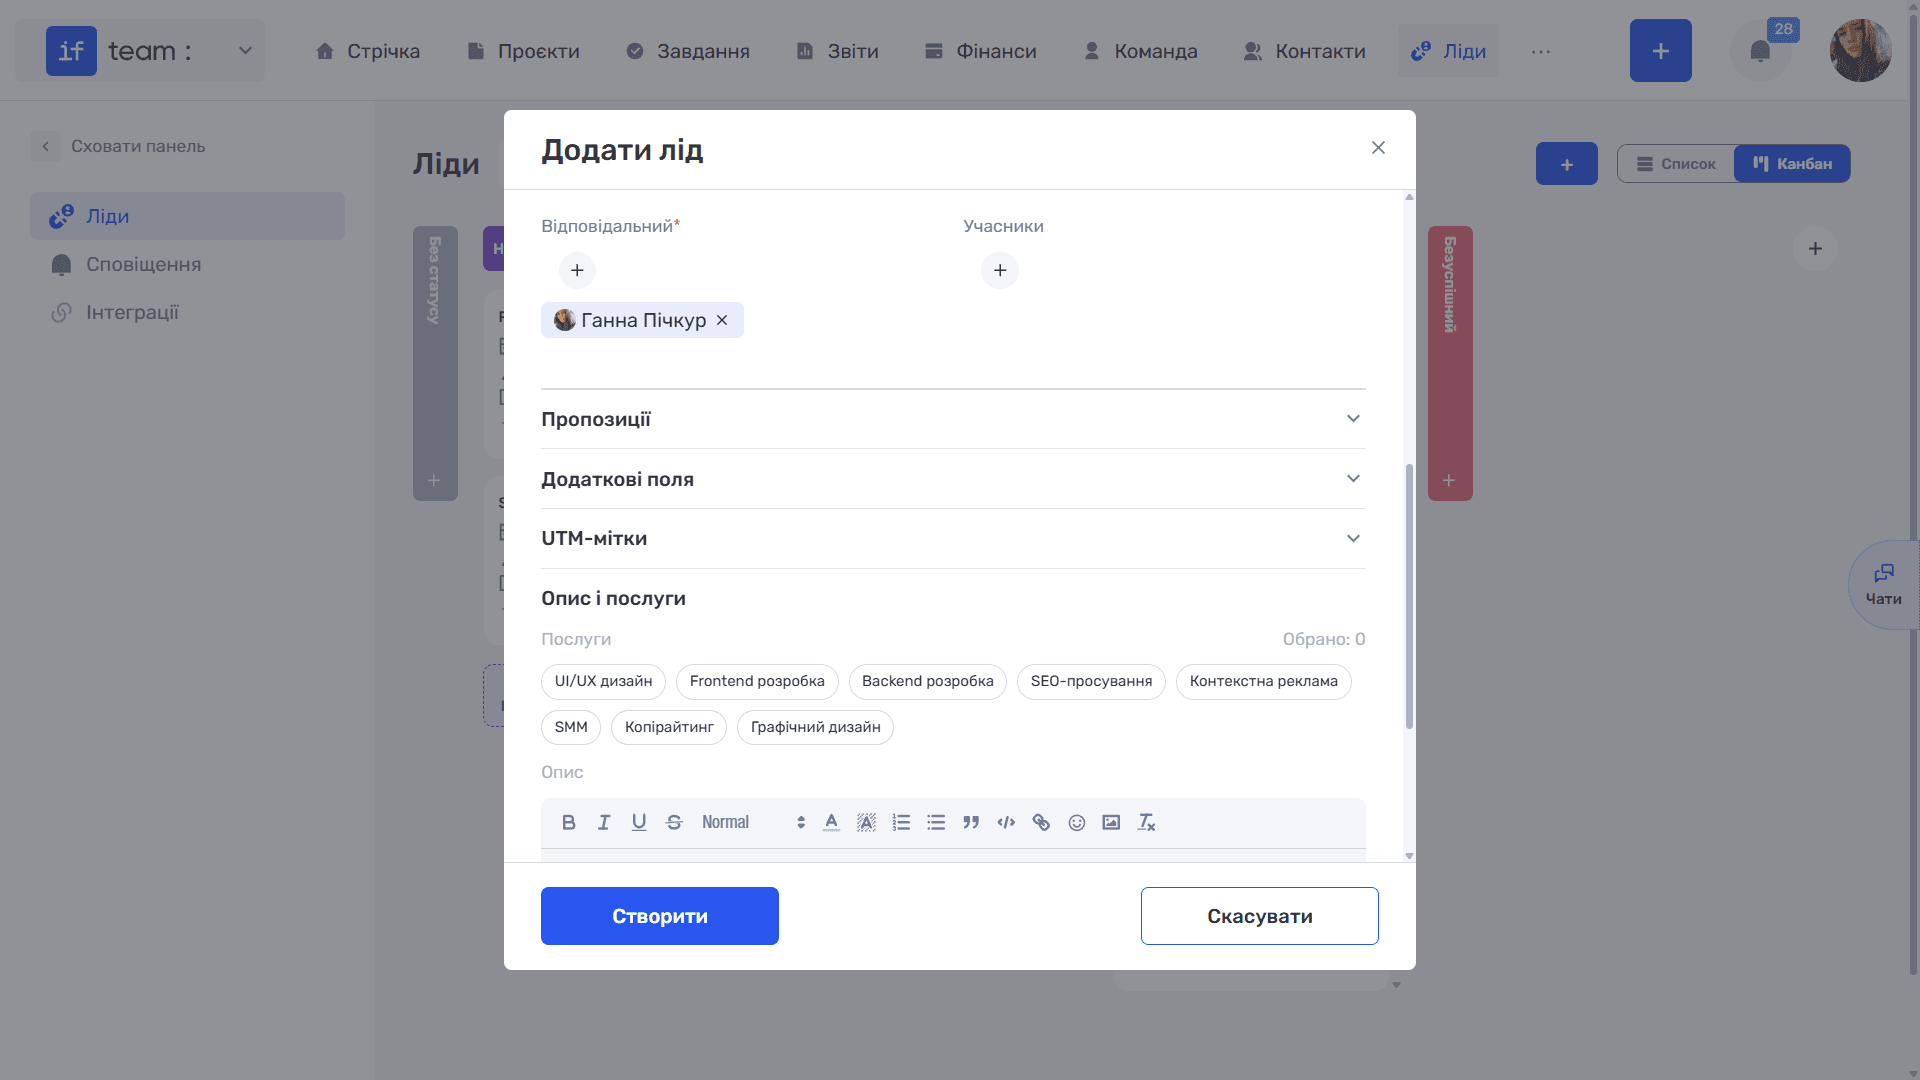
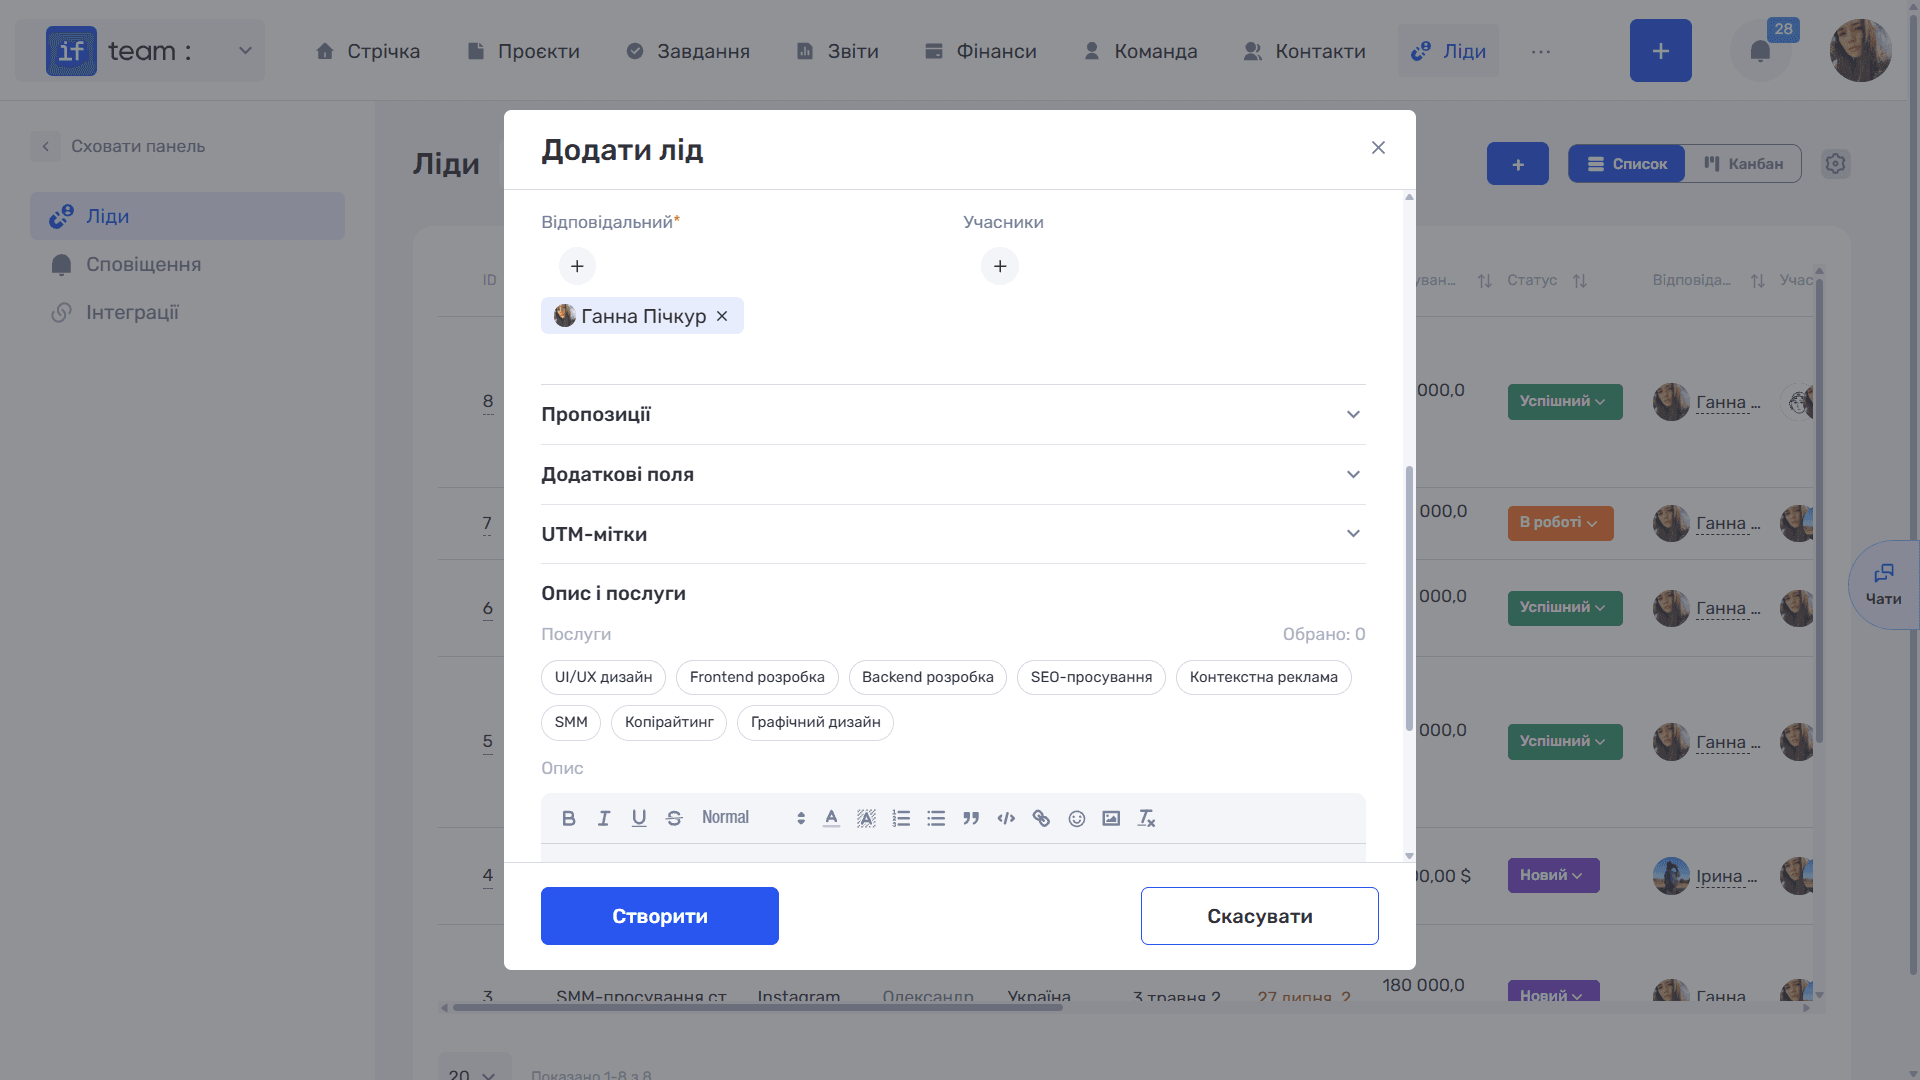
- Assignee is the employee managing the lead and is required.
- Members are other employees involved in the work.
Enter the Expected Budget together with its currency. If the lead currency differs from the company currency, “Exchange Rate” and “Amount in [Company Currency]” appear automatically. The system retrieves the exchange rate and immediately shows the equivalent. You can adjust the rate manually if necessary.
Please note
Leads from integrations are created automatically, with the source and status defined by the integration settings.
Lead UTM tags are retrieved from the advertising campaign; see Lead Integrations.
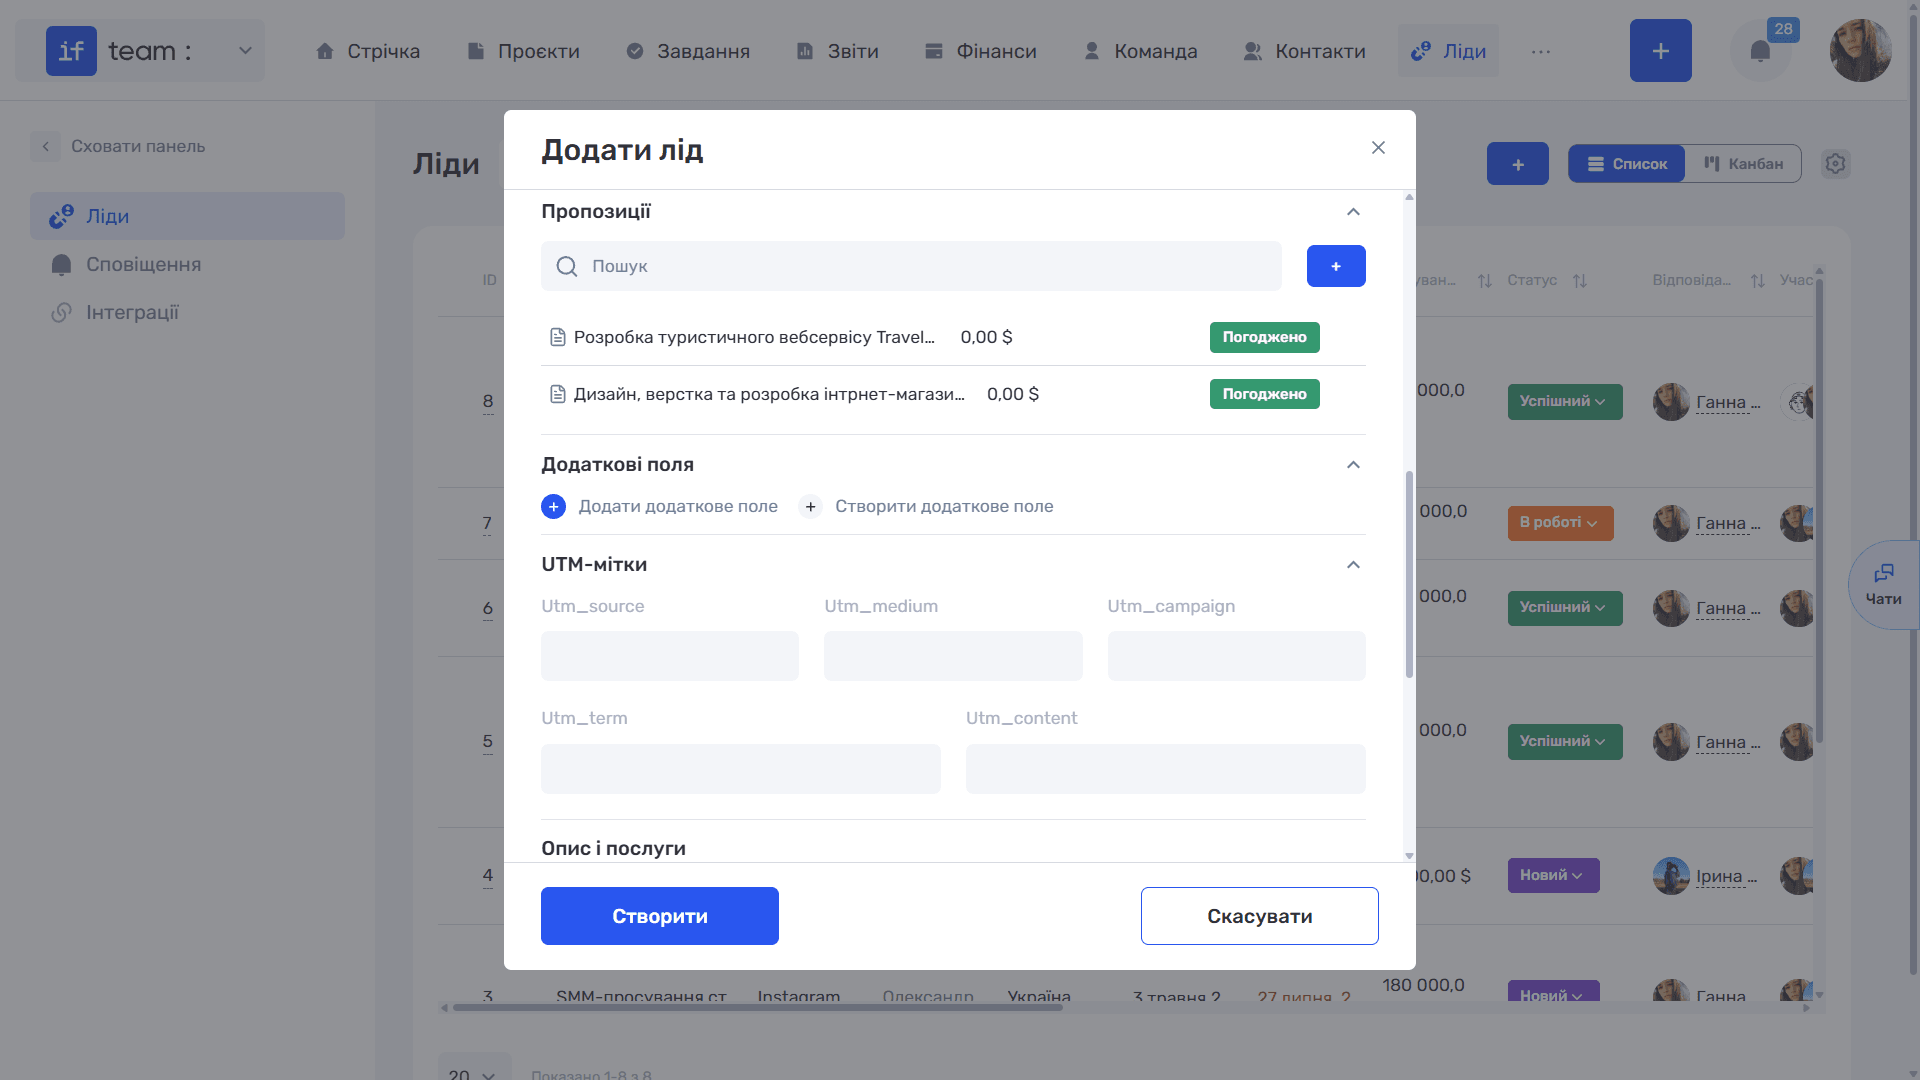
Below are four expandable sections:
- “Quote” attaches an existing quote to the lead. Use search or create a new one with “+.” The list displays the name, amount, and approval status. The attached quote’s data is later inserted into generated documents.
- “Additional Fields” uses “+ Add Additional Field” to add an existing custom field and “+ Create Additional Field” to create a new one; see Custom Fields for Leads.
- “UTM Tags” contains five fields: utm_source, utm_medium, utm_campaign, utm_term, and utm_content. For leads from integrations, these values are populated automatically from the advertising campaign, but you can enter or adjust them manually.
- “Description and Services” lets you select the services that interest the client. Configure the service list in the Admin Panel under “Settings” → “CRM” → “Services.” The count on the right shows how many services are selected. Below is a text editor for describing the inquiry, with formatting, lists, links, and images.
After completing all required fields, click “Create.”
Still have questions?
Maybe we haven't added this information yet. But you can always reach out:
Request a demo
Submit a request and we'll show you how the service works and its capabilities.
Book a demo