Work Calendar
The Calendar view shows the team’s work time by day: rows represent employees, columns represent days in the period, and cells use labels and colors to show the type of each day, such as working in the office or remotely, vacation, sick leave, or a day off. Hover over a cell to see how many hours have b
Period and Display Mode
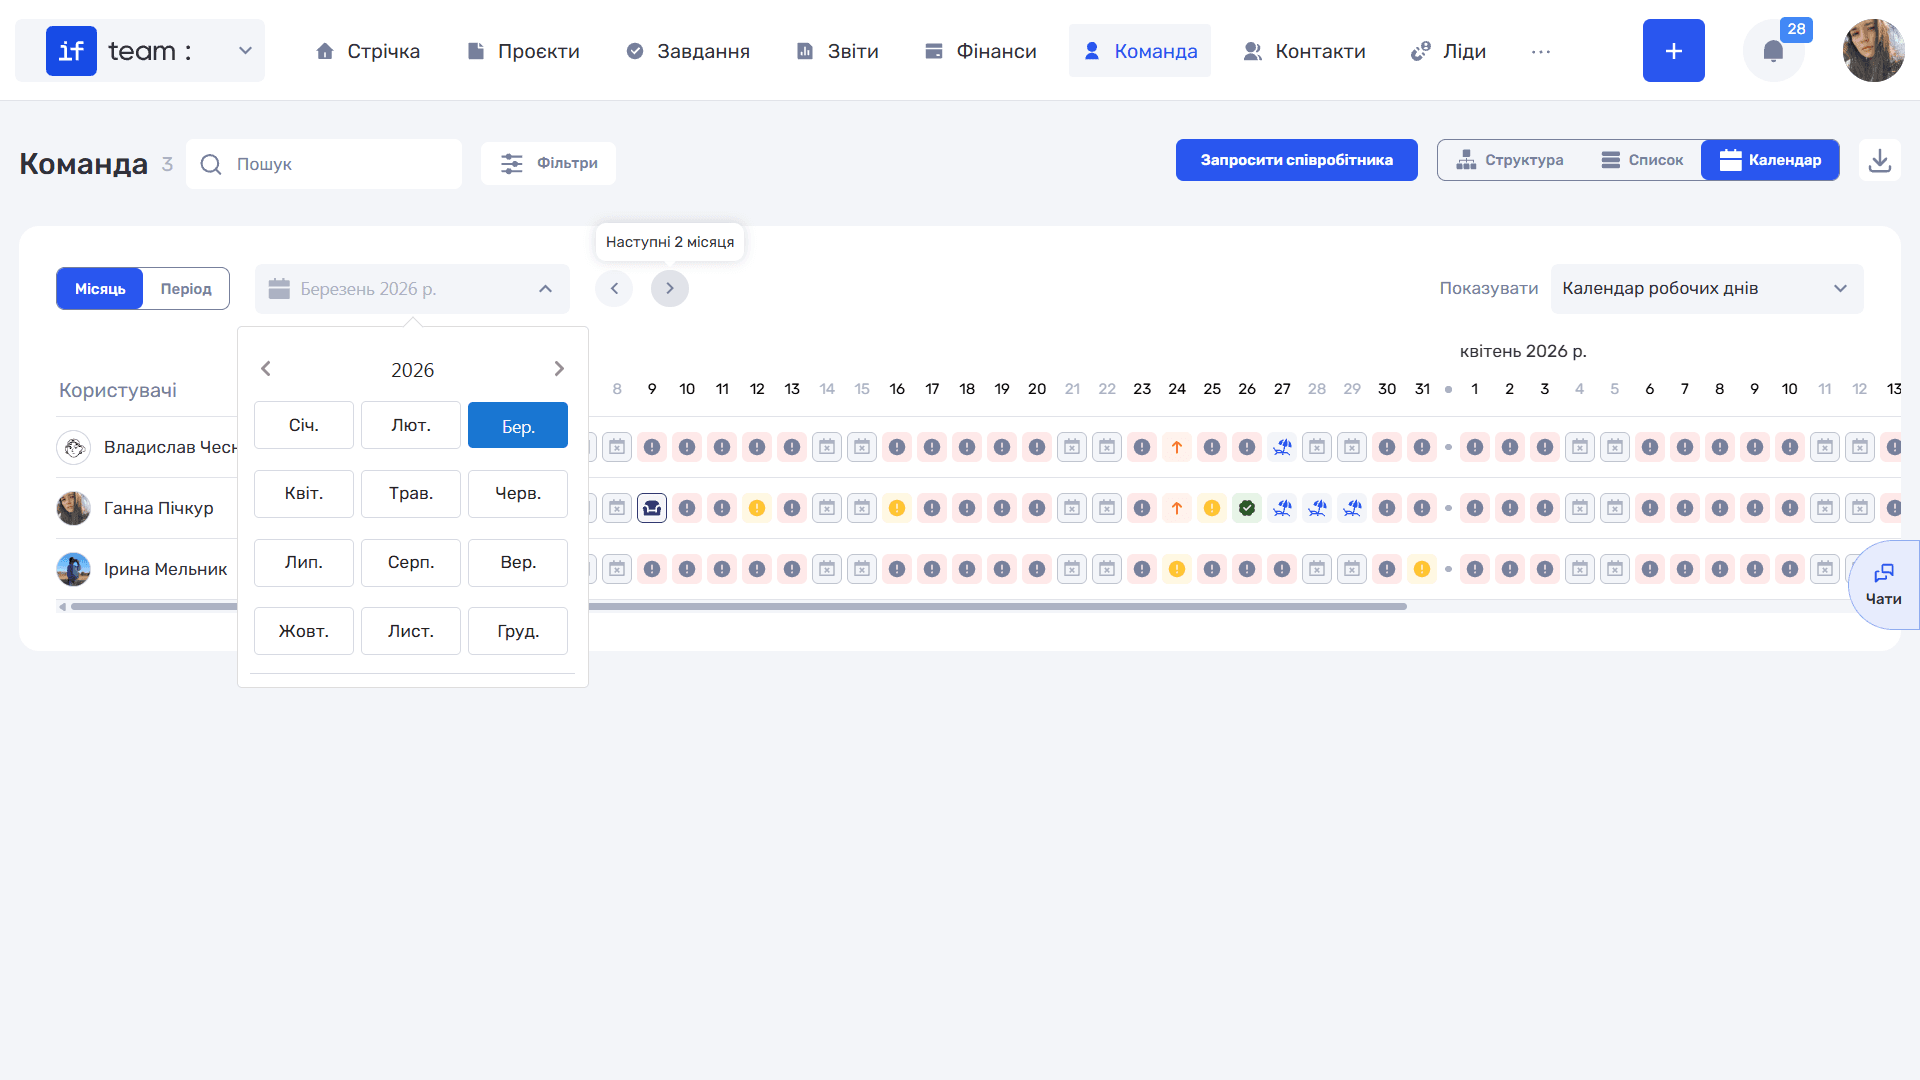
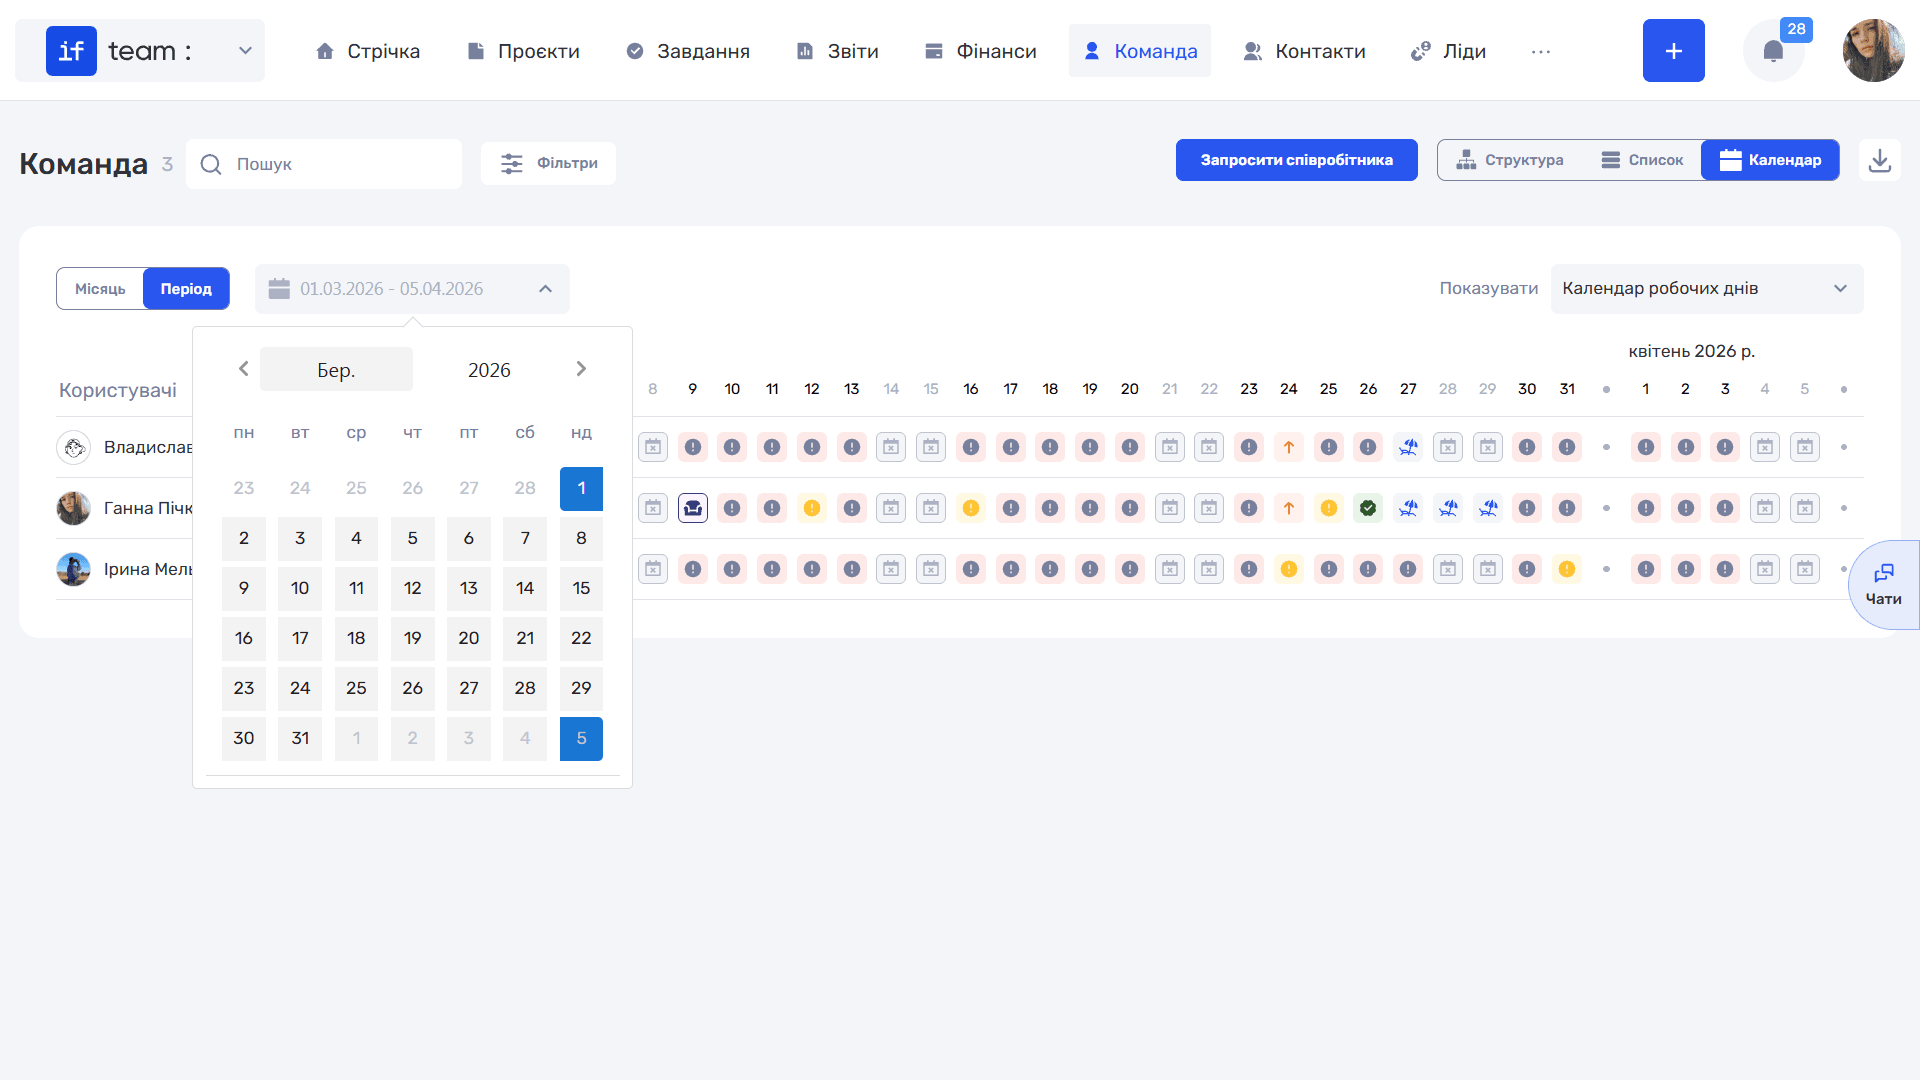
Use the switch in the upper-left corner to choose how the period is set: Month or Period, which is a custom date range. In Month mode, select a specific month from a calendar and switch between years. In Period mode, select a custom range by specifying start and end dates in a day-by-day calendar. In Month mode, arrows are also available to move the calendar forward or backward by 2 months.
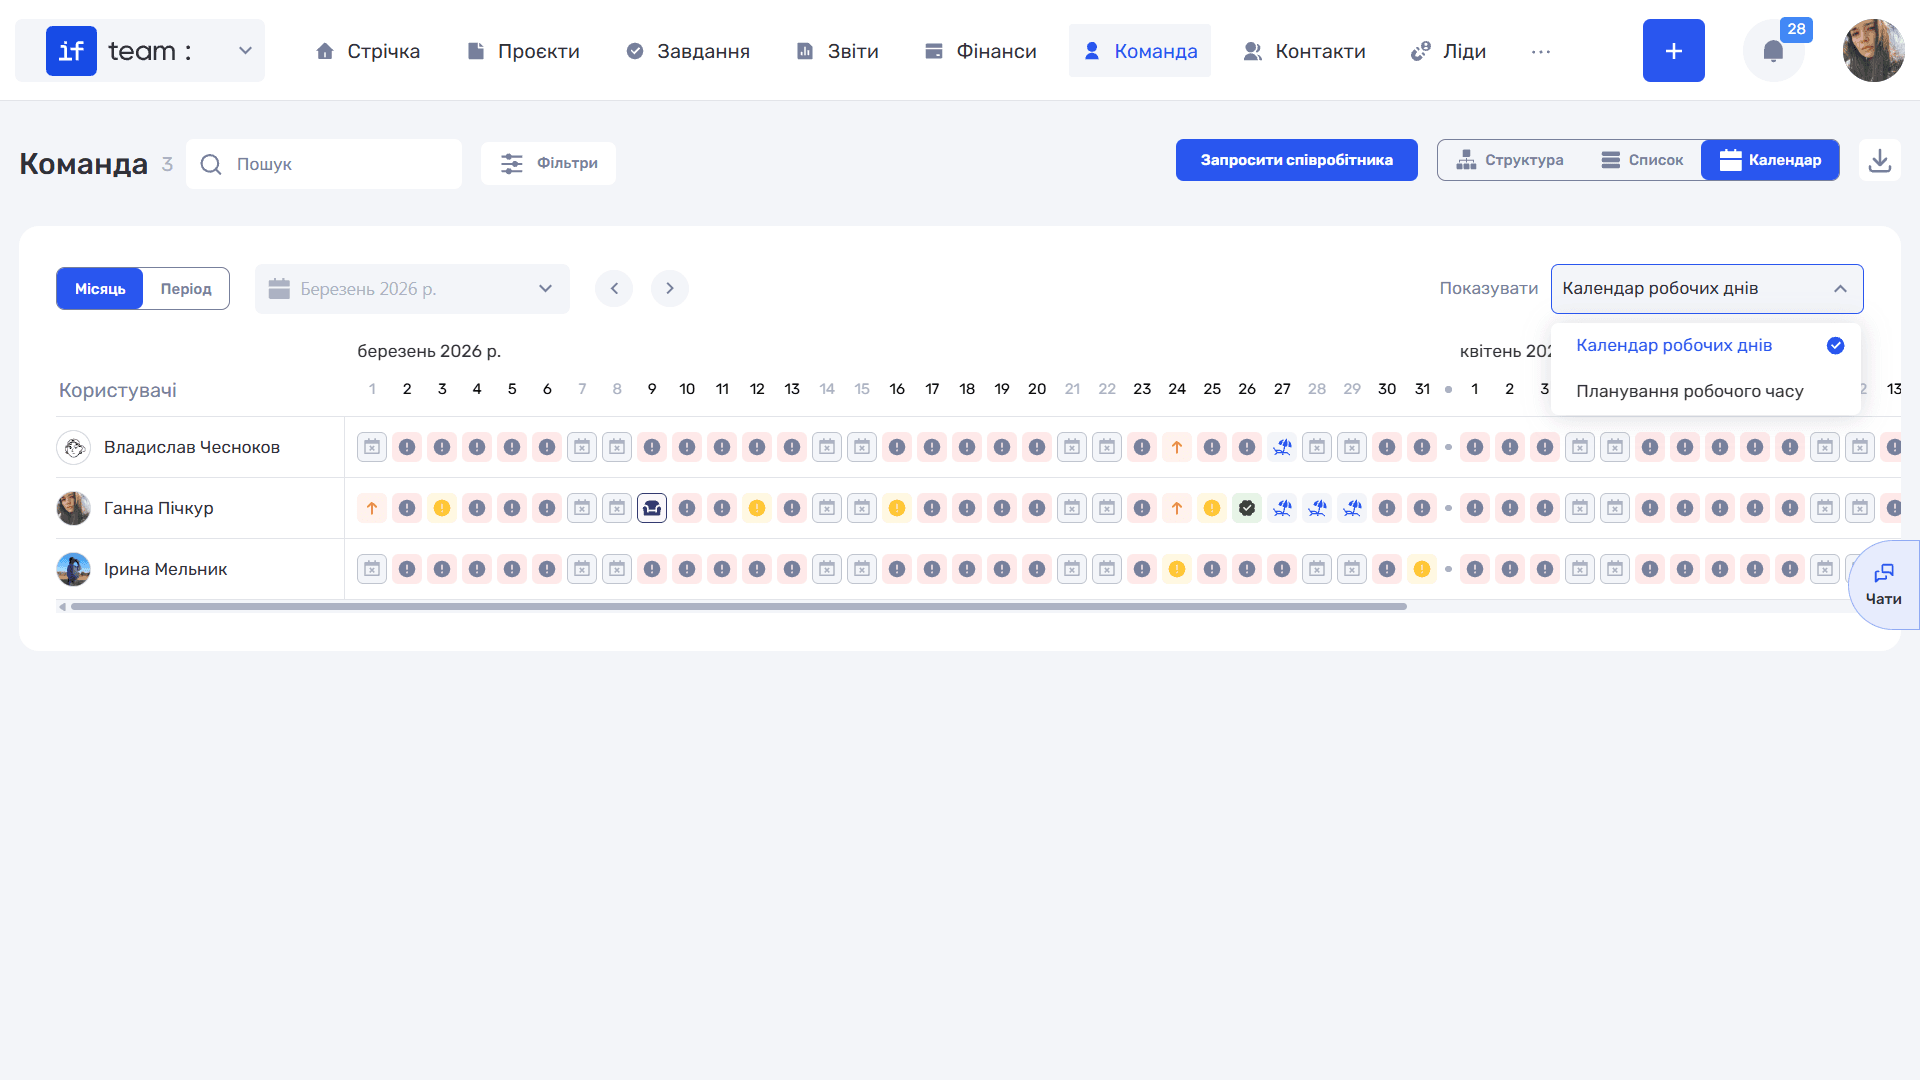
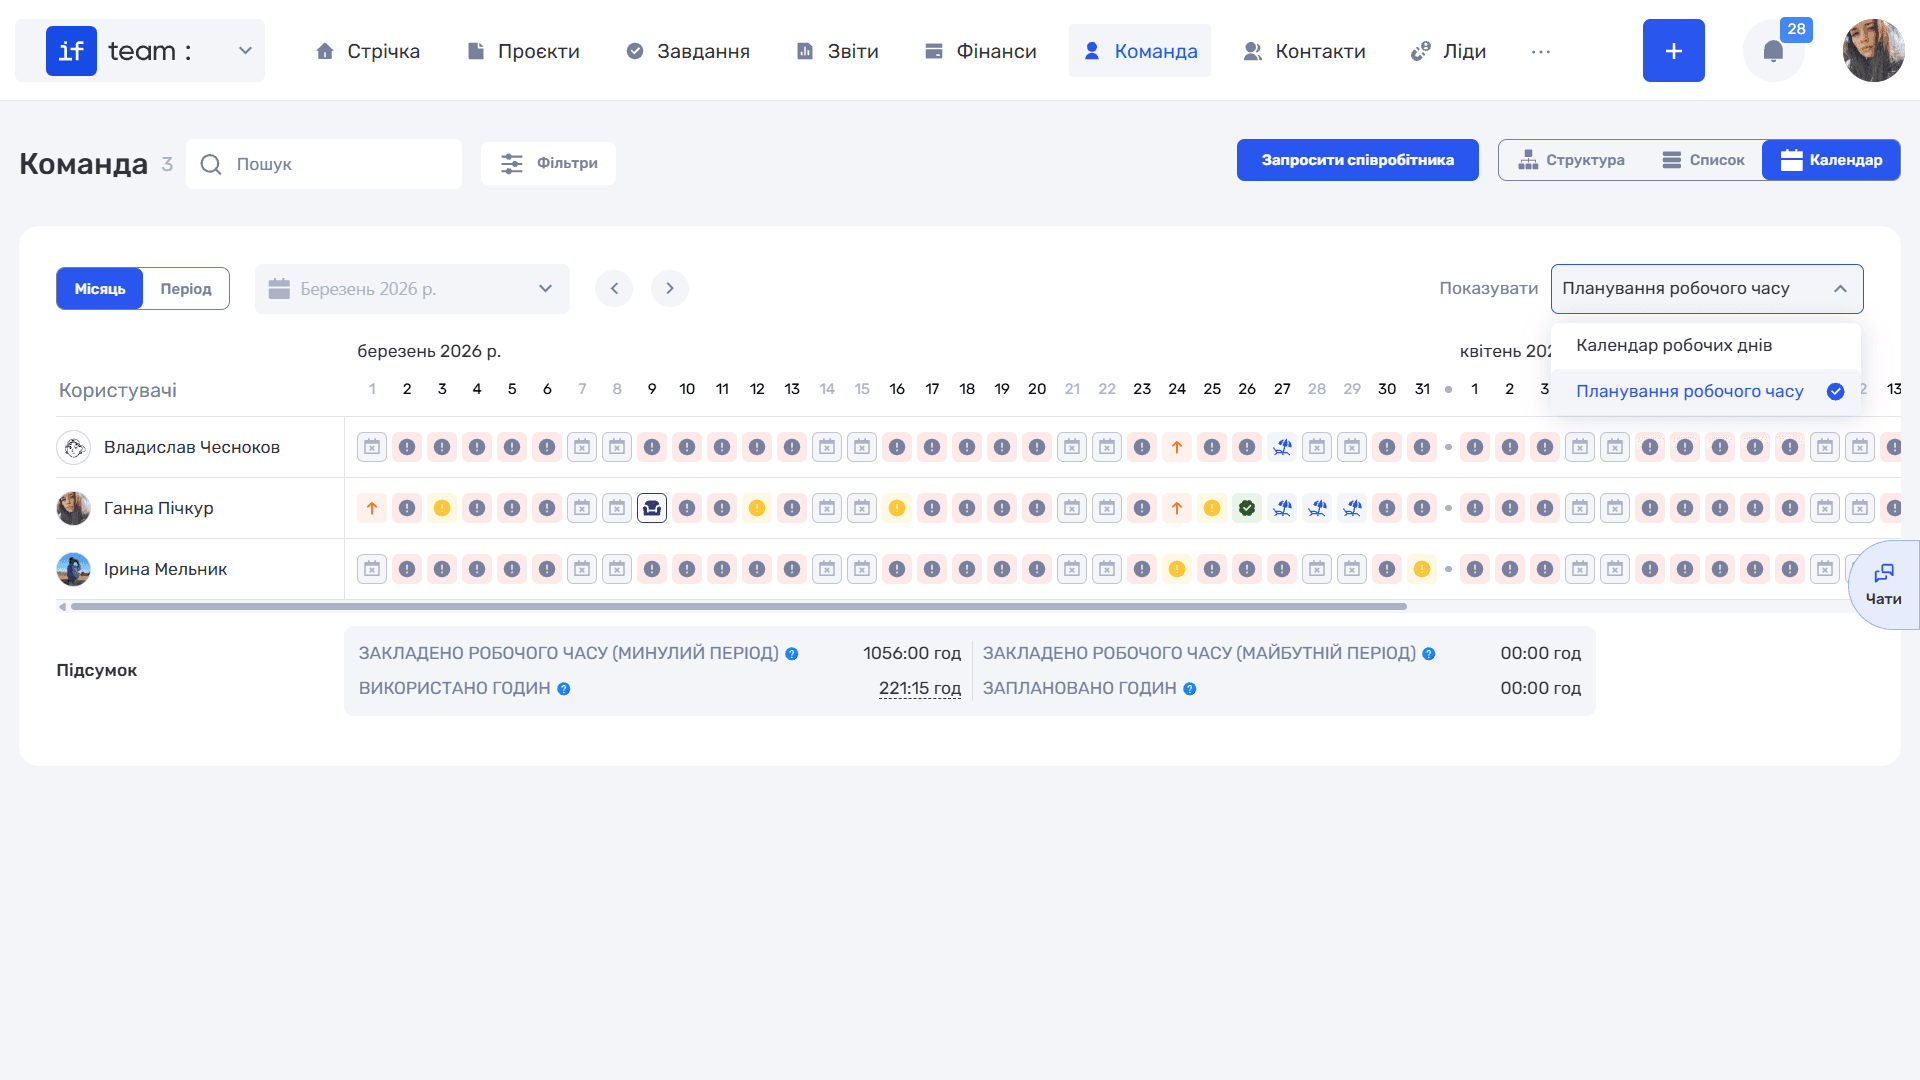
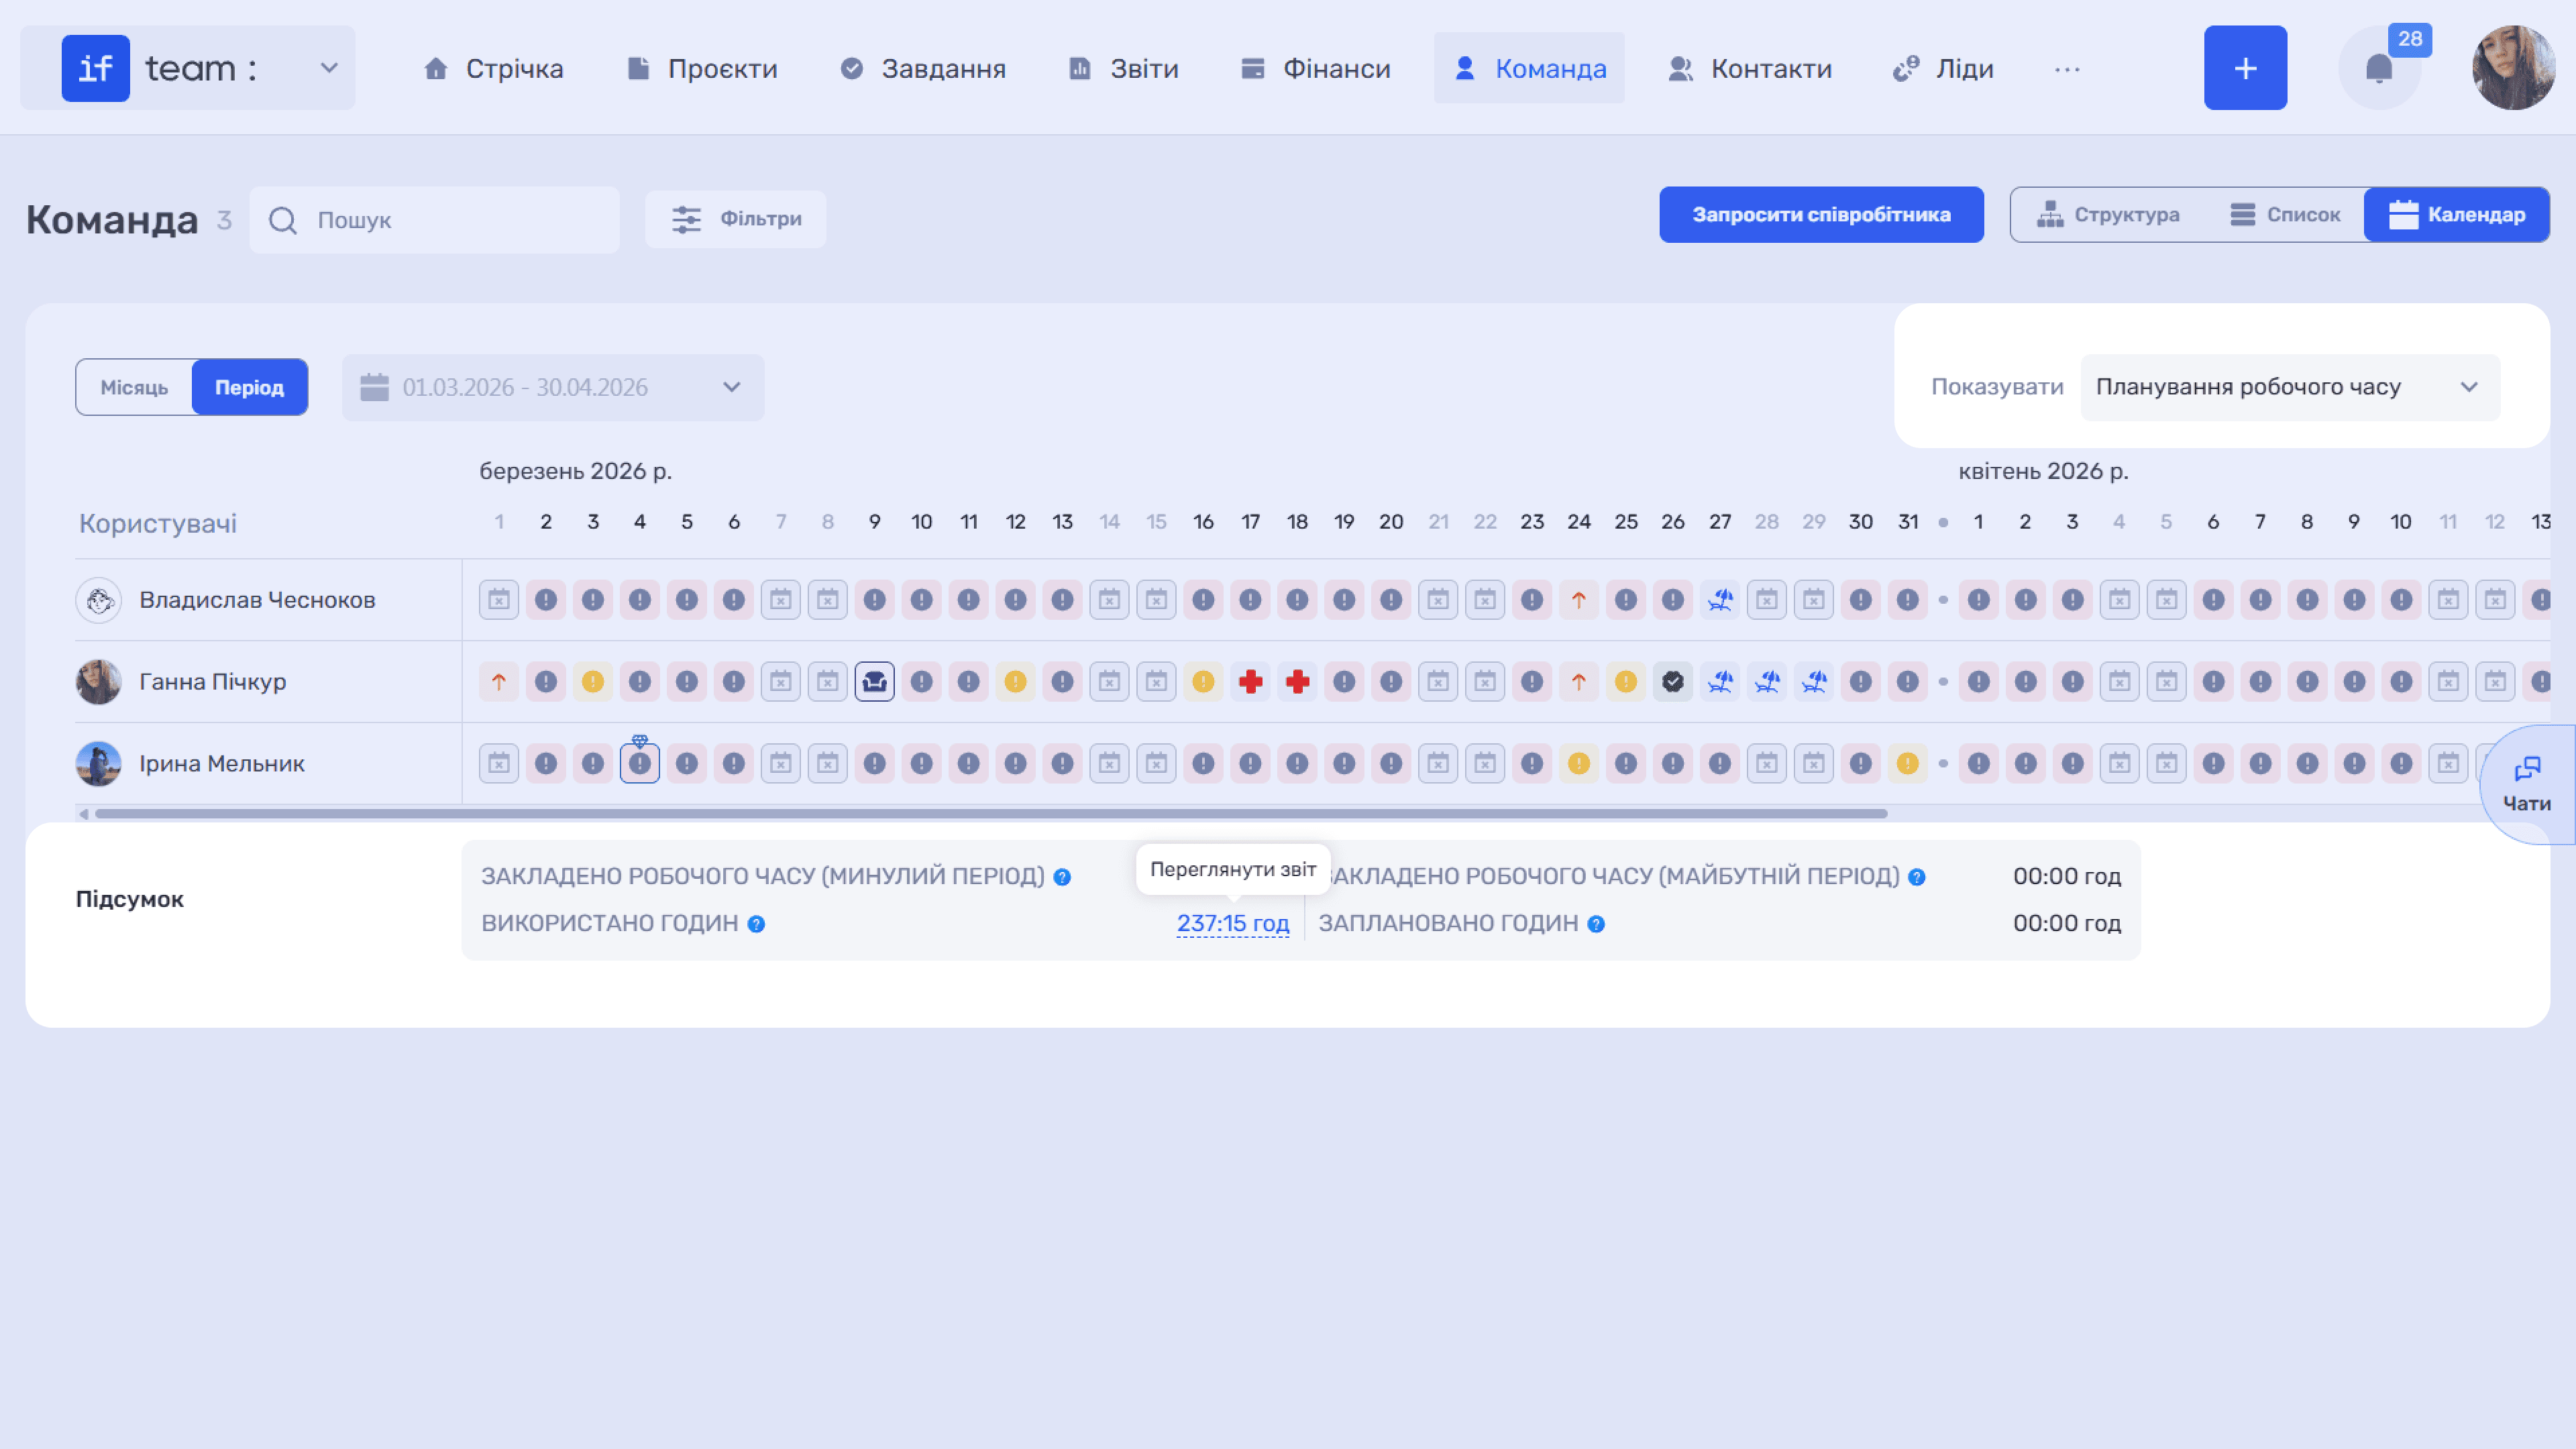
In the Show list on the right, you can select one of two calendar display modes:
- Workday Calendar provides an actual record of who worked, took vacation, or was on sick leave and when;
- Work Time Planning forecasts workload by showing how many hours are planned for tasks.
How to Mark Days
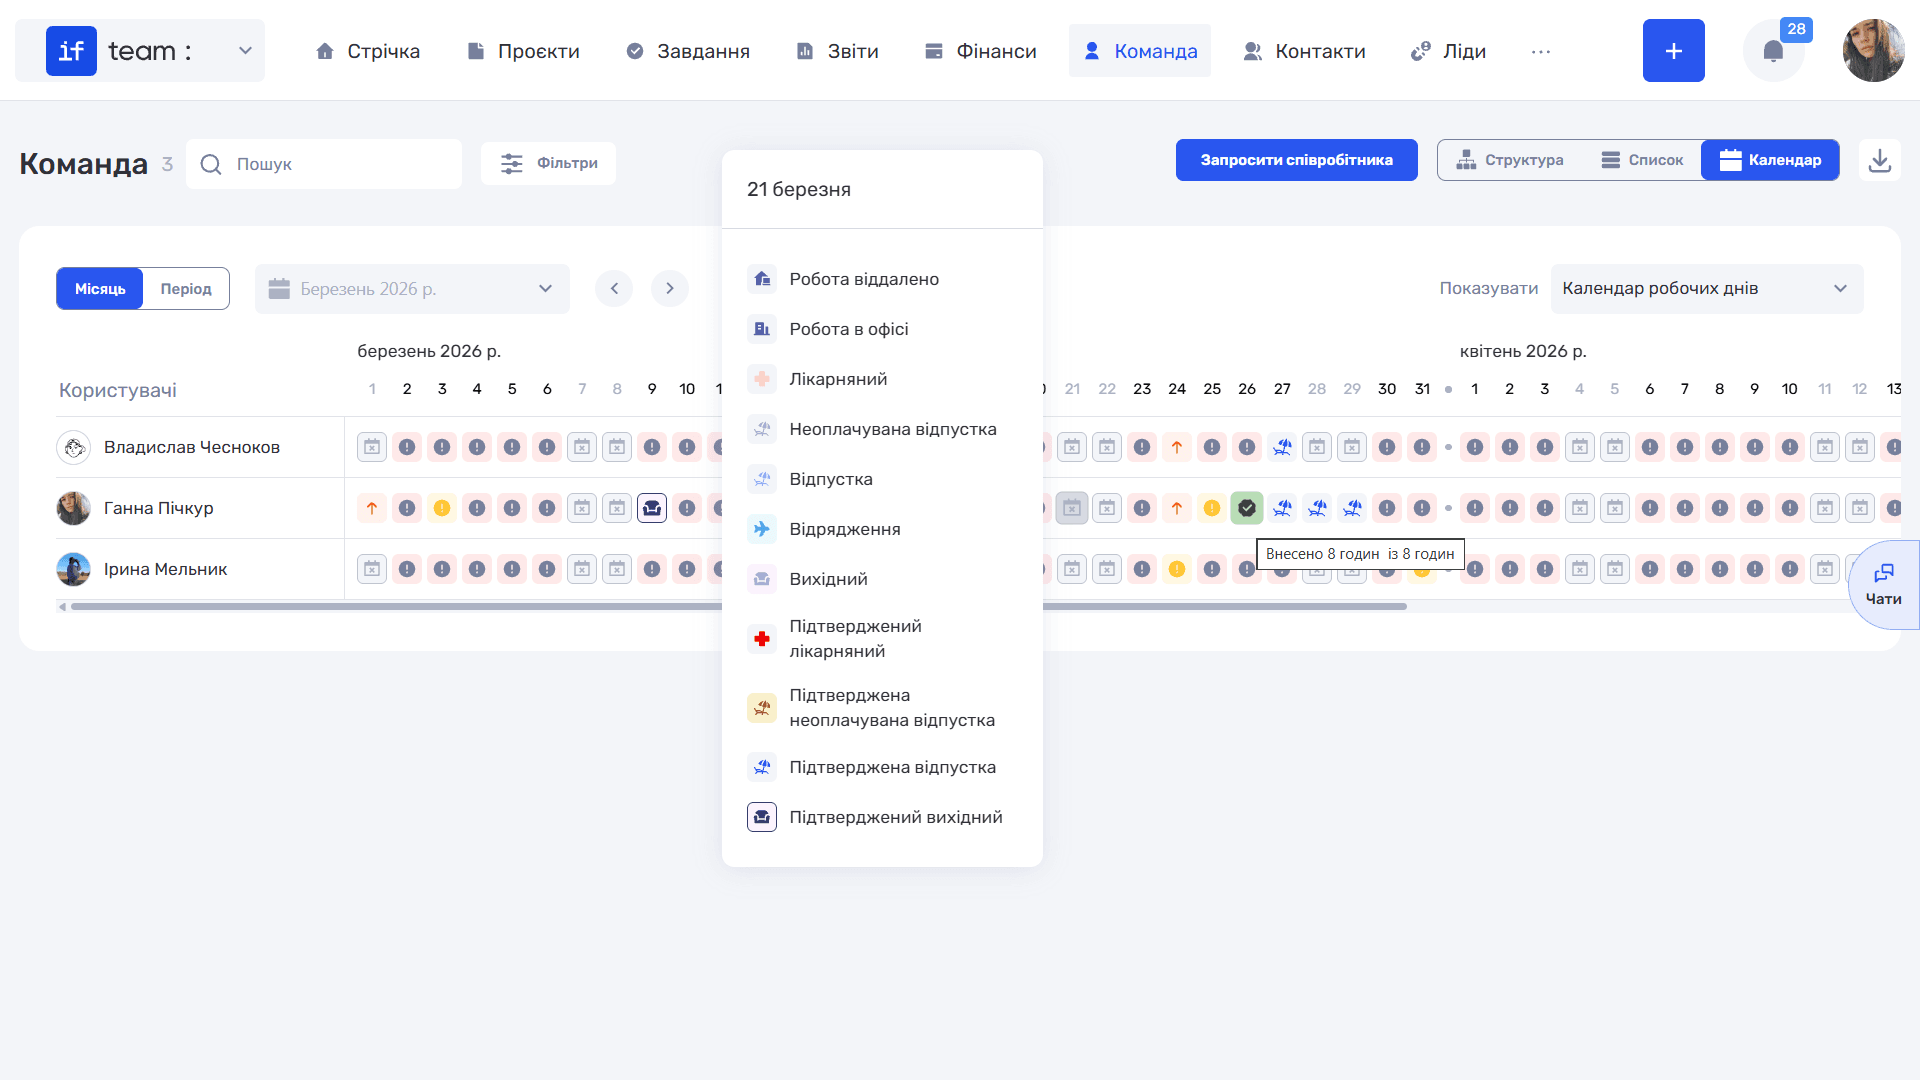
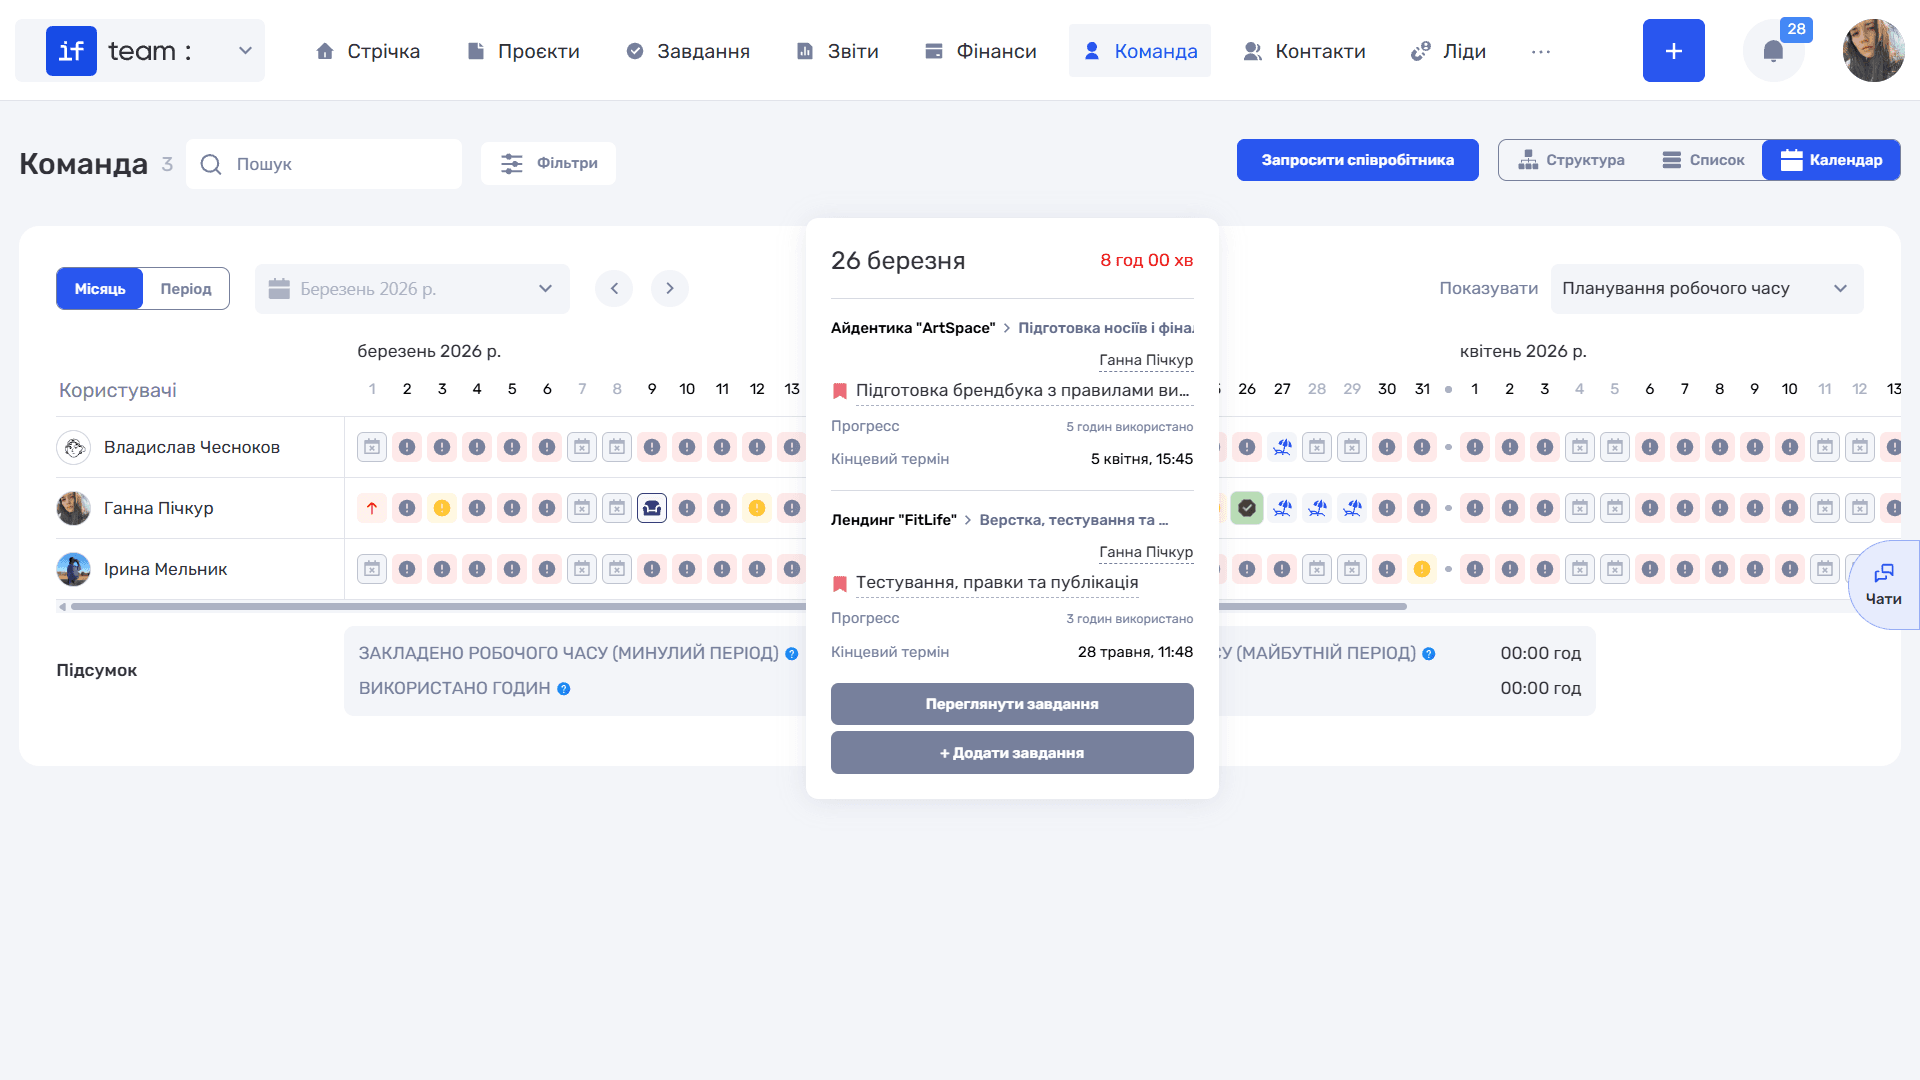
Clicking a day cell opens a window whose contents depend on the mode.
In Workday Calendar mode, select the day type in the window: Remote Work, Office Work, Sick Leave, Unpaid Leave, Vacation, Business Trip, or Day Off. Confirmed options are also available: Confirmed Sick Leave, Confirmed Unpaid Leave, Confirmed Vacation, and Confirmed Day Off.
In Work Time Planning mode, clicking a cell shows the employee’s tasks for that day, including planned hours, progress, and deadlines. It also provides the View Tasks button, which opens Tasks, and + Add Task, which opens the task creation form.
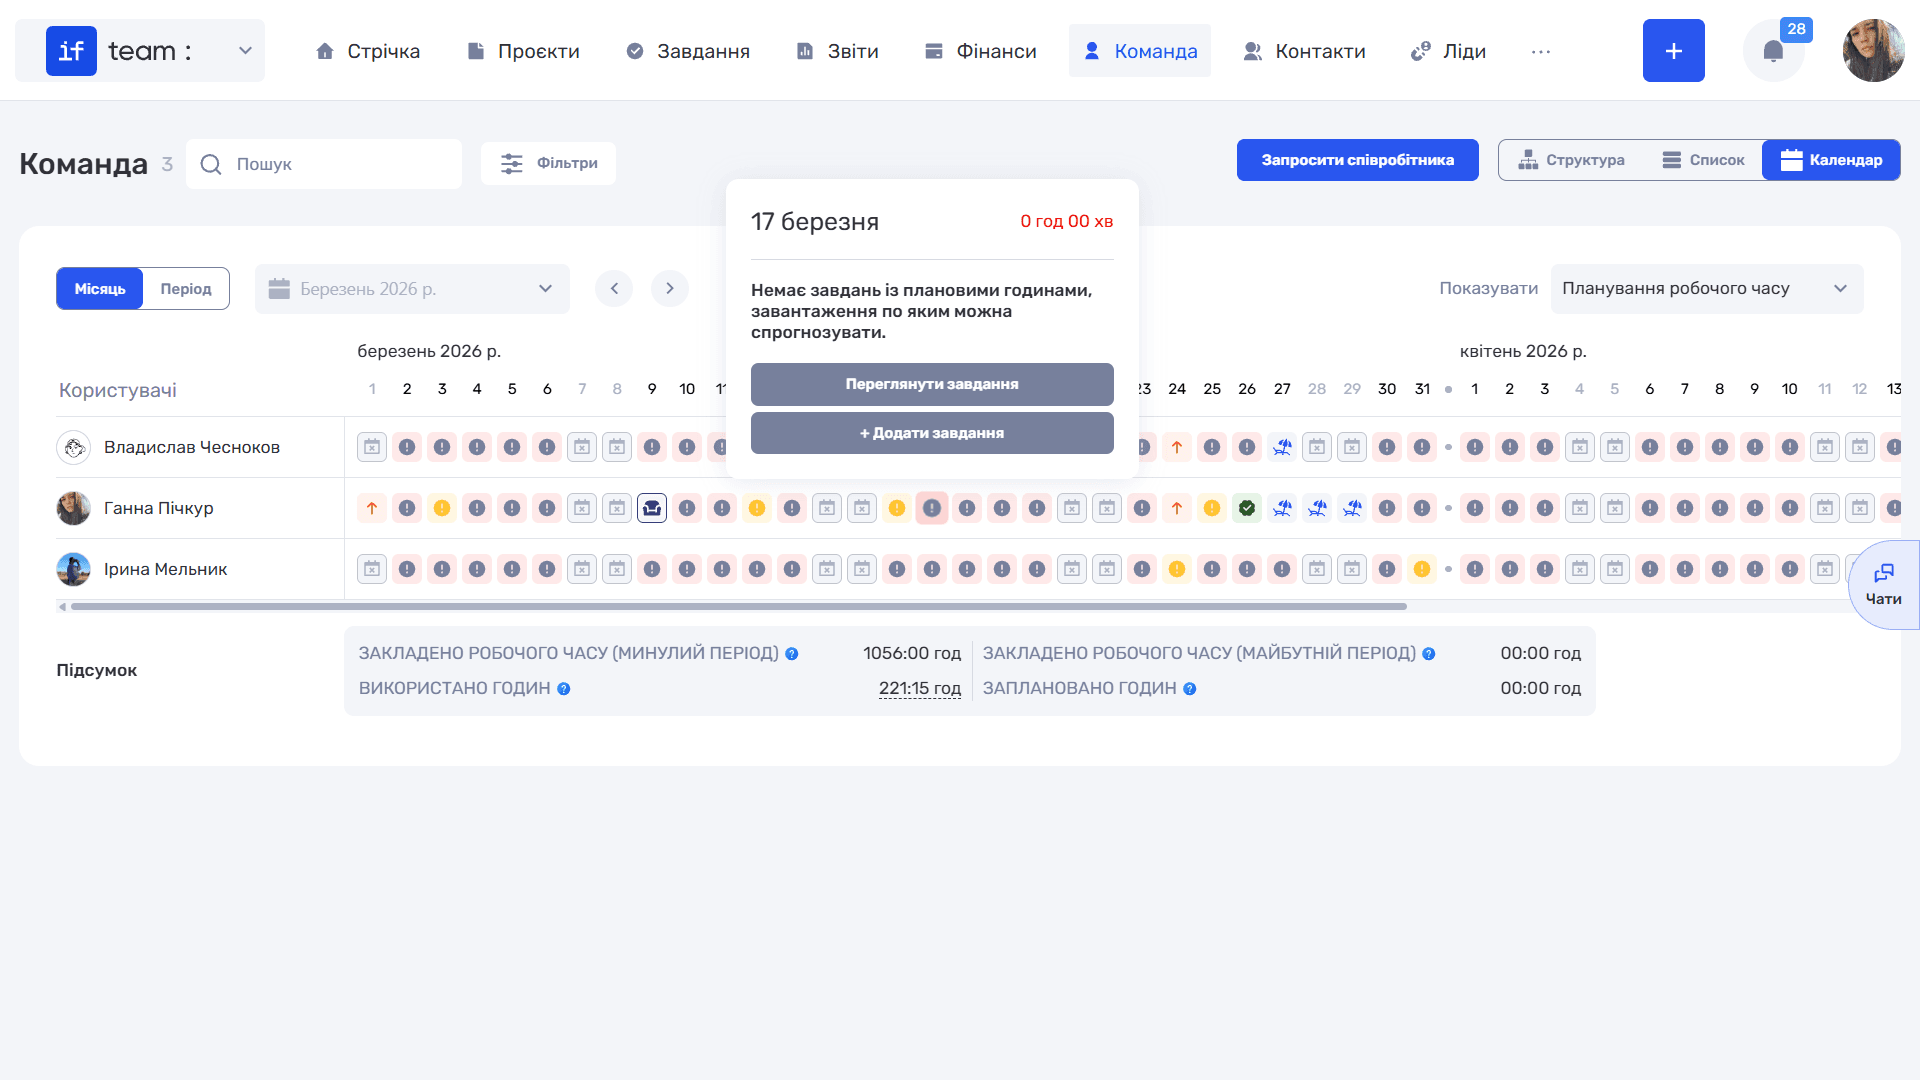
If there are no tasks with planned hours, the corresponding message appears.
Approving Requests
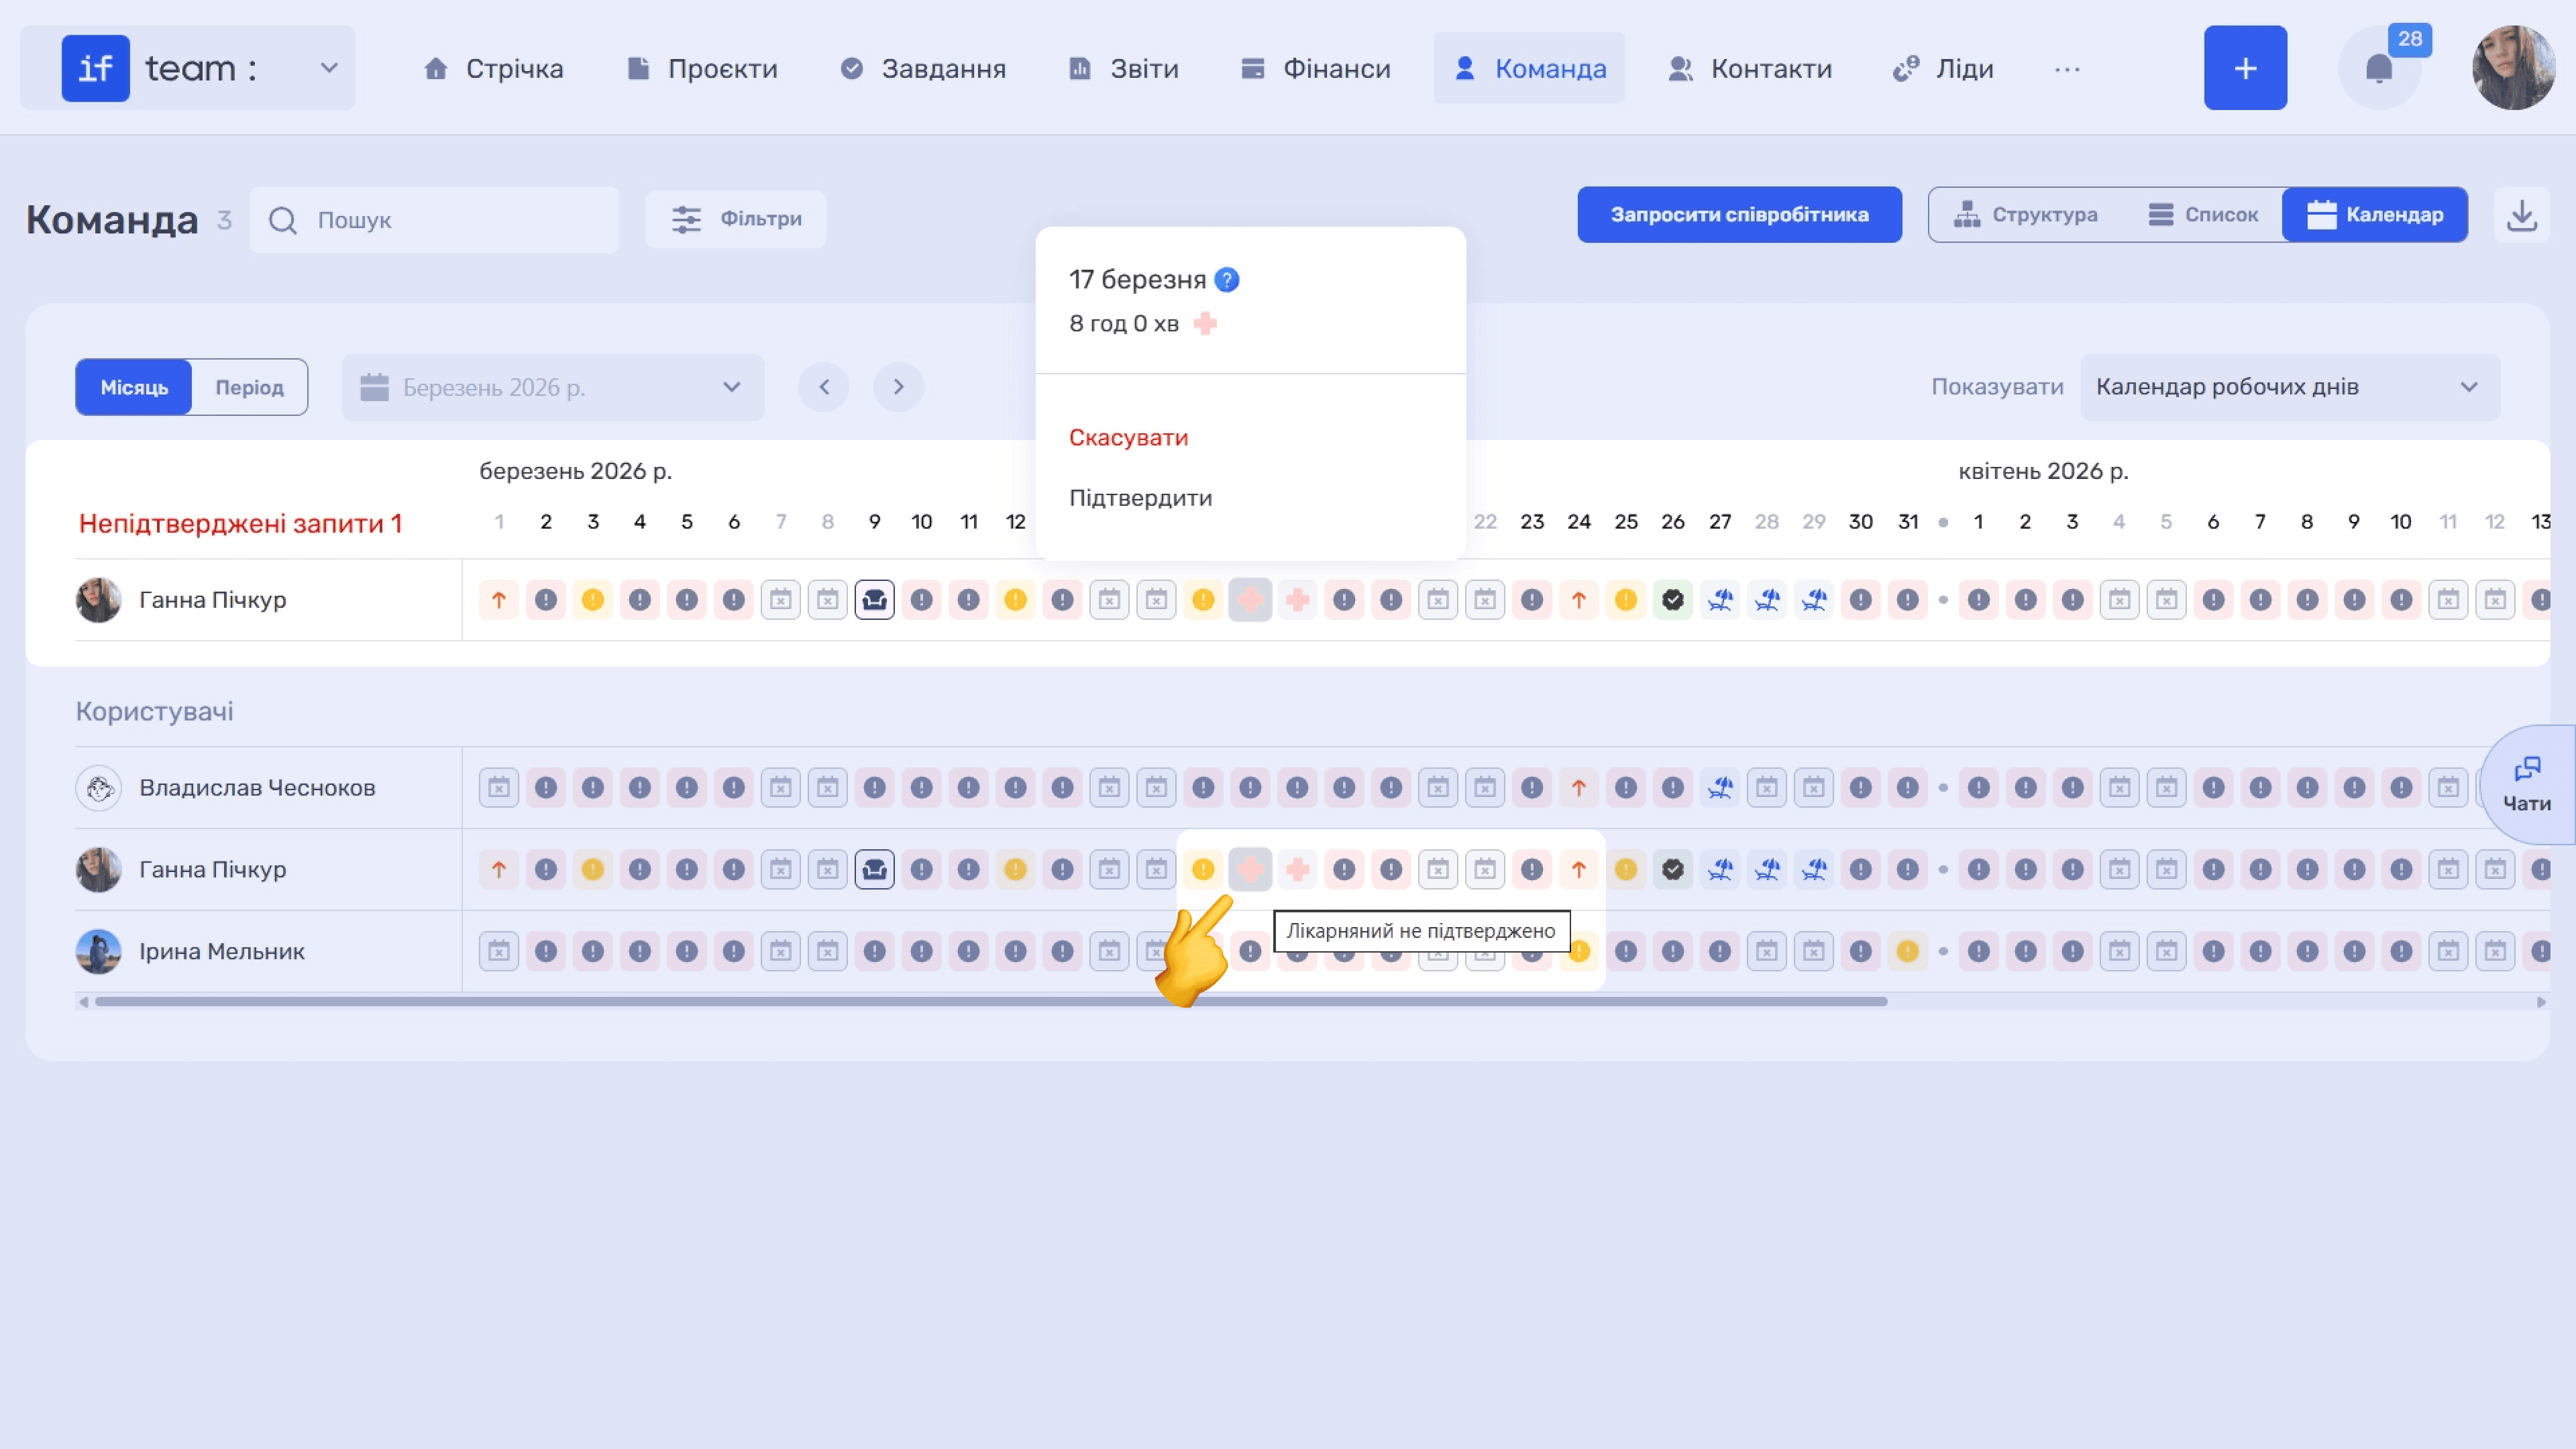
When an employee marks vacation or a paid day off, for example, the day initially receives the Unconfirmed status. These days are collected in a separate Unconfirmed Requests row above the team list. Clicking an unconfirmed day opens a window with the date and Confirm and Cancel buttons. The manager can approve or reject the request, after which the day becomes confirmed.
Planning Summary
At the bottom of the calendar in Work Time Planning mode are four summary metrics, each with an explanation next to the ? icon:
- Allocated Work Time (Past Period) is the number of hours provided for by the schedule, including work, days off, vacation, and sick leave;
- Hours Used is the number of hours actually used, including work and confirmed vacation or sick leave. The value is clickable (View Report) and opens Reports;
- Allocated Work Time (Future Period) is the number of hours provided for by the calendar going forward, including days off and holidays;
- Planned Hours is the number of hours actually planned, including confirmed vacation, sick leave, days off, and approved time for tasks.
Filters and Export
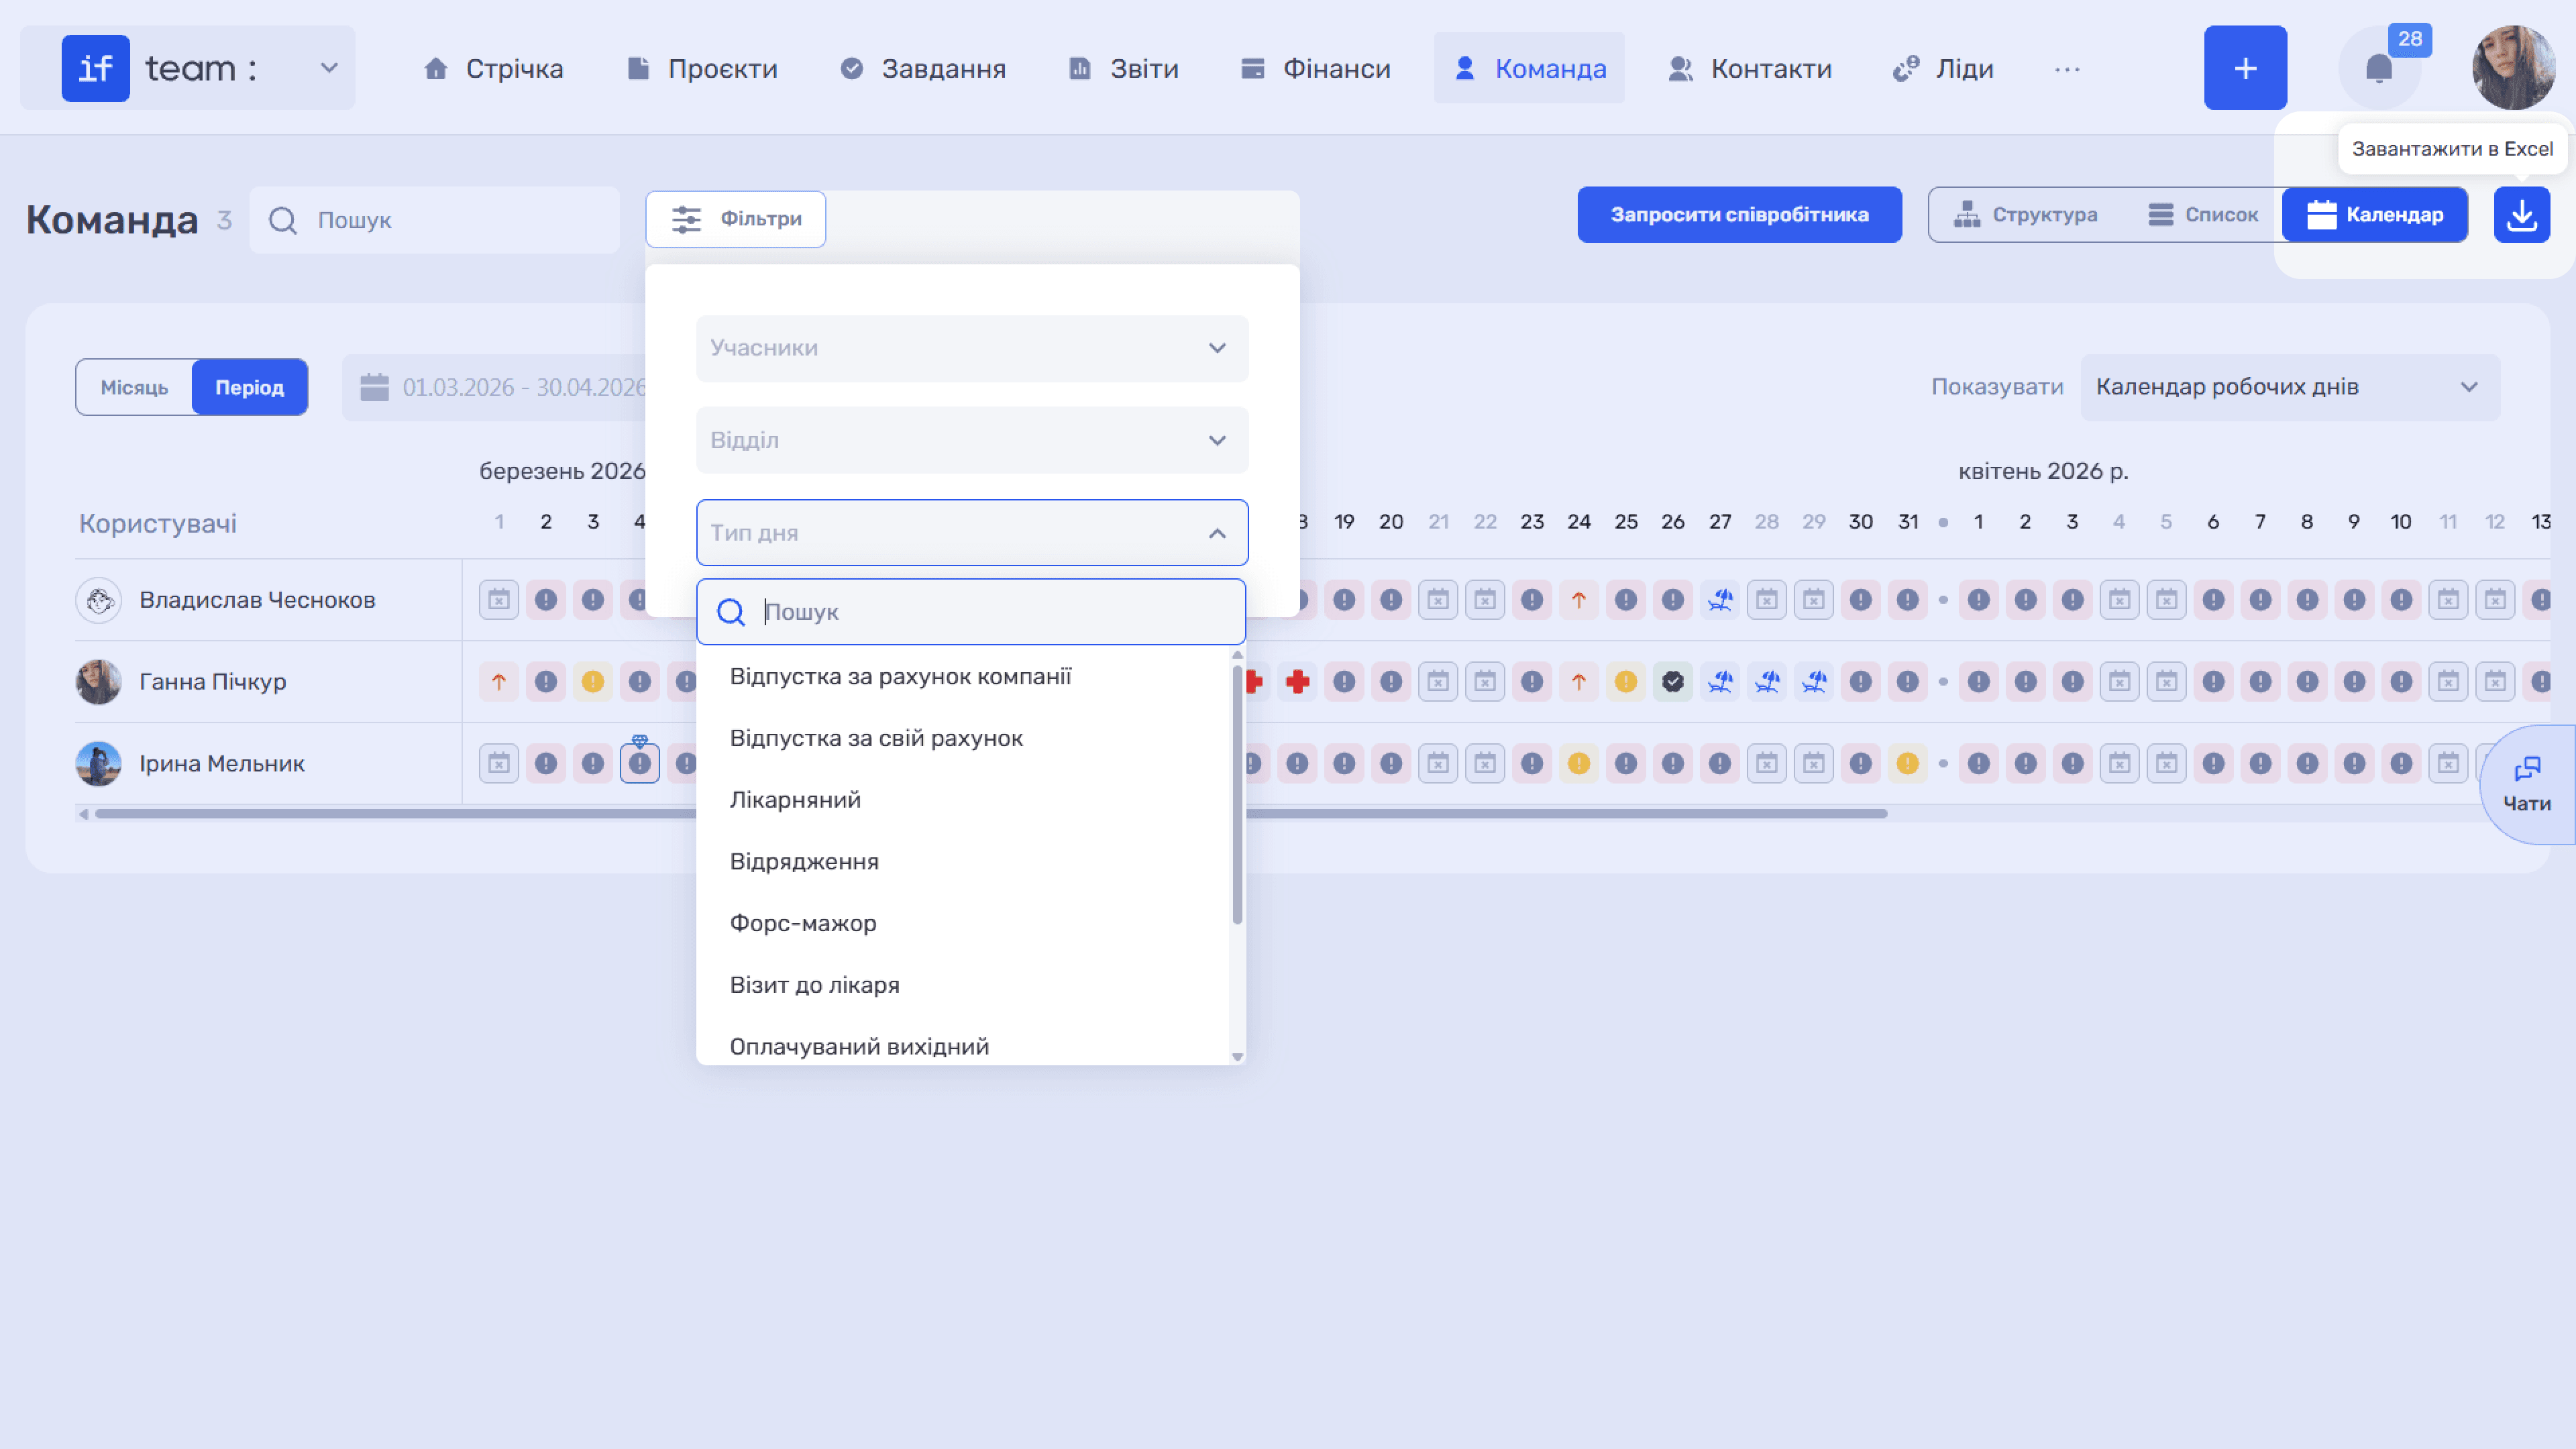
In calendar mode, the Filters button narrows the results by participants, department, and day type, such as vacation, sick leave, or business trip. The export icon on the right (Download to Excel) sends the calendar file to the email address specified in the company profile.
Please note
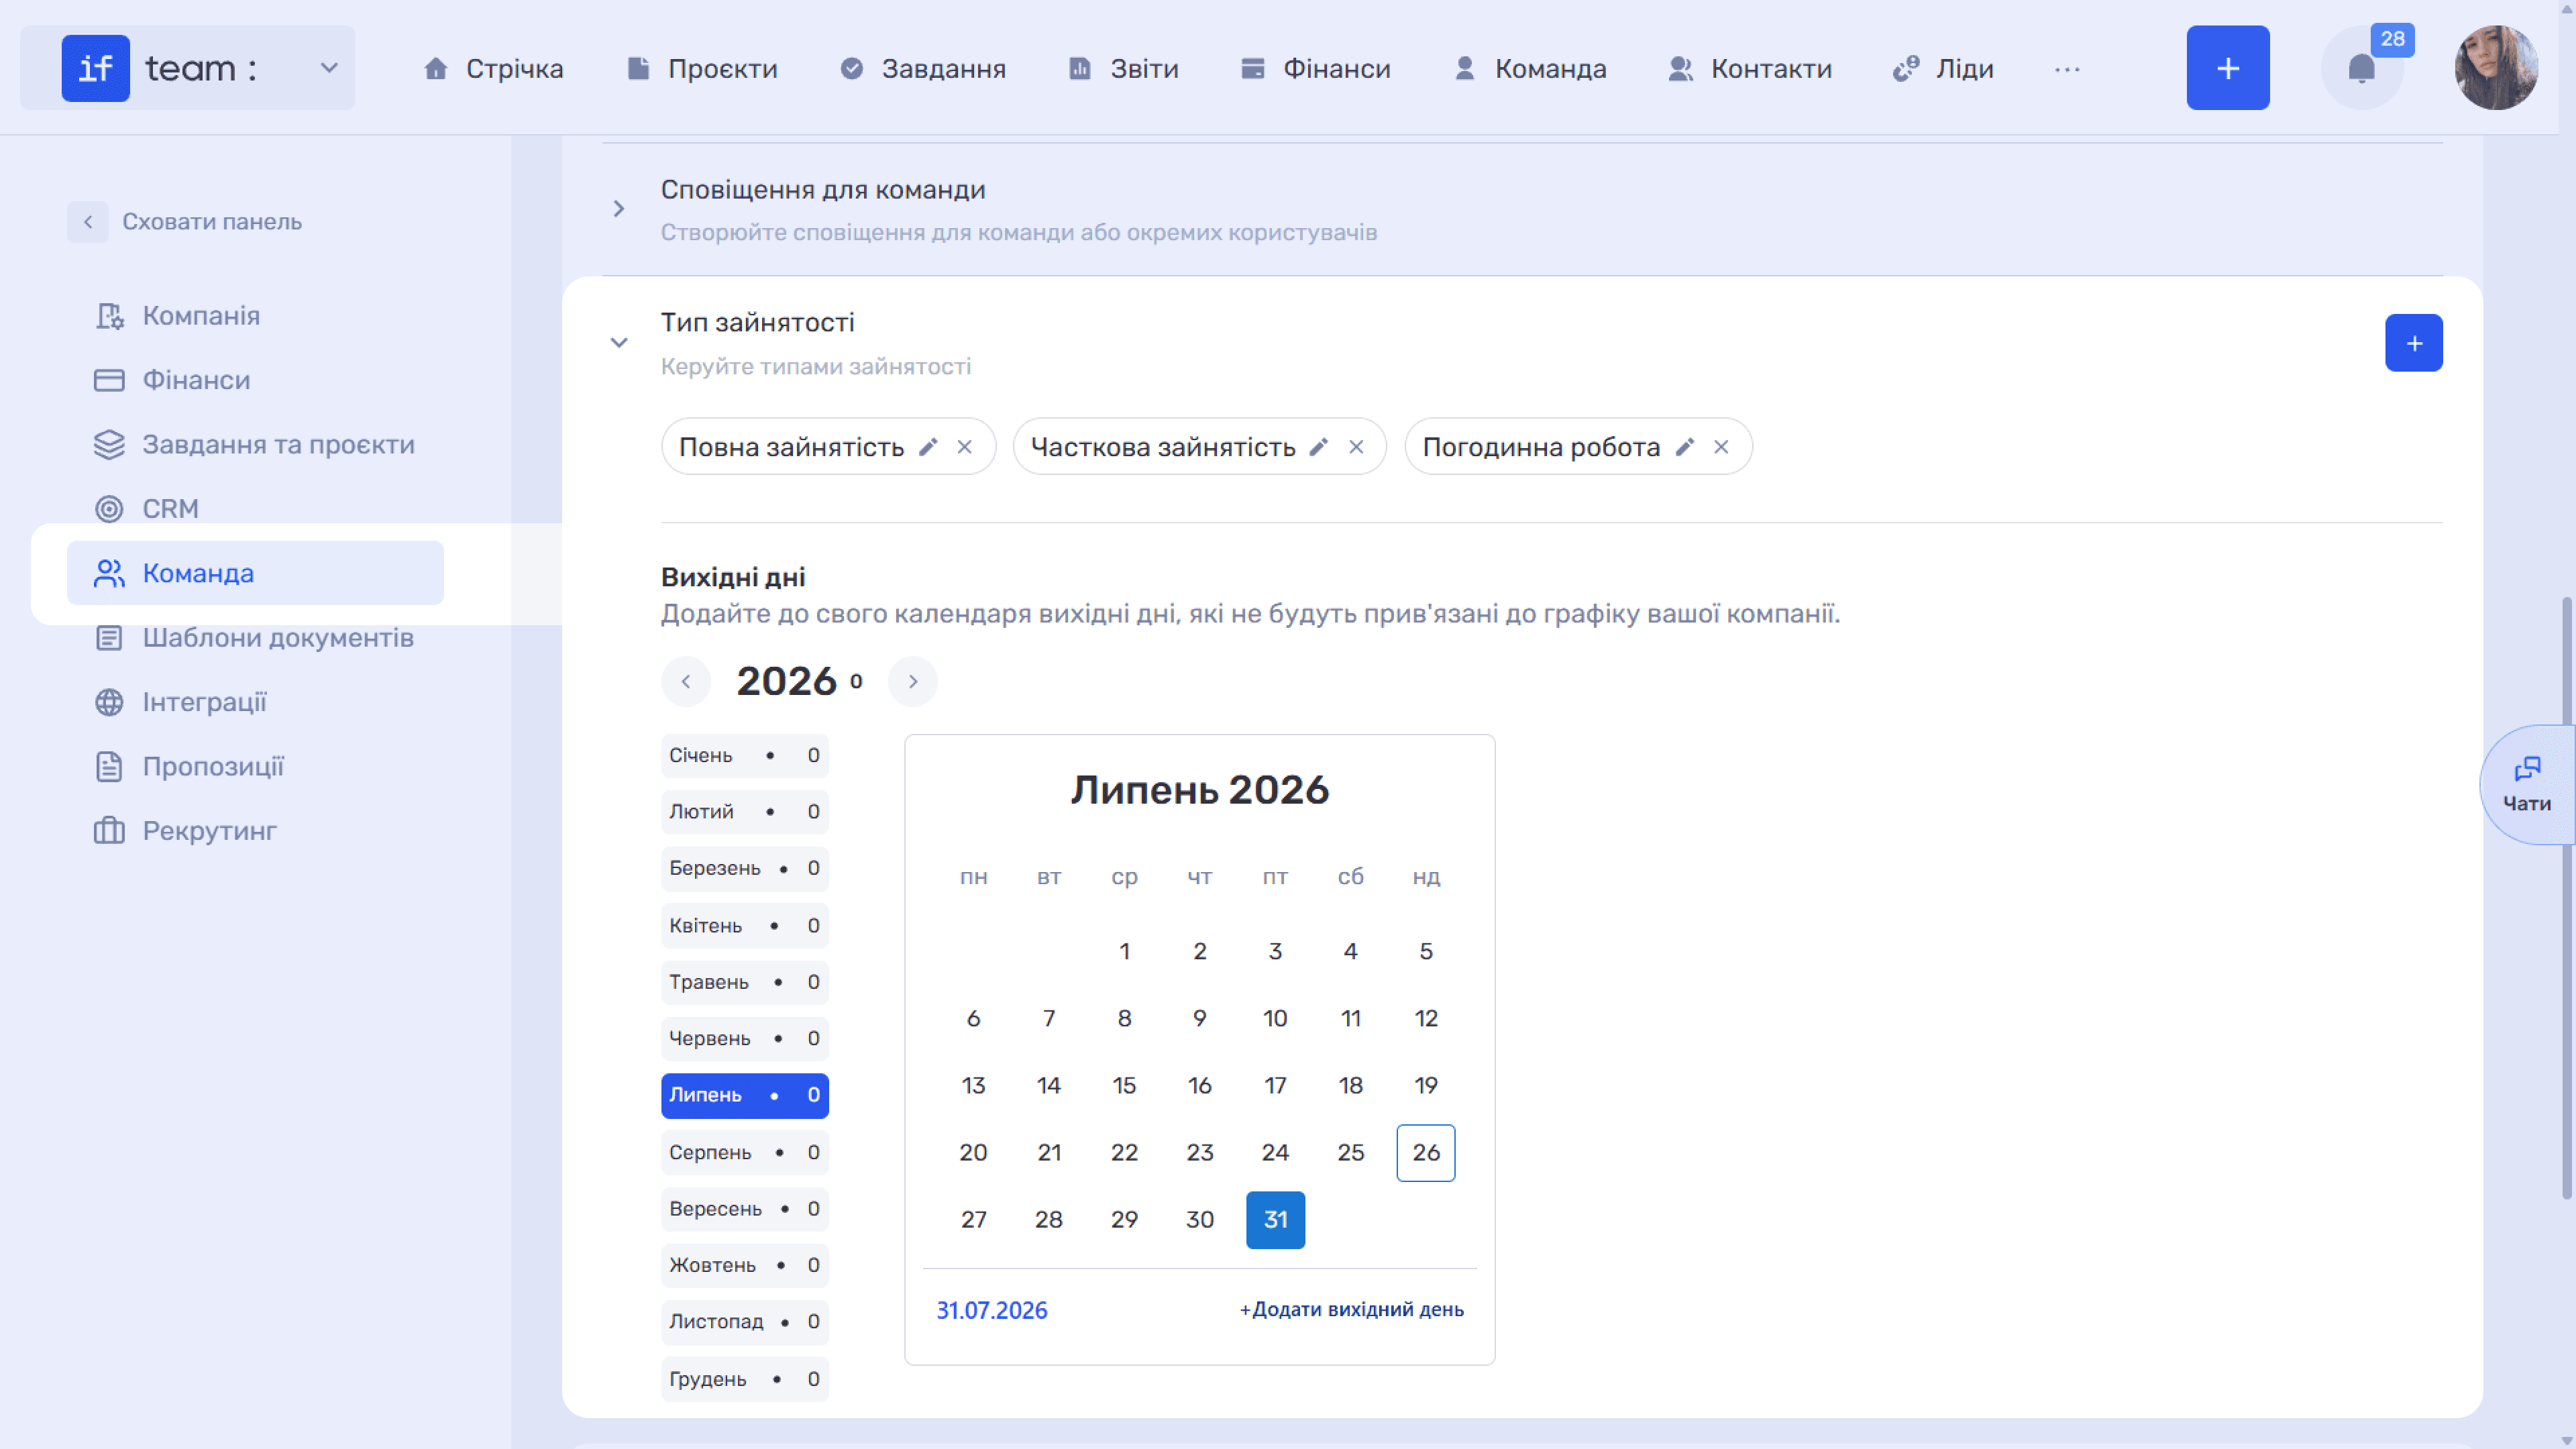
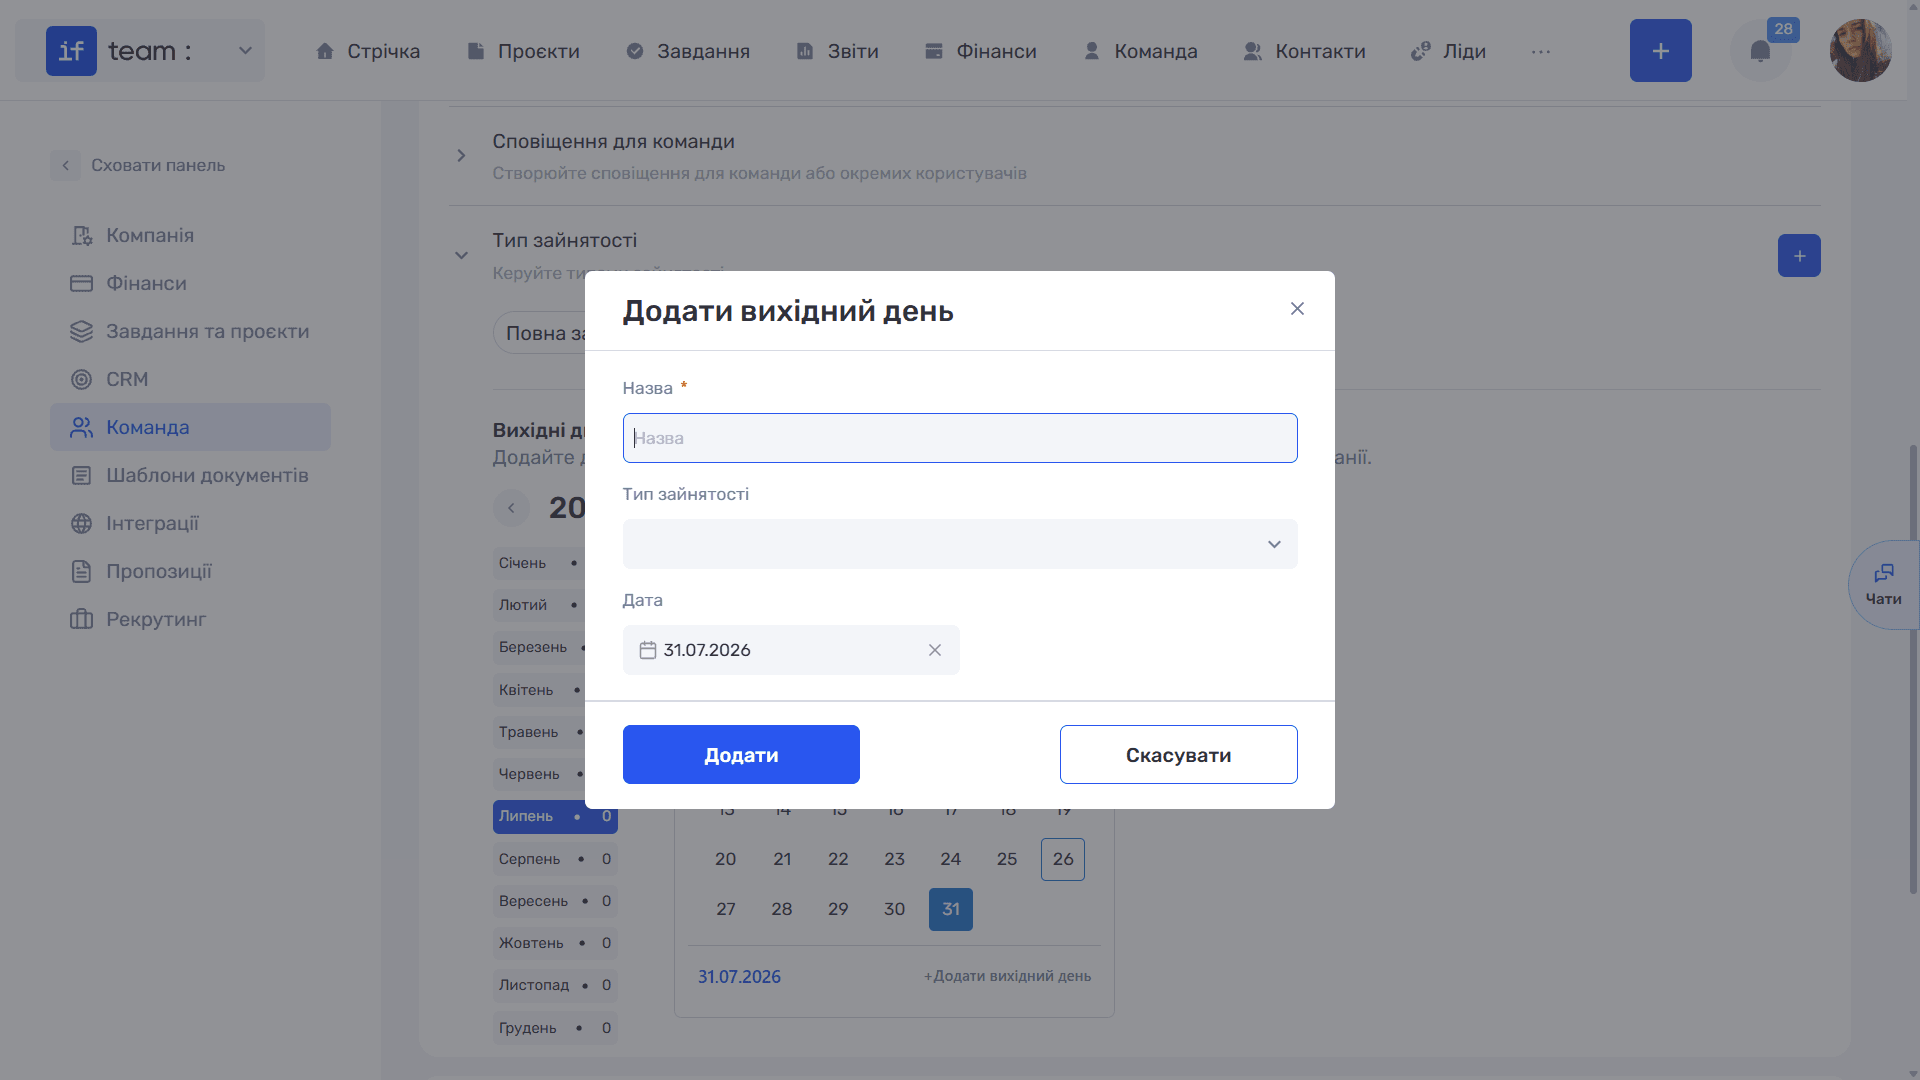
A company can define its own days off outside the standard schedule, such as company holidays. In the Admin Panel, go to Team → Employment Type → Days Off, then mark the required dates in the yearly calendar using + Add Day Off. These days are included in the work calendar for the entire team.
Still have questions?
Maybe we haven't added this information yet. But you can always reach out:
Request a demo
Submit a request and we'll show you how the service works and its capabilities.
Book a demo