Adding a Client to a Work Chat
A client or contractor can communicate in if.team chats under the same conditions as the team. No separate guest mode is required. The process is simple: first invite the person to the system with a restricted role, then add them to the required chat as a regular member.
Step 1. Invite the client to the system. Use the standard employee invitation window in “Team” and assign the person an appropriate role, such as “Client.”
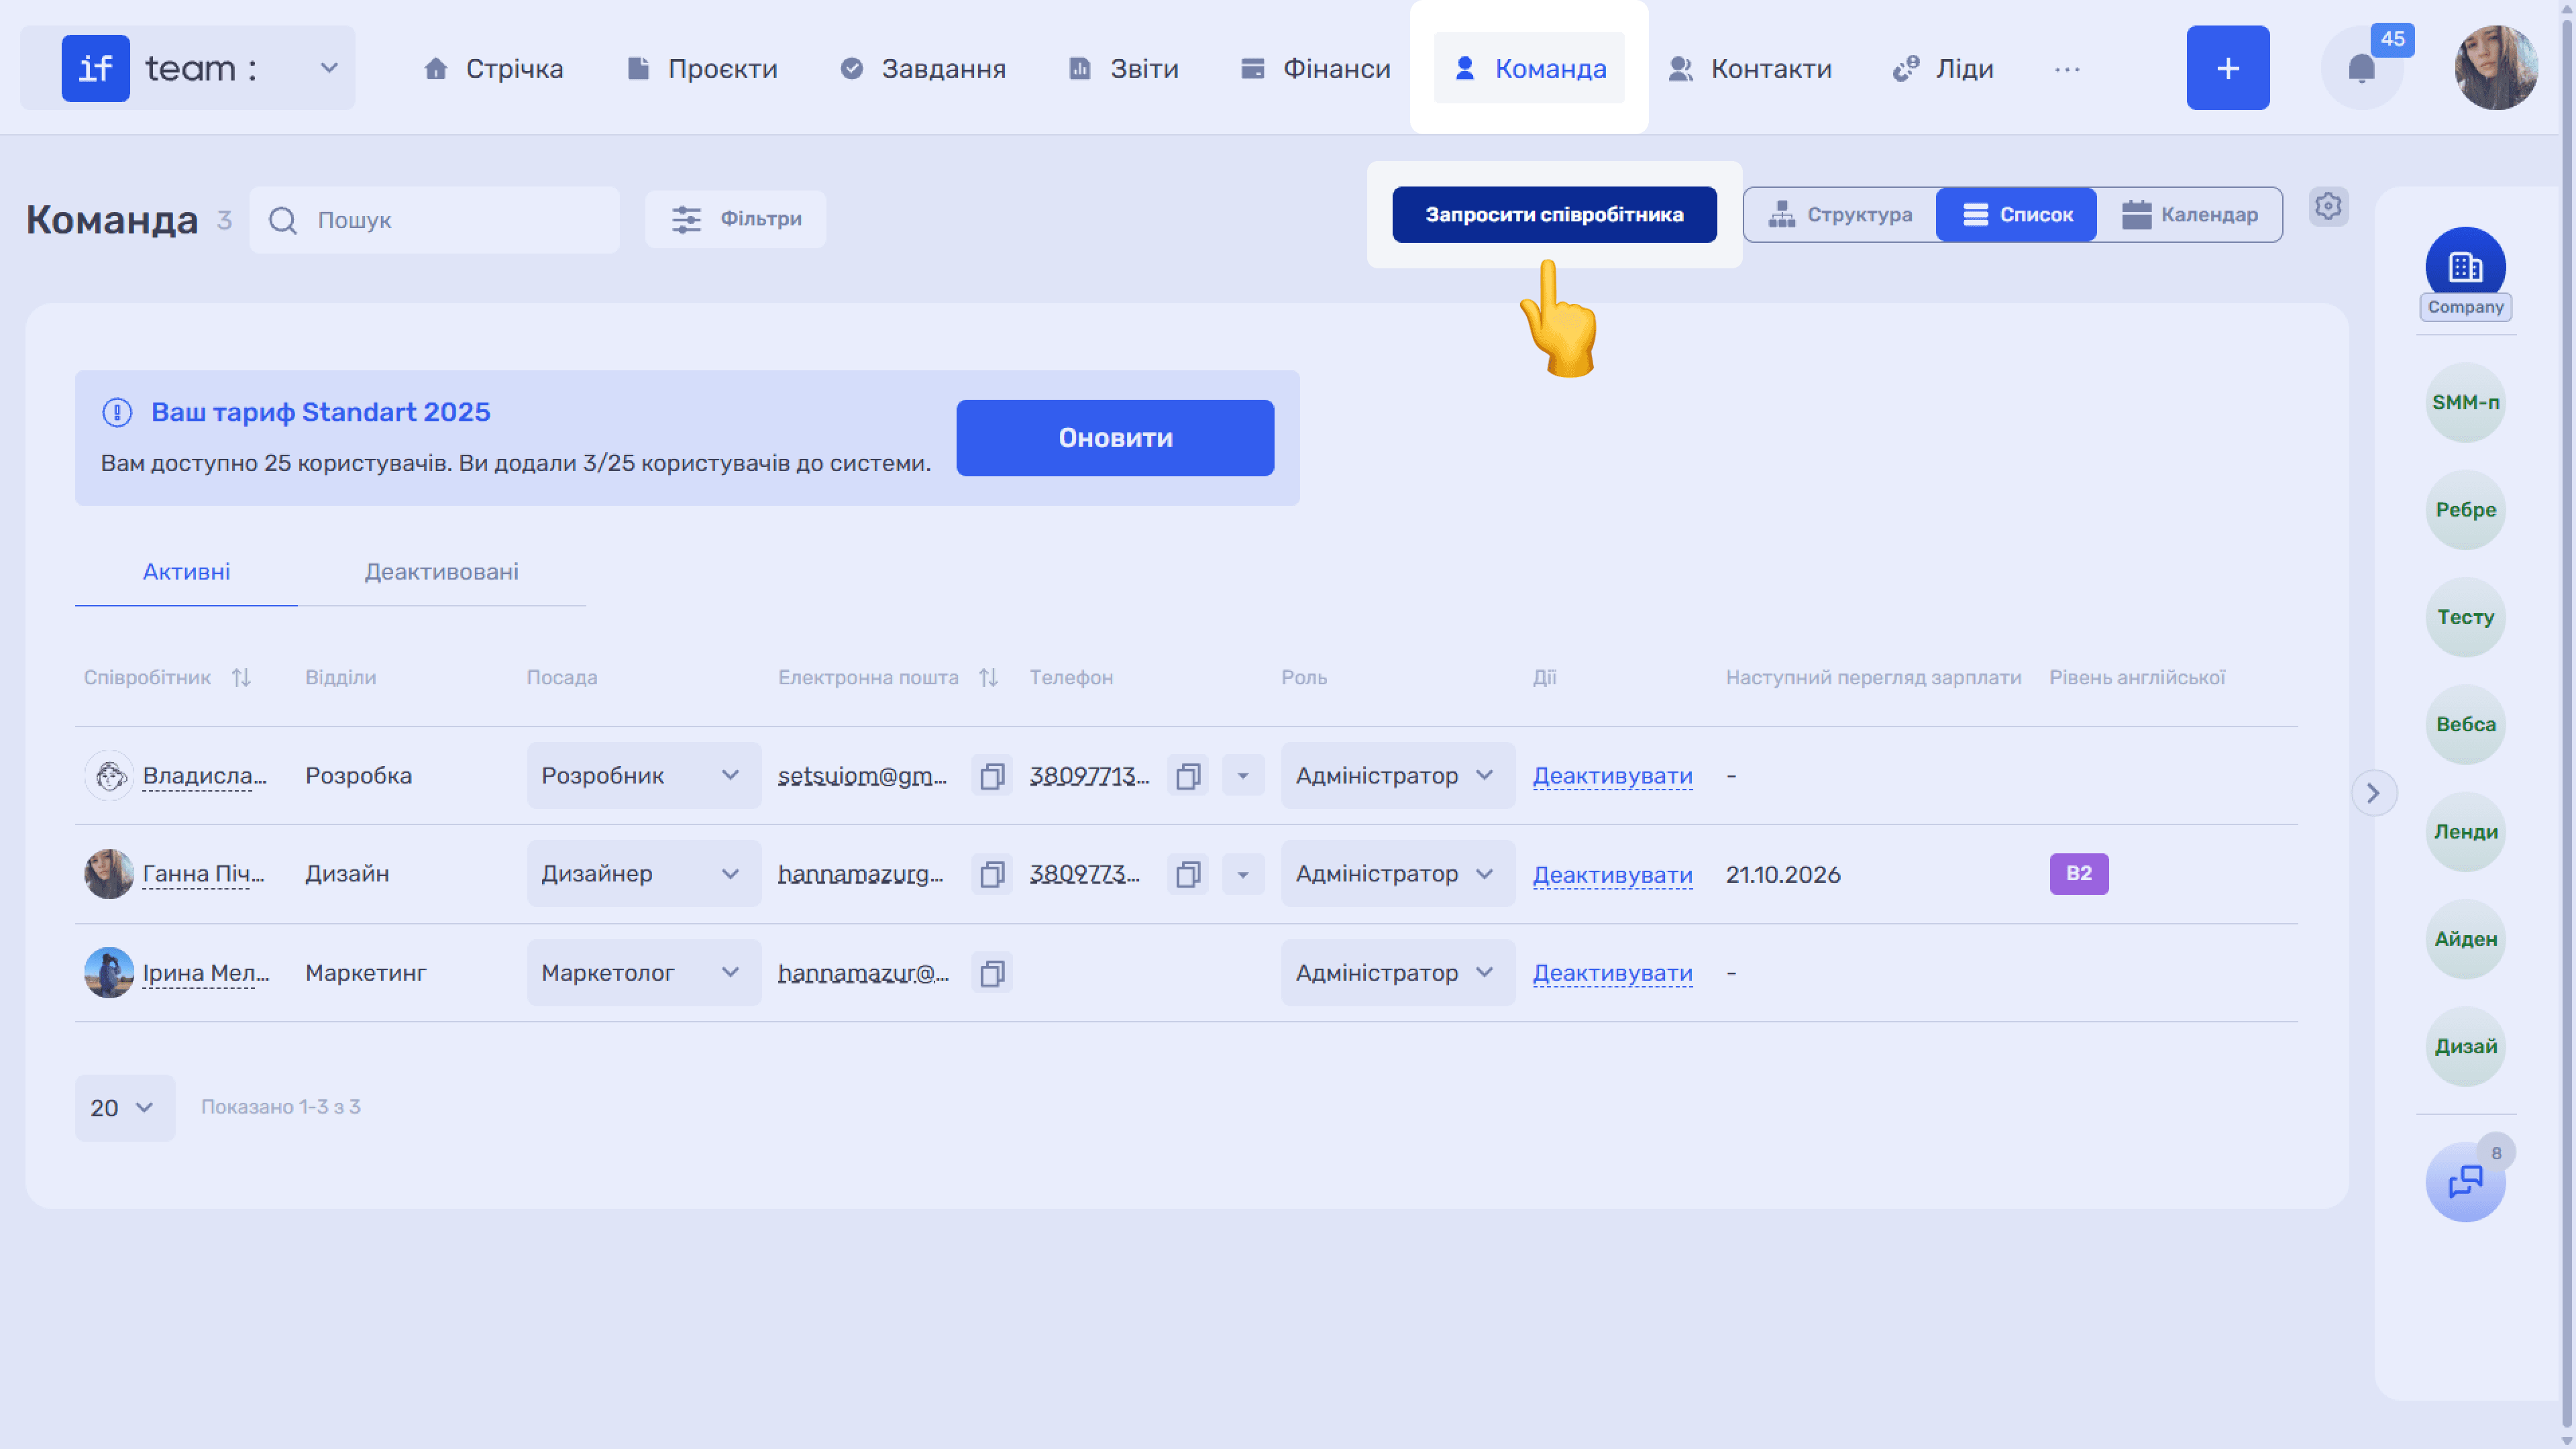
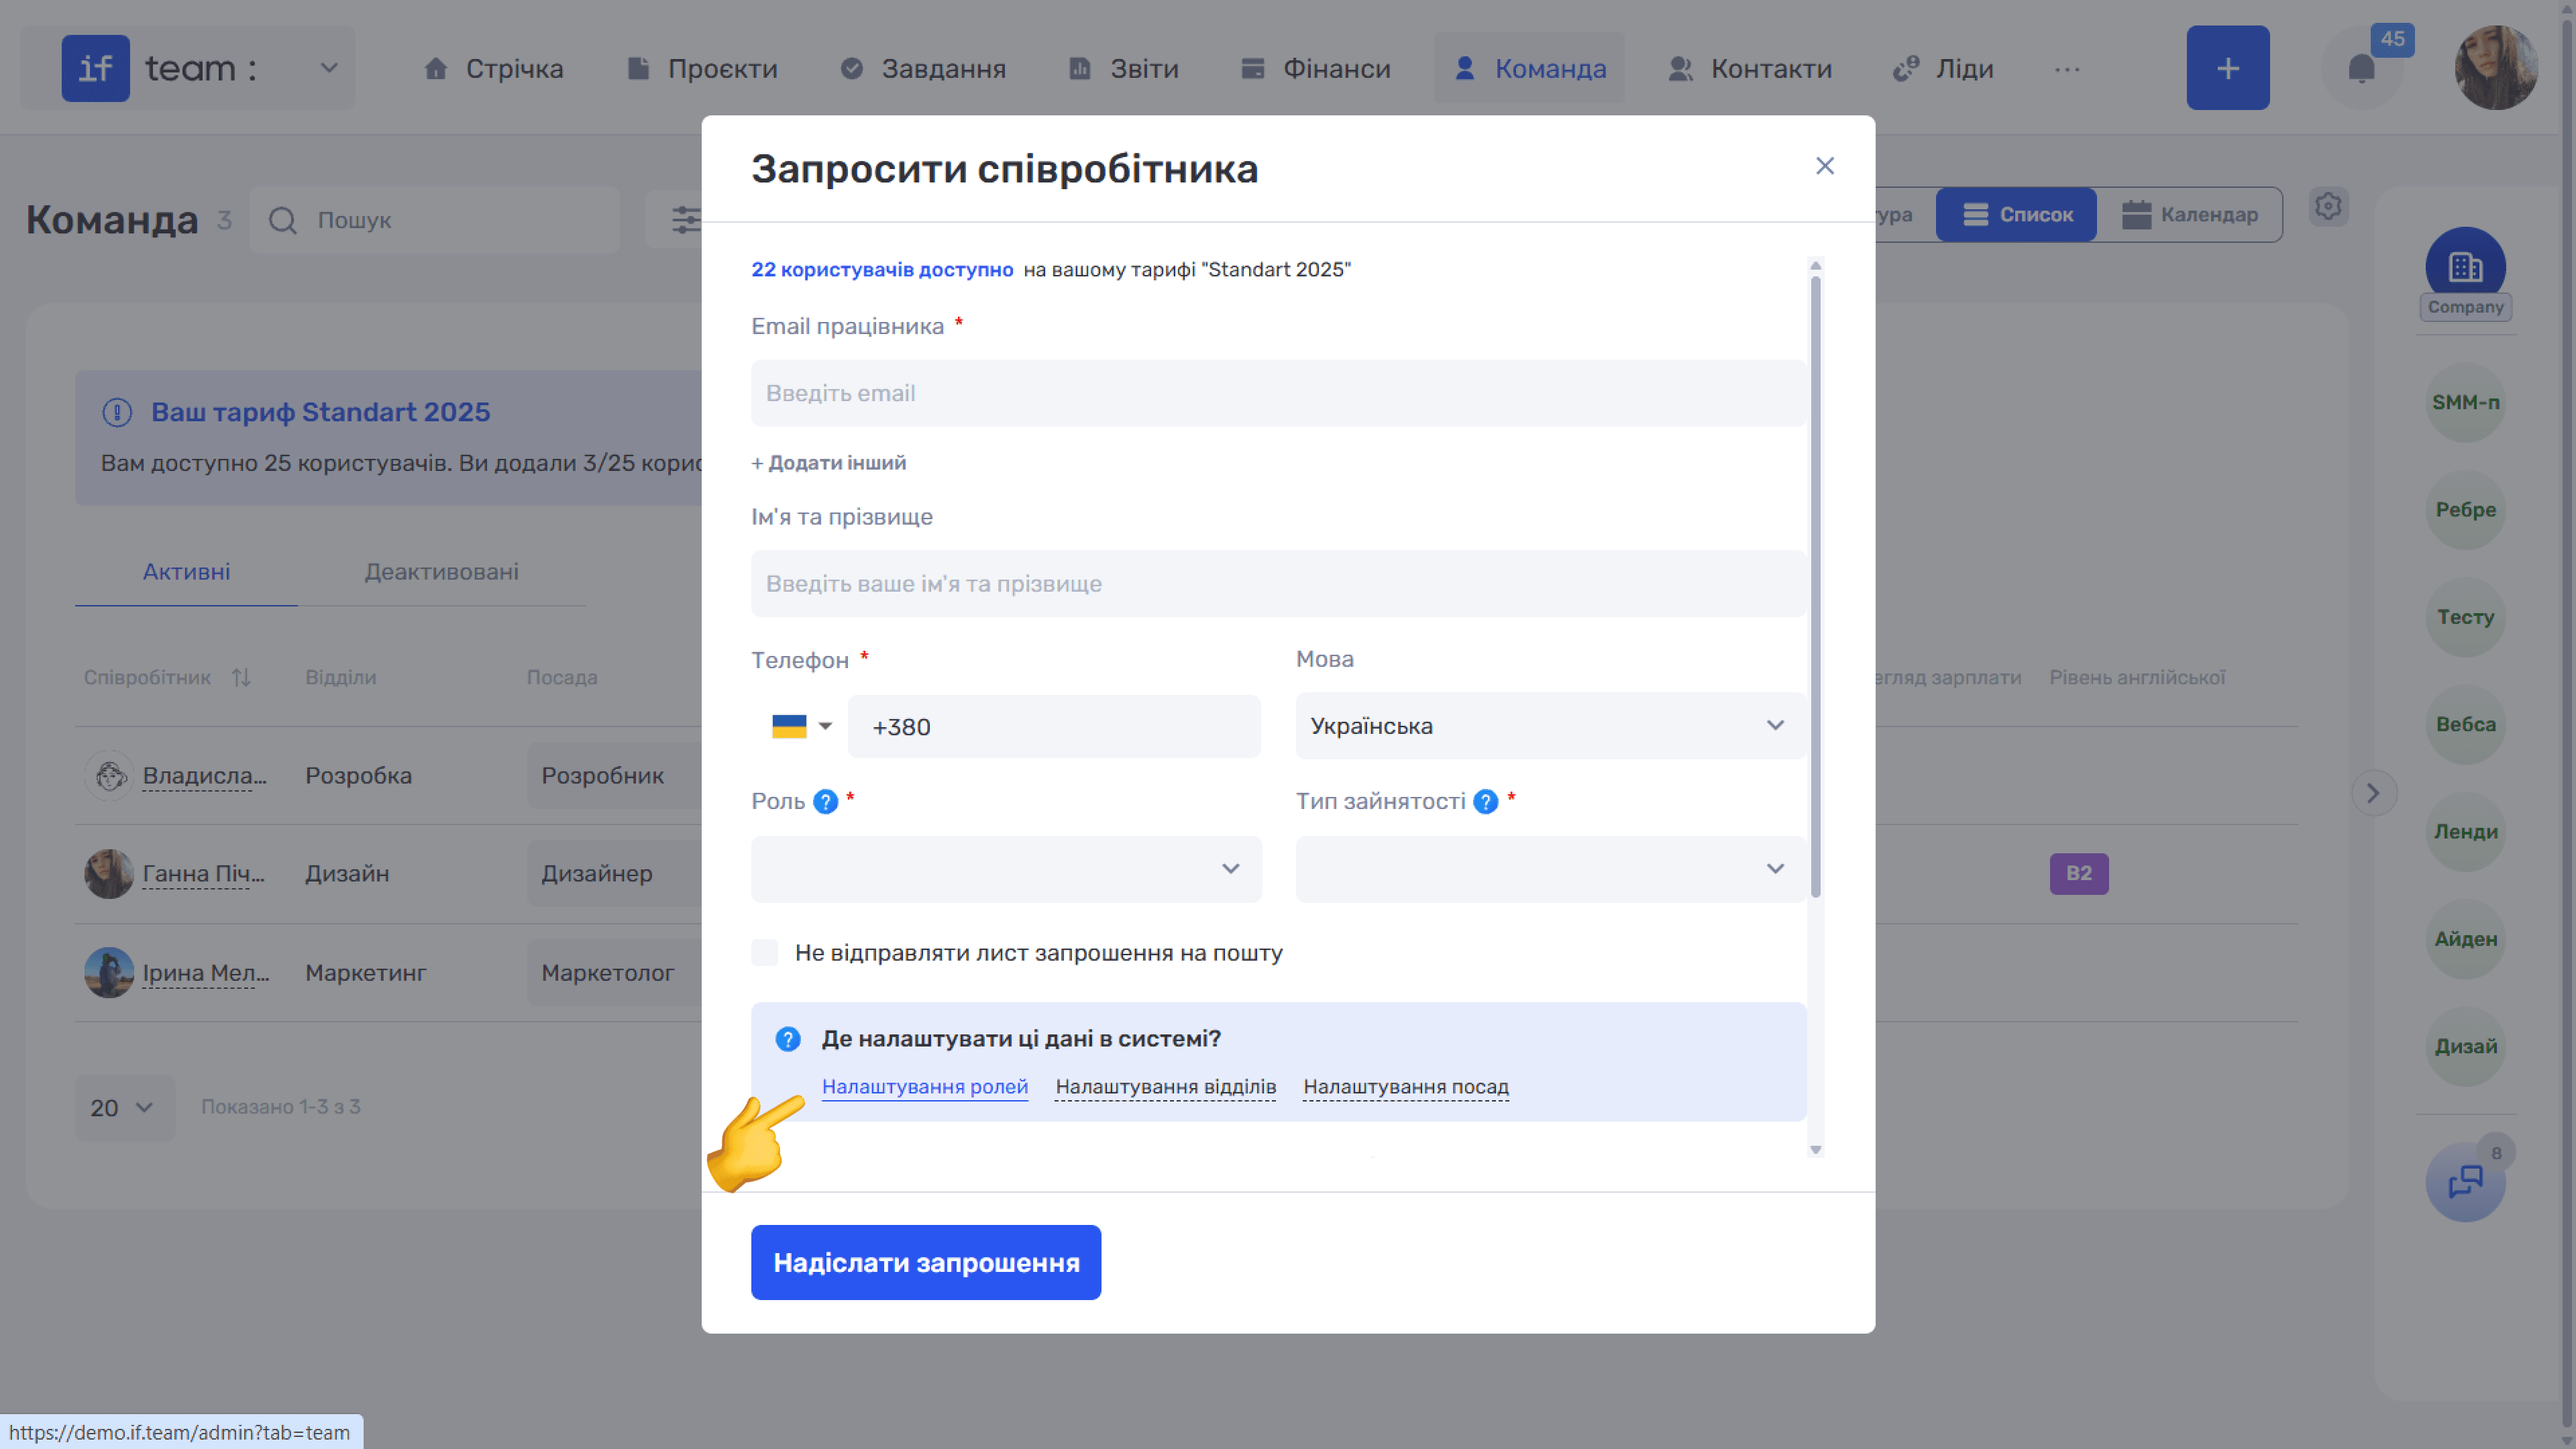
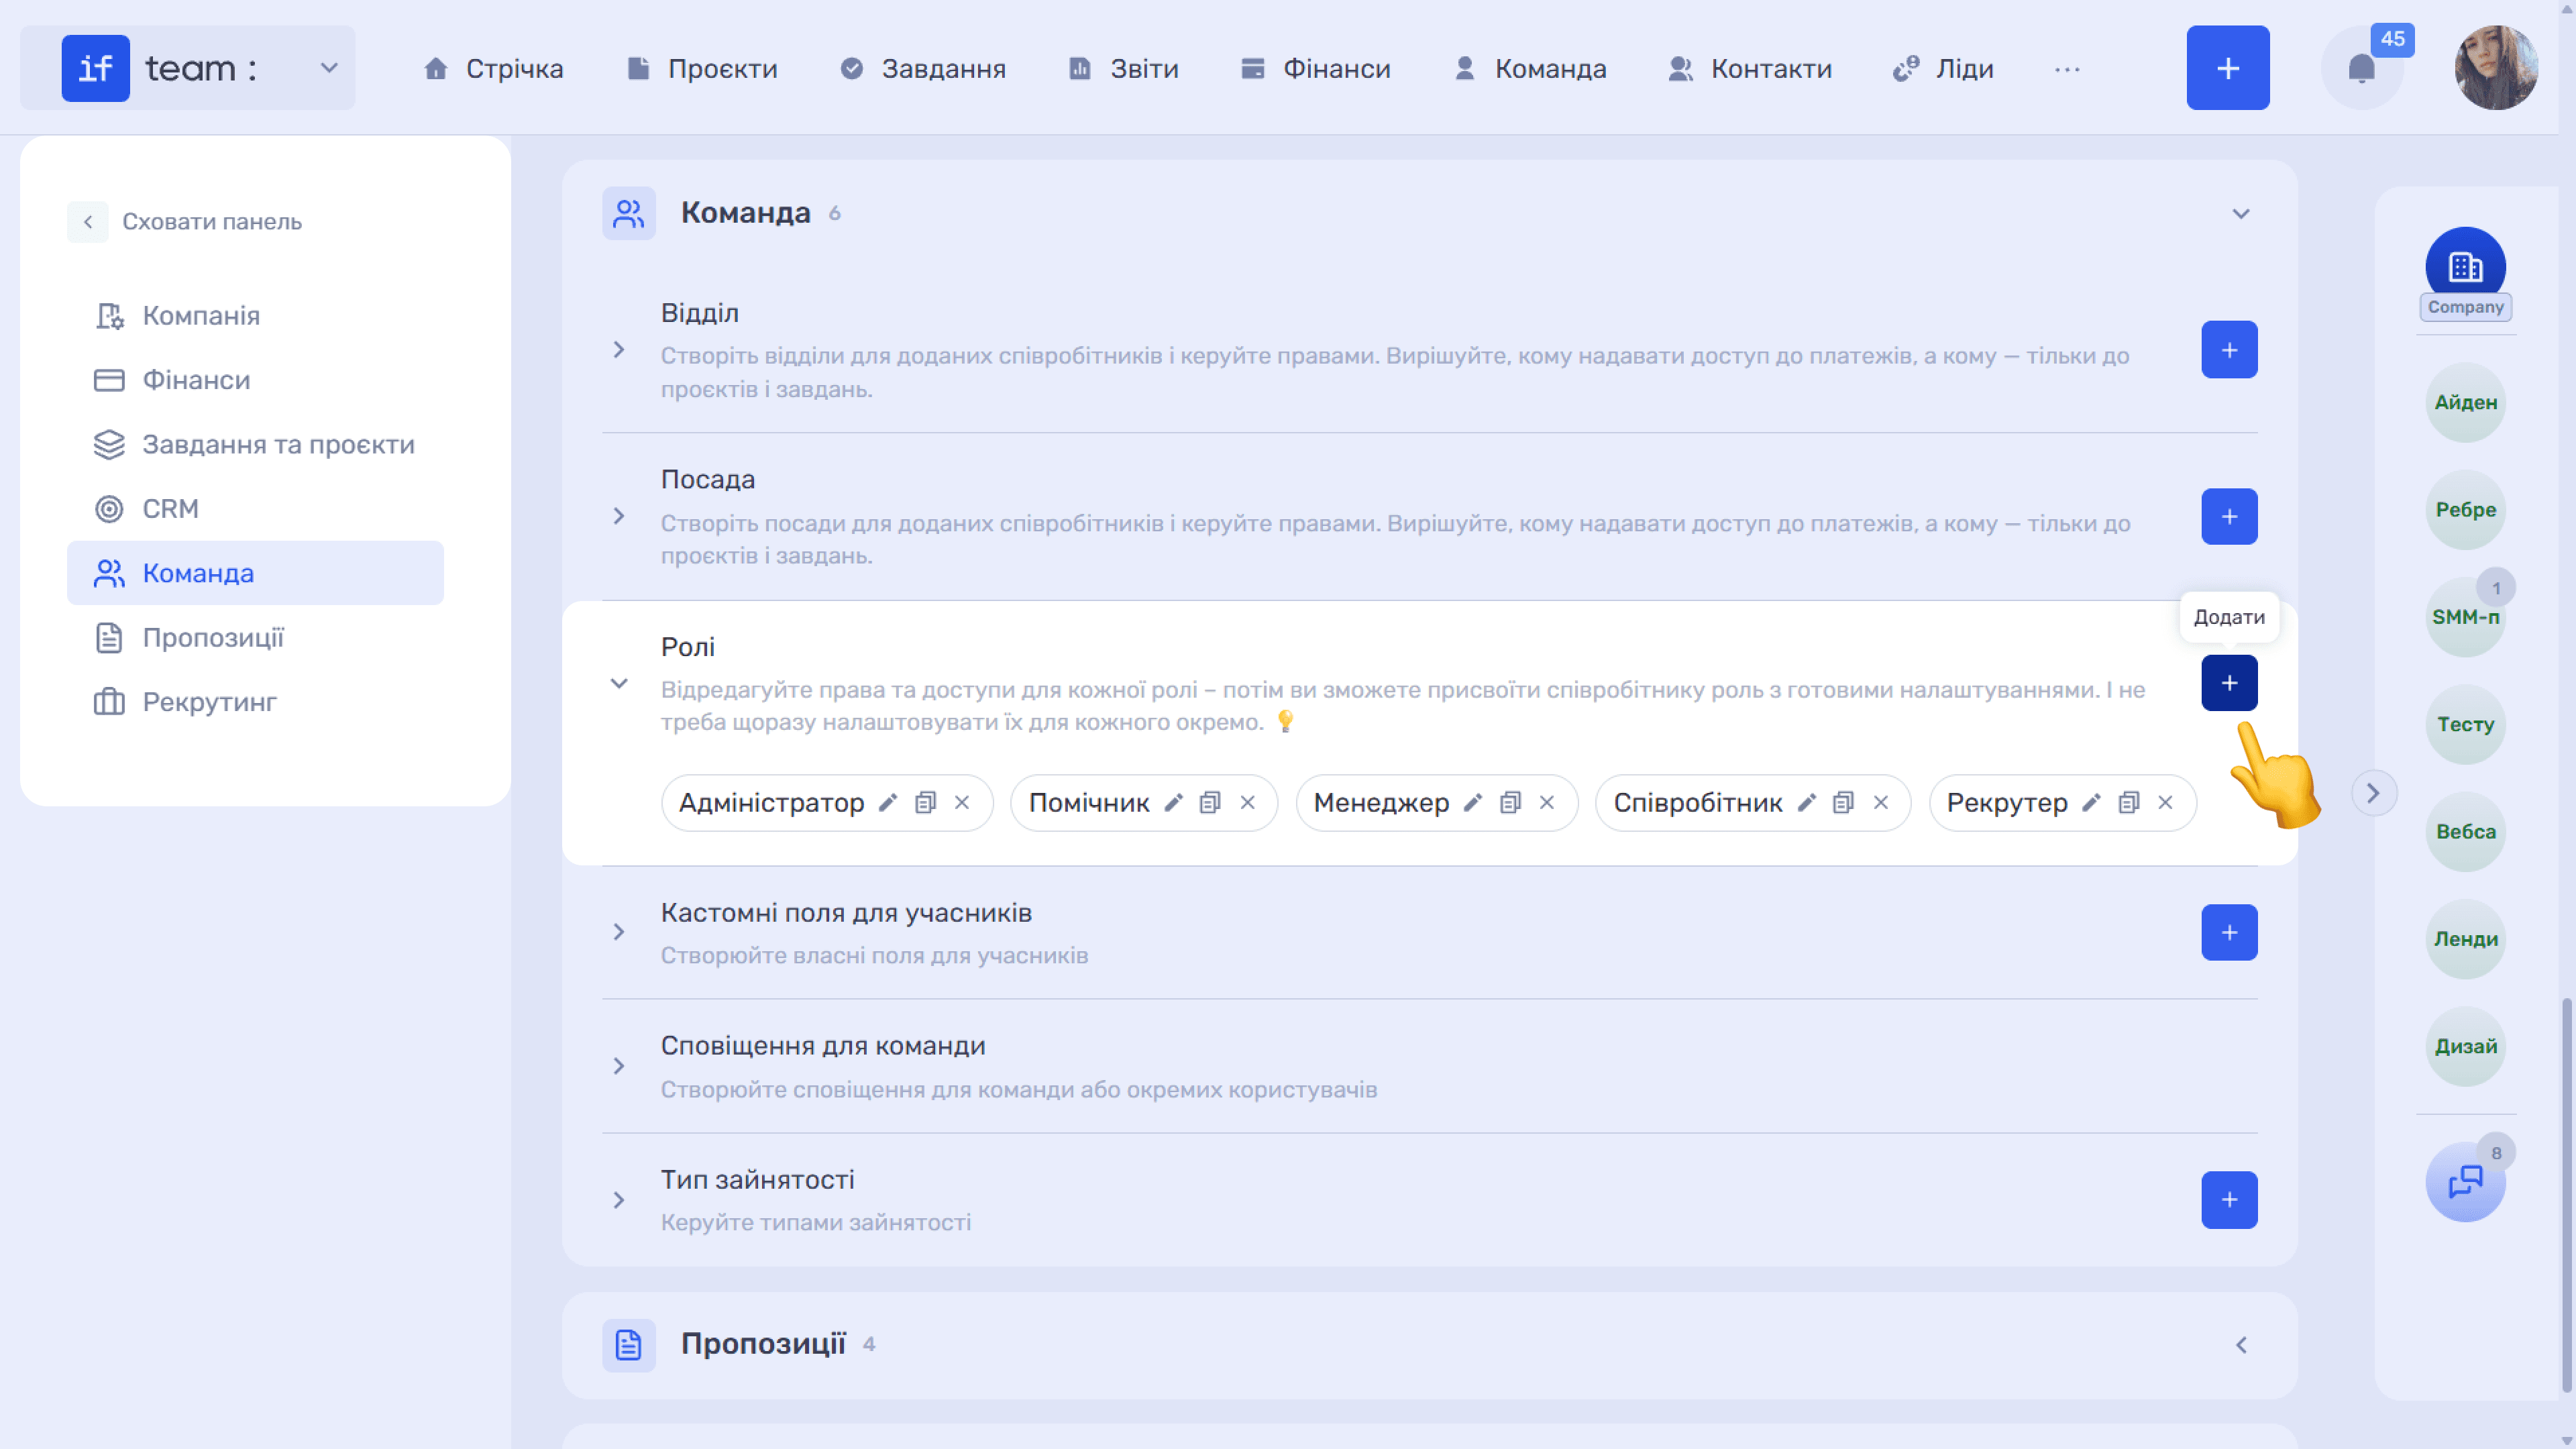
Step 2. Configure the role’s permissions. If the required role does not yet exist or its permissions need to be adjusted, you can do this without leaving the invitation window. In “Where Can These Details Be Configured?”, click “Role Settings” to open the corresponding section of the Admin Panel.
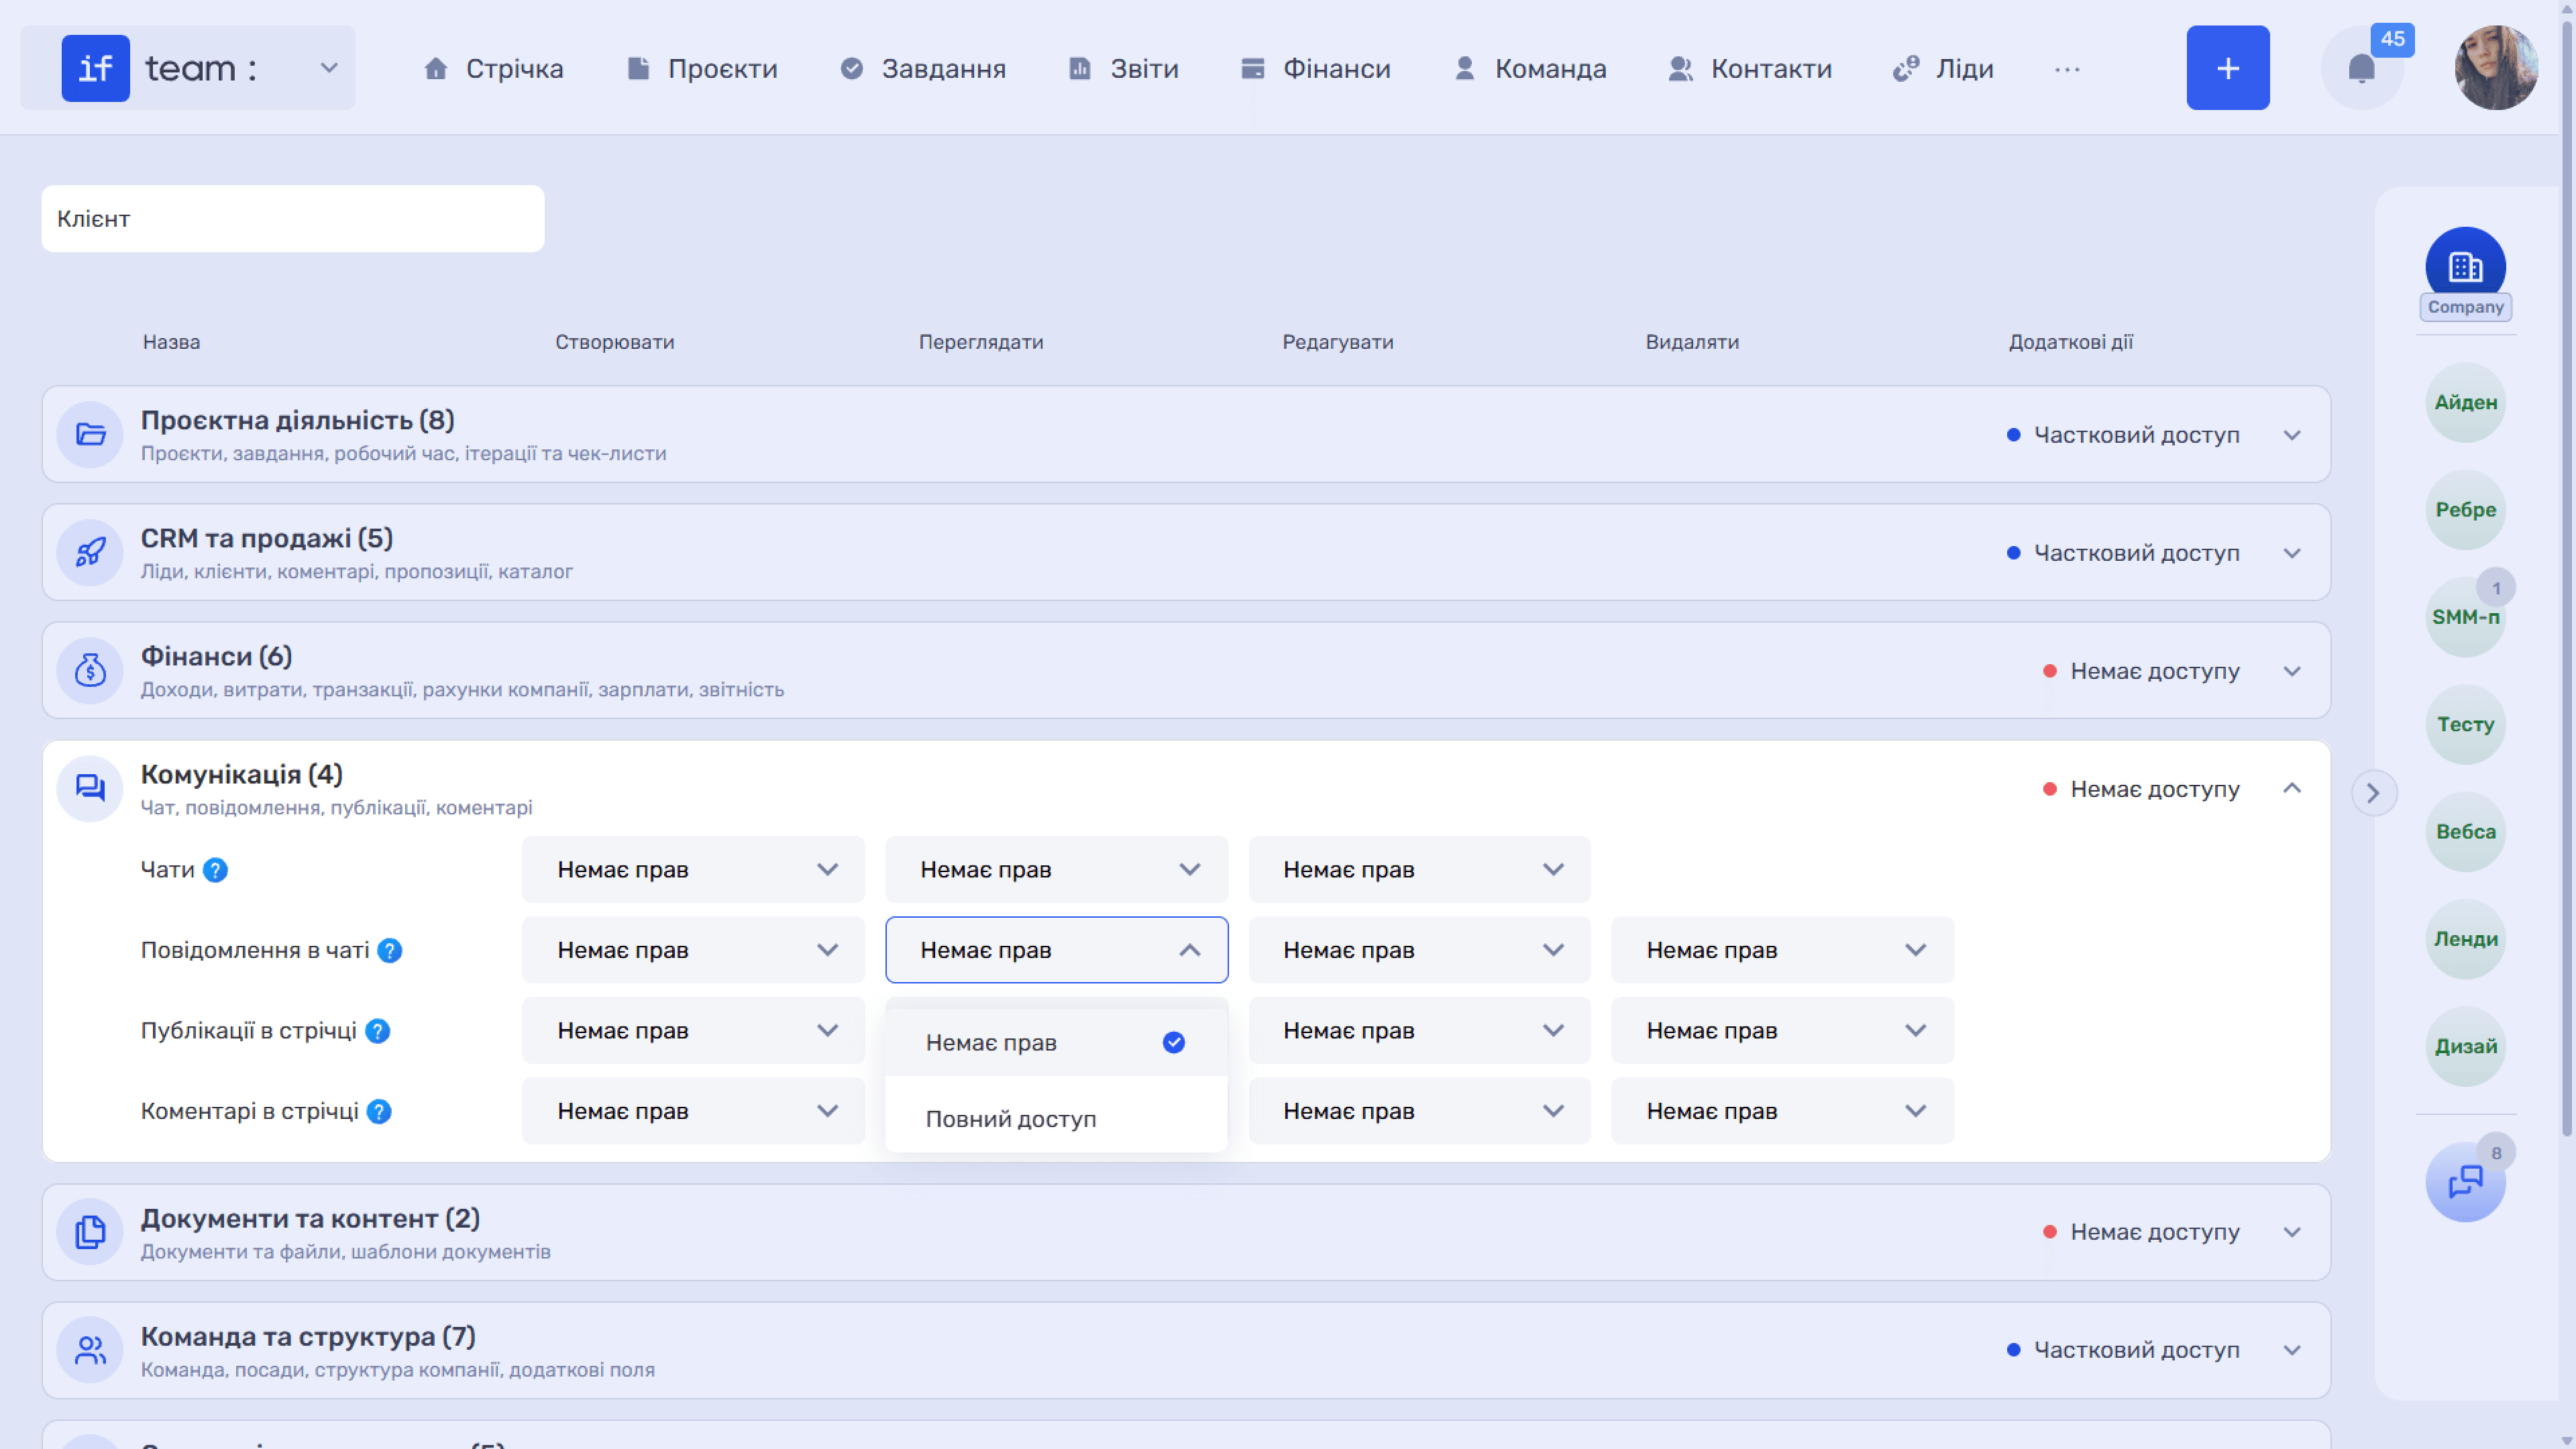
In the role settings, open the “Communication” permission group and grant access only to the required chats and actions. This lets the client view project progress and post messages in the chat without gaining access to Finance, payroll, or internal company data.
Step 3. Add the client to the project and chat. Once the client becomes a project member, they appear in the list of members available for the chat. In the “Edit Members” window, click ⊕ next to their name to make the conversation available to them.
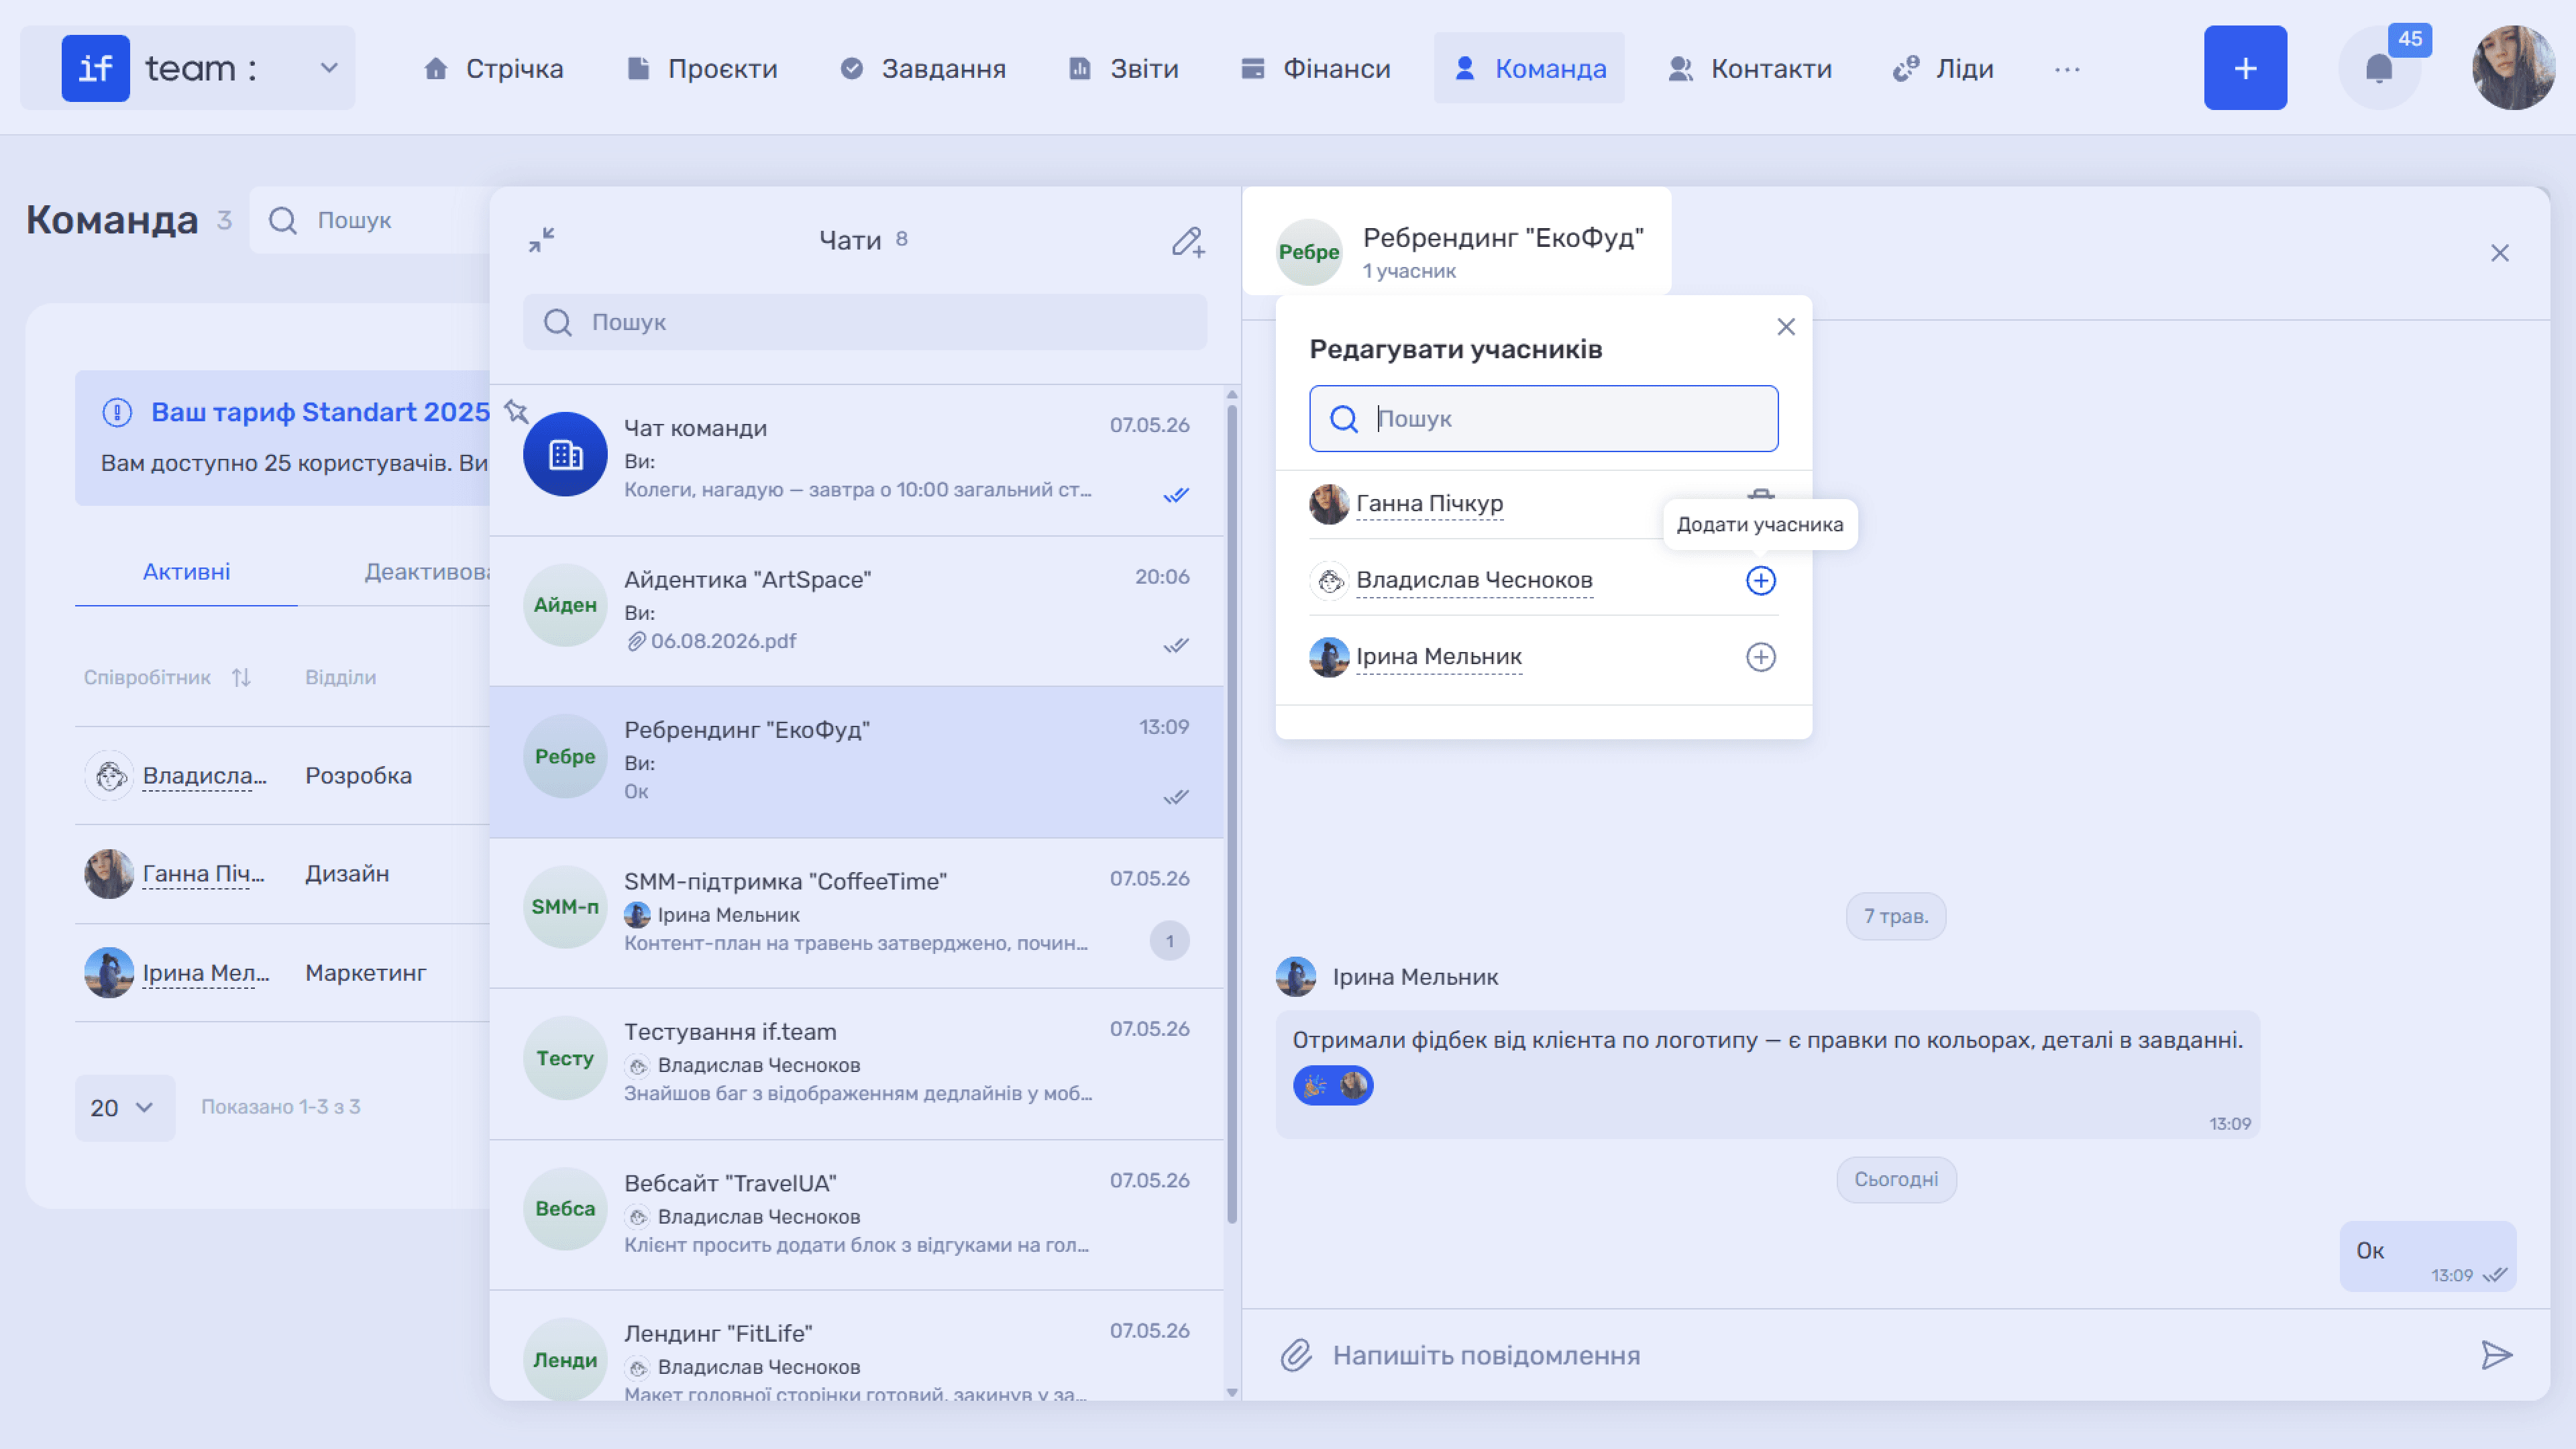
This approach is useful when a client participates in approvals. Instead of collecting feedback through email and messaging apps, you receive it in the same place where the project is managed.
Still have questions?
Maybe we haven't added this information yet. But you can always reach out:
Request a demo
Submit a request and we'll show you how the service works and its capabilities.
Book a demo