Mobile App
if.team has a mobile app for Android and iOS, available from the App Store and Google Play, respectively. It lets you stay connected with the team and manage work from your smartphone. The app includes the primary features for working with your profile, tasks, leads, and Finance.
The bottom navigation bar contains four tabs: Tasks, Leads, Finance, and Profile.
Sign In
Sign in to the mobile app in the same way as the web version: using a Google Account or an email and password.
Profile
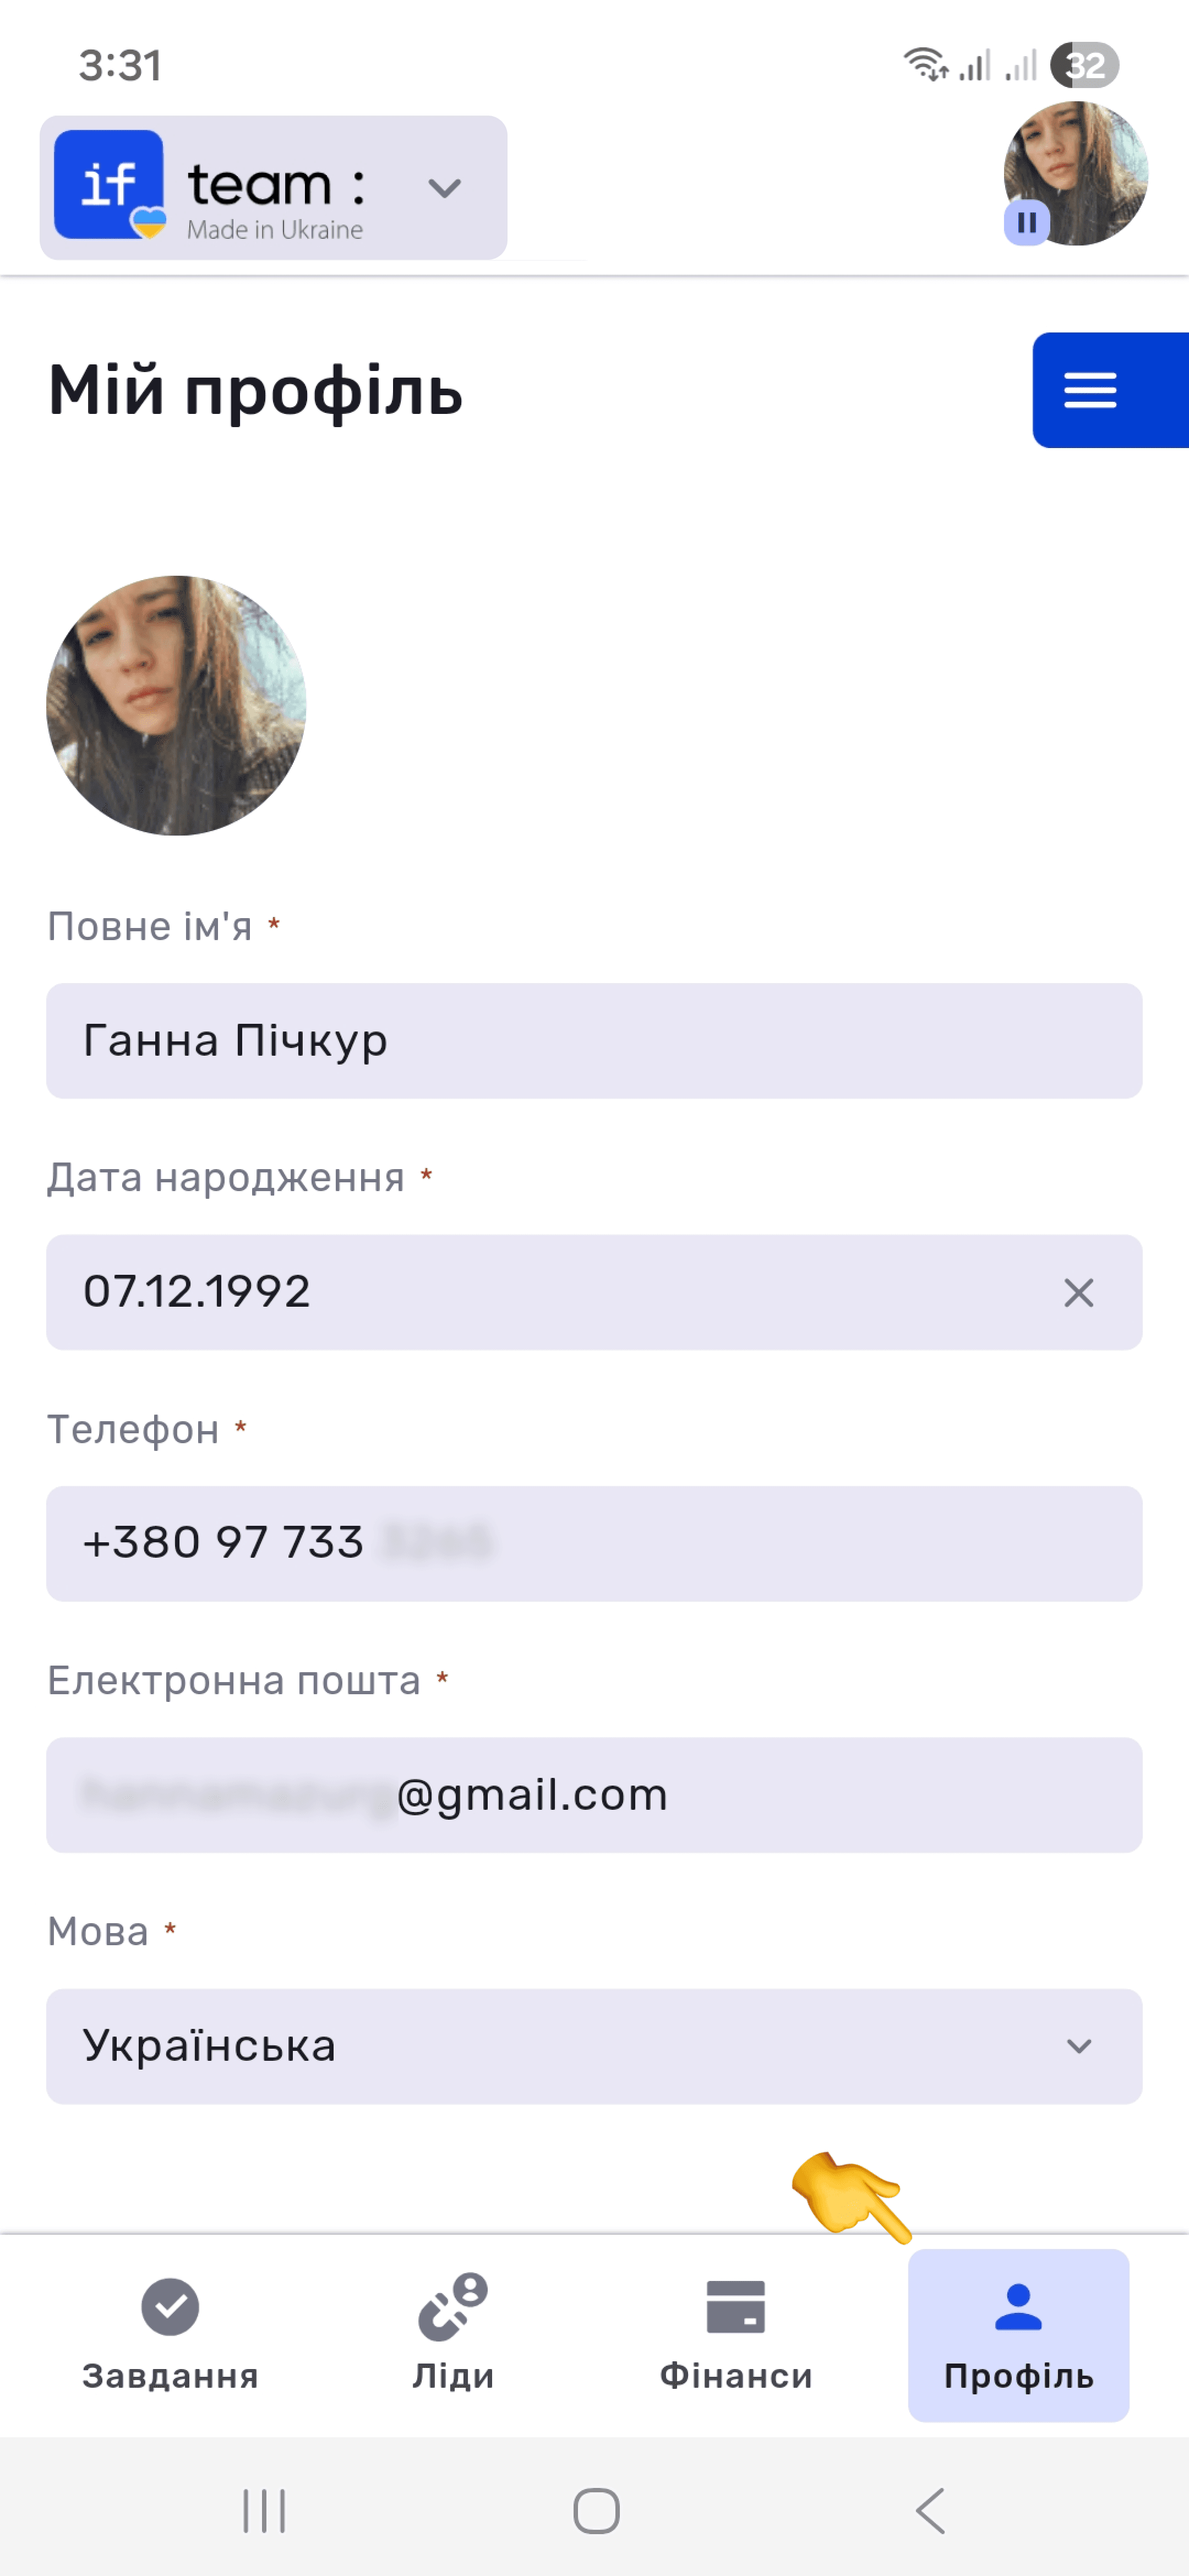
The My Profile tab contains the user’s personal data: name, date of birth, phone number, email, and interface language.
To open the quick menu, tap the avatar in the upper-right corner of the home screen. If the time tracker is running, the current task name and total time spent appear at the top of the menu with a pause button (⏸). The avatar itself displays an indicator: ▶ when the tracker is running or ⏸ when paused. This lets you control time tracking without opening the task.
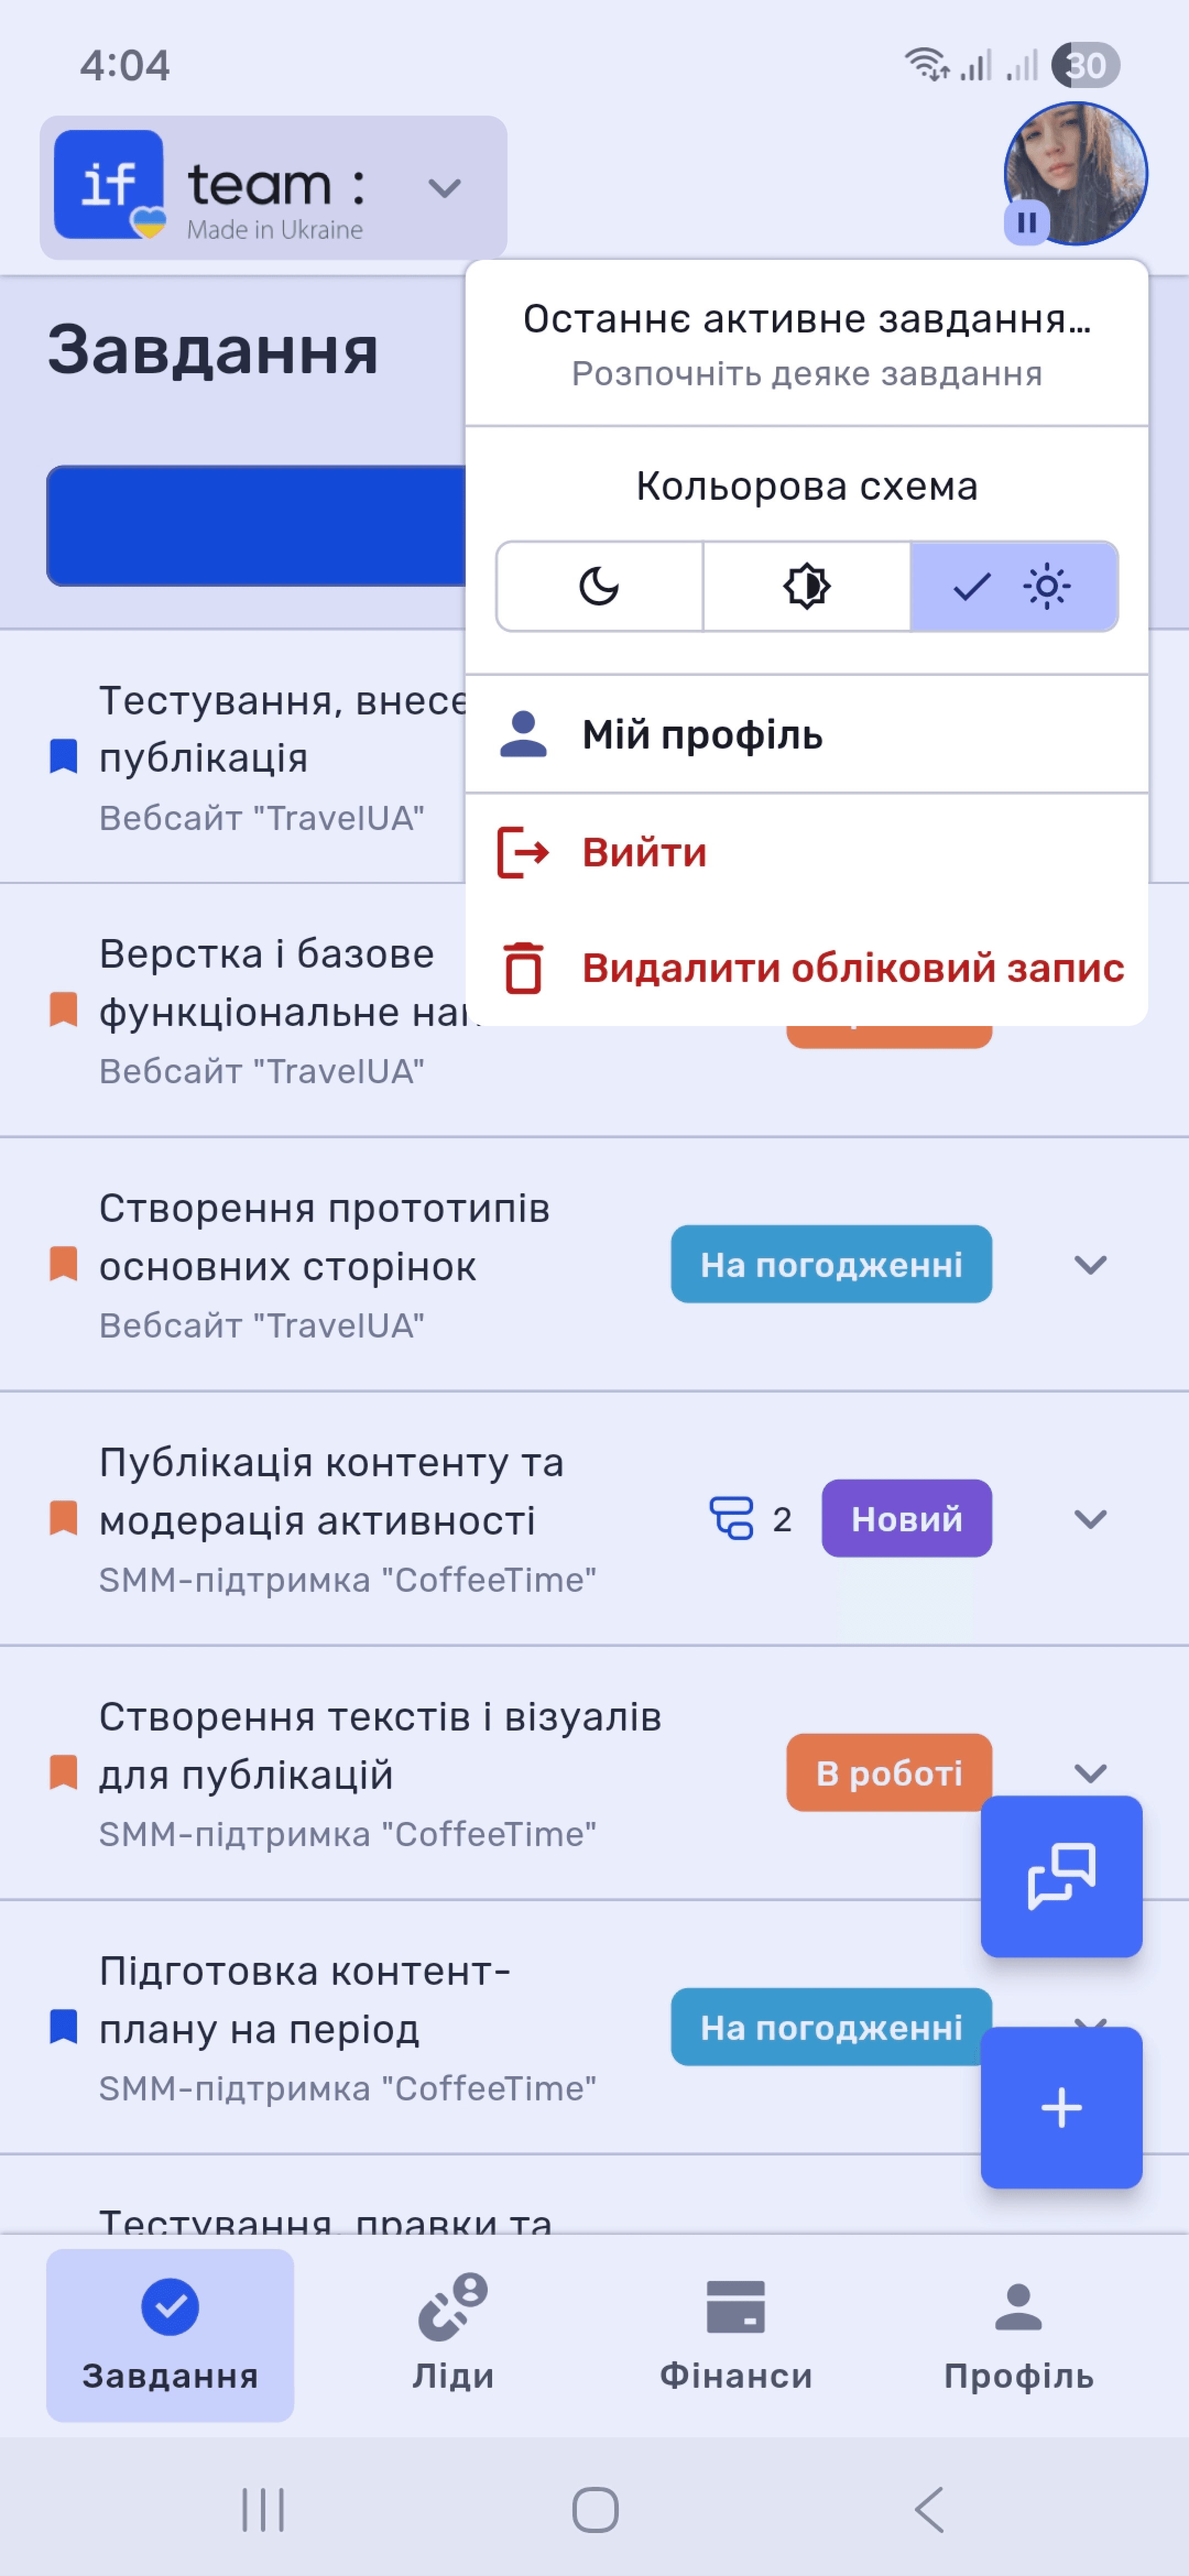
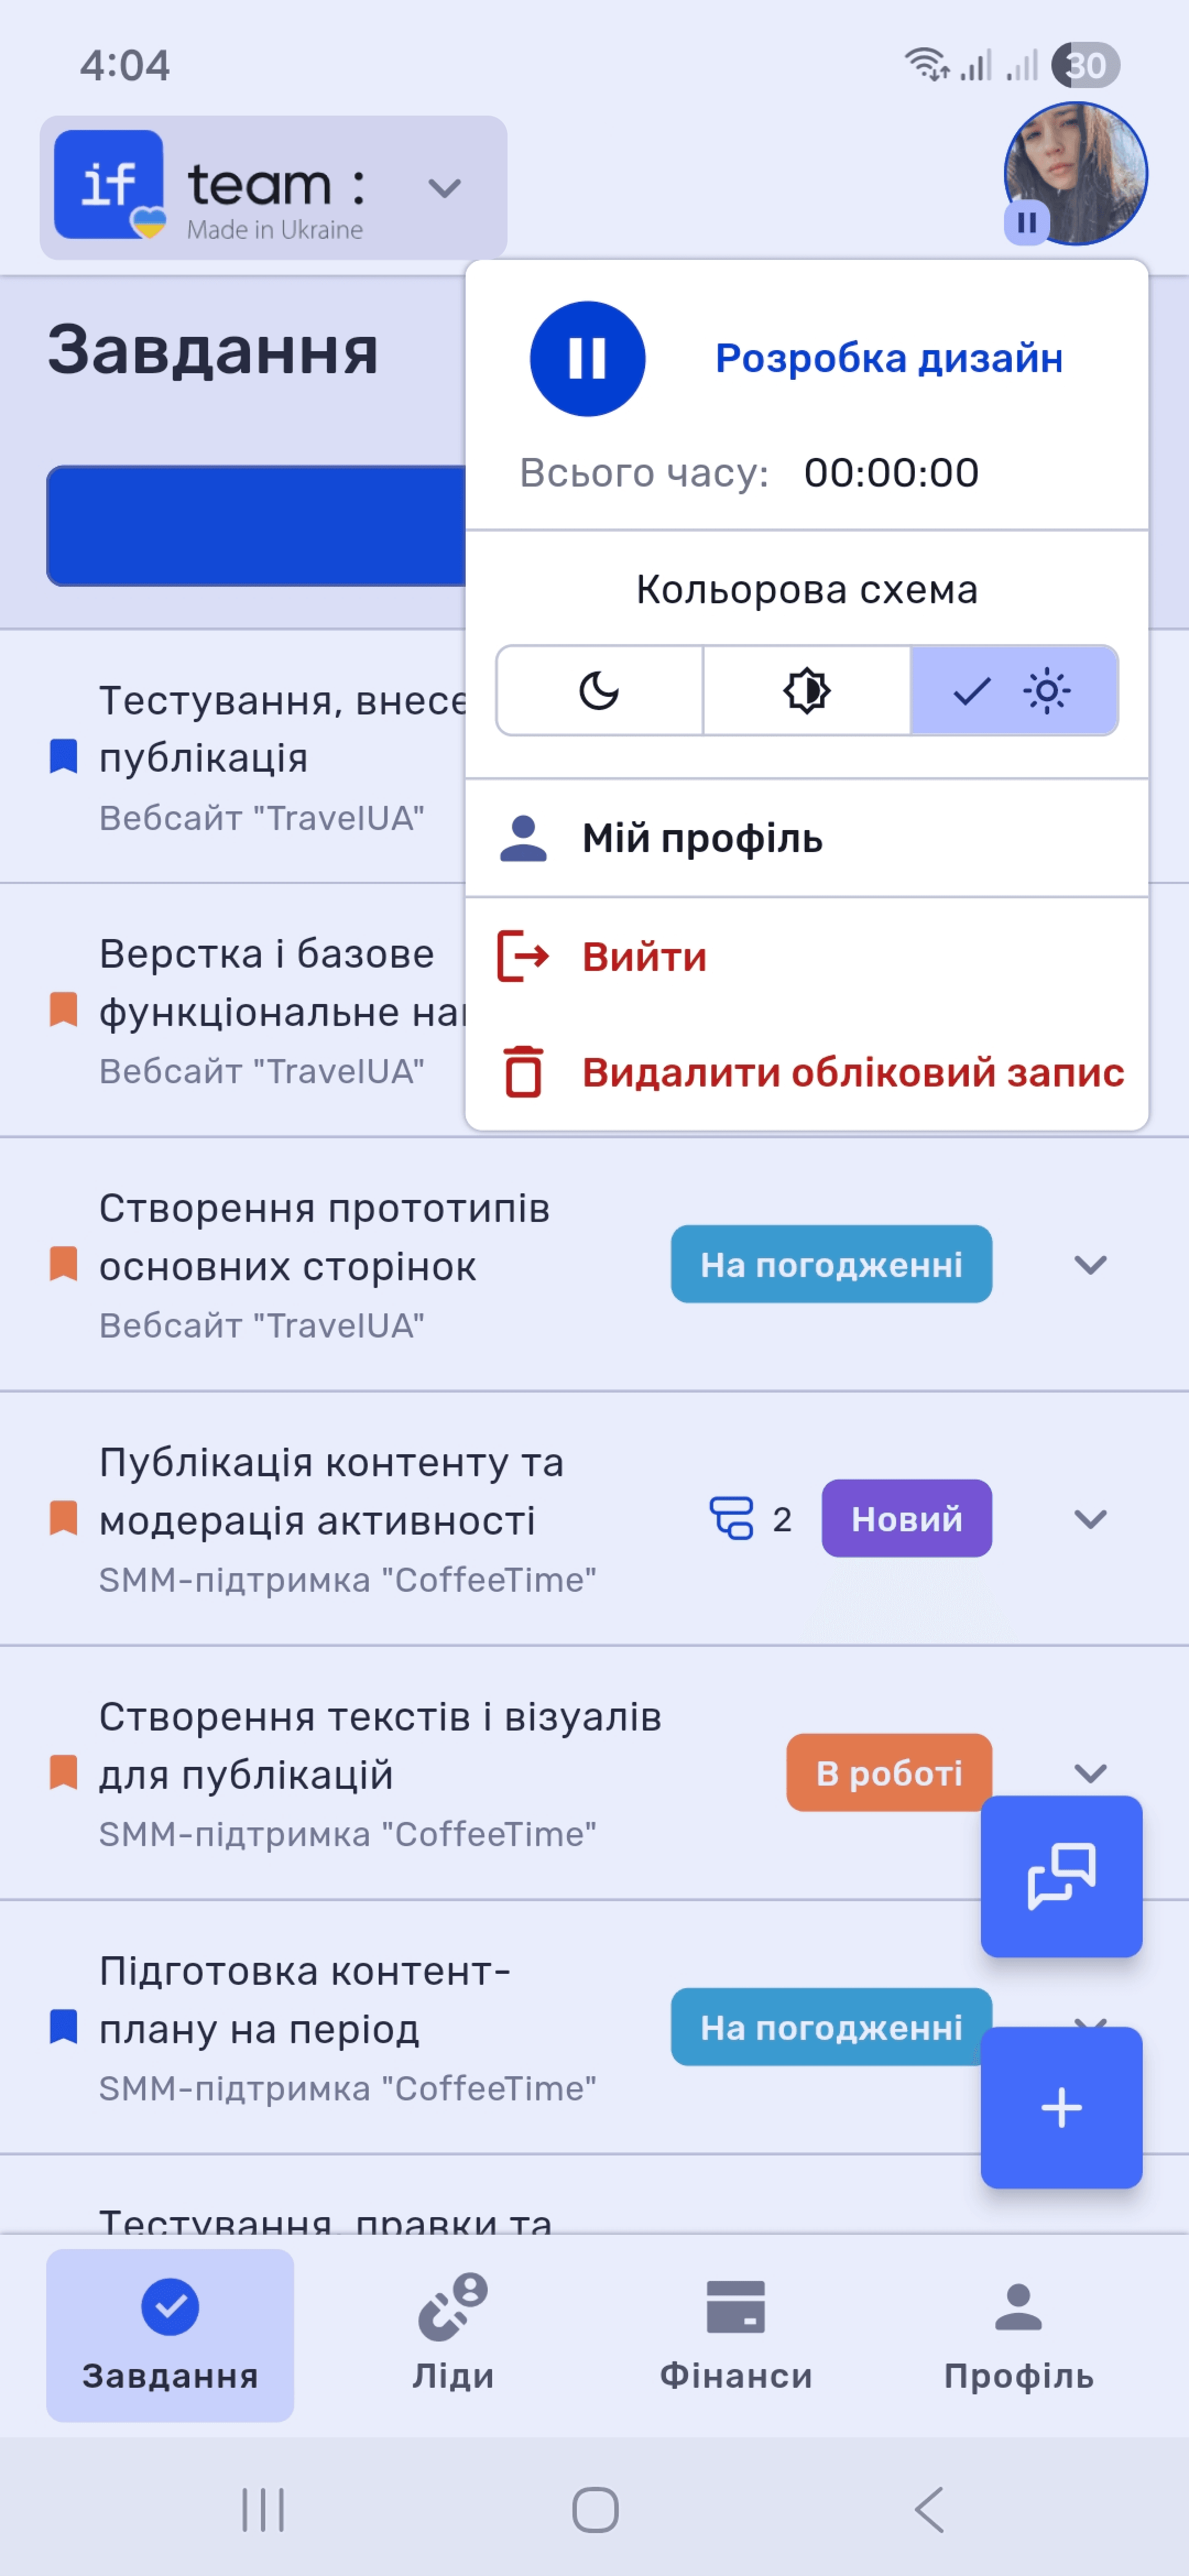
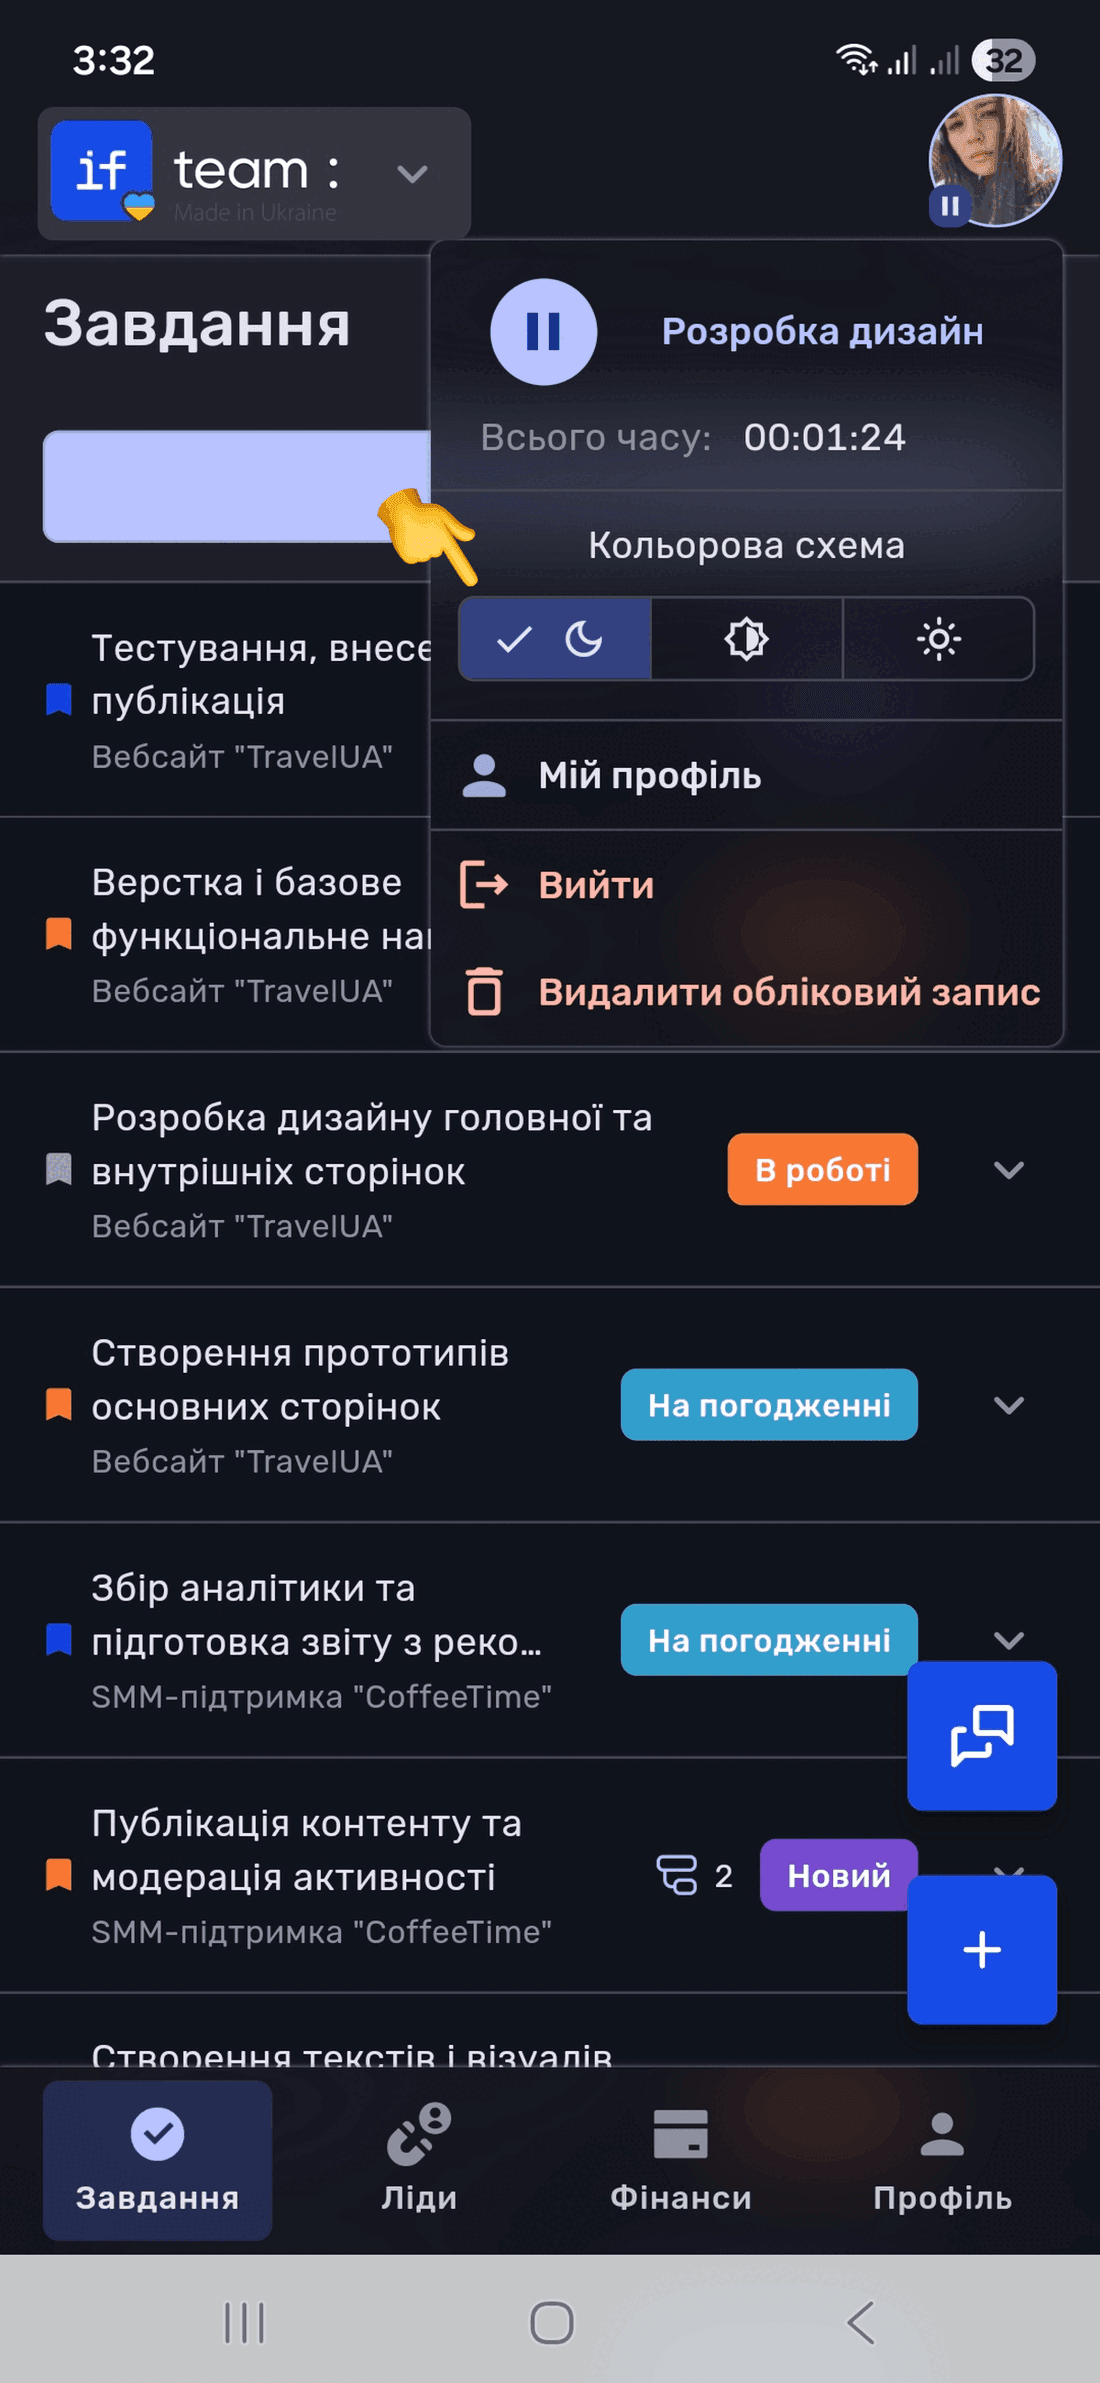
The menu also contains:
- Color Scheme for dark, light, or system theme;
- My Profile for editing your profile;
- Sign Out and Delete Account.
Tasks
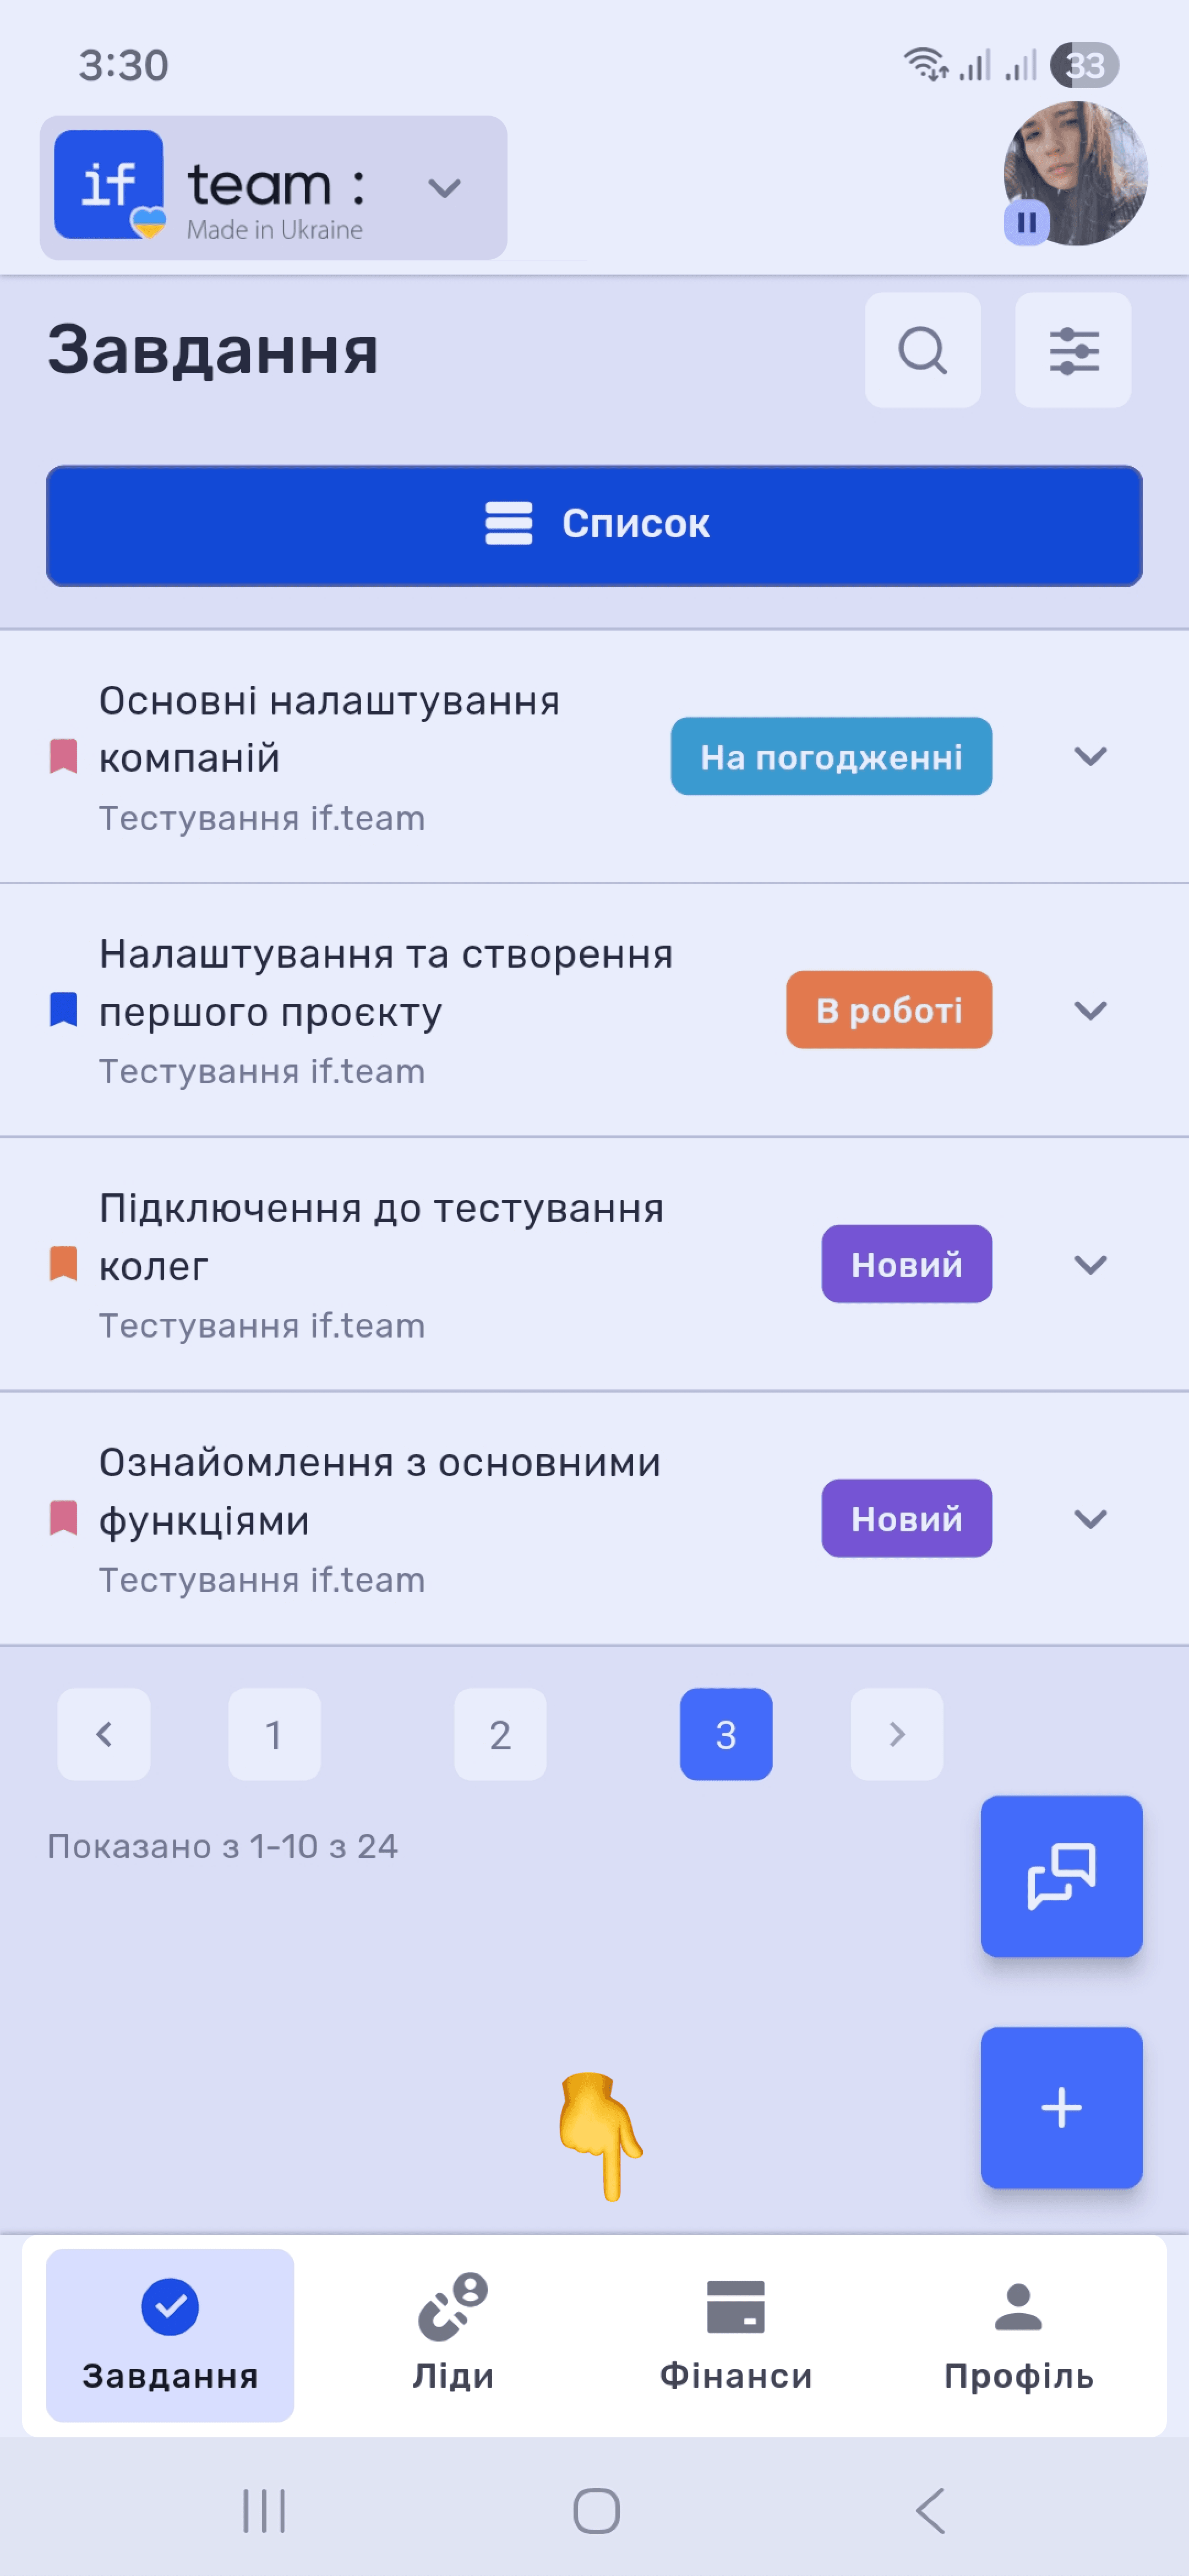
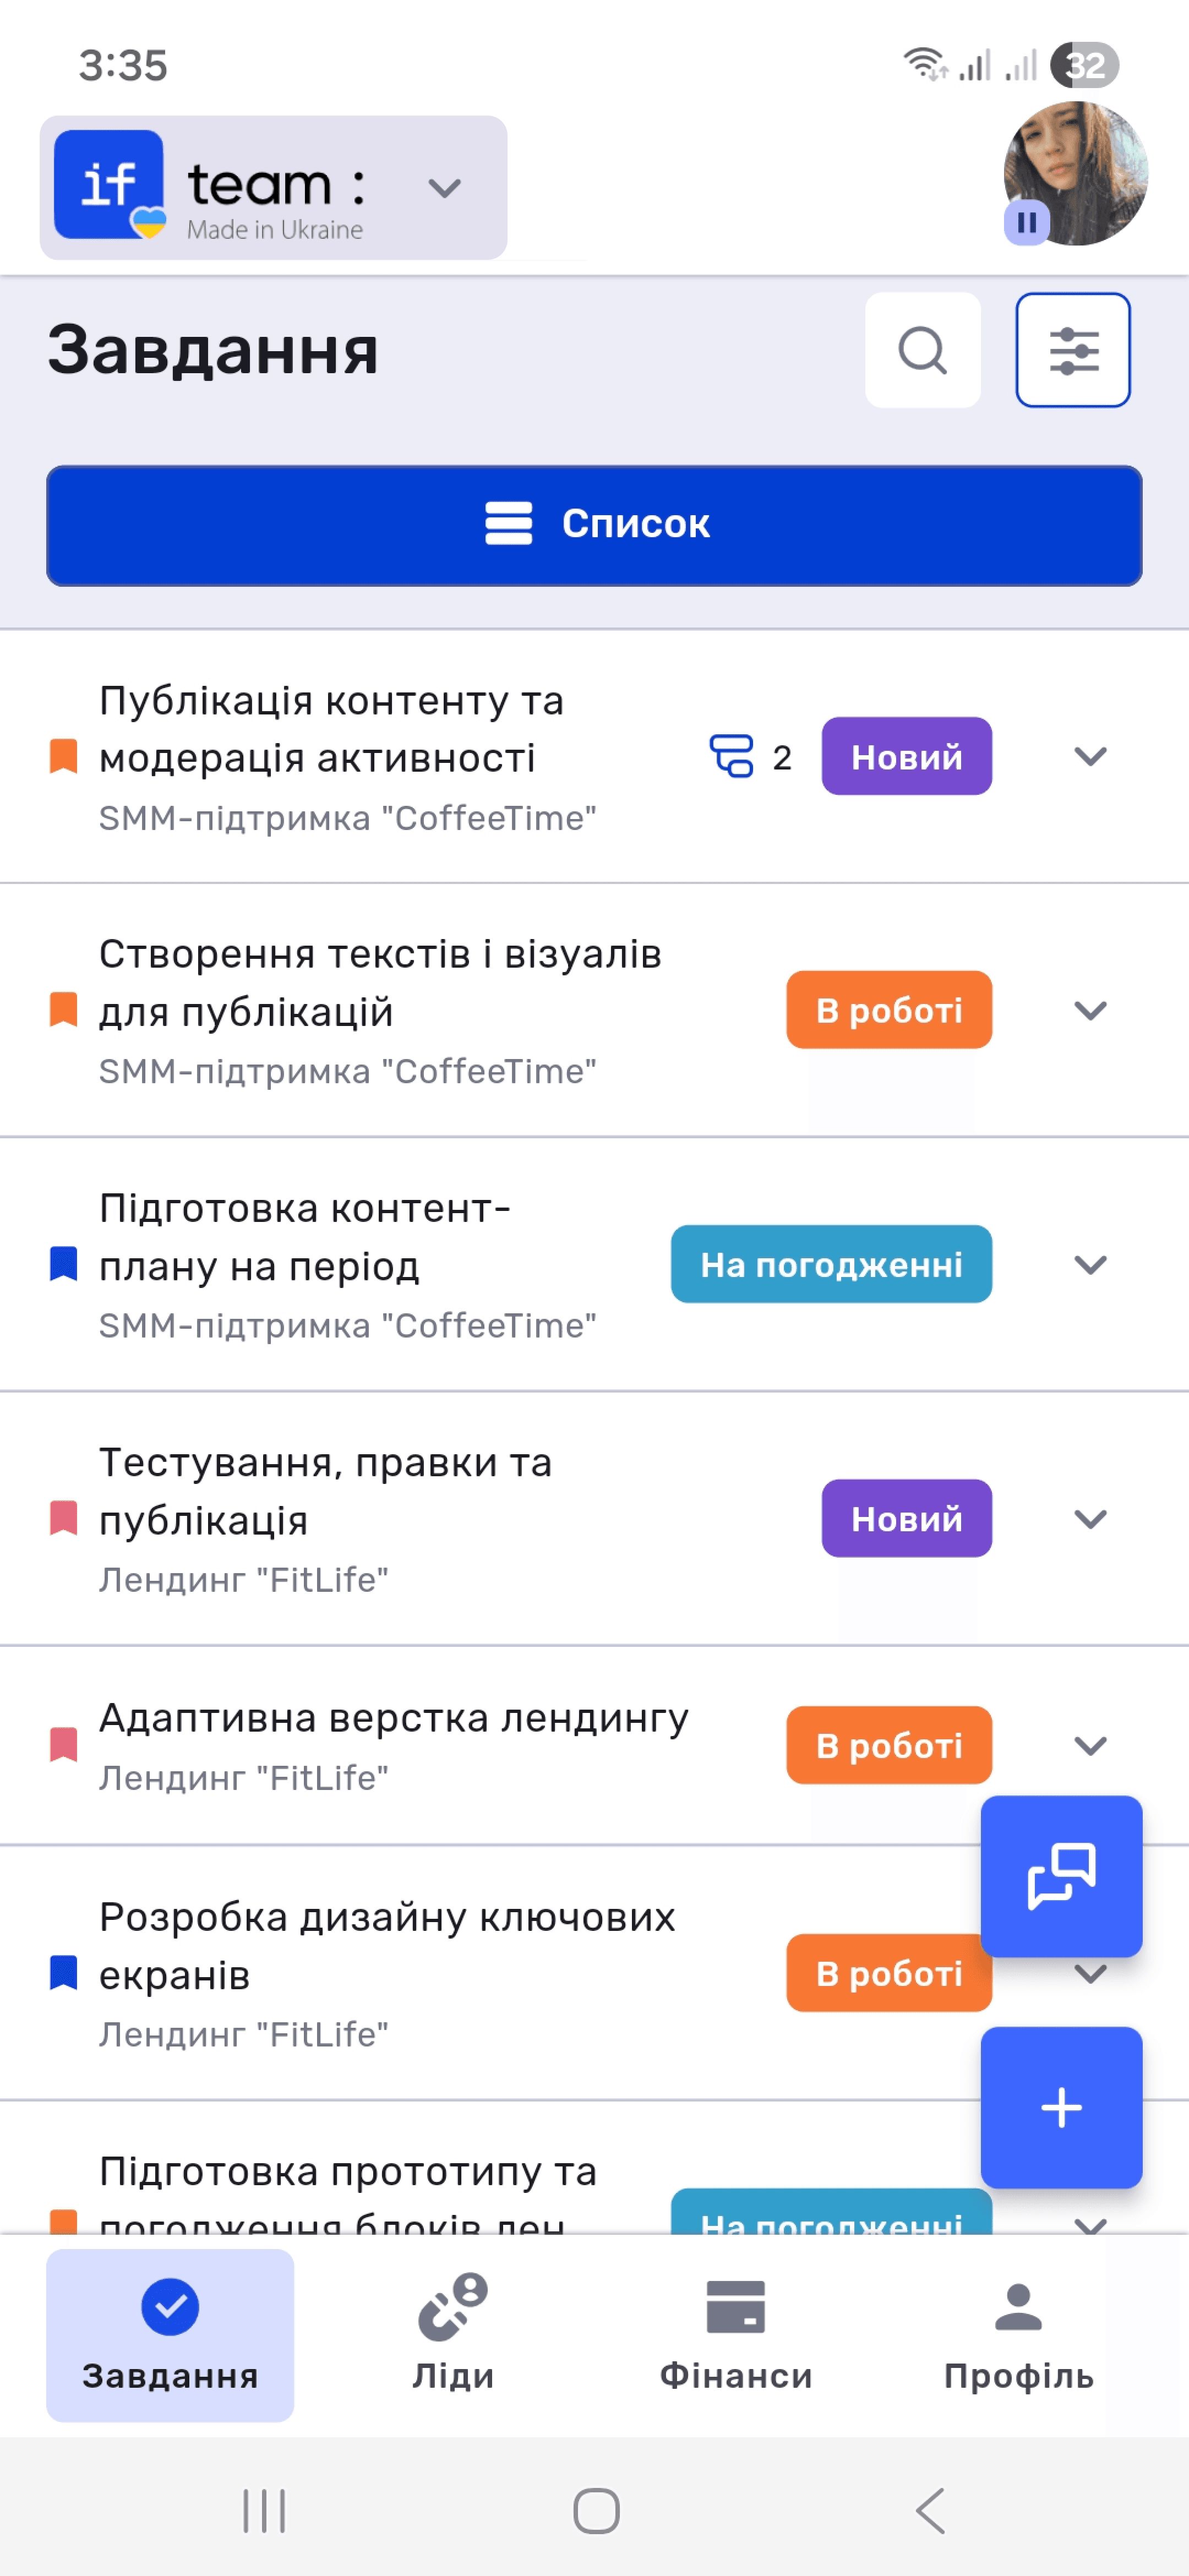
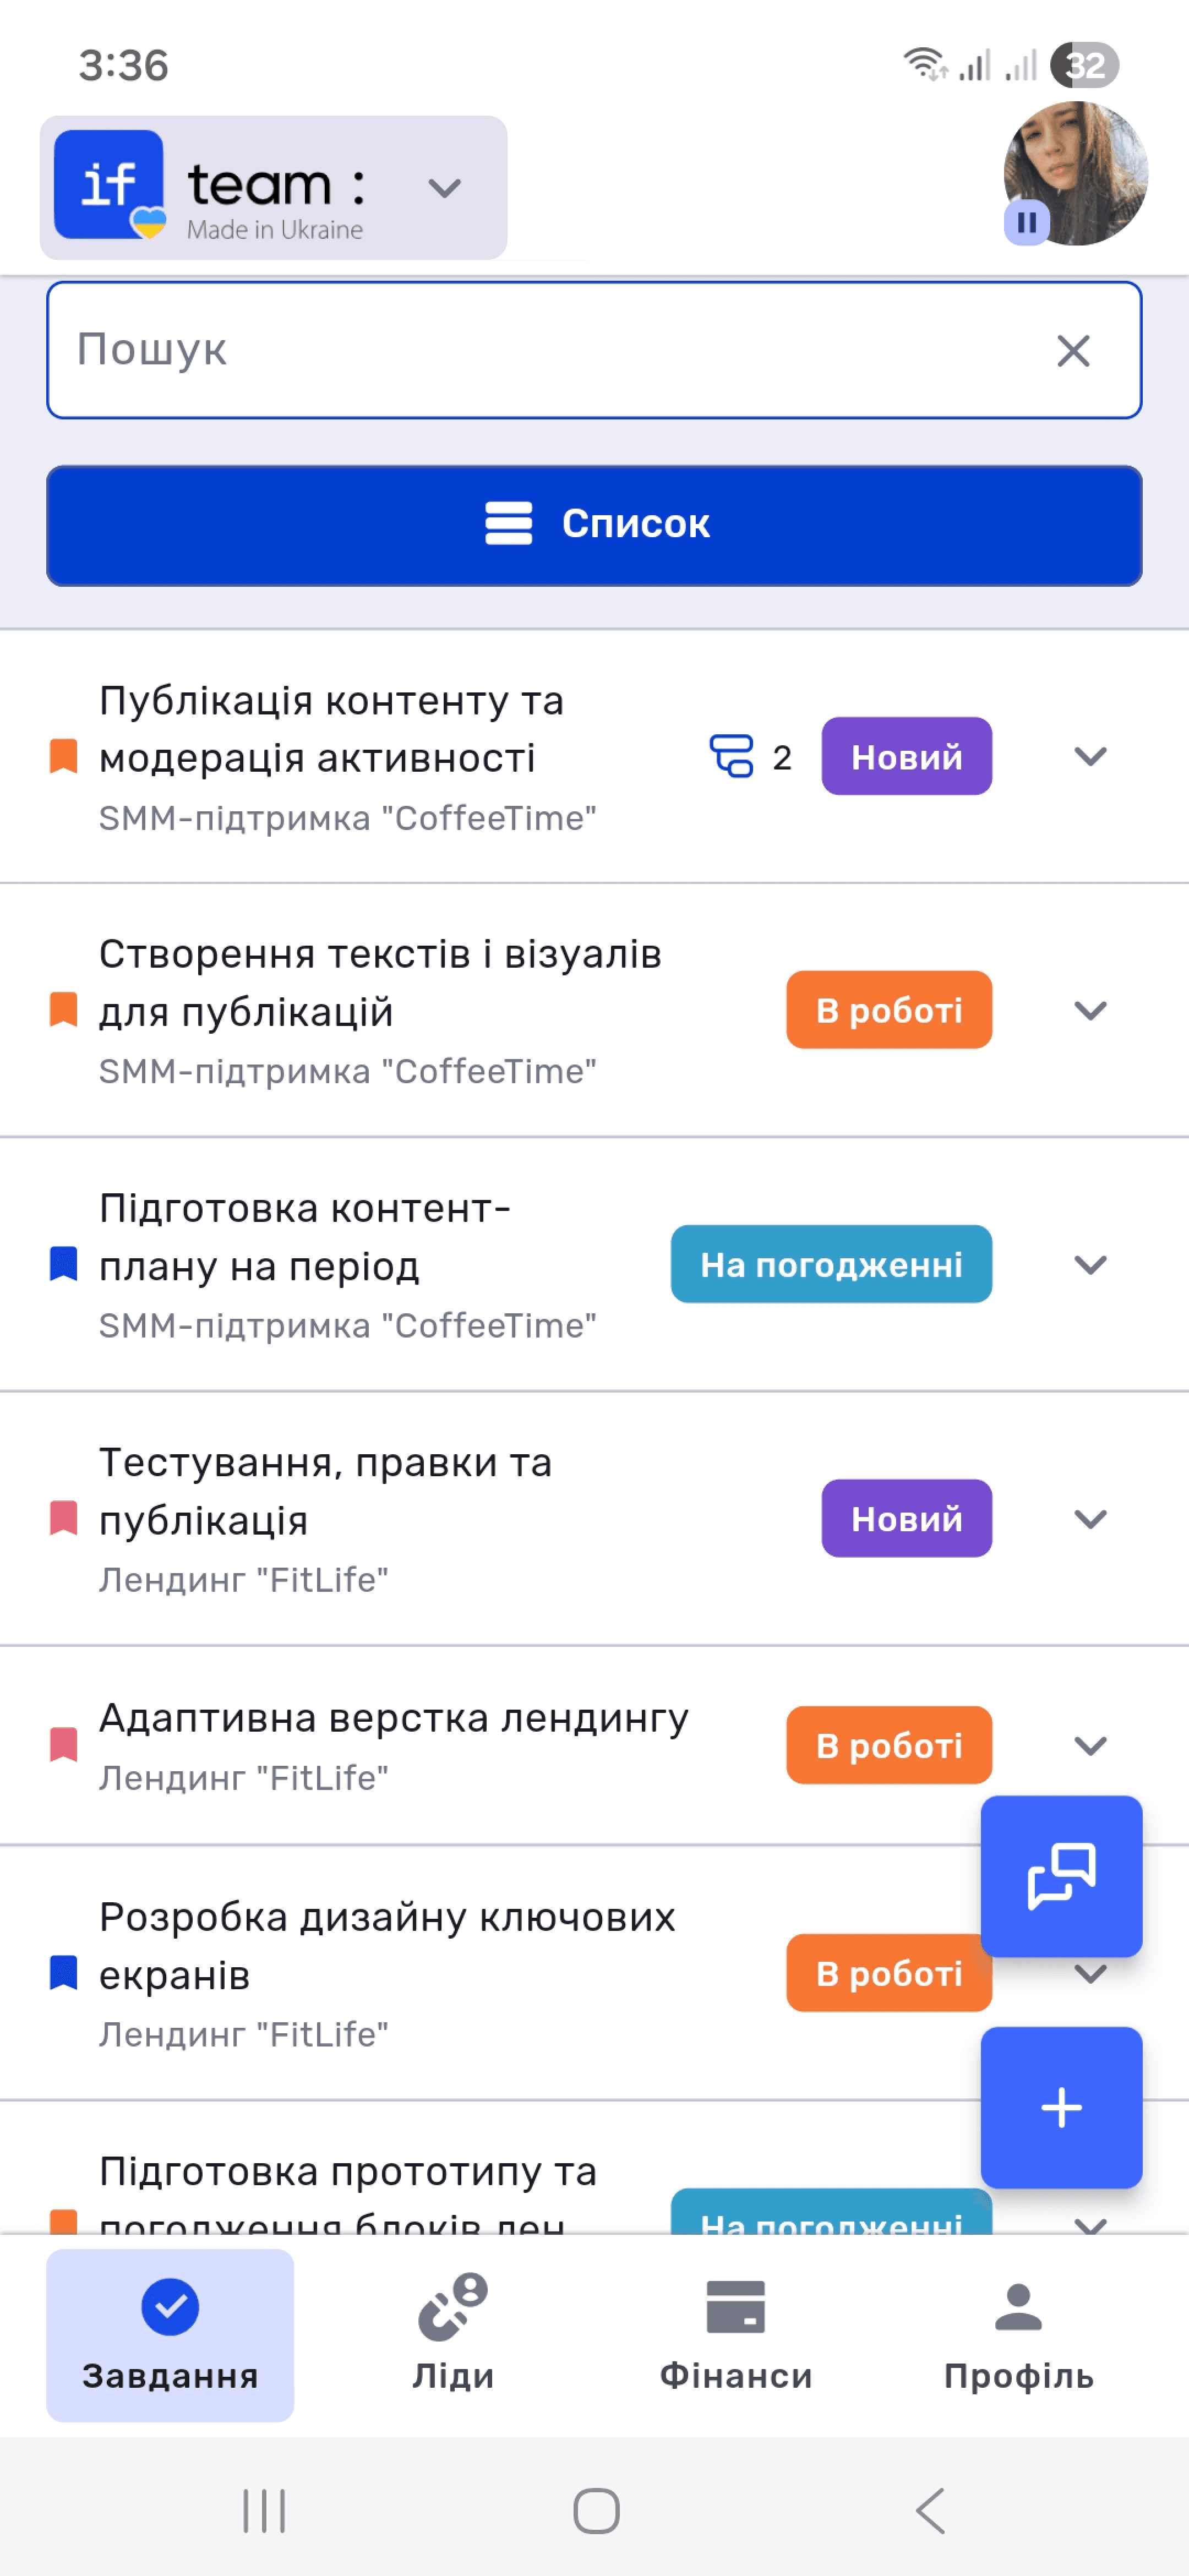
The Tasks tab is the app’s main screen. All tasks appear as a list. Each task shows its name, project, and status. If a task has subtasks, their number appears next to it.
Viewing Task Details
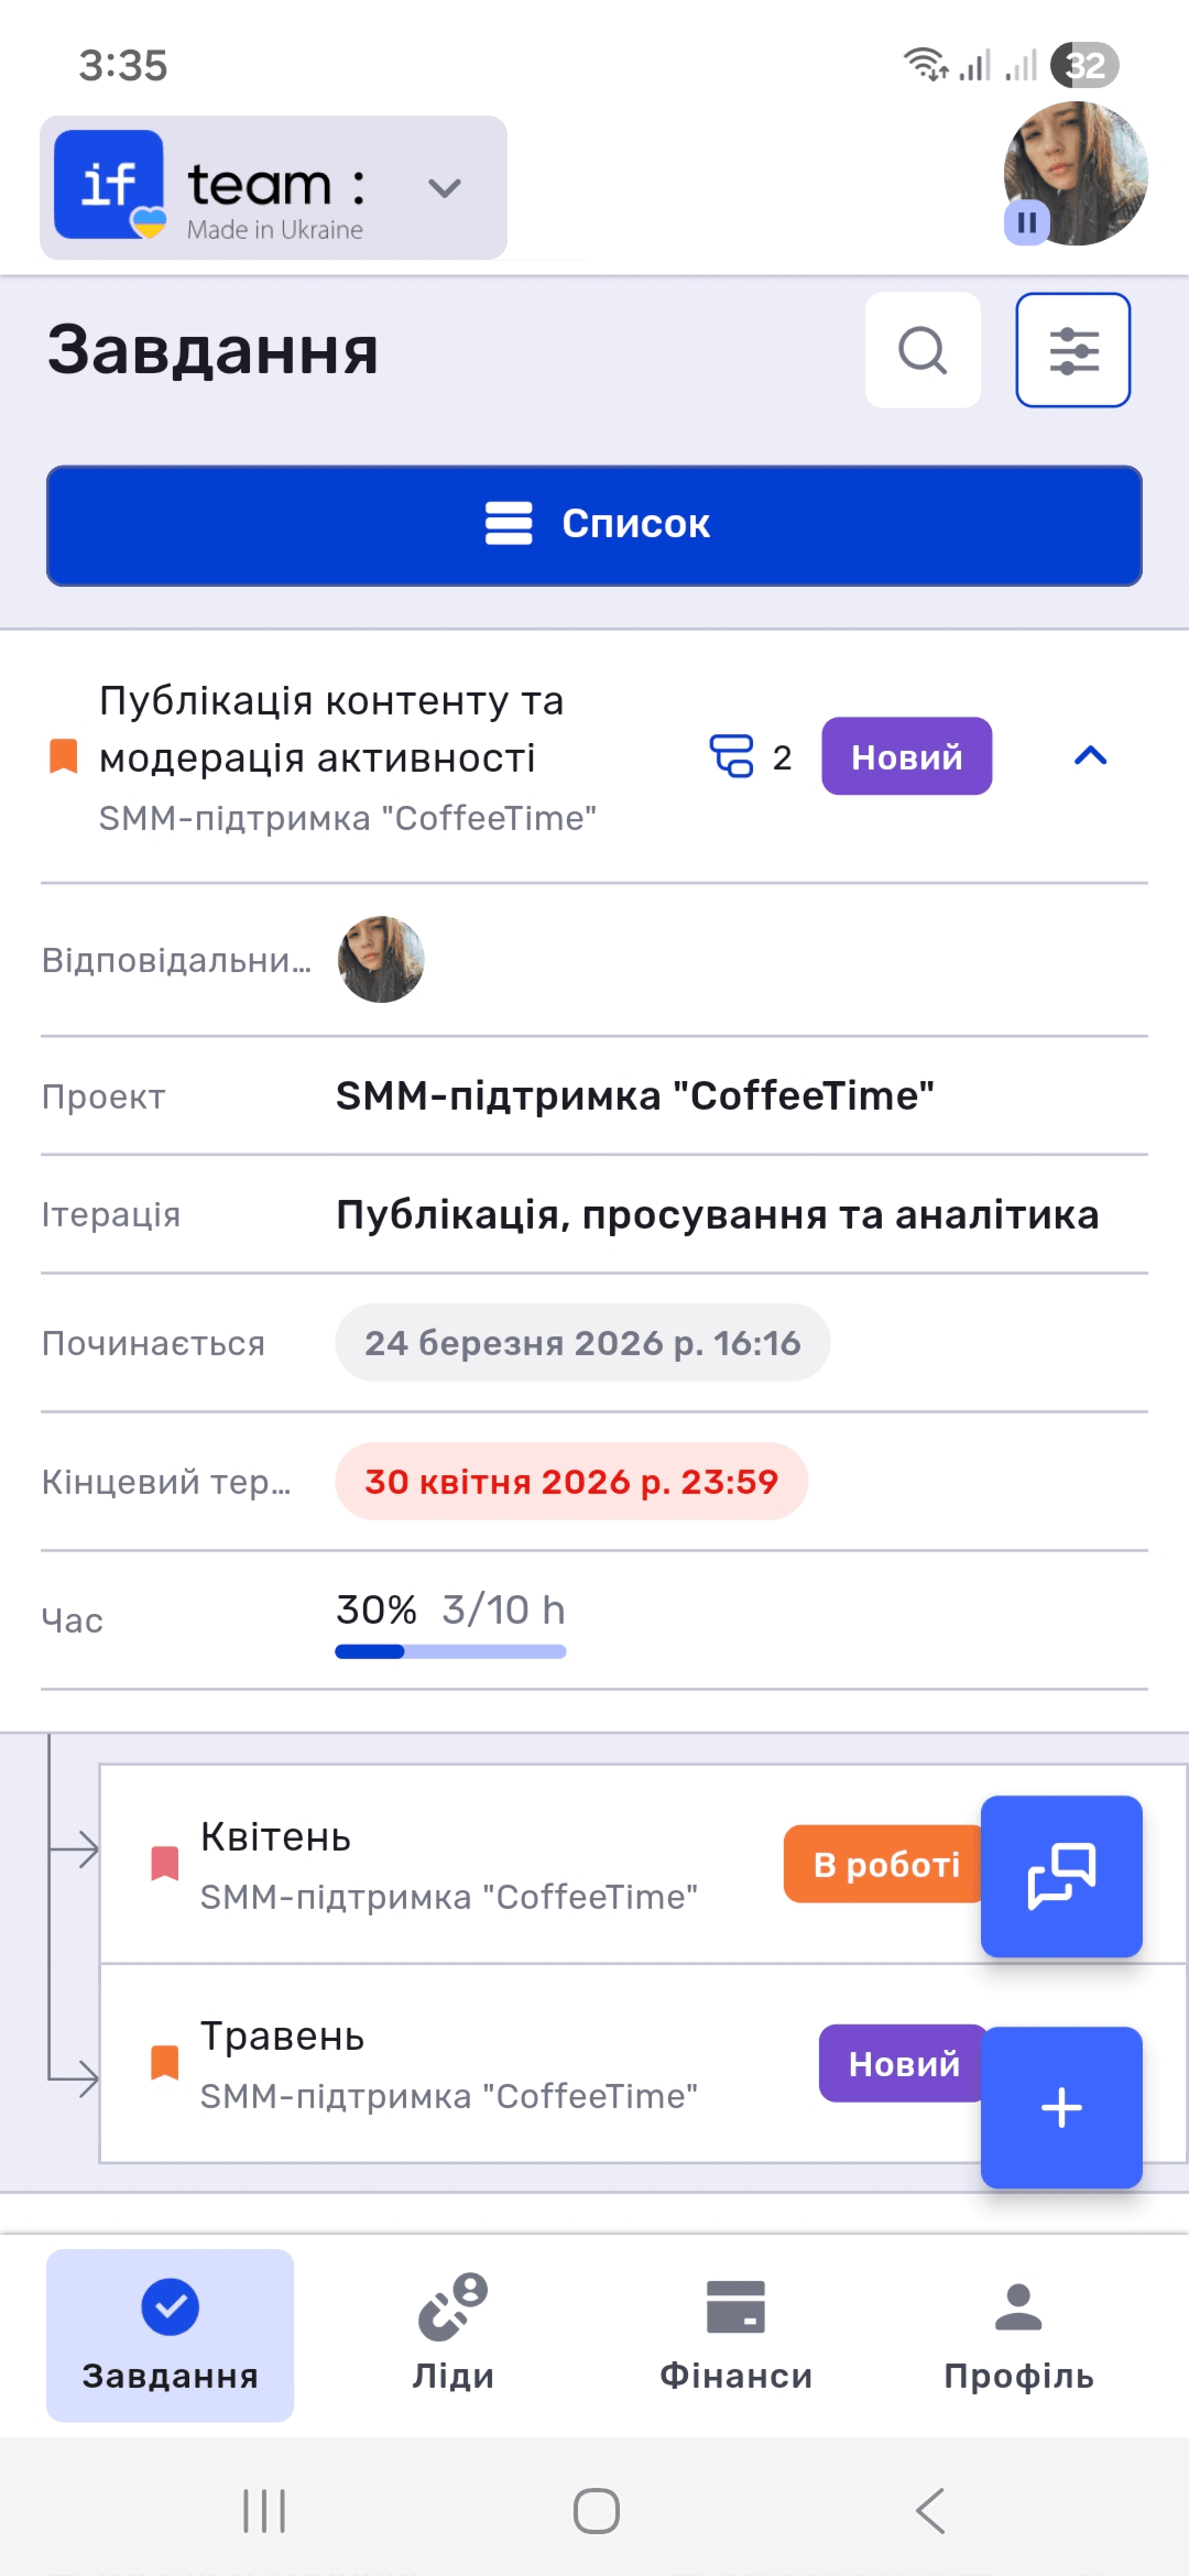
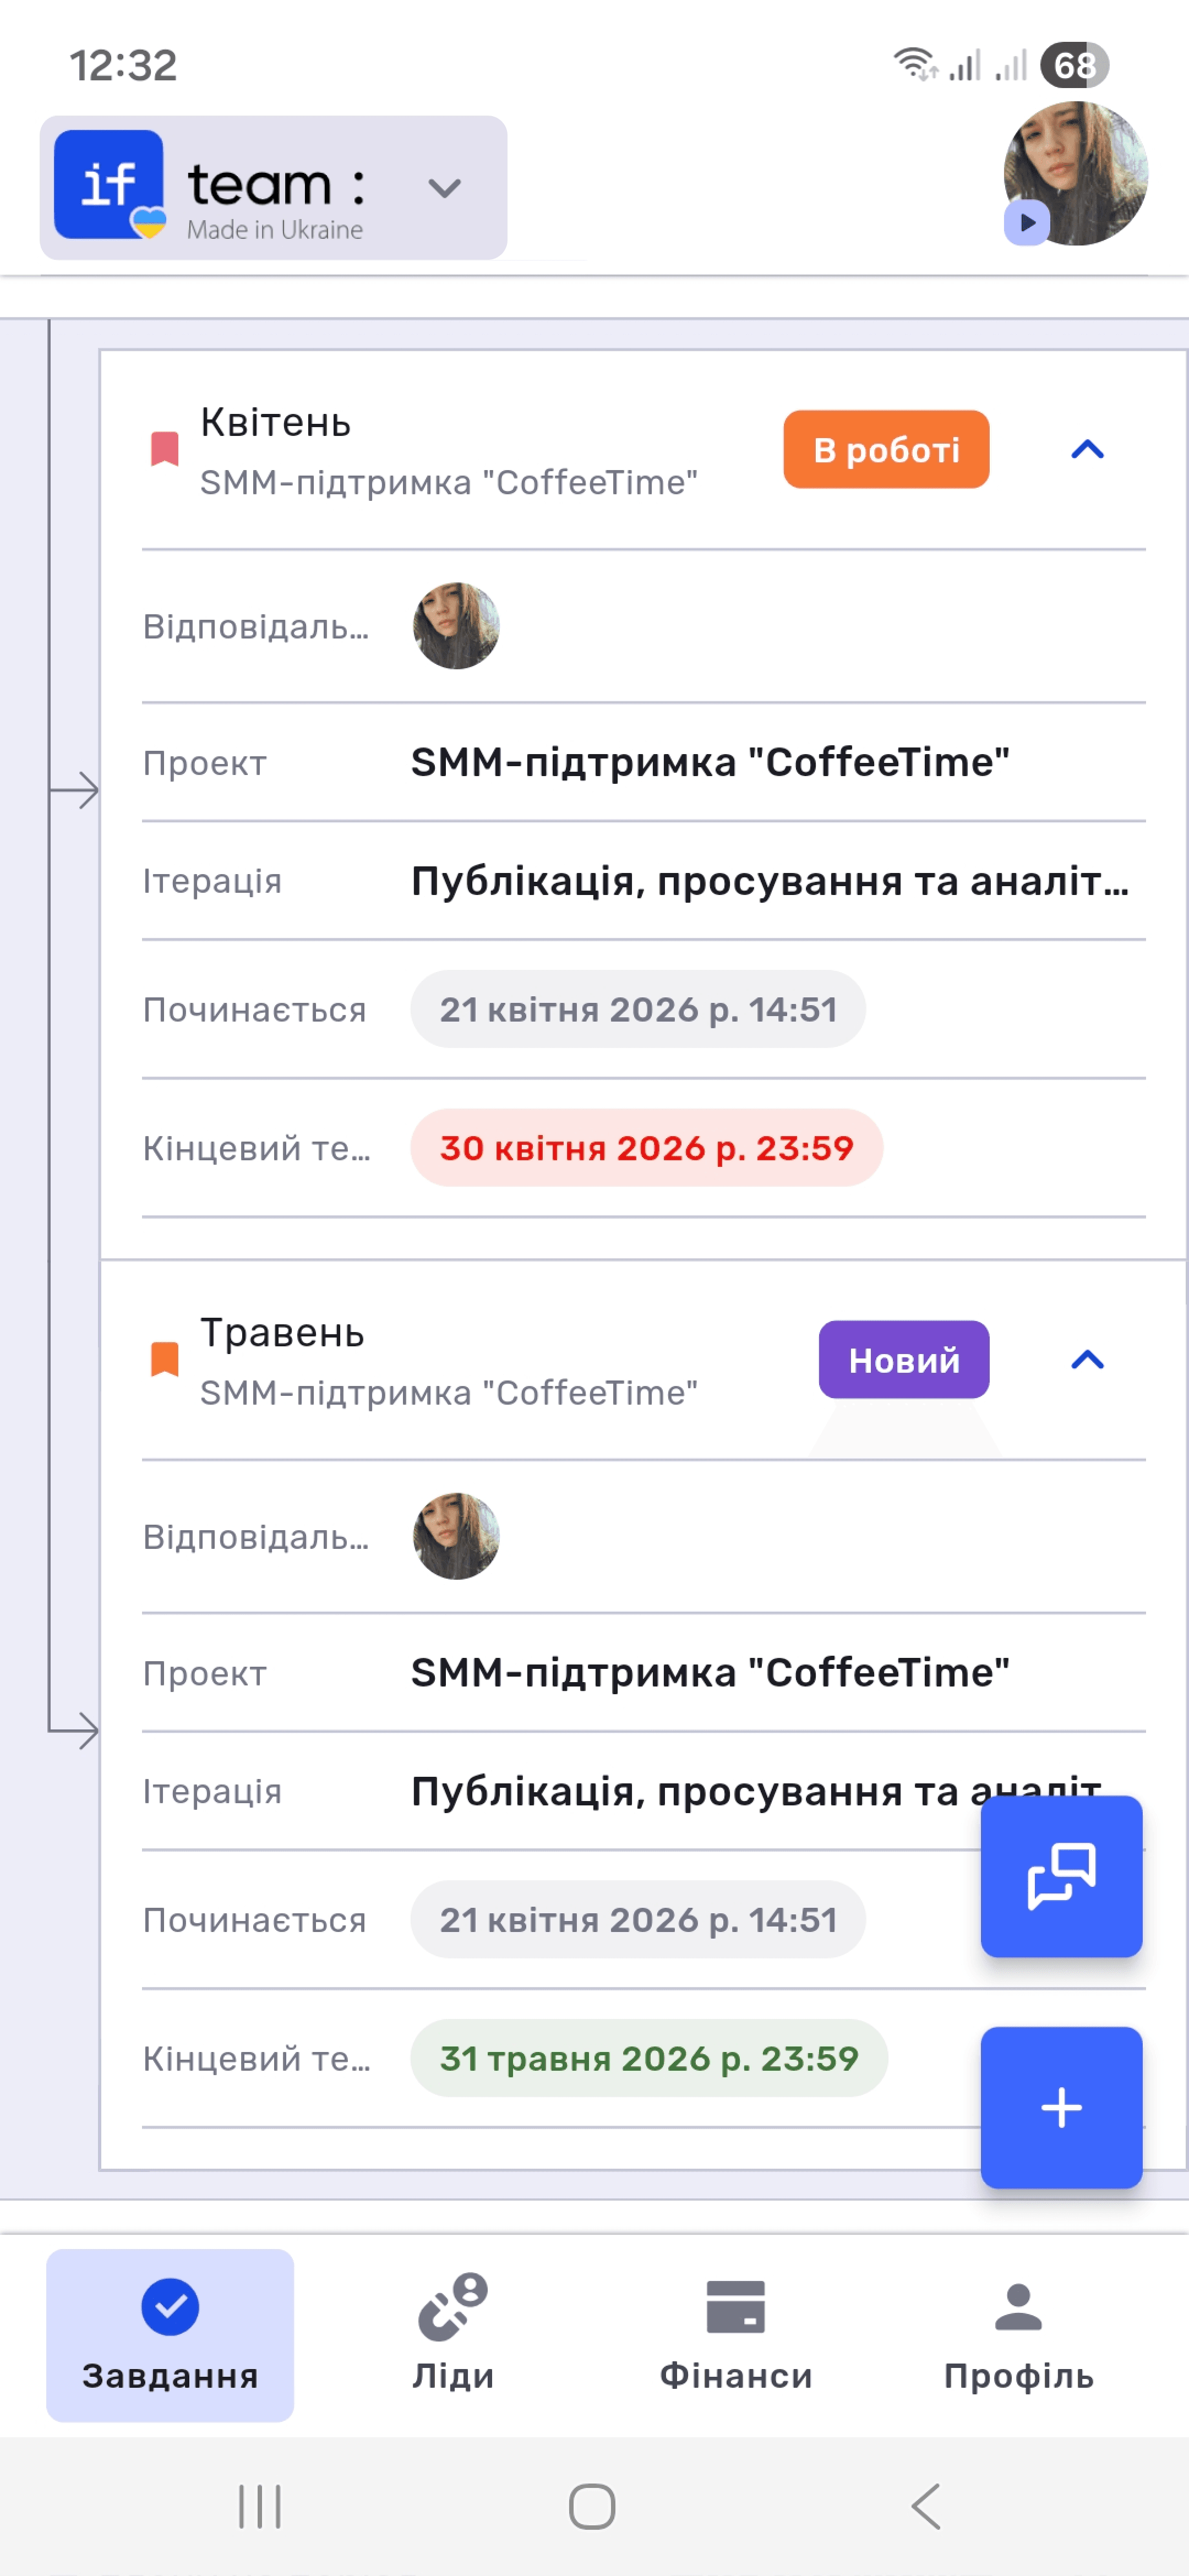
Tap the arrow (˅) to the right of a task to expand a summary showing the responsible employee, project, iteration, start date and deadline, and planned time with completion progress. Subtasks appear below the main task and can also be expanded.
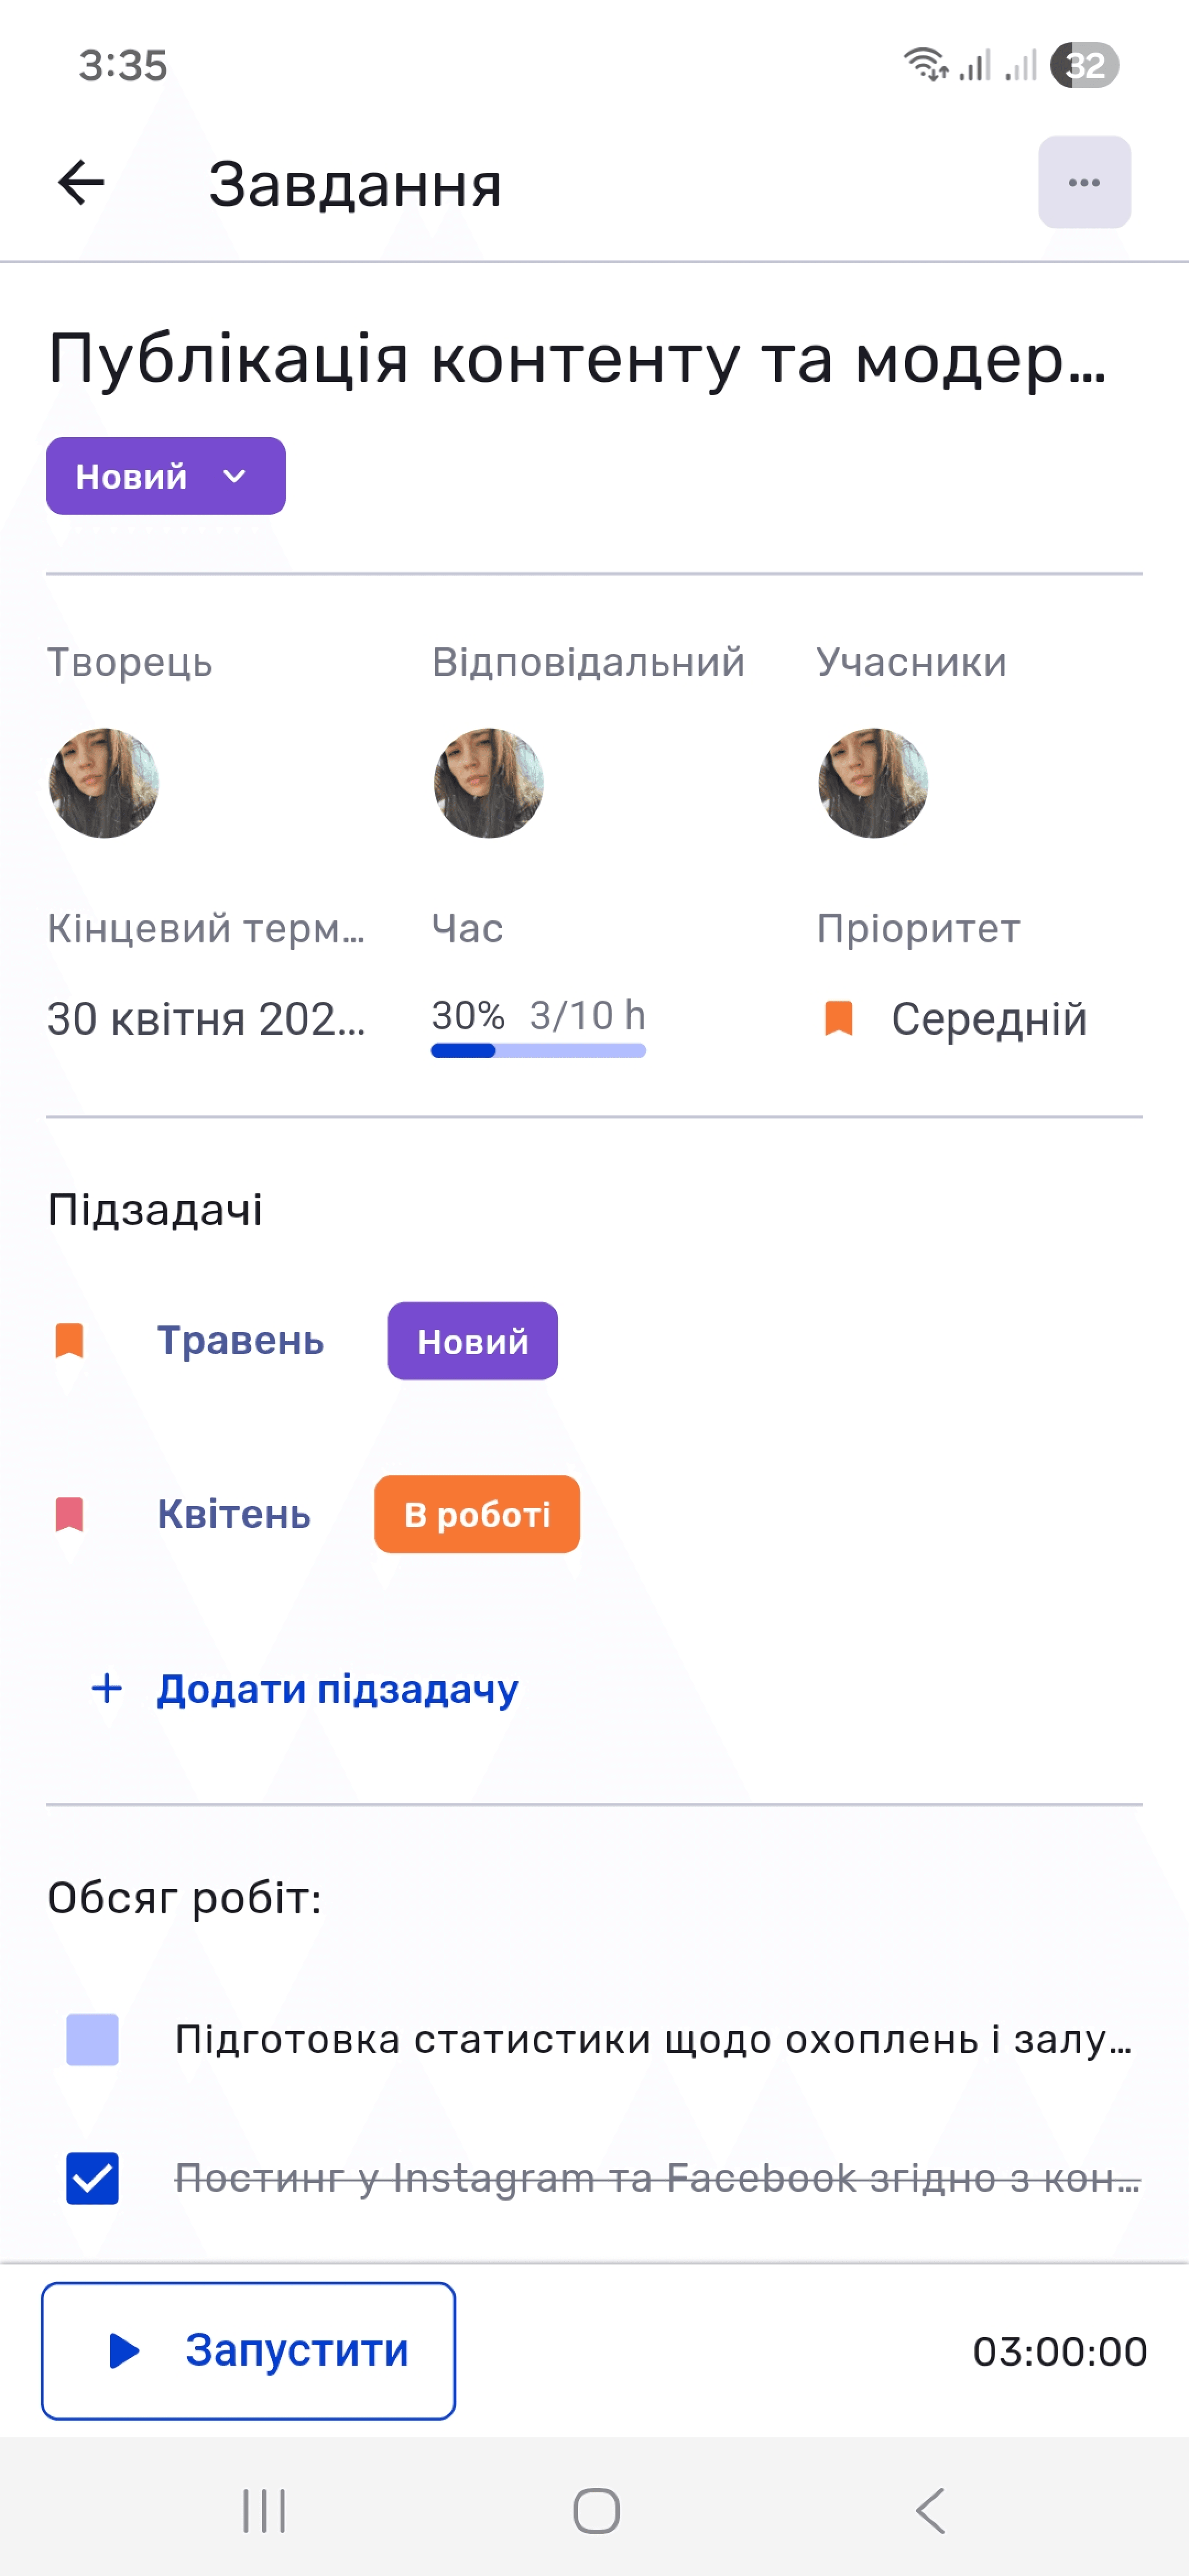
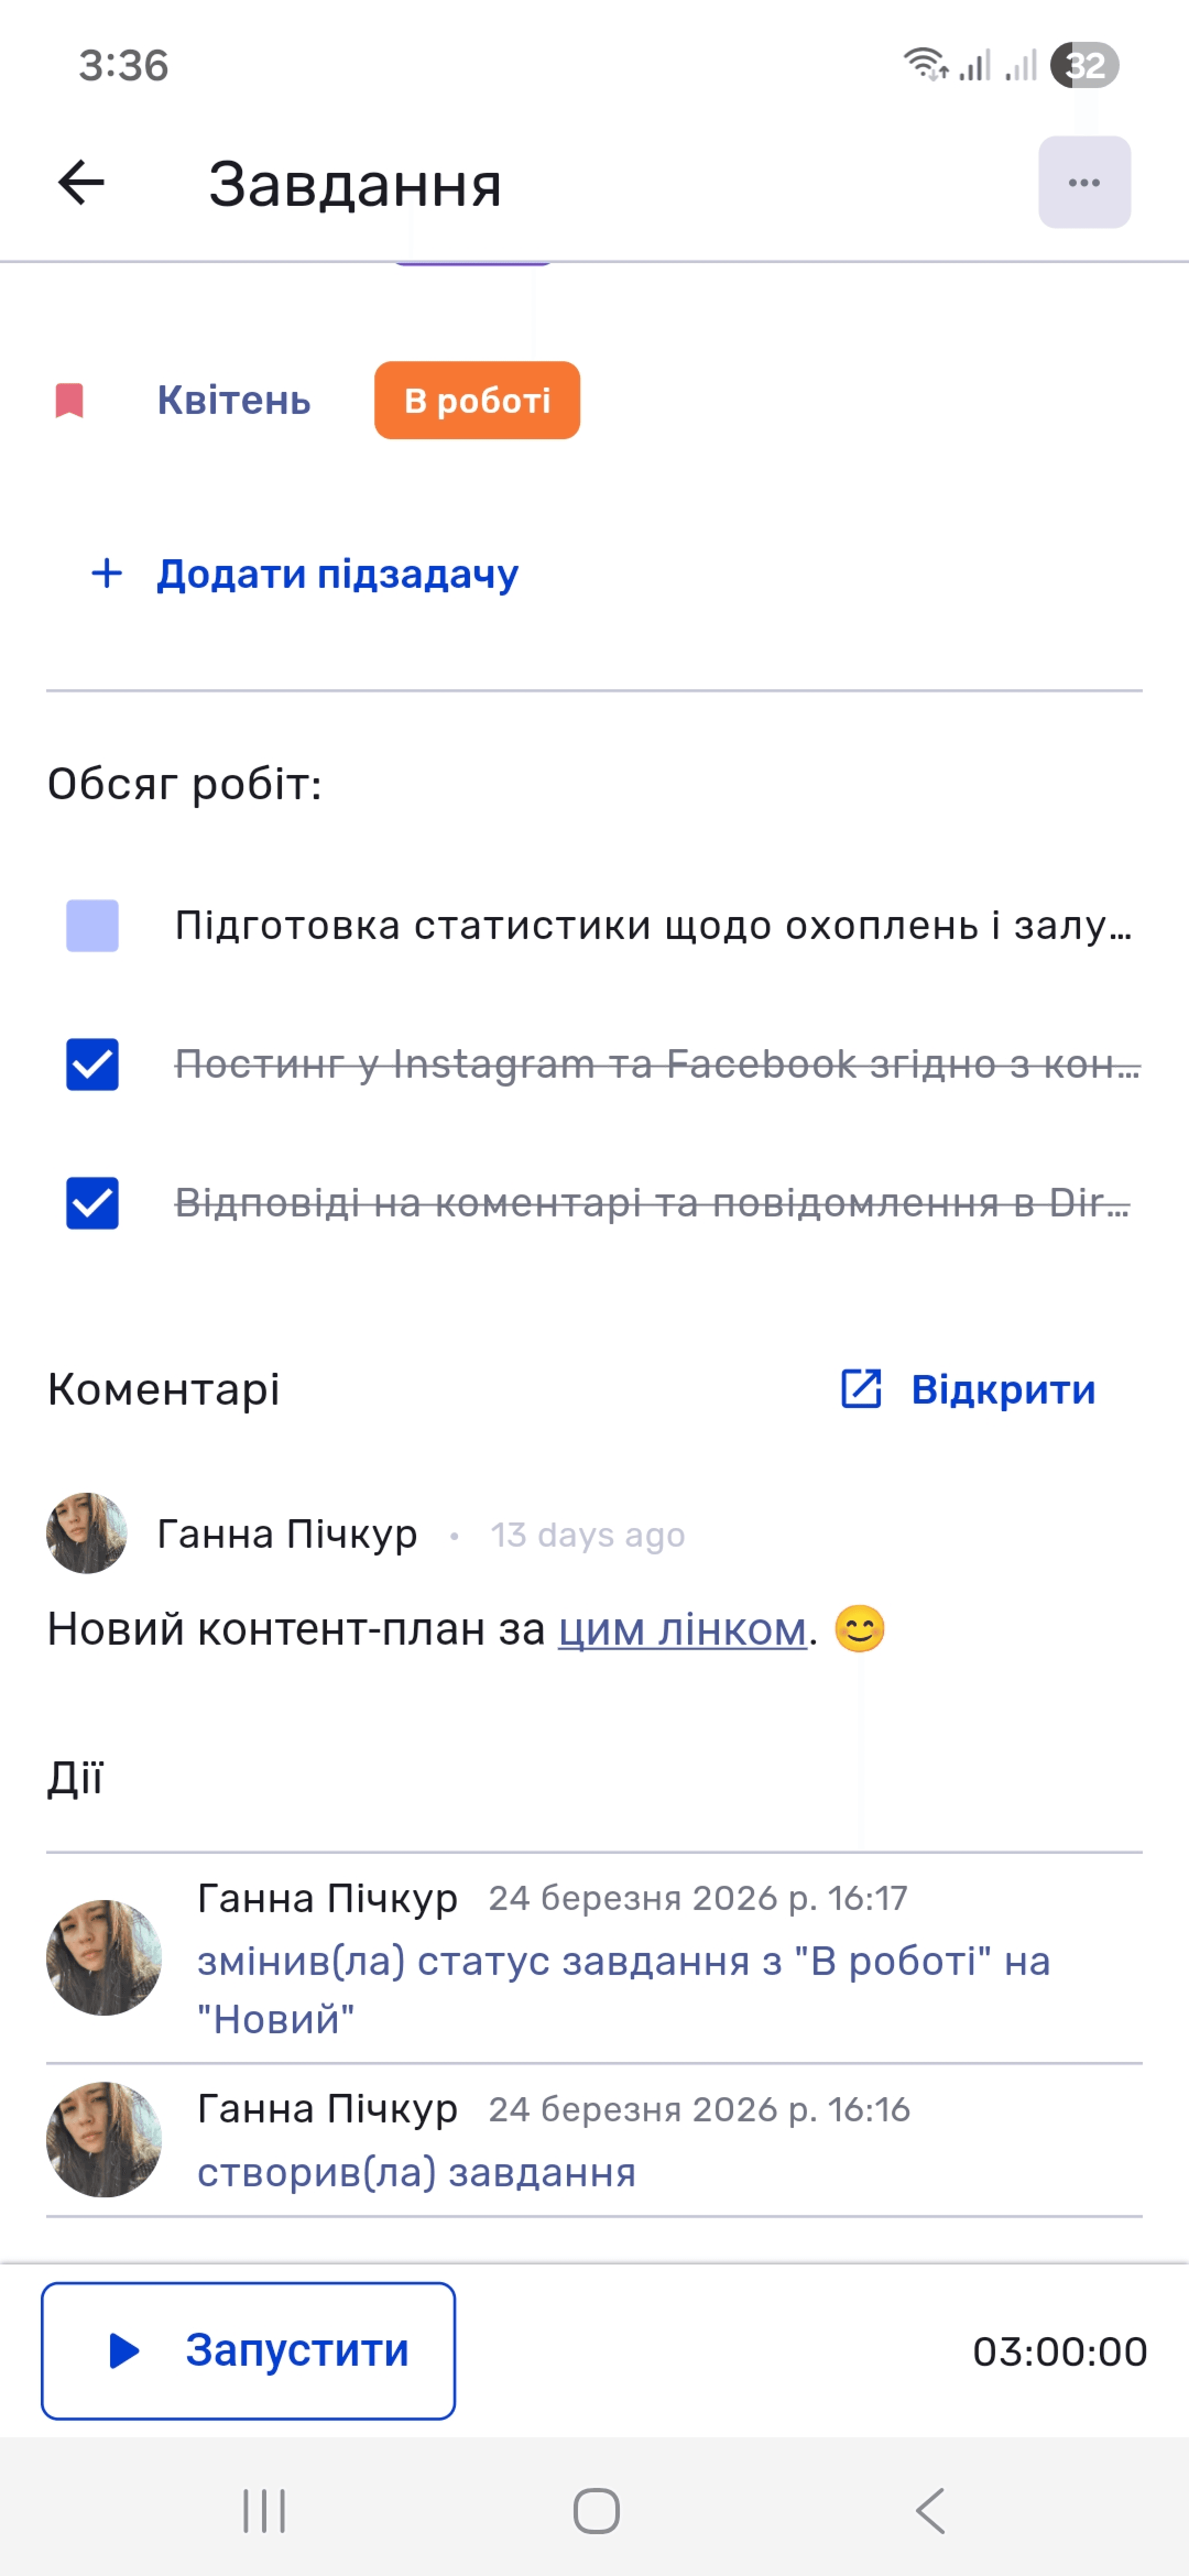
Tap the task itself to open its full card. It contains the status, task creator, responsible employee and participants, deadline, planned and spent time, priority, subtasks, checklists, comments, and action history. The Start button at the bottom of the card starts the time tracker.
Search and Filters
If there are many tasks, pagination with page numbers and the total entry count appears at the bottom of the list. To quickly find a task by name, tap the search icon (🔍) at the top of the screen.
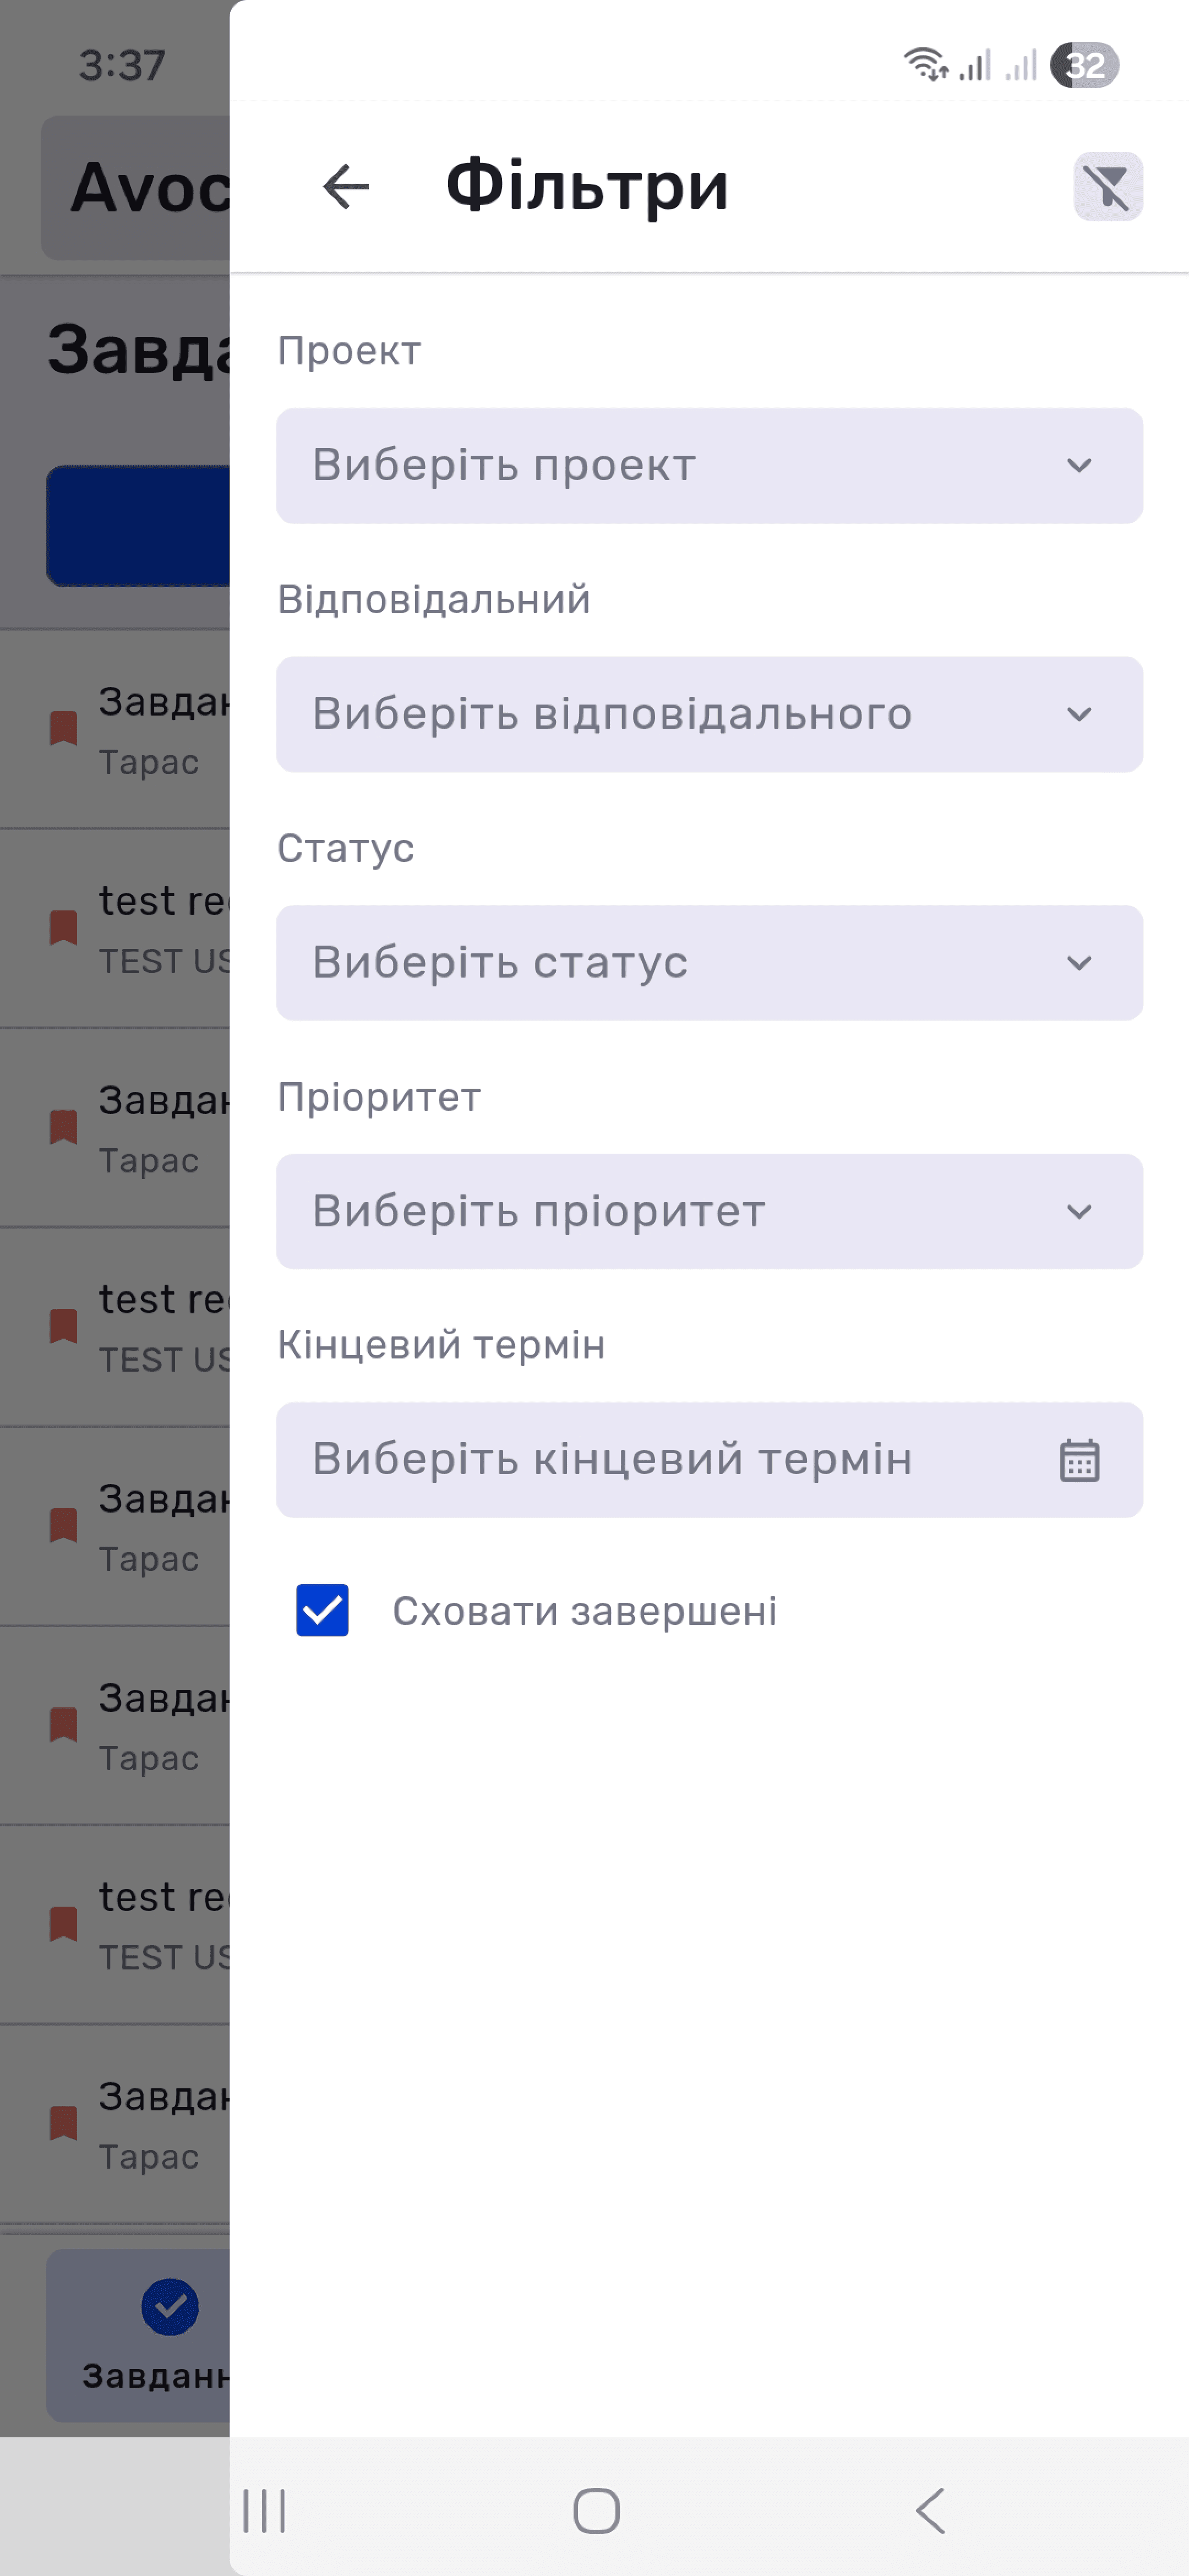
The filter icon (⚙) opens a panel with project, responsible employee, status, priority, and deadline parameters. Hide Completed hides completed tasks.
Creating a Task
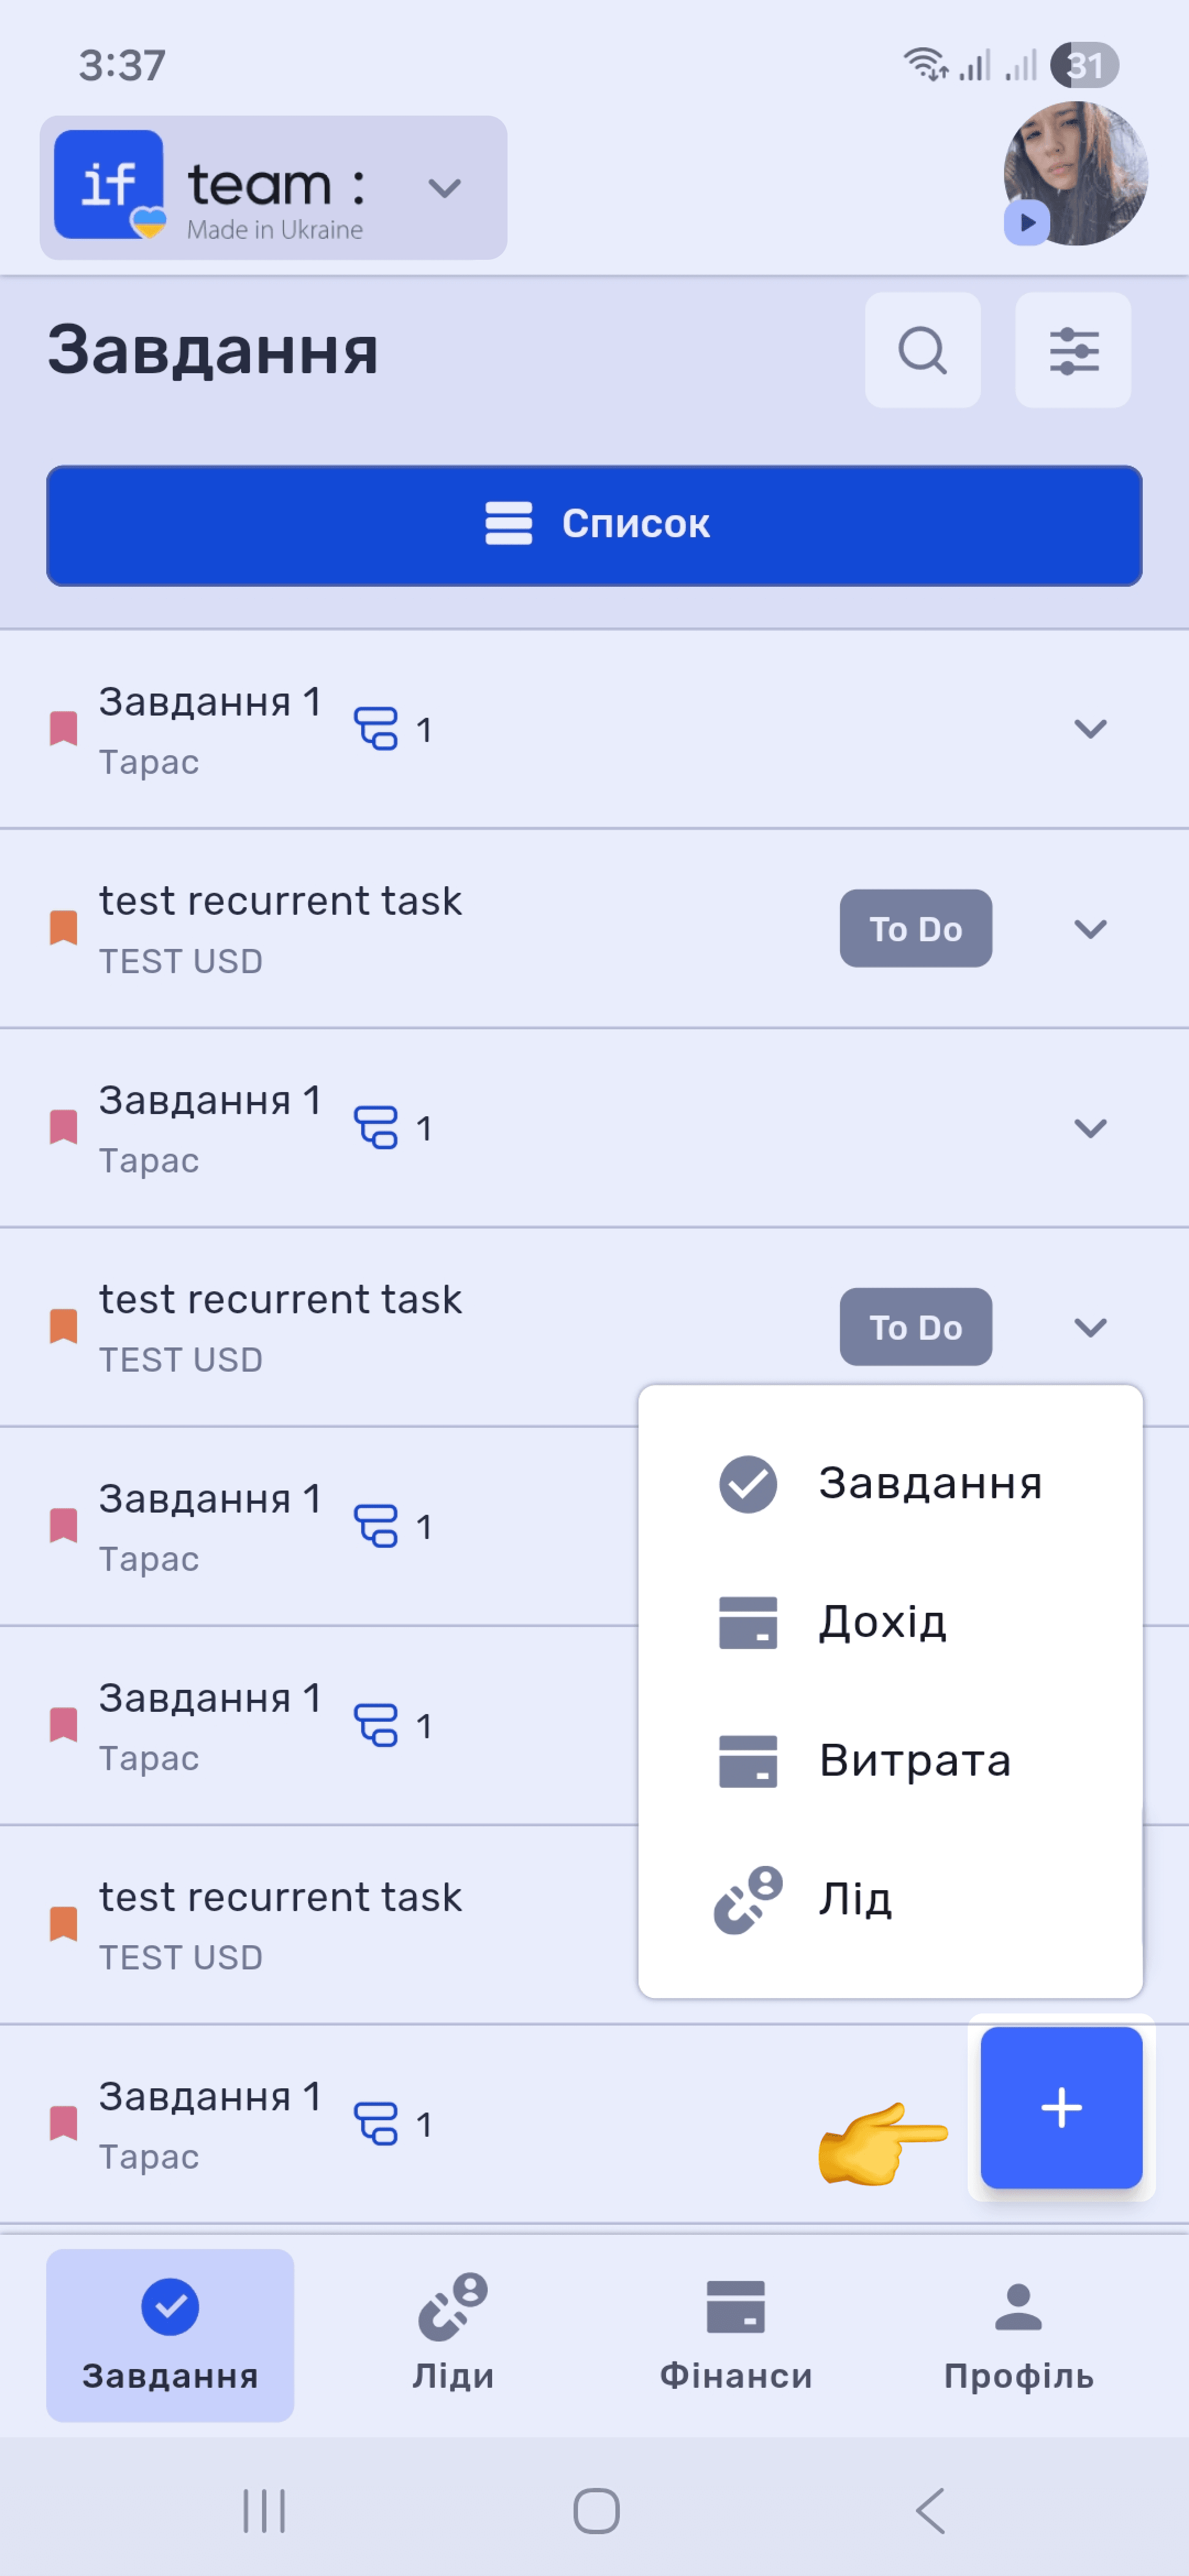
Tap + in the lower-right corner of the screen. Select Task from the pop-up menu.
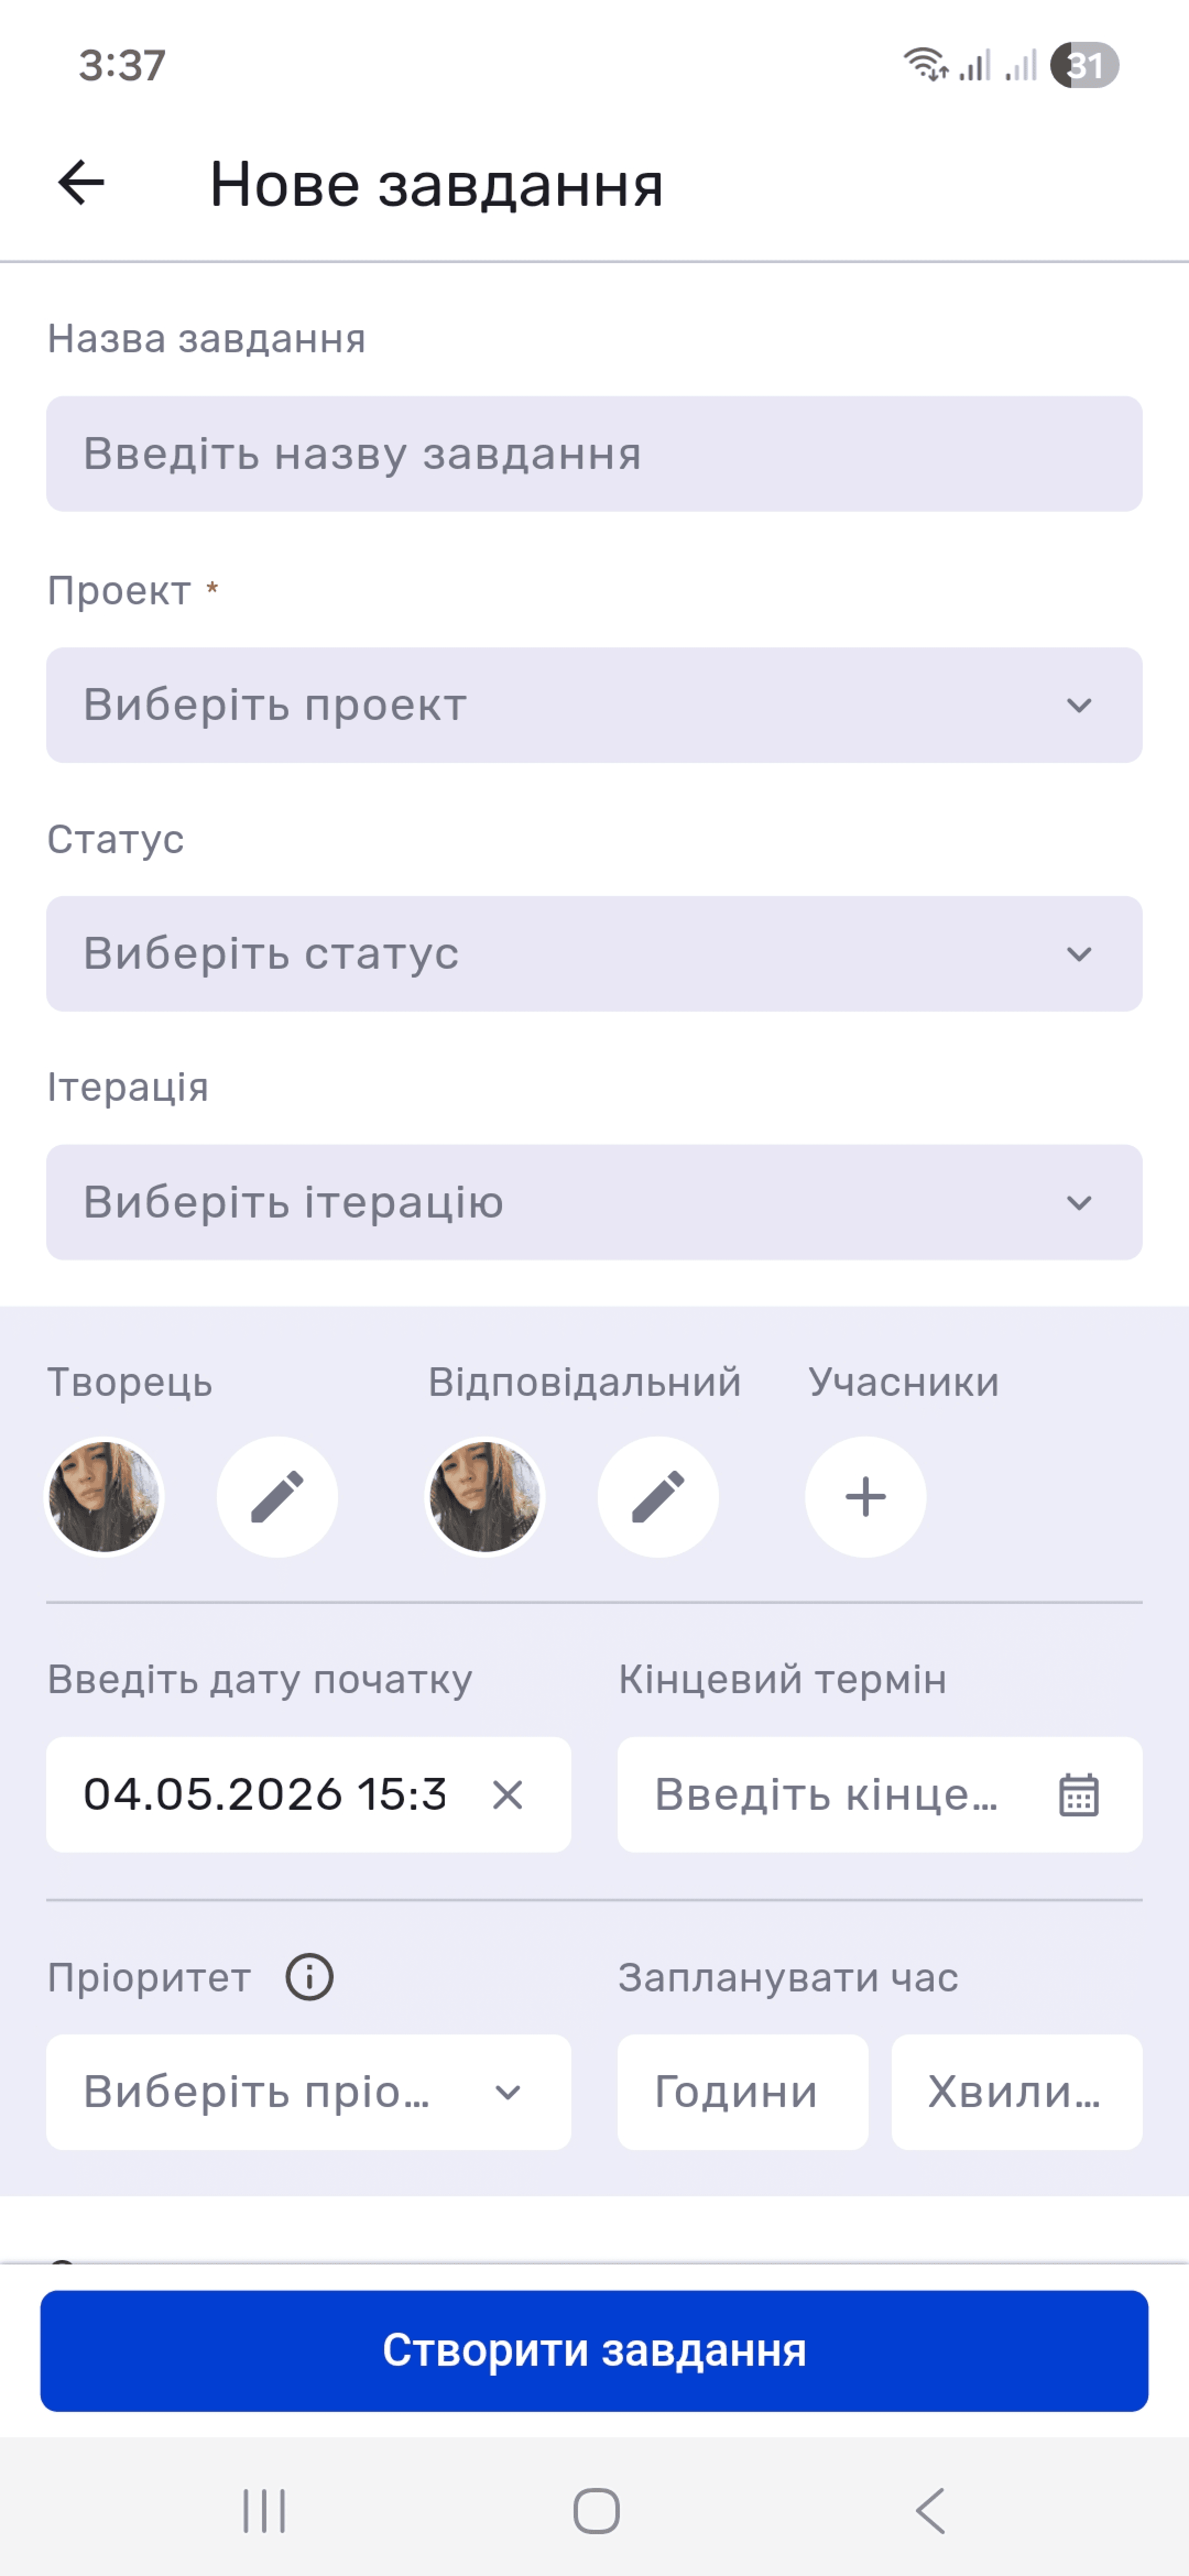
To create a task, complete the form fields: task name, required project, status, iteration, task creator, responsible employee and participants, start date and deadline, priority, and planned time.
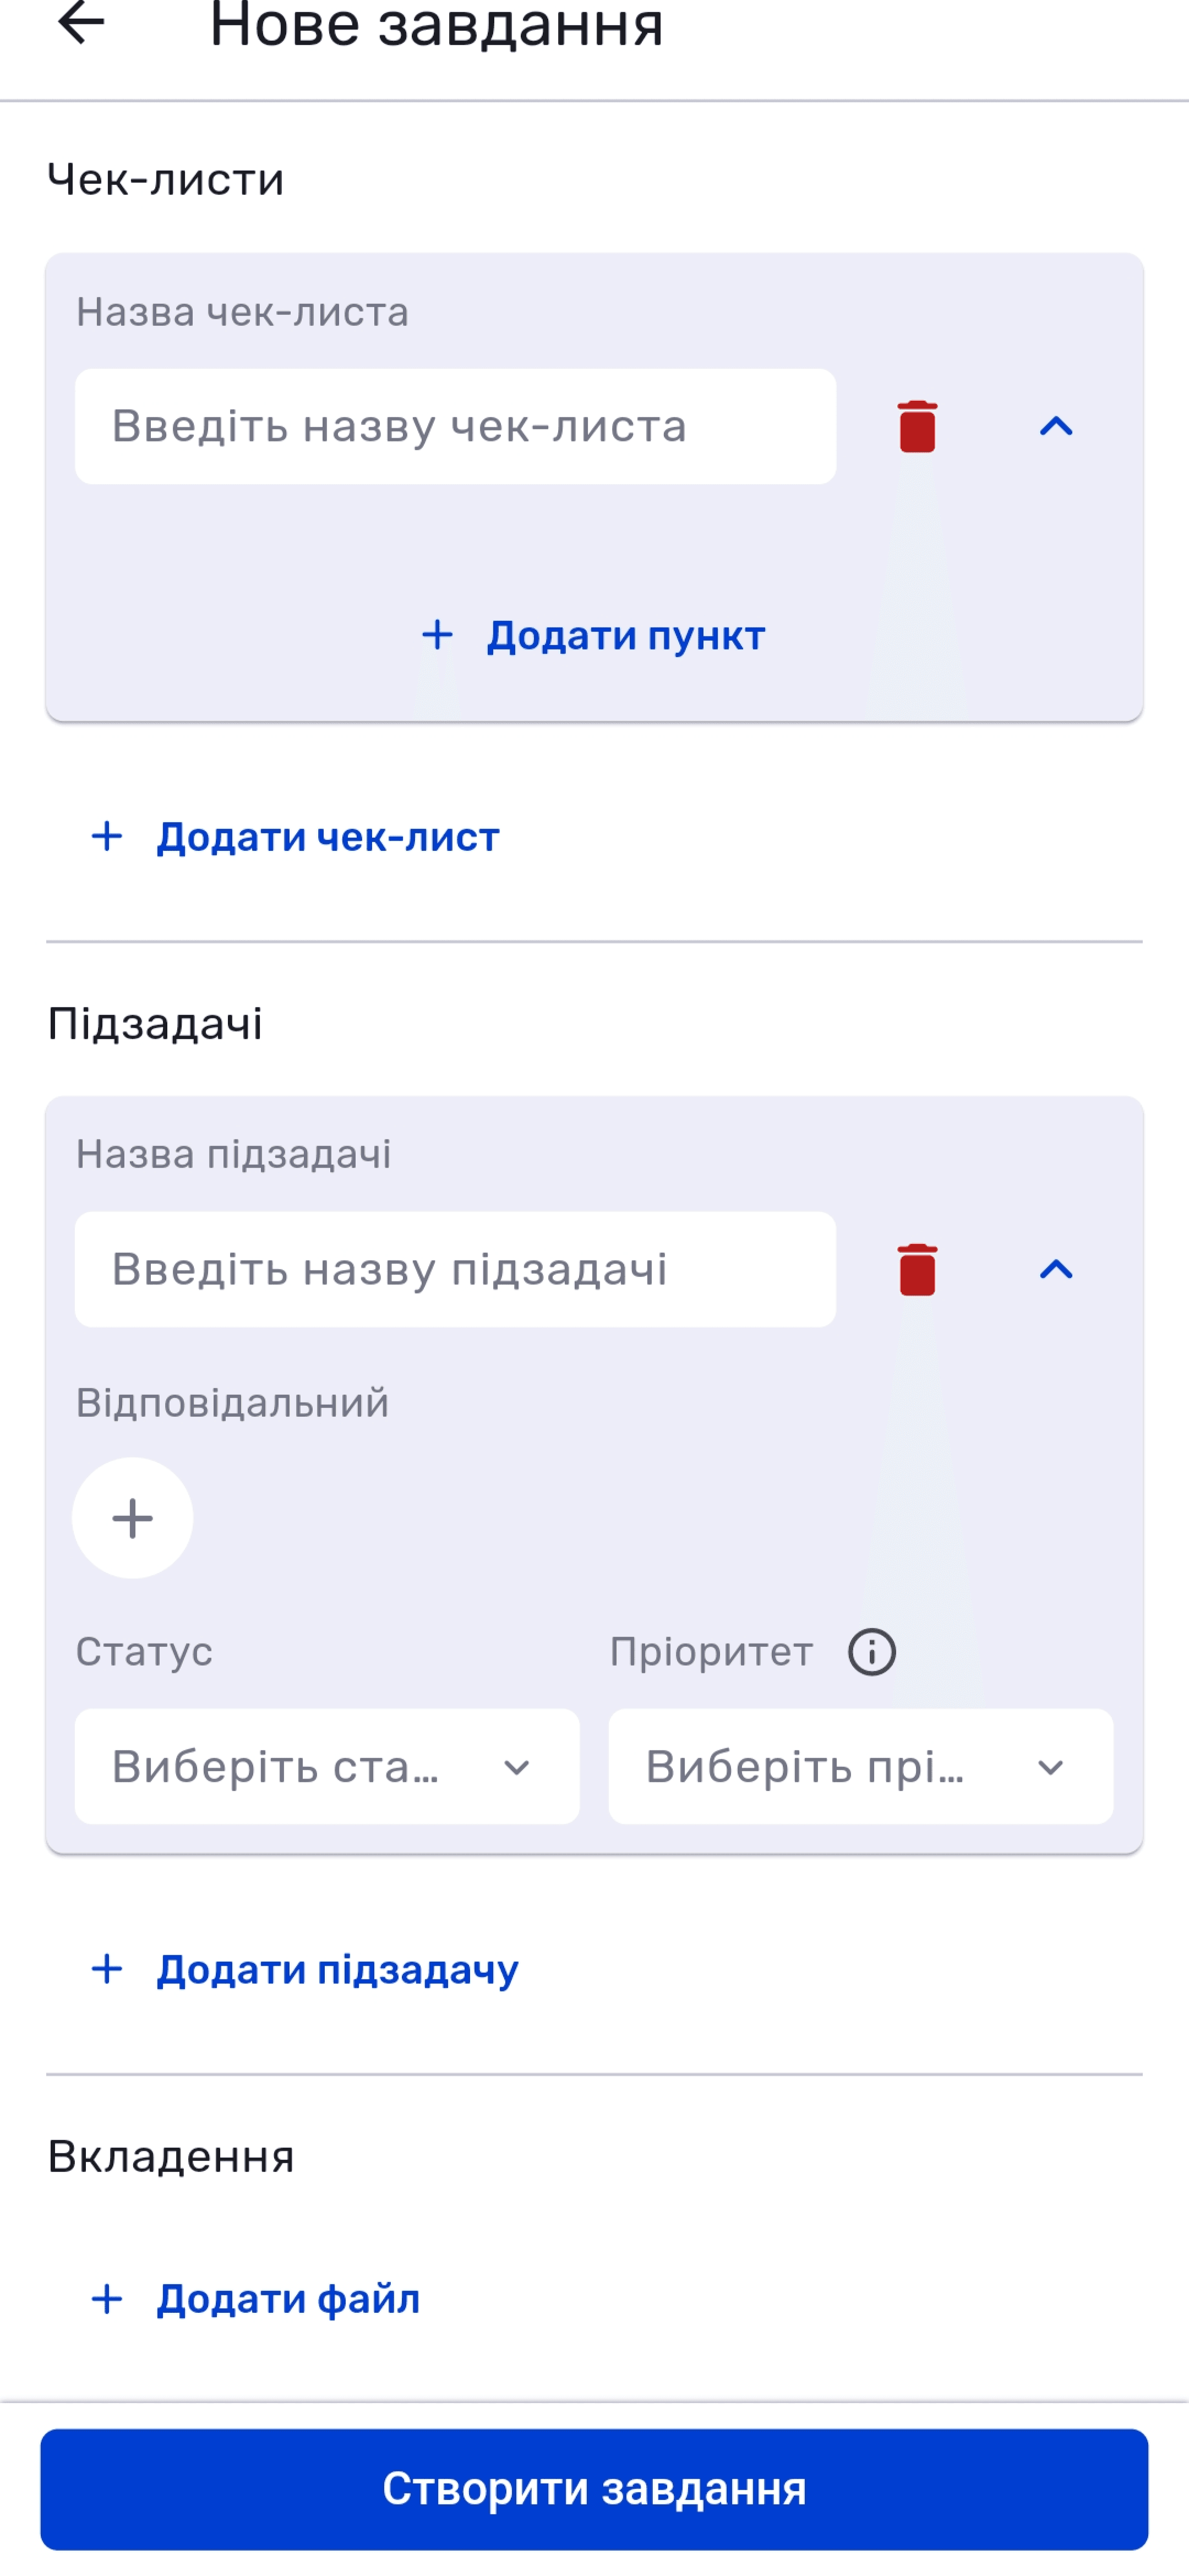
Below, you can add a description using the text editor, as well as checklists, subtasks, and attachments.
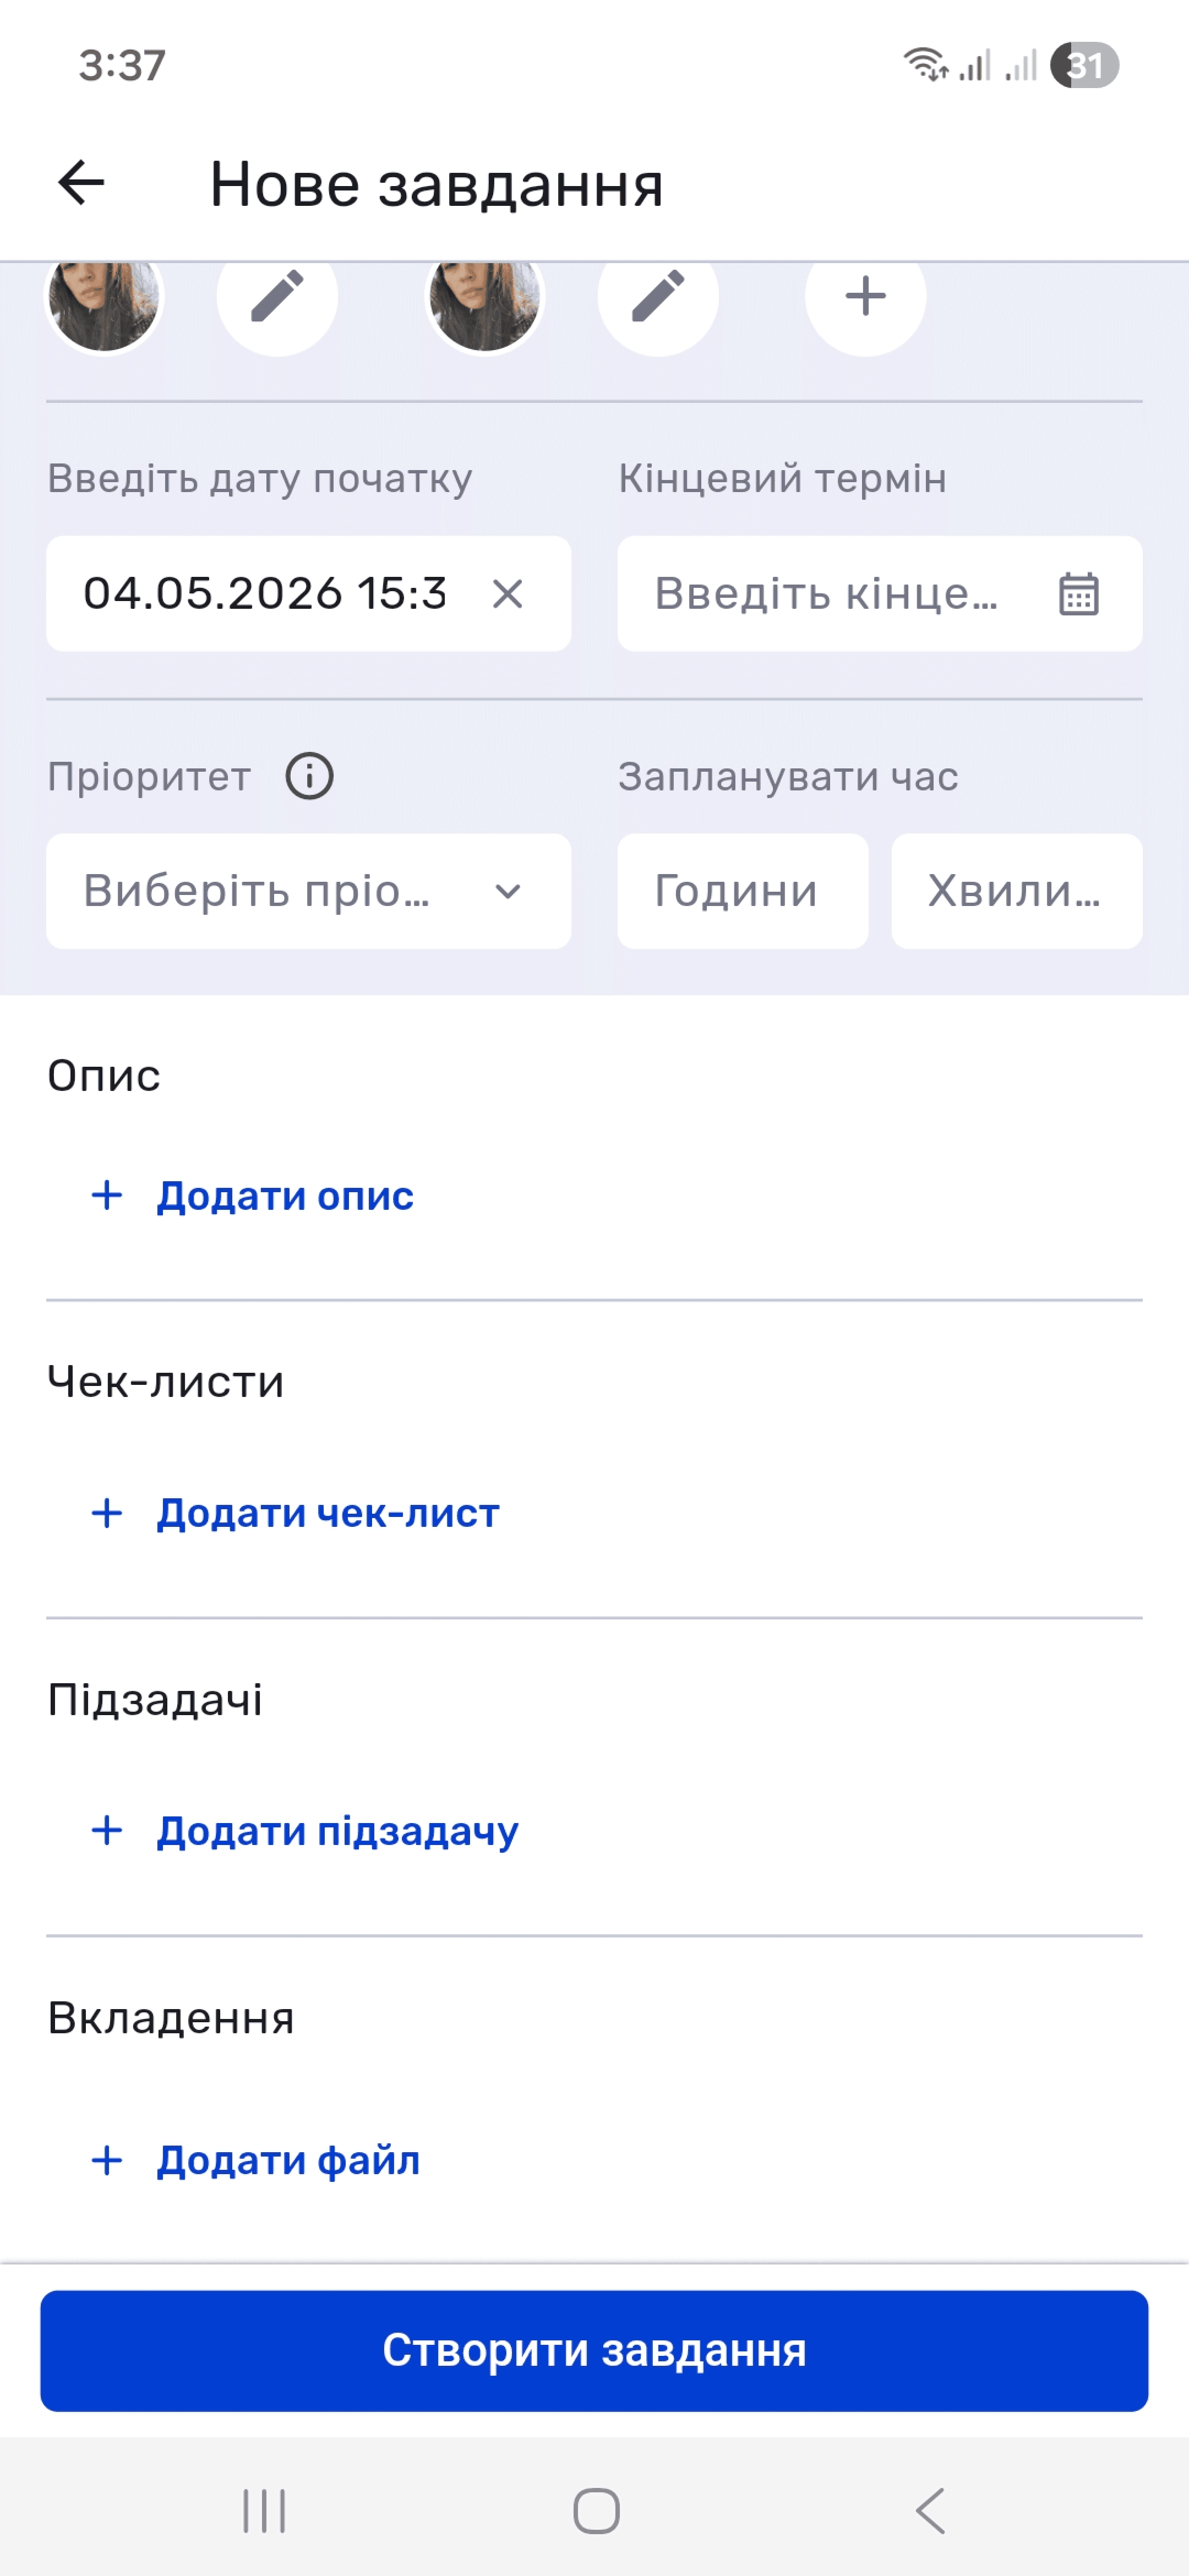
You can create checklists and subtasks while creating the task or add them to an existing task later. Additional settings are available for subtasks: responsible employee, status, and priority. When everything is complete, tap Create Task.
Leads
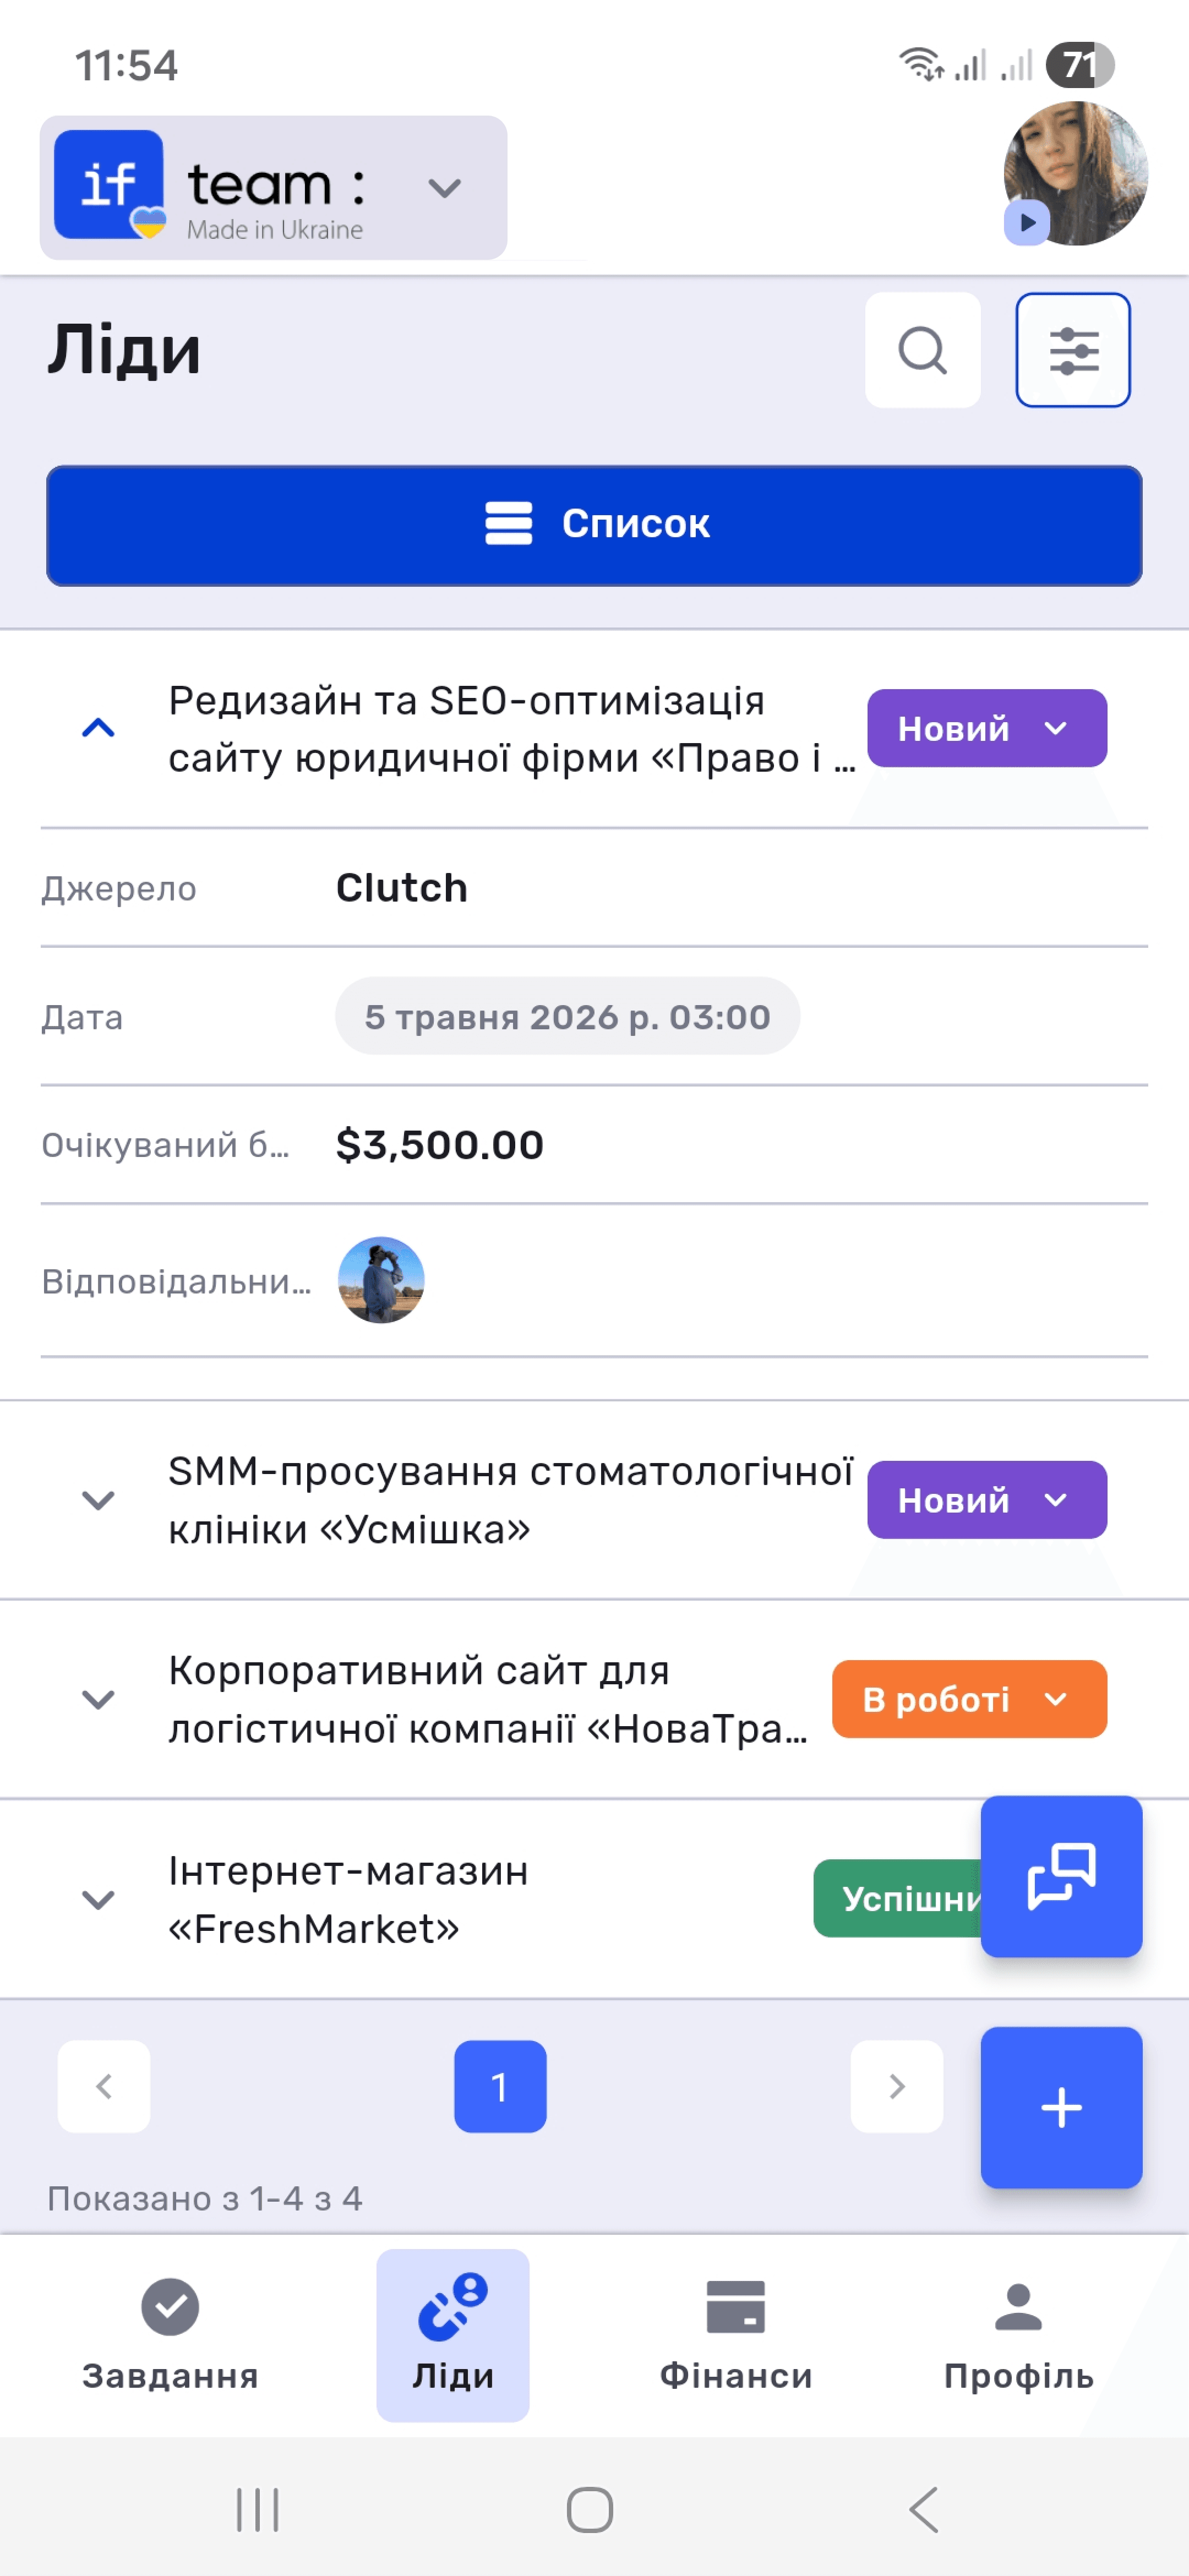
The Leads tab displays all leads with their statuses. Tap the arrow (˅) to expand a lead summary showing its source, date, expected budget, and responsible employee.
Lead Card
Tap a lead to open its full card. It contains an editable status, responsible employee, participants, expected budget, description, attached files, comments, and complete action history. Edit and Delete are available from the menu (⋯) in the upper-right corner.
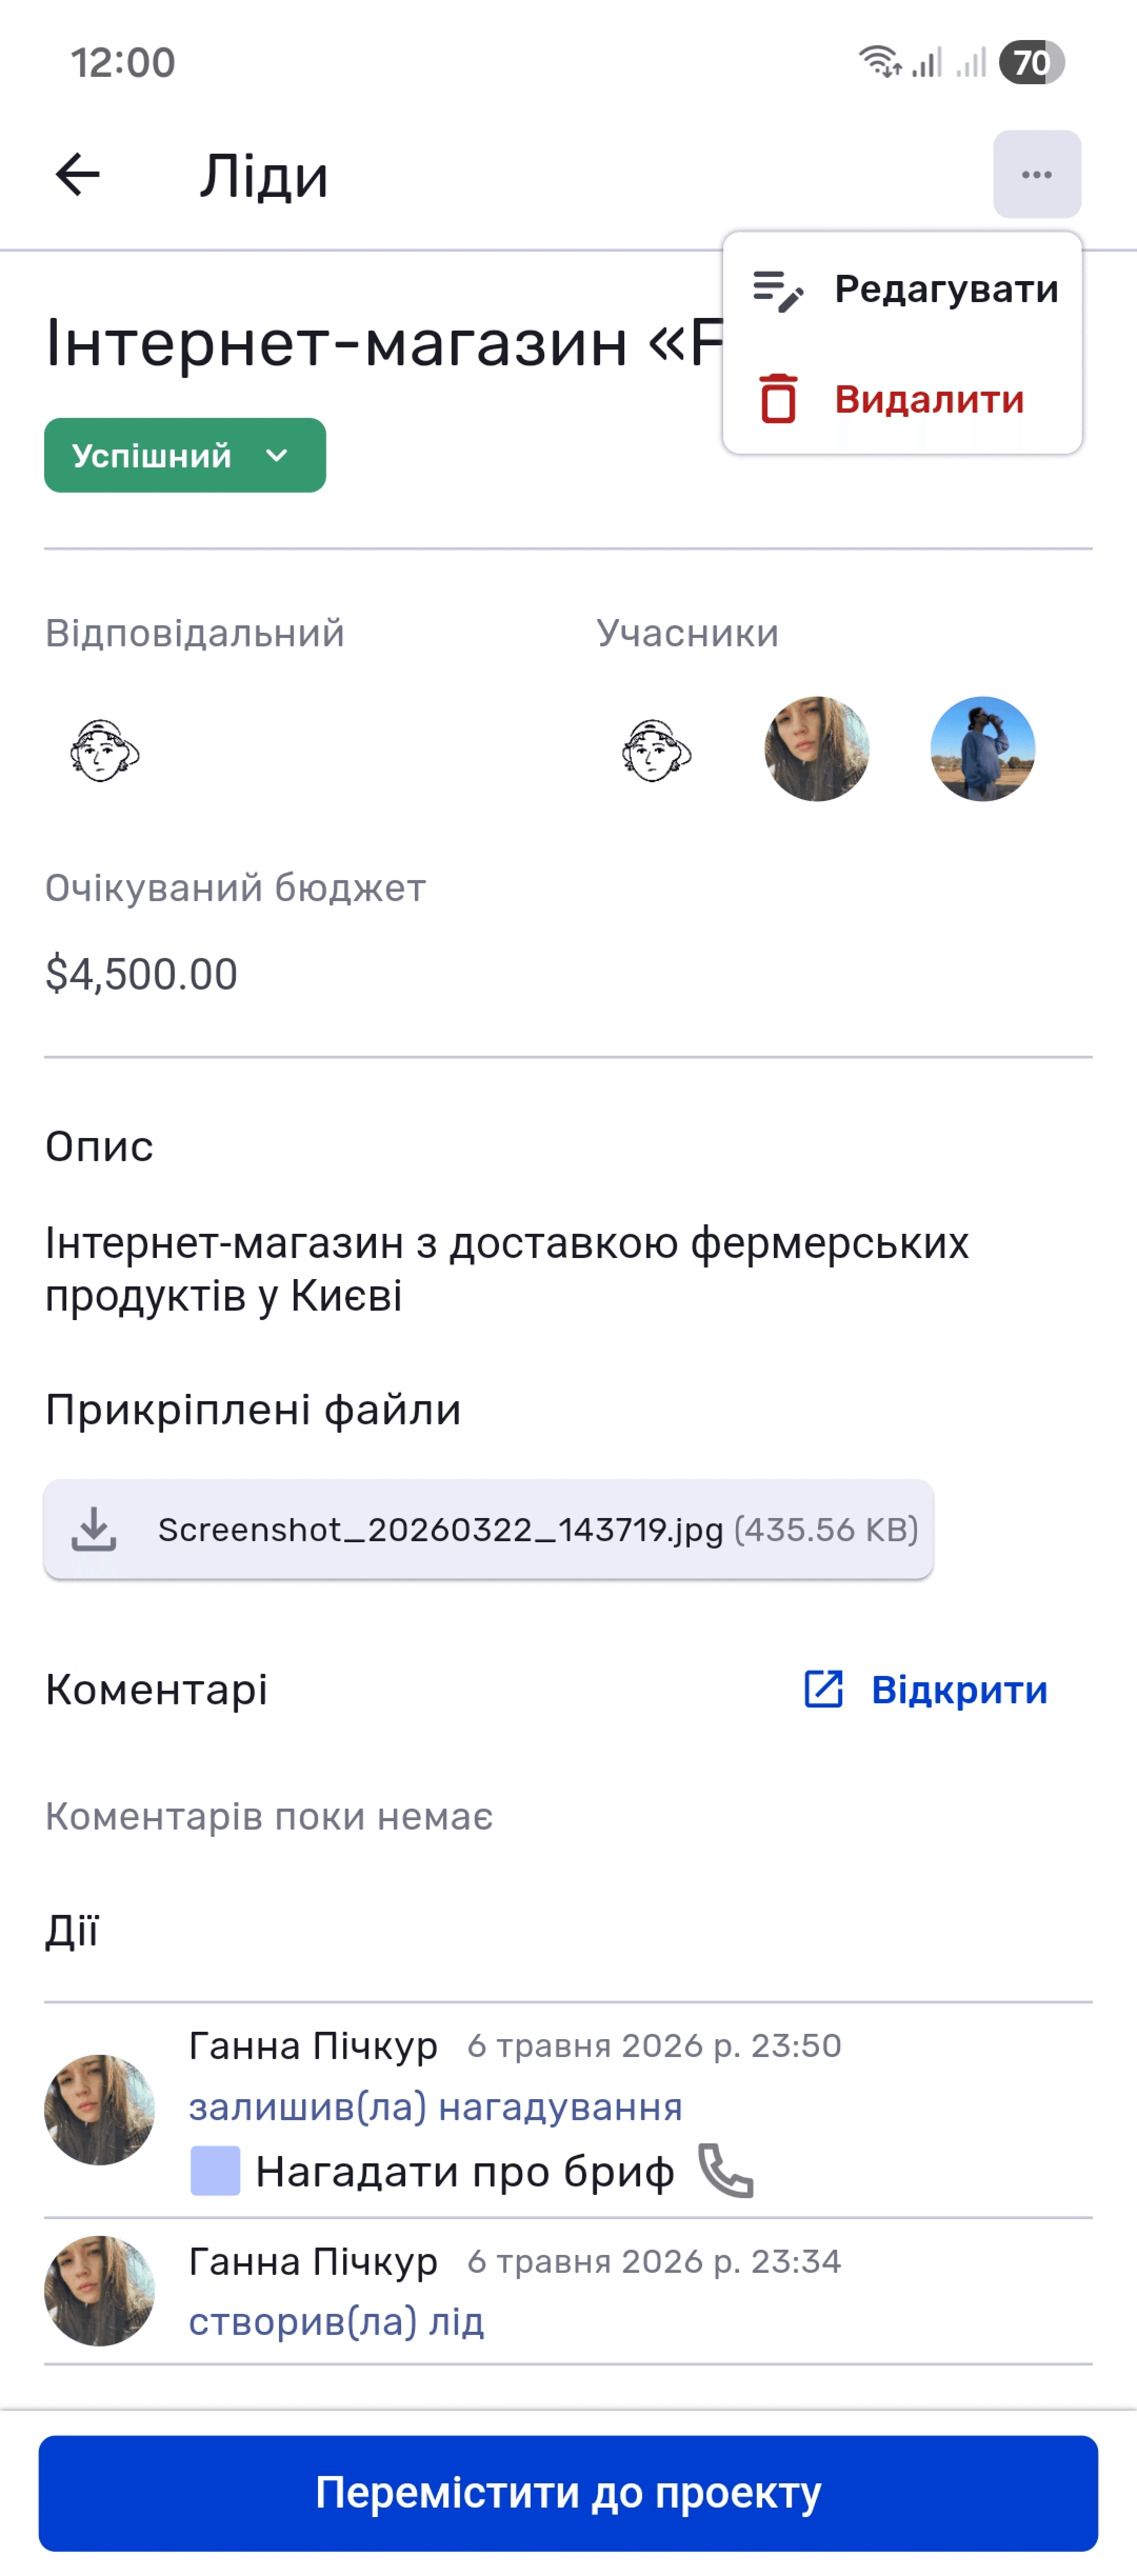
The Move to Project button at the bottom of the card converts the lead into a project with one tap.
Creating a Lead
Tap + in the lower-right corner and select Lead from the pop-up menu.
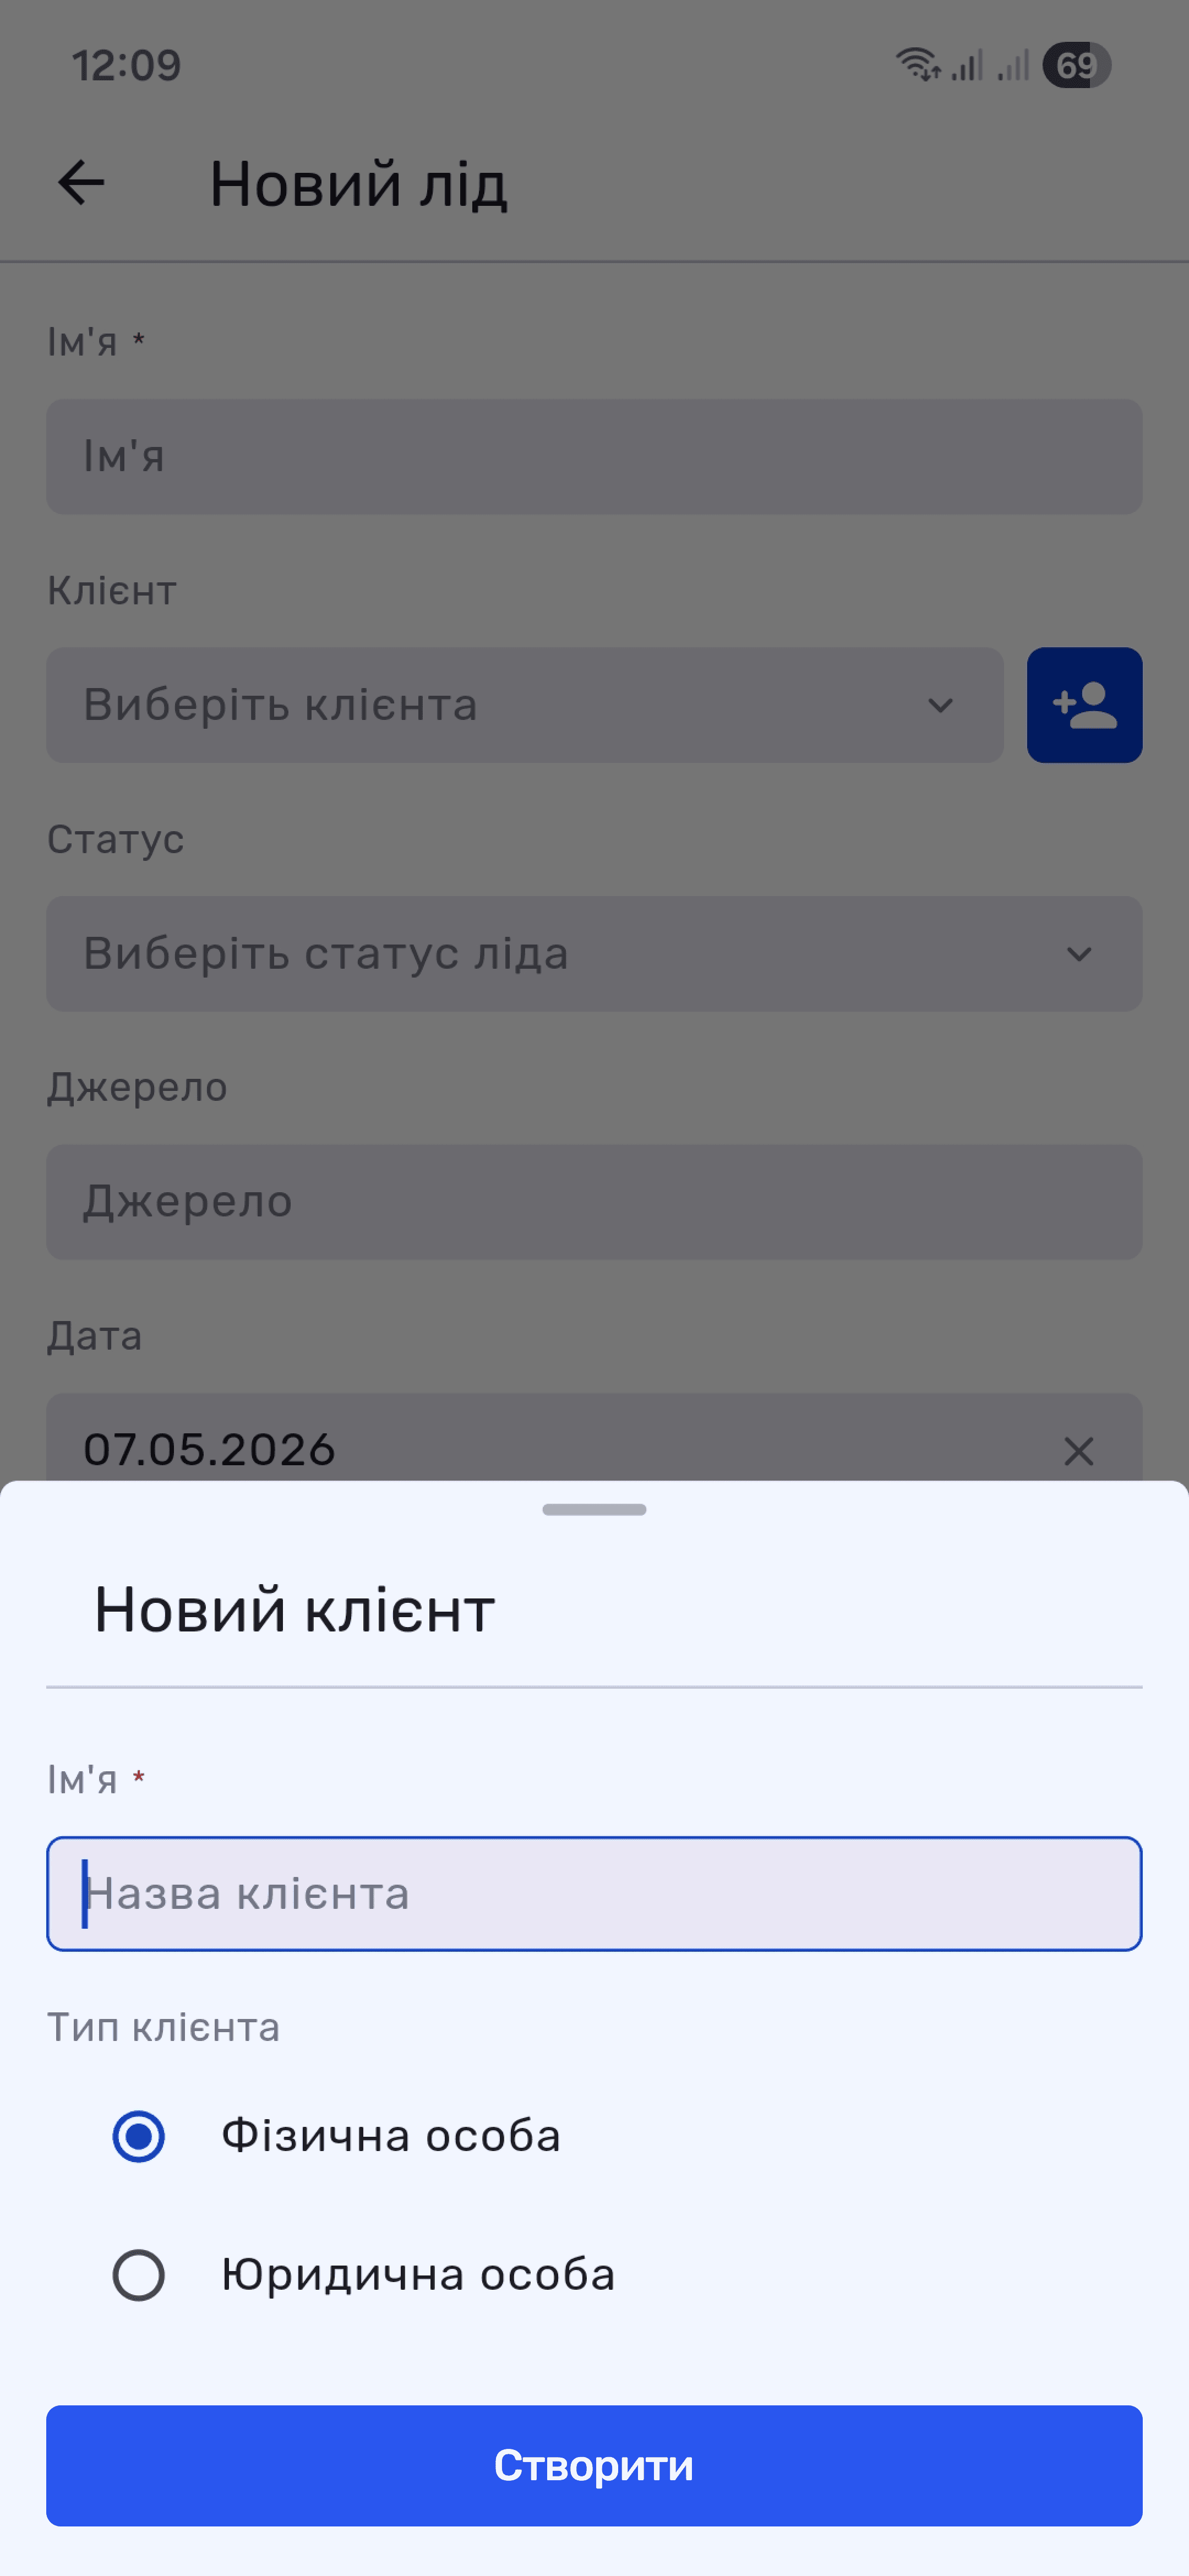
Enter the lead name and select a client from the list. If the required client is not yet in the system, create one here: tap +, enter the name, and select the client type, Individual or Legal.
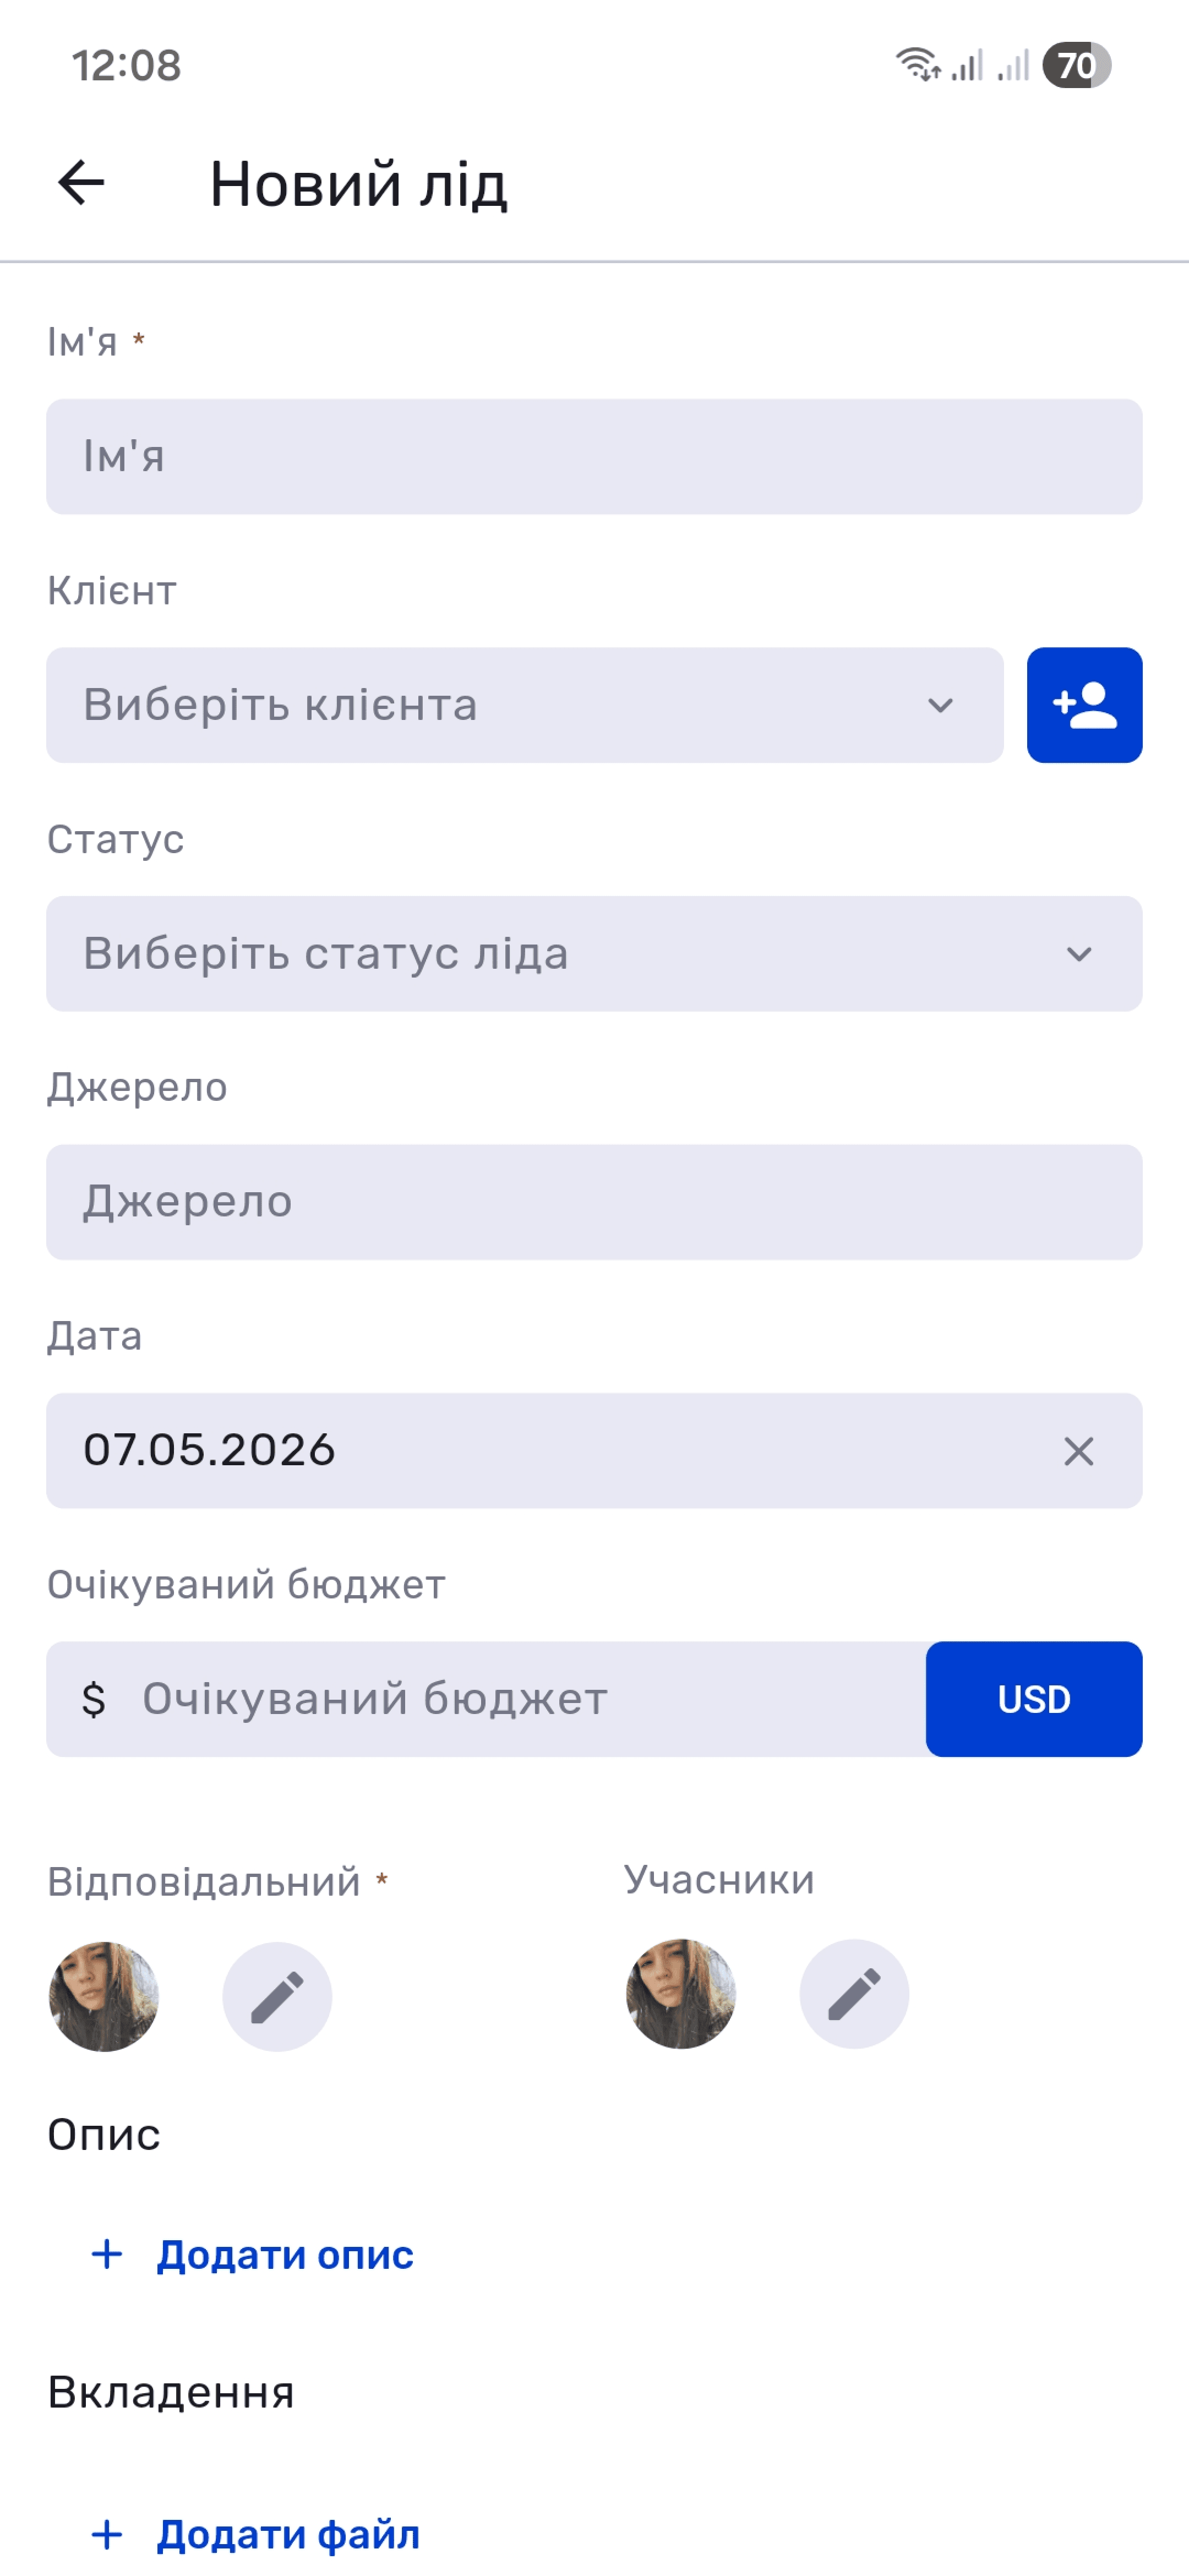
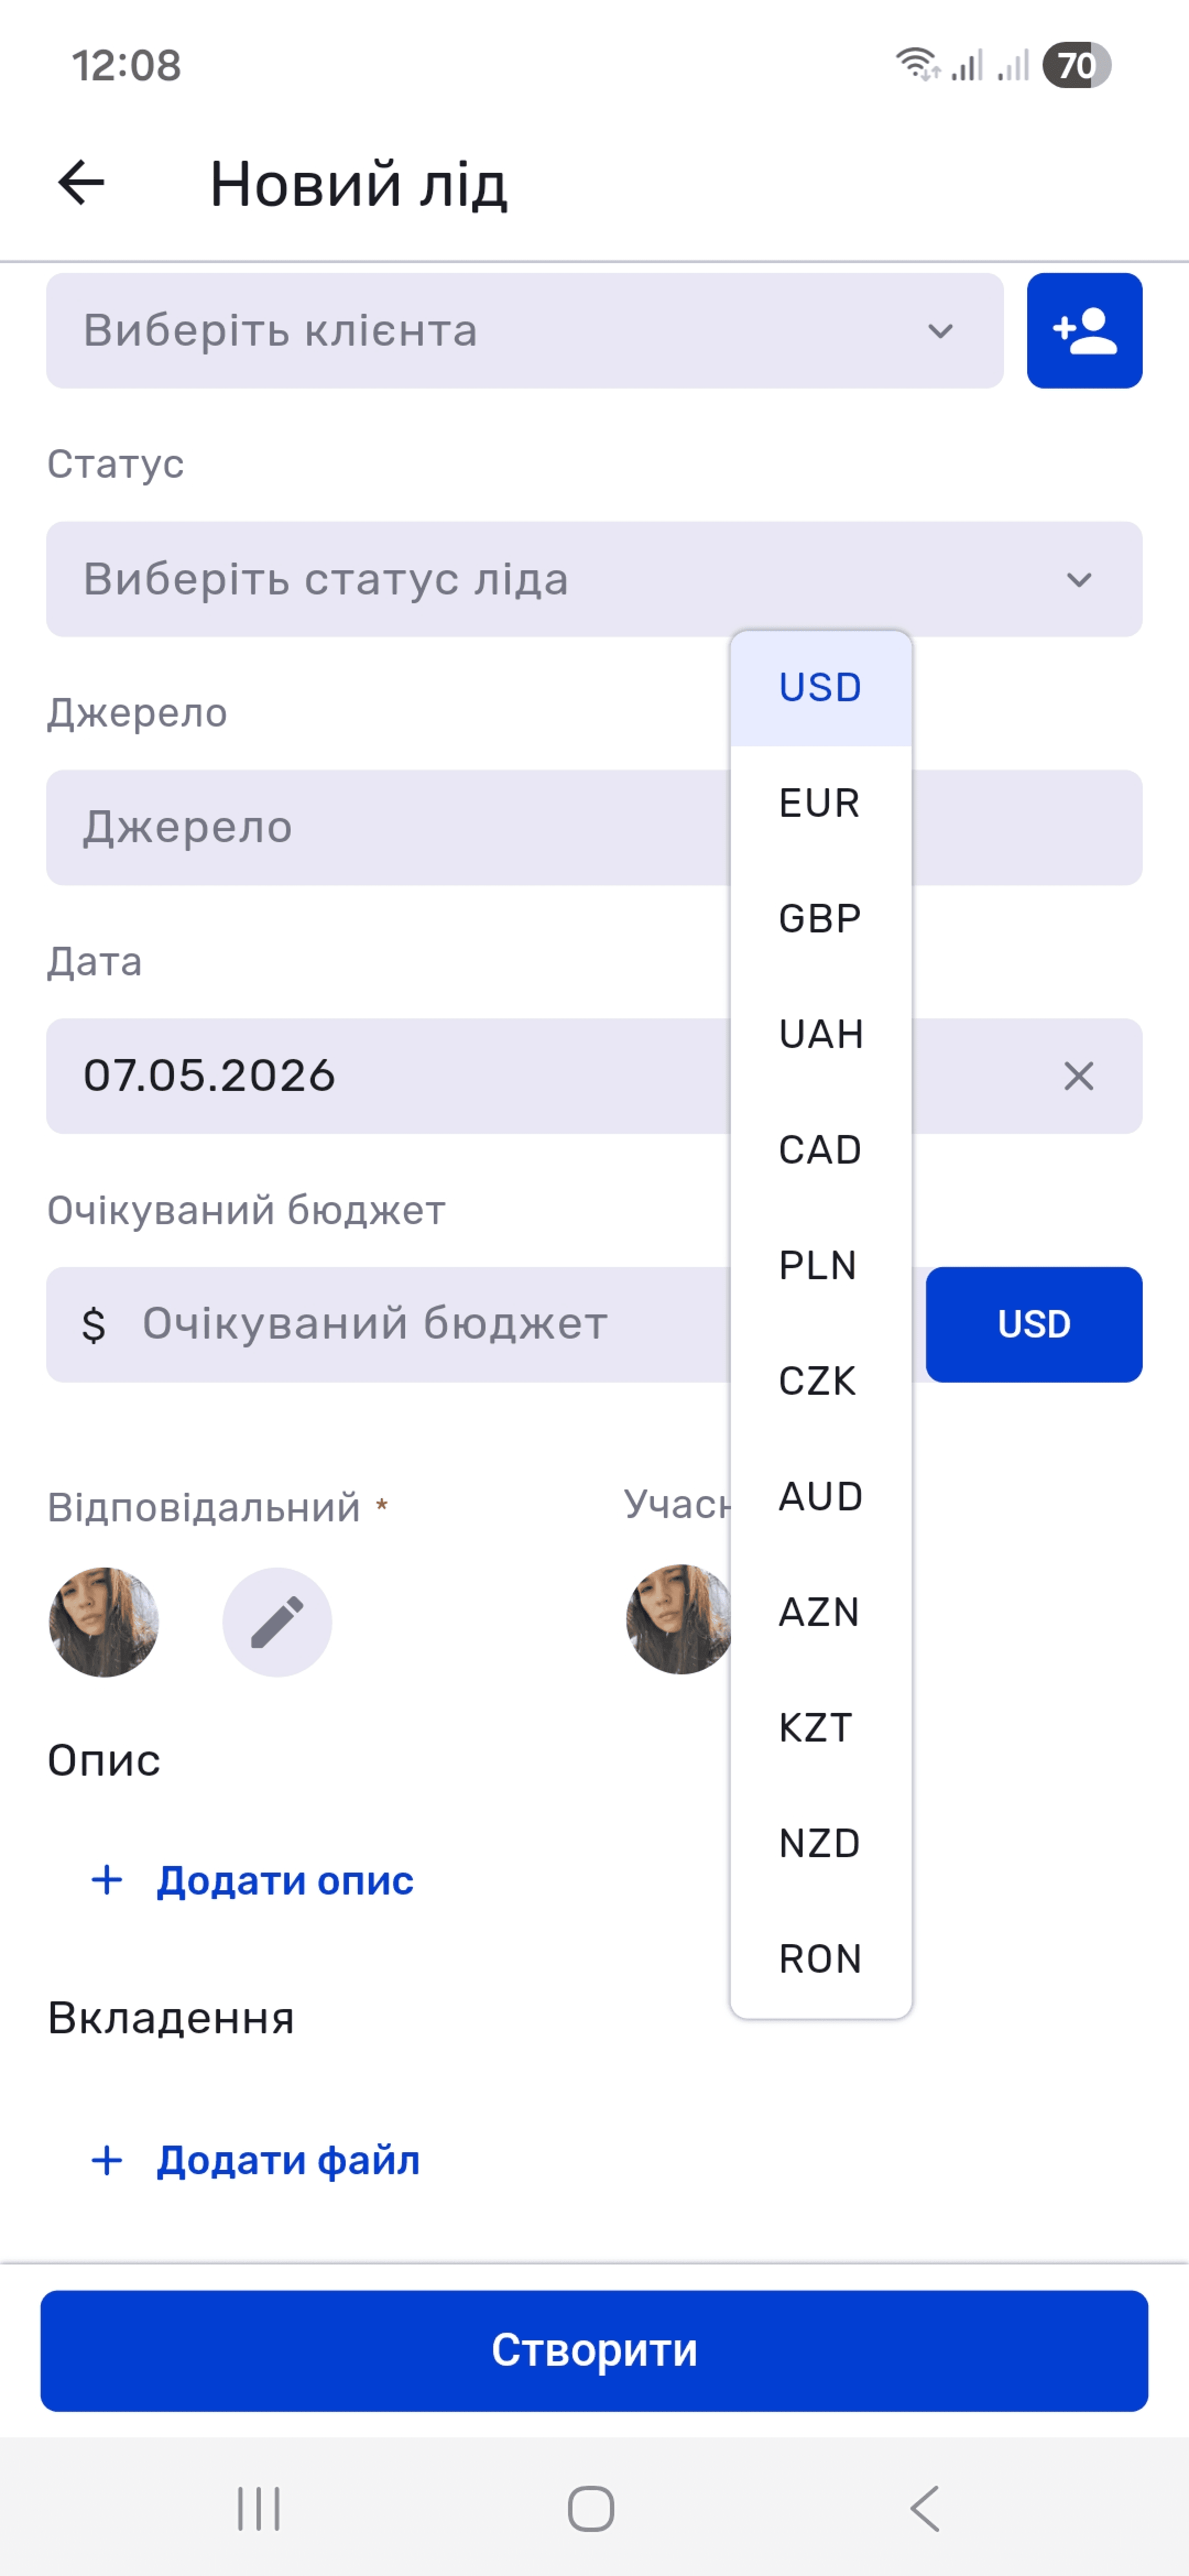
Next, specify the lead status and source, date, and expected budget with a currency selection such as USD, EUR, UAH, GBP, PLN, or another currency. Assign a responsible employee, which is required, and add participants if needed. You can add a description and attach files to the lead card. When everything is ready, tap Create.
Finance
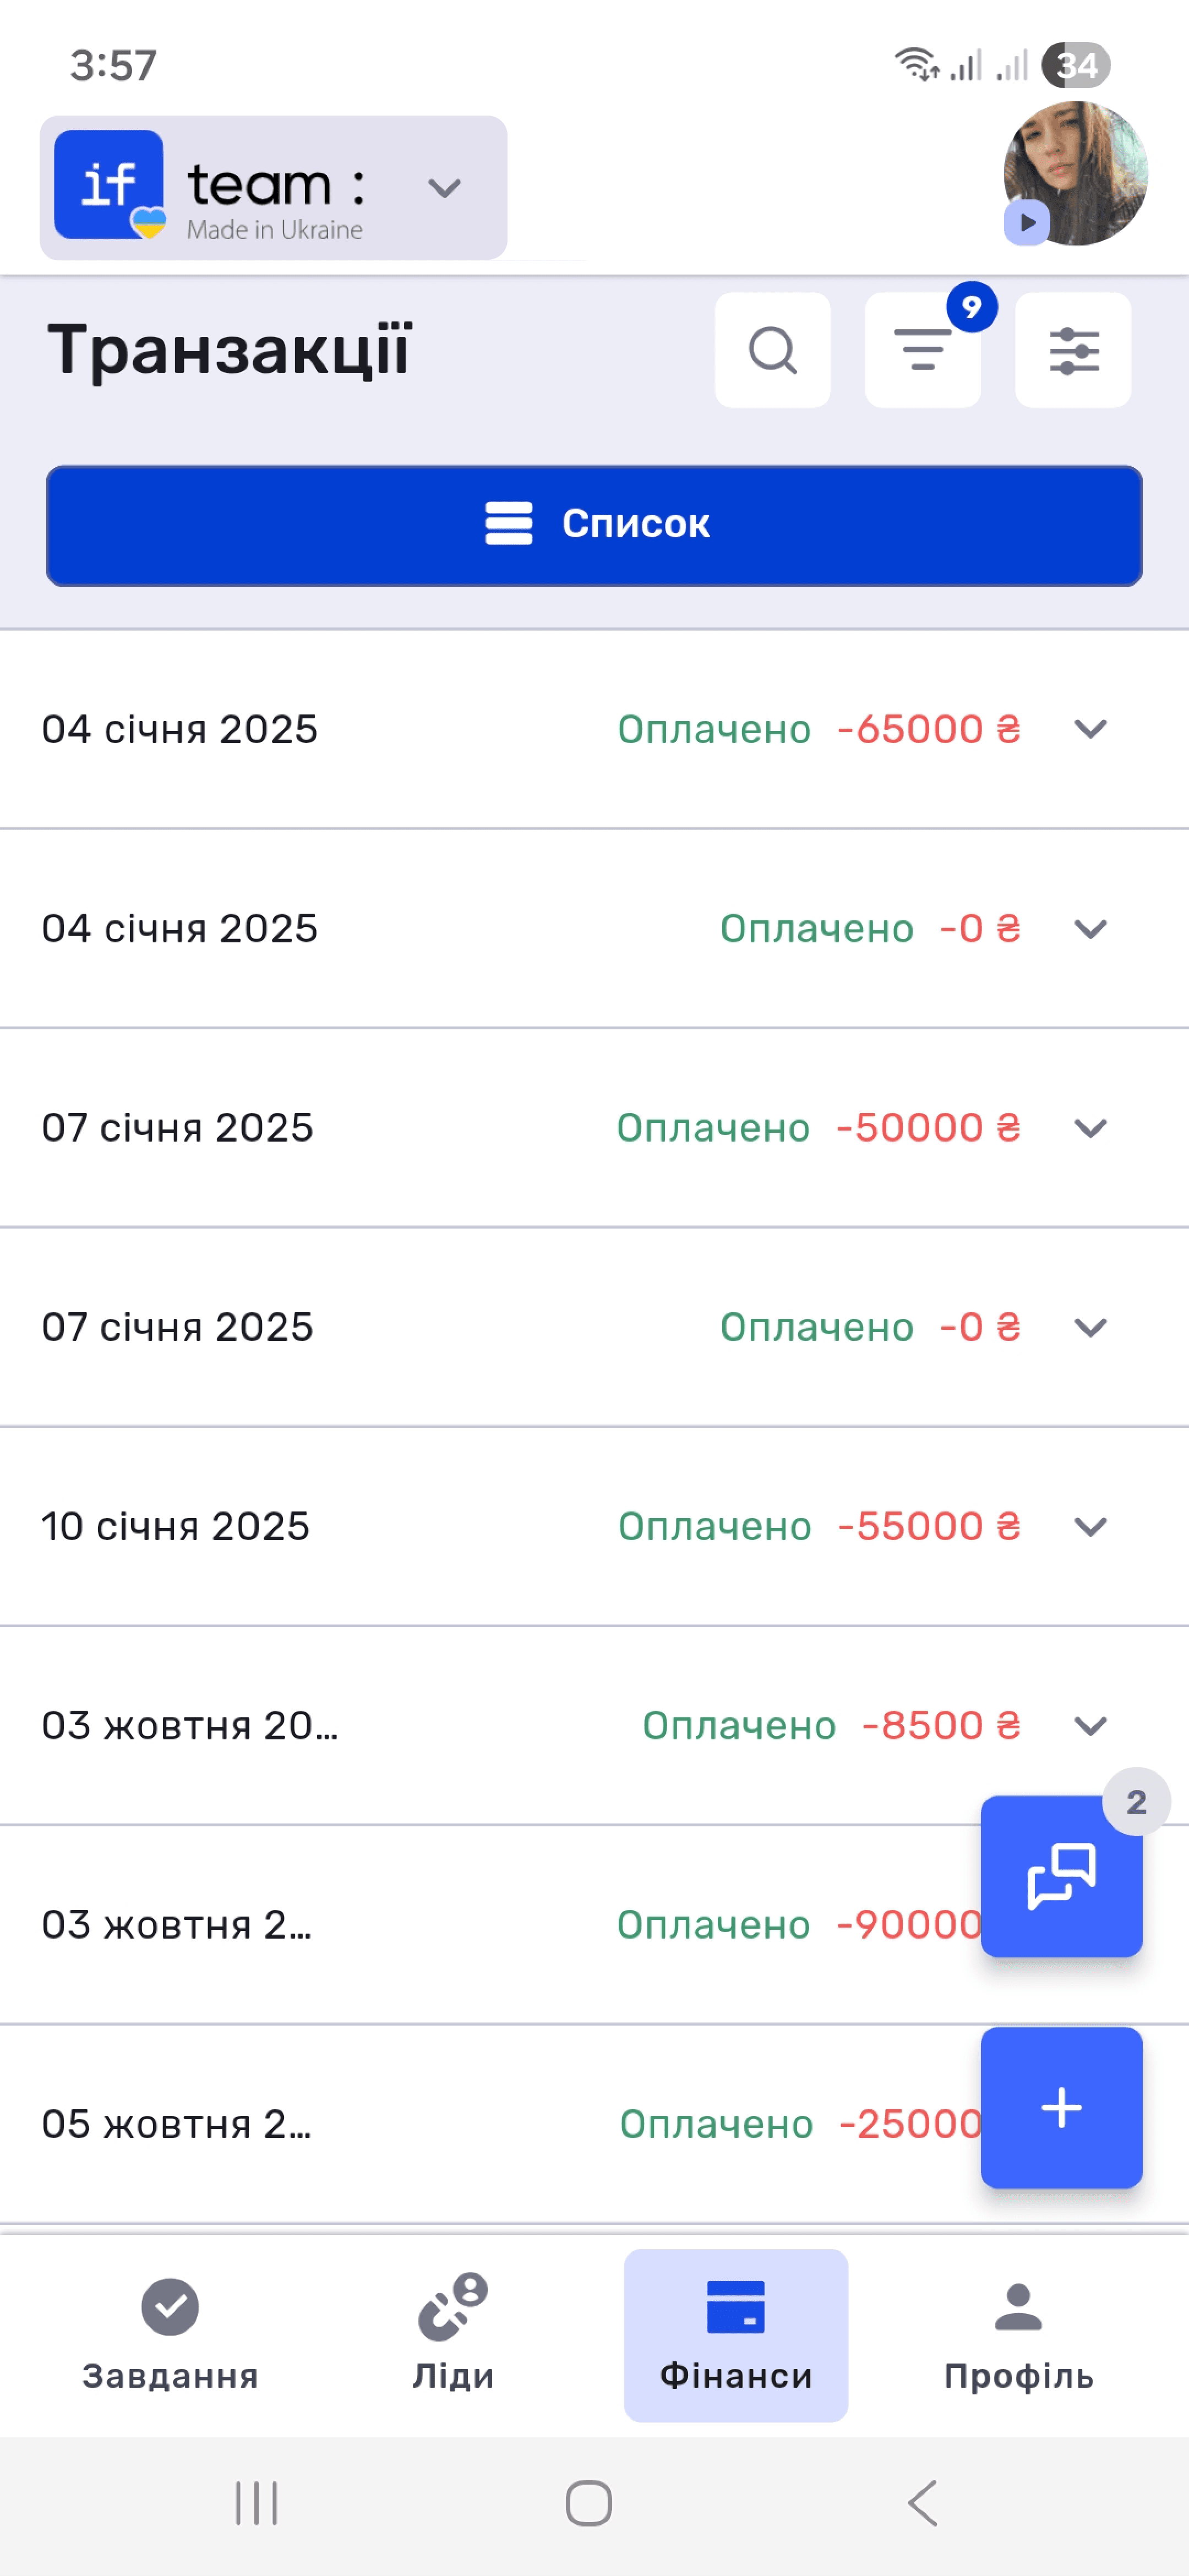
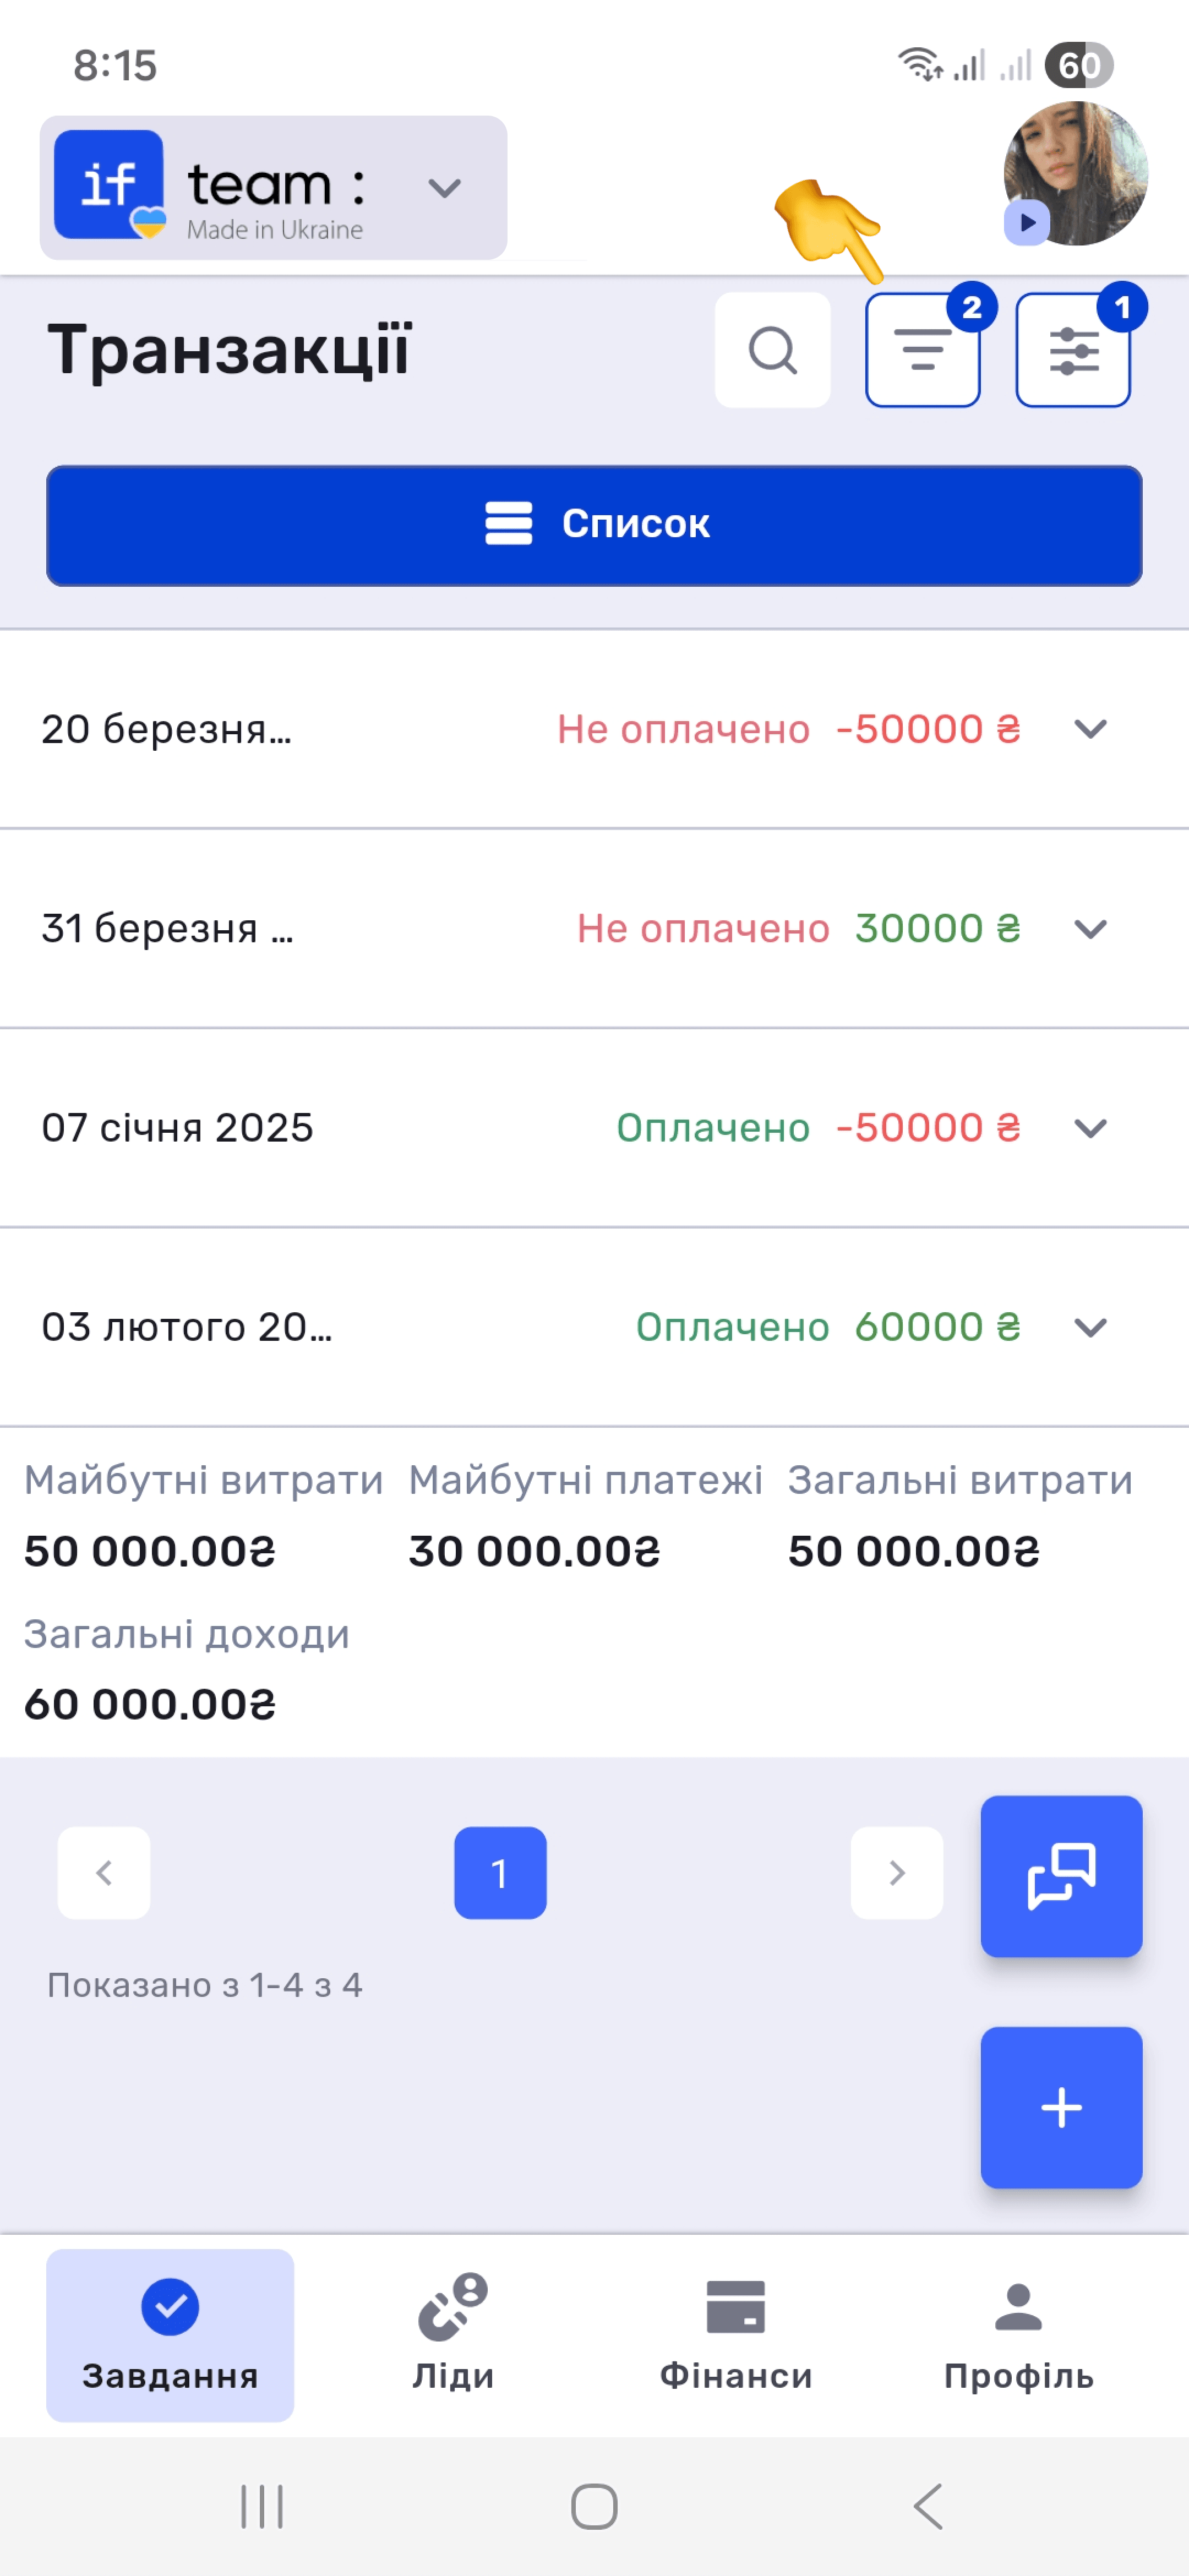
The Finance tab in the bottom navigation opens Transactions, a list of all company financial transactions. Each entry shows the date, payment status, and amount. Expenses are negative values in red, while income is positive and green.
Viewing Transaction Details
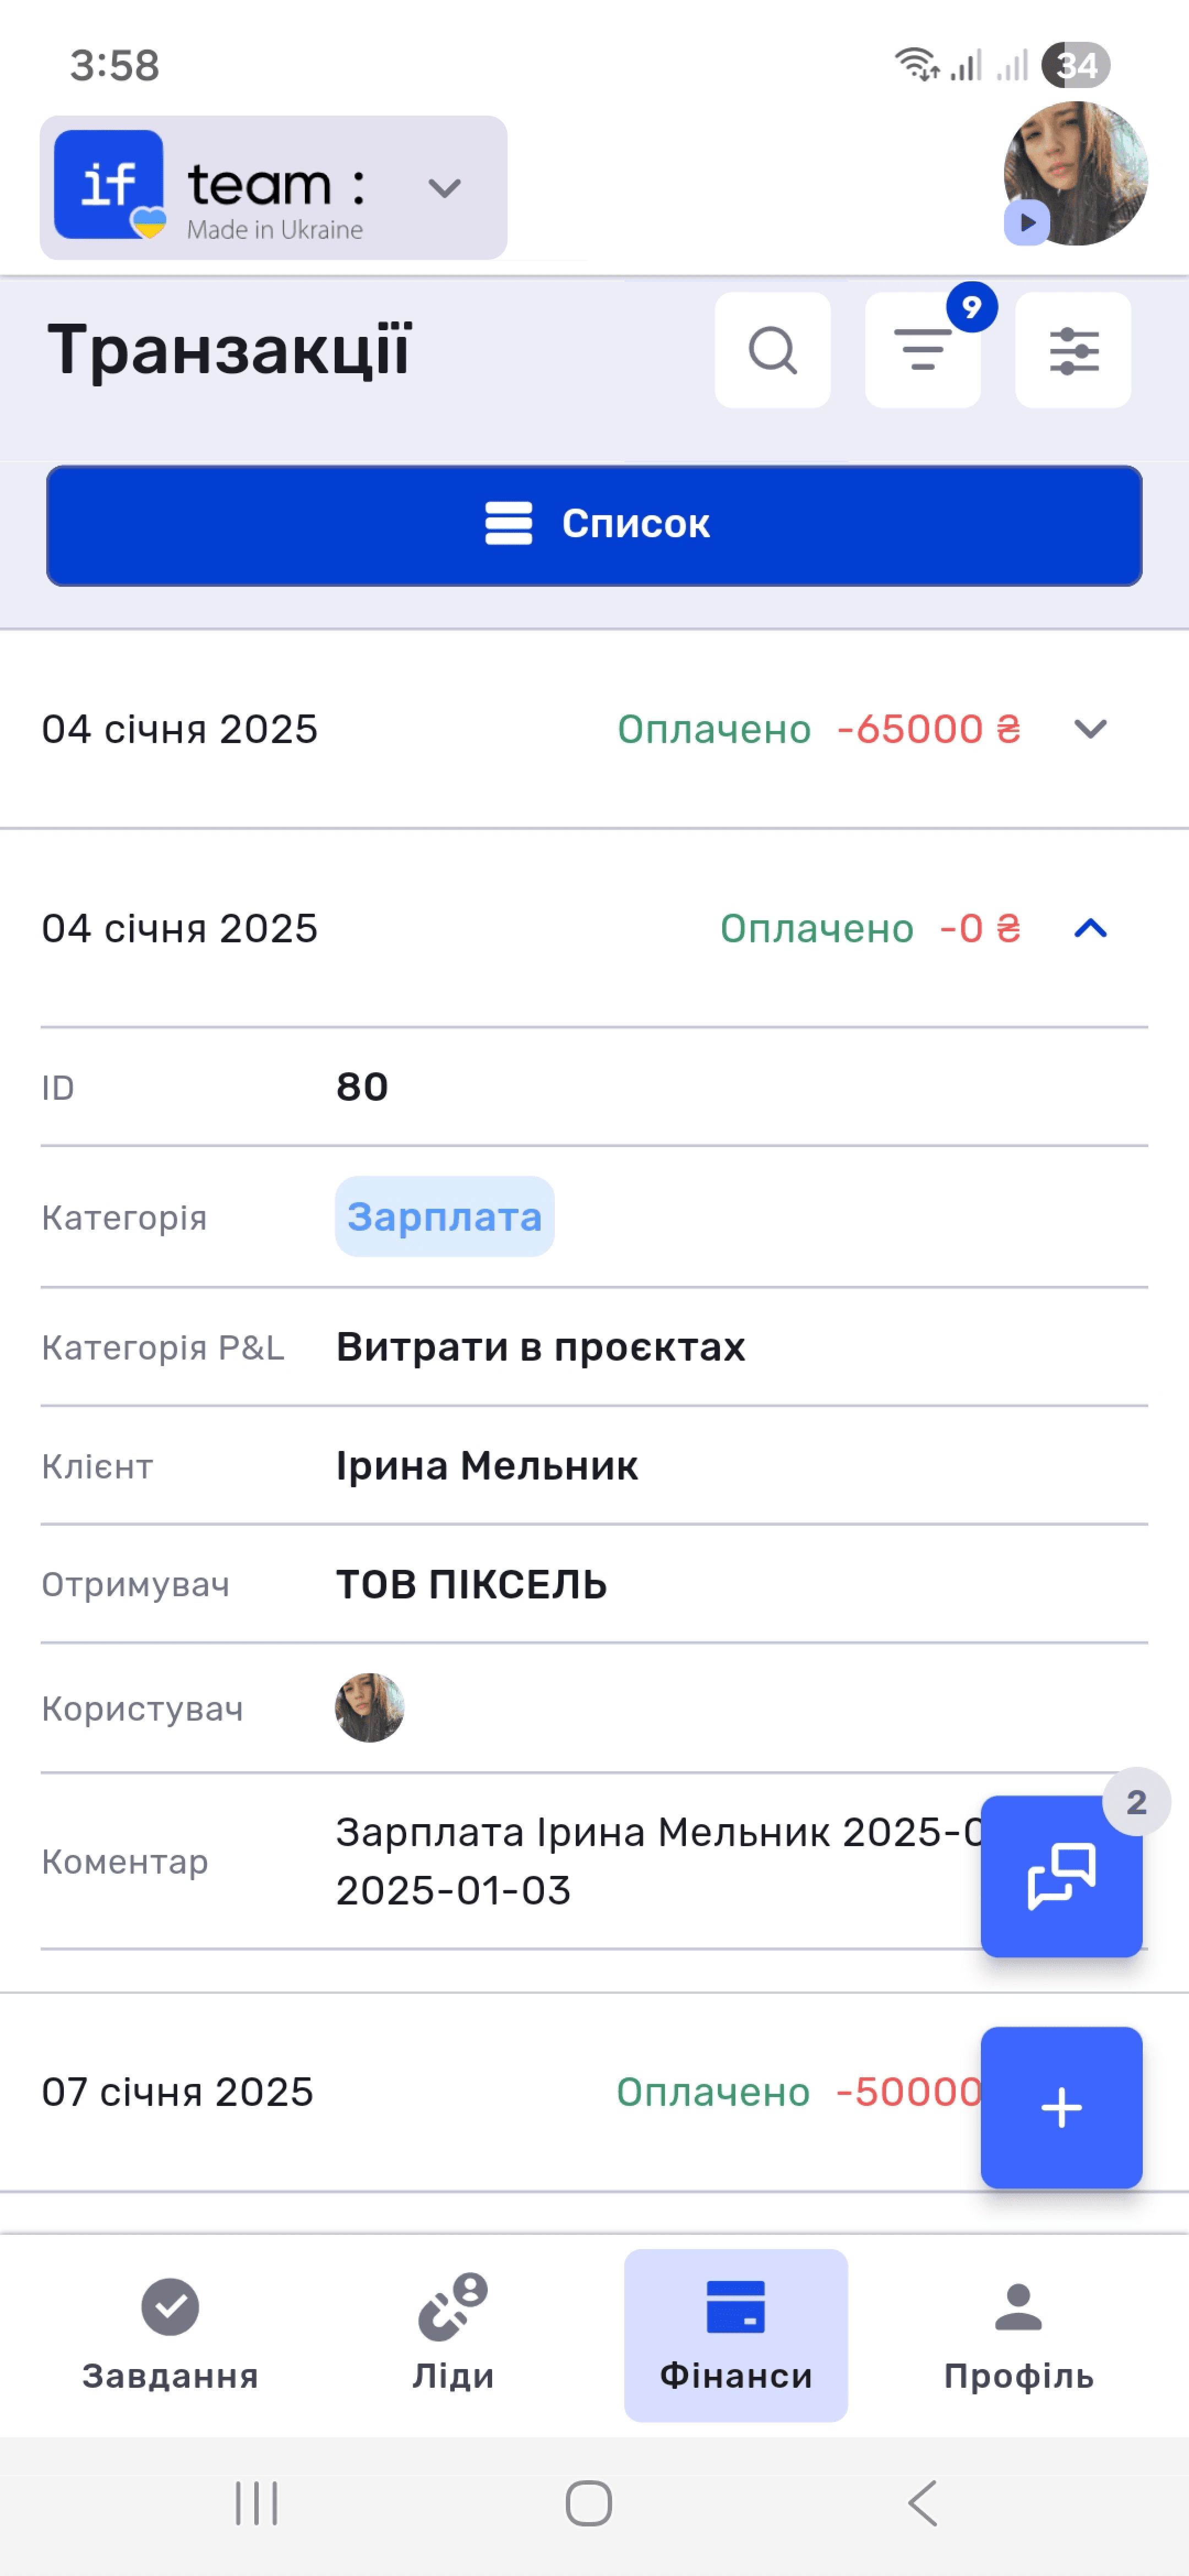
Tap the arrow (˅) to the right of a transaction to expand its details: ID, category, P&L category, client, recipient, user, and comment.
Editing a Transaction
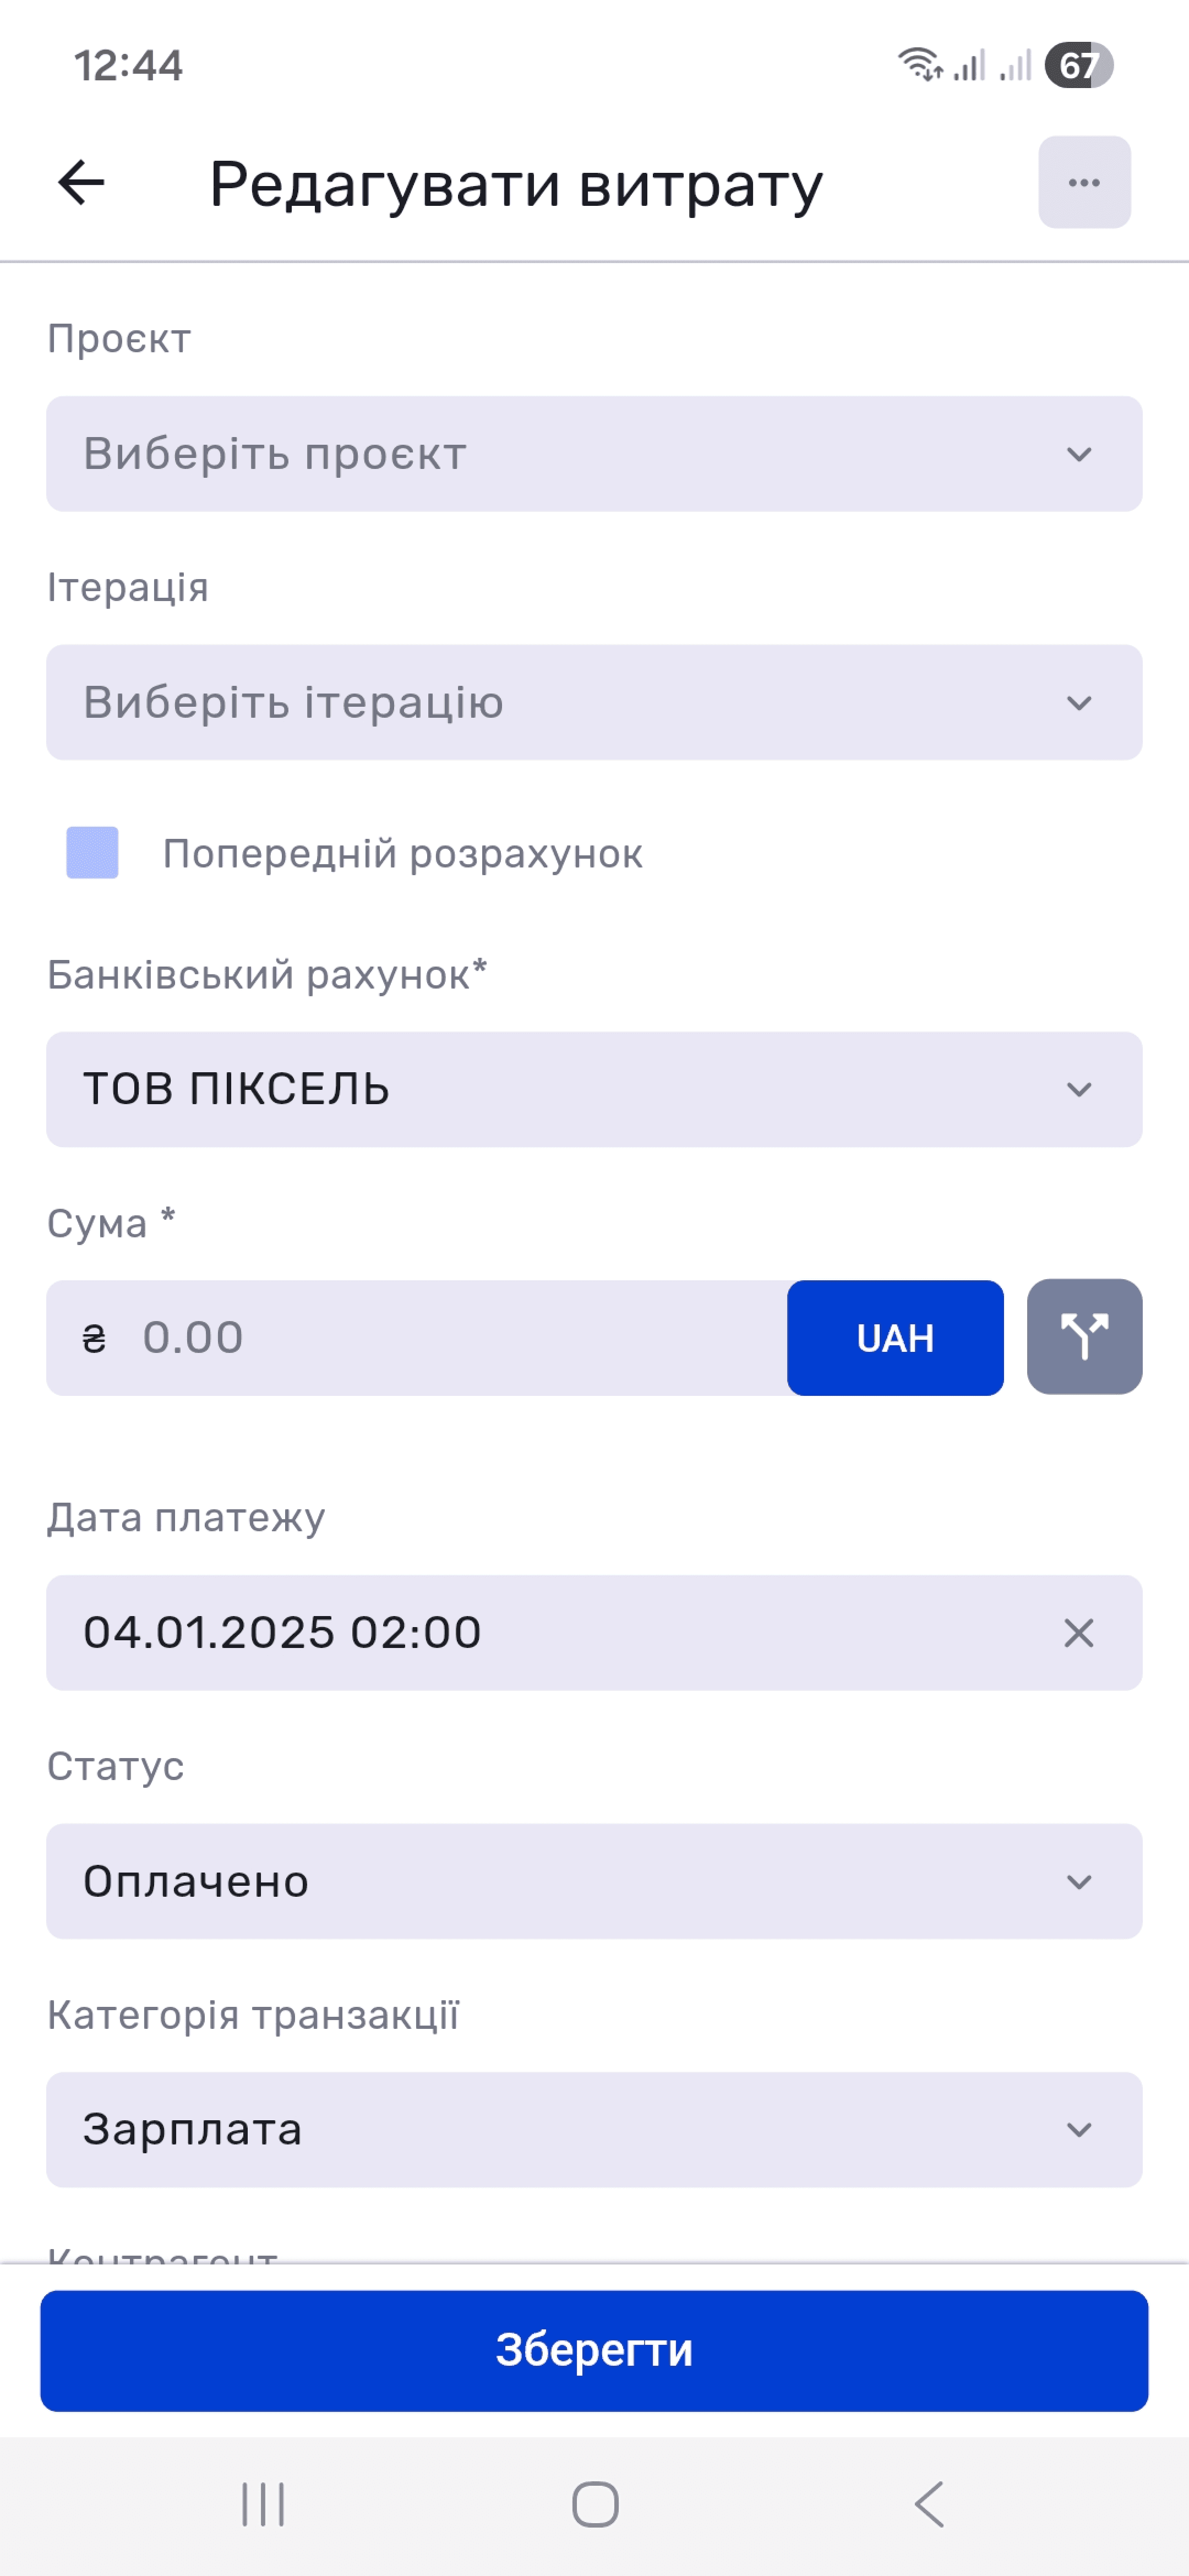
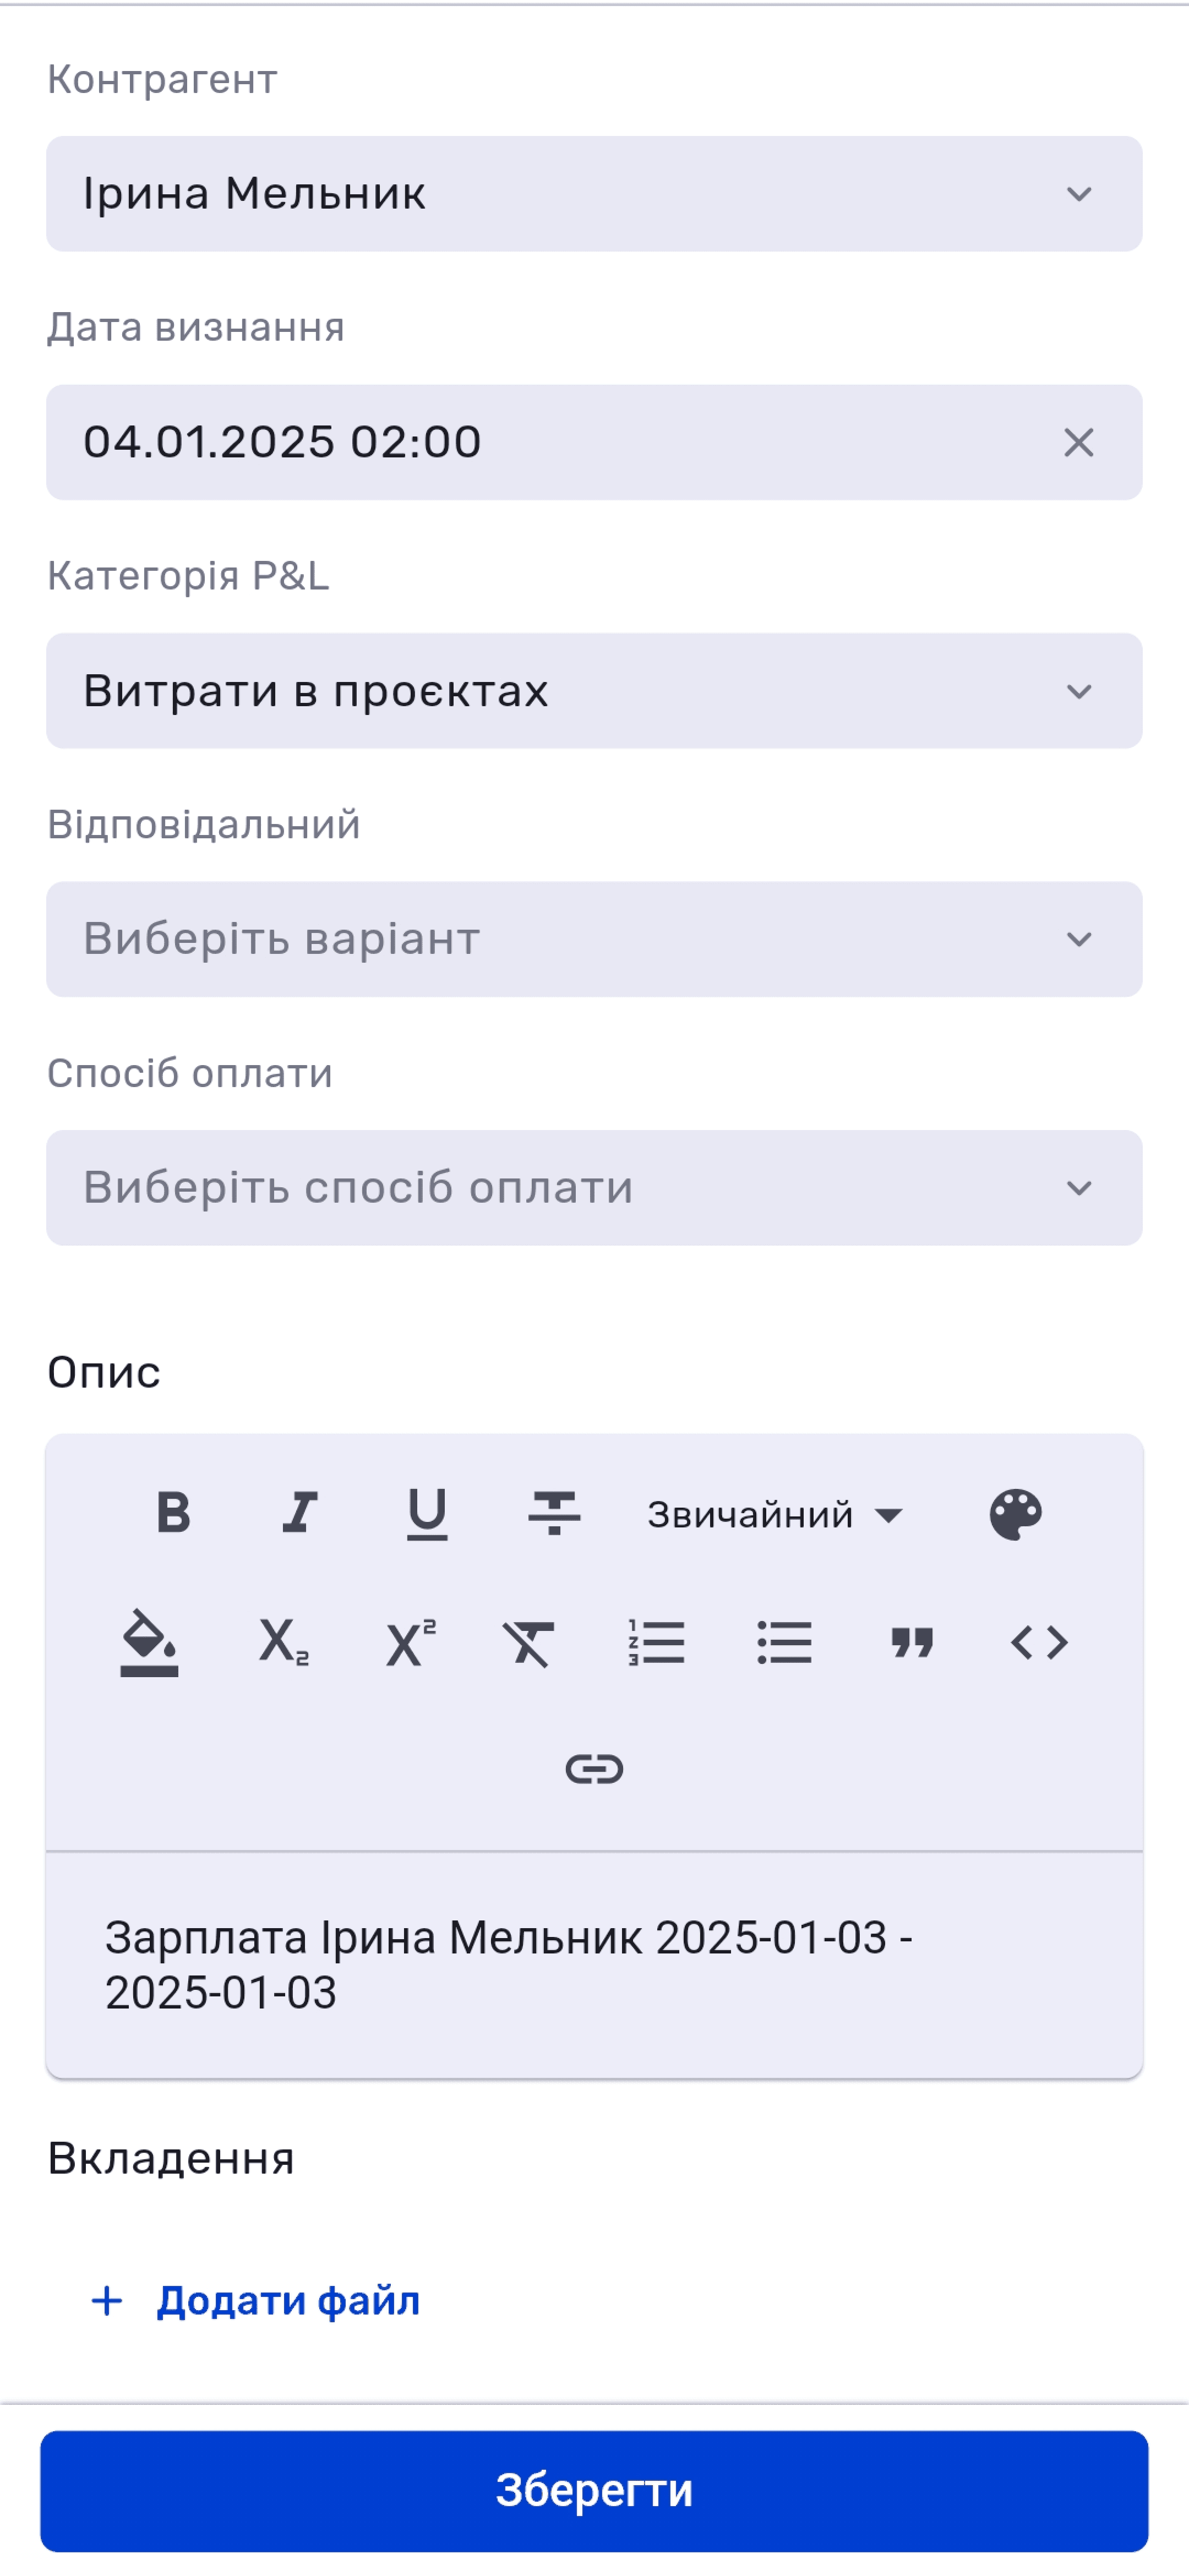
Tap a transaction to open the editing form. The expense and income forms look the same, with one difference: expenses have a Preliminary Calculation checkbox that is not available for income.
The form contains all key fields: project, iteration, bank account, amount with currency selection, payment date, status, transaction category, counterparty, recognition date, P&L category, responsible employee, payment method, description with a text editor, and attachments.
After completing all required fields, tap Save.
Splitting a Transaction
You can split one transaction into several parts and link them to:
- different projects and iterations, for example when a client pays for several stages in one payment;
- expense or income categories when a payment relates to different items;
- recognition periods when income or expenses must be distributed across several months in P&L;
- P&L categories when one part of a payment is operating and another is non-operating.
Each split part has its own project, iteration, amount, recognition date, transaction category, and P&L category. Remove an unnecessary part using Delete, or add a task using + Add Task. The system verifies that the split total matches the transaction amount and displays the corresponding message.
.jpg)
Payment splits are included in project and project-stage economics, P&L, transaction filtering, and income and expense structure analysis. This enables much more accurate financial accounting without manually creating several separate transactions.
Filters
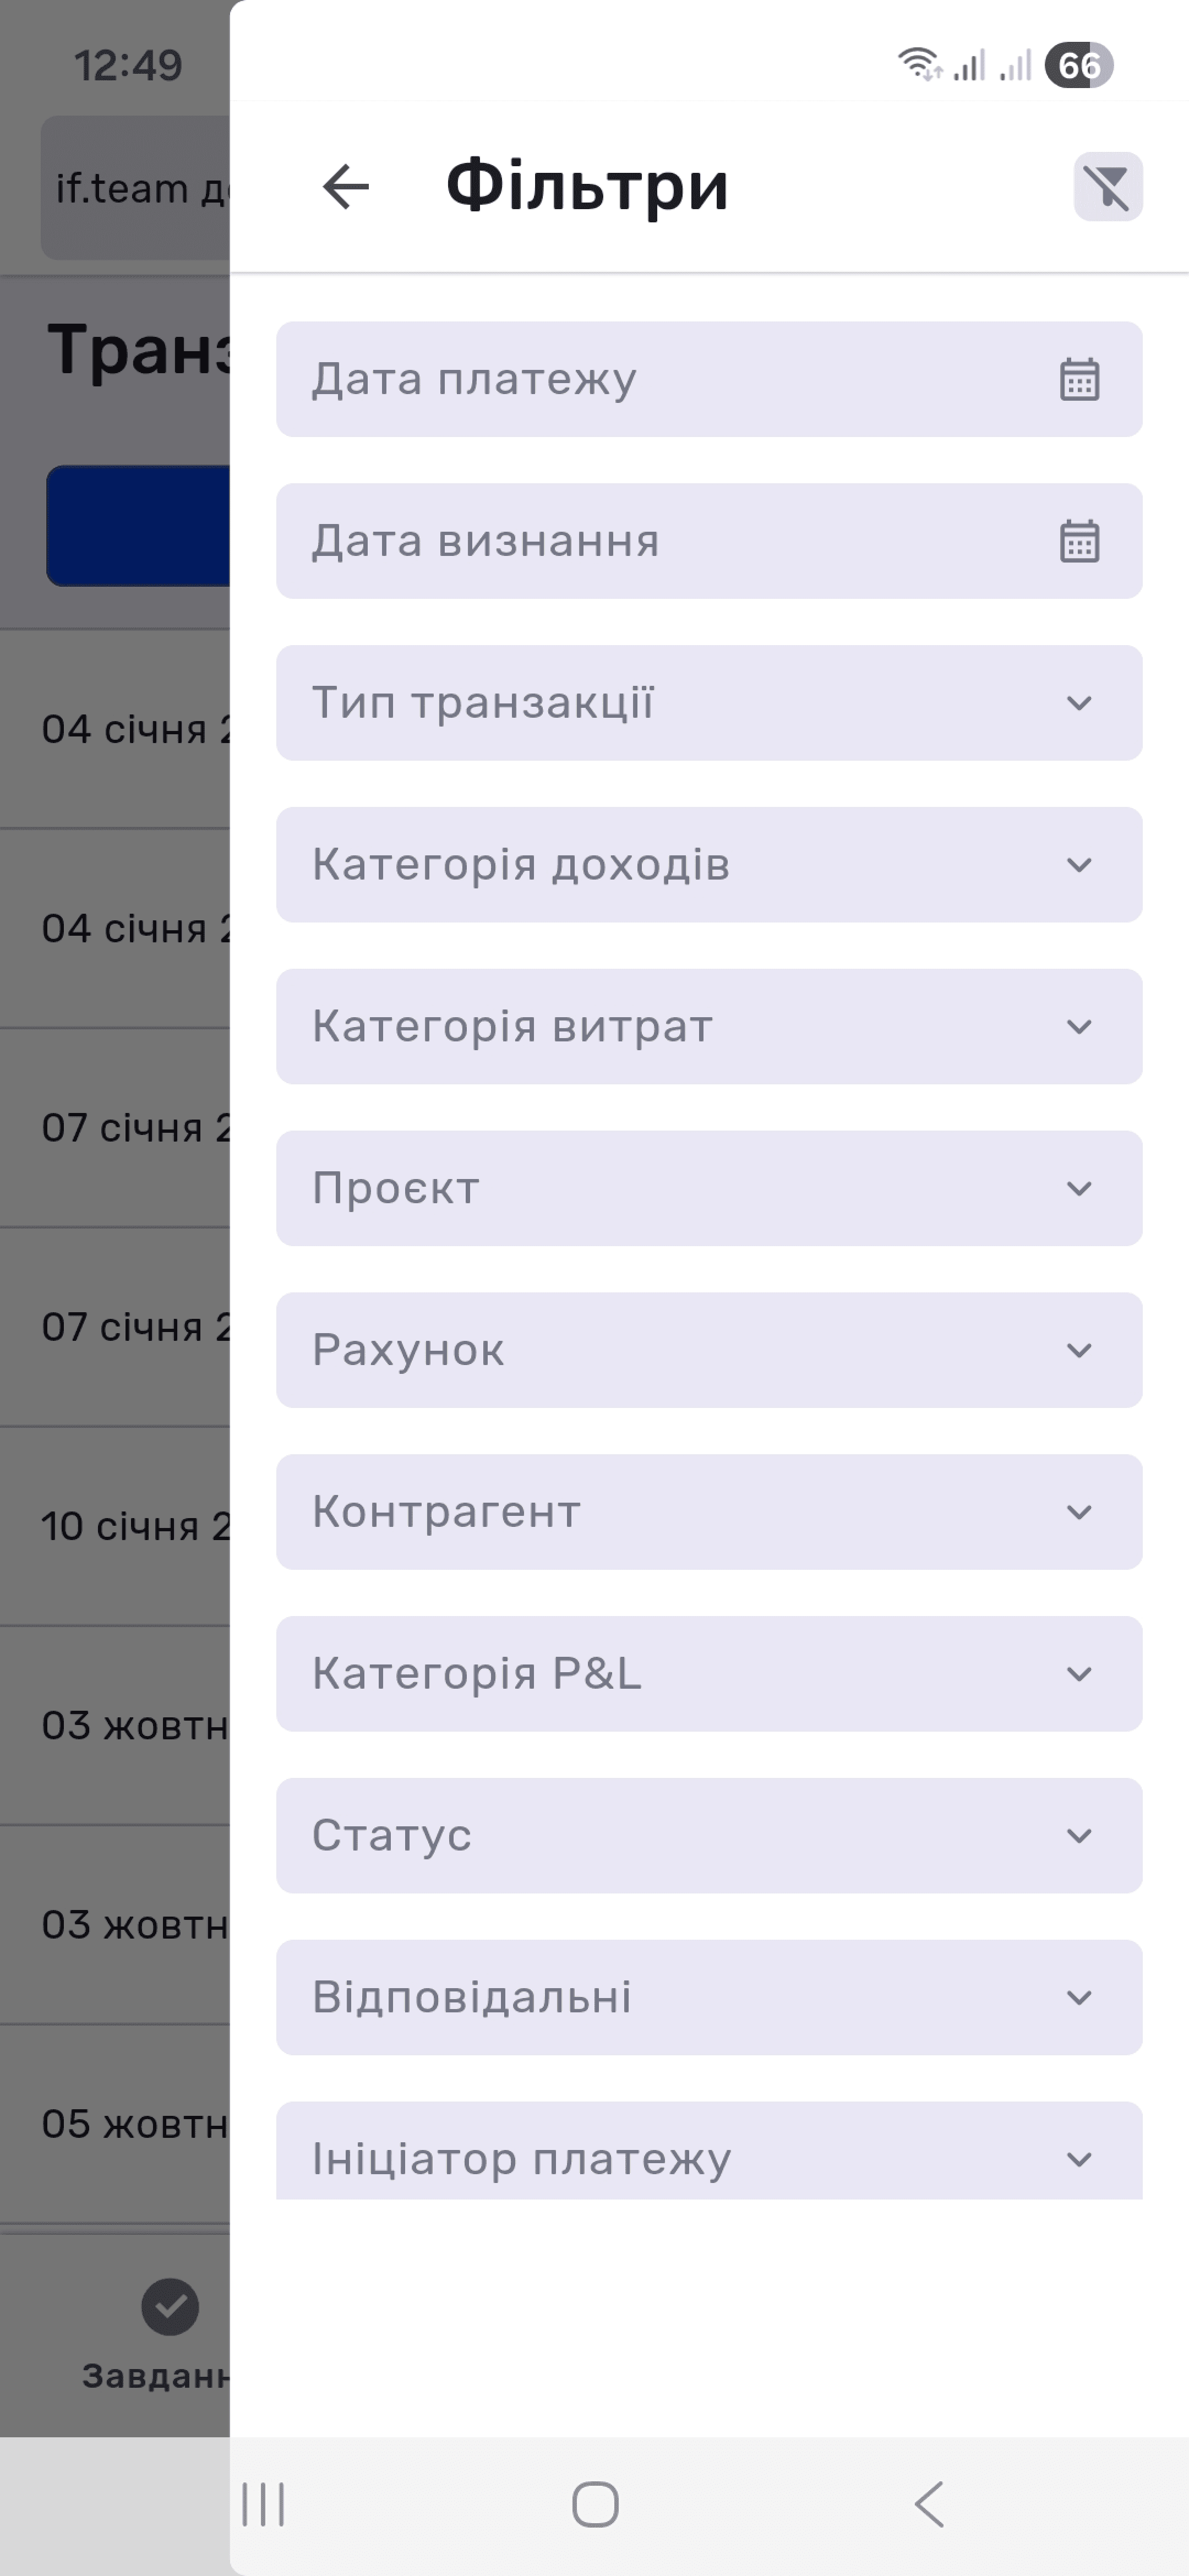
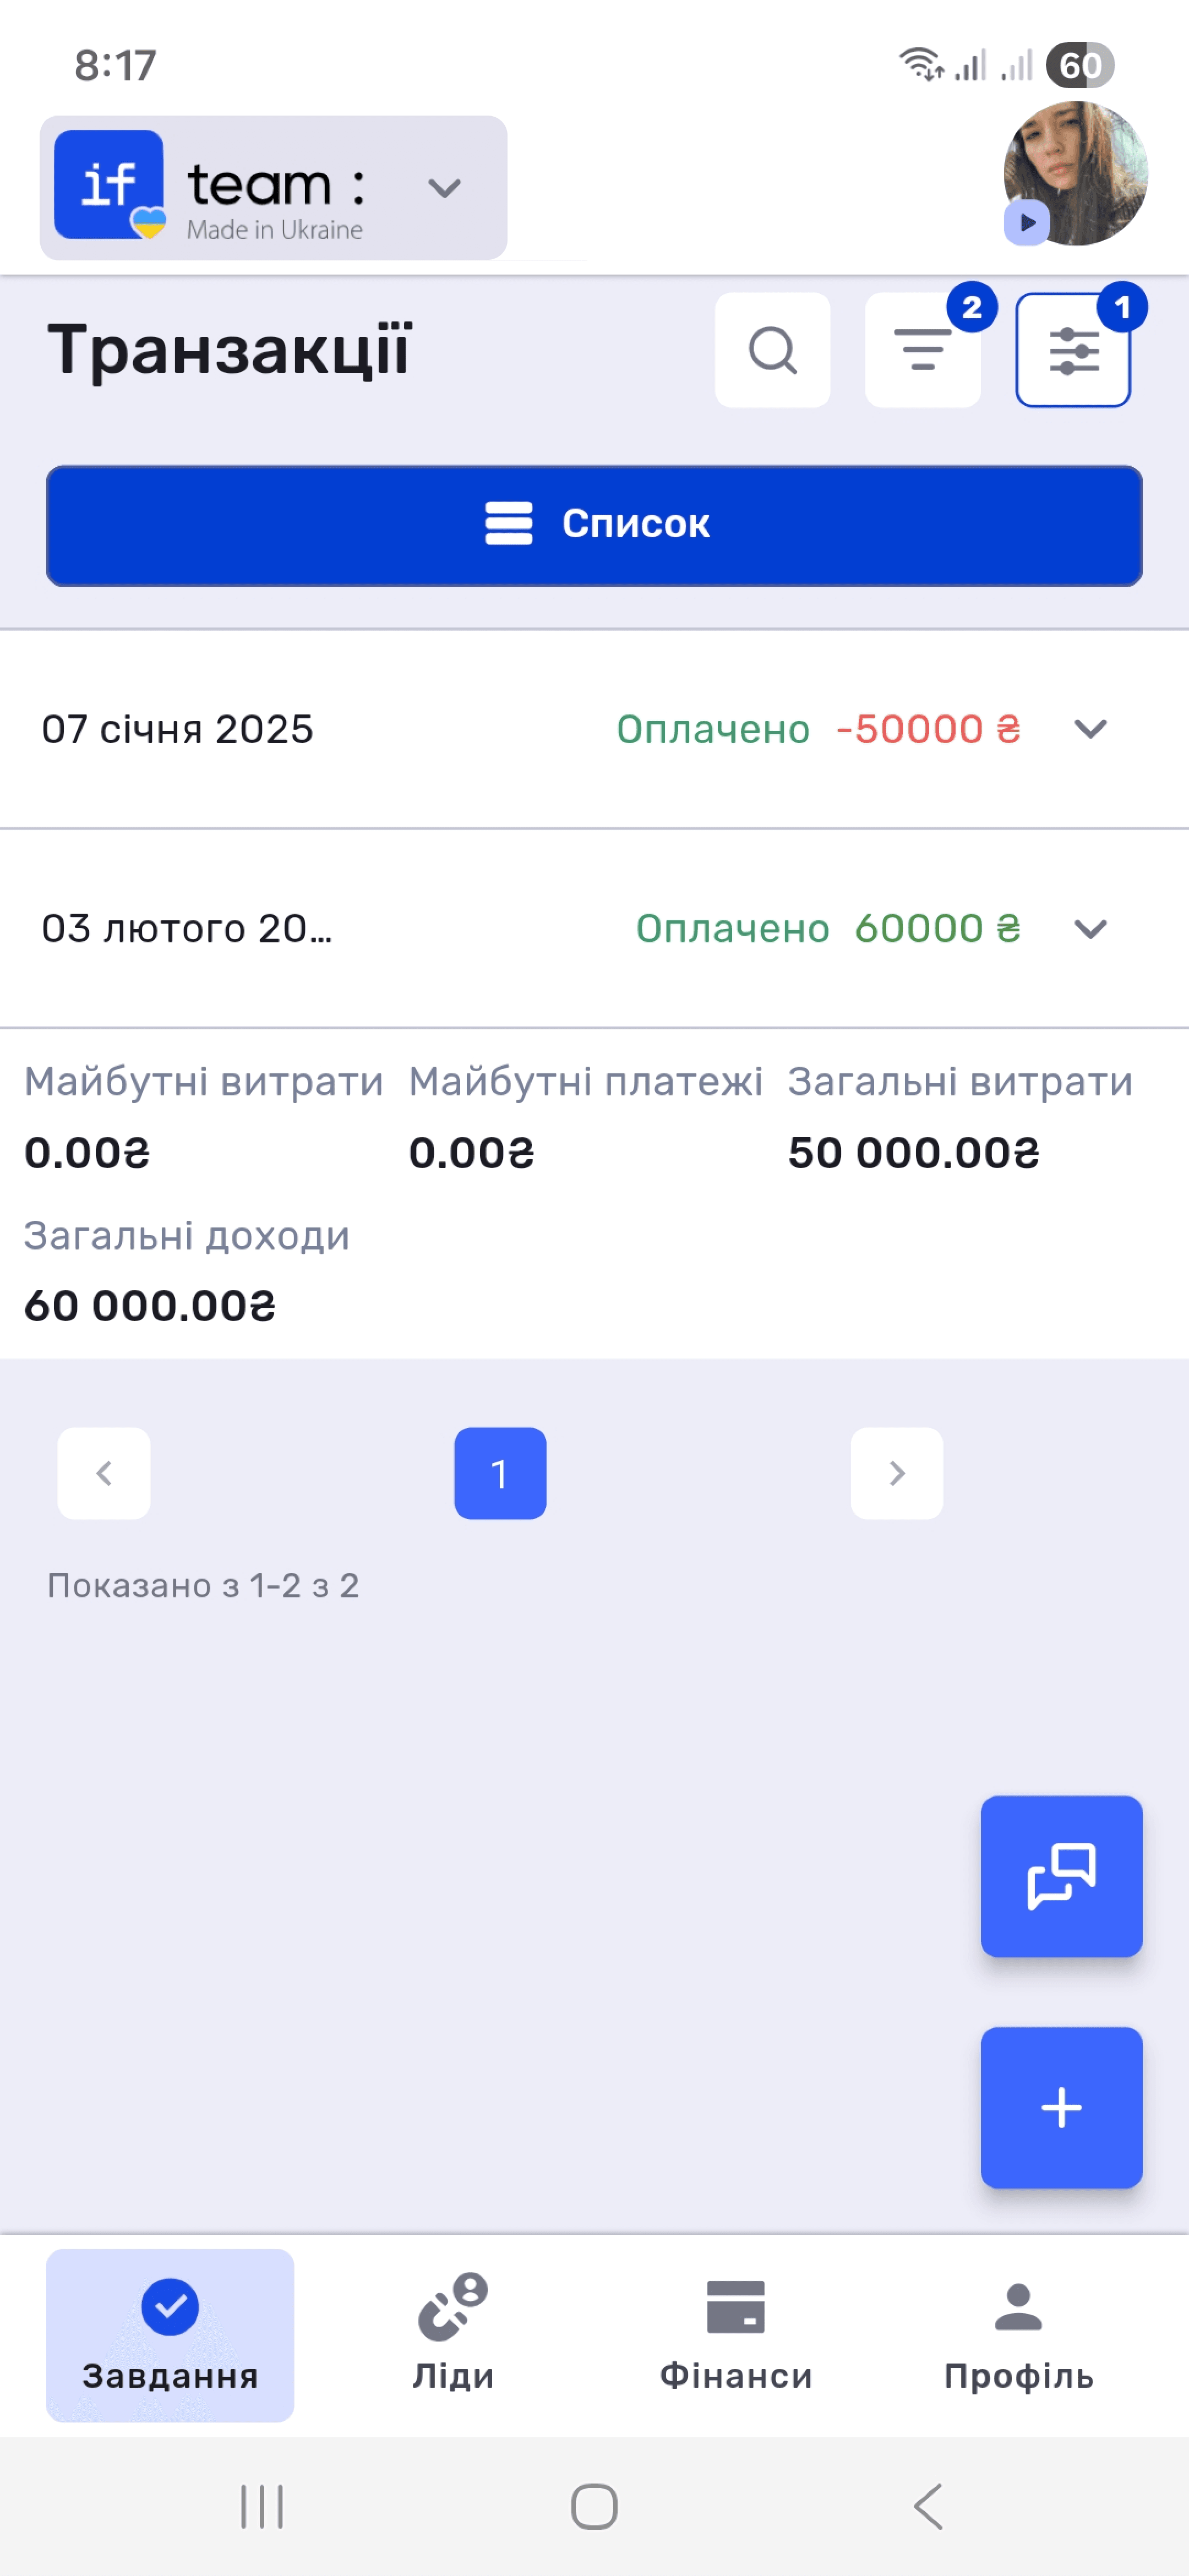
Tap the filter icon to narrow the transaction selection. Available parameters are payment date, recognition date, transaction type, income category, expense category, project, account, counterparty, P&L category, status, responsible employees, and payment initiator. The number of active filters appears as a numerical indicator on the icon.
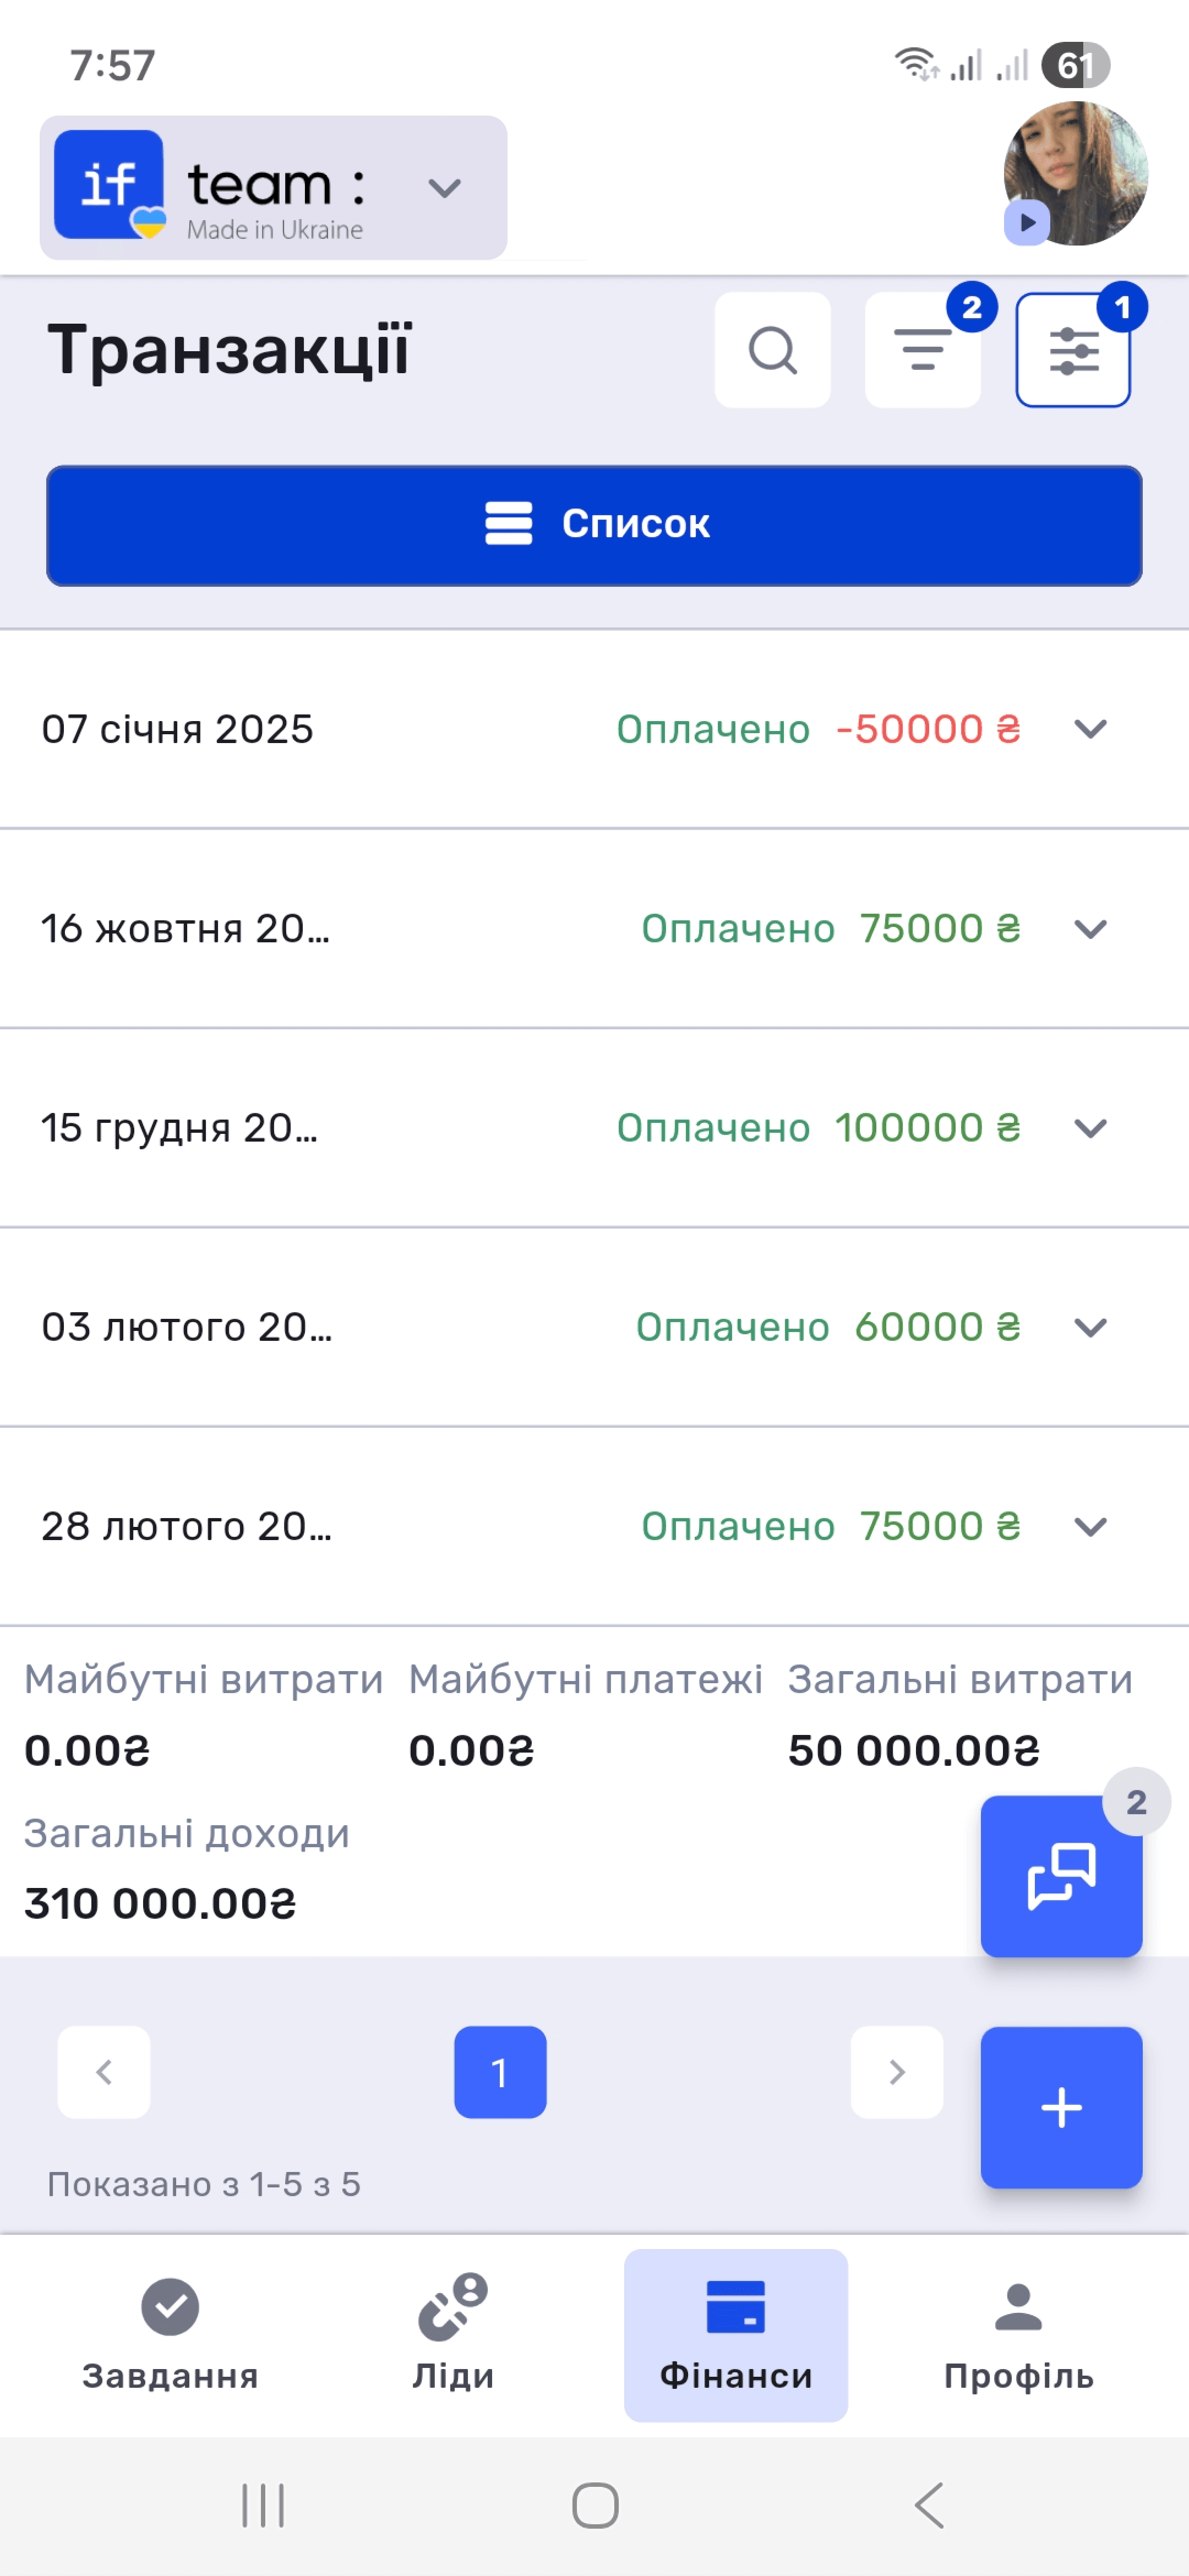
The planning mode indicator is next to the filter button. Tap it to show or hide planned transactions, such as planned client payments and planned expenses for payroll or services. The number on the indicator shows the number of planned entries.
When enabled, planned expenses and income are added to the general list and appear at the top. At the end of the list, next to total expenses and income, a summary of future expenses and payments appears. When disabled, only actual transactions remain in the list.
Creating New Entries
Tap + in the lower-right corner. Select Income or Expense from the pop-up menu.
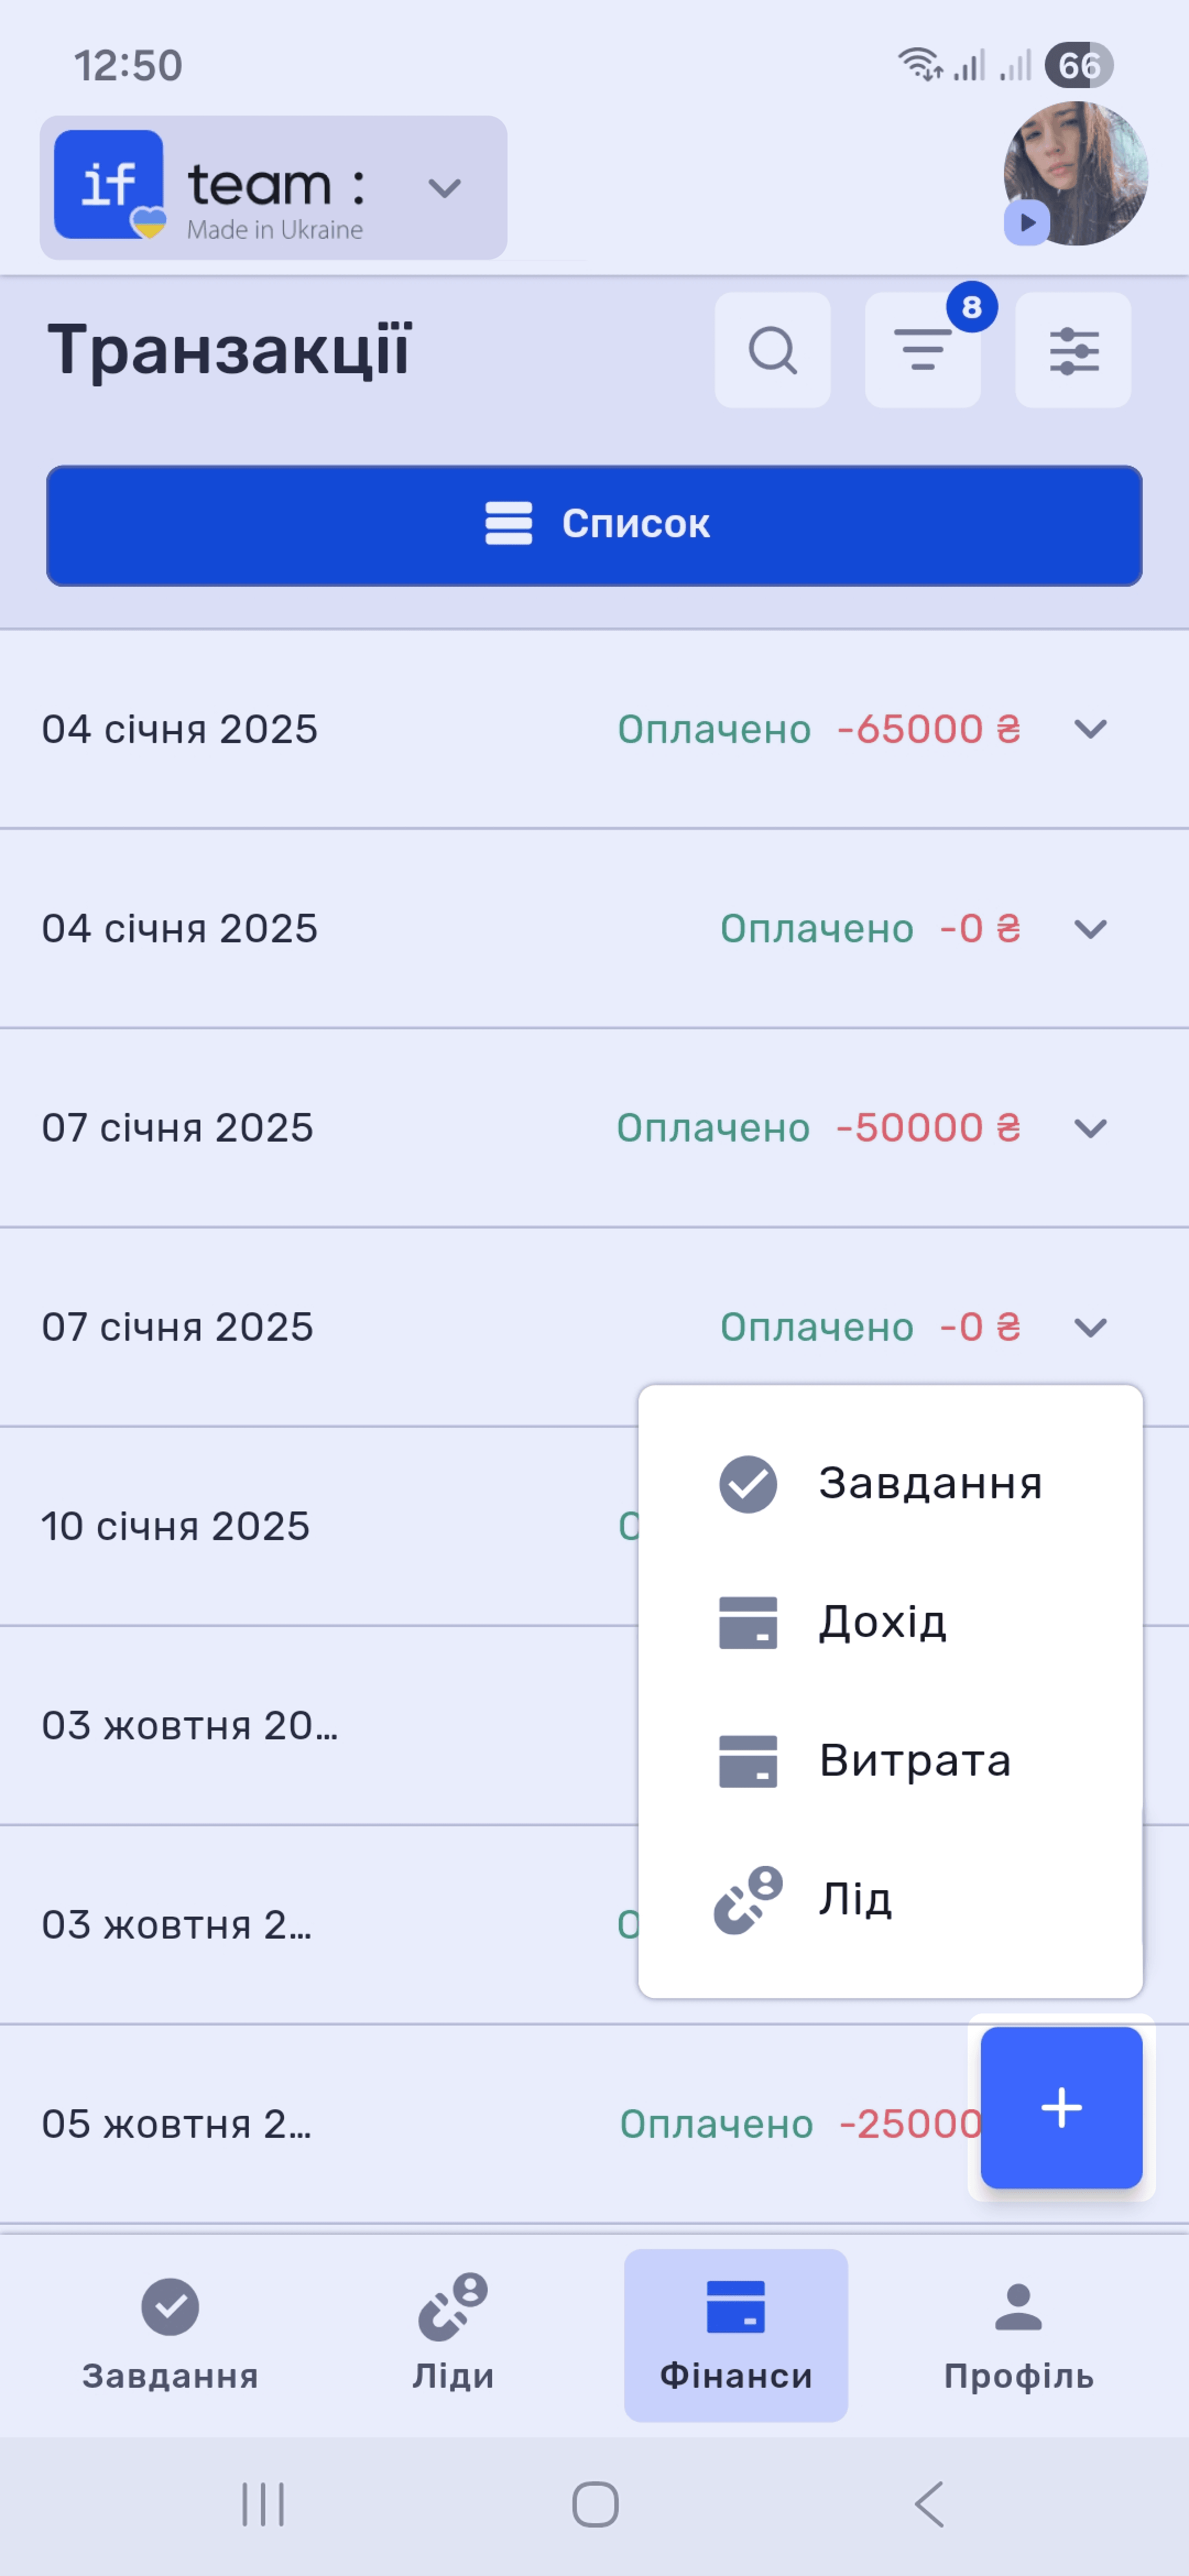
You can create a new transaction, task, or lead this way from every main tab with the floating + button: Finance, Tasks, and Leads.
Chats
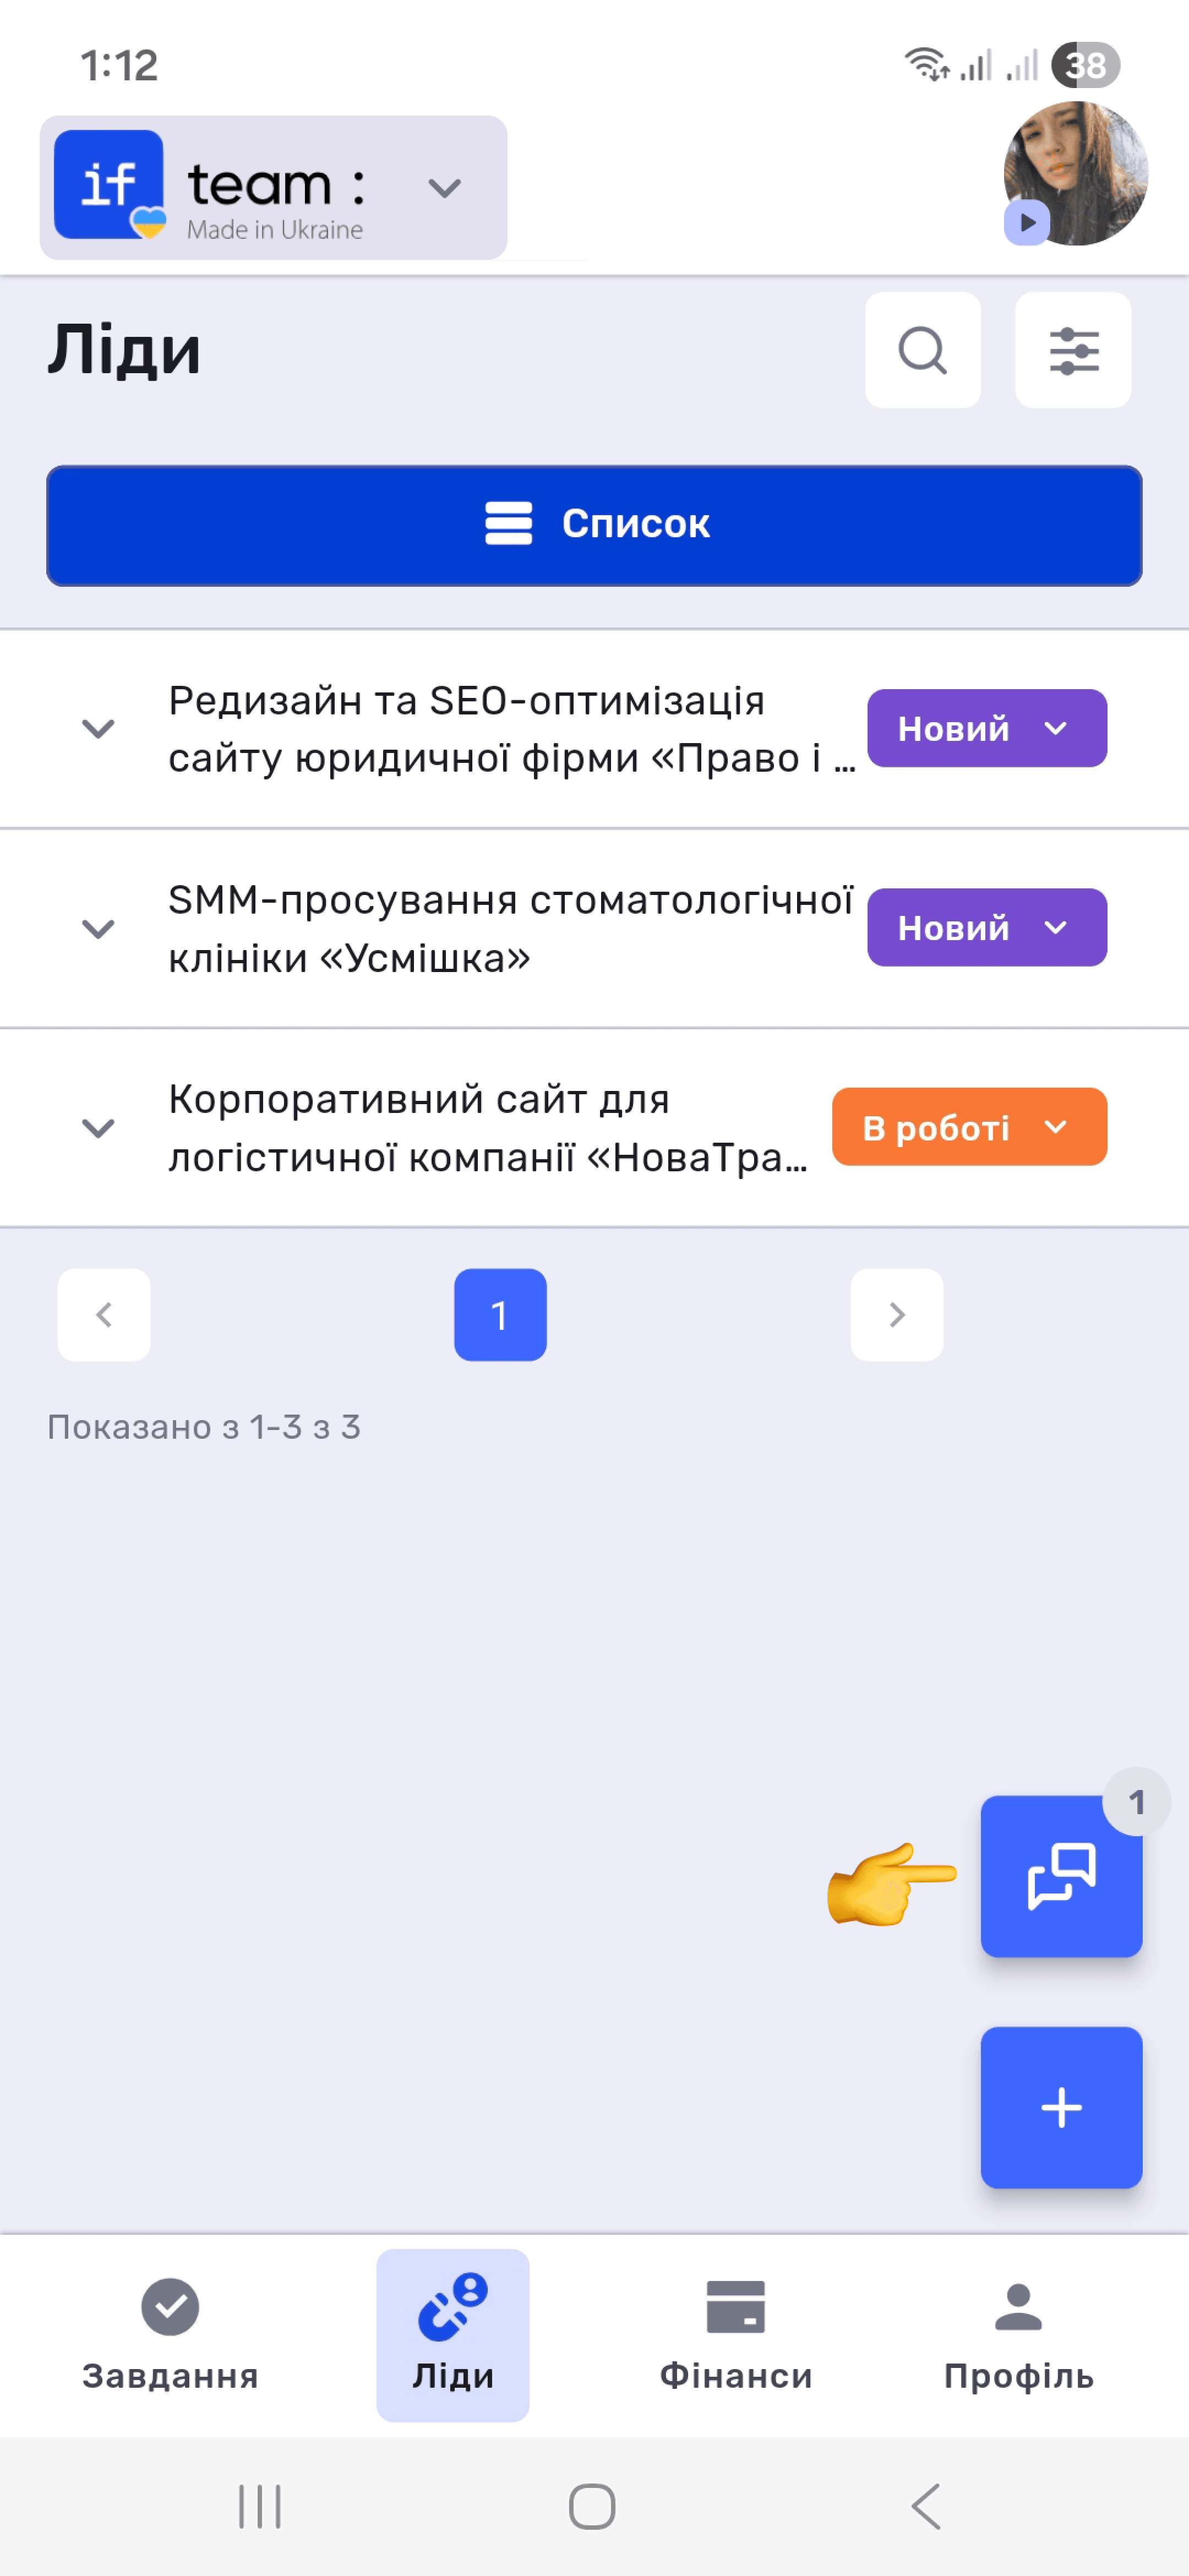
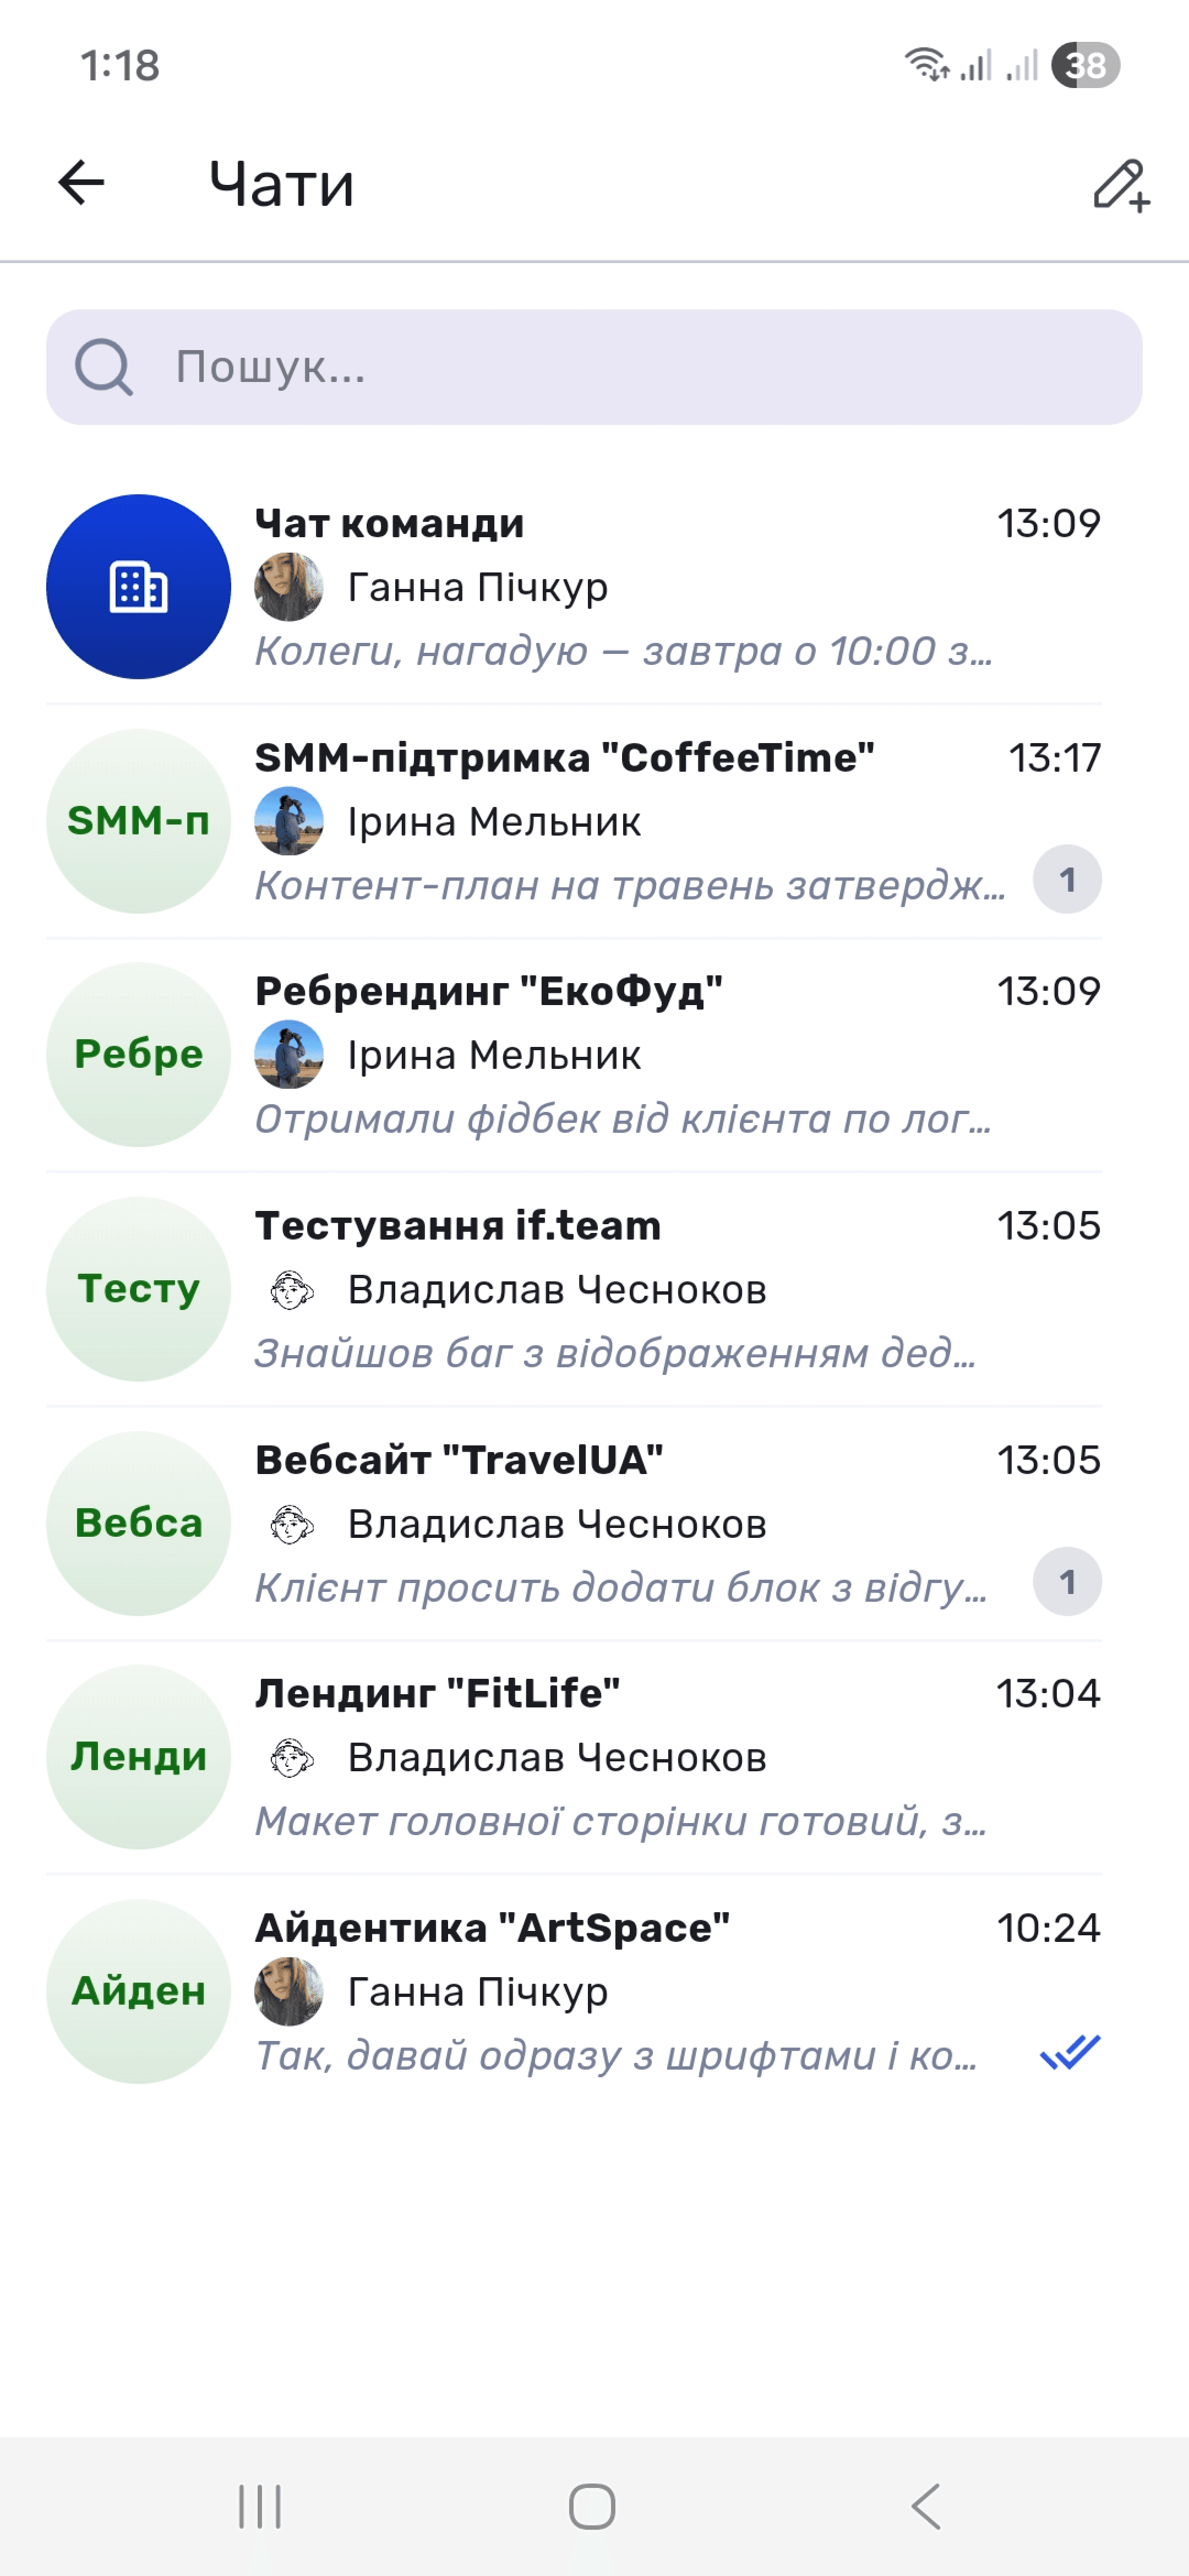
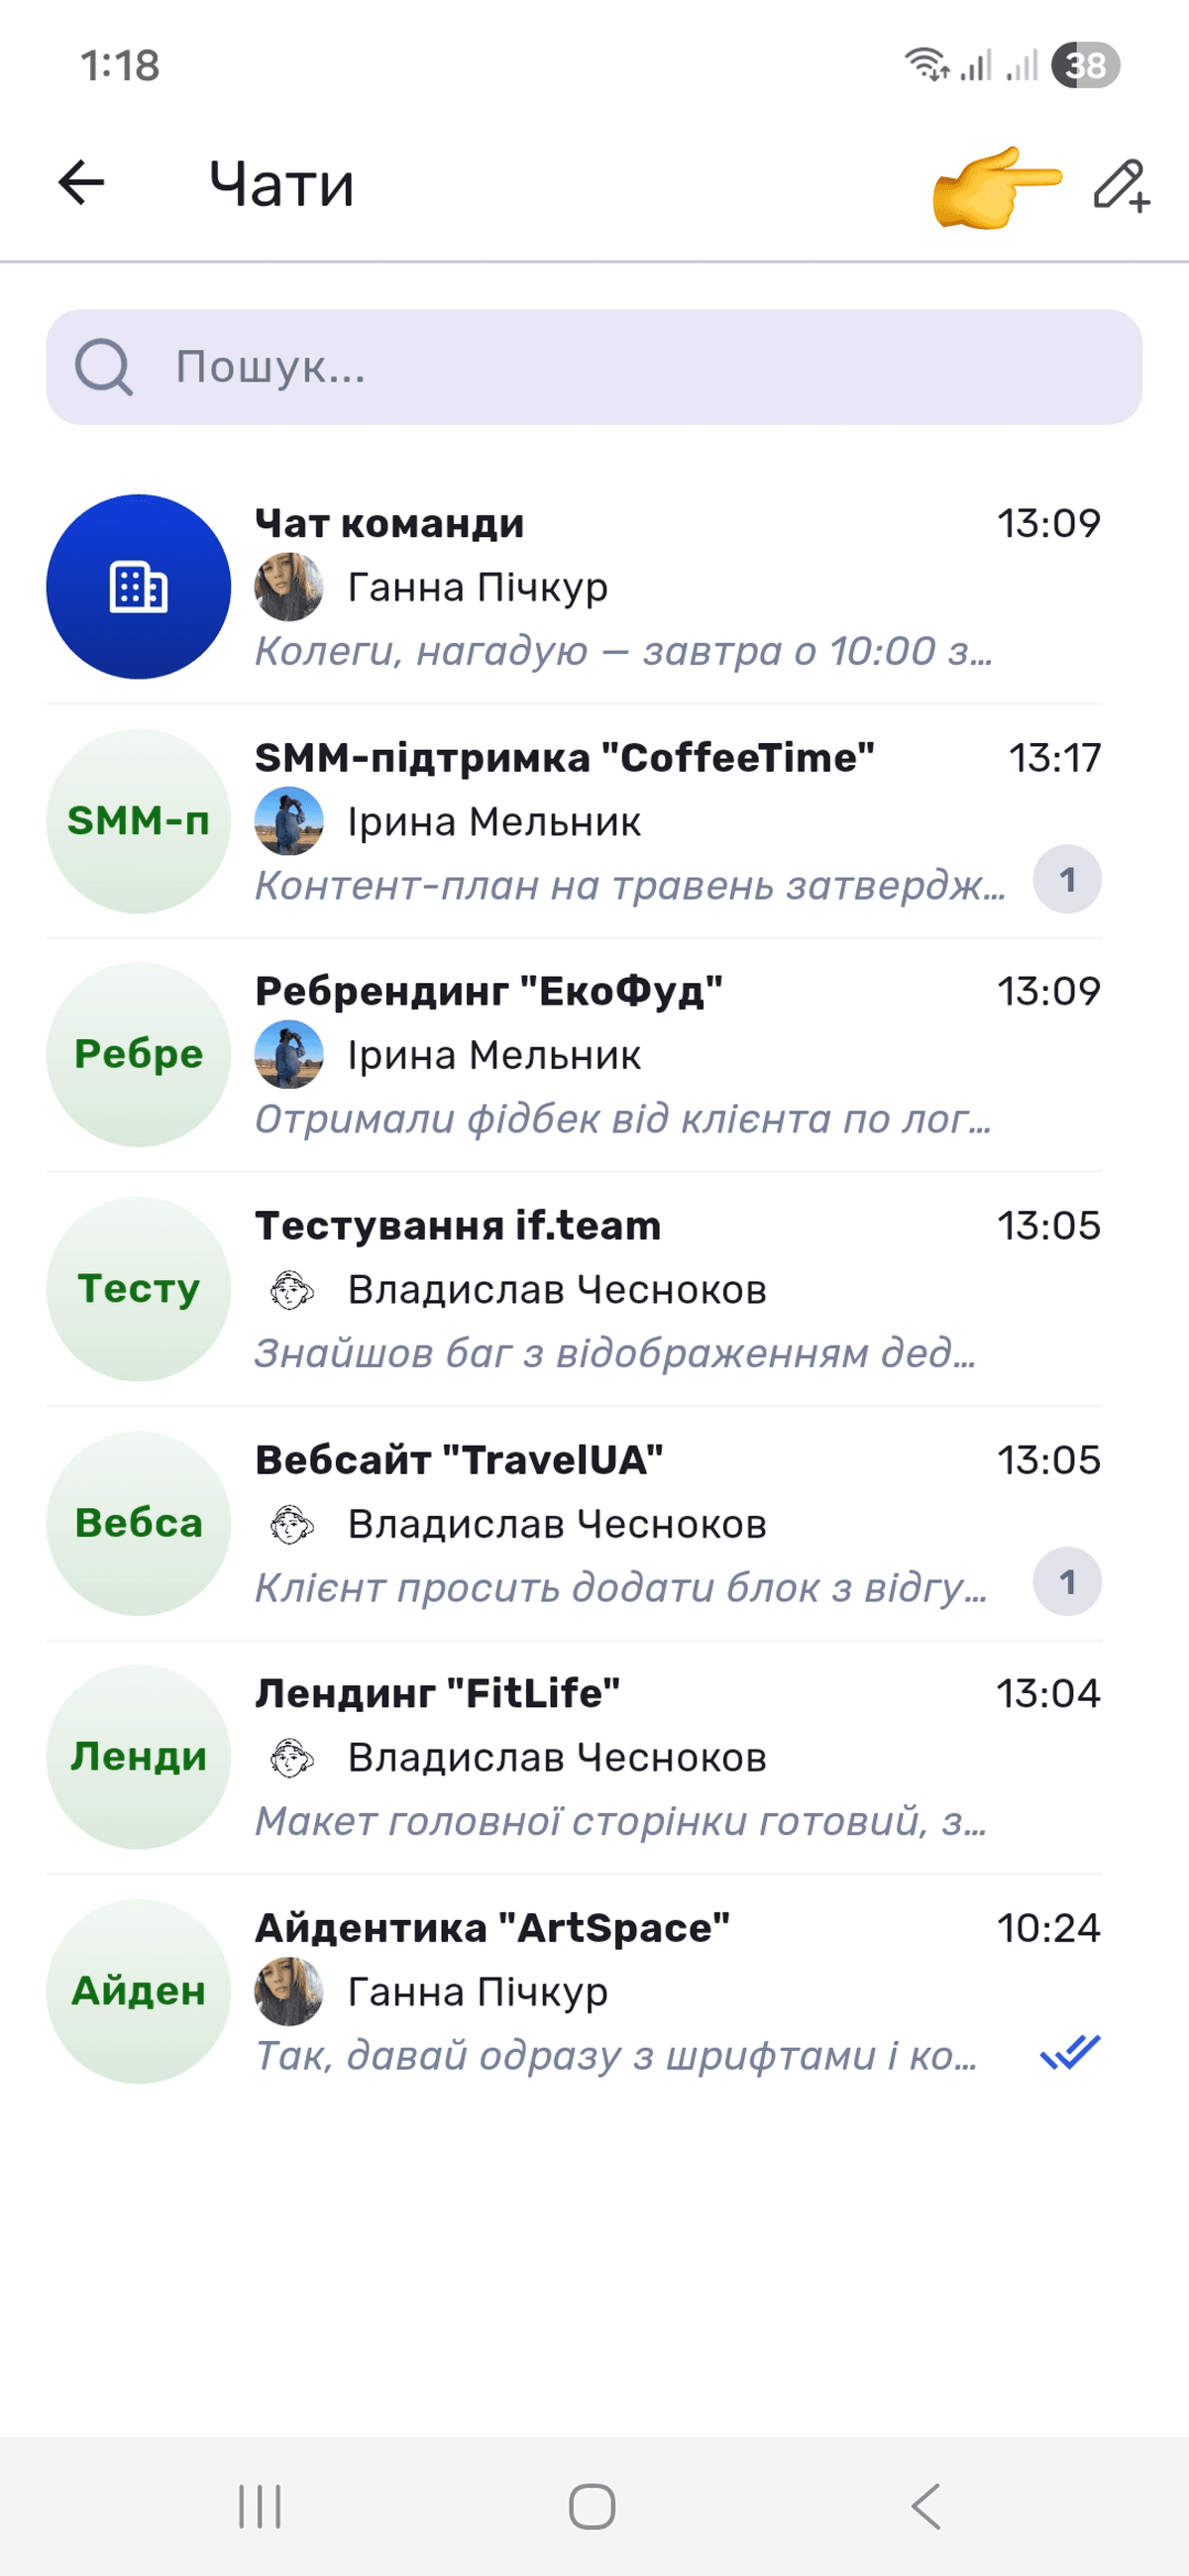
The floating chat button (💬) on the home screen opens Chats. It displays the general company chat, project chats, and private conversations, with search by name.
Each project automatically receives its own chat where participants can discuss work. The list shows the chat name, author, text and time of the latest message, and an unread message indicator.
Communicating in a Chat
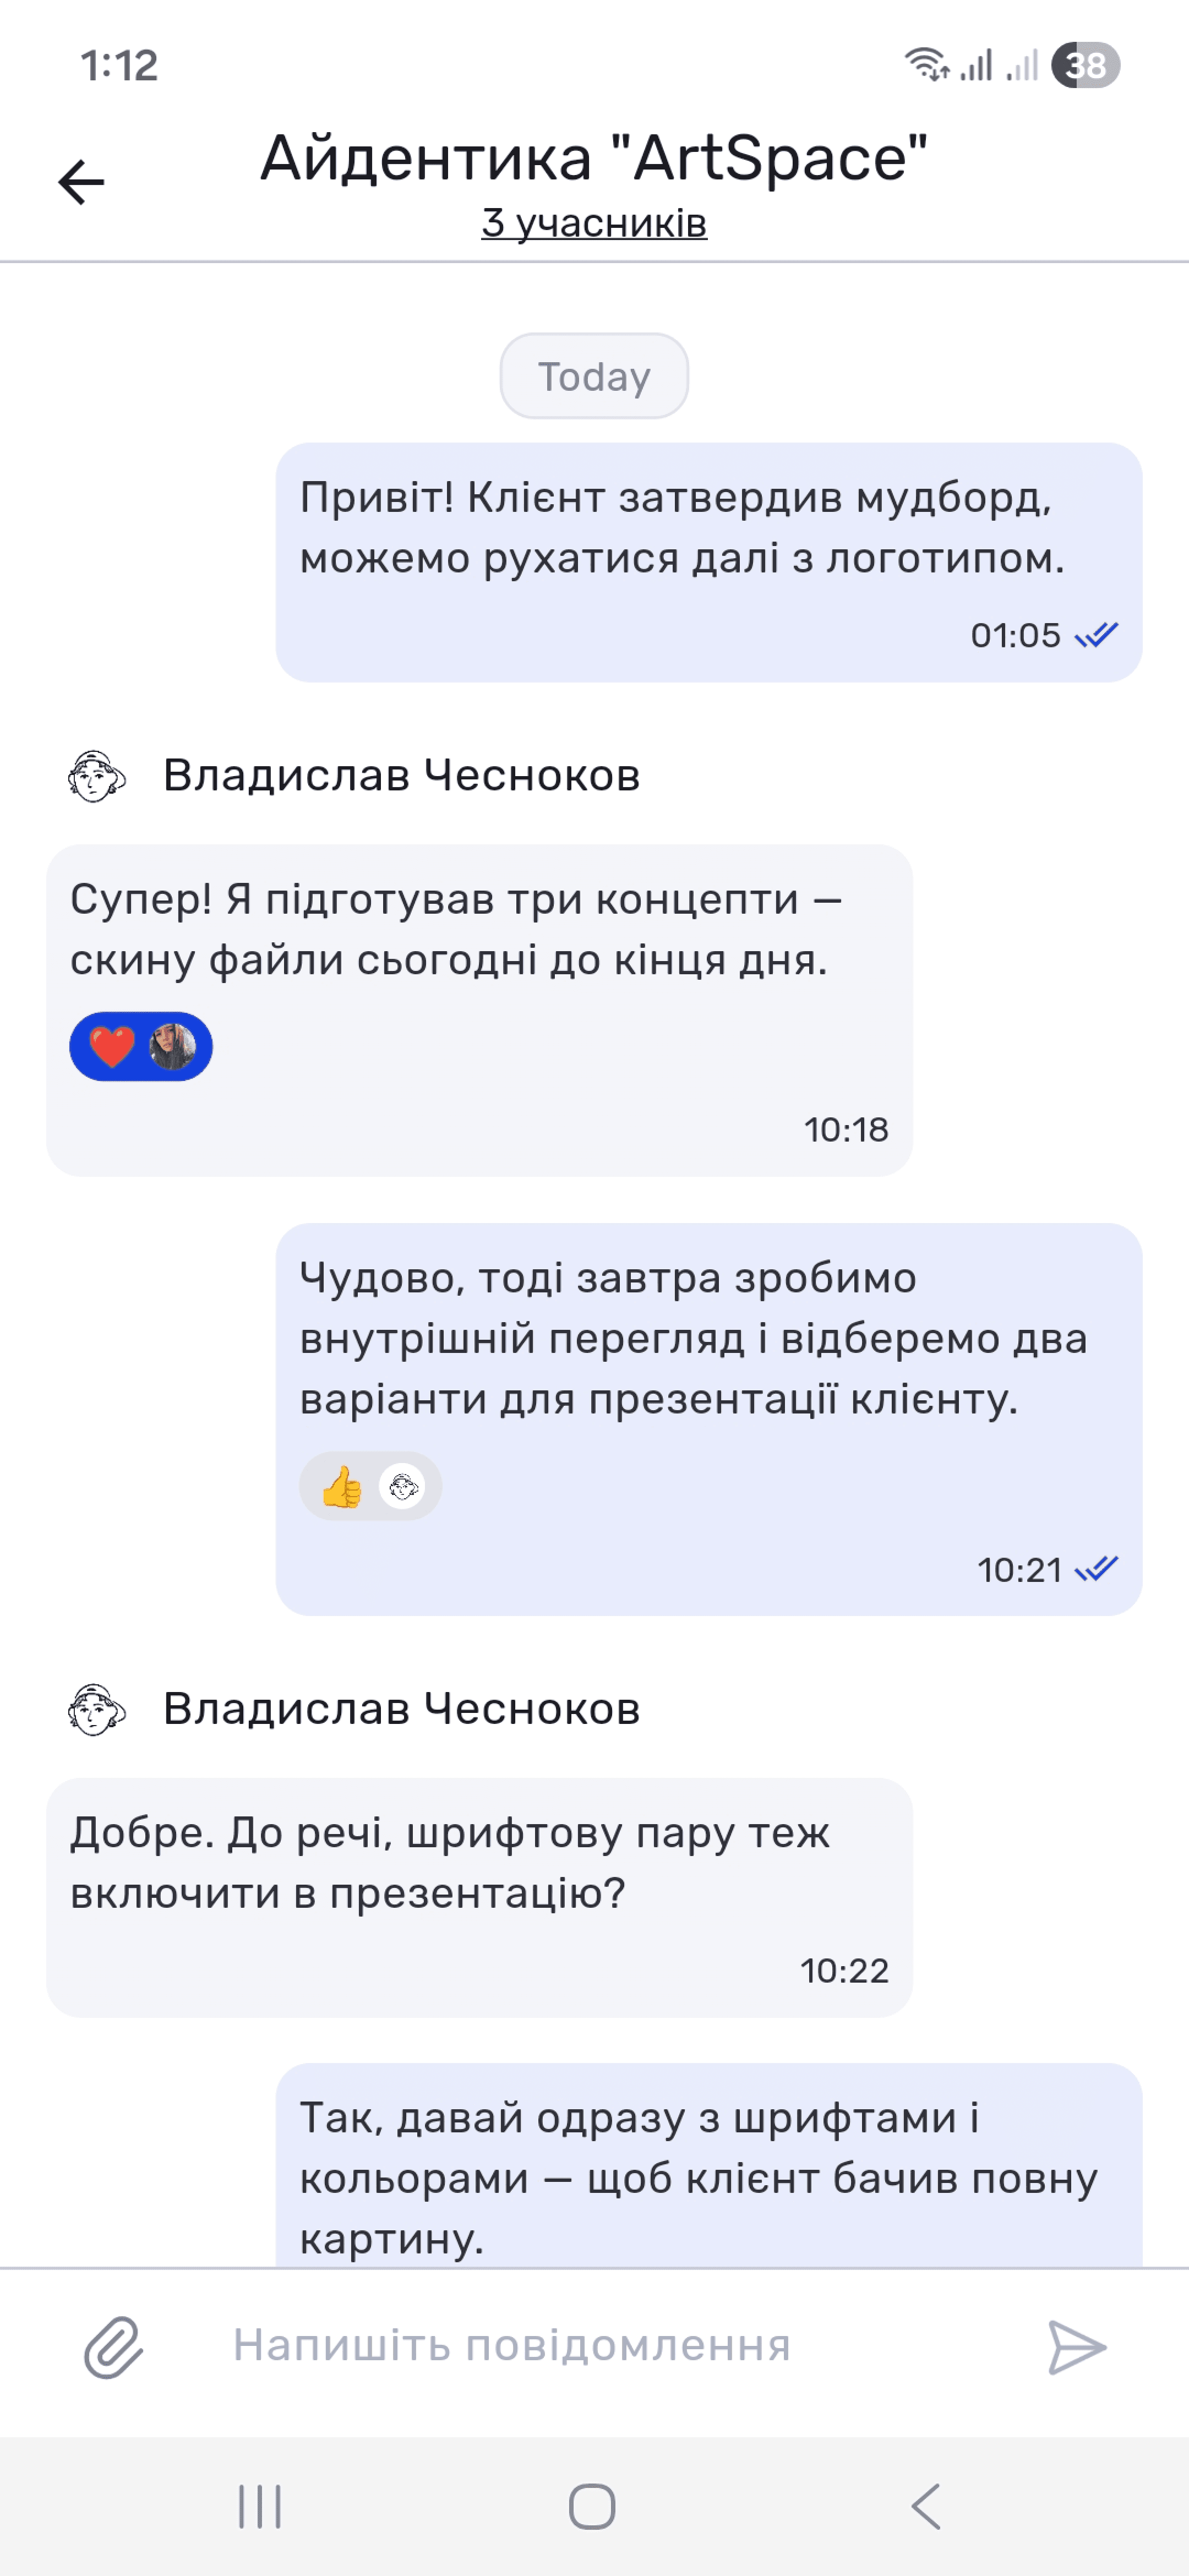
Tap a chat to open the conversation. Your messages appear on the right, while colleagues’ messages appear on the left with the sender’s name and time. A double blue checkmark means the message has been read.
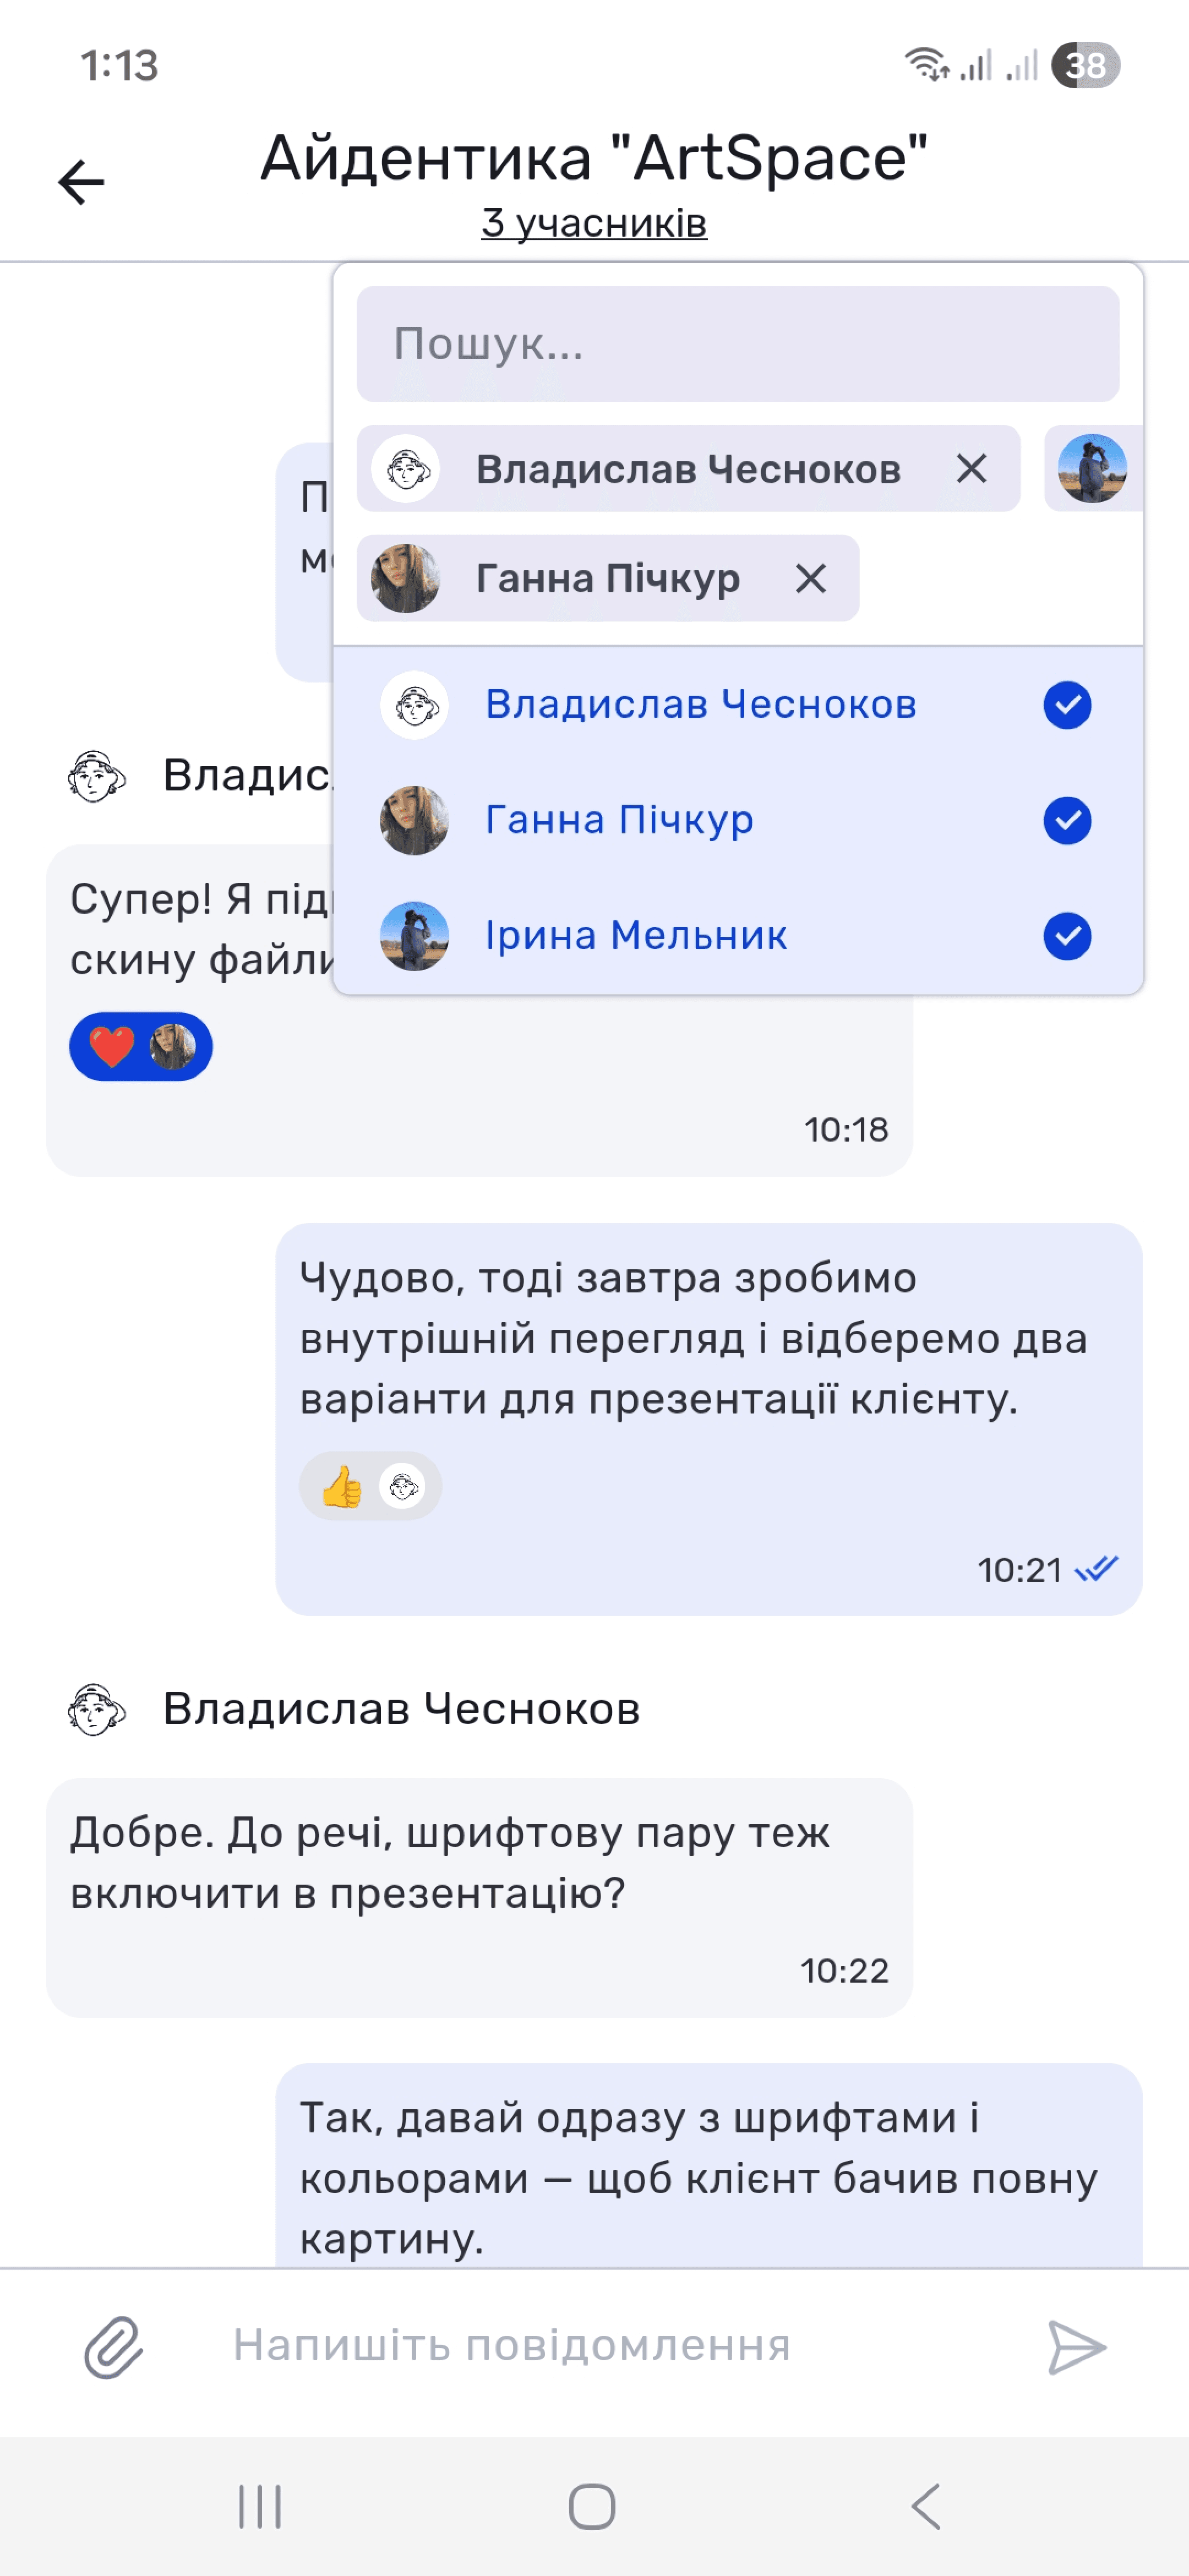
Tap the participant count in the chat header to see all members and their last online time.
Reactions and Message Actions
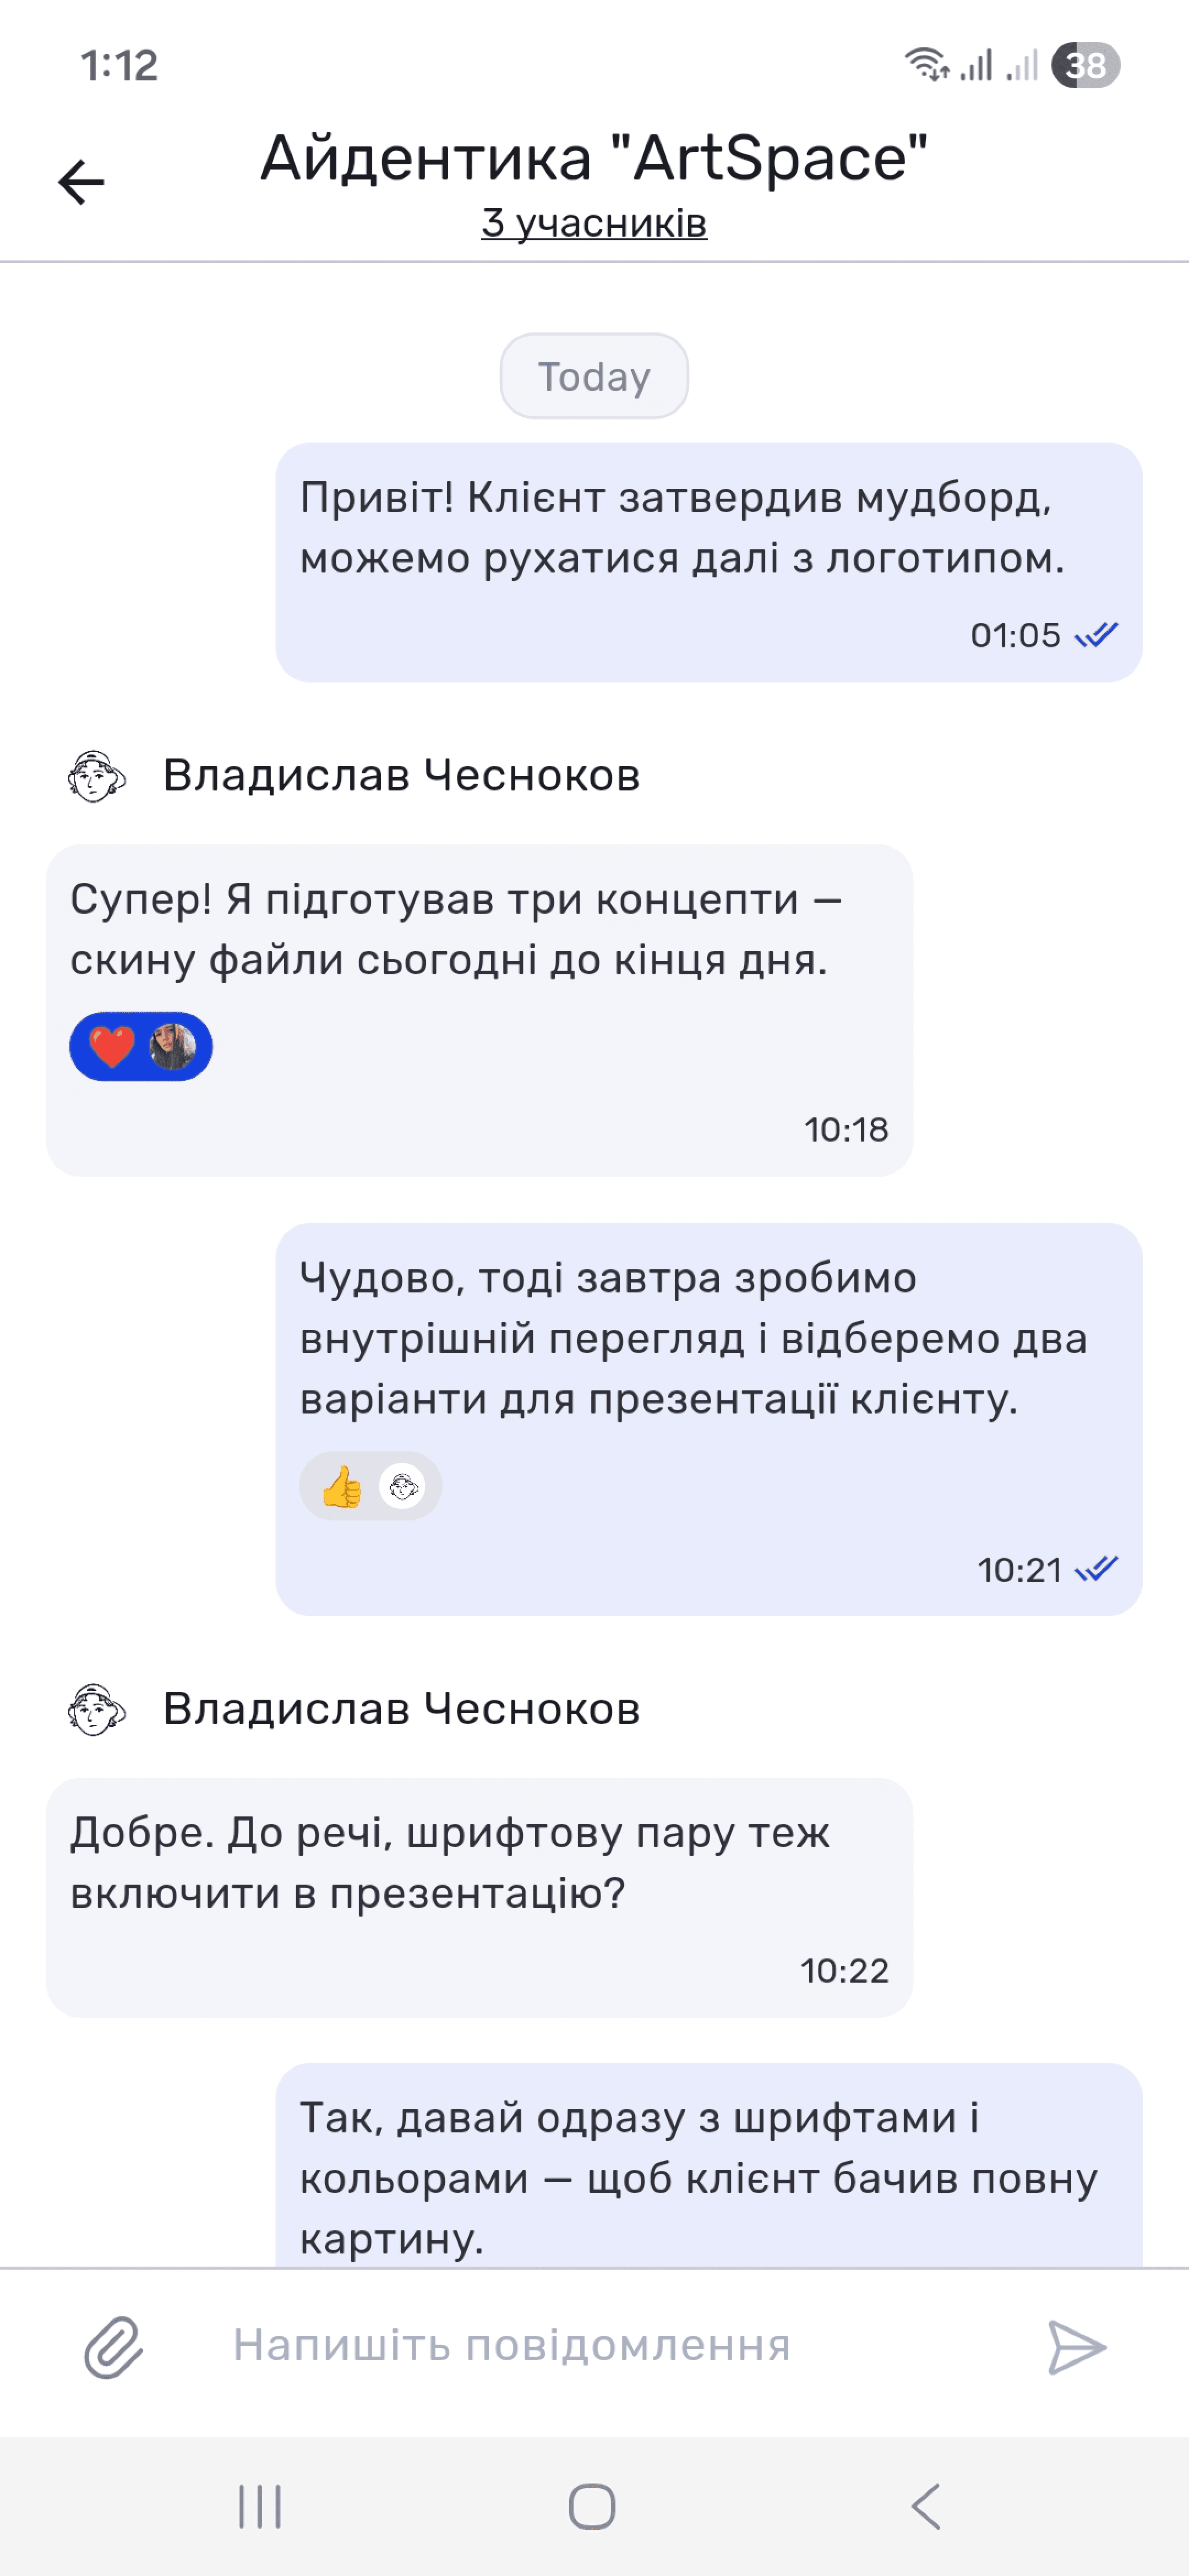
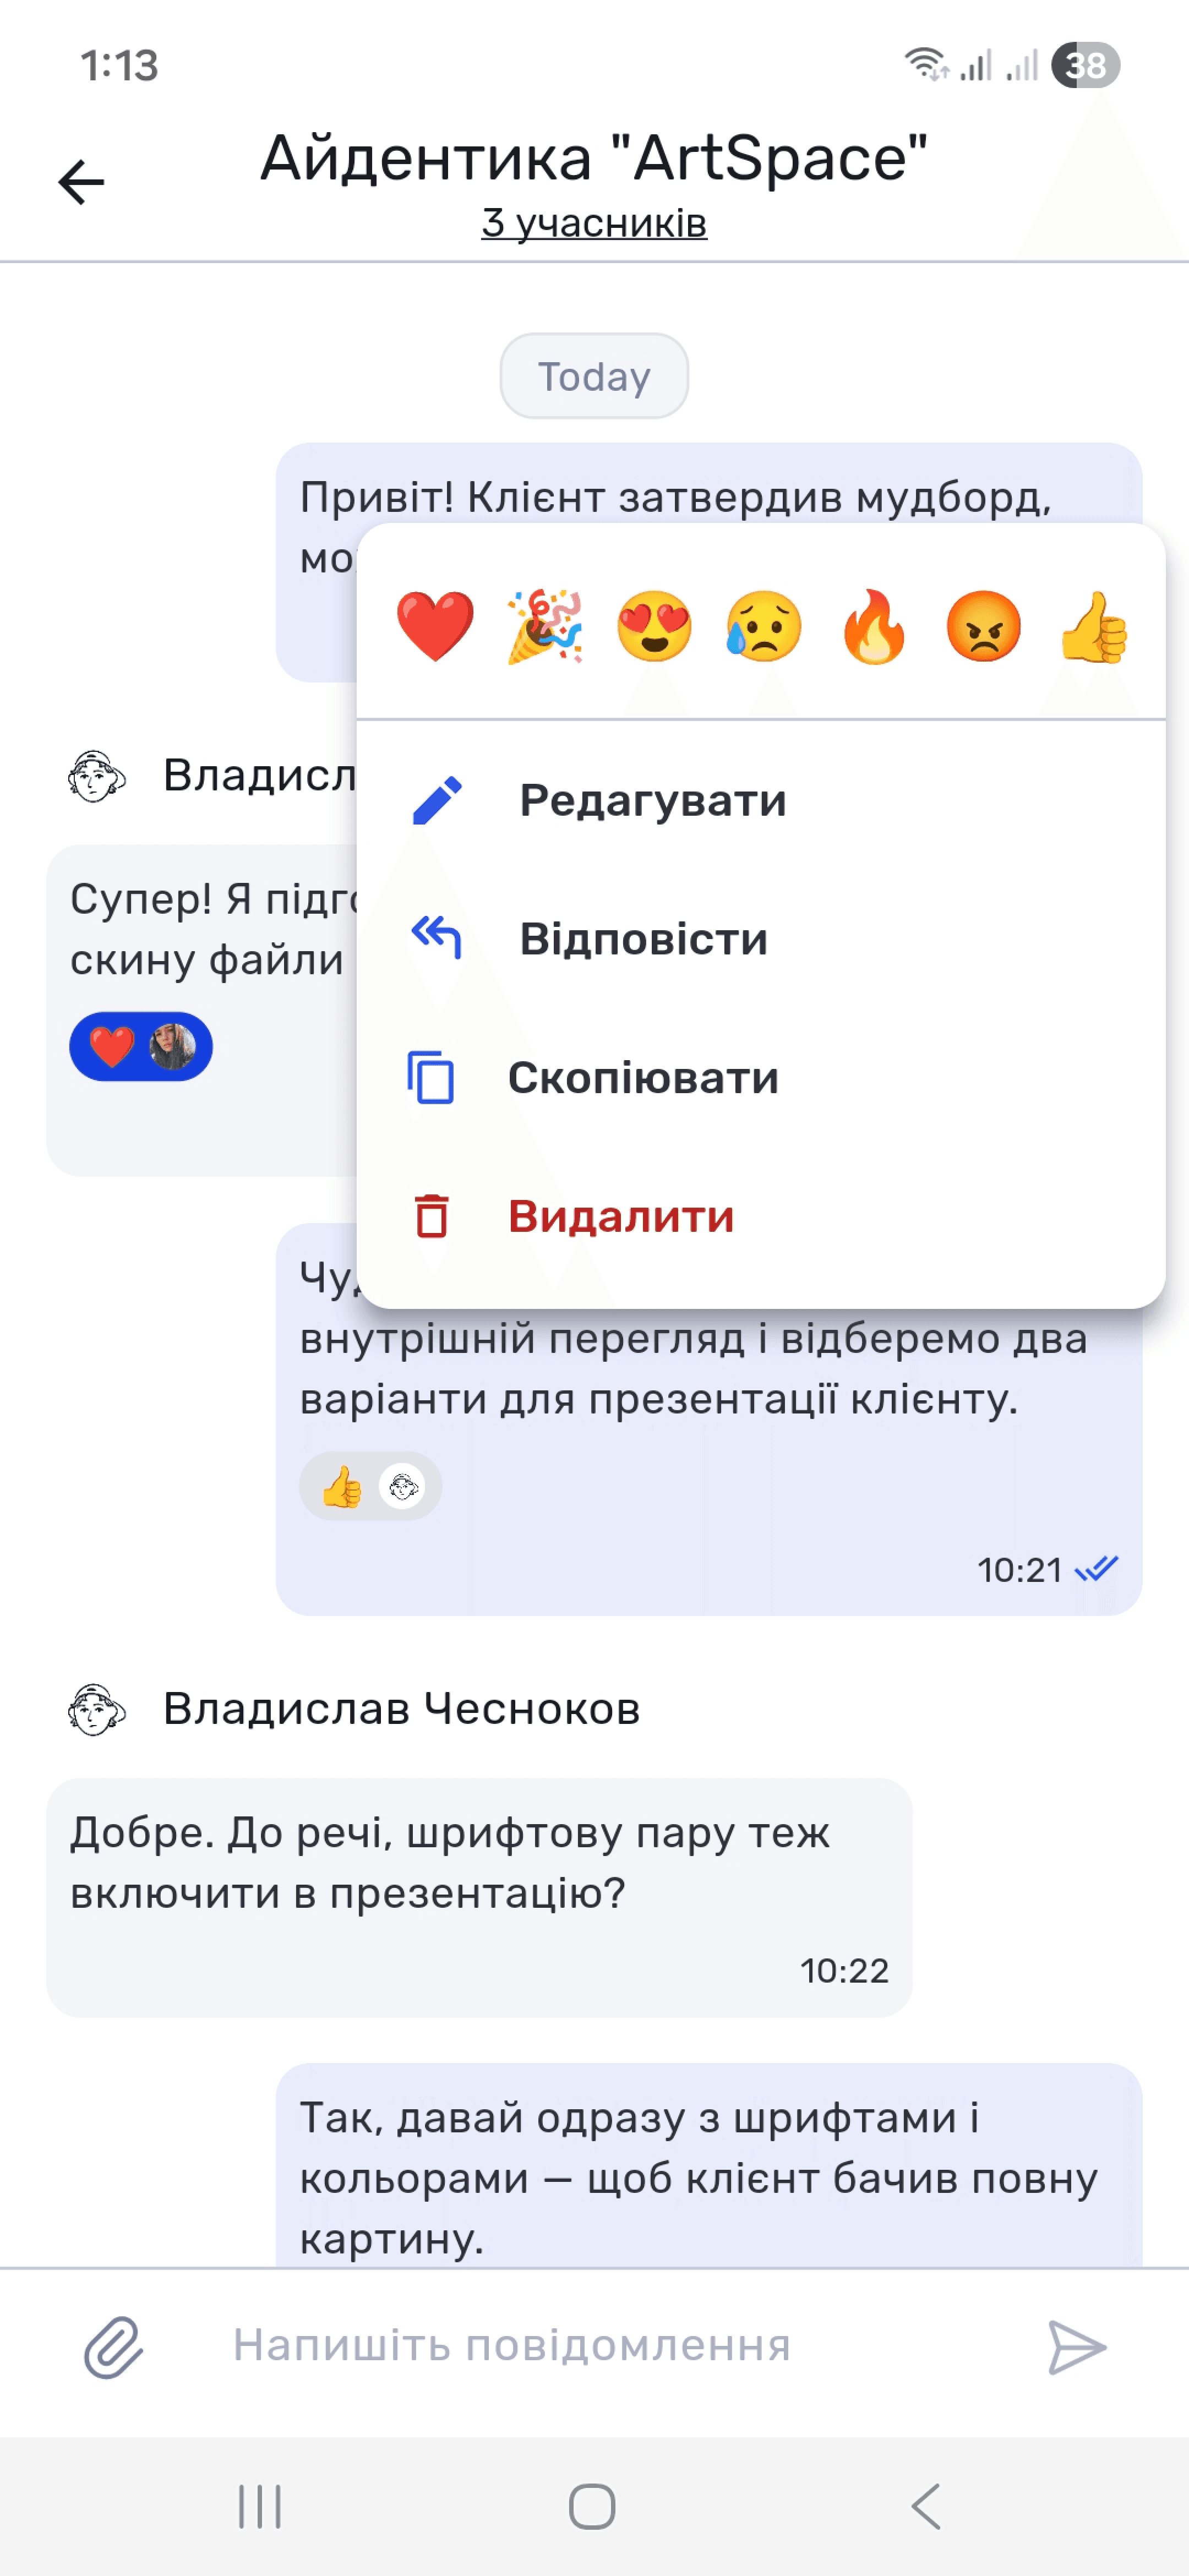
Press and hold a message to open the context menu. At the top is a quick-reaction panel with emoji. Below are message actions: Edit, Reply, Copy, and Delete. Reactions appear below the message and are visible to all chat members.
Attachments
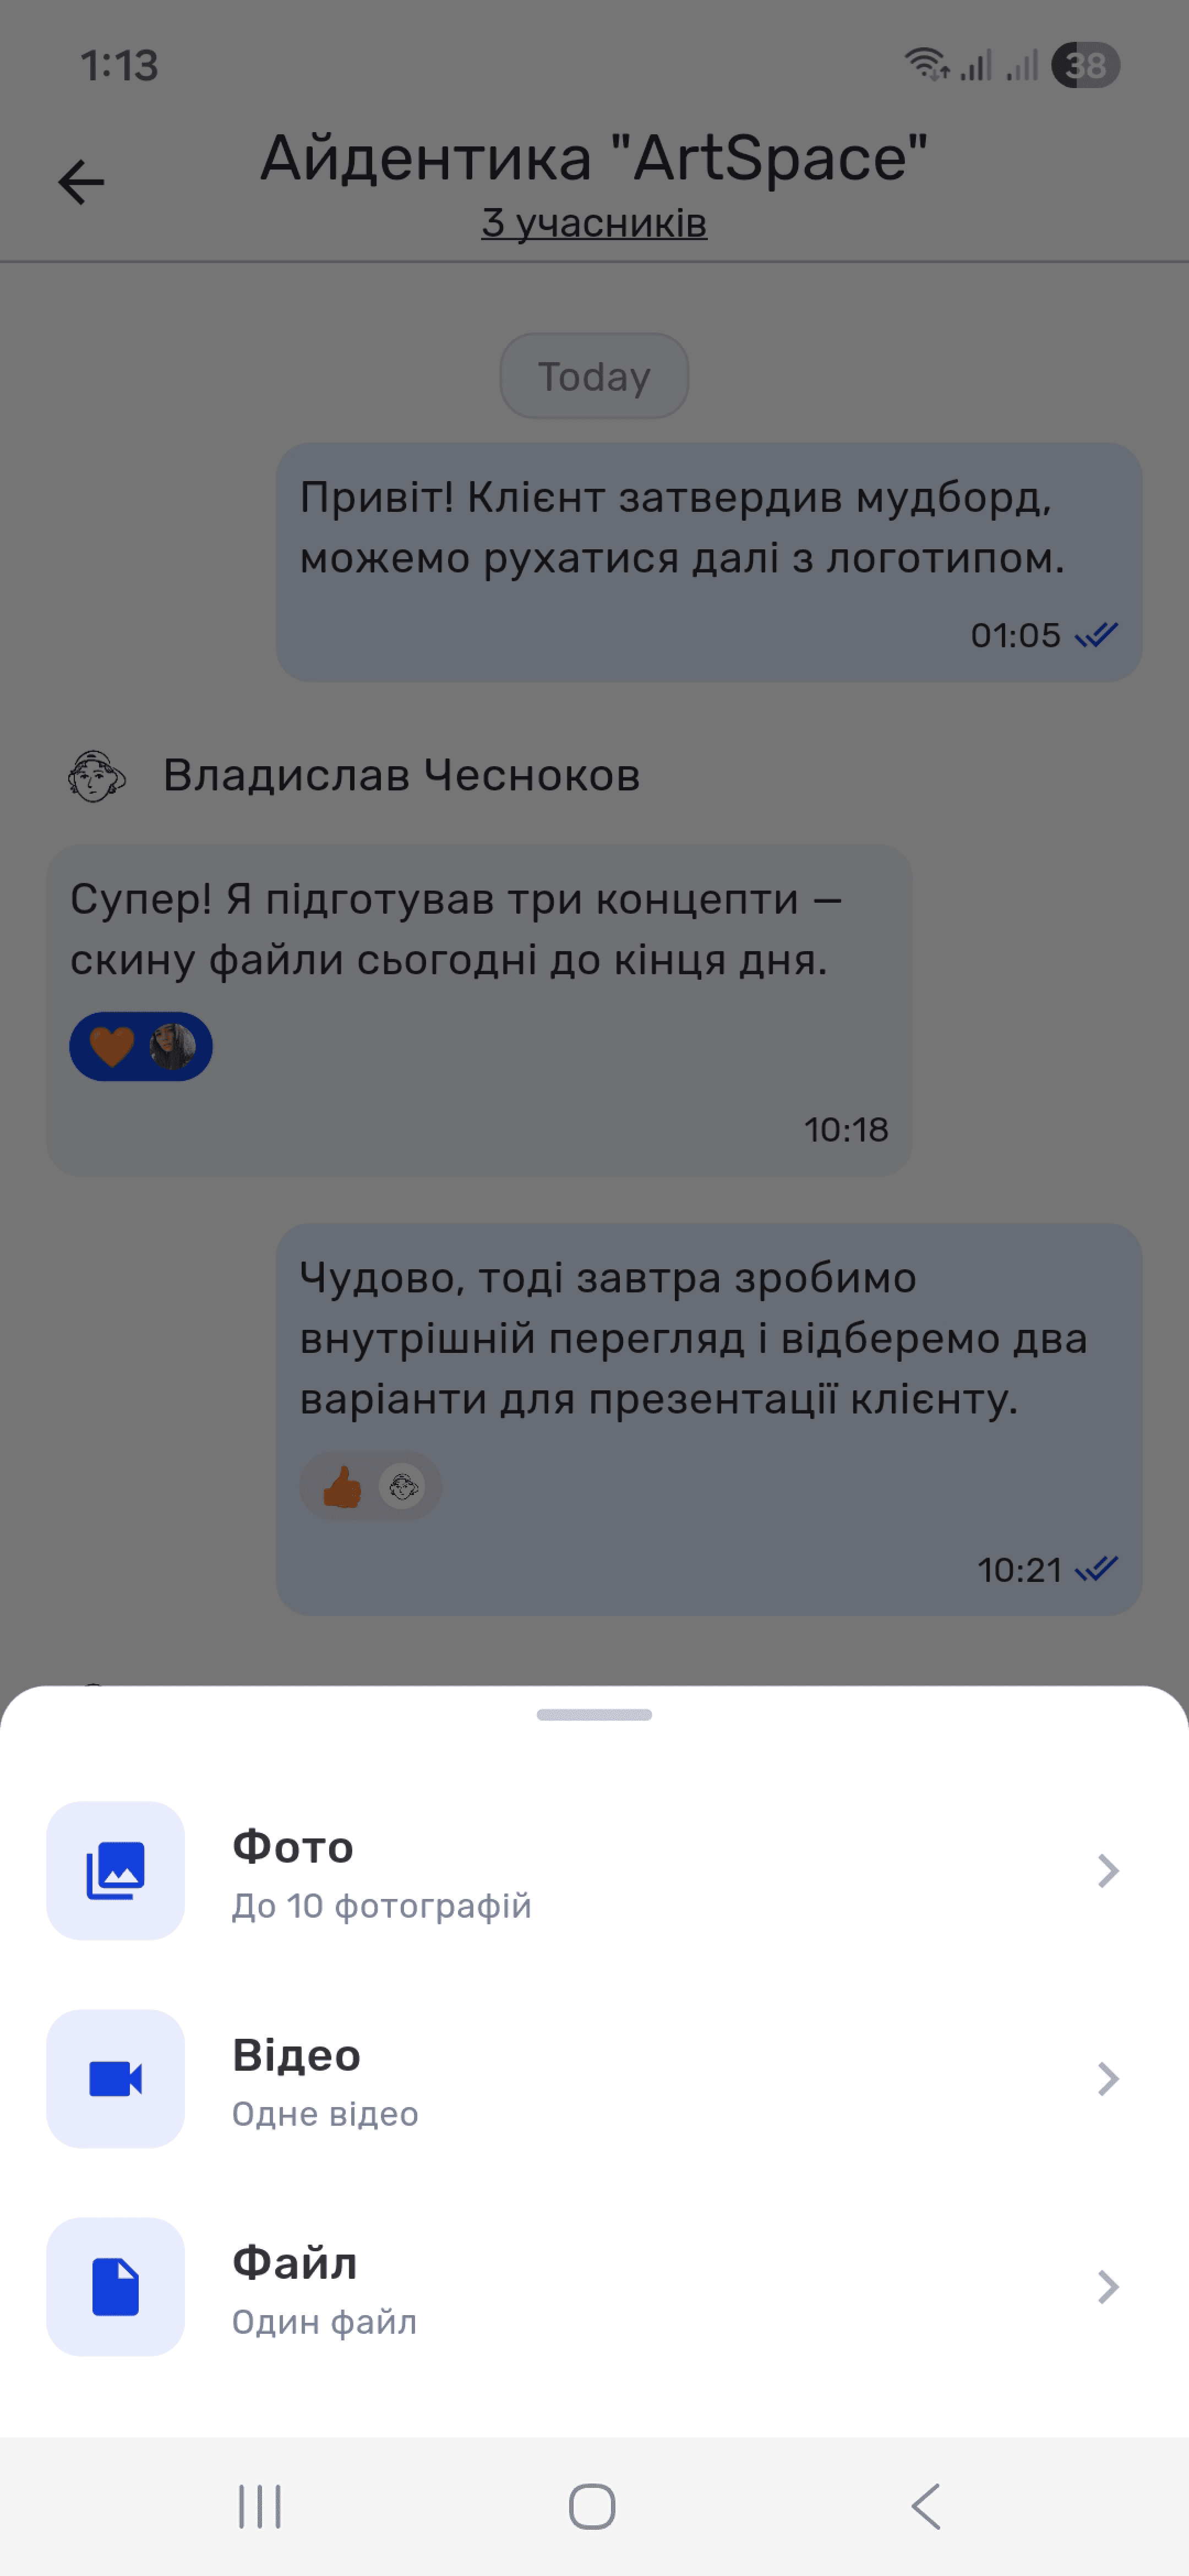
You can also share attachments in a chat. Tap the attachment icon (📎) at the bottom of the chat to add photos (up to 10 images), a video (1 file), or a document (1 file).
Creating a New Chat
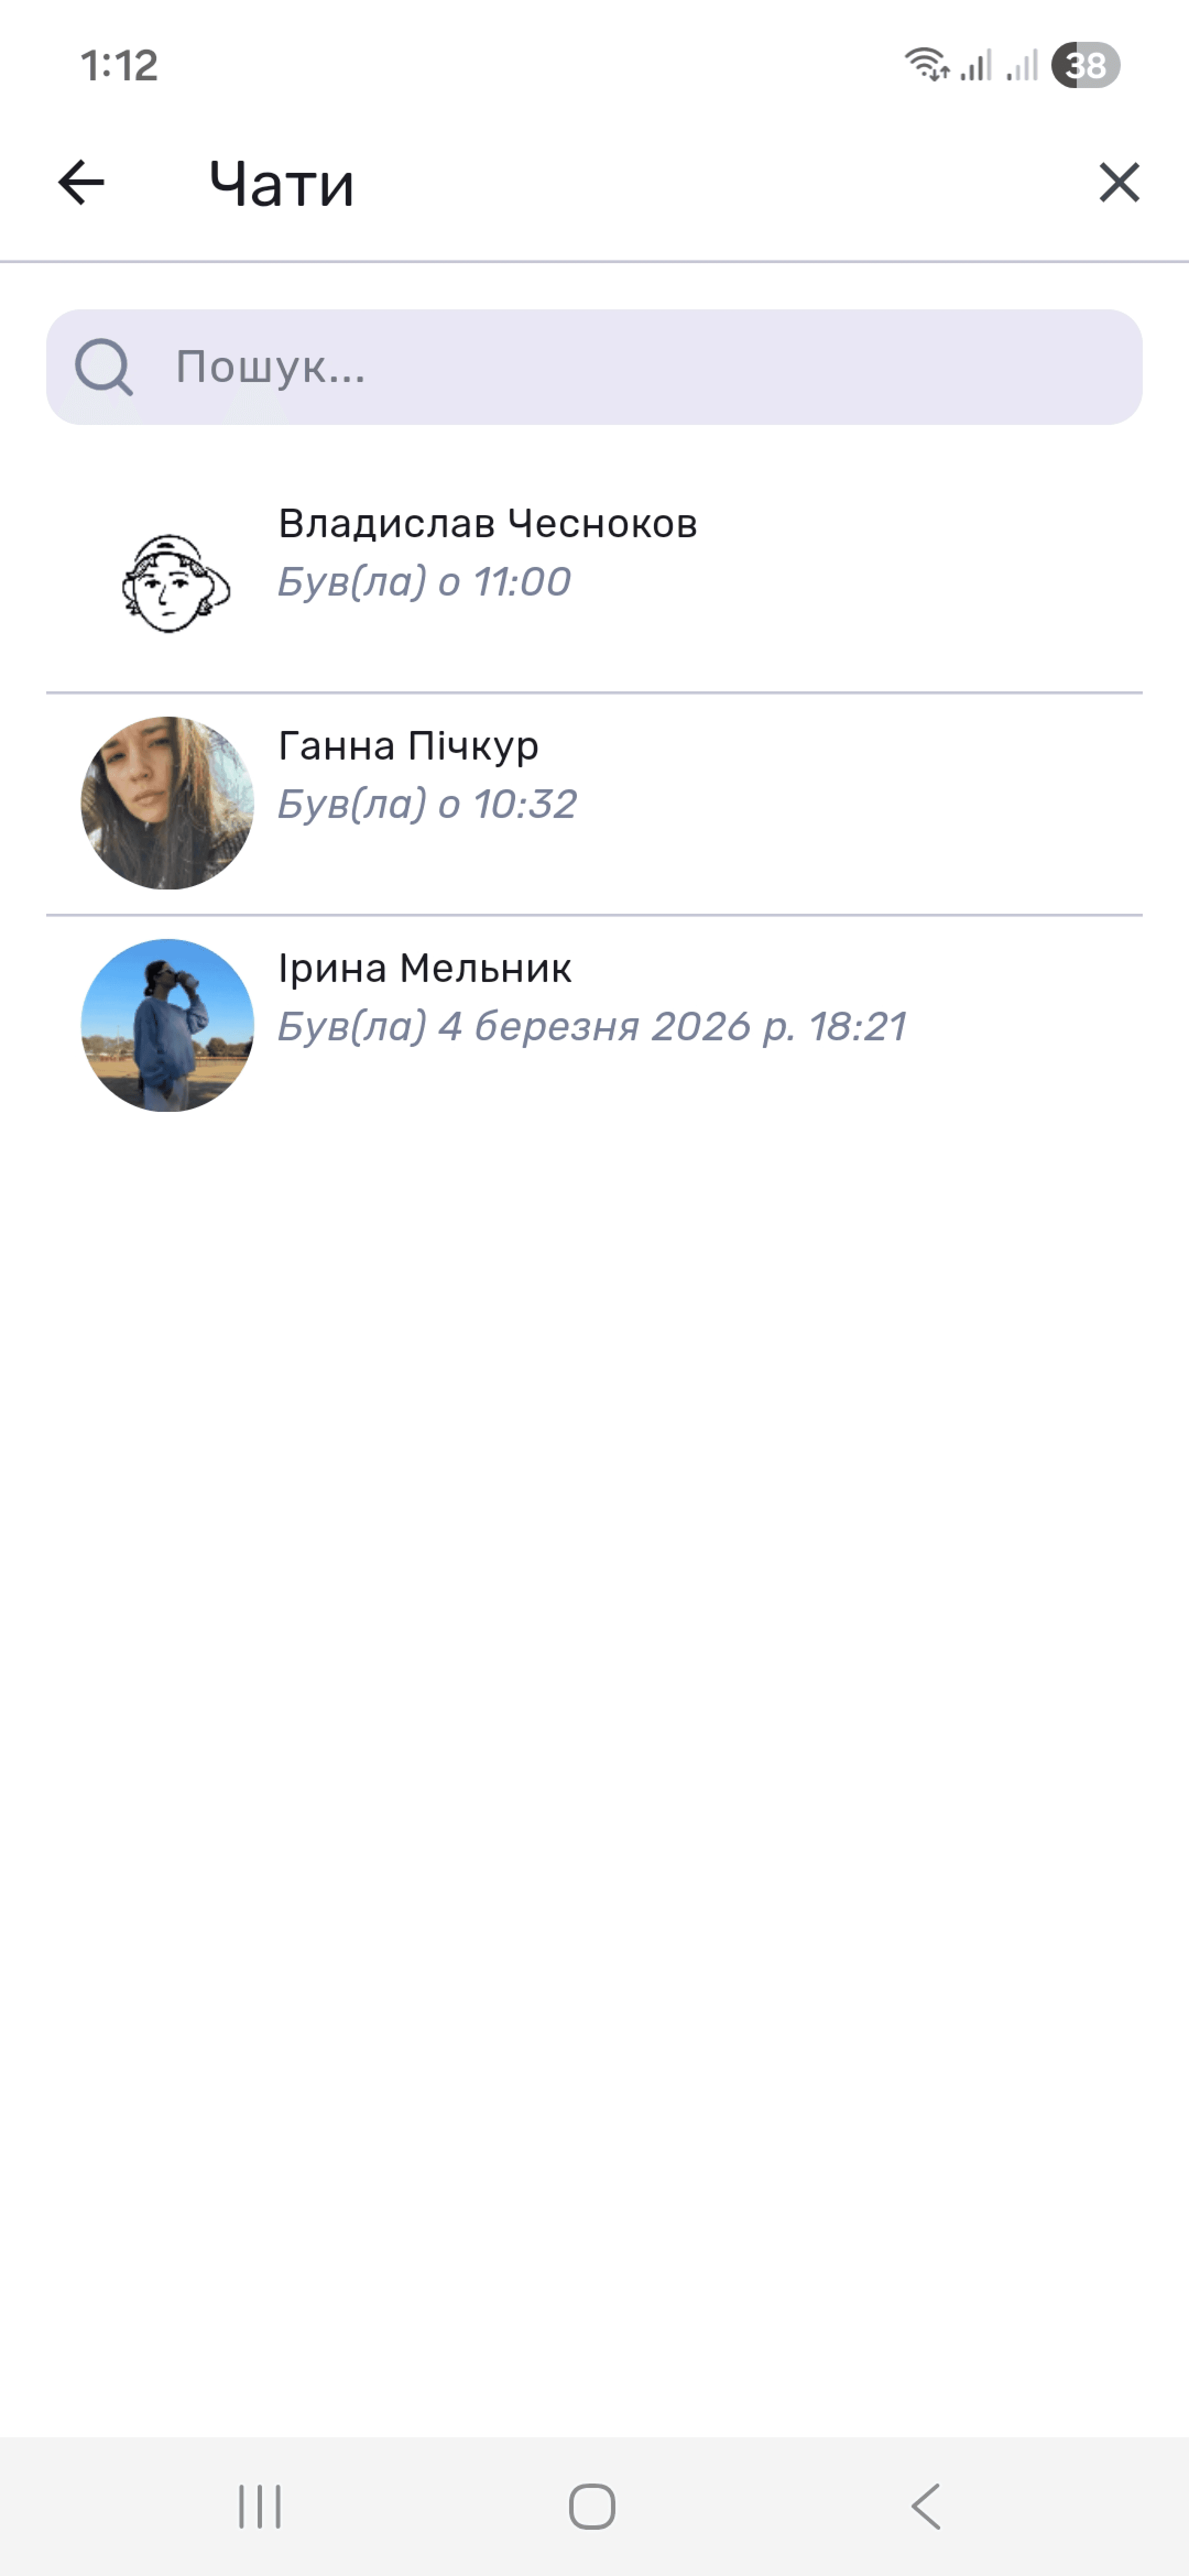
To create a new chat, tap the create icon (✏) in the upper-right corner of the chat list. A list of team members opens with each person’s last online date. Select an employee to start a private conversation.
Still have questions?
Maybe we haven't added this information yet. But you can always reach out:
Request a demo
Submit a request and we'll show you how the service works and its capabilities.
Book a demo